

Page 1
Image 2000 multifunctional fax,
copier, scanner, colour printer
and telephone
User guide
Page 2

Please open this page for an ‘at a glance’ guide to
your Image 2000 fax machine.
Date of purchase:
Place of purchase:
Serial number (on base of unit):
Purchase price:
(Proof of purchase is required for warranty
purposes, so please keep your receipt)
For your records
Page 3
STOP
FAX
BACK
START
1
2
A
B
C
3
D
E
F
5
J
K
L
6
M
N
O
8
T
U
V
9
W
X
Y
Z
0
4
G
H
I
7
P
Q
R
S
✱
P
R
REDIAL
DIRECTORY
SET UP
RECEIVE
MODE
••
•••
••
•••
••••
•••
••••
•••
••••
•••
••••
•••
••••
•••
••••
•••
••••
•••
••••
•••
••
•••
••
••
•••
••
•••
••
•••
••
•
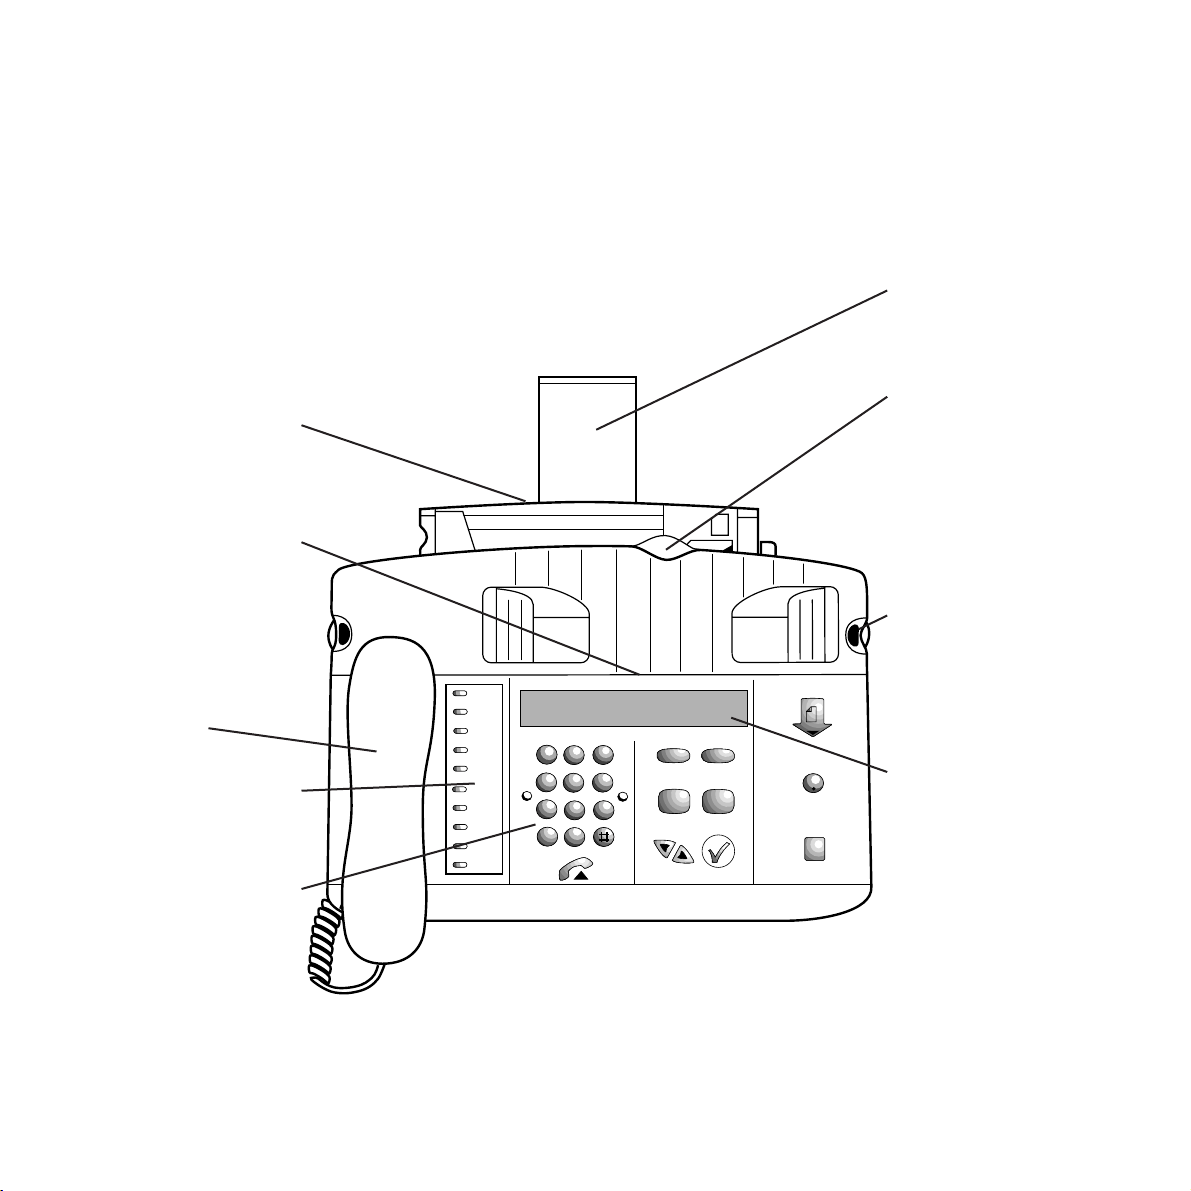
1
Paper holder
Holds up to 100 sheets
of A4 (210 x 297mm) at
75gsm.
Also takes envelopes up
to A4 size.
Automatic
document feeder
Holds up to 20 pages
ready to be faxed or
copied.
Handset
One touch panel
Stores up ten one touch
names, telephone and
fax numbers.
Keypad
Use to dial numbers
and to enter names
and numbers in the
memor y.
Paper support
Supports paper in the
paper holder.
Document feeder
support
Extend to support
documents held in the
automatic document
feeder. (For additional
support, attach the
document support
extension).
Release buttons
Press to open the front
panel in order to free
a document jam or
change the ink
cartridge.
Display
2 line screen shows the
status of the machine
as well as displaying
names, telephone and
fax numbers. It also
gives short
instructions.
At a glance
At a glance
Page 4
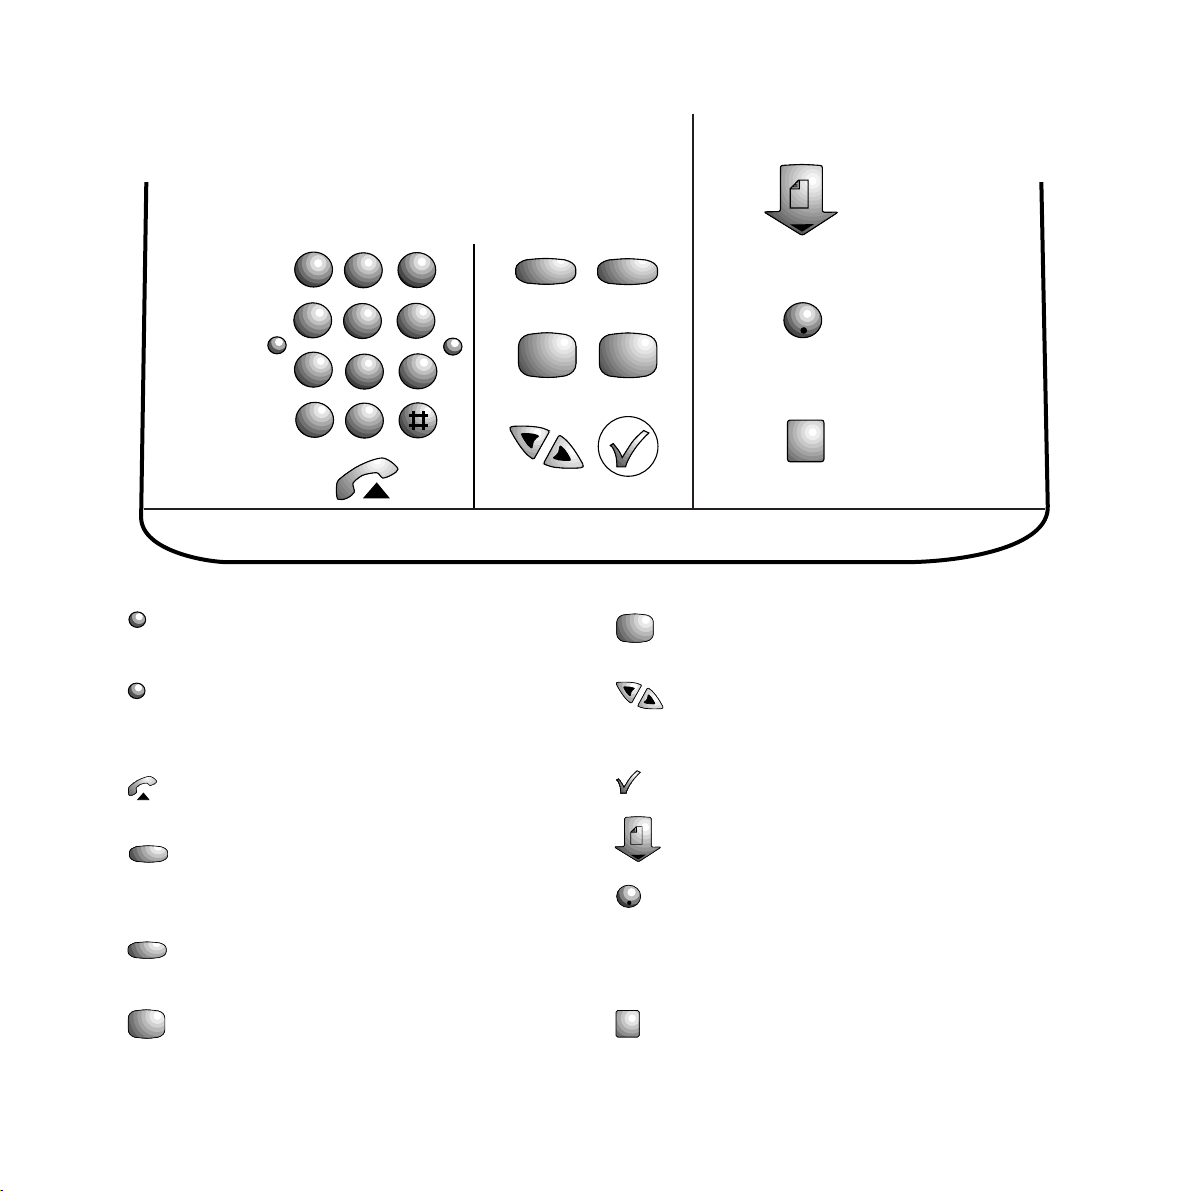
2
Control panels
PAUSE button - inser ts a pause
when entering a number.
RECALL button - for use with
switchboards and BT Select
Ser vices.
Activates the line monitor before
dialling phone or fax numbers.
SET UP button - use to enter
sub-menus when changing fax
settings.
RECEIVE MODE button - use to
access the receive mode options.
DIRECTORY button - stores up
to 20 names, phone numbers and
fax numbers.
DIRECTORY
RECEIVE
MODE
SET UP
R
P
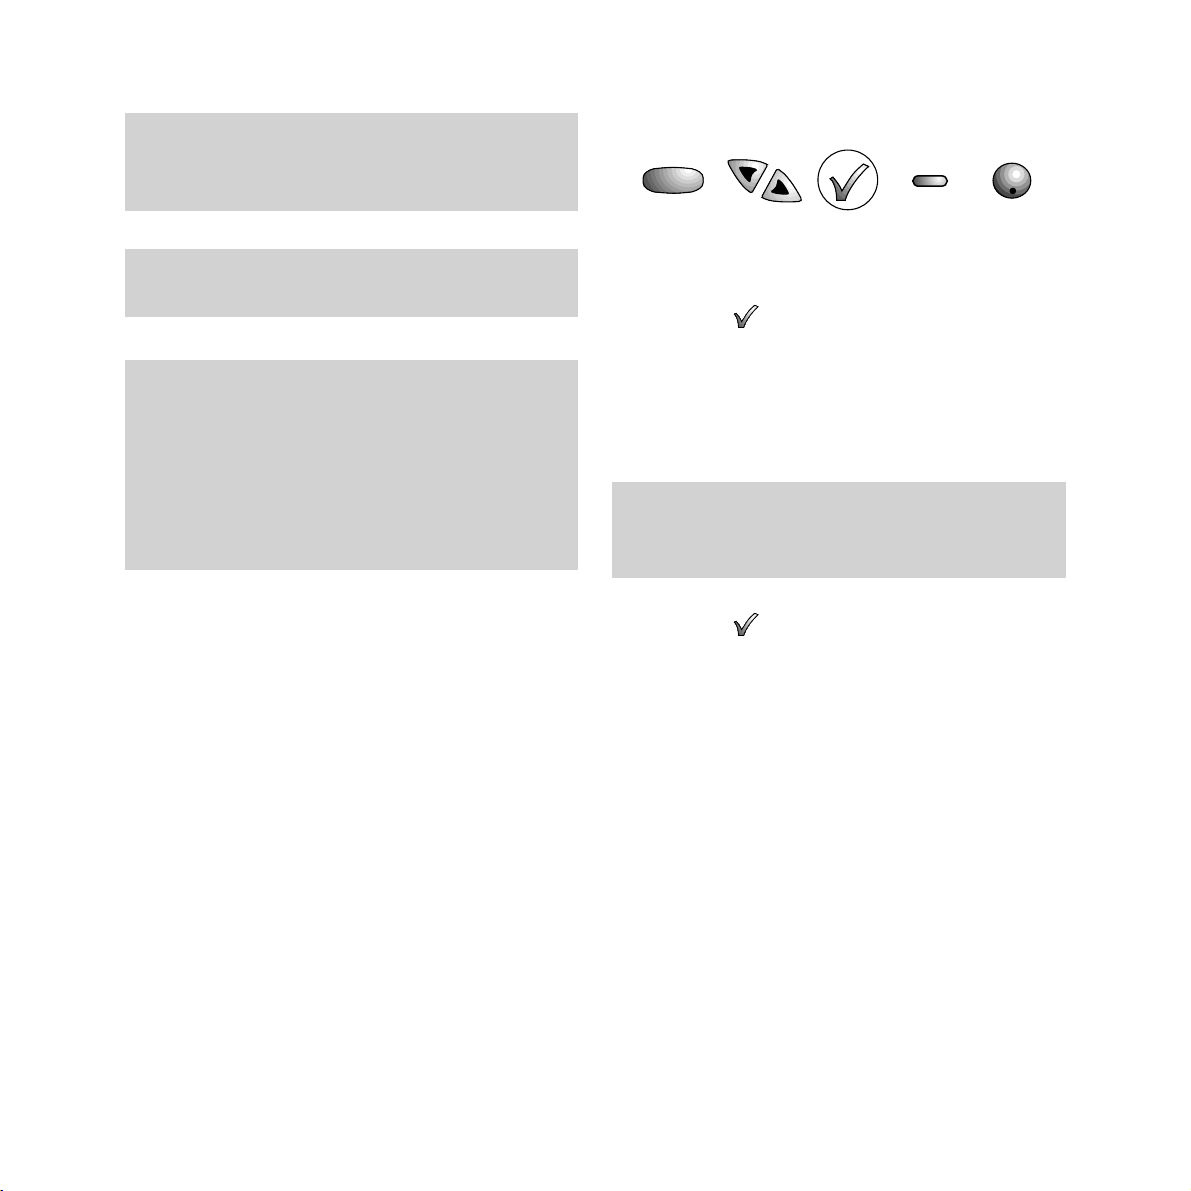
REDIAL button - redials phone
and fax numbers.
Moves the cursor through the
display. Shown as
§©
throughout this guide.
Use to confirm settings.
START button - press to begin
sending or copying a document.
STOP button - press to stop
faxing or copying. Also takes you
back to standby during
programming.
FAXBACK button - automatically
retrieves a document from a fax
machine set ready for polling.
FAX
BACK
STOP
START
REDIAL
1
2
A
B
C
3
D
E
F
5
J
K
L
6
M
N
O
8
T
U
V
9
W
X
Y
Z
0
4
G
H
I
7
P
Q
R
S
✱
P
R
REDIAL
DIRECTORY
SET UP
RECEIVE
MODE
STOP
FAX
BACK
START
Page 5

In this guide
3
In this guide
Hints, tips and important information
In this user guide we’ve included helpful tips, useful notes and important information shown in grey boxes.
At a glance 1
Introduction 4
Setting up 5
Using the telephone, fax and copier 14
Making telephone calls 14
One touch name and numbers 15
Directory names and numbers 20
Sending and receiving faxes 24
Copying documents 45
Additional features 47
Connecting an answering machine to your Image 2000 53
Connecting to a PC for faxing, scanning and printing 55
Connecting to a switchboard 56
Help 58
Technical specification 66
Technical information 67
Index 69
Page 6

Introduction your Image 2000 multifunctional fax
machine is designed for ease of use and made to the high standards
set by BT
Thank you for choosing a BT product. You can
expect it to give you many years of quality
ser vice.
Please read these instr uctions carefully befor e
use, and keep this user guide for future
reference. Please note, your Image 2000 is
Millennium compliant.
Check that your Image 2000 is complete.
When you unpack you must have:
• Image 2000
• telephone handset
• handset cord
• telephone line cord
• mains power cable with 13 amp plug attached
• mono print car tridge (you can also use
colour print car tridges with your machine
- get your first one free by phoning
0800 590 009)
• PC software on 3.5 floppy disk and user guide
• PC connection cable
• ser vice car d
• a document suppor t extension
• a spare ink car tridge holder
Electrical storm warning
We advise you to disconnect your Image 2000
during electrical storms as there is a slight chance
it could be damaged.
If a fault occurs during the 12 month warranty
period due to accidental or wilful damage
(including lightning and electrical damage) BT
will not replace or repair the equipment free of
charge. If any damage of this nature occurs, please
claim against your home insurance.
Customer Helpline
If you have any problems with your Image 2000,
call the BT Helpline on 0845 600 053
Warning
As this is a mains powered product it is normal that
it will produce a certain amount of heat. Whilst
this is entirely safe we would advise against placing
this product on antique, veneered or wooden
surfaces as damage to those surfaces may result.
Caution
Do not block or cover any of the openings on the
machine.
Avoid placing your Image 2000 in direct sunlight,
beside an air conditioner or where it is dusty or
damp.
If you have a problem with the machine, do not try
to repair it yourself. Call the BT Helpline on 0845
600 053.
4
Introduction
Page 7
Setting up
5
Setting up follow these steps to get your Image 2000 up
and running and ready to use
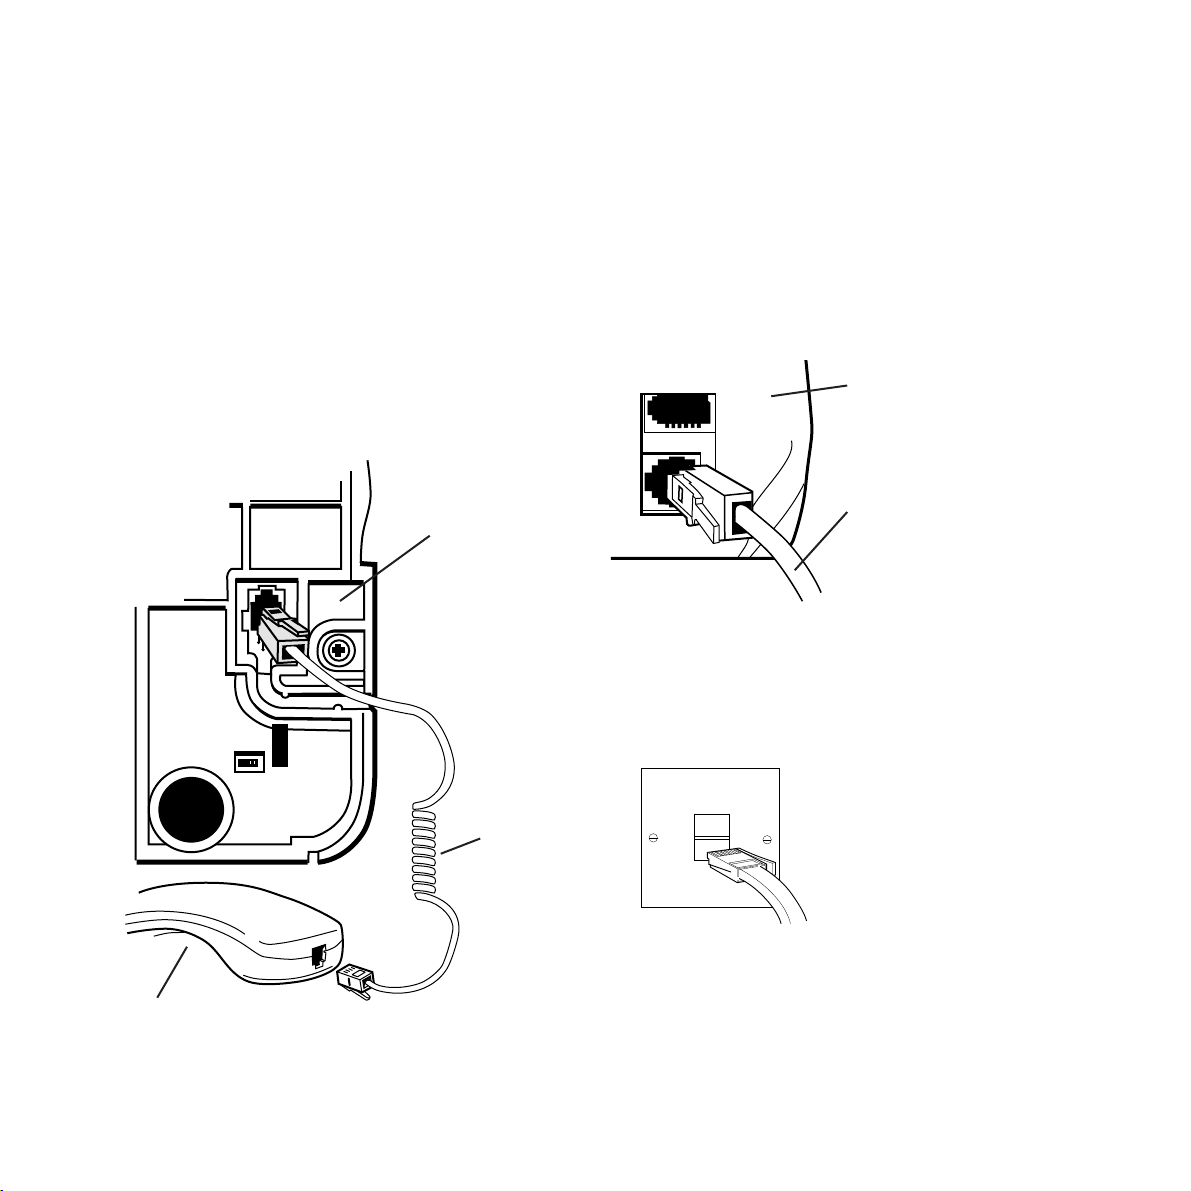
1 Connect the handset cord to
the handset and the base unit
Plug one end of the handset cord into the
socket on the handset and the other end into
the socket on the base of the fax.
2 Plug the telephone line cord
into the fax
3 Plug the other end of the
telephone line cord into the
telephone socket
If you do not have a modern style socket, call
Freefone 0800 800 150 and ask for a BT
engineer to come and fit the correct socket.
This is a chargeable ser vice.
Handset
cord
Handset
Underside of
the fax
Telephone line cord
Back of fax
Page 8
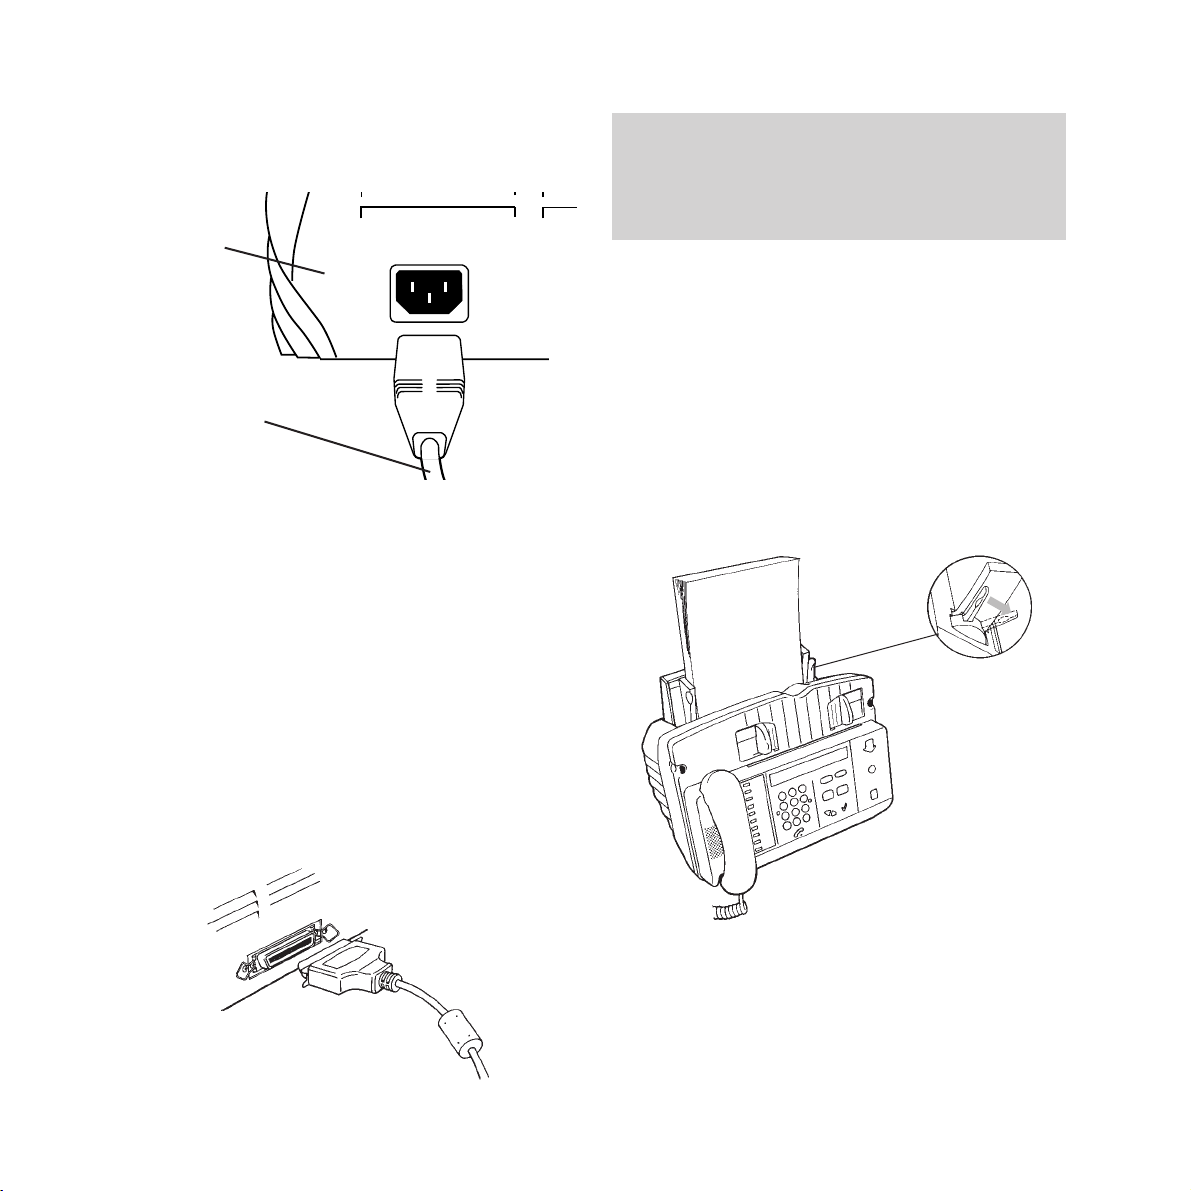
7 Load paper into the automatic
sheet feeder
Your Image 2000 prints onto plain paper. It will
hold up to 100 sheets of A4 75gsm paper
(210x297mm)
See also “Connecting to a PC for faxing,
scanning and printing” on page 55 of this
guide.
4 Plug the mains power cable
into the base
Push the plug in firmly to ensure it is fully
inser ted.
5 Now plug the mains cable into
a convenient 13 amp mains
power socket
Once connected to the mains your Image 2000
will beep and the display shows WARMING
UP.. . PLEASE WAIT A MOMENT before changing
to show
OUT OF PAPER and FILL PAPER HOLDER.
6 Connection to a PC
6
Setting up
When running Windows 95 (or above) your PC
may prompt you to install the necessary software.
Please follow the instructions in the Unimessage
user guide.
Power cable
base unit
paper tray lever
• Extend the paper suppor t.
• Push the paper tray lever towards the back
of the machine.
• Inser t the paper.
• Adjust paper guides to the size of the paper.
Page 9
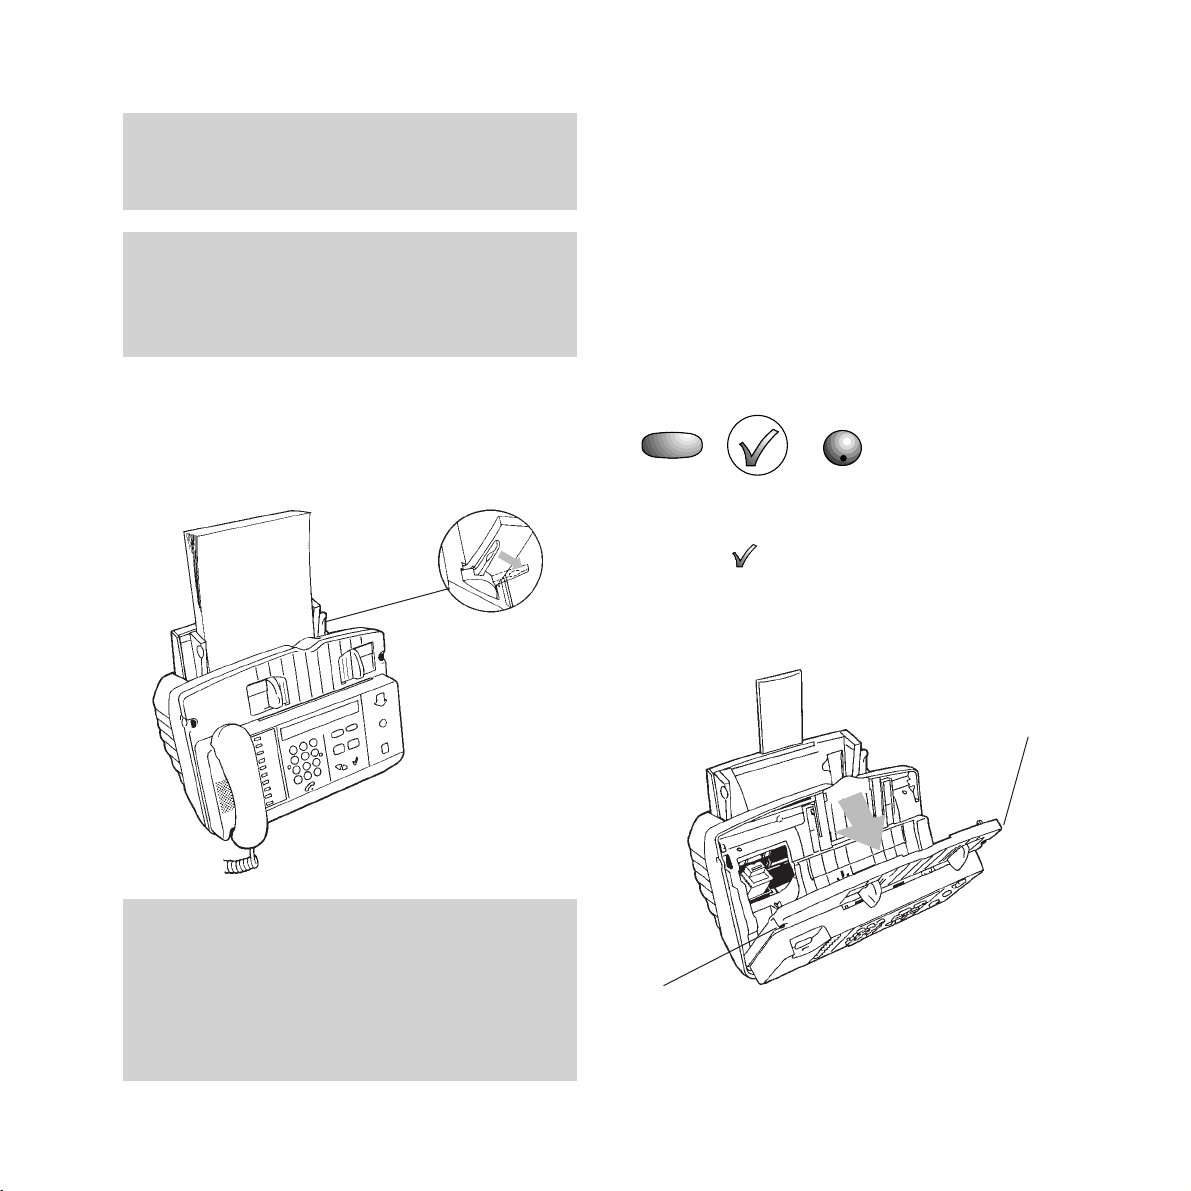
• Pull the paper tray lever towards the front of
the machine. The paper is held in place and
the display shows NO INK CARTRIDGE and
PRESS SET UP.
8 Installing the print cartridge
Unwrap the car tridge carefully.
Do not touch the metal contacts.
Always hold the car tridge by the black areas
or coloured top only. (A black ink car tridge
will have a white top whilst a colour ink
car tridge will have a blue top.)
To install the print cartridge
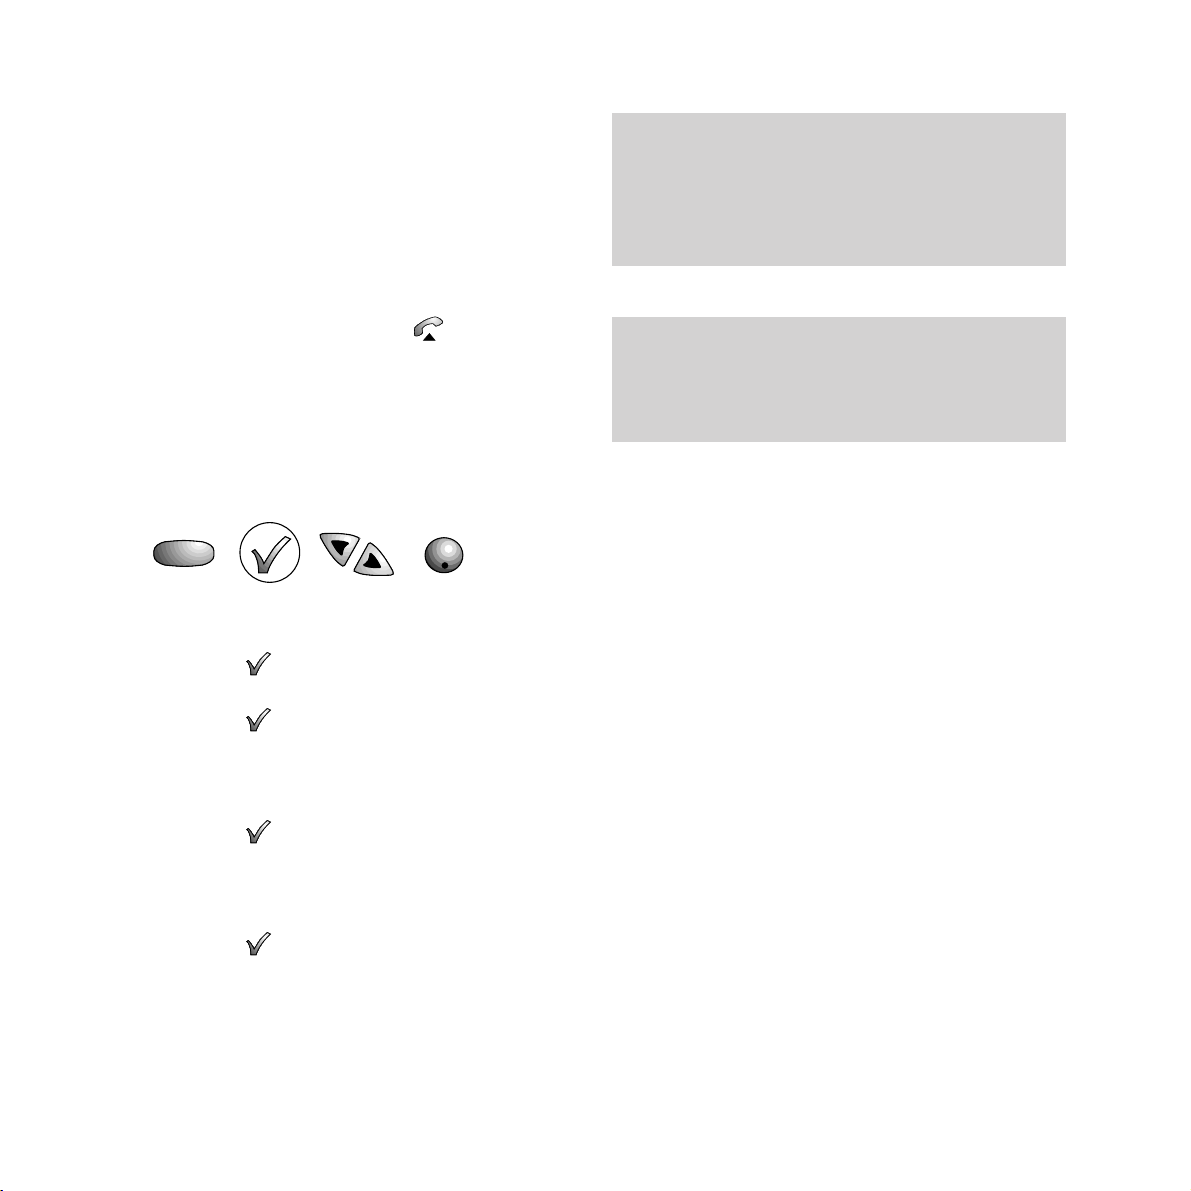
• Press the SET UP button to display REPLACE
CARTRIDGE.
• Press the button. The print car tridge
holder is moved into the load position and
the display shows TICK TO FINISH
.
• Open the front cover by pressing the two
release buttons either side of the Image 2000.
SET UP
STOP
To help prevent paper jams and misfeeds, flick your
thumb across the bottom edge of each stack of paper
before you insert it into the machine.
paper tray lever
7
Setting up
Release button
Release button
Special papers
Please note that care should be taken when printing
on glossy or silk paper as the ink may take longer to
dry than when using standard multi-purpose paper.
It is recommended that only standard multi-purpose
paper is used for receiving faxes.
Warning
Make sure that the protective foam strip is removed
from the machine’s paper tray before inserting the
paper.
Page 10
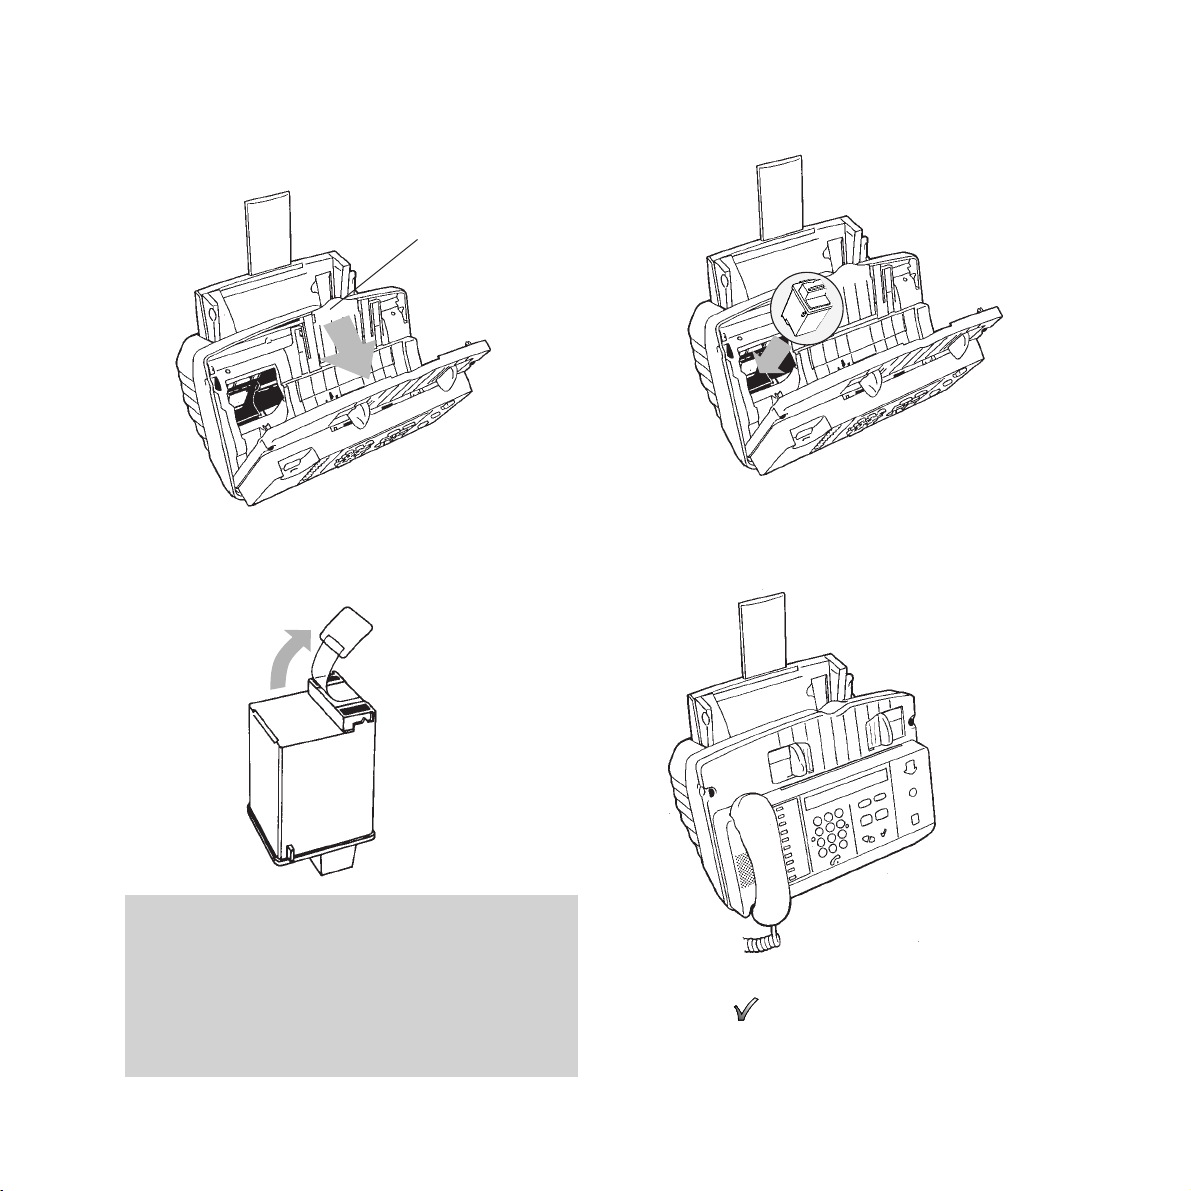
• When opened the white moulding can be
pulled for war d to prop the fr ont cover open.
• Carefully remove the tape covering the print
head. Be sure to remove all the tape.
Setting up
8
Any faxes received, or copies made, whilst you have
a colour cartridge installed, will be printed in blue this is to remind you have a colour cartridge
installed. You are advised too change to a black
cartridge when not printing colour from your PC
as it will reduce the life of your colour cartridge.
Moulding
• Inser t the print cartridge into holder.
• Push the print car tridge back until it clicks
into place. If it moves loosely in the carrier,
it is not locked into place.
• Close the front cover.
• Press the button, display shows
CARTRIDGE ≈ NEW.
Page 11
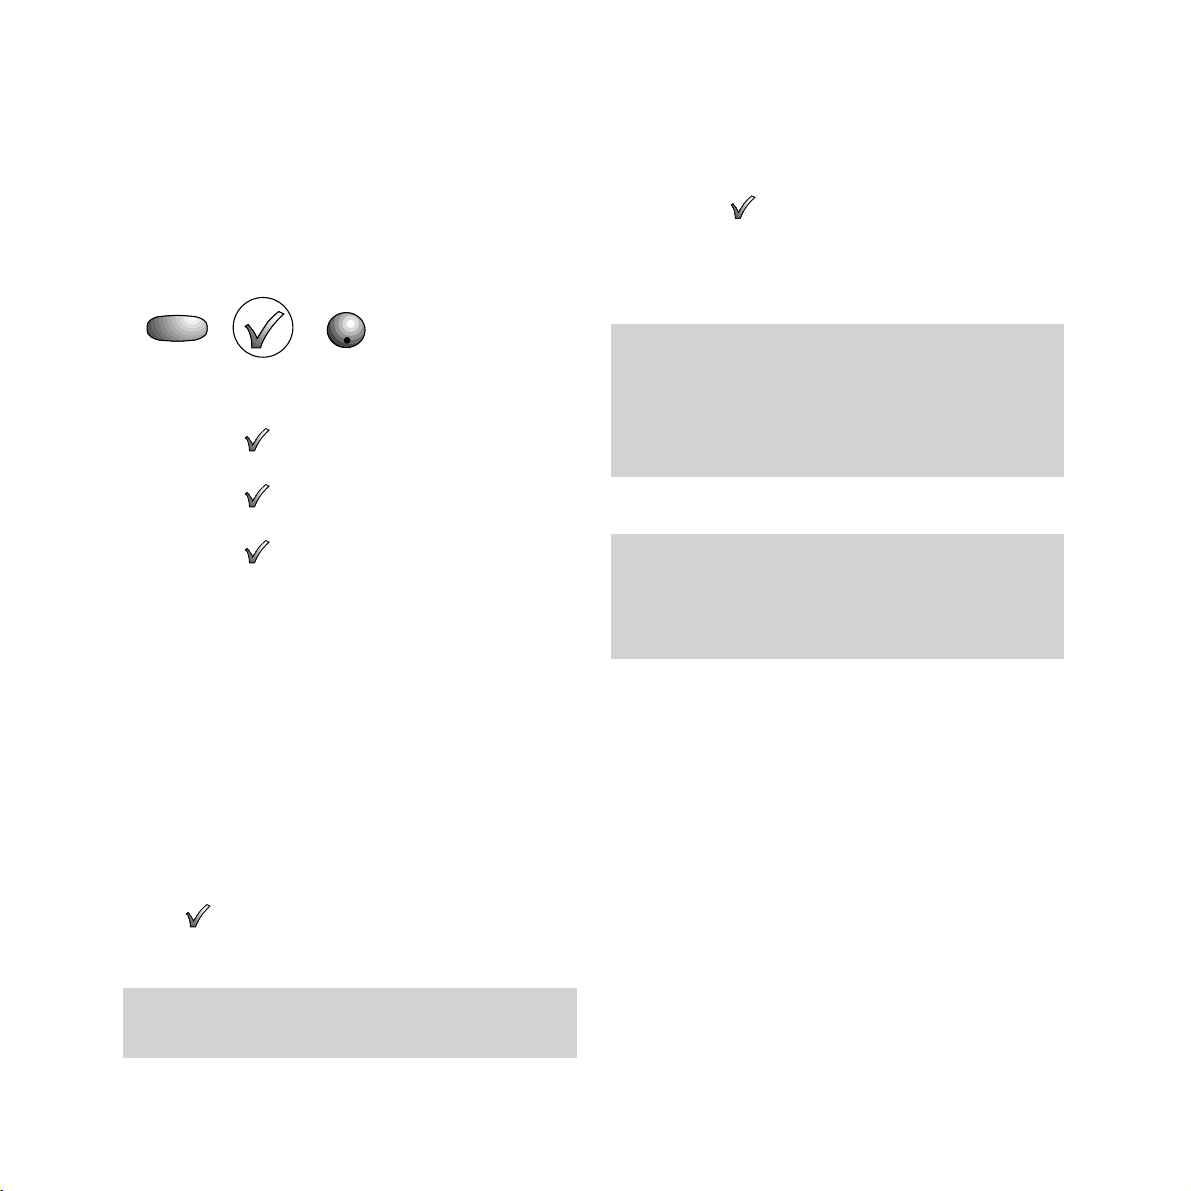
9 Entering your sender ID
Your name and fax number can be printed at
the top of each page you send. This is called
your sender ID.
To enter your sender ID
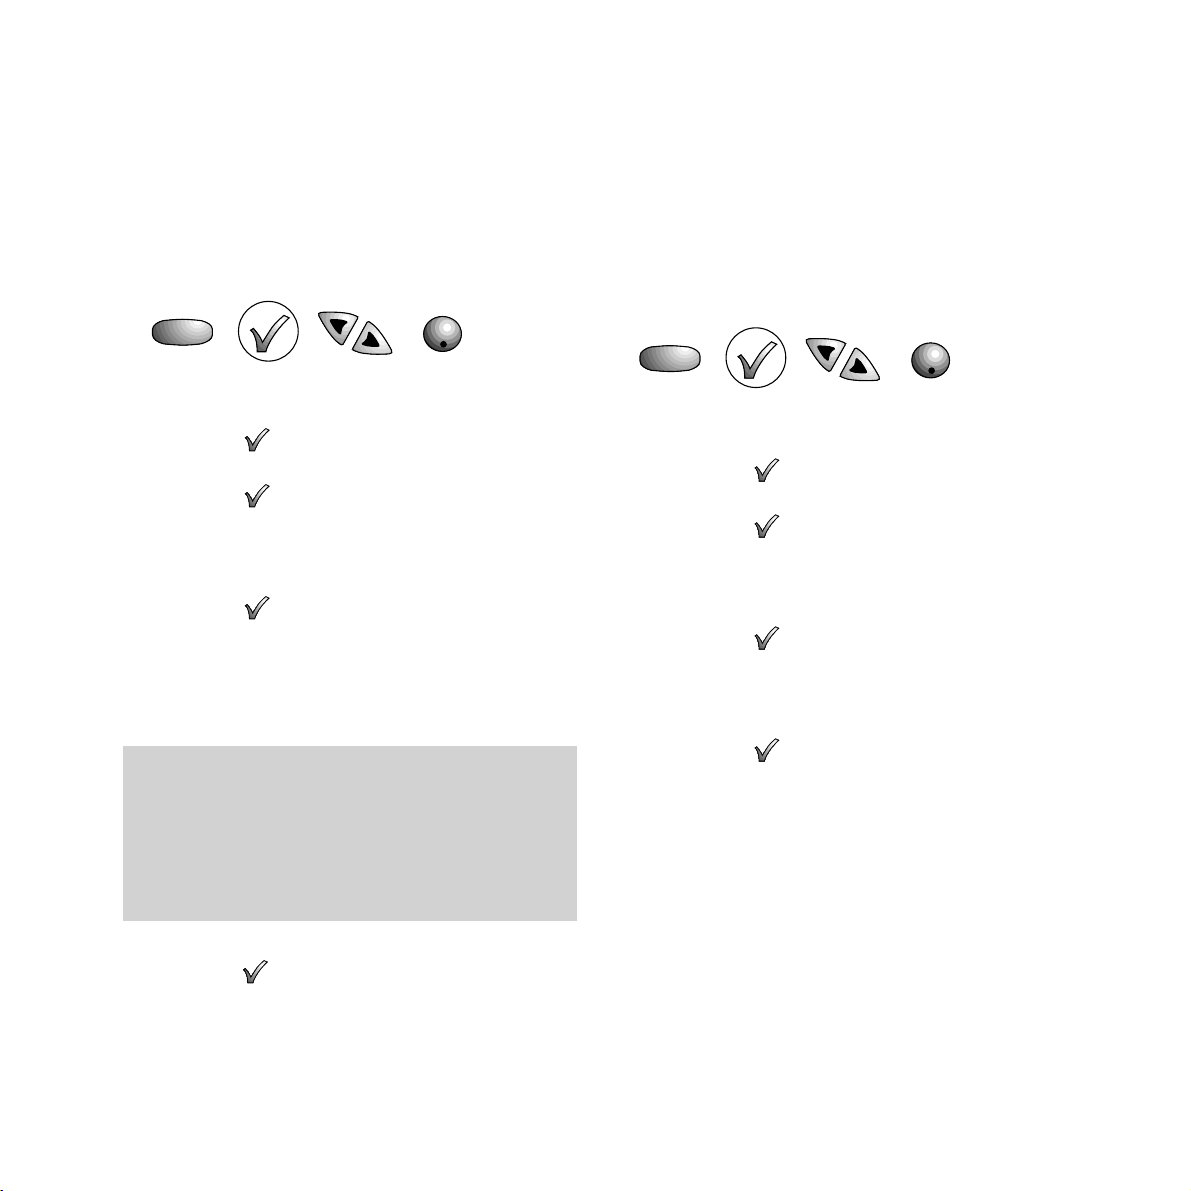
• Press the SET UP button until the display
shows USER SET UP.
• Press the button to display SET USER
INFORMATION.
• Press the button to display ENTER
SENDER ID
.
• Press the button to display ENTER ID
NAME.
• Use the keypad to enter the name you want
to appear on the fax heading. You can enter
a name of up to 32 characters.
For example, to enter the name JOHN:
• Press the 5 button until the display shows J
• Press the 6 button until the display shows O
• Press the 4 button until the display shows H
• Press the 6 button until the display shows N
• When you have entered your name, press
the button to confirm. The display
shows ENTER ID FAX NO.
• Use the keypad to enter your fax number.
You can enter up to 20 digits.
• When you have entered your fax number,
press the button to confirm. The display
shows CALL BACK TEL NUMBER.
• Press the STOP button to return to standby.
Use the © button to move forward through the
display. Use the § button to delete characters.
Use the © button to move forward through the
display. Use the § button to delete characters.
If required use the ✱button to enter a +sign
before the first digit(for international dialling
codes).
If you pause for more than one minute when
entering your ID, your Image 2000 will
automatically revert to standby and any changes
you have made will NOT be saved.
9
Setting up
SET UP
STOP
Page 12
10 Entering a call back number
As well as your name, you can also store a
telephone number on which you can be
contacted. This is called your call back
number.
During a fax transmission you can request
voice contact by pressing the button. If
the other par ty does not respond, your Image
2000 will instruct the other fax machine to
print out your call back number along with a
message requesting a telephone call.
To enter a call back number
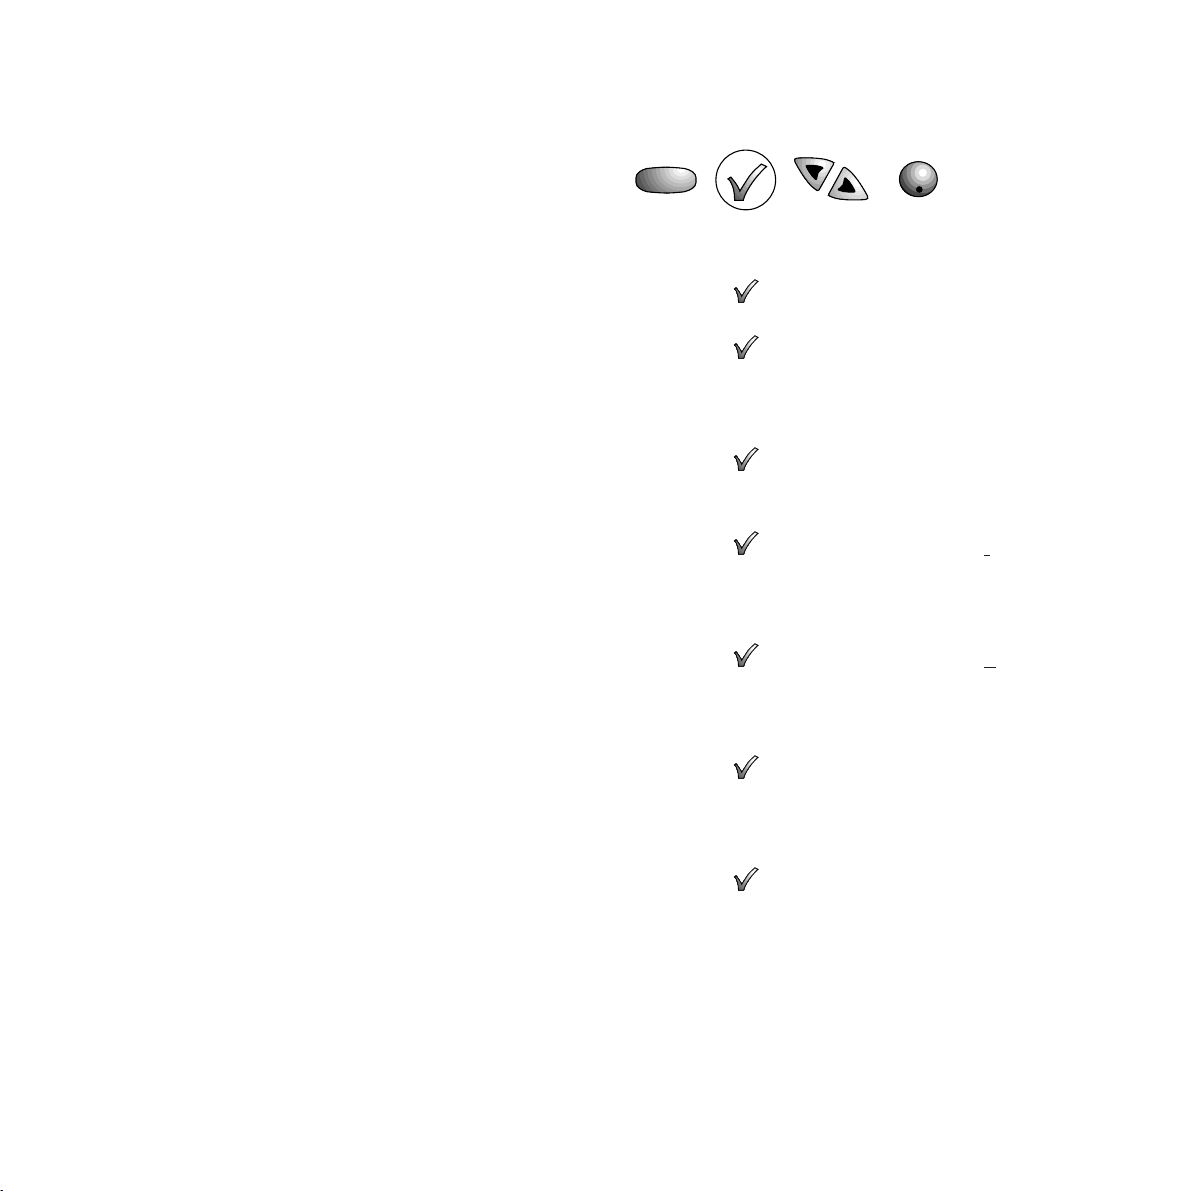
• Press the SET UP button until the display
shows USER SET UP.
• Press the button to display SET USER
INFORMATION.
• Press the button to display ENTER
SENDER ID.
• Press the © button until the display shows
CALL BACK TEL NUMBER.
• Press the button. Display shows any
previously entered call back number.
• Use the keypad to enter your call back
telephone number. It can be up to 32 digits
• Press the button to confirm. Display
shows SET DATE AND TIME
.
• Press the STOP button to return to standby.
Setting up
10
STOP
SET UP
Use the © button to move forward through the
display. Use the § button to delete characters.
If required use the ✱button to enter a +sign
before the first digit(for international dialling
codes).
If you pause for more than one minute when
entering your ID, your Image 2000 will
automatically revert to standby and any changes
you have made will NOT be saved.
Page 13
11 Setting the date and time
When your Image 2000 is in standby, the
display shows the time. It can also print the
date and time at the top of each fax it sends.
To set the date and time
• Press the SET UP button until the display
shows USER SET UP.
• Press the button to display SET USER
INFORMATION.
• Press the button to display ENTER
SENDER ID.
• Press the © button until the display shows
SET DATE AND TIME.
• Press the button. Display shows the
currently set date and time.
• Use the keypad to enter the new date and
time setting. After each digit, the cursor will
automatically move on to the next space.
• When the correct day and time is shown,
press the button to confirm. The display
shows SEND BATCH TX TIME.
• Press the STOP button to return to standby.
Your Image 2000 displays the date and time in the
following order: DayDay/MonthMonth/YearYear
HourHour:MinuteMinute using the 24 hour clock
for the time. For example, to set 25 minutes past 4
in the afternoon on 20 February 1998, enter: 20
02 98 1625.
11
Setting up
Batch time
Setting a batch time lets you send a group of
faxes to the same number at the same time
each day. This is pr e-set to 18.00 hrs, but you
can change it to any other time.
To set a daily time for sending documents
• Press the SET UP button until the display
shows USER SET UP.
• Press the button. Display shows SET
USER INFORMATION.
• Press the button to display ENTER
SENDER ID
• Press the © button until the display shows
SET BATCH TX TIME.
• Press the button. Display shows 18:00
and TICK TO SELECT.
• Use the keypad to enter the time you want
your batch files to be sent.
• Press the button to confirm the change.
Display shows SET OFFICE TIME.
• Press the STOP button to return to standby.
SET UP
SET UP
STOP
STOP
Page 14
Setting up
12
To set to office time
• Press the SET UP button until the display
shows USER SET-UP.
• Press the button. Display shows SET
USER INFORMATION.
• Press the button. Display shows ENTER
SENDER ID.
• Press the © button until the display shows
SET OFFICE TIME.
• Press the button. Display shows OFFICE
TIME ≈OFF.
• Press the © button to change OFF to ON.
• Press the button. Display shows 18:00
and END OF OFFICE TIME.
• Enter the time that you want your of fice
time to end.
• Press the button. Display shows 09:00
and START OF OFFICE TIME.
• Enter the time that you want your of fice
time to star t.
• Press the button. Display shows
ANSWER MODE ≈MANUAL
.
• Press the © button to display the answer
mode you want outside of fice hours.
• Press the button to confirm the
displayed option. Whatever mode you set for
your Image 2000 during of fice hours, it will
switch to this mode outside of fice hours.
• Press the STOP button to return to standby.
Office time
You can set the time you star t work and leave
work so that, out of of fice hours, your Image
2000 automatically switches to the receive
mode you want.
For example, if you have an answering
machine attached you could set your Image
2000 to switch to
ANS/FAX mode from 6.00pm
to 9.00am so that it will take voice or fax
messages automatically, and then back to
TEL/FAX during the day.
SET UP
STOP
Page 15

Setting up
13
12 Setting the receive mode
Your Image 2000 answers calls, and receives
faxes in one of five modes:
MANUAL
AUTOFAX
TEL/FAX
ANS/FAX
PC FAX
To set or change the receive mode
The currently set r eceive mode is shown in
the display.
Which setting is correct for you?
MANUAL When set to MANUAL you must
answer all calls by lifting the handset. If the
incoming call is a fax, press the
START button
and replace the handset.
AUTOFAX In AUTOFAX mode, your Image 2000
automatically answers any incoming calls and
prepares to receive a fax. If the handset is
picked up before the machine answers an
incoming call, you can talk to the caller or press
the
START button to r eceive a fax.
TEL/FAX When in TEL/FAX mode your Image
2000 answers calls after one ring and checks
for a fax signal. If it is not a fax call, the caller
is put on hold, the phone rings and the display
shows LIFT HANDSET to indicate you should
answer the call manually. If you do not lift the
handset before the ringing stops, your Image
2000 will assume it is a fax call and prepare to
receive a fax. To change the number of rings
before the call is answered, see page 50.
ANS/FAX
In ANS/FAX mode your Image 2000 can
operate with an answering machine. This
means that you can receive voice messages
and faxes.
All calls are answered automatically by the
answering machine and your outgoing
message is played. Callers can leave a
message. If the Image 2000 detects a fax signal
while the answer machine is operating, it will
automatically take control of the call and
receive the fax.
PC FAX In PC FA X mode your Image 2000
will receive and send faxes to a connected PC
with the fax application software installed. If
your PC is switched off, or the fax application
isn’t running, incoming faxes will be r eceived
on your Image 2000 after 8 rings, as if it was in
AUTOFAX mode. You can send faxes fr om the
PC with the Image 2000 in any receive mode.
Faxes can always be sent directly from your
Image 2000, even when in PC FAX mode.
In order for the ANS/FAX mode to work, your
Image 2000 must be connected to an answering
machine - via the socket located just above the line
cord socket on the back of the base unit.
Page 16

14
The telephone lets you make and receive calls
even if the mains power is disconnected.
Making telephone calls
Dialling using the handset
When you lift the handset the display shows
HANDSET IN USE. DIAL NUMBER. When you
hear the dial tone, dial the number you want.
To end the call, replace the handset.
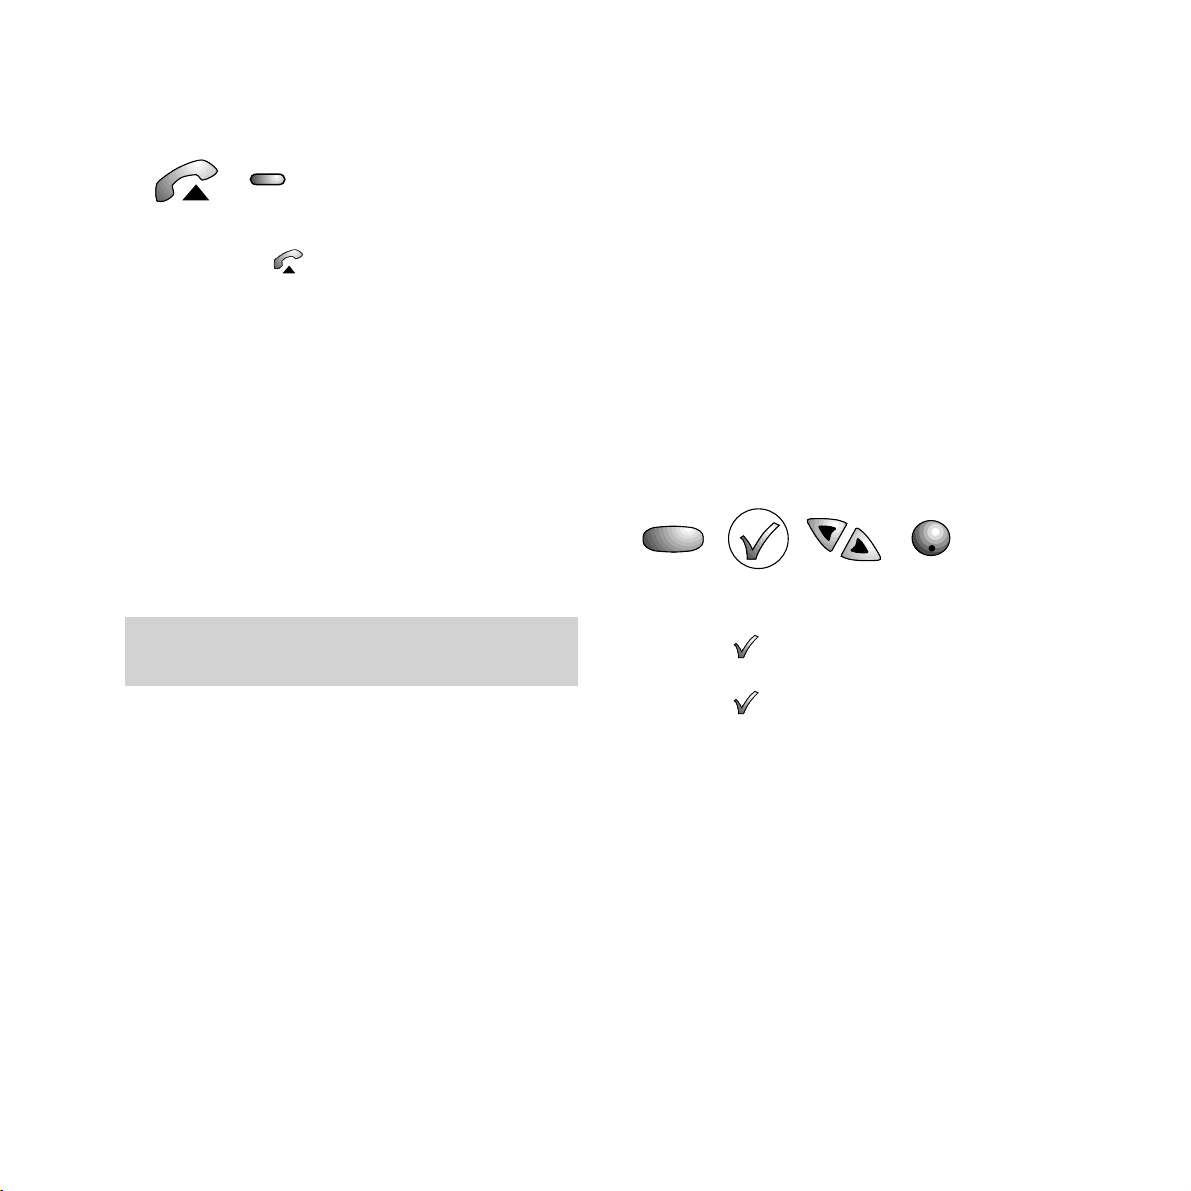
Dialling without lifting the handset
(on-hook dialling)
• Press the button. Display shows LINE IN
USE. DIAL NUMBER. When you dial, you can
hear whether the number is ringing or
engaged.
• If the call is answered, pick up the handset
and begin talking.
Replace the handset to end the call.
To redial the last number
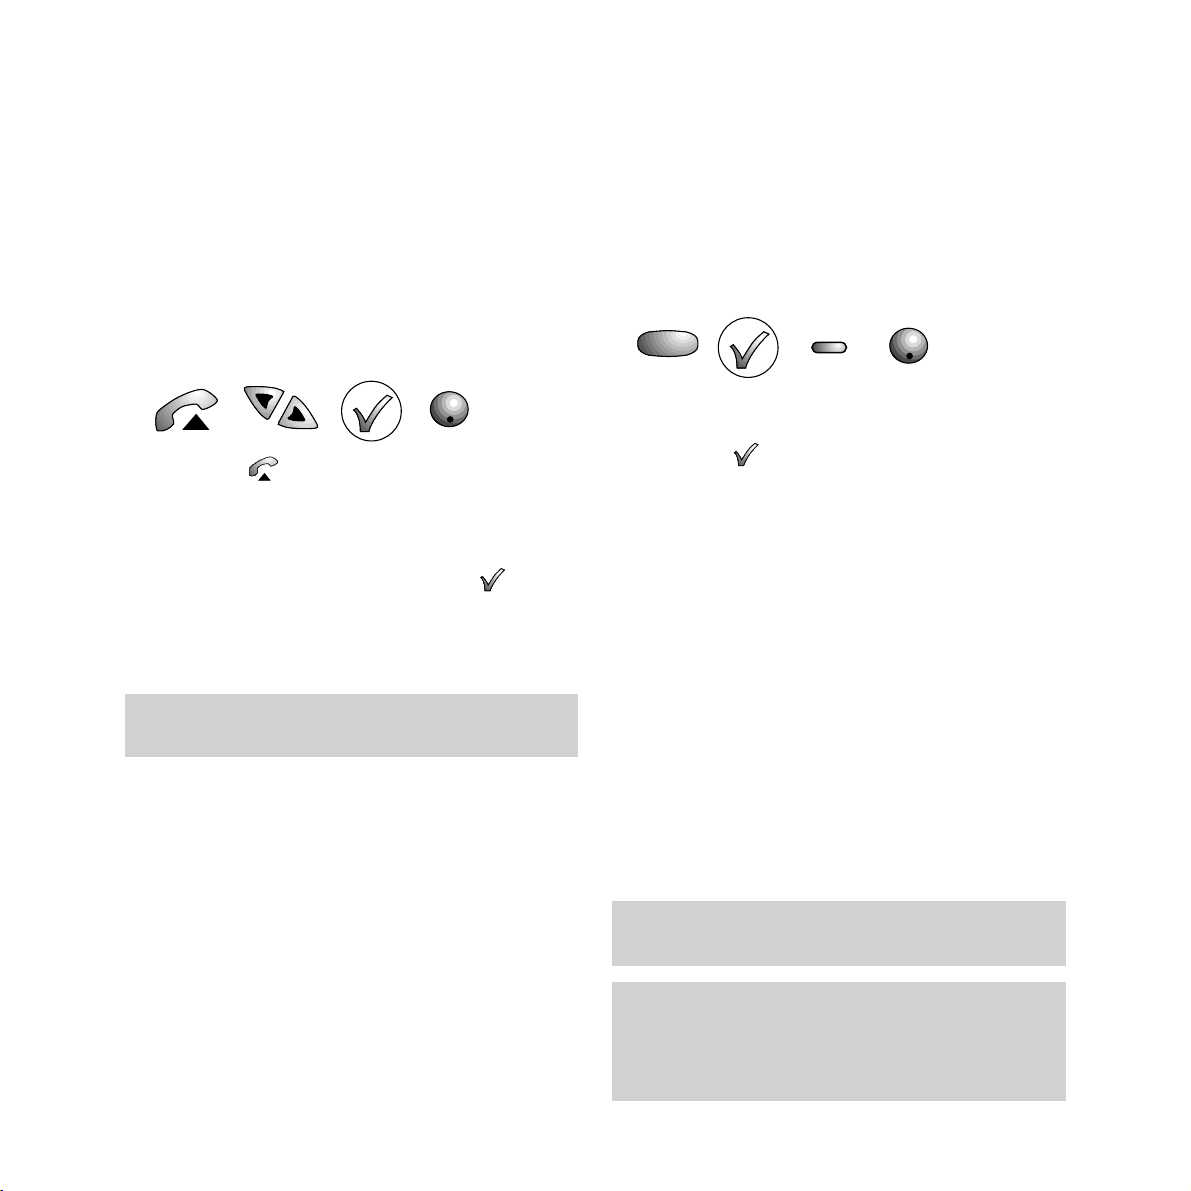
• Lift the handset or press the button.
• Press the REDIAL button. Display shows the
number as it is dialled.
Using the telephone, fax and
copier
Using the telephone,
fax and copier
When using on-hook dialling, make sure the
speaker volume is set to an audible level.
If the handset is lifted or the button is pressed
while a name or number is shown on the display,
your Image 2000 will dial the number after a short
pause.
REDIAL
Page 17
Setting the speaker volume
Your Image 2000 has an built-in speaker that
enables you to monitor the progress of a fax or
phone call.
The speaker has three settings:
LOW,
MEDIUM, HIGH.
To set the volume
• Press the button.
• Adjust the volume of the dial tone to LOW,
MEDIUM or HIGH using the § or ©
buttons.
• When the volume is set, press the
button.
• Press STOP to retur n to standby, or dial a
number.
One-touch names and
numbers
You can store a name, fax and phone number
under each of the one-touch buttons.
To store one-touch names and numbers.
• Press the SET UP button until the display
shows ONE TOUCH SET UP.
• Press the button. Display shows ONE
TOUCH SET UP. SELECT ONE-TOUCH KEY.
• Press the ONE-TOUCH button you want.
Display shows the one-touch button number
and ENTER NAME. You can now enter a
name. If a name has been previously
entered, the display shows EDIT NAME.
(See page : To edit one-touch names and
numbers)
You can enter a name of up to 20 characters.
For example, to enter the name JOHN:
• Press the 5 button until the display shows J
• Press the 6 button until the display shows O
• Press the 4 button until the display shows H
• Press the 6 button until the display shows N
15
When you set your Image 2000 to HIGH or LOW,
the machine gives two beeps.
Use the © button to move forward through the
display. Use the § button to delete characters.
If you pause for more than one minute when
entering your ID, your Image 2000 will
automatically revert to standby and any changes you
have made will NOT be saved.
Using the telephone,
fax and copier
SET UP
STOP
STOP
Page 18
Sub addresses and passwords
In addition to name, fax and phone numbers,
you can also store a sub-address number and a
password, each up to 20 digits long.
A sub-address is like a mailbox at the receiving
machine and faxes sent to this mailbox can
normally only be accessed by someone who knows
the sub-address. Not all fax machines that you send
to have this facility.
A password can be used when polling a document
from another machine. It provides security and the
password must be the same as the password set at
the polled machine. See POLLING, page 36.
Sub-addresses and passwords can only be used
with fax machines which comply with the
international fax standards.
Using the telephone,
fax and copier
16
• Press the button to confirm your
entr y. Display clears then shows ENTER
FAX NO.
• Enter the fax number associated with the
name you have just added.
• Press the button to confirm. Display
shows ENTER TEL NO
.
• Enter the telephone number.
• Press the button to confirm. Display
shows ENTER SUBADDRESS
.
• Enter the subaddress number using the
keypad and press the button to confirm
your entr y. Display shows ENTER
PASSWORD
.
• Enter the password number using the
keypad and press the button to confirm
your entr y. Display shows SELECT ONE
TOUCH KEY ready for you to enter another
name and numbers.
• Press the STOP button to return to standby.
If you want to go on to the next stage without
entering a number, just press without entering
any digits.
Page 19

To put a pause in a one-touch memory
For such ser vices as home banking, you may
need to use the
PAUSE function. Storing a
pause is simple. Begin entering a number,
then, when you need to inser t a pause, press
the
PAUSE button. The display will show
-
.
Continue to store the rest of the number as
normal.
To dial one-touch fax numbers
• Inser t a document into the document feeder.
• Press the ONE-TOUCH button you want.
• Press the START button to dial and send
the fax.
To dial a one-touch phone number
• Lift the handset or press the button.
• Press the ONE-TOUCH button you want.
The number is dialled automatically.
17
Using the telephone,
fax and copier
To edit one-touch names and numbers
• Press the SET UP button until the display
shows ONE TOUCH SET UP.
• Press the button. Display shows ONE
TOUCH SET UP. SELECT ONE-TOUCH KEY.
• Press the ONE-TOUCH button you want.
Providing a name has already been entered,
the display shows the name, the one-touch
button number and EDIT NAME.
• Use the keypad to change the name.
• Press the button to confirm the change.
Display shows the fax number and EDIT
FAX NO
.
• Use the keypad to change the number.
• Press the button to confirm the change.
Display shows the telephone number and
EDIT TEL NO.
• Use the keypad to change the number.
• Press the button to confirm the change.
Display shows the sub-address number and
EDIT SUBADDRESS.
• Use the keypad to change the number.
• Press the button to confirm the change.
Display shows password and EDIT PASSWORD.
• Use the keypad to change the number.
• Press the button to confirm the change.
Display shows SELECT ONE TOUCH KEY.
• Select another one-touch button to edit
another entr y or pr ess the
STOP button to
return to standby.
Special note
Your Image 2000 can send faxes to mailboxes but
it does not have its own internal mailboxes.
To return to standby at any time, press the STOP
button until the display shows the time and date.
Only entries that have been confirmed by pressing
the button are stored in the memory.
SET UP
STOP
START
Page 20
Using the telephone,
fax and copier
18
If a number has not been previously entered, for
example, as a sub address, then the display will
show ENTER SUB ADDRESS not EDIT SUB ADDRESS.
To delete a one-touch entry
• Press the SET UP button.
• Press the § or © buttons until the display
shows ONE-TOUCH SET UP
.
• Press the button. Display shows SELECT
ONE-TOUCH KEY.
• Press the ONE-TOUCH button you want.
Display shows the name and EDIT NAME.
• Press the § button to delete the name.
• Press the button to confirm.
• Press the STOP button to return to standby.
One touch memory label
Keep a reminder of the names stored in the ONETOUCH memory on the label. Remove the plastic
cover and the memory label and write in the names
alongside the relevant buttons, then replace the
label and plastic cover. Using a pencil makes it easy
to make any changes to the label.
Once a one-touch name has been deleted, the
associated fax and telephone numbers are
automatically deleted.
If you do not press any buttons for 60 seconds, your
Image 2000 automatically returns to standby.
SET UP
STOP
Page 21

19
Using the telephone,
fax and copier
Call Divert and Call Return (1471)
one-touch buttons
Two of the one-touch buttons on your Image
2000 have been pre-set to useful BT Select
Ser vices.
Call Diver t lets you forward calls to another
number where you can be reached.
You can switch this service on and off as often
as you like and change the numbers to which
you want calls diver ted. The Call Diversion
ser vice is available for a small quarterly fee.
Call Return 1471 lets you find out the number
of your last caller. This service is free.
Call Diversion
You can programme your Image 2000 to divert
incoming calls to another number.
You can use Call Diversion to diver t calls
if there is no answer within 15 seconds,
or if your phone is engaged.
You will get comprehensive instr uctions when
you subscribe to the ser vice.
To divert your calls
• Lift the handset.
• Press the CALL DIVERSION button. Display
shows *21*.
• Follow the spoken instructions.
• Replace the handset.
To cancel Call Diversion
• Lift the handset.
• Press the CALL DIVERSION button.
Display shows #21# and confirms
cancellation.
• Replace the handset.
Call charges
With Call Diversion, you pay for the second part of
the call only (i.e. from your number to the number
to which you have diverted the call).
If you are diverting a call to a cellular phone,
charging will begin either when the call is
answered, or when the network answers.
Please note
You can store your own One-Touch numbers under
a Select Services button. The Select Service is
automatically overwritten.
To restore the Select Services button, simple delete
the entry stored under that One-Touch button.
Page 22
To use Call Return
• To hear who called you last, lift the handset
or press the button.
• Press the CALL RETURN button.
You will hear an exchange announcement
telling you the telephone number.
• If you now want to call the number back
just dial 3.
If the number has been withheld, the
exchange announcement will say: “The caller
withheld their number.”
Using the telephone,
fax and copier
20
If you have overwritten your CALL RETURNbutton
you will have to dial 1471 manually.
Directory names and
numbers
You can store up to 20 names, in alphabetical
order, along with their associated fax and
telephone numbers. The names can be easily
displayed for dialling - if you are making a
phone call the phone number is automatically
selected. If you inser t a document for faxing,
the fax number is automatically selected.
To store names and numbers in the
directory
• Press the SET UP button until the display
shows DIRECTORY SET UP.
• Press the button. Display shows ADD A
NEW ENTRY.
• Press the button. Display shows ENTER
NAME.
Use the keypad to enter a name.
You can enter a name of up to 20 characters.
For example, to enter the name JOHN:
• Press the 5 button until the display shows J
• Press the 6 button until the display shows O
• Press the 4 button until the display shows H
• Press the 6 button until the display shows N
SET UP
STOP
Page 23
21
Using the telephone,
fax and copier
• Press the button to confirm your entry.
Display shows ENTER FAX NUMBER.
• Enter the fax number.
• Press the button to confirm your entry.
Display shows ENTER TEL NUMBER.
• Enter the telephone number.
• Press the button to confirm your entry.
Display shows ENTER SUBADDRESS.
• Enter the subaddress number using the
keypad and press the button to confirm
your entr y. Display shows ENTER PASSWORD.
• Enter the password number using the
keypad and press the button to confirm
your entr y. Display shows ADD A NEWENTRY
.
• Either press the button to star t a new
entr y or pr ess the
STOP button to retur n
to standby.
If the letter you require is on the same button as the
previous letter, press the © button to advance the
cursor to the next space.
Use the © button to move forward through the
display. Use the § button to delete characters.
If you pause for more than one minute between
button presses, your Image 2000 will automatically
revert to standby and any changes you have made
are NOT saved.
To return to standby at any time, press the STOP
button until the display show the time and date.
Only entries that have been confirmed by pressing
the button are stored in the memory.
If you want to go on to the next stage without
entering a number, just press without entering
any digits.
Sub addresses and passwords
In addition to name, fax and phone numbers,
you can also store a sub-address number and a
password, each up to 20 digits long.
A sub-address is like a mailbox at the receiving
machine and faxes sent to this mailbox can
normally only be accessed by someone who knows
the sub-address. Not all fax machines that you send
to have this facility.
A password can be used when polling a document
from another machine. It provides security and the
password must be the same as the password set at
the polled machine. See POLLING, page 36.
Sub-addresses and passwords can only be used
with fax machines which comply with the
international fax standards.
Special note
Your Image 2000 can send faxes to mailboxes but
it does not have its own internal mailboxes.
Page 24

Using the telephone,
fax and copier
22
To put a pause in the directory
For such ser vices as home banking, you may
need to use the
PAUSE function. Storing a
pause is simple. Begin entering a number as
shown above then, where you need to inser t a
pause, press the
PAUSE button. The display
shows
-
. Continue to store the rest of the
number as normal.
To dial numbers stored in the directory
• Press the DIRECTORY button. Display
shows the last name accessed.
• Either use the § and © buttons to scroll
through the directory of names. Or you can
use the keypad to enter the first letter of the
name you want and then use the
© button
to scroll to the name. (e.g., to find the name
JOHN, press the
5 button beginning with J,
then use the
© button to scroll through
other stored names beginning with J until
JOHN is shown in the display.)
• When the name you want is shown: either
lift the handset and press the
START button,
or if sending a fax, just press the
START
button.
• The number is dialled automatically.
If a document has been inserted in the document
feeder, your Image 2000 will automatically select
stored fax numbers. If no document has been
inserted, the telephone number will be selected.
Scrolling through the directory
Press and hold the § or © button to scroll through
stored names. Release the button when you get to the
name you want.
Press and then, after hearing a single beep, release
the © button, fax and phone numbers belonging to
the name will be displayed.
Press the © button to display the name again.
Press and release the © button after two beeps, the
next name in the directory will be displayed.
DIRECTORY
START
P
Page 25

23
Using the telephone,
fax and copier
To edit names and numbers stored in the
directory
• Press the SET UP button until the display
shows DIRECTORY SET UP.
• Press the button. Display shows ADD A
NEW ENTRY.
• Press the © button until the display shows
EDIT AN ENTRY.
• Press the button. Display shows the last
name accessed and SELECT ENTRY TO EDIT.
• Use the § or © buttons (or the keypad) to
display the entr y you want to change.
• Press the button. Display shows EDIT
NAME.
• Use the keypad and the §©buttons to
change the name.
• Press the button. Display shows EDIT
FAX NUMBER.
• Use the keypad to change the number.
• Press the button to confirm the change.
Display shows EDIT TEL NUMBER.
• Use the keypad to change the number.
• Press the button to confirm the change.
Display shows EDIT SUBADDRESS.
• Use the key pad to change the sub-address
number.
• Press the button to confirm the change.
Display shows the password and EDIT
PASSWORD.
• Use the keypad to change the number.
• Press the button to confirm the change.
Display shows EDIT AN ENTRY.
• Either press the STOP button to return to
standby or press the button to edit
another entr y.
If you pause for more than one minute when
entering your ID, your Image 2000 will
automatically revert to standby and any changes
you have made will NOT be saved.
SET UP
STOP
Page 26

Using the telephone,
fax and copier
24
To delete directory entries
This will delete the name, fax number,
telephone number, subaddress number and
password at the same time.
• Press the SET UP button until the display
shows DIRECTORY SET UP.
• Press the button. Display shows ADD A
NEW ENTRY.
• Press the § or © buttons until the display
shows DELETE AN ENTRY.
• Press the button to confirm. Display
shows the last name accessed and SELECT
ENTRY TO EDIT.
• Press the § or © buttons (or use the
keypad) to display the entr y you want to
delete.
• Press the button. Display shows DELETE
THIS ENTRY?
• Press the button to confirm. The name
and all numbers are deleted.
• Either press the STOP button to return to
standby or press the button to delete
another entr y.
Sending and receiving
faxes
Your Image 2000 lets you set its functions to
suit the way you work. The most commonly
preferr ed settings are pr e-selected as default.
You can alter or choose new settings as
desired.
Do not try to send or copy documents
which are:
• still wet with ink or correcting fluid
• very thick or very thin (for best results, paper
should be 75gsm)
• stapled or clipped together
• torn, folded, crumpled or with punched holes
• on carbon paper or glossy paper
When adjusting the settings, if you do not touch any
buttons for more than 1 minute, your Image 2000
will automatically return to standby.
In the display, RX= receive, TX = send.
SET UP
STOP
Page 27

25
Using the telephone,
fax and copier
To load documents for faxing
Load up to 20 pages at a time, face down, into
the automatic document feeder. The first page
is automatically drawn a little way into the
feeder.
Display shows ENTER FAX NO
OR PRESS
START TO COPY.
To send a fax
You have a choice of ways to dial a fax number.
Normal dialling
• Load the document
• Dial the number you want. (Press the §
button to delete any digit you dial by
mistake).
• Press the START button. The number is
dialled and document sent. Upon
connection, the display shows REMOTE ID
and the number of the receiving machine.
After the last page has been sent, the display
shows CALL COMPLETE and you hear a beep.
One-touch dialling
• Load the document
• Press the ONE-TOUCH button you want.
Display shows the name stored.
• Press the START button. The fax number is
dialled and document sent. Upon
connection, the display shows REMOTE ID
and the number of the receiving machine.
After the last page has been sent, the display
shows CALL COMPLETE and you hear a beep.
If you make a mistake, pull out the loose sheets and
press the STOP button. This cancels the fax and
ejects the page held in the unit.
START
START
Page 28
Using the telephone,
fax and copier
26
To monitor a fax call
Your Image 2000 can be set to allow you to
monitor the progress of a call.
When the line monitor is set to
ON, you will
hear fax tones from your Image 2000’s built-in
loudspeaker until the moment the document
begins to be sent (i.e., when the paper star ts
to go through the machine). When the line
monitor is set to
OFF, a transmission is only
monitored until dialling is complete. The
factor y setting for the Image 2000 is
OFF.
To switch line monitor on
• Press the SET UP button until the display
shows USER SET-UP.
• Press the button, display shows SET
USERINFORMATION.
• Press the © button to change the display to
SET UPFAXFUNCTIONS.
• Press the button. Display shows
ACTIVITYREPORT.
• Press the © button to change the display to
SETLINEMONITOR.
• Press the button. Display shows
LINEMONITOROFF.
• Press the © button to change the display to
ON.
• Press the button. Display shows
RINGER VOLUME SET-UP.
• Press the STOP button to return to standby.
Directory dialling
• Load the document
• Press the DIRECTORY button.
• Press the § or © buttons to scroll through
the names (or use the keypad) until the
display shows the name you want.
• Press the START button. The fax number is
dialled and document sent. Upon
connection, the display shows REMOTE ID
and the number of the receiving machine.
After the last page has been sent, the display
shows CALL COMPLETE and you hear a beep.
START
DIRECTORY
SET UP
STOP
Scrolling through the directory
Press and hold the § or © button to scroll through
stored names. Release the button when you get to the
name you want.
Press and then, after hearing a single beep, release
the © button, fax and phone numbers belonging to
the name will be displayed.
Press the © button to display the name again.
Press and release the © button after two beeps, the
next name in the directory will be displayed.
Page 29

27
Using the telephone,
fax and copier
Automatic redial
If the number you are calling is engaged or the
connection not made, your Image 2000 will
automatically redial the number up to two
times. The display will show WAITING 1ST
(or
2ND)REDIAL
To use the redial button
You can redial the last number called at any
time.
• Load the document
• Press the REDIAL button, display shows
the last dialled number and PRESS START
TO SEND.
• Press the START button, the number is
dialled and the fax sent.
To stop a fax you are sending
• Press the STOP button once to stop a fax in
progress. Any remaining pages in the
document feeder will be automatically
ejected.
To delay a fax
This allows you to send a fax automatically at a
pre-set time. This can be useful if you want to
send a fax abroad, so it coincides with the
other person’s of fice hours, or when call
charges are lower.
• Inser t the document to be faxed. If necessary,
adjust the contrast and resolution.
• Press the SET UP button until the display
shows DELAYED SEND SET UP.
• Press the button. Display shows SEND
AT BATCH TIME.
• Press the © button to display SEND AT
FIXED TIME.
• Press the button to confirm the FIXED
TIME option. Display shows ENTER SEND TIM E.
• Using the keypad, enter the date and time at
which you want the fax to be sent.
• Press the button to confirm, display
shows ENTER DESTINATION.
• Use the keypad to enter a number (or use
the Directory or One Touch buttons to enter
a name).
• Press the button to confirm the number,
display shows RESOLUTION/CONTRAST and
TICK TO SELECT, START.
• Press if you want to change the standard
resolution or contrast settings.
• Press START to finish the set-up, the
document is scanned into the memor y and
sent at the set time.
Sending small text or pages with pictures
If you are sending small print, illustrations or
photographs, you can alter the RESOLUTION and
CONTRAST settings to ensure the best possible
results. See Additional features, page 47.
REDIAL
STOP
SET UP
Page 30

Using the telephone,
fax and copier
28
To cancel a fax stored for sending later
All stored faxes can be deleted using the FILE
MANAGEMENT menu.
• Press the SET UP button until the display
shows FILE MANAGEMENT.
• Press the button. Display shows
MEMORY FREE XX% NEXT›
• Press the © button. Display shows details of
the first document stored,
e.g., 001 MEM RECEIVE 4P
. 001 is the file
number and 4P means the document is four
pages long.
• Press the © button until you display the file
you want to delete.
e.g., a delayed send file is shown as 011
DELAYED SEND 2P
. 011 is the file number.
2P is the number of pages.
• Press the button. Display shows FILE
XXX DOCUMENT. TICK TO PRINT, NEXT›
.
• Press the © button until the display shows
FILE XXX DELETE? TICK TO DELETE, NEXT›
.
If you are not sure which file you want to
delete, select FILE XXX DETAILS. TICK TO PRINT,
NEXT›. This will give you a print out of the
destination details for the file.
• Press the button to delete the fax.
Display shows the next stored file.
You can now delete fur ther files or pr ess the
STOP button to retur n to standby.
SET UP
STOP
Page 31

29
Using the telephone,
fax and copier
To receive a fax
Your Image 2000 is pre-set to AUTO FAX which
means it is ready to receive faxes automatically.
When a call is received, the machine rings.
The display shows
CONNECTING and the fax is
received.
Your Image 2000 is pre-set to print faxes
automatically, however this setting can be
altered so that faxes are stored in the memory
to be printed later.
To receive faxes into the memory
• Press the SET UP button until the display
shows MEMORY RECEIVE.
• Press the button. Display shows
MEMORY RECEIVE ≈OFF.
• Press the © button to change the display to
ON.
• Press the button. Display shows 0000
ENTER PASSWORD.
• Enter a four digit password (or leave as
0
000 if you do not want to enter a private
password)
• Press the button. Display shows
MEMORY RECEIVE ≈ON and the password
you have entered is shown briefly.
All faxes will now be received into the memory
and you will need to know the password to
print them out.
If there is no paper, the fax will be stored in the
memory and printed when more paper has been
inserted.
Any faxes received, or copies made, whilst you have
a colour cartridge installed, will be printed in blue this is to remind you that you have a colour
cartridge installed. You are advised to change to a
black cartridge when not printing from your PC as
it will reduce the life of your colour cartridge.
SET UP
Page 32

30
Using the telephone,
fax and copier
To stop faxes from being received into the
memory
You need to know the cur rent passwor d in
order to switch the memory off.
• Press the SET UP button until the display
shows MEMORY RECEIVE.
• Press the button. Display shows
MEMORY RECEIVE≈ON.
• Press the © button to change the display to
OFF.
• Press the button. Display shows 0000
ENTER PASSWORD.
• Enter the current passwor d.
• Press the button. If the password is
correct, the display shows MEMORY
RECEIVE ≈OFF. Any stored documents will
be printed before the machine retur ns to
standby.
Changing the password allowing faxes to
be received into the memory
The memor y r eceive must first be switched
of f and then switched back on as shown in
‘To receive faxes into the memor y’ on the
previous page.
Printing stored faxes
If there are faxes held in the memory, the
display shows FAXES IN MEMORY XX (the
number of faxes stored). If this is not
displayed, press the
§ or © buttons until it is
shown.
All stored faxes can be printed or deleted as
desired using the
FILE MANAGEMENT menu.
If you enter the wrong password, the display will
show MEMORY RECEIVE≈ON. You can change it to
OFF and repeat the steps above or press the STOP
button to return to standby.
Special note
Your Image 2000 can send faxes to mailboxes at
other machines but it does not have any mailboxes of
its own.
SET UP
Page 33

31
Using the telephone,
fax and copier
To print a fax stored in the memory
• Press the SET UP button until the display
shows FILE MANAGEMENT.
• Press the button. Display shows
MEMORY FREE XX% NEXT›
• Press the © button. Display shows details of
the first document stored.
e.g.: 001 MEM RECEIVE 4P
. 001 is the file
number and 4p means the document is four
pages long).
• Press the button. Display shows 0000
ENTER PASSWORD.
• Enter the current memory receive password
and press the button.
• Press the button to print the file.
To delete a fax stored in the memory
You can delete a fax without printing.
• Press the SET UP button until the display
shows FILE MANAGEMENT.
• Press the button. Display shows
MEMORY FREE XX% NEXT›.
• Press the © button. Display shows details of
the first document stored.
e.g.: 001 MEM RECEIVE 4P
. 001 is the file
number and 4p means the document is four
pages long).
• Press the © button to display the file you
want to delete.
• Press the button. Display shows 0000
ENTER PASSWORD.
• Enter the current memory receive
password and press the button.
• Press the © button until the display shows
DELETE.
• Press the button to confirm deletion.
Display shows the next file stored in the
memor y.
You can now either delete fur ther files or pr ess
the
STOP button to return to standby.
SET UP
SET UP
STOP
Page 34

32
Using the telephone,
fax and copier
Forwarding incoming faxes to
another fax machine
You can set your Image 2000 to automatically
send received faxes to another number. Once
you have switched on fax for war ding, all faxes
will be for war ded to the number you have set
until the function is switched of f again. You
have the option of saving copies of all the
for war ded faxes in memory, printing them out
or deleting them. The default option is to print
all faxes for war ded.
To set up fax forwarding
• Press the SET UP button until the display
shows FAX TRANSFER SET UP.
• Press the button. Display shows FAX
TRANSFER ≈OFF.
• Press the © button to display FAX
TRANSFER ≈ON.
• Press the button. Display shows 0000
and ENTER AN ACCESS CODE.
• You can now enter a 4 digit code to prevent
your Image 2000 being switched of f without
authorisation.
• Press the button to confirm the code.
Display shows FAX TRANSFER ≈ON and
ACCESS CODE ≈XXXX and then changes to
ENTER DESTINATION.
• You can now enter the fax number you want
your faxes for war ded to.
• Press the button to confirm the number.
Display shows PRINT TRANSFER FILE. You
can now choose whether you want copies of
the faxes printed, stored or deleted by your
Image 2000.
• Press the © button to display the available
options – PRINT, STORE and DELETE.
• Press the button to confirm the displayed
option. Display shows FAX TRANSFER ≈ON
and TO XXXXXXX (fax number) before
returning to standby.
To switch off fax forwarding
• Press the SET UP button until the display
shows FAX TRANSFER SET UP.
• Press the button. Display shows FAX
TRANSFER ≈ON.
• Press the © button to display FAX
TRANSFER ≈ OFF.
• Press the button. Display shows 0000
and ENTER AN ACCESS CODE.
• You must now enter the same 4 digit code
that was entered when fax transfer was
switched on.
• Press the button to confirm the code.
Display shows ACCESS CODE CORRECT and
FAX TRANSFER ≈ OFF before returning to
standby.
SET UP
SET UP
A code of 0000 allows free access.
If no code has been set the Image 2000 will go
directly to standby.
Page 35

33
Using the telephone,
fax and copier
Group dialling
If you regularly need to send a fax to a number
of dif ferent destinations, your Image 2000 lets
you store up to 50 destination numbers in each
of three Group Dial memories.
The 50 destination numbers in each Group
Dial memor y may comprise of-
- any of the 10 stored under the one touch
buttons
- any of the 20 stored in the directory
- plus 20 manually entered numbers
Each destination number can be up to 20 digits
long.
To store numbers under a group dial
memory
• Press the SET UP button until the display
shows GROUP SET UP.
• Press the button. Display shows
GROUP 1.
• Press the § or © buttons to display the
group memory you want 1, 2 or 3.
• Press the button. Display shows ENTER
DESTINATION 01.
• Enter the name or fax numbers you want by
using the one-touch buttons, directory or
keypad
• Press the button to confirm. Display
shows ENTER DESTINATION 02.
Continue entering all the names and numbers
you want, confirming each one by pressing the
button, up to a total of 50 destination
numbers.
SET UP
Page 36

34
Using the telephone,
fax and copier
To add a number to a group dial memory
• Press the SET UP button until the display
shows GROUP SET UP.
• Press the button. Display shows
GROUP 1.
• Press the § or © buttons to display the
group memory you want 1, 2 or 3.
• Press the button. Display shows EDIT
EXISTING GROUP?
• Press the button. Display shows ADD
AN ENTRY?
• Press the button. Display shows ENTER
DESTINATION XX
. Add a new destination
name or number.
• Press the button to confirm.
You can now add more entries (until the total
number of entries reaches 50) or press the
STOP button to retur n to standby.
To delete a number in the group memory
• Press the SET UP button until the display
shows GROUP SET UP.
• Press the button. Display shows
GROUP 1
.
• Press the § or © buttons to display the
group memory you want 1
(2 or 3).
• Press the button. Display shows EDIT
EXISTINGGROUP?
• Press the button. Display shows ADD
AN ENTRY?
• Press the © button to display DELETE AN
ENTRY?
• Press the button to confirm. Display
shows the first name or number stored and
to SELECT, NEXT›.
• Press the § or © buttons to scroll through
the entries until the one you want to
delete is shown.
• Press the button to delete the entr y.
• You can now delete another entry or press
the
STOP button to return to standby.
SET UP
STOP
STOP
SET UP
Page 37

35
To delete an entire group
• Press the SET UP button until the display
shows GROUP SET UP.
• Press the button. Display shows
GROUP 1.
• Press the § or © buttons to display the
group memory you want - 1, 2 or 3.
• Press the button. Display shows EDIT
EXISTING GROUP.
• Press the © button to display DELETE
GROUP X?
• Press the button to confirm. Display
shows GROUPX DELETED and then GROUP
SETUP
.
• Press the button to enter a new group or
press the
STOP button to retur n to standby.
Using the telephone,
fax and copier
SET UP
STOP
Broadcasting
You can send a fax to a large group of people
(up to 50) using the broadcast feature. You can
use this feature to send faxes to everybody in
your pre-programmed group or you can enter
other fax numbers manually.
Using Broadcast, documents are first stored in
the Image 2000’s memor y. You can program as
many broadcasts as you want until all the
available memor y has been used. You can
choose the date and time that the documents
are sent.
To set up a broadcast
• Load the document.
• Press the SET UP button until the display
shows BROADCAST SET UP.
• Press the button. Display shows
BROADCAST FILE XXX followed by GROUP
ENTRIES.
• Press the © button to display GROUP
ENTRIES or MANUAL ENTRIES. If you want
to send the fax to a pre-programmed group
of numbers, select GROUP ENTRIES,
other wise select MANUAL ENTRIES.
• Press the button.
SET UP
Page 38

If you select GROUP ENTRIES:
• Press the § or © buttons to display the
group memory you want - 1, 2 or 3.
• Press the button. Display shows ADD
MORE ENTRIES.
• Press the © button to display ADD MORE
ENTRIES or FINISH. Select ADD MORE ENTRIES
to add another group or manually entered
numbers. Select FINISH when you have
entered all the names and numbers you want.
• Press the button to confirm.
If you select
MANUAL ENTRIES:
Display shows ENTER NAME/NUMBER 01 (01
indicates the first entr y).
• Use the keypad to enter numbers (or use
the Directory or One Touch buttons to enter
a name)
• Press the button after each entr y.
When you have added all the numbers you
want in the broadcast, press the button
again. Display shows ADD MOREENTRIES.
• Press the © button to display FINISH.
• Press the button to confirm.
You are now asked to enter the date and time
you want the broadcast to star t.
36
• Press the button to star t broadcasting
immediately or use the keypad to enter the
date and time you want.
• Press the button to confirm. The display
shows RESOLUTION/CONTRAST.
You can now star t the br oadcast by pressing
START or you can change the r esolution and
contrast settings first by pressing the
button and then using the
© and
buttons to display and select the settings
you want.
The document is now scanned into the
memor y and the display shows BROADCAST
FILE XXX before returning to standby. The fax
will be broadcast at the time set.
Polling
This allows your Image 2000 to retrieve a
document from another fax machine, or for
another fax machine to retrieve a document
from your Image 2000.
To store a document to be polled by another
machine
For this type of polling, your Image 2000 uses
a bulletin board. This allows you to store a
document in the memor y wher e it can be
retrieved by any caller making a polling call to
your machine. It cannot be protected by a
password and will remain in the memory until
it is deleted.
Using the telephone,
fax and copier
You can broadcast to up to 3 groups and up to 20
manual entries.
Page 39

37
Using the telephone,
fax and copier
• Press the button. Display shows
RECEIVE POLLING.
• Press the © button to display BULLETIN
BOARD.
• Press the button. Display shows
BULLETIN BOARD ≈OFF
• Press the © button to change from OFF to
ON.
• Press the button to confirm.
The display shows RESOLUTION/CONTRAST.
You can now finish the set-up by pressing
START or you can change the r esolution
and contrast settings first by pressing the
button and then using the
© and
button to display and select the settings
you want.
The document is scanned into the memor y
and the display shows BULLETIN FILE XXX
before retur ning to standby.
Your Image 2000 can hold only one document
at a time on the
BULLETIN BOARD. If a
document has already been stored your Image
2000 asks you if you want to replace it, delete
it or retain it. Use the
© button to display the
options.
A document on the bulletin board is not protected
and can be polled by anybody polling your number.
• Load the document.
• Press the SET UP button until the display
shows POLLING SET UP.
SET UP
To switch the polling Bulletin Board off
• Press the SET UP button until the display
shows POLLING SET UP.
• Press the button. Display shows
RECEIVE POLLING.
• Press the © button to display BULLETIN
BOARD.
• Press the button. Display shows
BULLETIN BOARD ≈ON.
• Press the © button to change from ON to
OFF.
• Press the button to confirm the change.
Display shows BULLETINBOARD ≈OFF
and FILE XXX DELETED before retur ning
to standby.
SET UP
Page 40
38
Using the telephone,
fax and copier
To poll a document from another fax
machine
You can retrieve a document from another fax
machine in one of two ways. In both cases, the
other fax machine must be set ready for
polling.
To poll a document using FAXBACK
The FAXBACK button makes it easy to retrieve
a document from another fax machine.
• Enter the fax number of the machine from
which you want to retrieve a document.
• Press the FAXBACK button.
• Polling begins automatically.
FAX
BACK
If the number you want to poll requires a
sub-address and/or password - you will need
to store the number and sub-address/password
under a one-touch button or in the directory. You
can then dial using the one-touch button or directory
before pressing the FAXBACK button.
Turn around POLLING
You can set your Image 2000 so that it will
automatically poll any machine it sends to.
With tur n ar ound polling on, when the sending
operation is complete and before the call is
terminated, your Image 2000 asks the called
machine if it has any documents on its bulletin
board. If it has, they will be received by your
Image 2000. The factor y setting for turn
around polling is OFF.
To switch turn around polling ON
• Press the SET UP button until the display
shows USER SET-UP.
• Press the button. Display shows
SET USER INFORMATION.
• Press the © button to display SET UP FAX
FUNCTIONS.
• Press the button. Display shows
ACTIVITY REPORT.
• Press the © button to display TURN AROUND
POLLING.
• Press the button. Display shows
AROUND POLLING = OFF.
• Press the © button to display OFF to ON.
• Press the button to confirm the
displayed option. Press the STOP button to
return to standby.
SET UP
STOP
Page 41
39
Using the telephone,
fax and copier
To use RECEIVE POLLING
You can use this feature if you want to poll
from more than one machine or if you want to
poll using a security password.
• Press the SET UP button until the display
shows POLLING SET UP.
• Press the button. Display shows
RECEIVE POLLING.
• Press the button. Display shows
RECEIVE POLLING XXX (XXX is the file
number allocated by your Image 2000 for
your reference), followed by GROUP
ENTRIES.
• Use the © button to switch the display
between GROUP ENTRIES and MANUAL
ENTRIES. If you want to poll one of your
pre-programmed groups of numbers, select
GROUP ENTRIES, other wise, select MANUAL
ENTRIES
.
If you select GROUP ENTRIES
• Press the § or © buttons to display the
group memory you want 1, 2 or 3.
• Press the button. Display shows ADD
MORE ENTRIES.
• Press the © button to display ADD MORE
ENTRIES
or FINISH. Select ADD MORE ENTRIES
if you want to add another group or manual
entries. Select FINISH when you have entered
all the names and numbers you want.
• Press the button to confirm.
If you select MANUAL ENTRIES
• Display shows ENTER NAME/NUMBER 01.
(01 indicates it is the first entry)
• Use the keypad to enter numbers, or the
one-touch buttons or the directory to
enter names.
• Press the button after entering each
number or name.
• When you have added all the names and
numbers you want to poll, press the
button again. Display shows ADD MORE
ENTRIES
.
• Press the © to display FINISH.
• Press the button to confirm. Display
shows ENTER POLLING TIME.
You can now enter the date and time you want
your Image 2000 to begin polling.
• Press the button if you want polling to
star t immediately or use the keypad to enter
the date and time you want.
• Press the button to confirm. Display
shows RECEIVEPOLLINGXXX. Polling will
begin at the time you have set.
SET UP
Page 42

40
Using the telephone,
fax and copier
Setting the incoming fax size
Your Image 2000 is pre-set to slightly reduce
incoming faxes to fit onto a smaller page area.
Documents can also be received normal size.
The available settings are:
AUTO REDUCTION (default setting)
Incoming faxes are automatically reduced to
ensure each page received fits onto one sheet
of paper. If the original document page length
is more than 1
1
/2times the set paper length,
then the document will be printed on two
sheets.
NORMAL
In normal mode, faxes are printed out full size.
This means that if the sender’s ID information
is set to OUTSIDE, the fax may go over onto a
second sheet.
CUT OVER LENGTH
In this mode, faxes are printed full size but, if
the page length of an incoming fax is longer
than the paper you are printing on, your Image
2000 will not print anything that is over the set
length of the page.
To change the incoming fax size
• Press the SET UP button until the display
shows USER SET UP.
• Press the button . Display shows SET
USER INFORMATION.
• Press the © button until the display shows
SET UP FAX FUNCTIONS.
• Press the button. Display shows
ACTIVITY REPORT.
• Press the © button until the display shows
SET PRINT MODE.
• Press the button. Display shows NORMAL.
• Use the © button to display the available
options - NORMAL
, FULL LENGTH,
CUT OVER LENGTH.
• Press the button to confirm the option
you want. Display shows RESOLUTION
DEFAULT.
• Press the STOP button to return to standby.
SET UP
STOP
Page 43

41
Setting the plain paper size for printing
For copying and incoming faxes, your Image
2000 can print out on:
A4 (210 x 297 mm)
Letter (216 x 279 mm)
Legal (216 x 356 mm)
The default setting is for A4 size. If you want
a dif ferent size, the paper size setting must be
changed. The maximum scanning width is
216mm.
To set the paper size in the paper tray
• Press the SET UP button until the display
shows PAPER SIZE SET UP.
• Press the button. Display shows PAPER
SIZE A4 (or the current size).
• Press the © button to display the available
options - A4
, LETTER, LEGAL.
• Press the button to select the option you
want. Display shows REPLACECARTRIDGE.
• Press the STOP button to return to standby.
Using the telephone,
fax and copier
SET UP
STOP
Print outs
Your Image 2000 can print out activity reports,
confirmation reports, a list of names and
numbers stored in memory, a list of settings and
a list of functions.
Activity report
This is a repor t which lists the details of the
fax calls you have made and received. The
repor t details the date, time, number of pages,
duration of call, the number dialled for faxes
you send, the sender’s ID for faxes you
received and the result of each fax.
Automatic activity report
Your Image 2000 is preset to automatically
print out a repor t after every 40 fax
transactions. After printing an automatic report,
the Image 2000 clears its calls log memor y and
prepares to log the next 40 calls.
You can print out intermediate reports if you
wish and you can also switch of f the automatic
repor t print out. When the automatic print out
is switched of f, the Image 2000 will still clear
its calls log memor y after every 40 calls.
Page 44

42
Using the telephone,
fax and copier
To switch the automatic report on or off
• Press the SET UP button until the display
shows USER SET UP.
• Press the button. Display shows SET
USER INFORMATION.
• Press the © button until the display shows
SET UP FAX FUNCTIONS.
• Press the button. Display shows
ACTIVITY REPORT.
• Press the button. Display shows
AUTOMATIC PRINT ≈ON.
• Press the © button to switch between ON
and OFF.
• Press the button to confirm the setting
you want.
• Press the STOP button to return to standby.
To manually print out an activity report
This gives you a list of all the calls made and
received since the calls log memory was last
cleared by the machine.
• Press the SET UP button until the display
shows PRINT OUTS +REPORTS.
• Press the button. Display shows
ACTIVITYREPORT.
• Press the button. The activity repor t is
printed and the display shows CONFIRM
LAST FAX.
• Press the STOP button to return to standby.
When the automatic print out is switched off, you
can still print reports manually.
SET UP
STOP
STOP
SET UP
Page 45
43
Using the telephone,
fax and copier
Confirmation reports
A confirmation report gives you an activity
repor t on the last call only.
Your Image 2000 is pre-set to print a report
automatically if a fax transmission or reception
fails. If required, you can change this to print a
repor t each time a fax is sent and/or r eceived.
It can also be switched of f.
To print out a confirmation report after each
transaction
• Press the SET UP button until the display
shows USER SET UP.
• Press the button. Display shows SET
USER INFORMATION.
• Press the © buttons until the display shows
SET UP FAX FUNCTIONS.
• Press the button. Display shows
ACTIVITY REPORT.
• Press the © buttons until the display shows
CONFIRMATION REPORT.
• Press the button. Display shows TX
REPORT ERROR ONLY
(TX = send).
• Press the © button to display the available
options - ERROR ONLY
, ALWAYS, NO REPORT.
• When the setting you want is displayed,
press the button. Display shows RX
REPORT ERROR ONLY
(RX = receive)
• Press the © button to display the available
options - ERROR ONLY
, ALWAYS, NO REPORT.
When the setting you want is displayed,
press the button. Display shows SET
LINE MONITOR.
• Press the STOP button to return to standby.
SET UP
STOP
Page 46
44
Using the telephone,
fax and copier
To manually request an individual activity
report
If your Image 2000 is not set to print a
confirmation report after ever y fax transaction,
you can request one as required. You can also
get a repor t of the last fax sent or the last fax
received.
• Press the SET UP button until the display
shows PRINT OUTS+ REPORTS.
• Press the button. Display shows
ACTIVITY REPORT.
• Press the © button until the display shows
CONFIRM LAST FAX.
• Press the button. Display shows
CONFIRM SEND.
• Press the © buttons to display the options
available CONFIRM SEND, CONFIRM
RECEPTION.
• Press the to confirm the option you
want. Display shows the time, number of
pages and the result of the last call.
• Press the button again if you also want a
print out.
• Press the STOP button to return to standby.
To print a list of the names and numbers
stored in your Image 2000’s one-touch
memory and directory
• Press the SET UP button until the display
shows PRINT OUTS+ REPORTS.
• Press the button. Display shows
ACTIVITY REPORT.
• Press the © button until the display shows
PHONE BOOK.
• Press the button. A list of the names and
numbers stored in the one-touch memory
and directory and group memories is
printed and the display shows USER SETTING.
• Press the STOP button to return to standby.
SET UP
STOP
STOP
SET UP
Page 47
45
Using the telephone,
fax and copier
To print a list of functions
• Press the SET UP button until the display
shows PRINT OUTS + REPORTS.
• Press the button. Display shows
ACTIVITY REPORT.
• Press the © button until the display shows
FUNCTION LIST.
• Press the button. A list of the functions
is printed and the display shows ACTIVITY
REPORT.
• Press the STOP button to return to standby.
To print a list of settings
This will give you a list of all the settings you
have chosen for your Image 2000 using the
SET UP menu.
• Press the SET UP button until the display
shows PRINT OUTS + REPORTS.
• Press the button. Display shows
ACTIVITY REPORT.
• Press the © button until the display shows
USER SETTINGS.
• Press the button. A list of the current
settings is printed. Display shows
FUNCTION LIST.
• Press the STOP button to return to standby.
Copying documents
Your Image 2000 can be used as a plain paper
copier.
To copy a document
You can load up to 20 pages in the document
feeder.
• Place the document to be copied face down
in the document feeder.
• Press the START button. Display shows
NUMBER OF COPIES ≈01
. RESOLUTION
≈
FINE
(this is the default setting)
• To change the Resolution, press the SET UP
button to display the available options -
NORMAL, FINE, SUPER FINE, PHOTO
.
(For an explanation of resolution settings,
see Resolution on page 47.)
• If you want more than one copy of the
document, use the keypad to enter the
number of copies you want to make.
• Press the START button. If you ar e making
only one copy then copying will now star t.
If you are making two or more copies the
display shows STACK and the number of
copies you have set.
• You can now choose whether to print copies
in sequence(STACK)or in collated sets(SORT).
• Press the © button to display STACK or SORT.
• Press the button to confirm the option
you want and star t copying.
• Press the STOP button at any time to halt
copying.
SET UP
SET UP
SET UP
STOP
START
Page 48

46
Using the telephone,
fax and copier
Replacement cartridges are available via the phone
number displayed on your machine.
Item code: 871089
To replace the print cartridge, see Help, p58.
Remember to make sure there is enough paper in
your Image 2000’s paper tray.
Page 49

47
Additional features
Resolution
You can choose dif fer ent resolutions settings
to ensure improved quality when faxing or
copying a document.
The default resolution for sending a fax is
NORMAL. The resolution can be changed
manually for each outgoing document. The
resolution will then revert to
NORMAL again
once the document has been sent.
The default resolution for copying a document
is
FINE.
There are four available settings:
NORMAL
For normal documents containing easy-to-read
text.
FINE
For small or hard-to-read text.
SUPER FINE
For a document containing ver y small har d-toread text or detailed drawings.
PHOTO
For pages containing pictures, photographs or
drawings which contain colours or var ying
shades of grey.
To change the resolution for individual faxes
• Inser t the document to be sent.
• Press the SET UP until the display shows
SET RESOLUTION.
• Press the button. Display shows
NORMAL.
• Press the © button to display the
available options
- NORMAL, FINE,
SUPERFINE, PHOTO
.
When the setting you require is shown in the
display, press the button to confirm the
new setting. Display shows SET CONTRAST.
• Press STOP button to display ENTER FAX NO.
or press
START to copy.
You can now dial the fax number and send the
document as normal.
Additional features
When you are setting up a document for delayed
send, broadcasting or polling, you do not need to set
the resolution when you insert the document. Your
Image 2000 will ask you what resolution you want
during the set up procedure.
SET UP
STOP
START
Page 50
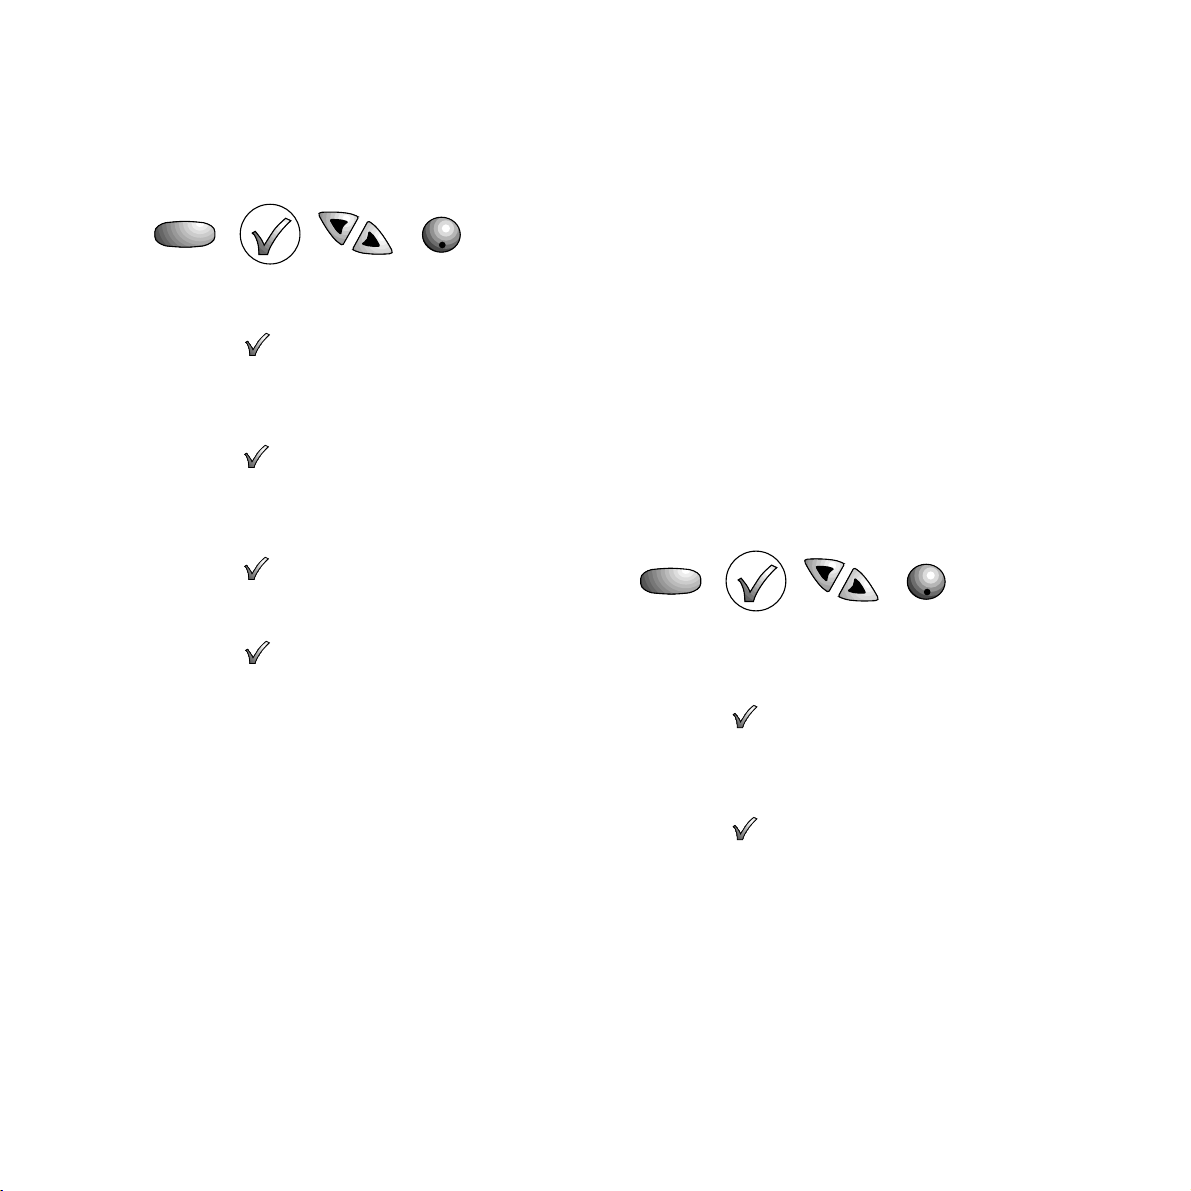
48
Additional features
To change the default resolution for faxes
This changes the setting for all documents you
fax or copy. The pr e-set resolution is
NORMAL.
• Press the SET UP button until the display
shows USER SET UP.
• Press the button. Display shows SET
USER INFORMATION.
• Press the © button to display SET UP FAX
FUNCTIONS
.
• Press the button. Display shows ACTIVITY
REPORT
.
• Press the © button until the display shows
RESOLUTION DEFAULT.
• Press the button. Display shows NORMAL.
• Press the © button to display the available
options - NORMAL, FINE, SUPERFINE, PHOTO.
• Press the button to select the displayed
option.
• Press the STOP button to return to standby.
Contrast
You can choose different contrast settings to
compensate for light or dark original
documents which you want to fax or copy.
The available settings are:
NORMAL - when sending all clearly printed
documents
DARK - when sending dark original documents
LIGHT - when sending light original
documents
To set the contrast for individual faxes and
photocopies
• Inser t the document to be sent or copied.
• Press the SET UP button until the display
shows SET CONTRAST.
• Press the button to select.
• Press the © button to display the available
options - NORMAL ORIGINAL, LIGHT ORIGINAL
or DARK ORIGINAL
.
• Press the button to select the option
displayed.
• Press the STOP button to display ENTER
FAX NO or press
START to copy.
You can now dial the fax number and send the
document as normal or just press the
START
button to copy.
SET UP
STOP
STOP
SET UP
Page 51

49
Additional features
To change the default contrast setting
The pre-set setting for sending a fax is
NORMAL. This setting is suitable for most
cases. If you do need to change it.
• Press the SET UP button until the display
shows USER SET UP.
• Press the button. Display shows SET
USER INFORMATION.
• Press the © button to display SET UP FAX
FUNCTIONS
.
• Press the button. Display shows
ACTIVITY REPORT
.
• Press the © button until the display shows
CONTRAST DEFAULT.
• Press the button. Display shows NORMAL
ORIGINAL
.
• Press the © button to display the available
options - NORMAL ORIGINAL, LIGHT ORIGINAL
or DARK ORIGINAL
.
• Press the button to select the default
setting you want. This will now apply to all
faxes you send or copies you make.
Press the
STOP button to return to standby.
SET UP
STOP
Setting the print quality
Your Image 2000 has two modes for print
quality:
NORMAL and HIGH QUALITY.
The machine is pre-set to print in
NORMAL
mode and this produces good quality printouts
adequate for most cases. However, if you need
improved definition, especially if you are
printing ver y small text or finely detailed
documents, you may want to choose the
HIGH
QUALITY setting.
To change the print quality setting
• Press the SET UP button until the display
shows USER SET-UP.
• Press the button. Display shows SET
USER INFORMATION.
• Press the © button to display SET UP FAX
FUNCTIONS.
• Press the button. Display shows ACTIVITY
REPORT.
• Press the © button to display PRINT
QUALITY SET-UP.
• Press the button. Display shows NORMAL.
• Press the © button to display the available
options – NORMAL and HIGH QUALITY.
• Press the button to confirm the displayed
option.
• Press the STOP button to return to standby.
It should be noted that the ink consumption will be
increased if you use HIGH QUALITYprint mode.
SET UP
STOP
Page 52

50
Setting the ring response
The ring response is the time that your Image
2000 allows before answering a call. You can
set between one and nine rings.
To set the AUTOFAX ring response
This is the number of rings after which your
Image 2000 will answer a call when set to
AUTOFAX. The pre-set number of rings is 1.
• Press the SET UP button until the display
shows USER SET UP.
• Press the button. Display shows SET
USER INFORMATION
.
• Press the © button until the display shows
SET LINE PARAMETERS.
• Press the button. Display shows AUTO
ANSWER RESPONSE
.
• Press the button. Display shows
AUTOFAX RESPONSE
.
• Press the button. Display shows RING
RESPONSE ≈1 RING.
• Use the keypad to enter the number of rings
you want between
1 and 9.
• Press the button to confirm the setting.
• Press the STOP button to return to standby.
To set the ANS/FAX ring response
This is the ring response when your Image
2000 is used with an answering machine. To
ensure that your Image 2000 works with an
answering machine, the answering machine
must always answer a call before the Image
2000. Therefore, the number of rings set on
the answer machine must be fewer than those
set on your Image 2000.
If the answering machine is switched of f, your
Image 2000 will answer calls after the number
of rings you have set for the ANS/FAX mode.
The pre-set number of rings for ANS/FAX
mode is 8 and you will not normally need to
change this. If you do need to change it:
• Press the SET UP button until the display
shows USER SET UP.
• Press the button. Display shows SET
USER INFORMATION
.
• Press the © button until the display shows
SET LINE PARAMETERS.
• Press the button. Display shows AUTO
ANSWER RESPONSE.
• Press the button. Display shows
AUTOFAX RESPONSE.
• Press the © button to display ANS/FAX
RESPONSE.
• Press the button. Display shows RING
RESPONSE ≈8 RINGS.
STOP
SET UP
SET UP
STOP
Additional features
Page 53

51
• Press the button. Display shows
AUTOFAX RESPONSE.
• Press the © button to display TEL/FAX
RINGTIME.
• Press the button. Display shows RING
TIME ≈20 SECONDS.
• Use the keypad to enter the ring time you
want, between 10 and 30 seconds.
• Press the button to confirm the new
time. Display shows DIRECT LINE or PBX.
• Press the STOP button to return to standby.
Setting distinctive ring feature
If you subscribe to a distinctive ring ser vice,
you can have two or more telephone numbers each with its own distinctive ring - on a single
telephone line.
Using this ser vice you could have, for
example, one number dedicated for voice calls
and one for fax.
If you set the Image 2000 distinctive ring
feature on, it will then automatically answer
calls only if the incoming ringing pattern is 1
second on followed by 2 seconds of f. It will
ignore other ringing patterns. So, if your
dedicated fax number has a 1 second on and
2 seconds of f ringing pattern, your Image 2000
will only answer fax calls.
Additional features
• Use the keypad to enter the number of rings
you want between
1 and 9.
• Press the button to confirm the setting.
• Press the STOP button to return to standby.
In ANS/FAX mode, your Image 2000’s ring
response should be set to at least 2 rings more
than your answering machine.
Adjusting the ring time (TEL/FAX
mode)
When your Image 2000 is set to TEL/FAX
mode it answers all calls after one ring and
then checks whether the incoming call is a fax
call or voice call. If it is a voice call, your Image
2000 will ring and the display will show LIFT
HANDSET to indicate that you should answer
the call by lifting the handset. Your Image 2000
is preset to ring for 20 seconds and after this
time, if the handset is not lifted, it prepares to
receive a fax. If you find that this ring time is
too long or too shor t you can change it to any
time between 10 and 30 seconds.
To change the ring time
• Press the SET UP button until the display
shows USER SET UP.
• Press the button. Display shows SET
USER INFORMATION
.
• Press the © button until the display shows
SET LINE PARAMETERS.
• Press the button. Display shows AUTO
ANSWER RESPONSE.
STOP
SET UP
Page 54

52
Additional features
To set the distinctive ring facility
• Press the SET UP button until the display
shows USER SET UP.
• Press the button. Display shows SET
USER INFORMATION.
• Press the © button until the display shows
SET LINE PARAMETERS.
• Press the button. Display shows AUTO
ANSWER RESPONSE.
• Press the button. Display shows
AUTOFAX RESPONSE
.
• Press the © button to display DISTINCTIVE
RINGING
.
• Press the button. Display shows
DISTINCTIVERINGING≈OFF
.
• Press the © button to change the display
from OFF to ON.
• Press the button to confirm. Display
shows TEL/FAX RING TIME.
• Press the STOP button to return to standby.
SET UP
STOP
Adjusting the ringer volume
You can adjust the volume of the tone ringer
to suit your environment. It has four settings,
low, medium and high and off. The default
setting is medium.
To change the ringer volume
• Press the SET UP button until the display
shows USER SET-UP.
• Press the button. Display shows SET
USER INFORMATION.
• Press the © button to display SET UP FAX
FUNCTIONS.
• Press the button. Display shows
ACTIVITY REPORT.
• Press the © button to display RINGER
VOLUME SET UP.
• Press the button. Display shows RINGER
VOLUME ≈ MEDIUM.
• Press the © button to display the available
options – LOW, MEDIUM, HIGH and OFF.
• Press the button to confirm the displayed
option.
• Press the STOP button to return to standby.
SET UP
STOP
Page 55

53
Additional features
Connecting an
answering machine to
your Image 2000
To ensure your answering machine inter works
with your Image 2000 you must plug it into the
socket above the telephone line cord socket on
the back of your Image 2000.
You must ensure that the number of rings
before the answering machine answers is less
than the number of rings set in the ANS/FAX
ring response on your Image 2000. This is to
ensure that your answer machine always
answers calls first.
With the exception of the BT Response 5, all recent
answering machines should be compatible with
your Image 2000. Whilst your Image 2000 will
work with any type of answering machine, for
optimum performance it is recommended that you
use one which has a digital outgoing message.
Telephone
line cord
Back of fax
Answer
machine
line cord
Using the recall button
If you have an ordinary telephone extension to
a switchboard/PBX, you would normally use
the
RECALL button to put a call on hold and
transfer it to another extension.
The
RECALL button can also be used in
conjunction with BT Select Ser vices.
You can programme the recall button to
provide either “Ear th” or “Timed Break”
recall. It is preset to “Timed Br eak” and this
will be correct for all dir ect lines and most
installations.
If your Image 2000 is installed on a
switchboard line you may need to change the
recall to “Ear th”. (See connecting to a
switchboard, Page 56.)
If you are a BT customer connected to a digital
exchange, you can subscribe to a range of BT’s Select
Services. For information, call us on Freefone
0800 800 150 for residential customers or
Freefone 0800 800 152 for business customers.
(9am to 5pm Monday to Friday).
If you are not a BT customer, please contact your
network provider for information about their
network based services.
Page 56

54
Additional features
Fax detector
When your Image 2000 is working with an
answer machine, and a call comes in, your
answer machine will answer the call first and
your Image 2000 will take over the call if it
detects that it is a fax call.
If your Image 2000 fails to take fax calls of f the
answer machine there may be several reasons,
the most likely are:-
i) Your answer machine may drop the line
before the fax machine has had the chance to
detect fax tones (within 7 seconds of the
‘speak after the tone’ beep). If this is
happening you should change the fax detector
from A to B.
ii) Your outgoing message on the answer
machine may be too long, so the calling
machine ‘gives up’ before your Image 2000 has
the chance to respond. The maximum
optimum length of the message will var y with
the number of rings your answer machine is
set to answer after and with the fax detector
you have selected (see following).
Message length
Number Fax Fax
of rings Detector A Detector B
2 14 seconds 18 seconds
4 8 seconds 12 seconds
If you are trying to receive faxes from abroad
you may find that you need to shor ten your
message fur ther.
To change the fax detector
The fax detector is pre-set to A. If the Image
2000 is failing to take faxes of f the answer
machine, or you want to use a longer outgoing
message, you can change to fax detector B.
• Press the SET UP button until the display
shows ANSWER MACHINE SET-UP
.
• Press the button. Display shows SET FAX
DETECTION
.
• Press the button. Display shows FAX
DETECTOR A
.
• Press the © button to change the display to
FAX DETECTOR B.
• Press the button to confirm the setting,
display shows DETECTTIME≈60 SECONDS
• Use the § or © buttons to adjust the detect
time. It should not normally be necessary to
change this time but, if you find your Image
2000 switches to fax when callers are trying
to leave messages, reduce it to be equal to
the length of the outgoing message on your
answer machine (in seconds) plus 10
seconds.
• Press the button to confirm the setting.
Display shows SET SILENCE DETECTOR.
• Press the STOP button to retur n to standby.
If your answer machine is a single tape machine
without a digital outgoing message you may need to
make the detect time longer to allow for the wind
forward time when you have a number of messages
recorded.
SET UP
STOP
Page 57

55
Additional features
Silence detector
When used with an answering machine, your
Image 2000 normally looks for fax tones to
detect whether or not an incoming call is a fax
call. However, some fax machines do not send
the appropriate tones, so your Image 2000 is
pre-set to switch to FAX mode if it detects a
silent period of 3 seconds.
If your Image 2000 switches to
FAX whilst
callers are leaving messages, you may need
to lengthen the silence detect period or switch
it of f.
To set the silence detector
• Press the SET UP button until the display
shows ANSWER MACHINE SET UP.
• Press the button. Display shows SET FAX
DETECTION.
• Press the © button to change the display to
SET SILENCE DETECTOR.
• Press the button. Display shows DETECT
TIME ≈ 3 SECS.
• Press the © button to display the available
options – 3, 6, 9 or OFF.
• Press the button to confirm the displayed
option.
• Press the STOP button to return to standby.
SET UP
STOP
Connecting to a PC
for faxing, scanning
and printing
Your Image 2000 acts as a full colour printer,
fax machine and scans documents into your
PC. Software installation and use has been
designed to be quick and easy.
Loading your software and using your PC
for faxing, scanning and printing
See the Unimessage user guide.
Please note that the default setting on your PC
is for printing with a black car tridge. If you
would prefer your default setting to be for
printing with a colour car tridge, follow the
procedure below.
To select printing with a colour cartridge
On your PC:
• Open the PRINTERS FOLDER from the
WINDOWS CONTROL PANEL
• Select the WINSTYLER COLOR GDI printer
with the right hand mouse button.
• In the drop down menu select PROPERTIES
• In the PROPERTIES window select DETAILS
• In the DETAILS window select SET UP
• Change the “print in” option from
“grey scale” (black car tridge) to “colour”
(colour car tridge).
• Select OK to complete the change.
Page 58

Connecting to a
switchboard
If you want to connect your Image 2000 to a
switchboard (also known as a PBX), you can
take advantage of its PBX mode. This allows
you to set the line access code under one
button and the machine will, if required,
automatically inser t a pause after the access
code when dialling an outside number. You
may also need to change the dialling mode.
To set PBX mode
• Press the SET UP button until the display
shows USER SET UP.
• Press the button. Display shows SET
USER INFORMATION.
• Press the © button until the display shows
SET LINE PARAMETERS.
• Press the button. Display shows AUTO
ANSWER RESPONSE.
• Press the © button to display DIRECT LINE or
PBX.
• Press the button.
• Press the © button to display PBX.
• Press the button. Display shows SET
ACCESS CODE. PBX mode is now set and you
can now enter a line access code if required.
You can also set the recall mode.
56
Additional features
If you stored your access code under the # or*
button, then, when you make a call, if the line
access button is the first button you press, the line
access code will be dialled. If you press the line
access button after another button, it will send its
normal signal.
SET UP
Page 59

57
Additional features
• Press the button to select the displayed
time. The display shows SET UP FAX
FUNCTIONS.
• Press the STOP button to return to standby.
To change the dial mode
Your Image 2000 is preset to dial in Tone
mode, you will need to change this if your PBX
uses Pulse dialling.
• Slide the small switch on the underside of
your Image 2000 from the
T position to the
P position.
You may need to contact your switchboard
maintenance supplier to find out whether you need
‘tone’ or ‘pulse’ dialling.
MODE
T
P
• Press the © button to display the available
options – SET ACCESS CODE or SET RECALL.
If you need to set an access code choose
SET ACCESS CODE, other wise choose SET
RECALL.
• Press the button to set the displayed
option.
If you chose
SET ACCESS CODE, the display
shows ENTER ACCESS CODE.
• Use the keypad to enter the code (up to 3
digits).
• Press the button to confirm. Display
shows ACCESS KEY FOR XXX
≈
# (XXX is
the code you have entered). This means
that the code is stored under the
# button.
You can change this to the
✱ button if you
prefer.
The pause time is the delay which your Image
2000 will automatically insert after dialling a
recall or the line access code. It is also the delay
which is inserted when you store a pause in a
memory using the P button.
You may need to contact your switchboard
maintenance supplier to find out whether you need
‘Timed Break’ or ‘Earth’ recall.
Page 60

58
Help
Helpif you have any problems using your Image 2000,
this section gives you the most common solutions.
Replacing the print cartridge
You can buy replacement colour and mono
car tridges from all BT shops, main electrical
retailers and good stationers. You can also
obtain replacement car tridges by phoning
0800 590 009 and quoting the following item
numbers.
Black - 871331
Colour - 871330
You can interchange between colour and black
car tridges as requir ed. If the cartridge you are
taking out is not empty you can store it in the
spare ink car tridge holder pr ovided.
A black ink car tridge will have a white top
whilst a colour ink car tridge will have a blue
top.
To replace a print cartridge
• Press the SET UP button until the display
shows REPLACE CARTRIDGE.
• Press the button. Display shows TICK TO
FINISH.
• Open the front cover and prop in the open
position using the document guide.
SET UP
STOP
Page 61
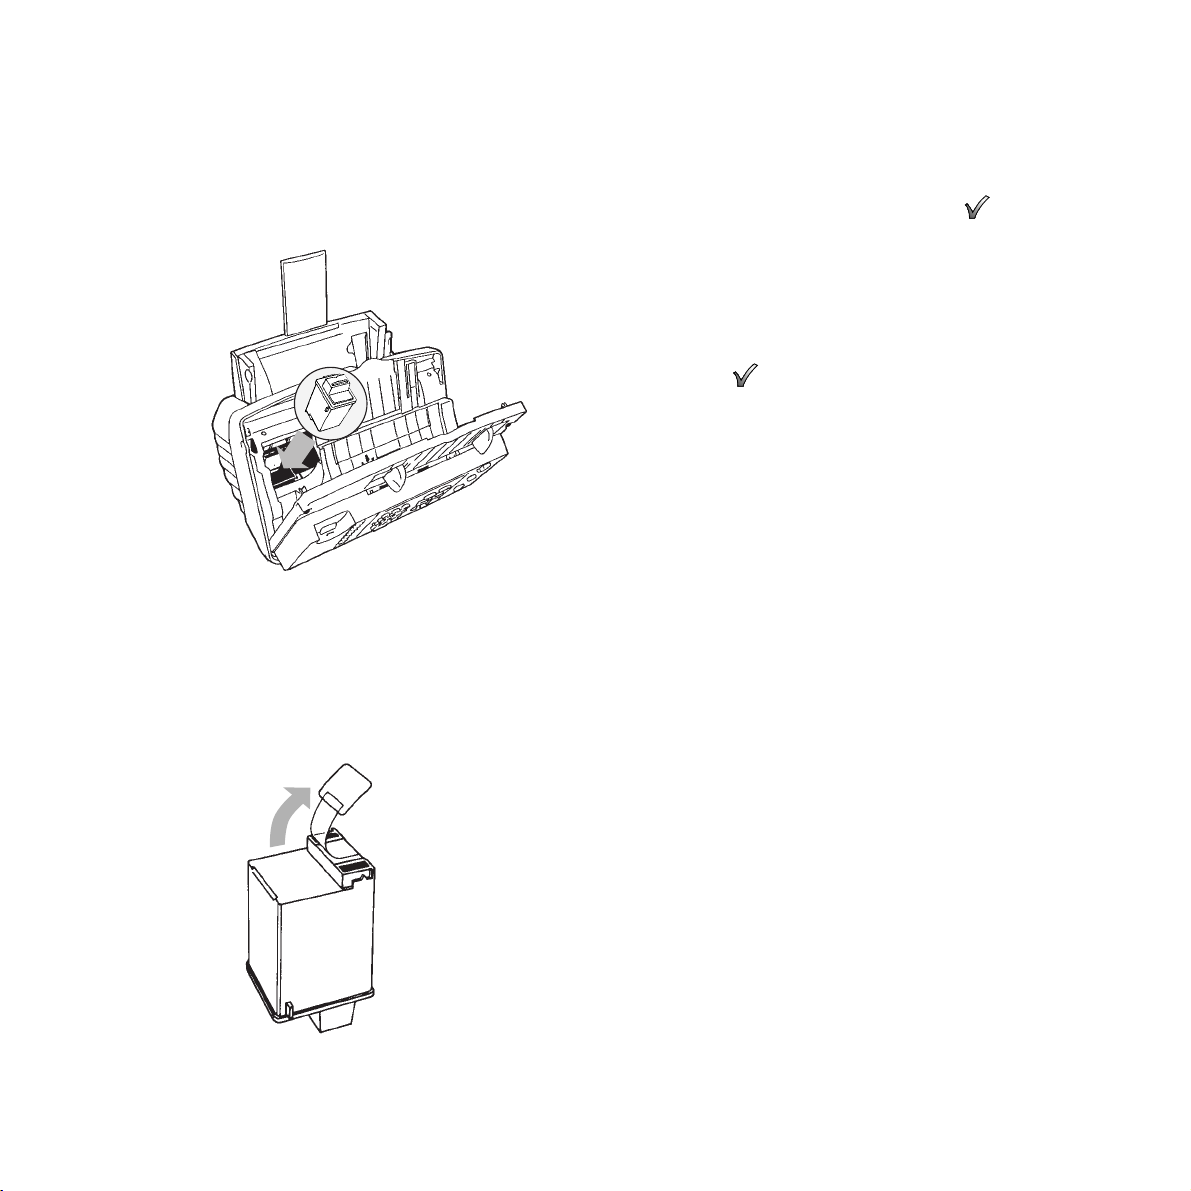
59
Help
• Remove the ink car tridge from the carrier.
If it is empty discard it, if it is par t used
store it in the spare ink cartridge holder,
(see page 63).
• Inser t the replacement cartridge into the
carrier. If it is a new cartridge, first carefully
remove the tape covering the printhead. Be
sure to remove all the tape.
• Push the car tridge back until it clicks into
place. If it moves loosely in the carrier, it is
not located correctly.
• Close the front cover and press the button.
Display shows CARTRIDGE ≈ NEW.
• Press the © button to display the available
options – NEW and OLD. If the cartridge is a
new car tridge choose
NEW, if it is par t used
choose
OLD.
• Press the button. Display returns to
standby.
Page 62

Paper jam
If a page of the document you are printing gets
stuck in the machine, display shows PAPER JAM.
Paper jammed in the paper feed area
60
Clearing a paper jam
Document jam
If a page of the document you are faxing,
copying or scanning gets stuck in the machine,
display shows DOCUMENT JAM.
• Open the front cover by pressing the two
release buttons on either side of the
machine.
• Pull the front panel forward.
• Remove the jammed paper.
• Shut the cover.
• Push the paper load lever away from you to
open the sheet feeder and remove loose
sheets.
• Pull out the jammed paper.
• After removing the jammed paper, re-load
the sheet feeder. Hold the left paper guide
and move it to the right to match the width
of the paper.
• Pull the paper load lever towards you to
close the sheet feeder.
Page 63

61
Paper jammed in the paper exit area Paper jammed inside the machine
• Press the STOP button; this may clear the
problem.
• If not, unplug main power cable, remove the
handset and open the front cover by
pressing the two release buttons.
• Open the inner access cover (white plastic)
and carefully remove the jammed paper.
• Close the access cover and front cover.
• Replace the handset and reconnect the
mains lead.
• Push the paper load lever away from you to
open the sheet feeder and remove loose
sheets.
• Removed the jammed paper as shown
above.
• After removing the jammed paper, re-load
the sheet feeder and move the paper guides
to the size of the paper.
• Pull the paper load lever towards you to
close the sheet feeder.
Page 64

62
Cleaning your Image 2000
Wiping the print Nozzles and Contacts
When the print is not clear or dots are
missing, the problem may be caused by dried
ink on the car tridge nozzles and/or contacts:
Cleaning the cartridge nozzles and contacts
• Remove the print car tridge. See “Replacing
the Print Car tridge” on Page 58.
• Use a clean cloth, dampened with water
only, to gently clean the entire coppercoloured area.
Take care not to smear from the nozzle area
onto the contact area. If you are cleaning
colour print car tridge, be especially careful to
wipe the nozzles in only one direction so the
colours do no mix.
Allow the copper-coloured area to dry.
• Reinstall the print car tridge.
If the problem is still present, clean the print
car tridge carrier contacts inside the machine.
To dissolve any dried ink, hold the damp cloth
against the nozzles for about three seconds.
Gently blot and wipe dry.
Cleaning the cartridge carrier contacts and
deflector
• Remove the print car tridge. See ‘replacing
the print car tridge” page 58.
• Unplug the mains lead from the electrical
outlet or the rear of the machine - this forces
the print car tridge carrier to remain in the
load position.
• Use a CLEAN, DRY CLOTH to clean the
print car tridge carrier contacts and the
carrier deflector inside the printer.
• Reconnect the mains lead.
• Re-install the print car tridge.
Contacts
Carrier deflector
Page 65

63
Cleaning the optical scanner
If there is a problem with the quality of a fax
you have sent, or a document you have
copied, the optical scanner may need cleaning
(see below).
• Remove the handset, press the PUSH TO
OPEN button and pull the fr ont panel open
as shown below.
• Clean the glass of the optical scanner with a
cloth such as a VDU Screen Wipe or cloth
dampened with a specific glass-cleaning
product. Dry the glass carefully. Do not pour
or spray cleaning product onto the glass.
Take care not to scratch the glass.
• Close your Image 2000
• Test that the optical scanner is clean by
copying a blank sheet of paper. If the copy is
not clear, check the glass again. If copies are
still not clear, call the Customer Helpline
Ser vice on
0845 600 0053.
Help
Printer cartridge holder
The spare printer car tridge holder pr ovides a
convenient place to store an extra black or
colour print car tridge, and prevents an opened
car tridge from drying out.
To store a print cartridge in the spare
printer cartridge holder
• Holding the printer car tridge by the
coloured top, inser t it into the printer
car tridge holder.
• Push firmly down until it clicks into place.
To remove a print cartridge from the spare
printer cartridge holder
• Holding the print car tridge and pull fir mly
towards you (while pulling the car tridge
towards you, push the printer car tridge
holder backward to remove the
car tridge easily).
Optical scanner
Page 66

64
Help
Fax error codes
If a fax transmission or reception fails the
reason for failure is logged as an error code
and will be shown on pr oblem reports and
activity repor ts. The code explanations are
shown below.
Sending
Error Meaning
code
01 Failure during call set-up negotiations
prior to transmitting first page.
02 The paper size of the document being
sent is too long or document jam.
03 Communications failure between pages.
04 Poor received document quality at far
end due to line conditions.
05 Sending stopped due to problem with
far end.
06 Compatibility problems between
machines.
STOP Stop button pr essed.
Receiving
Error Meaning
code
11 Failure during call set-up negotiations
prior to receiving first page.
12 Out of paper, paper jam or out of
ribbon.
13 Communications failure between pages.
14 Poor received document quality due to
line conditions.
17 Receiving stopped due to problem with
transmitting machine.
19 Polling failed due to wrong password
being set.
STOP Stop button pr essed.
Page 67

65
Help
Guarantee
BT guarantees this product against faults for a
period of one year from the date of purchase
provided that:-
• The product has been used only for its
intended purpose and has not been subjected
to misuse or been wilfully or accidentally
damaged (including electrical storm damage).
• The product has not been tampered with or
repaired by anyone other than BT, its staf f
or its agents.
If a fault occurs then you should contact the
BT helpline on 0845 600 0053. You should be
able to provide proof of purchase.
The terms of this guarantee do not affect your
statutor y rights.
If your Image 2000 develops a fault outside the
guarantee period then:-
• If you have purchased extended warranty
cover call the number supplied with your
extended warranty pack. If you don’t have
extended cover we recommend that you call
0845 600 0053 for advice on authorised repair
agents.
BT sponsors two schemes which you can join
if you are bothered by unwanted faxes and
phone calls:-
Fax Preference Scheme
BT is a sponsor of the Fax Preference Service
(FPS) – a scheme to enable customers to
reduce unwanted faxes.
The main feature of the
FPS is that whilst it
helps reduce the volume of unsolicited faxes,
it still allows you to receive faxes from
organisations with which you have a contractual
relationship.
In order to register for the
FPS, BT customers
should ring
0541 554555.
Telephone Preference Scheme
BT is a sponsor of the Telephone Preference
Ser vice
(TPS) – a scheme to enable customers
to reduce unwanted sales calls.
The main feature of the
TPS is that whilst it
helps reduce the volume of unsolicited sales
calls, it still allows you to receive impor tant
marketing calls from organisations with which
you have a contractual relationship.
In order to register for the
TPS, BT customers
should ring 0800 398893.
Page 68

Technical
specification
66
Technical specification
1 Type
2 Scanning system
3 Printing system
4 Transmission speed
5 Compression system
6 Resolution
7 Document size
8 Scanning width
9 Recording paper
10 Dimensions
11 Weight
12 Power consumption
Desktop Transceiver
CIS (Contact image sensor)
Ink-Jet
5ms/line (6 sec/A4 page)
MH/MR/MMR
Scanning section:NORMAL mode 8 x 3.85 line/mm
FINE mode 8 x 7.71 line/mm
SUPERFINE mode 8 x 15.4 line/mm
PHOTO mode 64 grey scales
Printer section: 300 x 300dpi
A5/A4/Letter/Legal (70-90mm)
210mm.
Pre-cut plain
373(W) x 308(D) x 221mm(H)
5.2-6kg (including handset & car tridge)
Standby = 12W; Tx = 23W; Rx/Copy = 32W(All black)
Page 69

67
Technical
information
Technical information
Choosing a position
Your Image 2000 should be kept clear of dust, moisture, high
temperature and vibration and should not be exposed to direct
sunlight. Don’t install it close to radiators or air-conditioning
outlets or in excessively warm, humid or dusty places.
Warning
The apparatus is only designed to be operated in a normal of fice
or domestic environment where the relative humidity does not
exceed 60%. It should not be used in bathrooms or near water.
Connecting to the UK network
Image 2000 is tested and approved for connection to the UK
network, provided that it is used in accordance with the
guidelines in this booklet.
Approval number
BABT Certificate Number 607158 for the Image 2000
APPROVED for connection to telecommunication systems
specified in the instructions for use subject to conditions set out
in them. CE compliant to 89/336/EEC (EMC Directive) and
73/28/EEC (low voltage directive).
Approval for use
This apparatus has been approved for use with the following
facilities:
- storage of telephone/fax numbers for retrieval by one touch or
predetermined code (if problems occur, verify the stored
numbers)
- automatic call initiation
- operation in the presence or absence of intial or secondar y
proceed indication
- automatic dialling facilities
- automatic storage of the last number dialled
- automatic repeat attempt facilities
- auto answer
- auto clear from the call originating end
- call progress monitor
- modem
- fax switch
- simple telephone
- series connection facility
- answer machine interface
- answer machine (Image 2001 only)
- dialling 999 Emergency Ser vices
Any other usage will invalidate the approval of the apparatus if,
as a result, it then ceases to conform to the standards against
which approval was granted.
You may connect it –
• To direct exchange lines.
• To extensions with new plug and socket arrangements
provided with these direct exchange lines.
• To compatible switchboards.
You may NOT connect it –
• To shared service (party) lines.
The connection to the telecommunication system must be
unplugged before the earth is disconnected. The connection to
the telecommunication system must not be hardwired.
This apparatus may be used on telecommunications systems
employing loop disconnect or MF signalling.
How many phones you can have
Your exchange line provides only a small current to make your
telephone ring. Although you may have any number of sockets it
is important to limit the number of telephones and other items
of apparatus connected to the line by these sockets. This
ensures that each telephone will receive enough current to ring.
Ever y telephone or item of apparatus has a Ringer Equivalence
Number (REN).
Page 70

Technical
information
68
In most cases a standard line should provide enough curr ent
for two or more telephones or items of apparatus, if the REN’s
add up to no more than 4.
Image 2000 has a REN of 1. Any telephone provided by BT may
be assumed to have a REN of 1 unless other wise stated on the
base. Even where the number of telephones has been limited,
there is no guarantee that the differ ent types of telephone on the
same line will ring.
The provided handset must only be connected to the socket on
the side of the machine.
Another approved handset may be connected but the apparatus
has been calibrated and approved for the provided handset.
The voltage drop introduced by the apparatus between the
PSTN and a series connected telephone at a current of 40mA is
1.7 Volts. Consequently, no additional series equipment may be
connected.
The introduction of this voltage drop may occasionally cause
difficulties in making calls from the series connected telephone
or problems in telephone conversation being experienced by
both parties to the call. In the unlikely event of any such
problems occurring, the user should contact the supplier or
maintainer of the apparatus.
While operation may be possible initially, changes to or
modernisation of the network, taking place in the normal course
of events, may result in the apparatus being connected to a
network ser vice with which it is not designed to be compatible.
Failure of the apparatus to work under these circumstances may
not be the responsibility of the network operator.
Connecting to switchboards
Your Image 2000 is approved only for use with a compatible
switchboard including those which do not provide secondary
proceed indication.
If you do have a compatible switchboard, it cannot be
guaranteed that the Image 2000 will operate correctly under all
possible conditions of connection.
If you have any difficulties, contact BT on Freefone 0800 800 152
for business Customers or Freefone 0800 800 150 for
residential customers (9am to 5pm Monday to Friday).
Safety warnings
1 Interconnection circuits should be such that the
equipment continues to comply with the requirements
of 4.2 of EN 41003 for TNV circuits and 2.3 of EN
60950 for SELV circuits, after making connections
between circuits.
2 Interconnection directly, or by way of other apparatus,
of ports marked “Safety Warning. See instructions for
use” with ports marked or not so marked may produce
hazardous conditions on the network. Advice should be
obtained from a competent engineer before such a
connection is made.
3 When you operate this equipment, the electrical mains
socket should be near the equipment and be easily
accessible.
Page 71

69
Index
Index
Activity repor t 41
Ans/Fax 13
Answering machine 53
Approval 67
Autofax 13
Automatic document feeder 1, 6
Automatic redial 27
Auto reduction 40
Batch time 11
Broadcasting 35
Bulletin board 37
Call back 10
Call diver t 19
Call return (1471) 19
Cancelling a fax 28
Cleaning 62
Confirmation reports 43
Contrast 48
Copying documents 45
Colour car tridge 55, 58
Cut over length 40
Dark 48
Date and time 11
Delaying a fax 27
Deleting
- a one-touch entr y 18
- directory entries 24
- a stored fax 31
- a group memory 34
Dialling
- with/without handset 15
- one touch numbers 17
Directory
- button 2
- storing names and numbers 20
- dialling names and numbers 22, 26
- editing 23
- deleting 24
Directory dialling 22
Display 2
Distinctive ring 52
Document jam 60
Faxback 2, 38
Fax detector 54
Fax error codes 64
Fax size 40
For war ding faxes to another fax 32
Group dialling 33
Guarantee 65
Handset cord 5
Help 58
Helpline 4
Incoming fax size 40
Keypad 2
Legal 41
Letter 41
Mailboxes 16
Mains power 6
Making calls 14
Memor y r eceive 29
Monitor a call 26
Of fice time 12
Page 72

70
Index
One-touch
- names and numbers 15
- editing 17
- dialling 17
- deleting 18
- keys 1
- fax 25
- printing 44
On-hook dialling 14
Paper
- holder/suppor t 1
- loading 6, 25
- size 7, 41
- capacity 7
- jam 60
Passwords 16, 30
Pause 2, 17, 22
PC connection 6, 55
PC FAX 13
PBX 56
Polling 36, 39
Power socket 6
Print car tridge 7, 46, 58
Printing 30, 55
Print outs 41
Print quality 49
Print car tridge holder 63
Recall 2, 53
Receive
- button 2
- modes 13
Receive faxes 12, 29
Redial 2, 14, 27
Release button 1, 6
REN 59
RX/TX 24
Resolution 47
Ring response 50
Ring time 51
Safety warning 4, 67, 68
Scanning 55
Sender ID 9
Sending faxes 24, 25
Set up 5
Silence detector 55
Size of incoming fax 40
Star t 2
Stop 2
Storing
- numbers 15, 33
- documents 31
Sub addresses 16, 21, 38
Switchboards 56, 68
Technical specification 66
Telephone line cord 5
Telephone preference scheme 65
Telephone socket 5
Tur n ar ound polling 38
Volume 15, 52
War nings 4, 67, 68
Page 73

Offices in Europe, North America,
Japan and Asia Pacific.
The Telecommunications services described in this publication
are subject to availability and may be modified from time to time.
Services and equipment are pr ovided subject to British
Telecommunications plc’s respective standard conditions of contract.
Nothing in this publication forms any part of any contract.
Touchtone
TM
is a registered trade mark of
British Telecommunications plc in the UK.
© British Telecommunications plc 1996.
Registered Office: 81 Newgate Street, London EC1A 7AJ.
Registered in England No. 1800000.
Printed in Taiwan. Issue No.1 (6/98) 3.
Designed by The Art & Design Partnership Limited.
APPROVED for connection to
telecommunication systems specified
in the instructions for use subject to
the conditions set out in them
CE compliant to 89/336/EEC
(EMC Directive) & 73/23/EEC (Low
Voltage Directive)
 Loading...