

Page 1
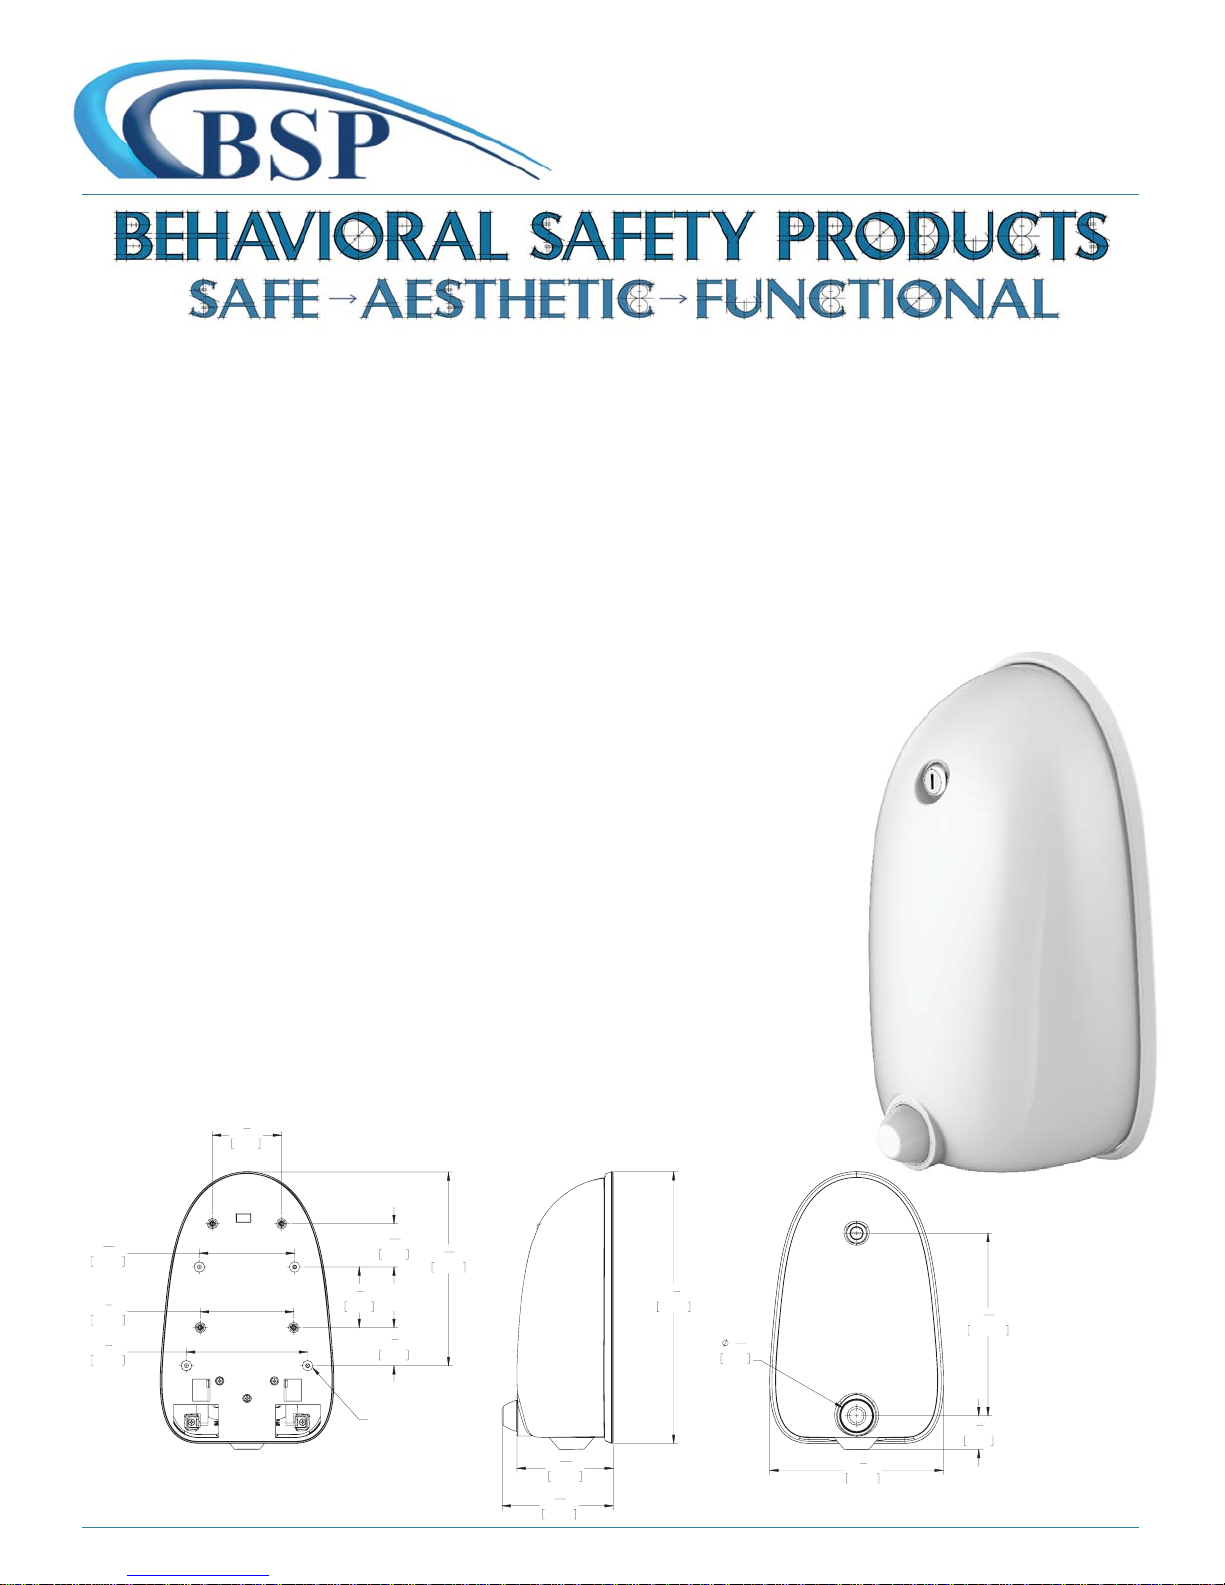
LIGATURE RESISTANT SOAP DISPENSER #SD750
INSTALLATION, MAINTENANCE & OPERATION INSTRUCTIONS
This heavy-duty metal construction soap dispenser reduces ligature risk normally associated with
standard soap dispensers. This ligature resistant product can be wall mounted in any location. The
activation allows for easy one hand operation. The unit is designed to fi t standard 1250 ml soap
cartridges allowing choice of different available products including soap, foaming soap and antibacterial. The front housing contains a key locking device to allow quick access for cartridge replacement.
All exposed surfaces are powder coated in a durable white fi nish. The back-mounting plate has multiple
mounting holes to allow various confi gurations. Overall dimensions are 7-7/8”W x 12-3/8”H fl ange and
5-1/16”D.
SPECIFICATIONS
· All exterior metal construction
· All exposed fi nish surfaces are powder coated
· Soap dispenser mounts directly to the wall
· Front cover is secured by mounting lock with positive engagement
· Includes keyed locking device to allow quick access for soap replacement
· Dispenser accepts 1250 ml Gojo soap cartridges (i.e. anti-bacteria, body wash, etc.)
· Cartridges can be easily replaced
· Flanged edge engages with front cover
· Tamper Resistant Screws used for mounting
ROUGH IN
5
4
"
16
110mm
1
4
"
4
108mm
1
5
"
2
140mm
706-705-1500
3
80mm
1
"
8
15
1
"
16
50mm
3
2
"
4
70mm
3
1
"
4
44mm
MULTIPLE MOUNTING HOLES
LOCATION PROVIDED
besafepro.com
13
8
16
224mm
"
3
12
"
8
4
113mm
5
16
128mm
316mm
7
1
"
16
36mm
BUTTON
7
"
16
1
"
7
200mm
7
"
8
5
8
"
16
210.9mm
1
1
"
2
39mm
CONTINUED
Page 2
PAGE 2 #SD750,
CONTINUED
IMPORTANT
· Do not over-tighten any connections or damage may occur.
· Be sure to read instructions thoroughly before beginning installation.
CARE & CLEANING
Your new Product is designed for years of trouble-free performance. Keep it looking new by cleaning it periodically with a soft cloth.
The use of harsh chemicals and abrasives on any of the custom fi nish products may damage the fi nish and void the product warranty.
Please be sure to only use approved cleaners.
SAFETY TIPS
Cover your drain to prevent loss of parts. Be sure to wear eye protection and follow all tool manufacturers safety recommendations.
WAIVER & DISCLAIMER
This waiver-disclaimer is attached to and made a part of the written contract to purchase these products for use in psychiatric and
correctional facilities. Such fi xtures and products are purchased to reduce the risk of self-imposed death or injury to patients or clients
in such facilities, but are NOT represented as able to prevent such death or injury.
Behavioral Safety Products, LLC (“BSP”) as the seller and Speakman Company as the manufacturer of these products have not, and will
not represent or warrant to the purchaser shown in this contract (“Purchaser”) that its fi xtures and products will prevent death or injury
in any case whatsoever.
BSP and Speakman Company make no express or implied warranty with respect to the preventative quality of its products, but merely
represents that the use of such products tends to reduce deaths and injuries by patients or clients who are subject to meticulous
screening processes and diligent supervision on the part of the facility housing them.
Purchaser acknowledges the foregoing disclaimer and waives any and all claims against BSP and Speakman Company as to express
or implied warranties of fi tness for any purpose whatsoever.
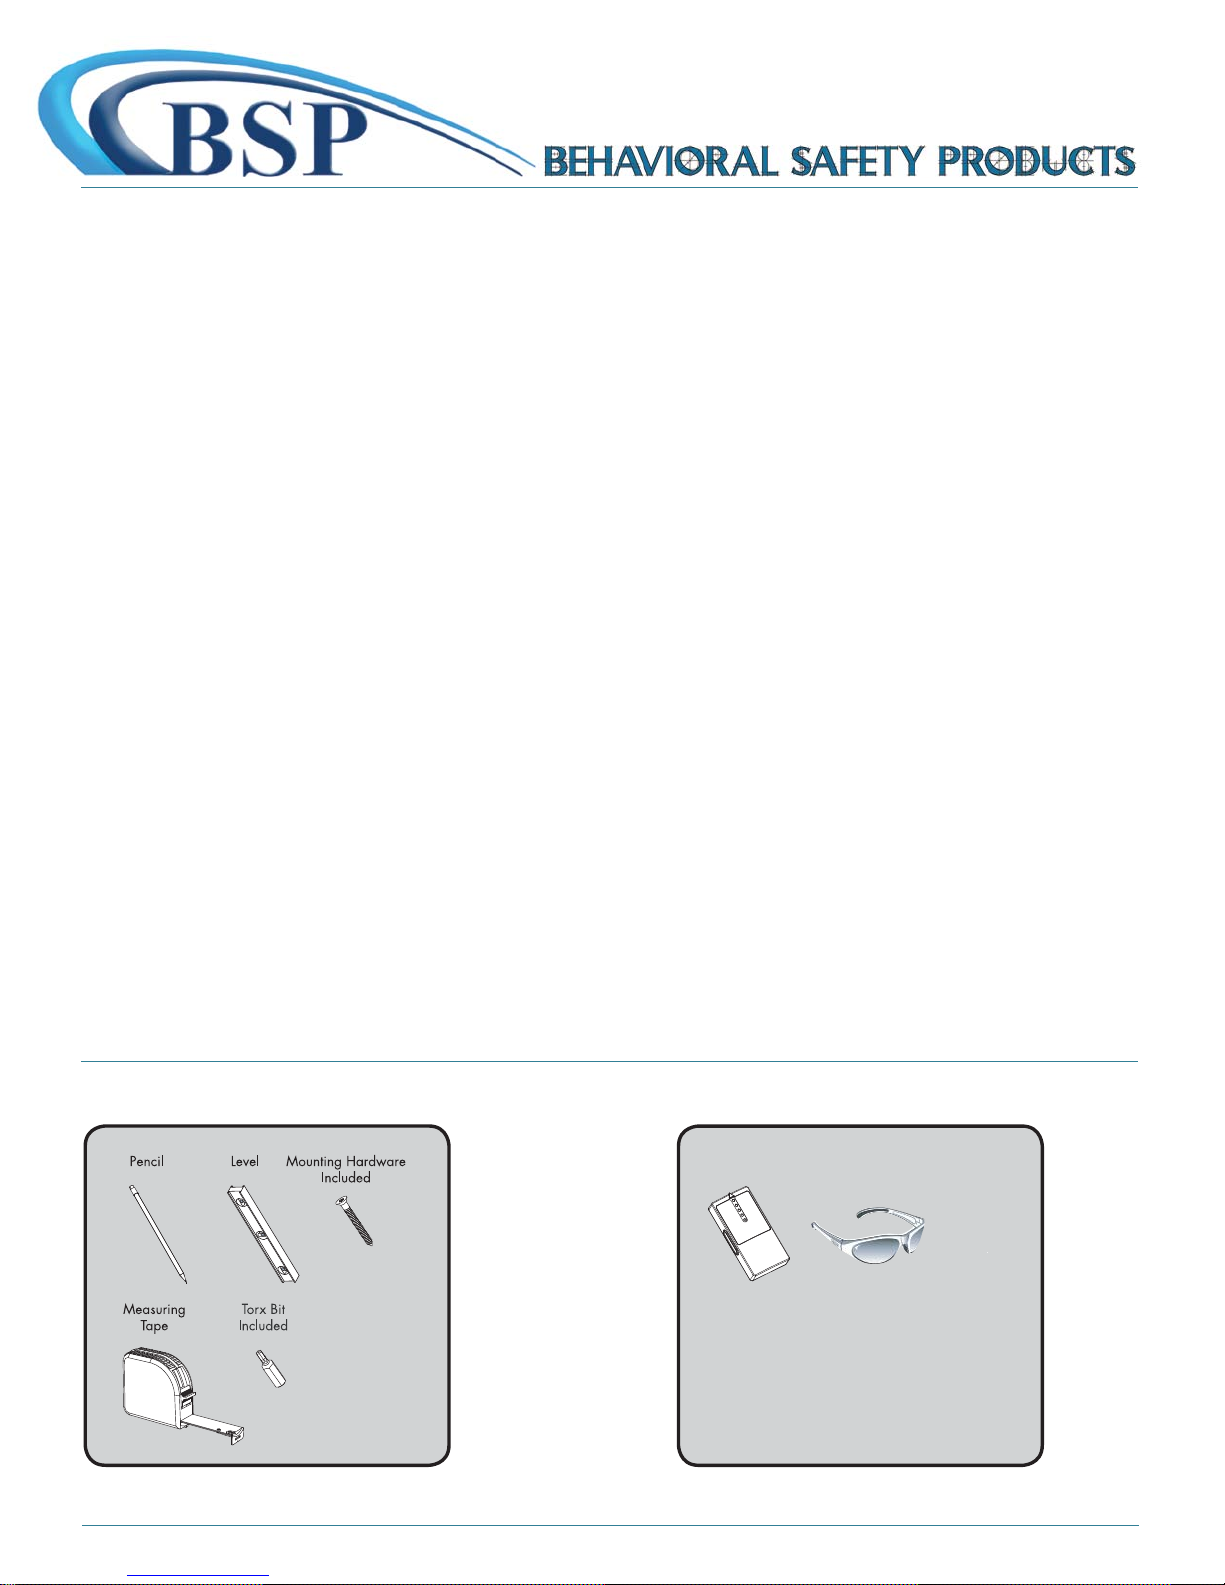
TOOLS AND SUPPLIES: HELPFUL TOOLS AND SUPPLIES:
Stud Finder
Safety
Glasses
706-705-1500
besafepro.com
Page 3
PAGE 3 INSTALLATION INSTRUCTIONS #SD750, CONTINUED
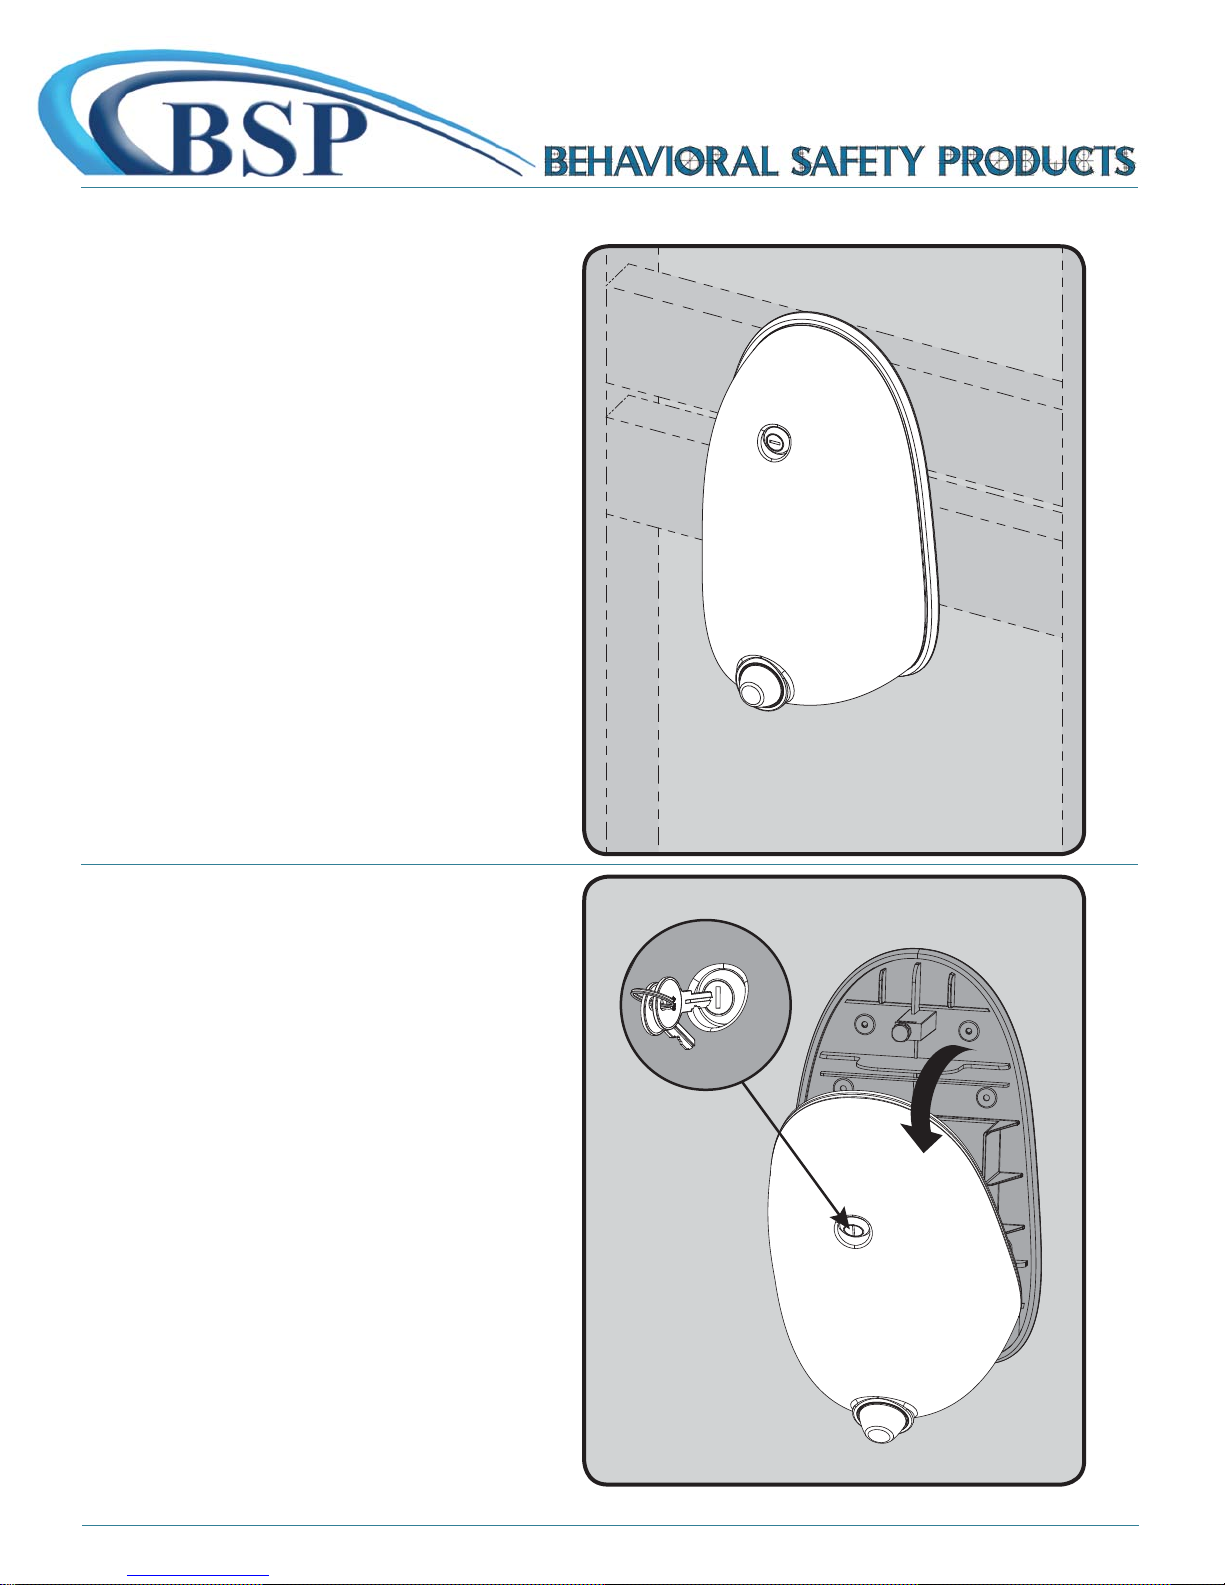
❶ Determine desired mounting position of the
Ligature Resistant Soap Dispenser. Ensure mounting
location is capable of supporting the product in use.
Ensure proper mounting structure is present within the
wall cavity.
❷ Open the unit using the Key provided and the
front cover will rotate downward.
706-705-1500
besafepro.com
Page 4
PAGE 4 INSTALLATION INSTRUCTIONS #SD750, CONTINUED
X4
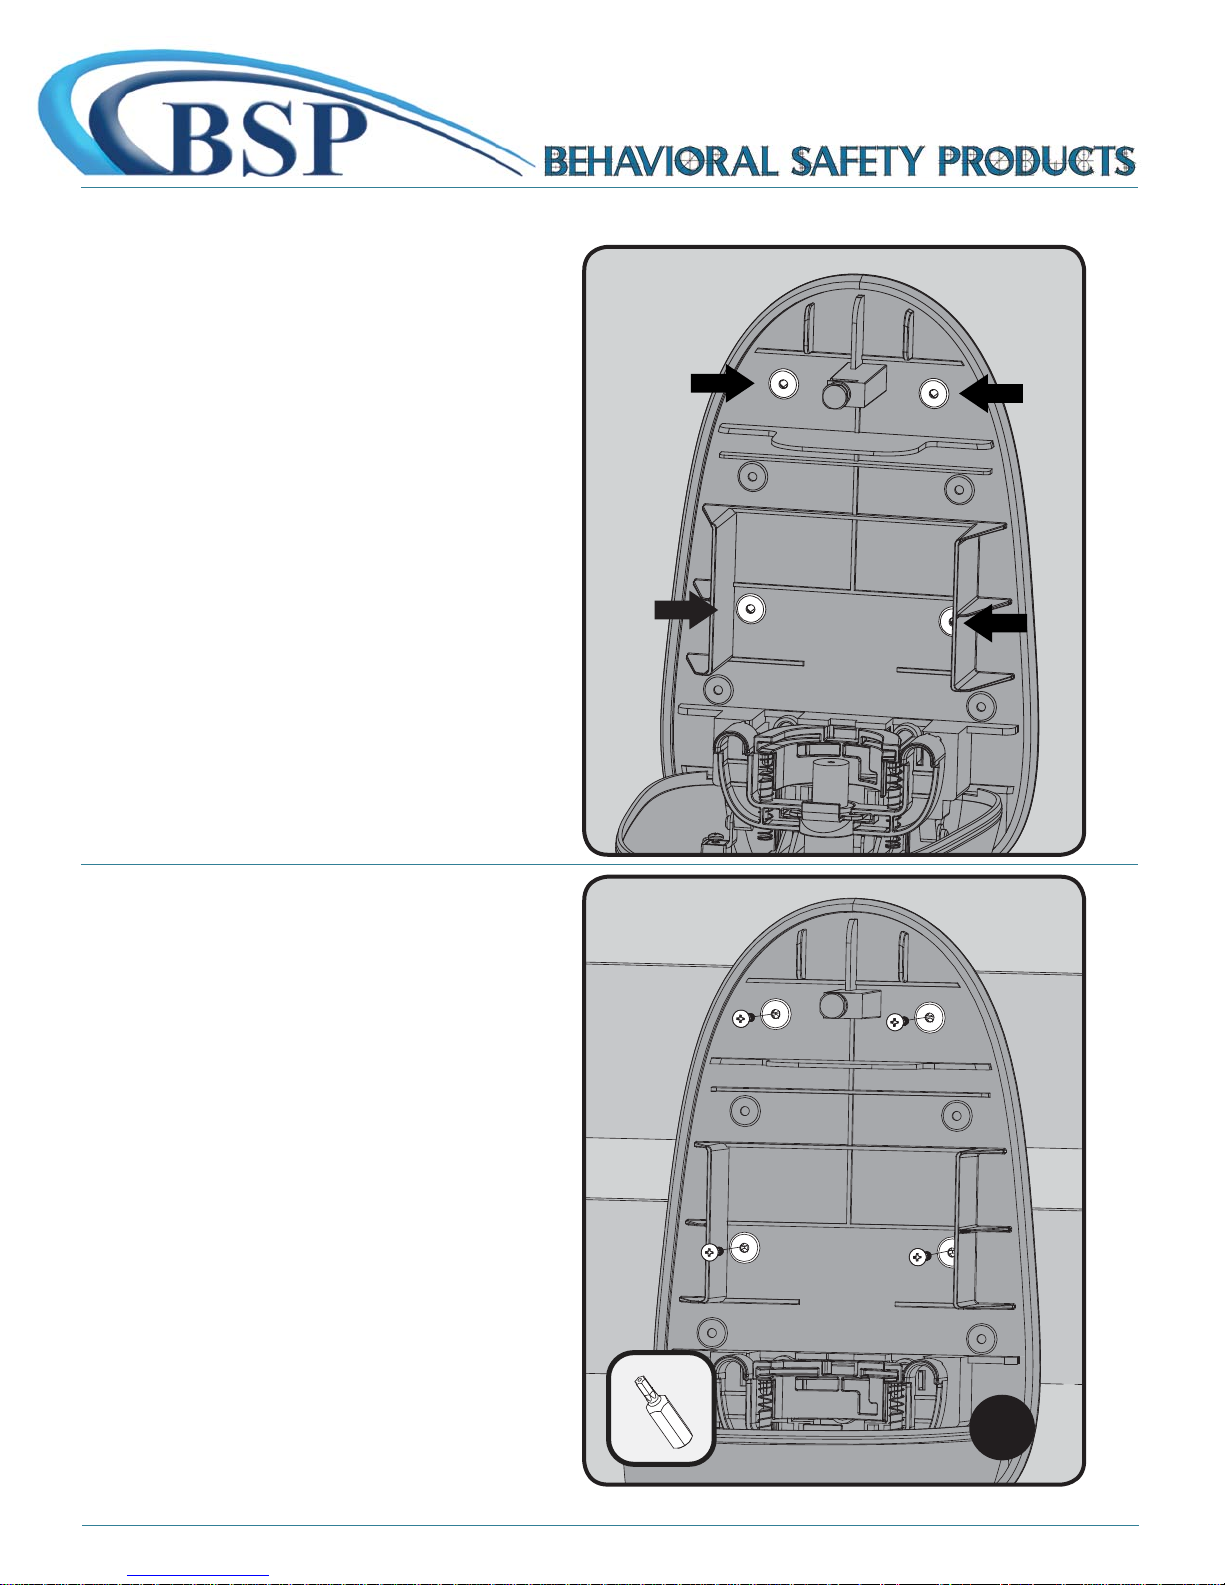
❸ Position the product on the wall and mark the
hole locations. Eight (8) mounting hole locations
are provided. Please select a minimum of four (4)
mounting holes based on your site requirements.
Recommended mounting holes are highlighted below.
❹ Install supplied Mounting Hardware through the
four (4) mounting locations using the supplied Torx
driver to secure into brace (supplied by installer) or into
wall structure.
Note: Mounting Anchors are not included. If
your installation requires Mounting Anchors,
acquire appropriate screws to go with the
anchors.
This will support the Ligature Resistant Soap Dispenser.
Ensure the mounting structure and mounting hardware
can safely support the product in use.
706-705-1500
besafepro.com
Page 5
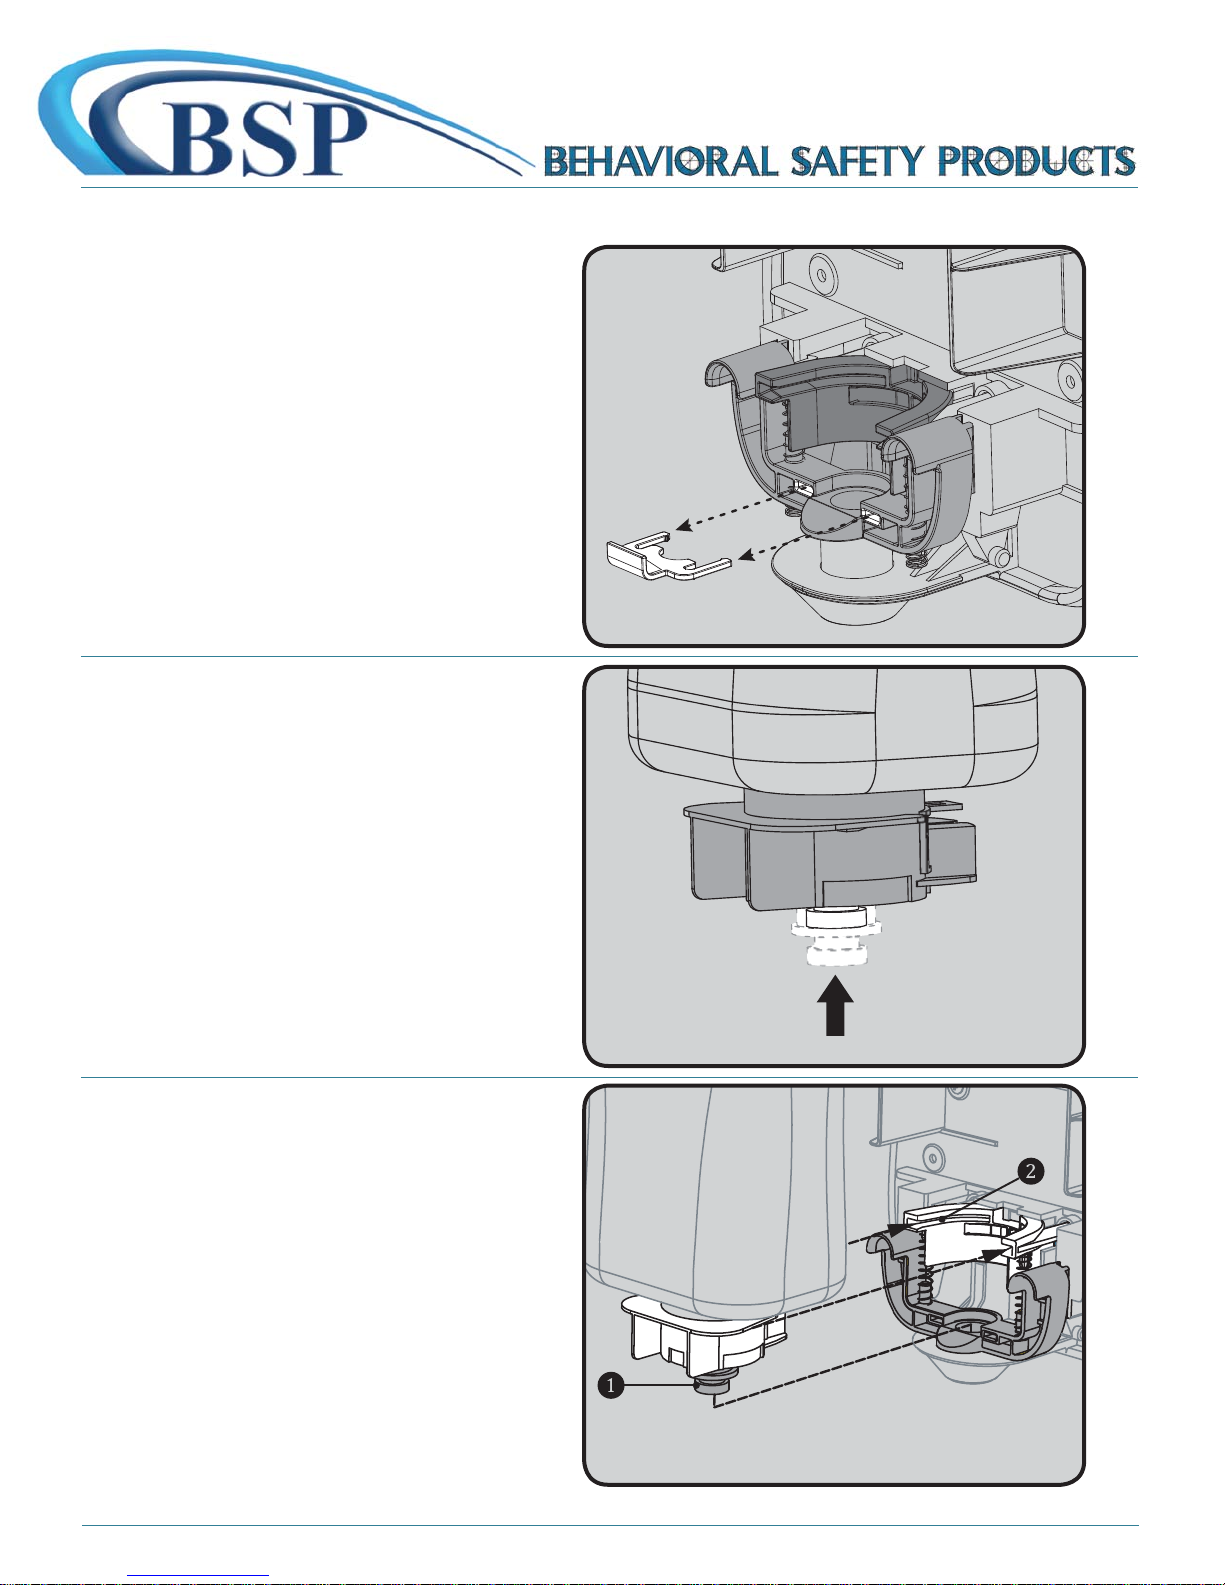
PAGE 5 SOAP BOTTLE INSTALLATION #SD750, CONTINUED
STEP 1: Remove the Red Clip (1).
STEP 2: Product is designed to accept GOJO®1250 mL
soap refills. With the bottle inverted as shown, depress
Soap Bottle Nipple upward.
STEP 3: Align Soap Bottle Bracket with slots in Receiver
(Blue) (2) and insert. Keeping bottle vertical and
allowing Nipple (1) to drop into hole.
706-705-1500
besafepro.com
Page 6
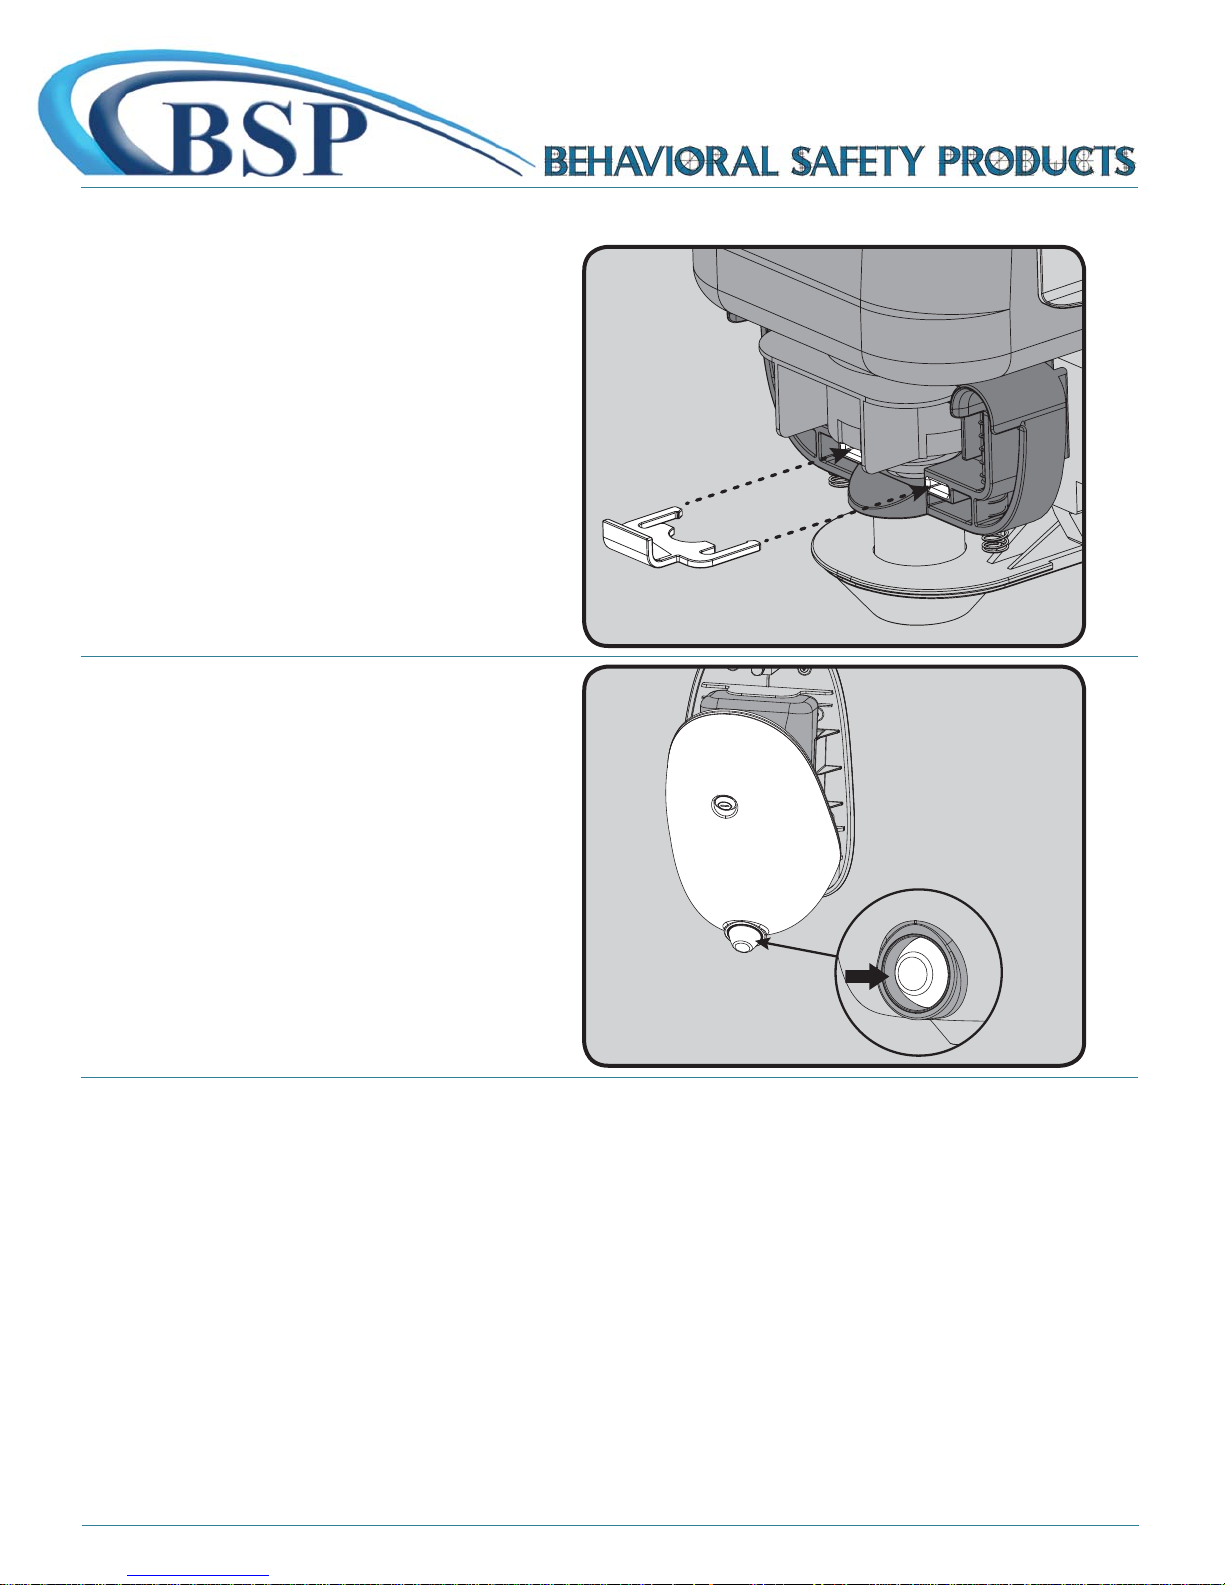
PAGE 6 SOAP BOTTLE INSTALLATION #SD750, CONTINUED
STEP 4: Push Retainer Clip (red) into Yoke Slots
(yellow).
STEP 5: Close the unit and lock with the key. Push the
button to activate the soap.
TROUBLESHOOT
If no soap is dispensed as you push the button:
1. Open the unit and remove the soap bottle by
reversing the Soap Bottle Installation steps.
2. Depress the Soap Bottle Nipple upward several times.
If Soap begins to fl ow properly, reinstall Soap Bottle to
Dispenser and retest unit.
3. If no soap fl ows when the Soap Bottle Nipple is
depressed, switch to a new soap bottle refi ll, install and
retest.
706-705-1500
besafepro.com
Page 7
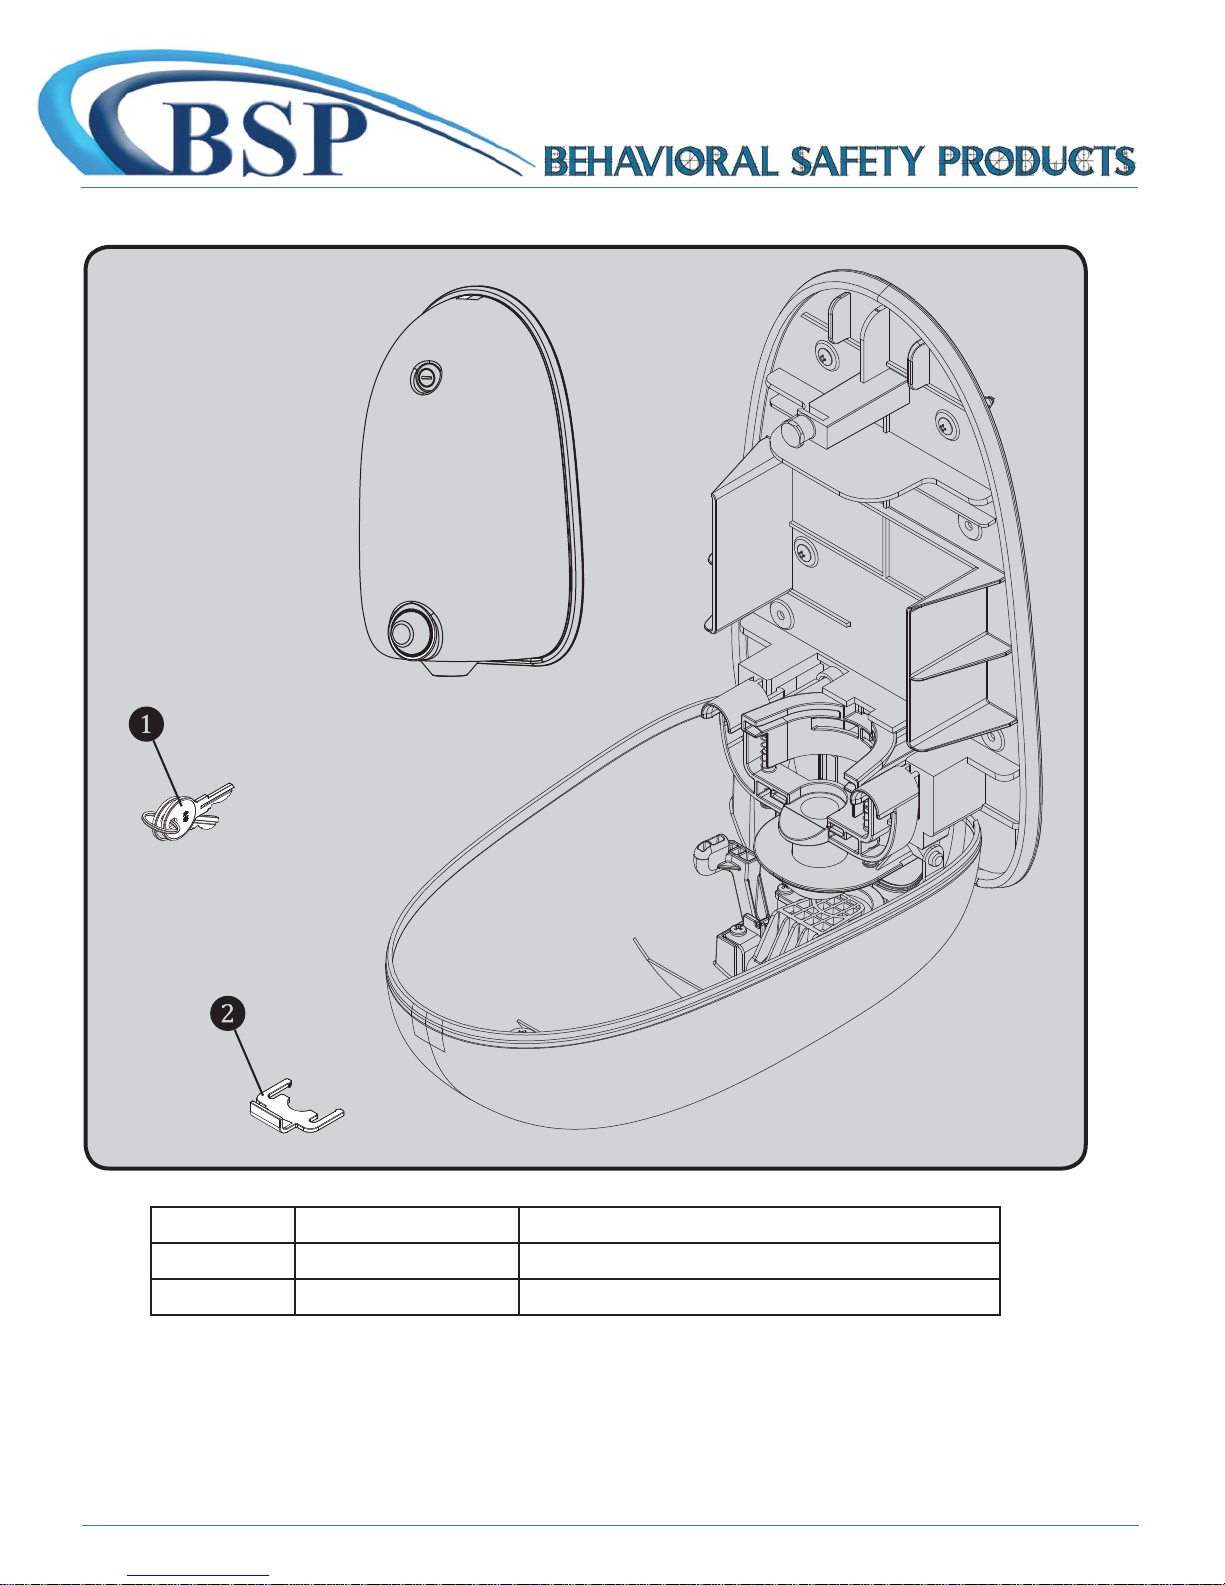
PAGE 7 REPAIR PARTS #SD750, CONTINUED
Item Number Part Number Description
1 RPG44-106407 Replacement Clip for SD750
2 RPG05-106408 Replacement Keys for SD750 (Two Keys to be Provided)
706-705-1500
besafepro.com
 Loading...