

Browning Vault Door Owner's Manual
Vault Door Installation Instructions
Tools Needed:
Tape Measure, Level, Drill, masonry Bit, 3/4”
socket and ratchet driver.
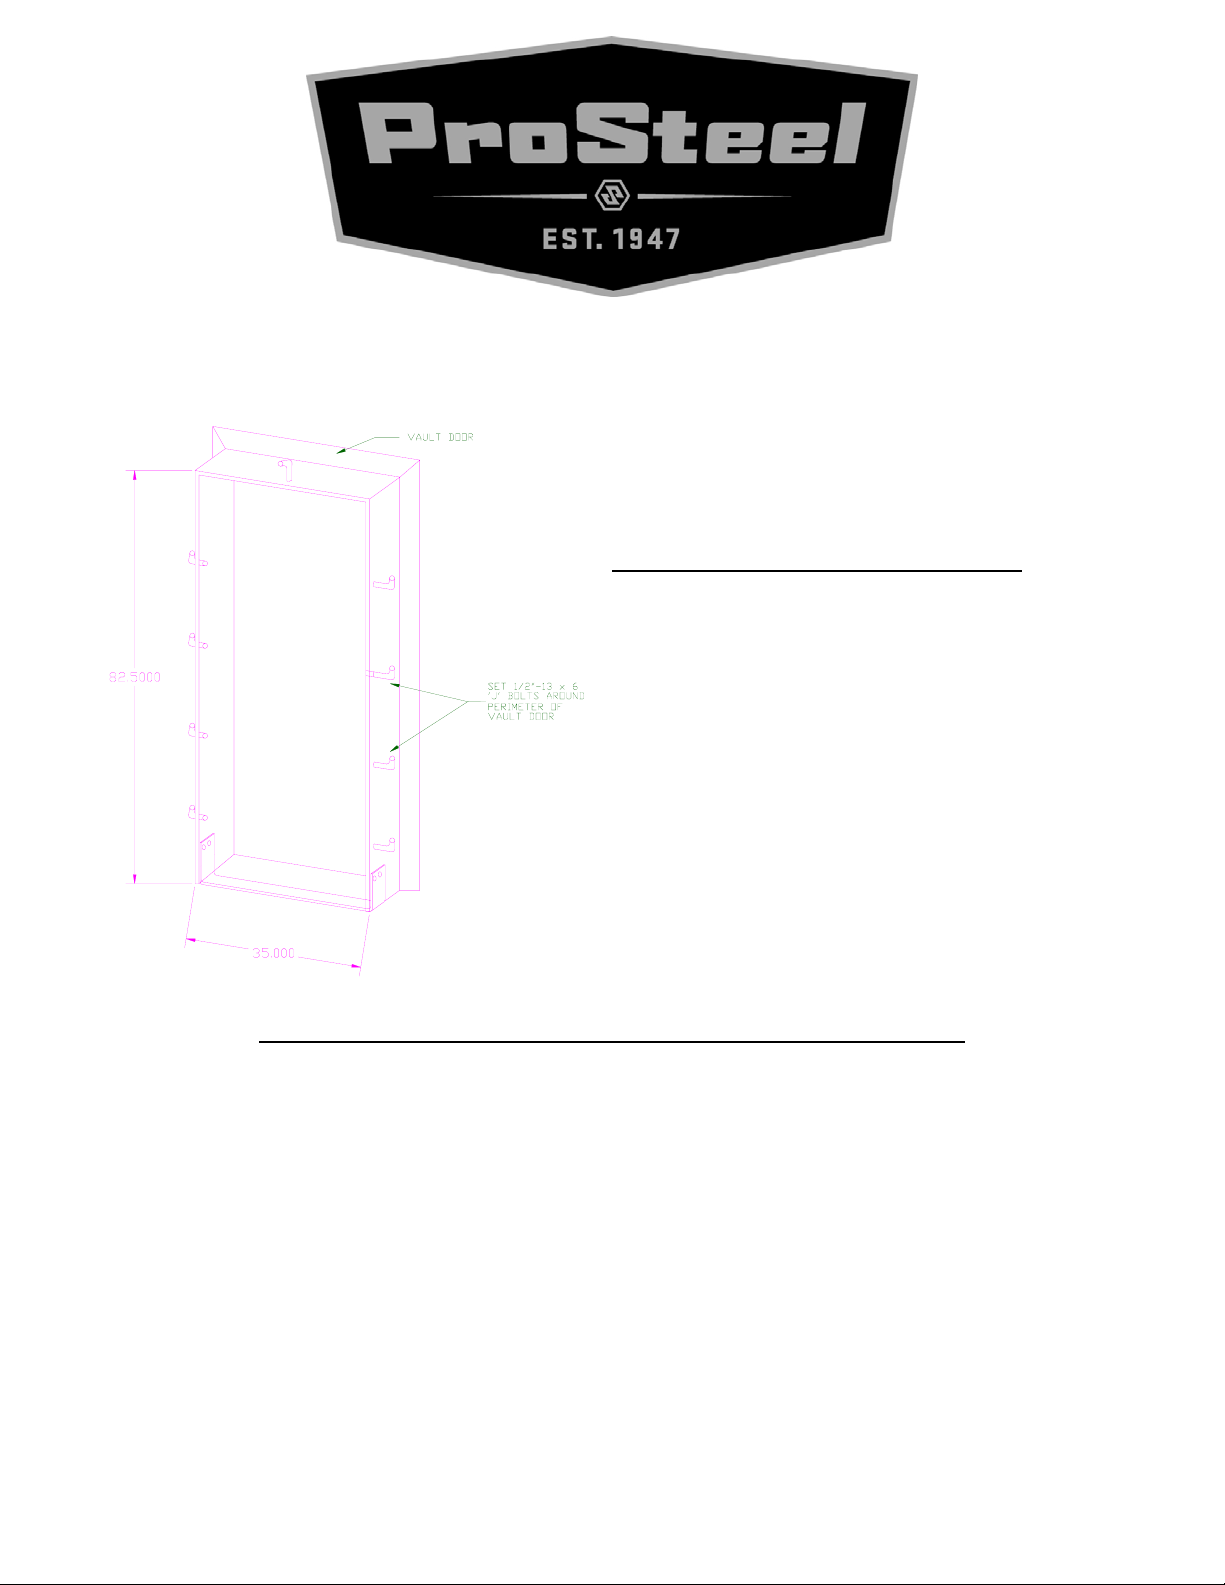
Vault door frame opening 82.5” x 35”
Vault Door Installation in Existing Wall
1.Wall thickness should be at least 5.75” (including
sheet rock)
2. Place vault door and frame in wall
opening.
3. Push vault door and frame securely against wall.
4. Mark and drill holes in wall corresponding with
½” holes in frame for ½” bolts.
5. Place ½” x 3” lag bolts (3” minimum length)
through frame holes into wall securing frame to
wall.
• Drill a 5/16” pilot hole before installing
½” lag bolts into wooden studs.
6. Bottom threshold is optional.
Installation Instructions for Constructing a Wall Around Vault Door
1. Move vault door and frame into opening in cement form.
2. Secure vault frame temporarily against cement forms.
3. Set (9) ½-13 x 6 “J” bolts around vault door frame and secure with ½”-13 washers and nuts.
4. Set back side of cement form corresponding with depth of vault frame. (Allow for sheet rock if
applicable.
• If wall is thicker than vault door frame, a wooden buck can be created. Temporarily
attach wood buck to vault door frame together using metal plates (provided). If further
assistance is needed please call the factory at 1-877 –501–SAFE (1-877-501-7233).
5. Keep vault door closed during cement pouring.
6. Pour cement in cement forms, giving extra care not to get cement on vault door surfaces.
7. Tighten ½" -13 nuts on “J” bolts
8. Remove cement frames.
 Loading...