

Page 1
1
Technical Reference
Title: Replacing Power Supply Board
Date: February 25, 2009
Models: BE-901, BE-901-PC, BE-1201, BE-1201-PC, BES-916, BES-1216
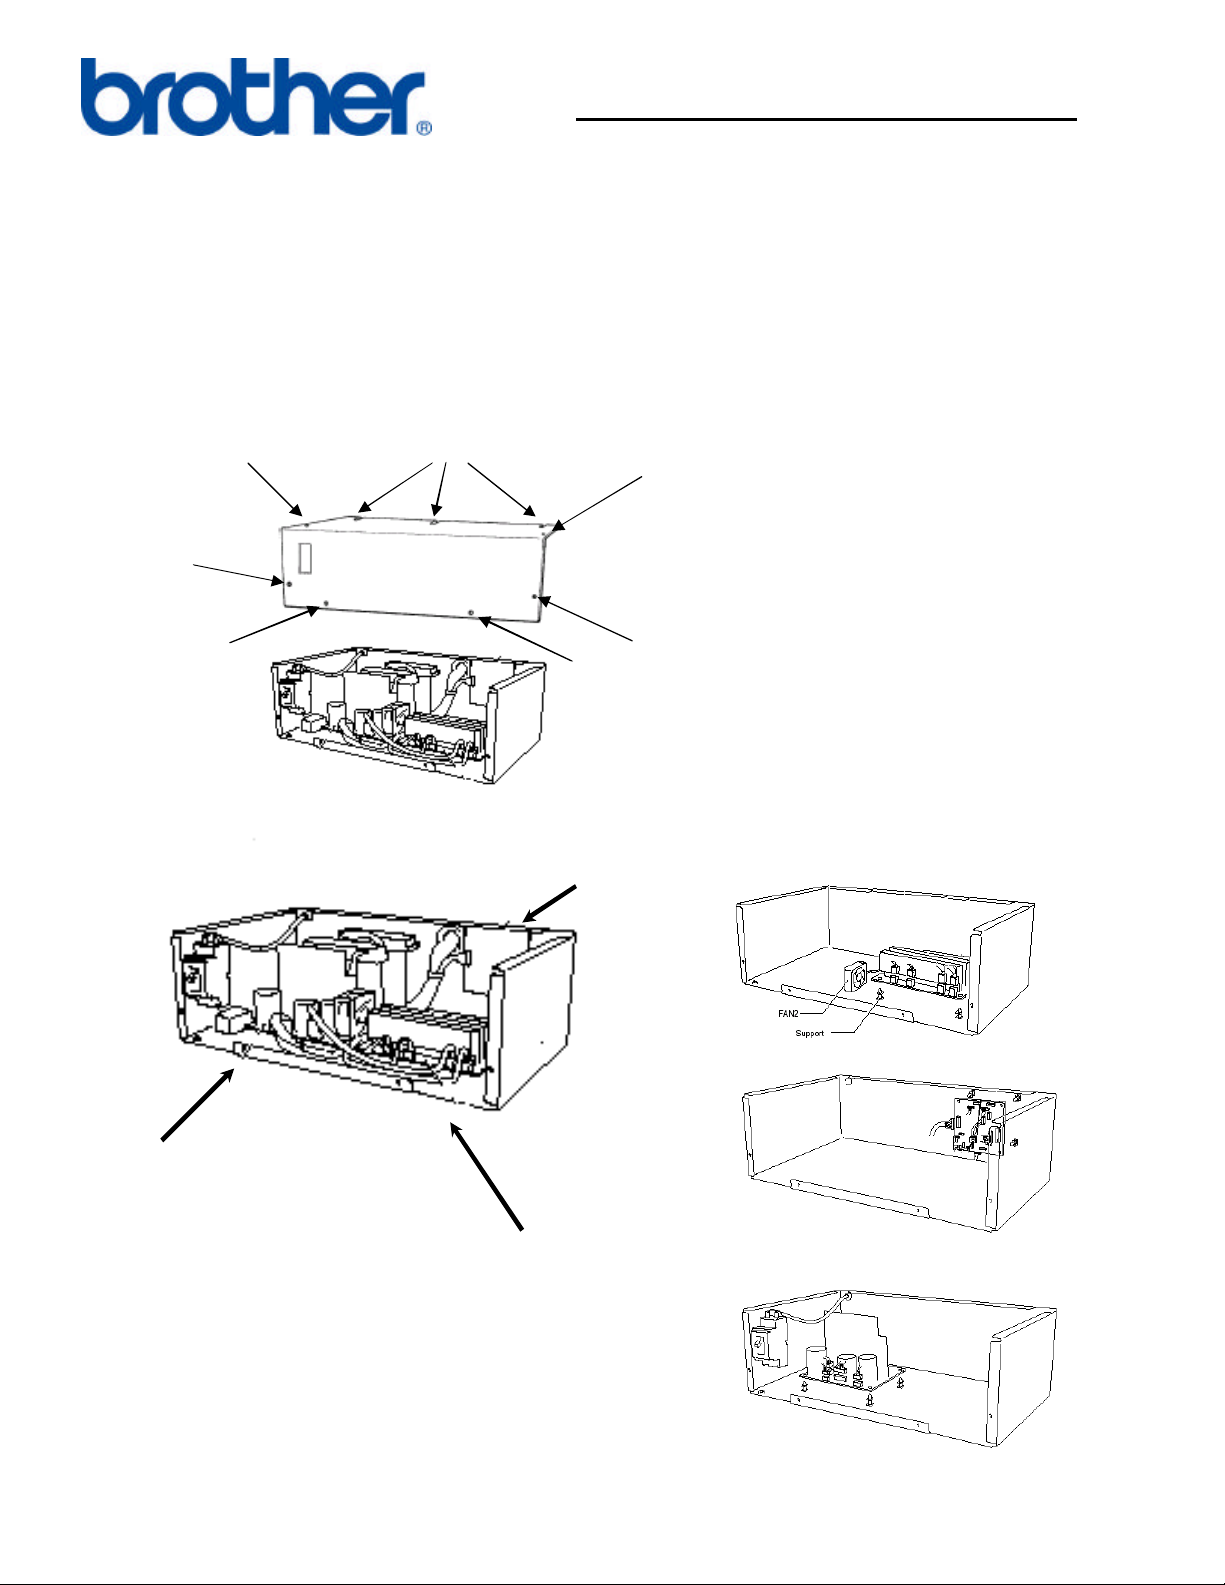
1. Make sure machine is OFF and Unplugged.
2. Remove cover assy. (Six screws removed “A”, Three loosened “B”)
3. Identifying Main Bord. (Also: Power Supply, and Head Board)
Power Supply
A
A
A
B
A
A
A
Head Board Main Board
Head Board
Main Board
Power Supply
Page 2
2
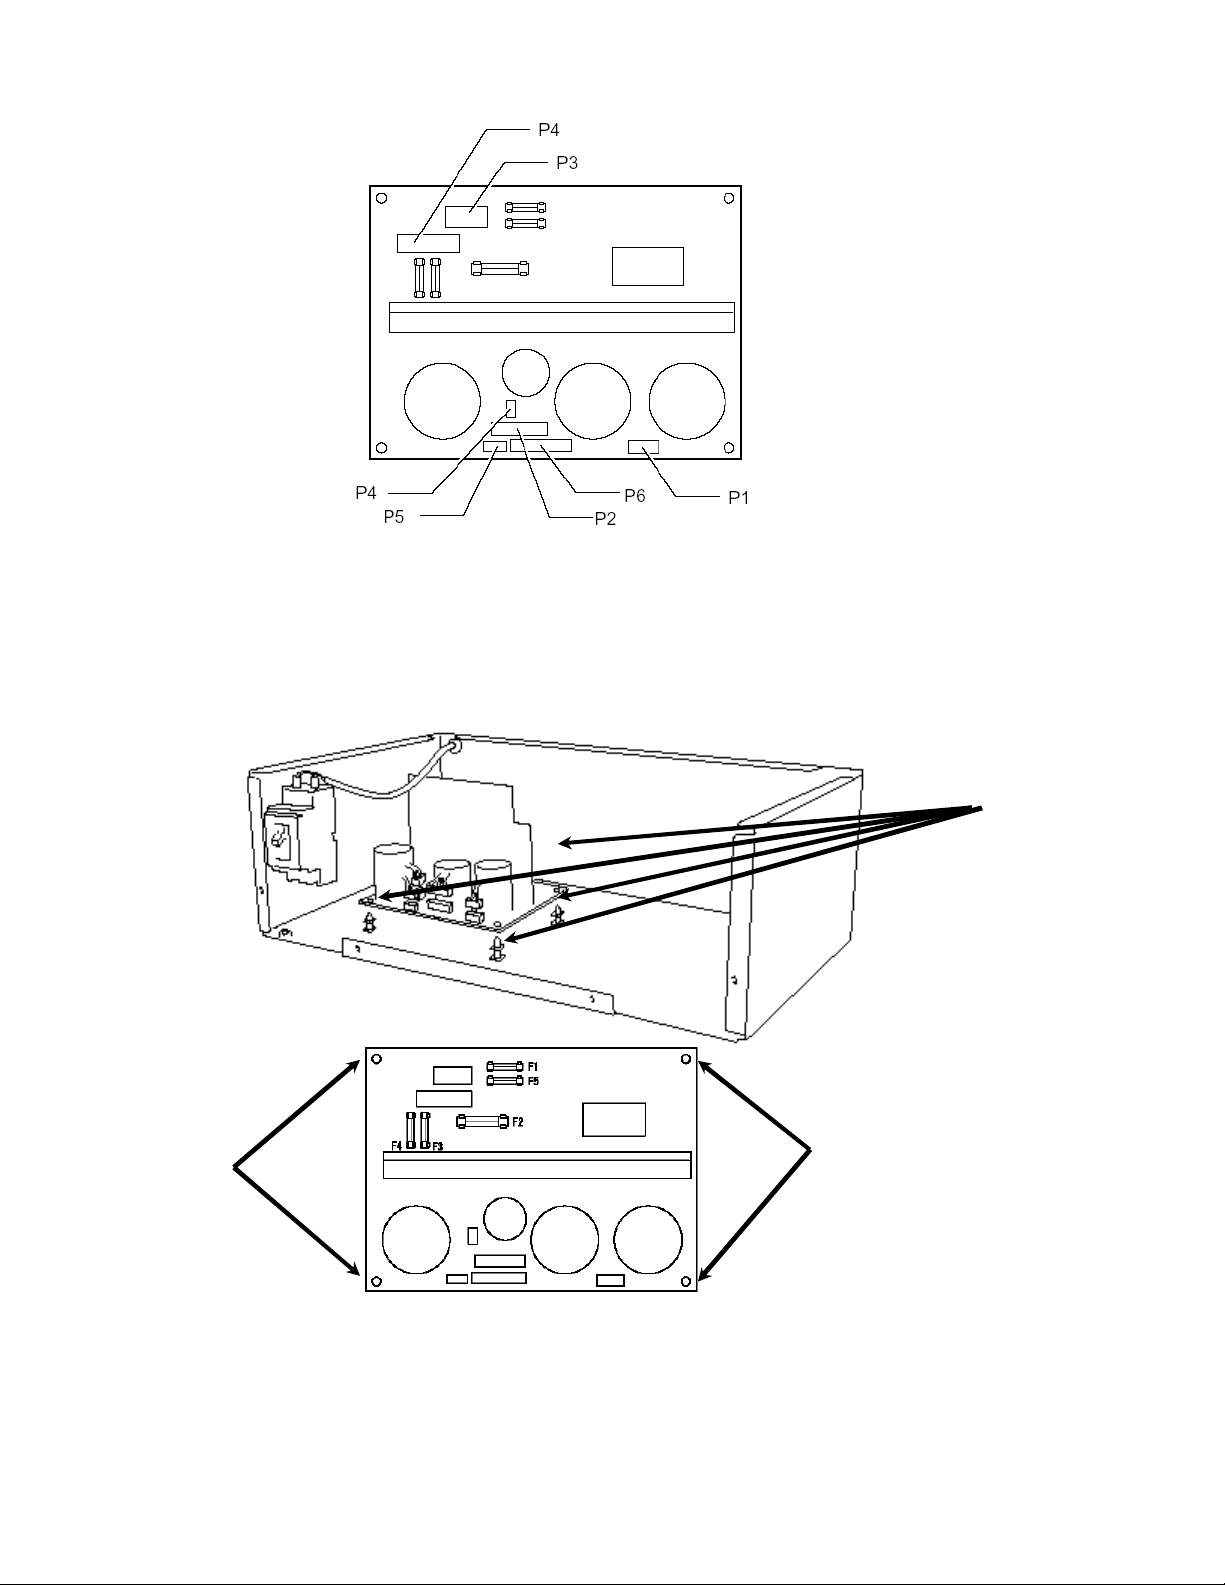
4. Unplugging all wire connector harnesses. P1, P2, P3, P4, P5, and P6.
5. Unplug all connectores to remove board. However, keep in mind that connectors only
go in one spot and can not be confused.
6. Board is held inplace by plastic clip locks. In order to unlock you will need to squeese
locks and lightly pull-up on board to release.
(Fig. 1-1)
plastic clip locks
Four-clip locks
hold board down.
plastic clip locks
Page 3

3
7. Once you remove old board you are ready to install the new one. Things to look for
before installing.
A. Fuses: If the new board is missing fuses remove from old board to install on new
board.
8. Installing board, please follow reverse instructions of removal.
9. After board is installed and all plugged in you are ready to plug machine into outlet and
turn on for operation.
 Loading...