

B
B
If your machine settings have not been programmed or if a “hard
reset” has been completed (necessitating reprogramming), these
instructions will walk you through programming the settings list.
PLEASE READ THESE INSTRUCTIONS
COMPLETELY BEFORE ATTEMPTING
ANY OF THESE PROGRAMMING STEPS.
E--
E
Website: http://www.brother-usa.com/industembroidery/tech_down.aspx
To reset the machine to the default settings:
1
2
0
1
1
2
0
For Technical Assistance Please Call Toll Free
B,,
1
B
Email:
tsupport@brother.com
9
9
0
1
0
1
1-877-4BROTHER
E--
E
A
A
C
C
1. “Power off” the machine.
2. Press and hold the key on the panel.
3. “Power on" the machine. Release the
key after the machine completes the “boot-up”
process.
4. Press the key, when it is available on the
display
Let the machine complete the deletion process
before continuing.
.
1

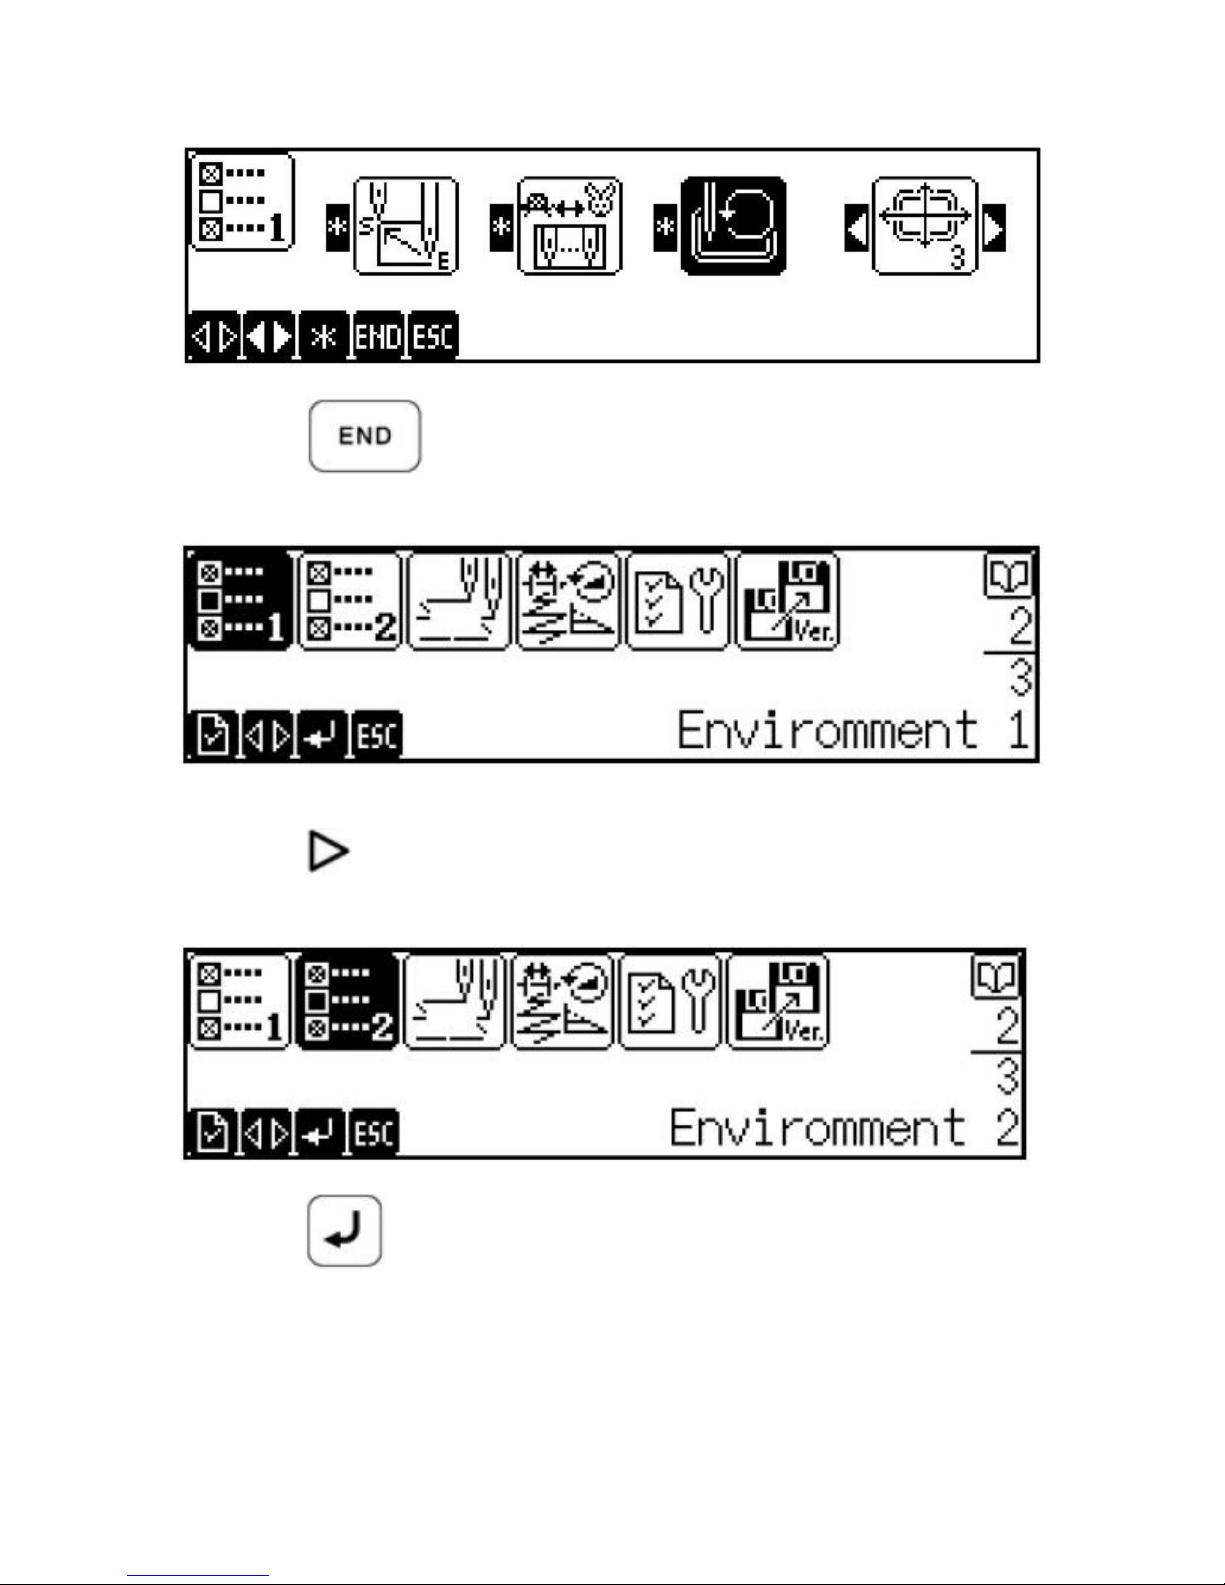
Settings Programming starts:
Press the key twice. Allow time for the display to react to
the first keystroke. The screen should appear as such:
Press the
Display should appear as such:
Press the
Page):
key, which will highlight the icon to the right. The
key. The Display should appear as such (Next
2
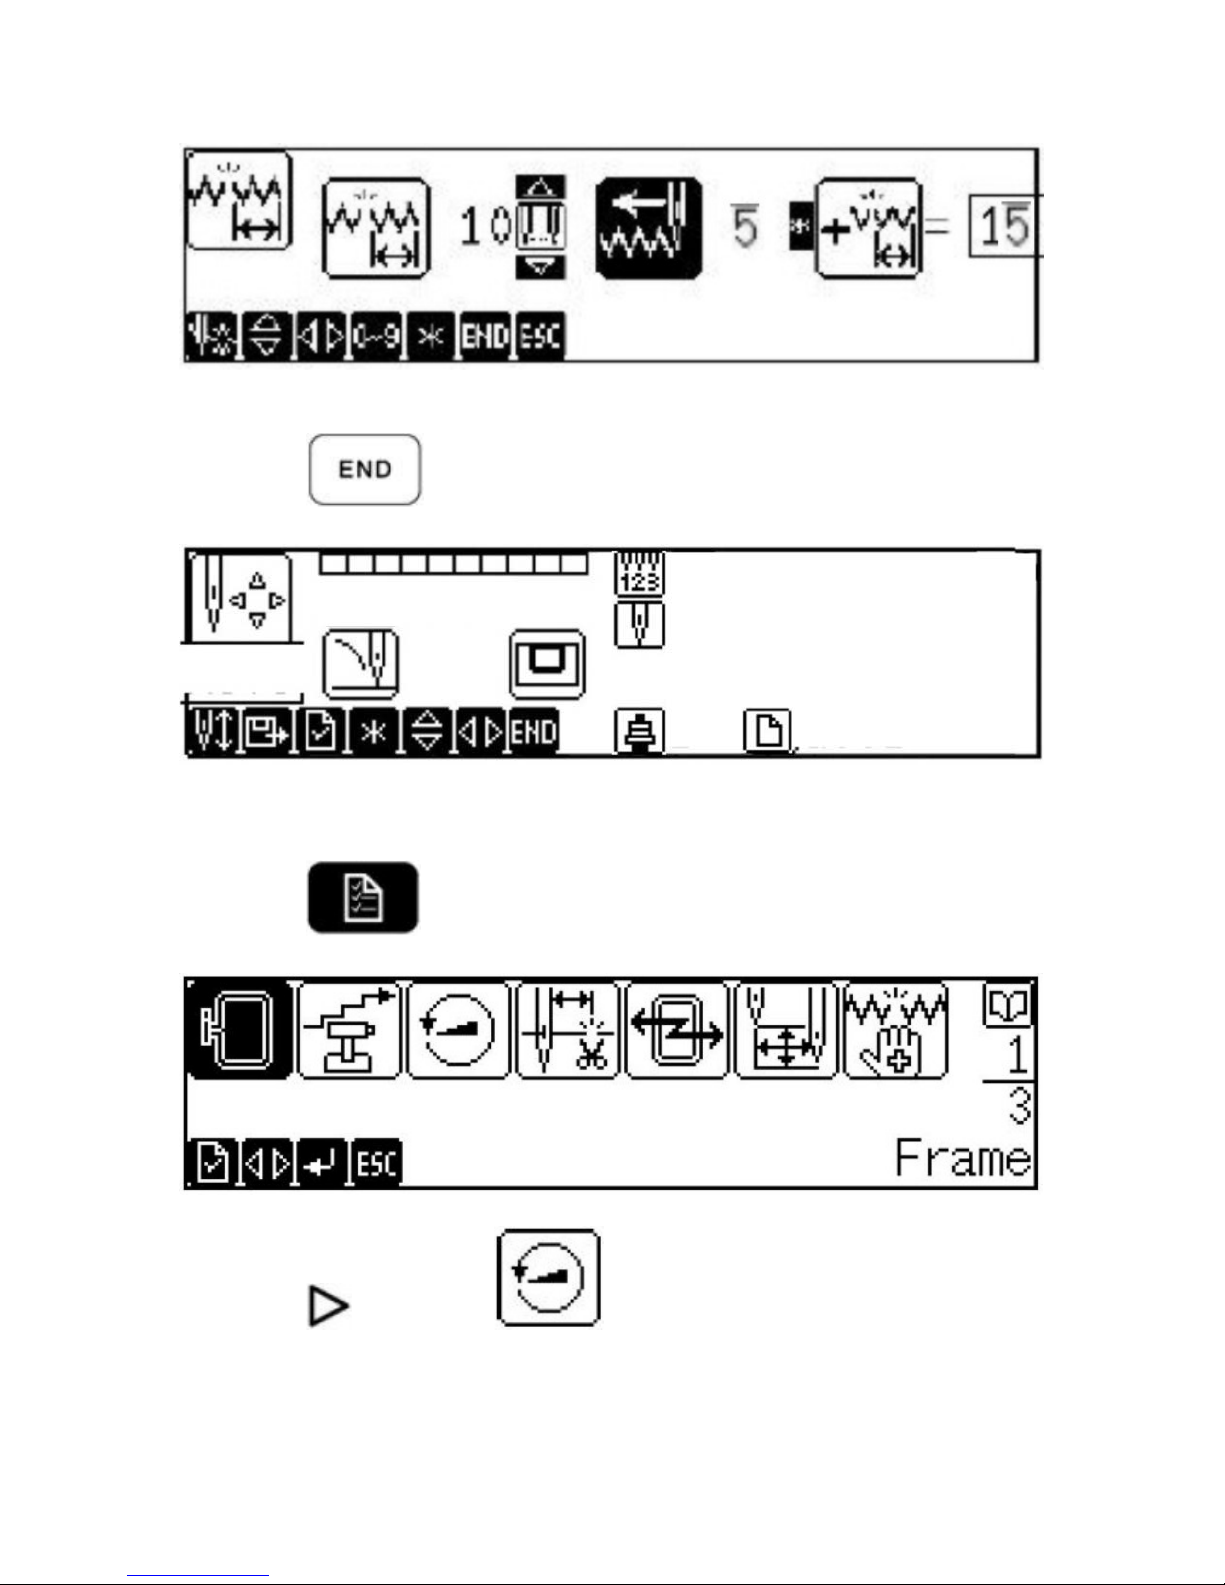
Press the
key. The screen should appear similar to such:
The Thread Break feature has now been programmed.
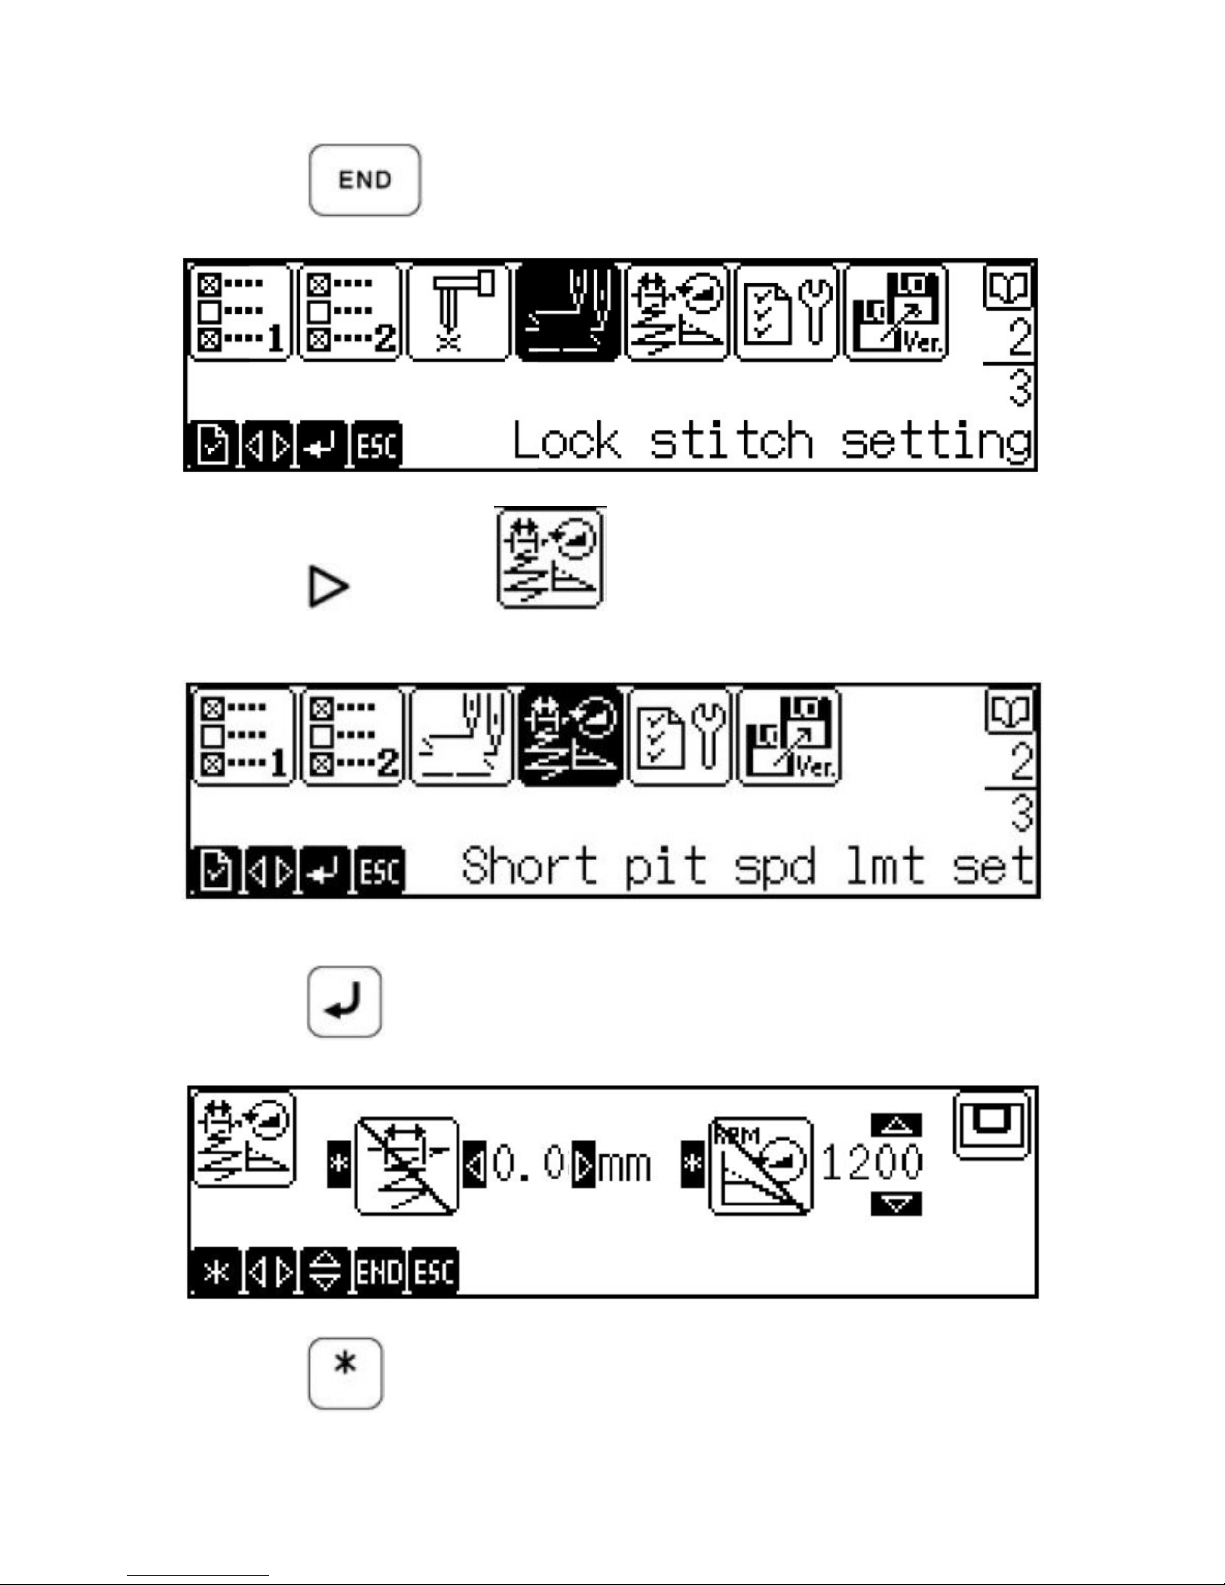
Press the
key. The display should appear similar to:
Press the key so the icon is highlighted. The display
should appear as such (Next Page):
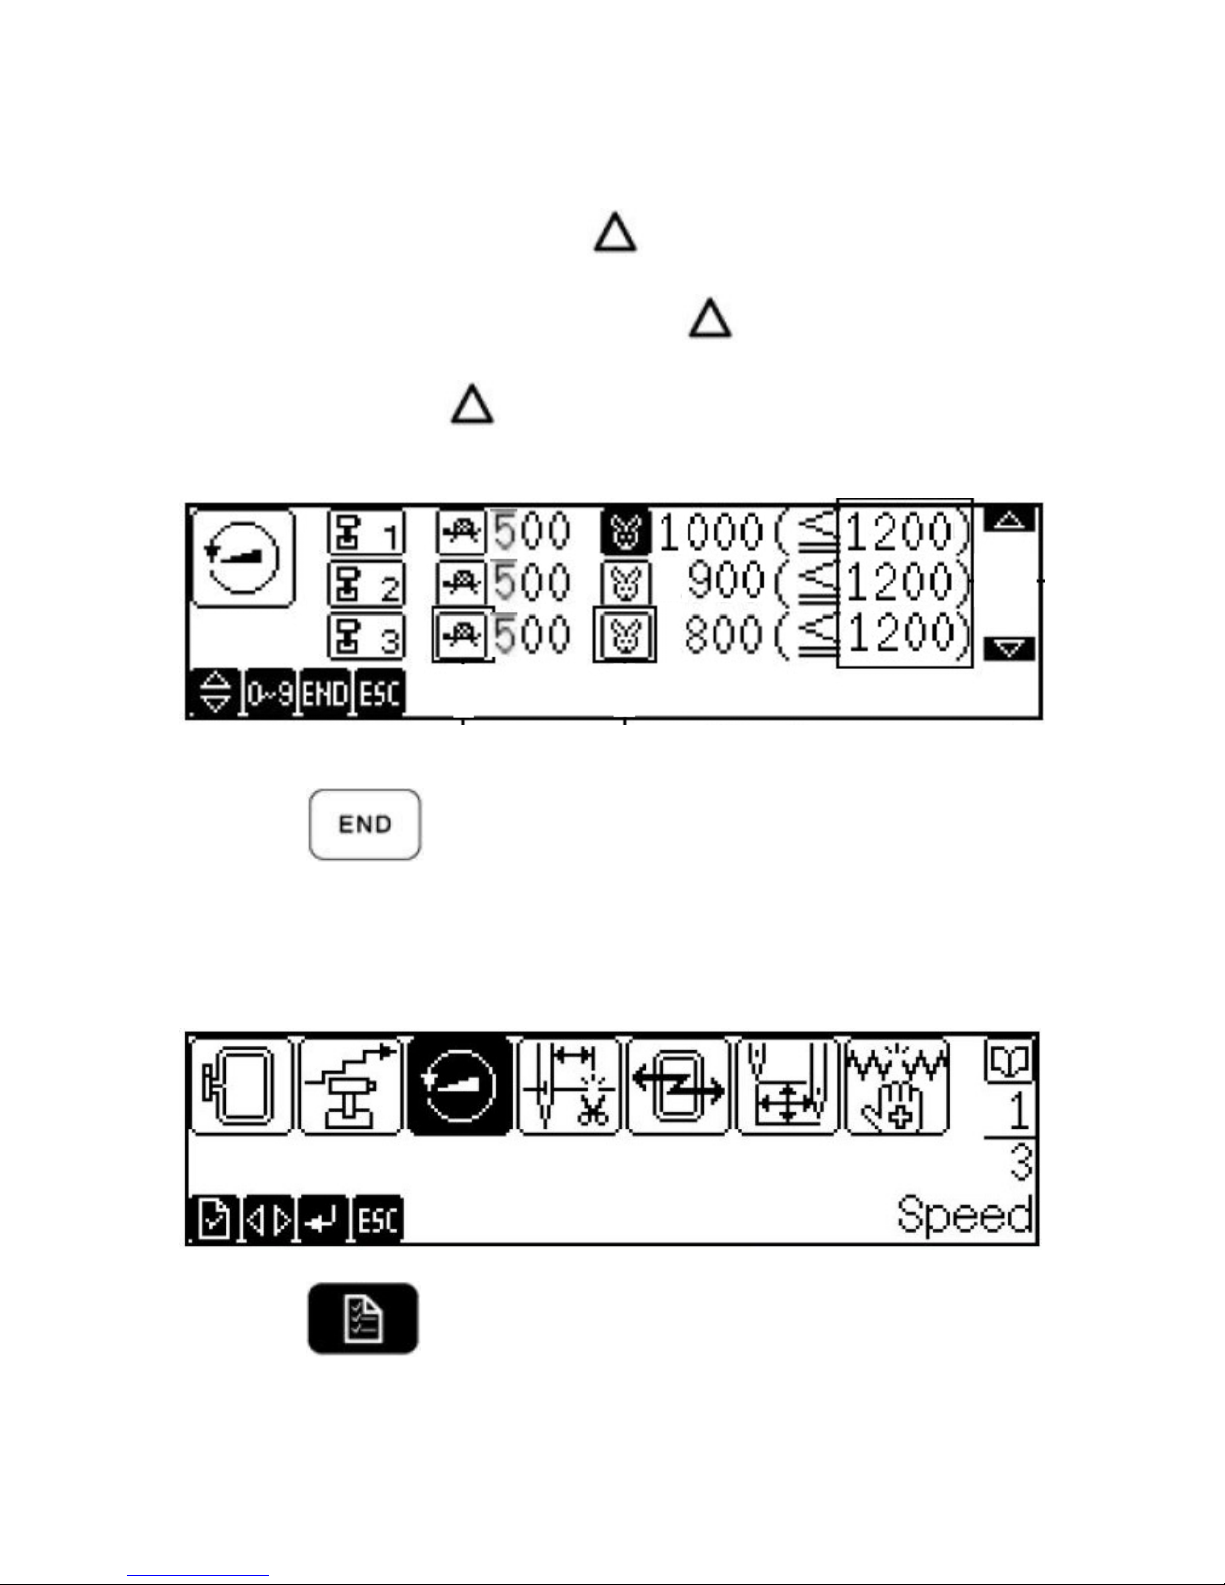
3

Press the
key. The display should appear as such:
There are six speed ranges that can be programmed. The
programming will be set from a high speed of 1000 SPM (Stitches per
Minute) to 500 SPM, decreasing in 100 SPM increments. The image
displayed above, shows the speed of ranges 1, 2, & 3. The number
to the right of each
icon shows the current programmed speed
of each range. Range 1 is shown with a speed of 1200 SPM, in the
image above.
Press
, , & then the key. You have just set
range one to be 1000 SPM, and are now able to the second range.
Press
the
key; press , & then the key;
press
, & then the key; press , & then
, & then the key; press , . The
4
key will not have to be pressed after setting the sixth speed range.
The six speed ranges should now be programmed as 1000, 900, 800,
700, 600 & 500 SPM. Press the
key 5 times, pausing to review
each programmed value as you scroll. Verify each setting increases
by a value of 100 SPM as you press the
key. You may press the
number keys to alter a value if you see that it is programmed
incorrectly. After the
key has been pressed so speed range one
is highlighted, the display should appear as:
Press the
key to accept the new speed settings.
The screen should appear as such:
Press the
key. The display should appear as such (Next
Page):
5
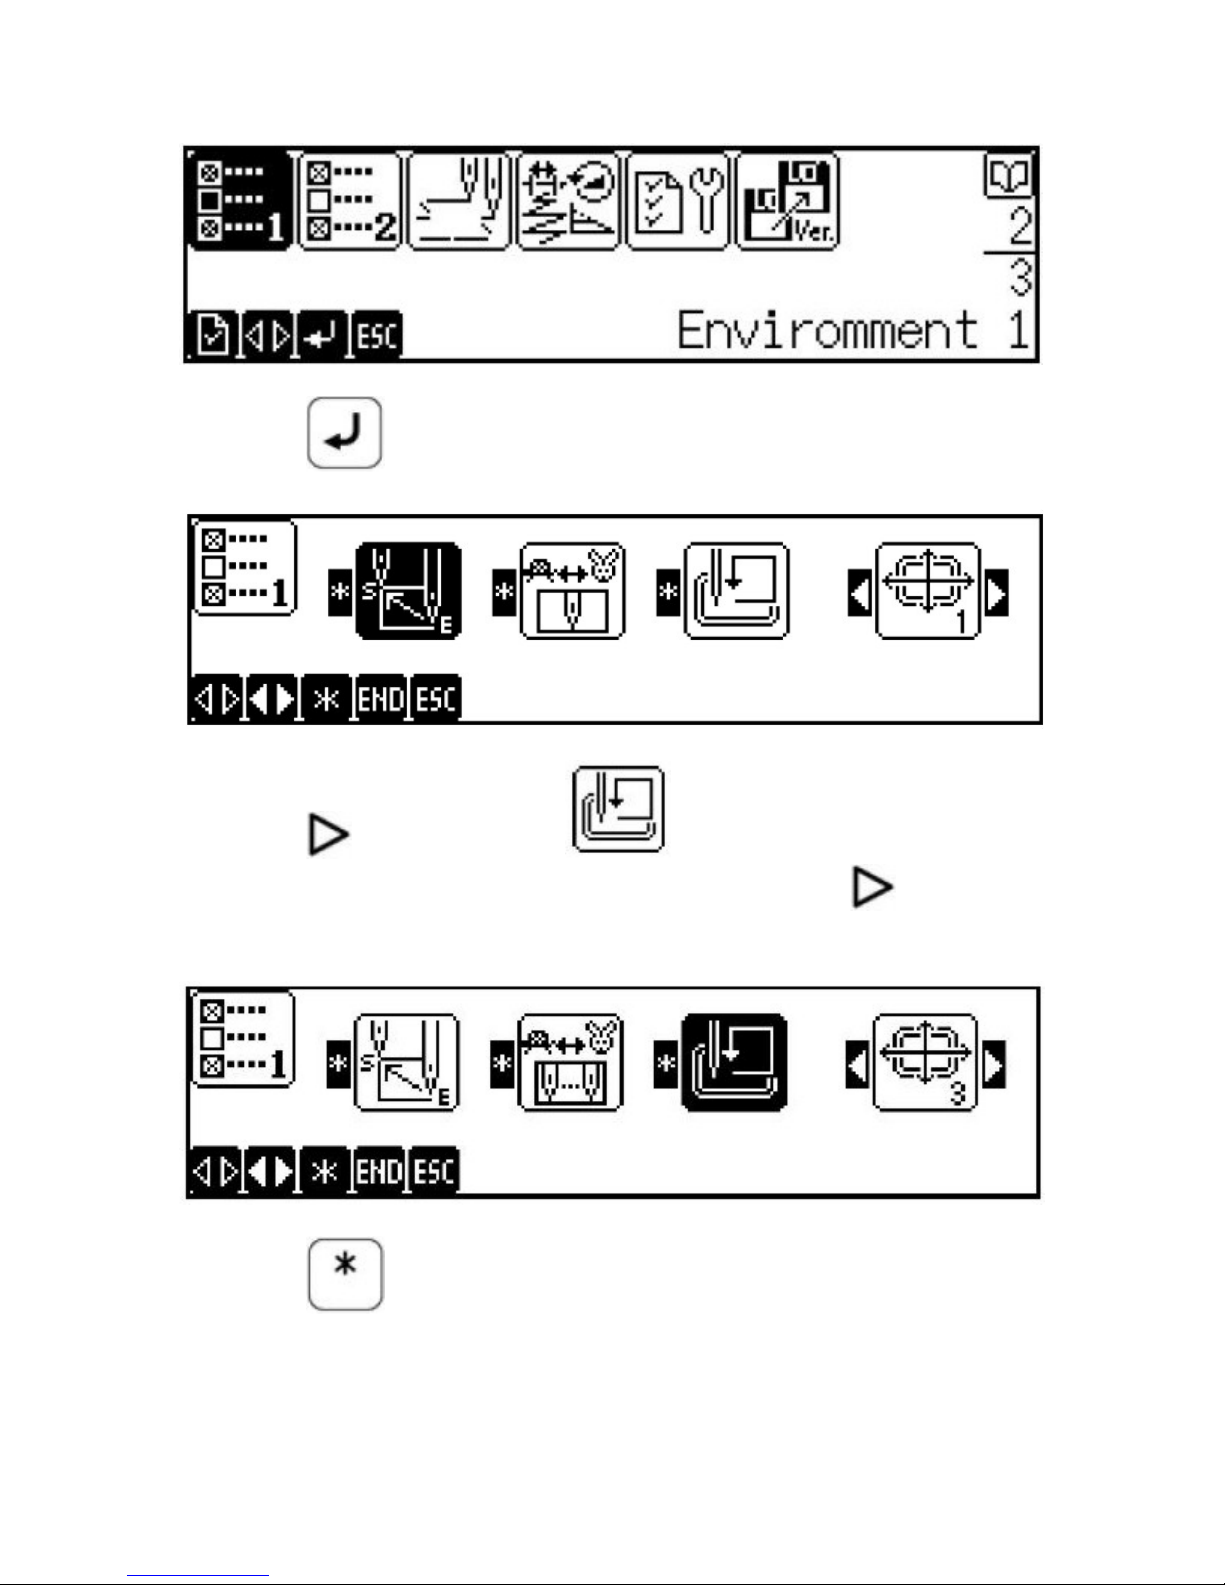
Press the
key. The display should appear as such:
Press the
key twice so the icon is highlighted. Let the
display react to the first keystroke before pressing the
second time. The display should appear as such:
key the
Press the
key to change the trace from rectangular to
octagonal. The screen should appear as such (Next Page):
6
Press the
Press the
key. The display should appear as such:
key once. The display should appear as such:
Press the
key. The display should appear as such (Next
Page):
7

Press the
key two times so the word “Beep” is highlighted. The
screen should appear as such:
There are three options for the “Beep” setting; OFF, ON, or 5. This
will determine if the panel “beeps” when there is a thread break, or
how many times it will beep. Press the
arrows to scroll
through the choices. Most operators prefer the setting of “5”, so the
machine will alert them when a thread break occurs, but stop beeping
after five beeps. When the “5” is selected, the screen should appear
as such:
Press the
key two times, so “Del. small stch” appears (allow for
the display to react to each key pressed). The display should appear
as such (Next Page):
8

Press the
one of the
key until “0.2” replaces the word “OFF”. Each time
keys is pressed, the value will increase or
decrease by 0.1 mm. The display should appear as such:
Press the
key. The display should appear as such:
Press the
key so the icon is highlighted. The display
should appear similar to (Next Page):
9

Press the
key. The display should appear as such:
Each icon will have a slash through it as shown in the first icon.
Press the
Press the
key. The slash will be removed from the first icon.
key & then the key to remove the slash from the
second icon.
Press the
key & then the key to remove the slash from the
third icon. The display should appear as such:
10
Press the key. The display should appear as such:
Press the
key so the key is highlighted. The display
should appear as such:
Press the
key. The display should appear as such:
Press the
key. The display should appear as such (Next
Page):
11

Press the
explained on page 13), and press the
key until the 0.0 value changes to 0.9 (1.1 for caps-
key until the 1200 value
changes to 700 (600 for caps). You are able to press any of the
keys to increase or decrease both values. The
display should appear as such:
Press the
key. The display should appear as such:
Press the
key.
12

The screen should appear as such:
The Short Pit speed limit feature will have to be programmed again
when the CAP mode is selected. Power off the machine, and change
the black frame mode switch from FLAT to CAP. Power “ON” the
machine and press the
accept each key selection). Press the
twice, (allow time for the screen to
key until the short pit
speed limit feature
the
key to remove the slashes, activating the feature. The
is selected. Press the key. Press
recommended settings are 1.1 mm and 600 SPM. Use the
keys to set those values.
Press the
key to accept the new settings.
Press the
If the machine is to continue in the tubular/flat mode, power off and
turn the frame mode switch back to the “Flat” position.
key to return to the main screen.
13

Please note that some icons may appear differently
on your machine panel, due to possible updates or
changes in current machine firmware, (version 5.12
as of January 2009).
For help or questions about these settings,
please contact Brother Technical Service at
877-427-6843, or email Brother Technical
Support at:
tsupport@brother.com
14
 Loading...