

Page 1
ASSEMBLY GUIDE
Milo Sofa Bed
v1.0
Page 2
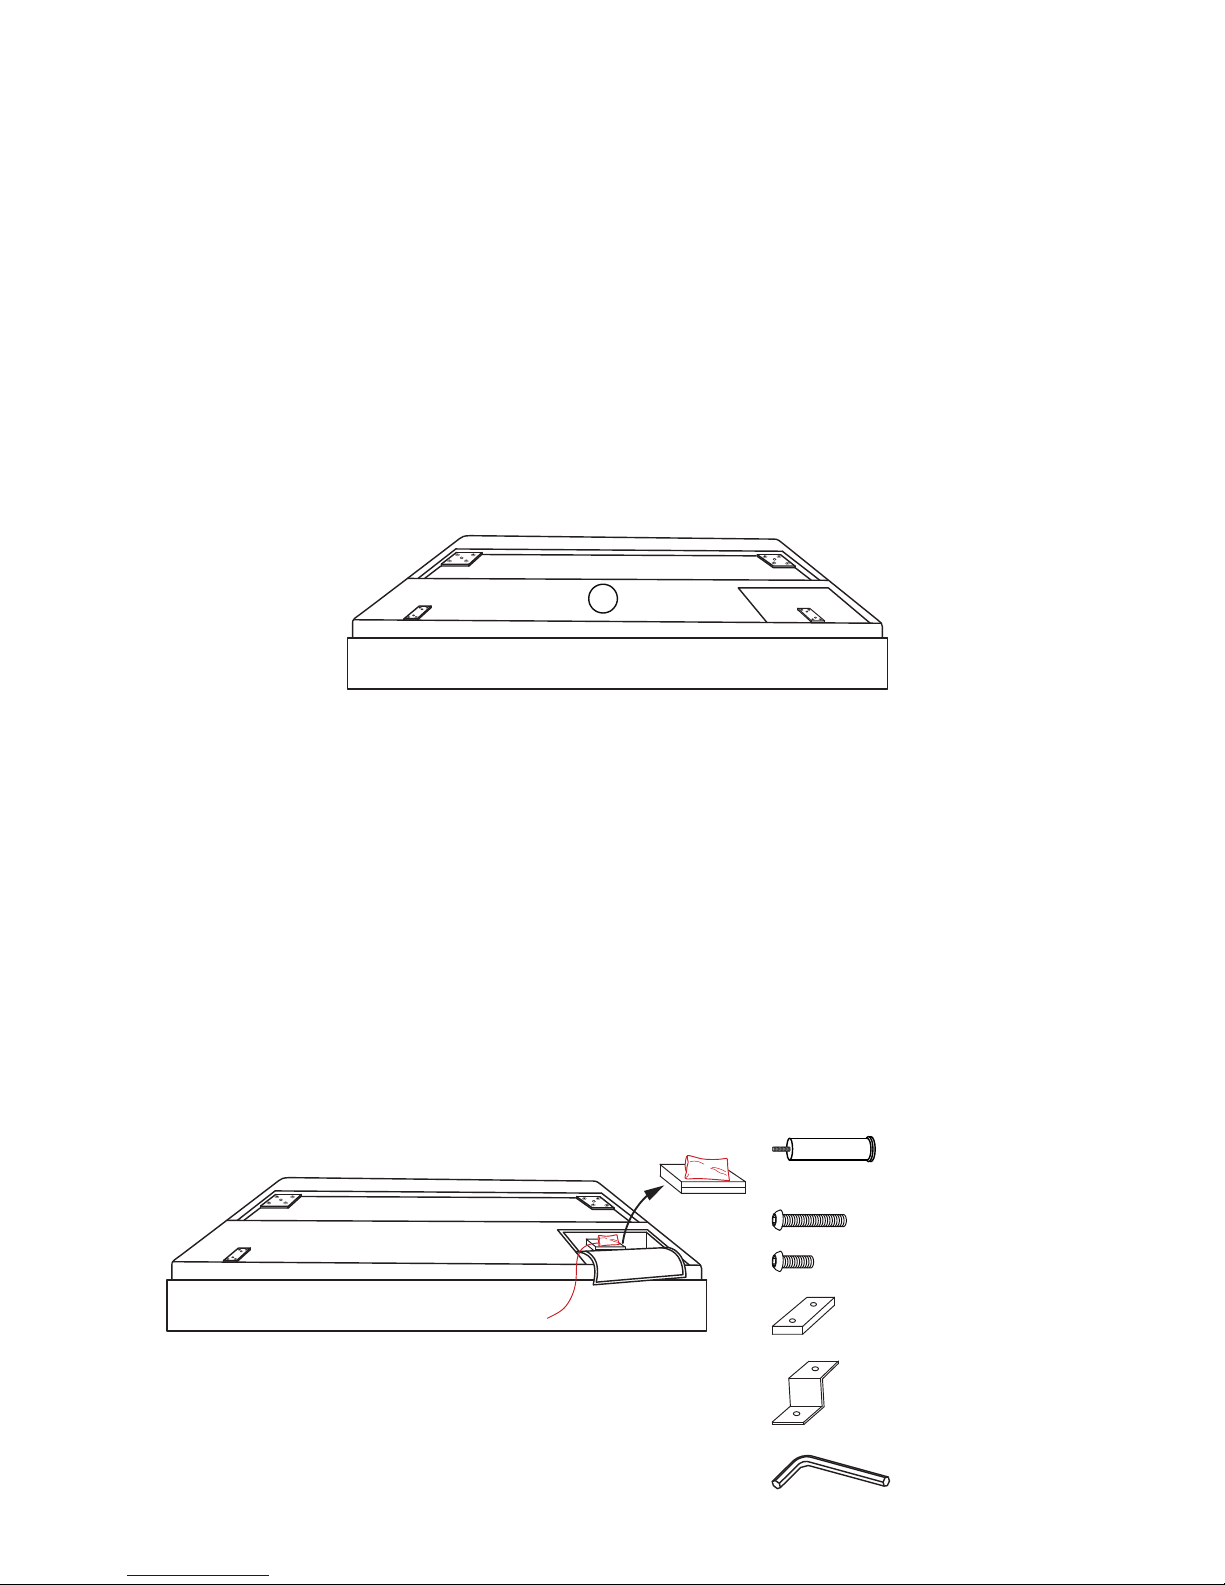
Components
Remove the bottom part of the package (this is very important because it will
make sure that the underside of the sofa bed body is facing you.) then you
should see one single component (the body of the sofa bed). Additional
components are packed inside the body, you will learn how to access and
utilise these components in the next steps.
1. Follow the coloured string to the component compartment. Uncover the
ap which is attached by velcro to reveal the the box containing 2 legs and
the hardware bag.
Sofa body x 1
Unpacking
A x 2 (Leg)
B x 2 (Large Bolt)
C x 2 (Small Bolt)
D x 2 (Plastic Block)
E x 2 (Metal Bracket)
F x 1 (Allen Key)
1
Hardware
Page 3
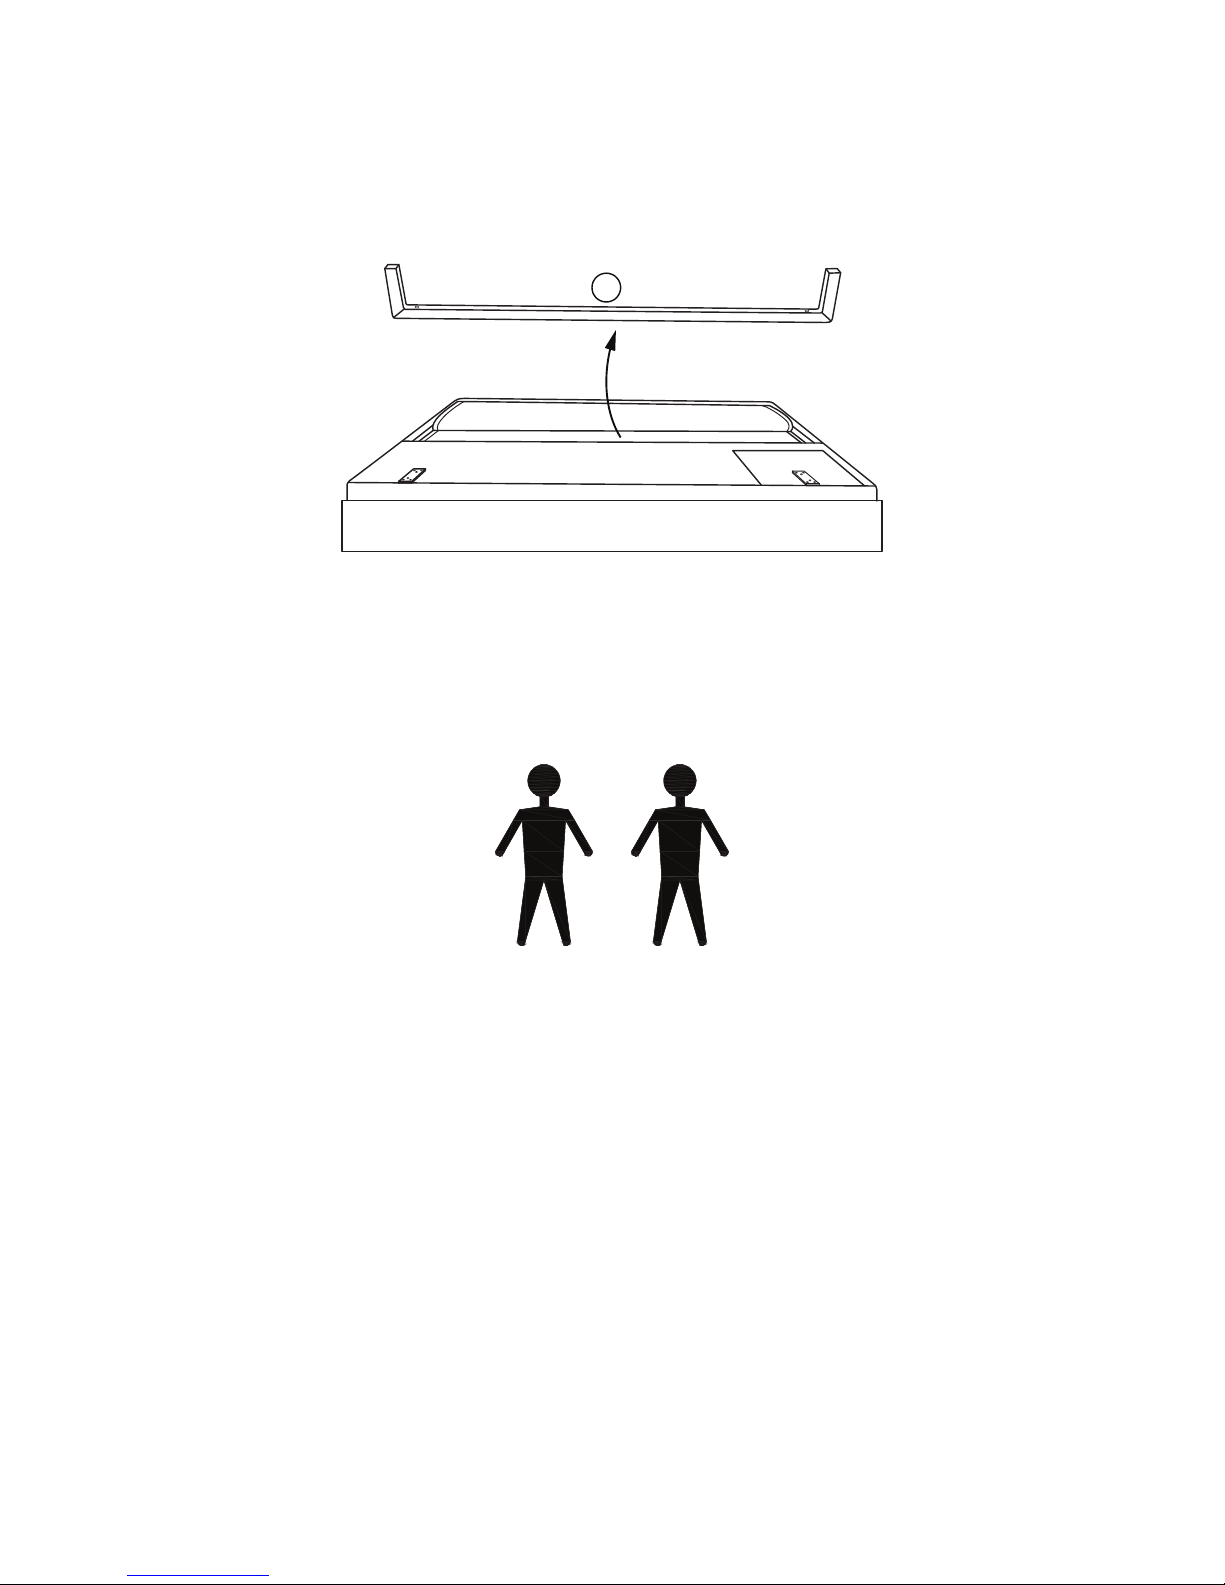
2. Uncover the ap on the other side to reveal the front leg.
You will need
2
Page 4
Step 1
A x 2
A A
B x 2
B
F
C x 2
D x 2
E x 2
F x 1
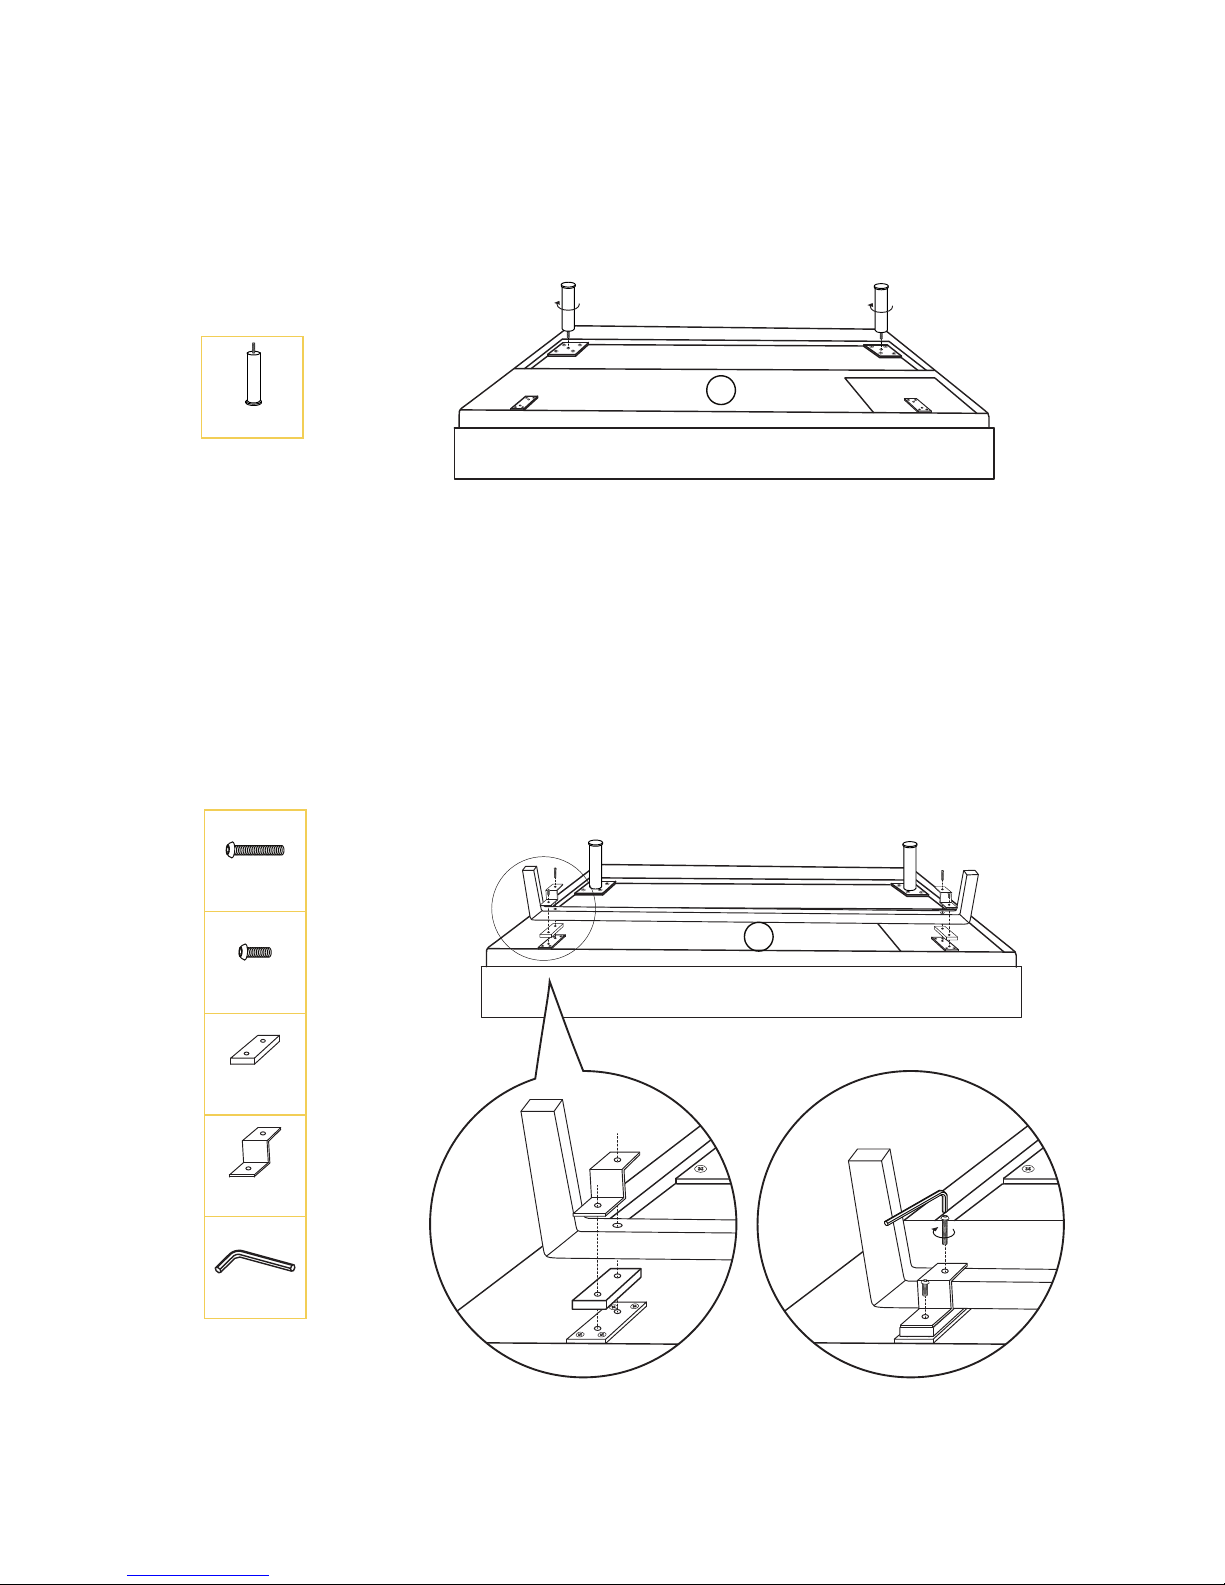
Remove the black plastic cap cover and screw in the
metal legs (A).
Step 2
Step 2.2
Align the front leg (2) with the sofa body (1). Put the
plastic blocks (D) under the front leg and metal
brackets (E) above the front leg. And then screw the
large and small bolts (B, C) into corresponding holes
using the allen key (F) but do not tighten yet.
C
D
E
Step 2.1
1
2
Page 5
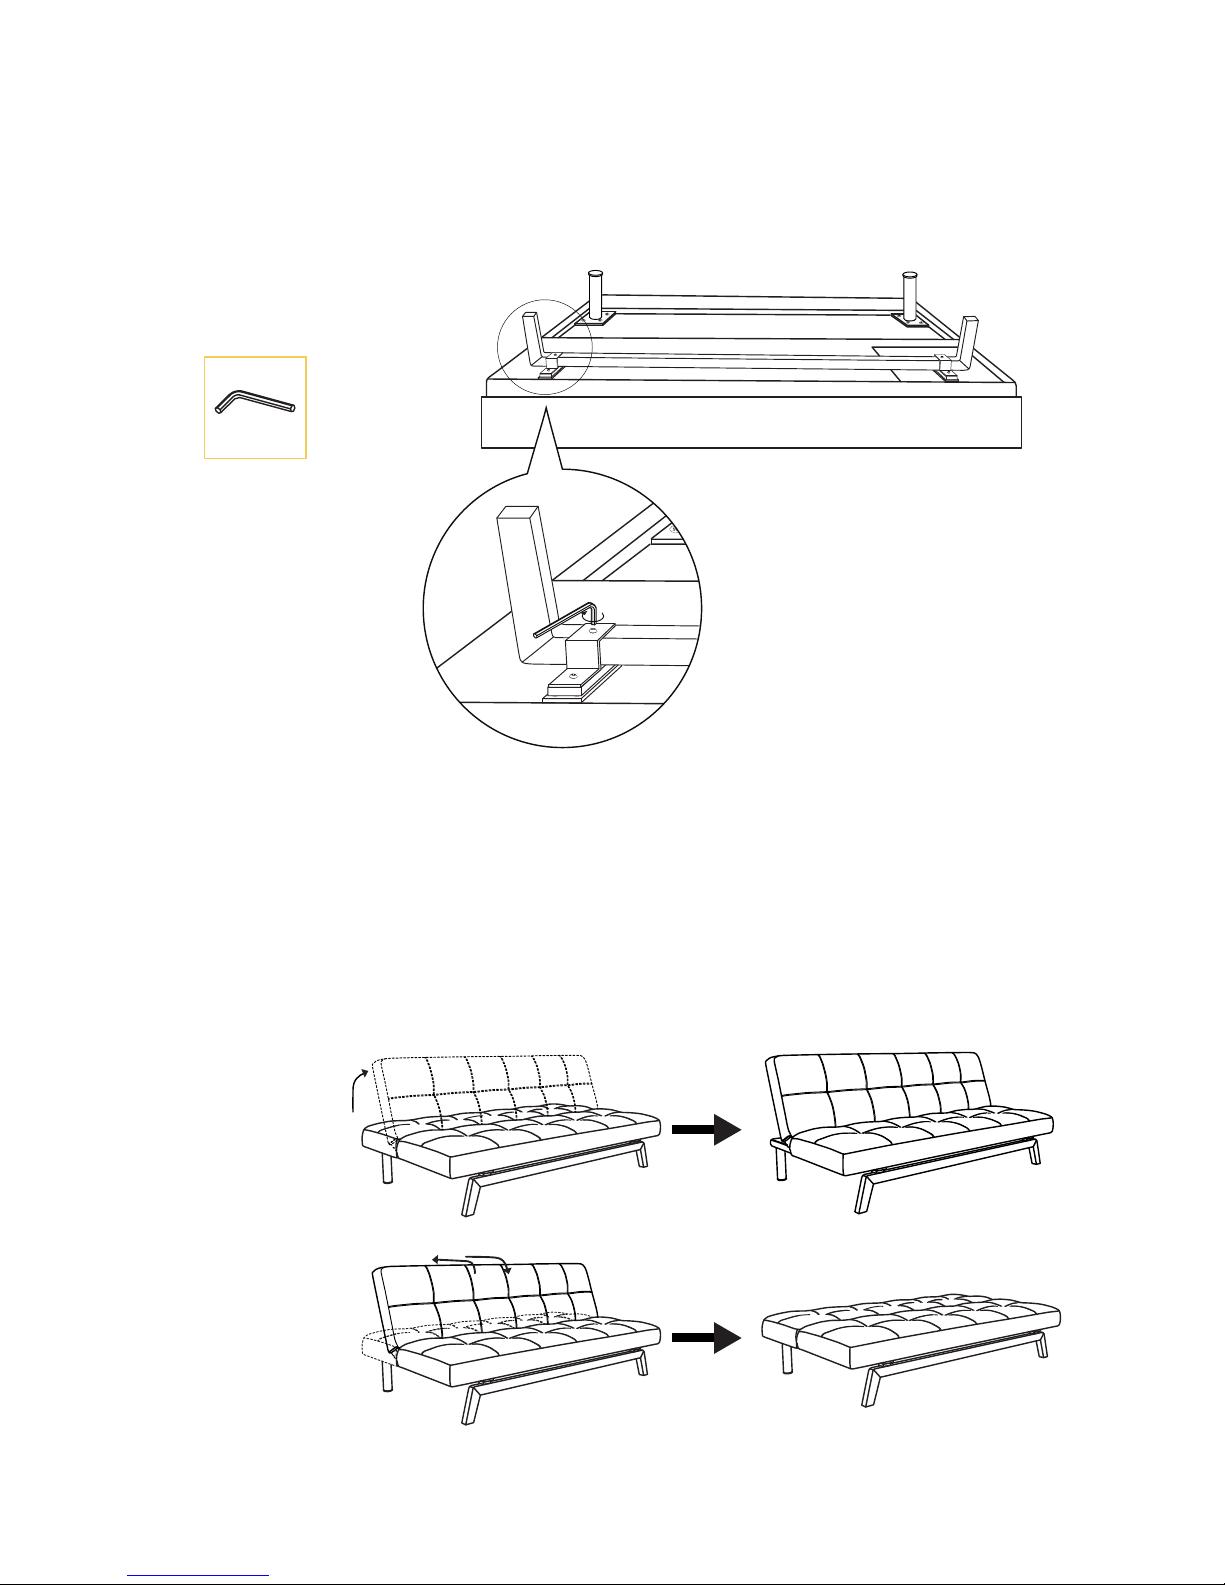
F x 1
Step 3
Use the allen key (F) to tighten all the bolts.
Step 4
Gently lift the sofa bed and place upright on a level
surface. Push the sofa bed back upwards until you
hear a ‘click’, then you will get a sofa position. To get
a bed position again, push the sofa bed back
upwards slightly and when you hear a ‘click’ put
down the back gently. Enjoy your new sofa bed.
Step 4.1
Step 4.2
CLICK
CLICK
1
2
 Loading...