

Page 1
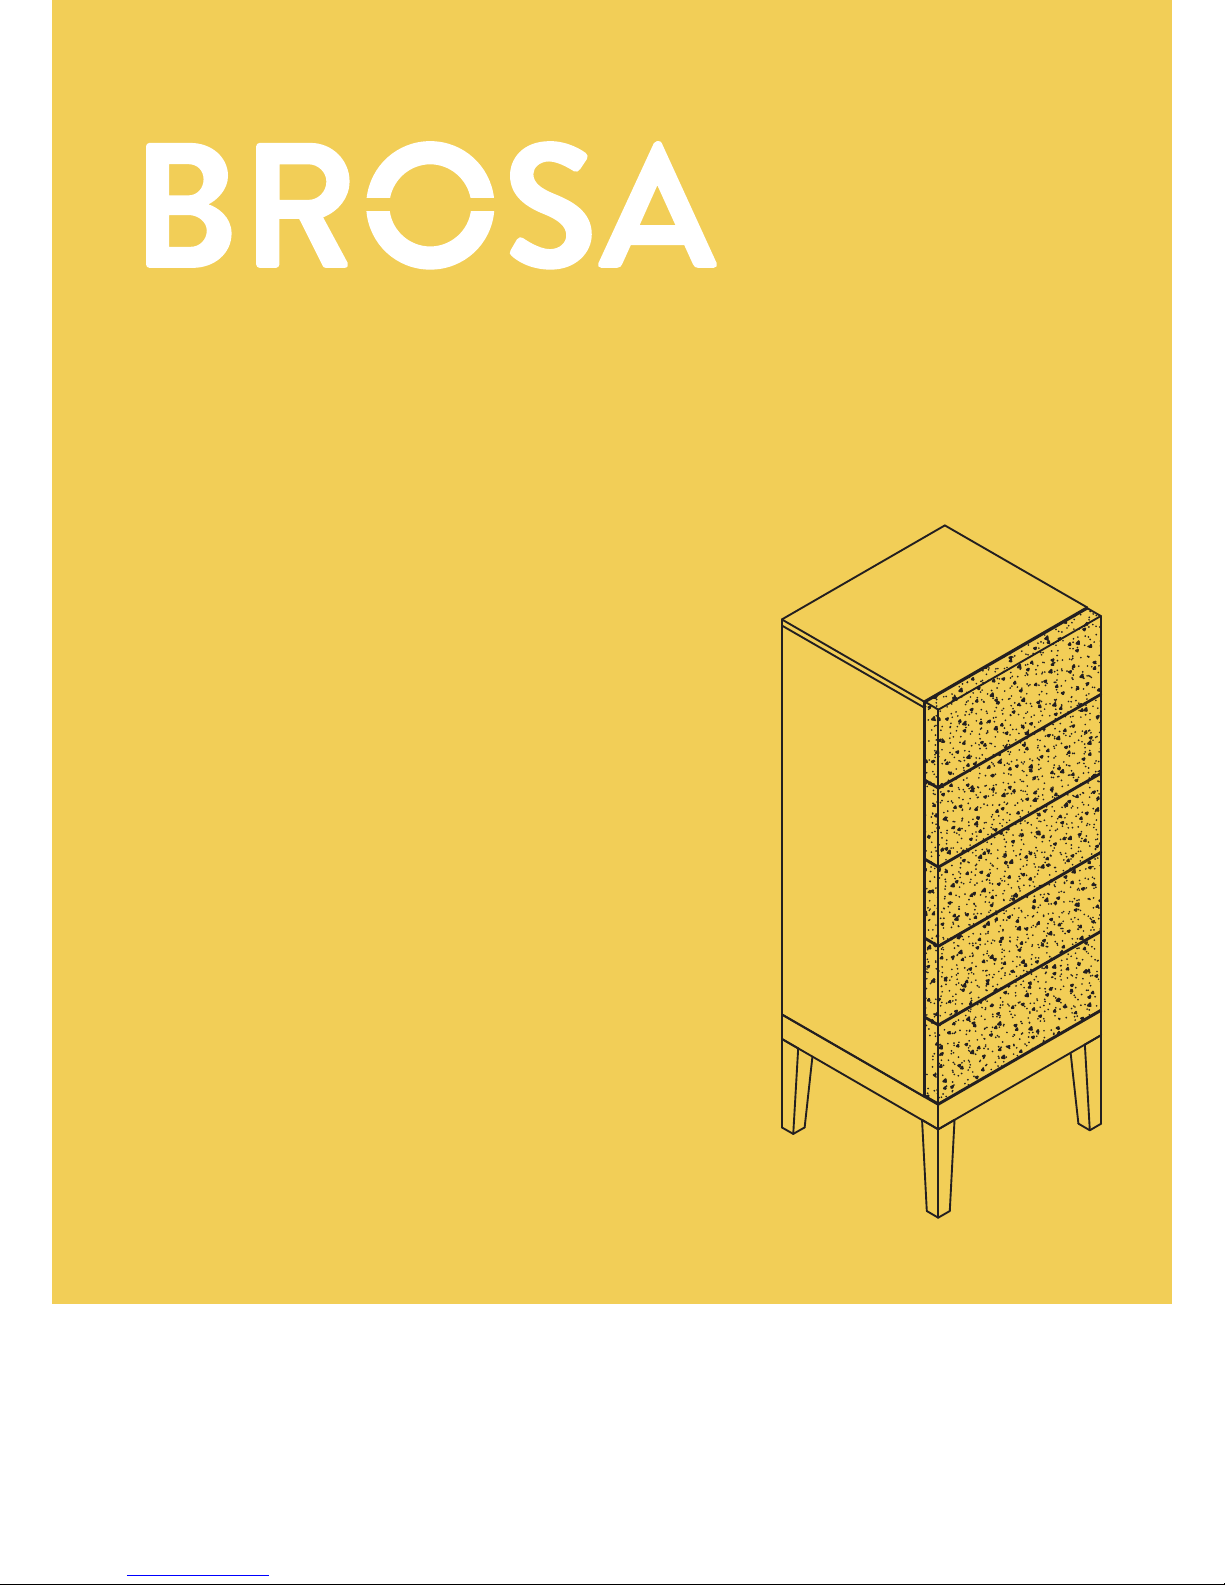
ASSEMBLY GUIDE
Edgar Tall Chest of Drawers
v1.0
Page 2
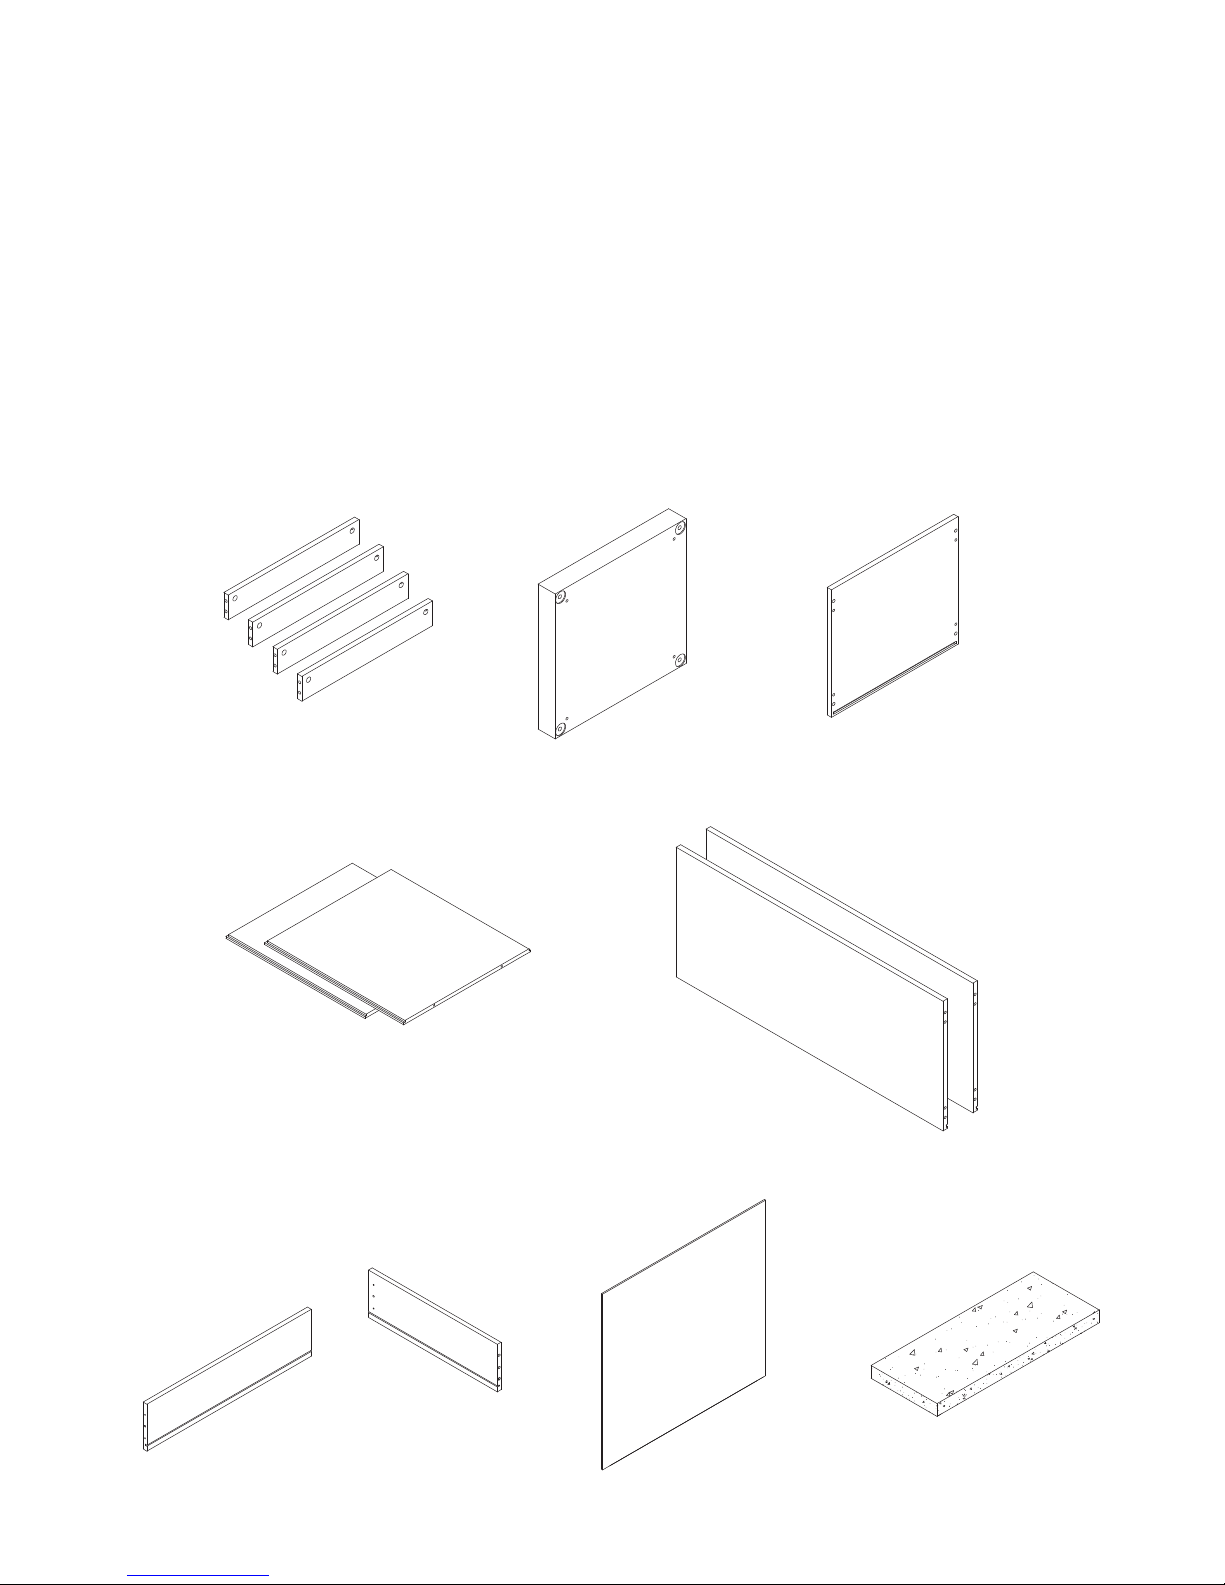
Components
Upon unpacking your tall chest of drawers from it’s delivery box, you should
have the separate pieces shown below. Follow the steps on the next pages to
assemble your new tall chest of drawers.
Outer body of chest of drawers
Draws
Side panel x 2
Base x 5
Front panel x 5
Back panel x 2
Back panel x 5
Side panel x 10
Support beam x 4 Base x 1 Top panel x 1
Page 3
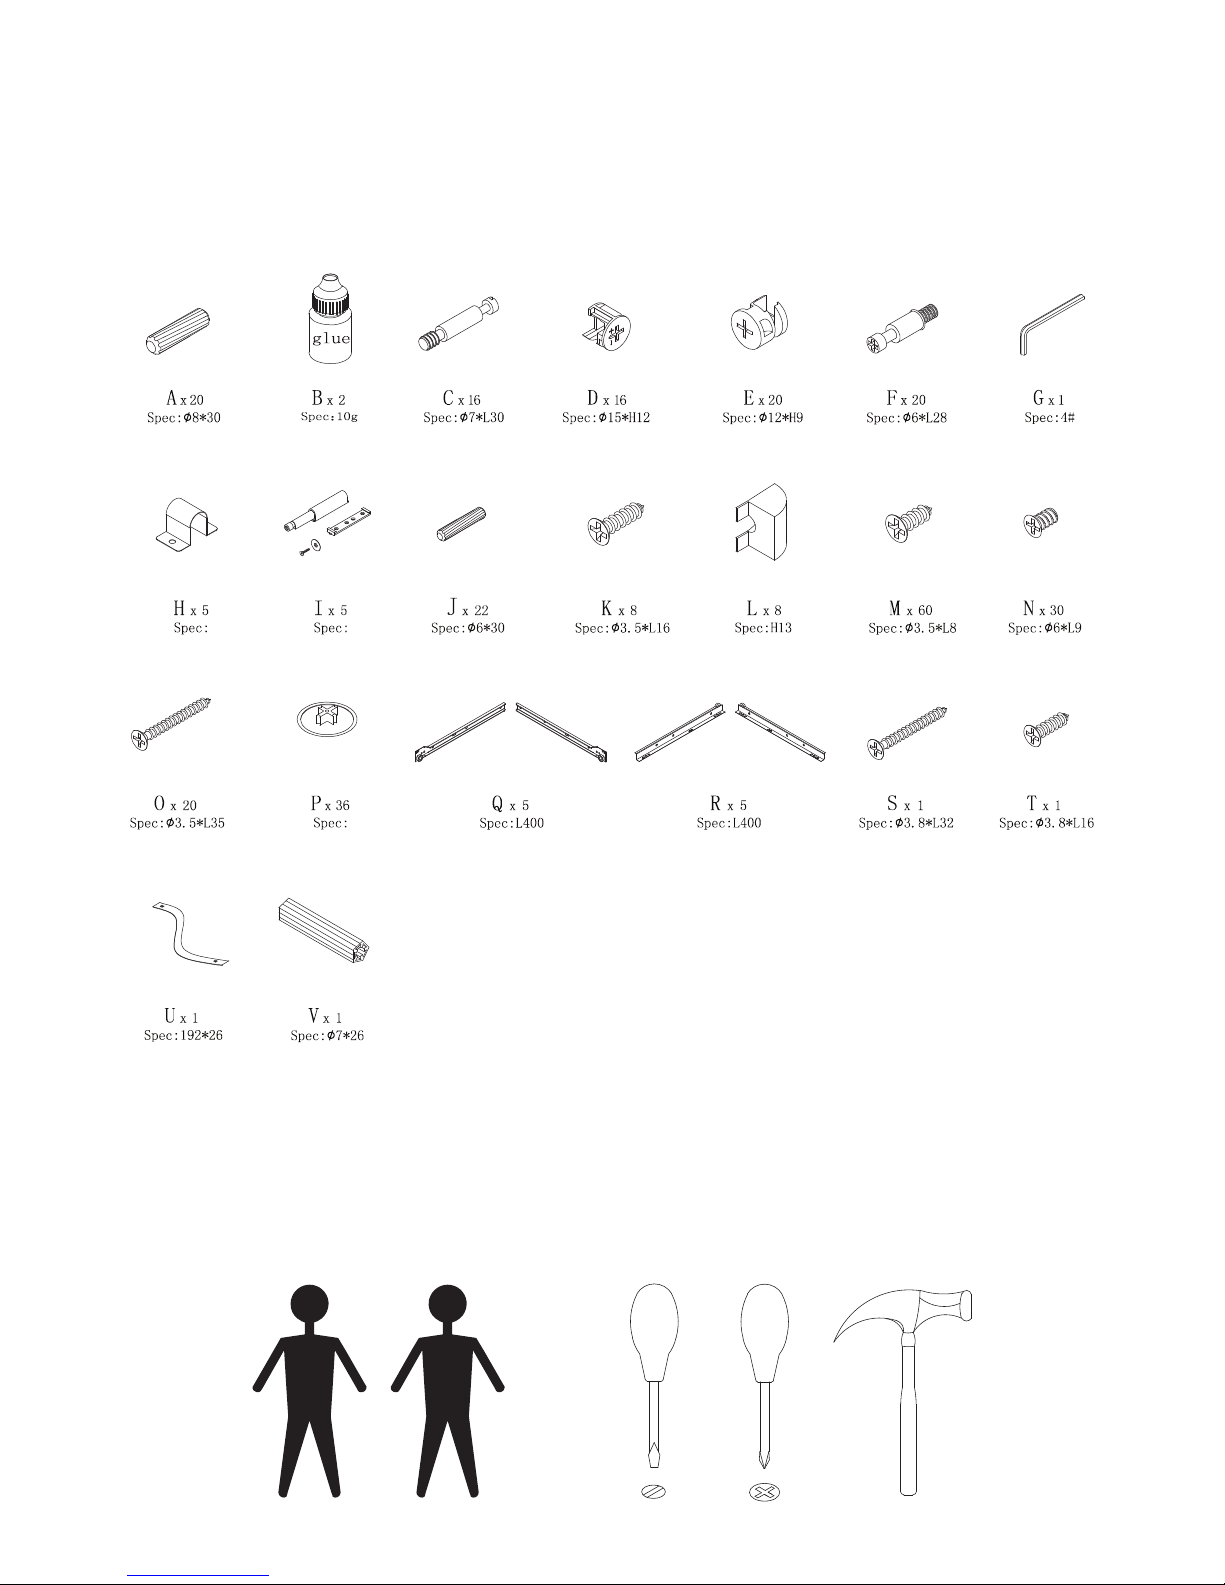
Hardware
You will need
Page 4
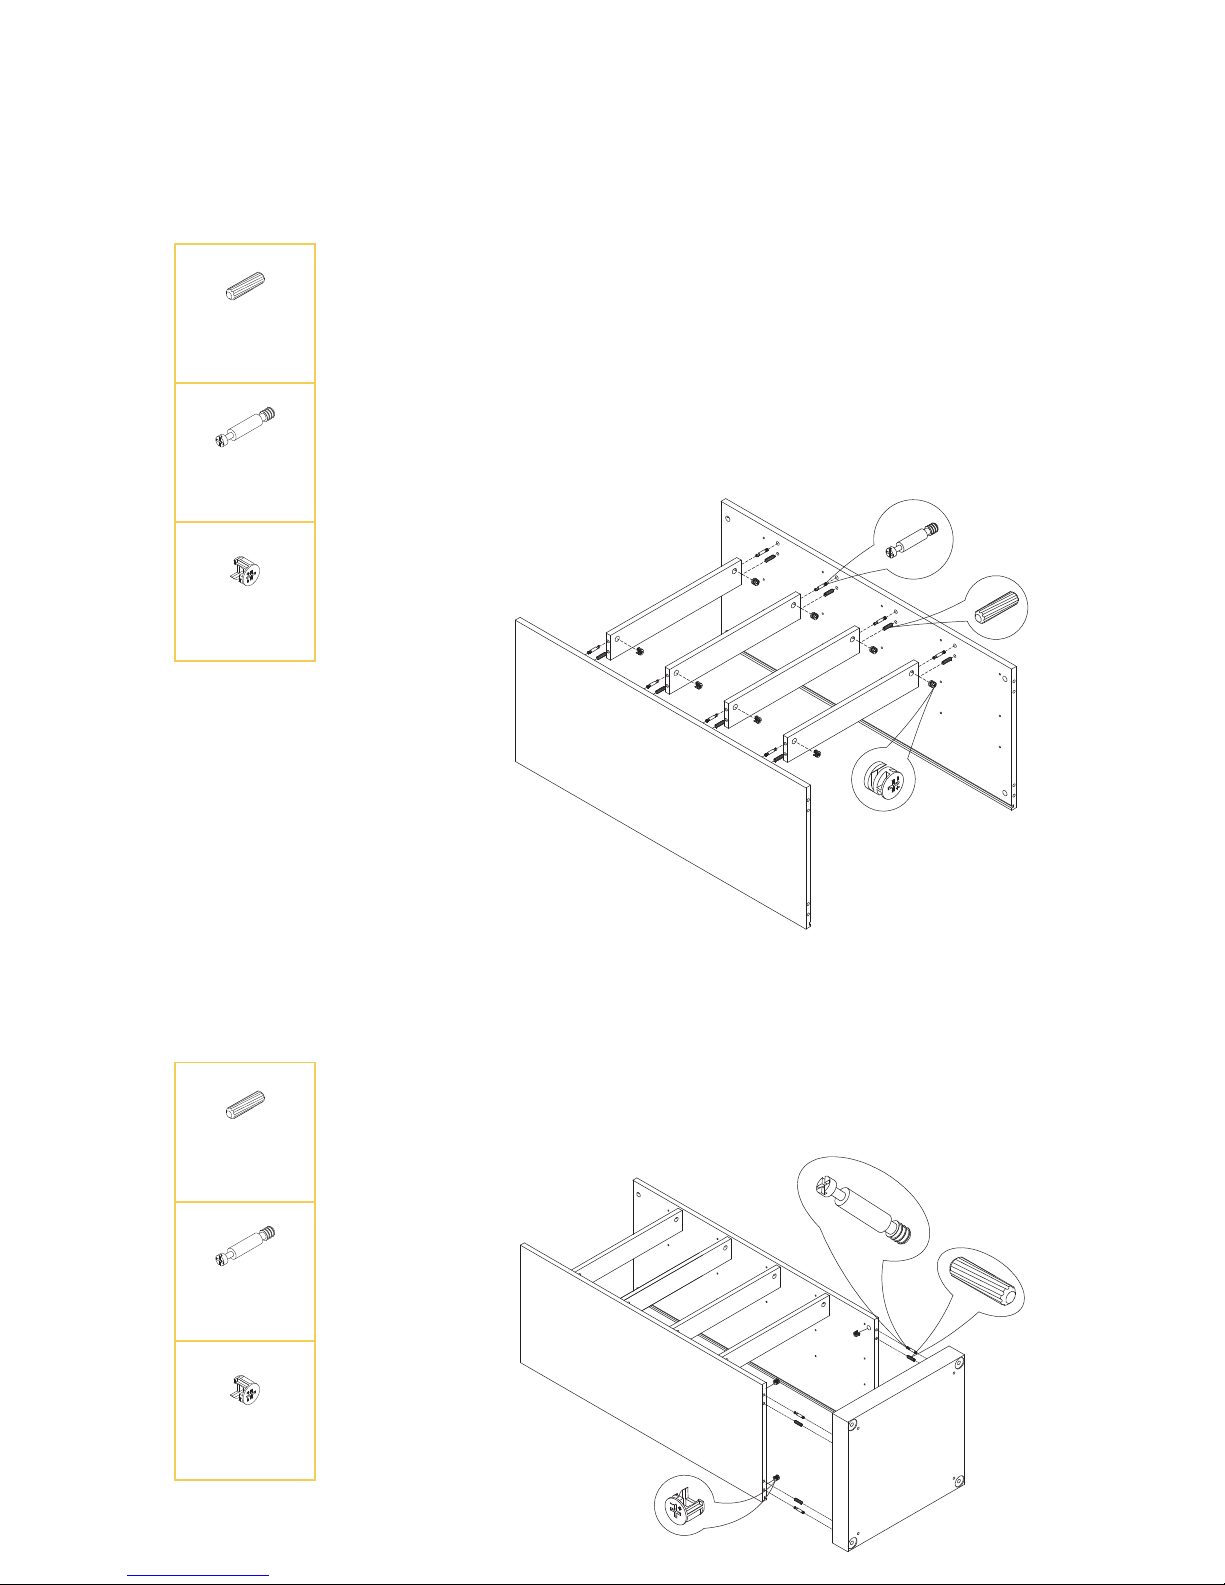
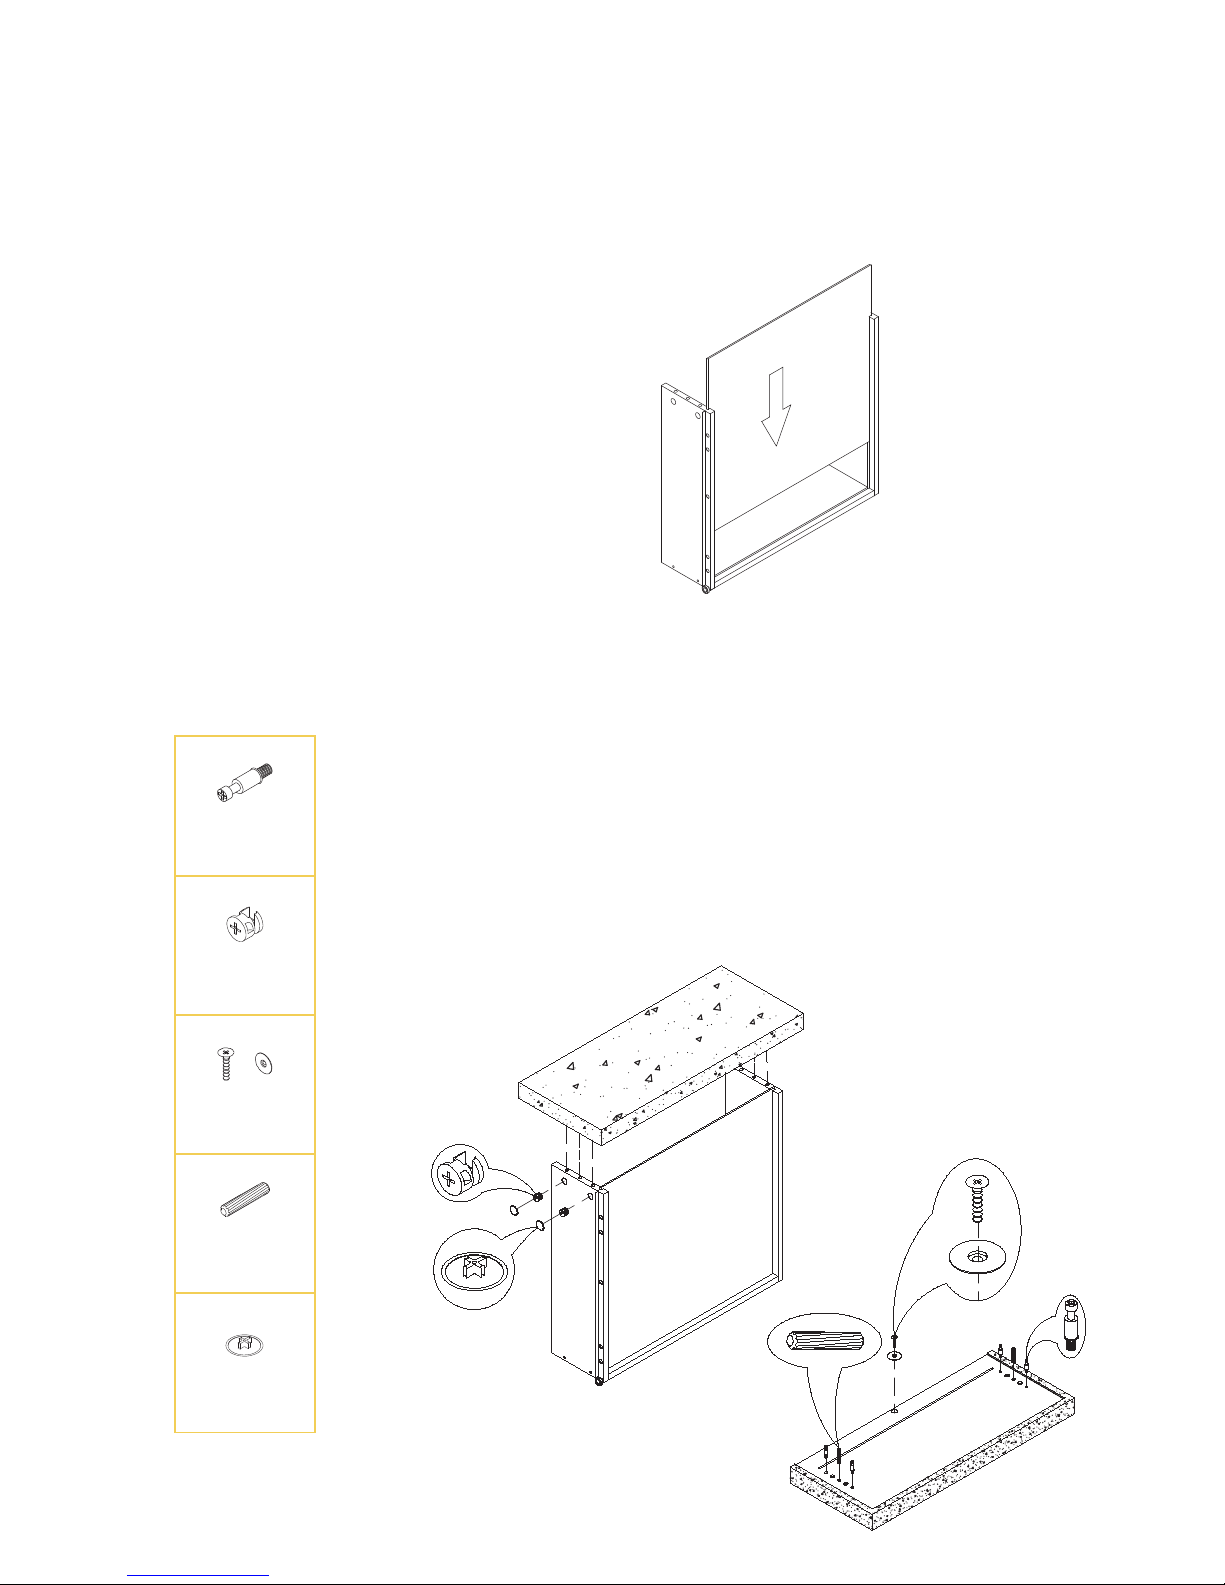
Step 1
C x 8
A x 8
D x 8
Insert a dowel (A) in the bottom hole on either side of
each support beam and a cam screw (C) in each of the
top holes on either side. Align a support beam to a side
panel and rmly press together. Insert a cam lock (D)
into the hole as shown in the diagram to secure the
support beam in place. Repeat for the remaining
support beams. Align the other side panel and rmly
press together then tting the remaining cam locks (D)
in place to secure the structure.
Step 2
C x 4
A x 4
D x 4
Insert a dowel (A) into each inner hole on the base and
a cam screw (C) in each of the outer holes. Align the
base to the structure formed in the previous step and
rmly press together. Insert a cam lock (D) into each
hole as shown in the diagram.
C
A
D
C
A
D
Page 5
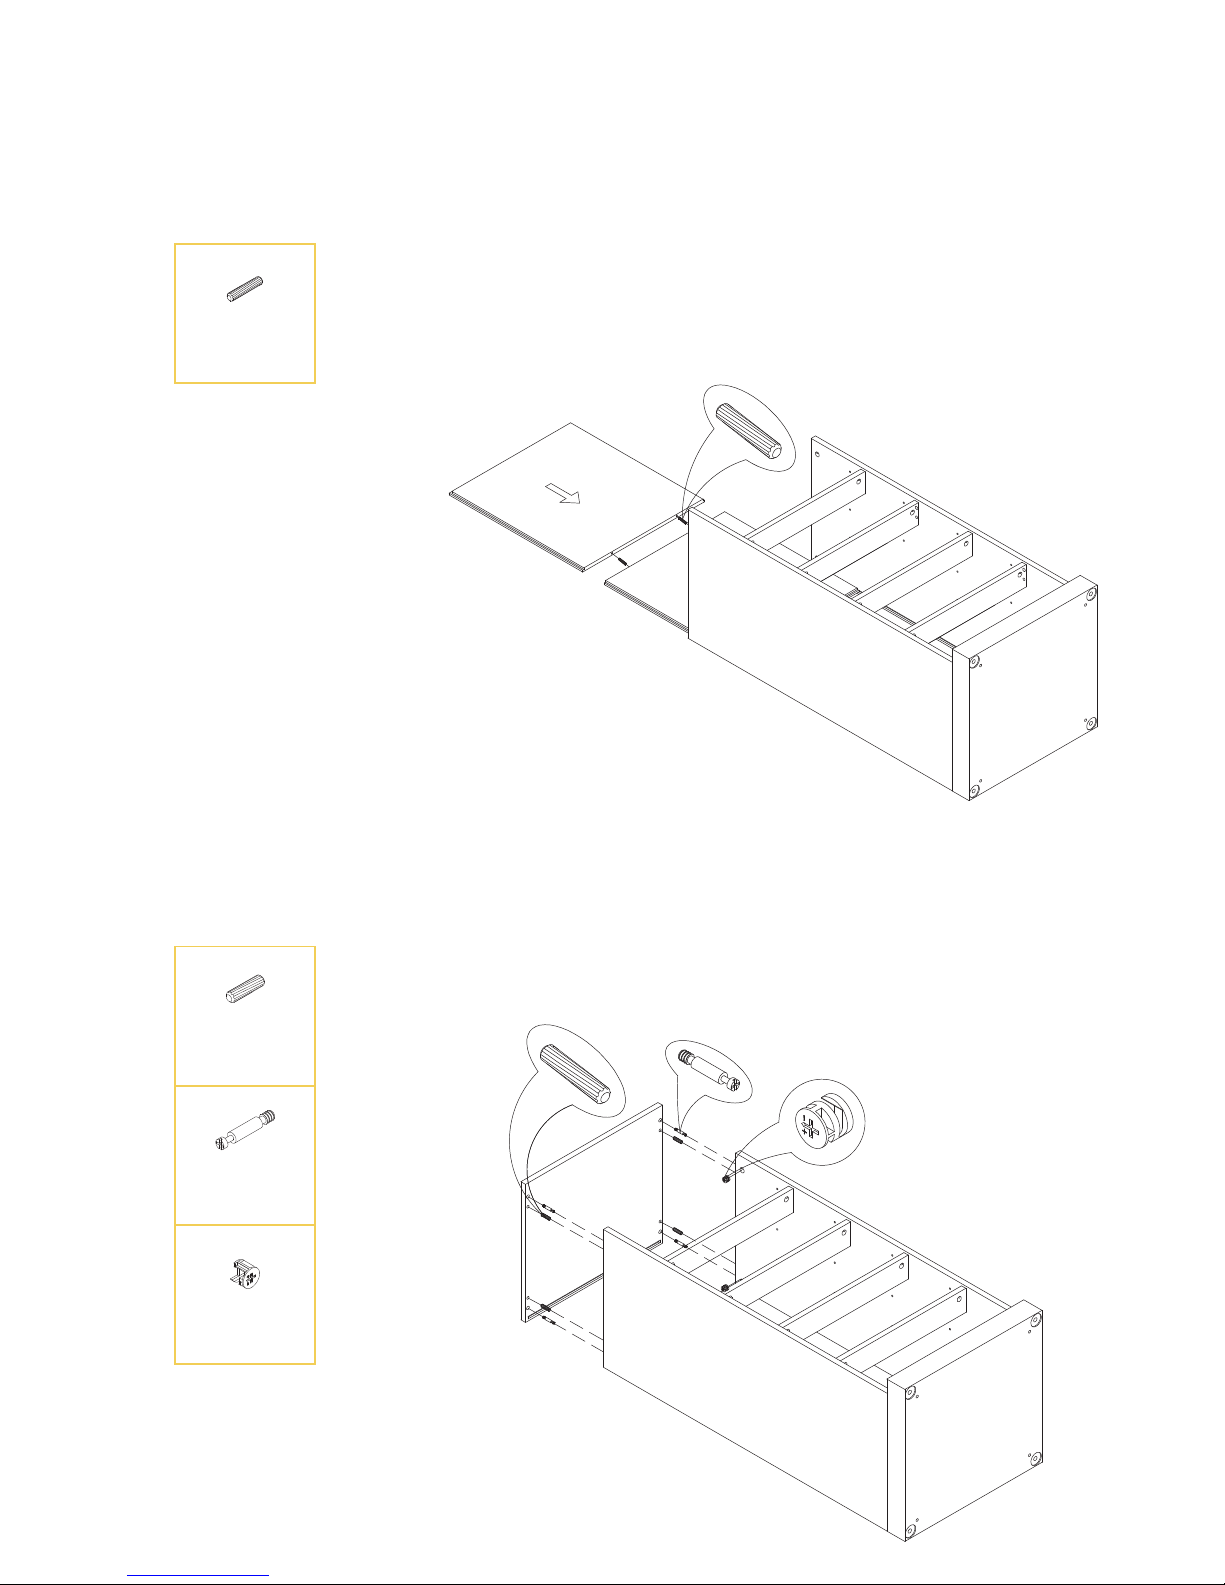
Step 3
J x 2
Align a back panel into the grooves of the side panels
making sure that the holes are facing upward and
gently slide all the way to the bottom. Insert a dowel (J)
into both holes of the back panel and then align the
second back panel and sliding it along the grooves until
it meets the rst panel. Press them rmly together.
Step 4
Insert a dowel (A) into each inner hole on the top panel
and a cam screw (C) in each of the outer holes. Align
the top panel to the structure and rmly press together.
Insert a cam lock (D) into each hole as shown.
J
A
C
D
C x 4
A x 4
D x 4
Page 6
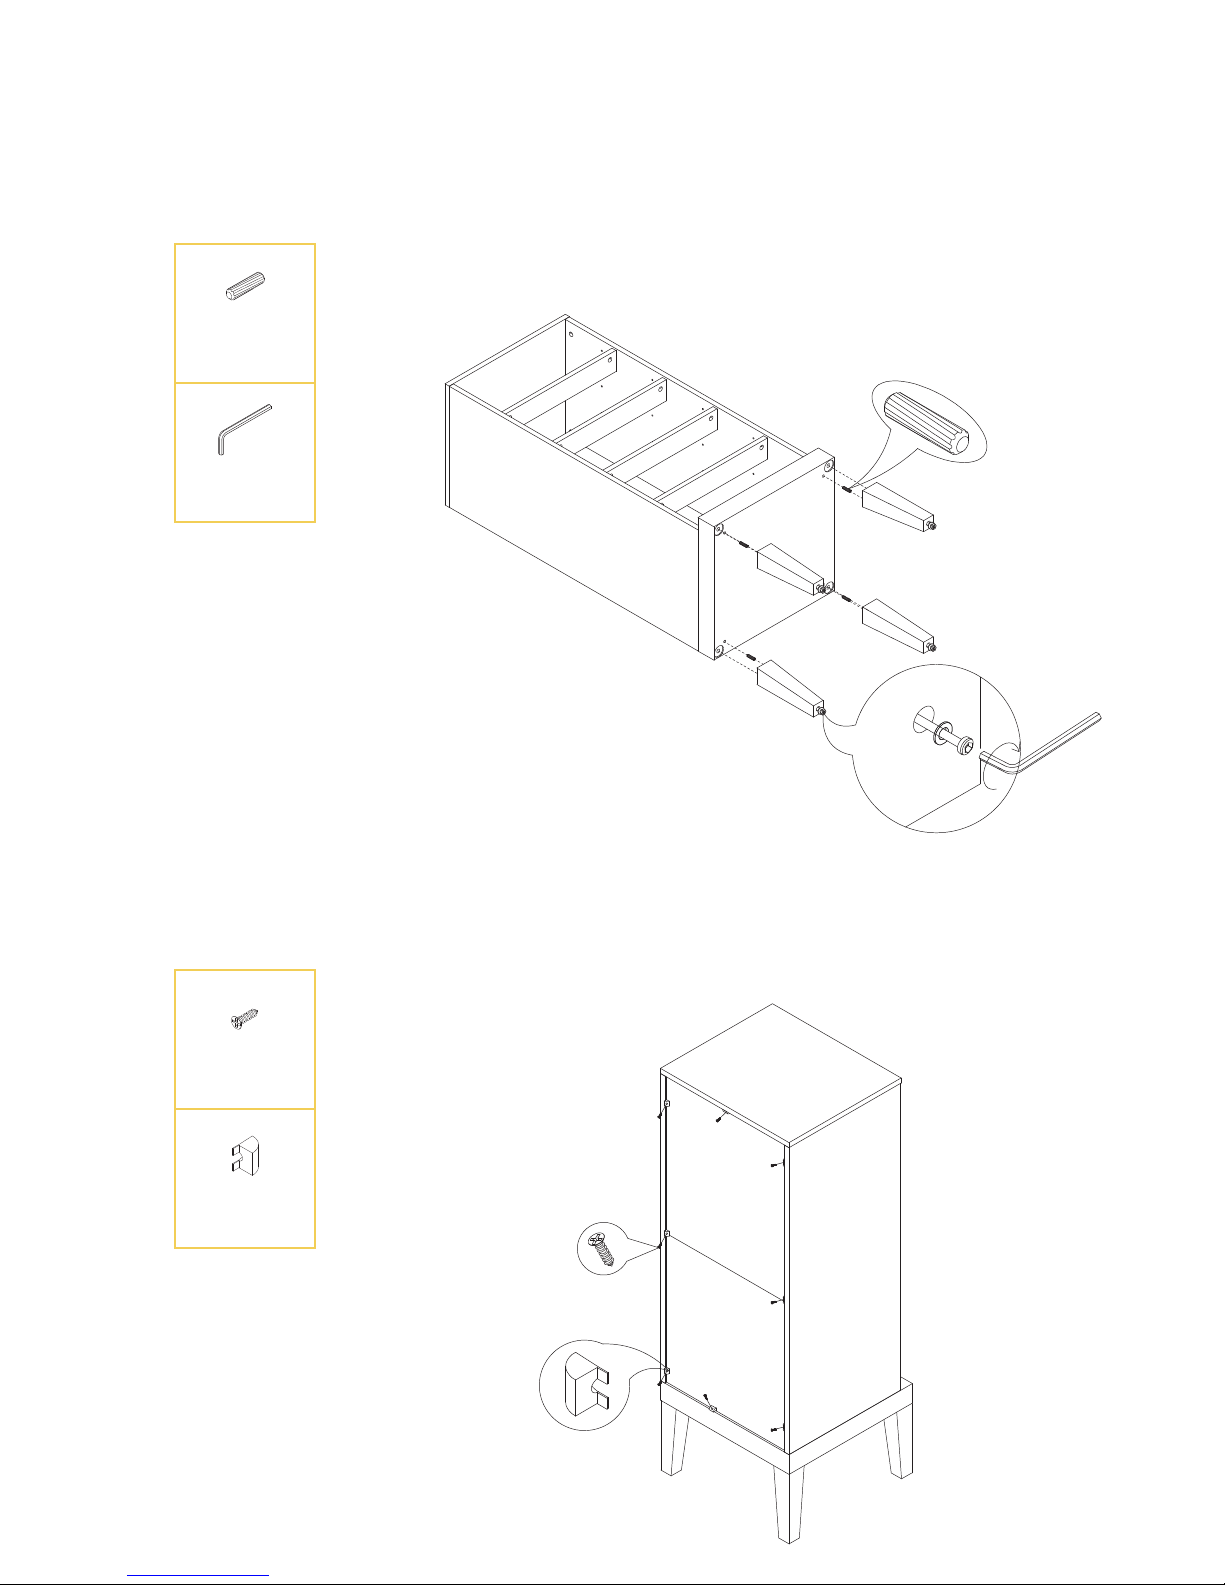
Step 5
Insert a dowel (A) into each of the four legs and one by
one align a leg to the base and rmly press into place.
Use the allen key (G) to tighten the bolts on the bottom
of each leg and to secure them to the structure.
A x 4
G x 1
Step 6
Place a stopper (L) along the side of the back of the tall
chest of drawers as shown in the diagram and then
follow it with a screw (K) to secure it into place.
K x 8
L x 8
A
G
K
L
Page 7
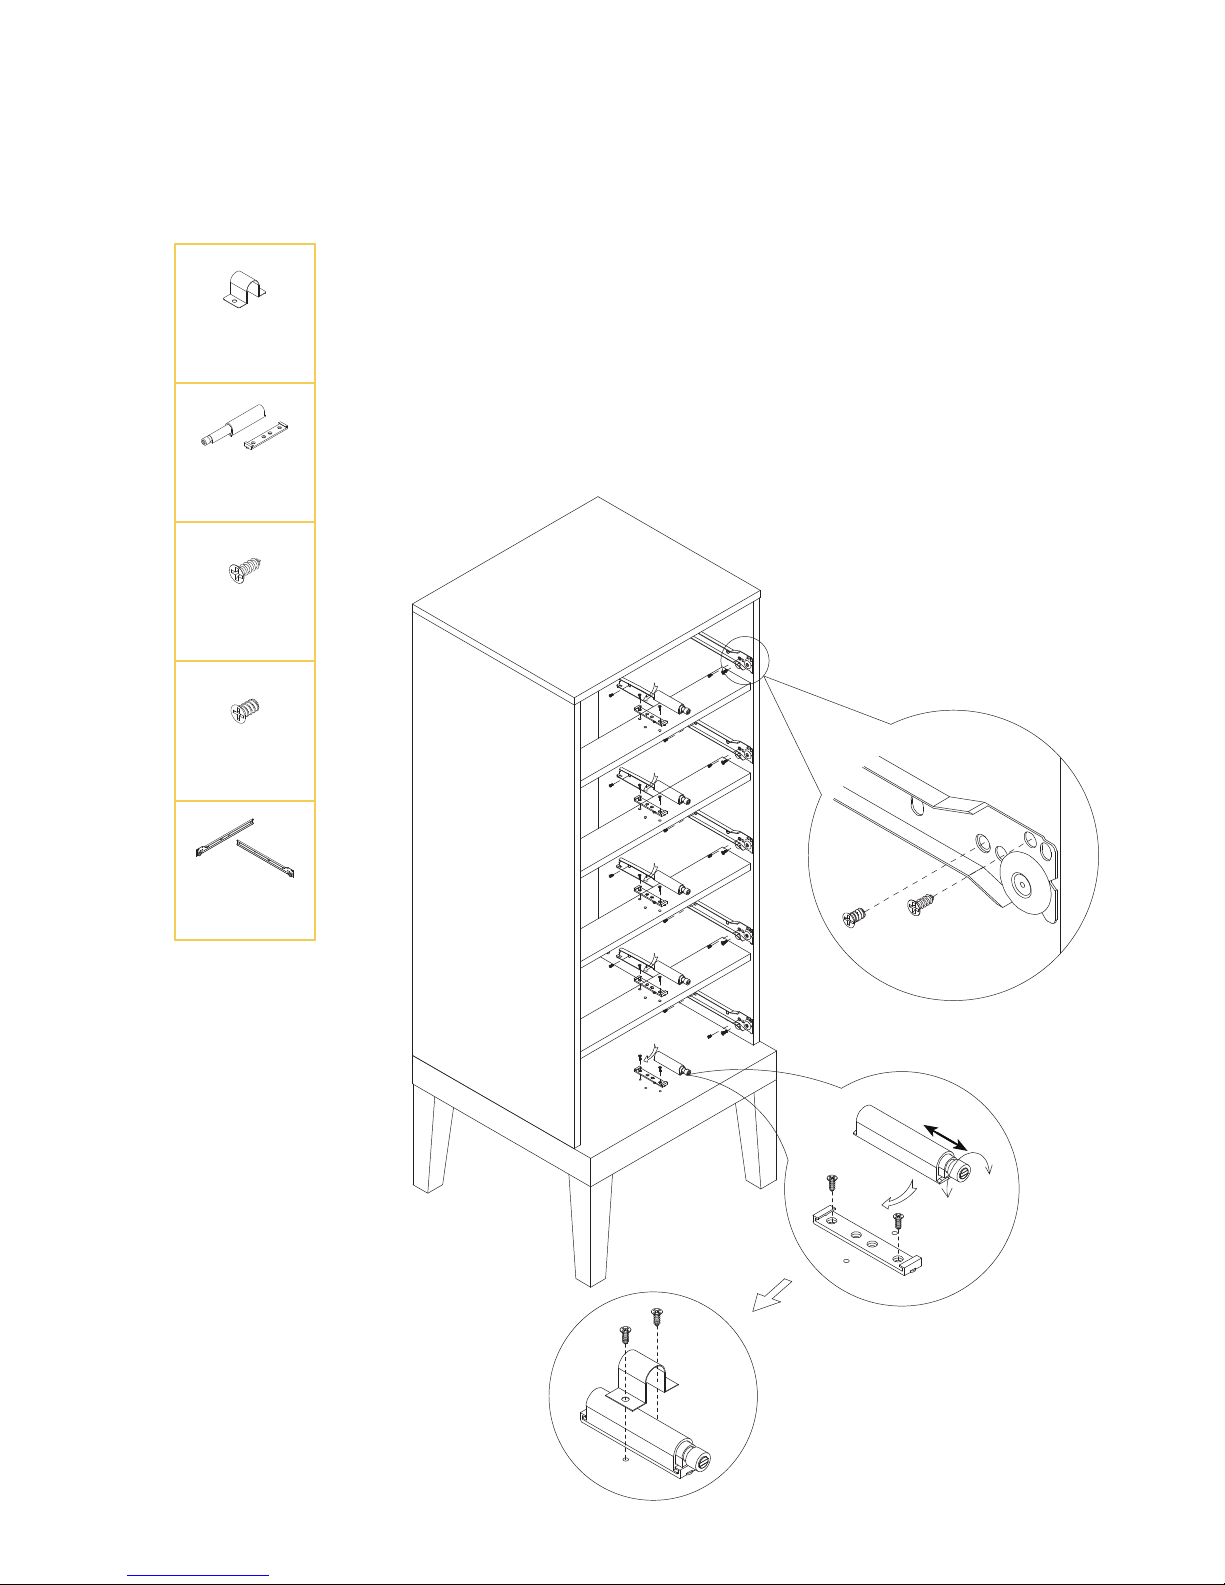
Step 7
H x 5
I x 5
M x 30
N x 30
Q x 5
7.1 Align a track (Q) at an interval and x into place
using screws (M & N). Repeat for the remaining tracks.
7.2 Align the tray from the push system (I) to its
corresponding place and x with screws (M). Clip the
push system (I) into the tray and place a xed button
over the top, securing it into place using screws (M).
Repeat the process for the remaining push systems.
Step 7.2
Step 7.1
Q
M
N
I
M
I
M
H
Page 8
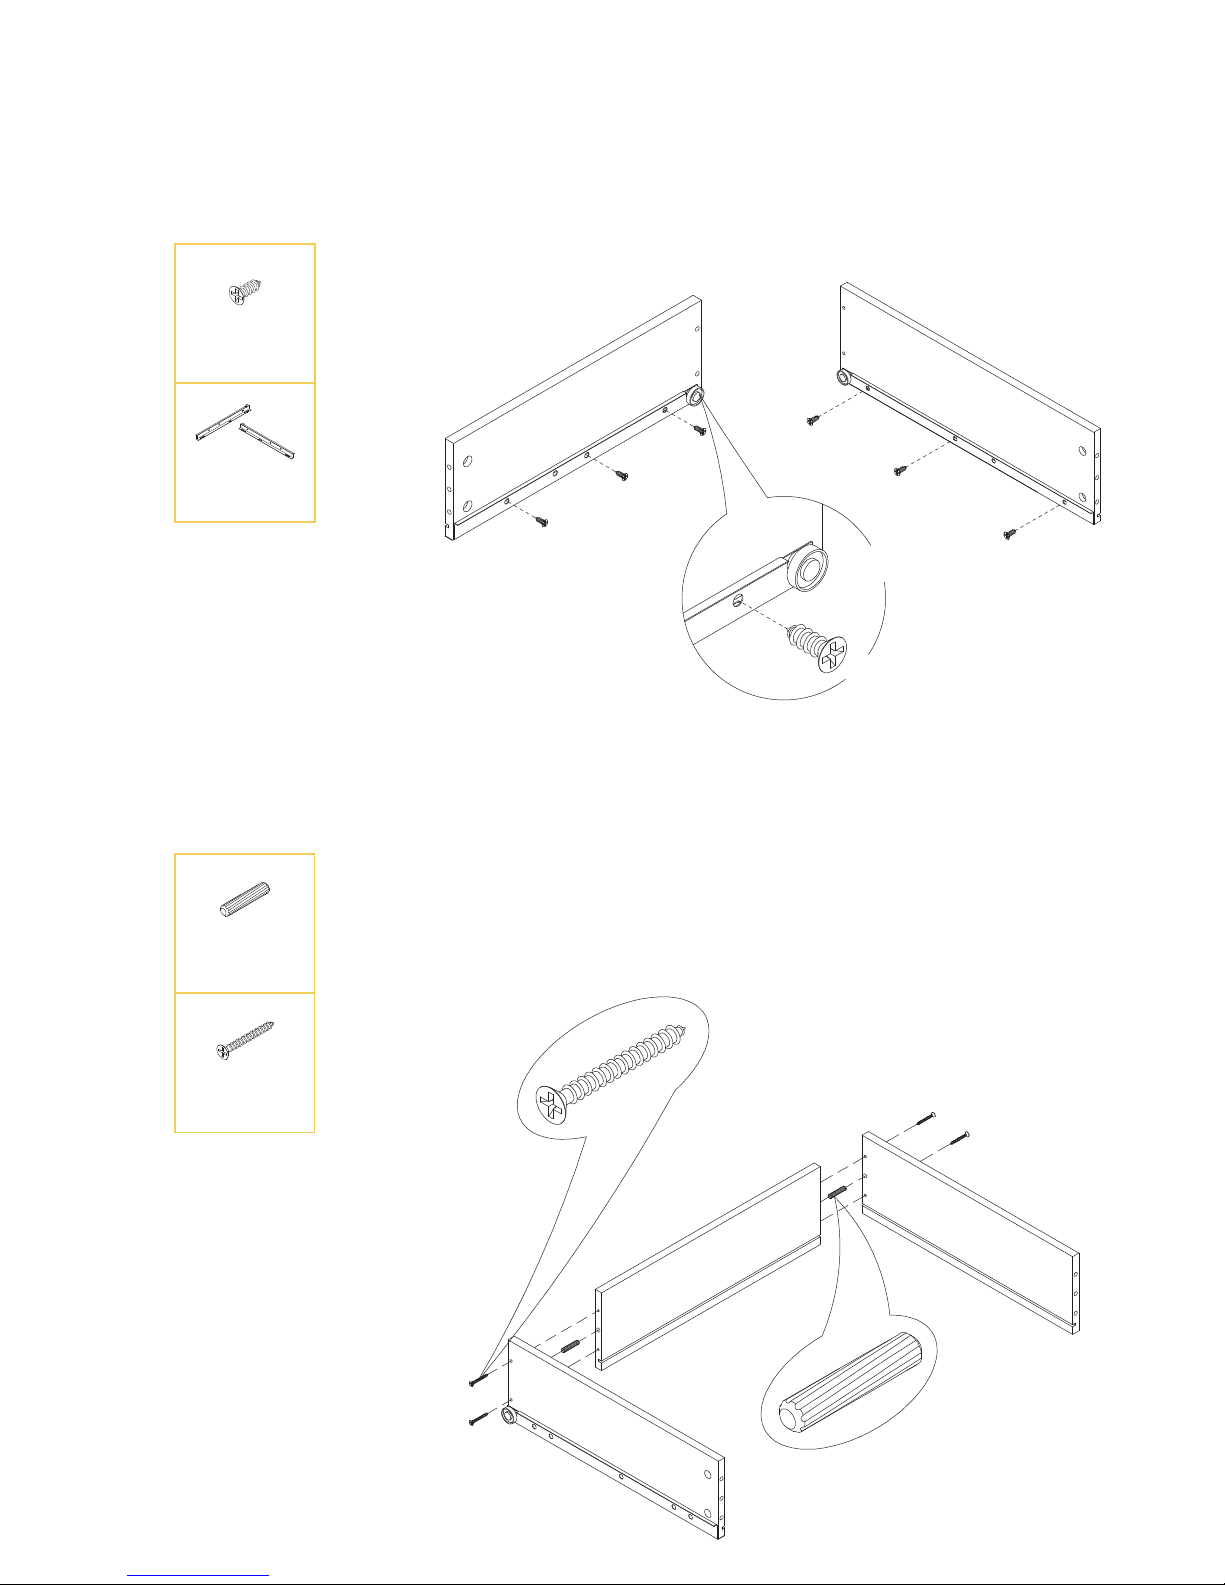
Step 8
Step 9
Insert a dowel (J) into the middle hole on either side of
the back side panel of the draw. Align the side panel to
the back and rmly press together. Insert a screw (O)
into both holes and screw tightly using a phillips head
screwdriver. Repeat for the other side panel.
Repeat process for the remaining draws.
Align a track (R) to a side panel for a draw and x into
place with screws (M). Repeat the same process for the
remaining side panels for the draws.
R
M
M x 30
R x 5
O
J
J x 10
O x 20
Page 9
Step 10
Align the base of the draw to the structure and slide
along the grooves until it reaches the end. Repeat for
the remaining draws.
Step 11
Insert a dowel (J) into the middle holes on either side
of the front panel of the draw and cam screws (F) in
the four outer holes. Fit a washer (I) to a screw (I) and
screw it into the middle hole on the front panel. Align
the front panel to the structure and press rmly
together. Insert cam locks (E) in each of the holes along
the outside of the structure and then cover them with
plastic caps (P). Repeat the for the remaining draws.
I x 5
P x 20
F x 20
E x 20
J x 10
F
I
P
E
Page 10
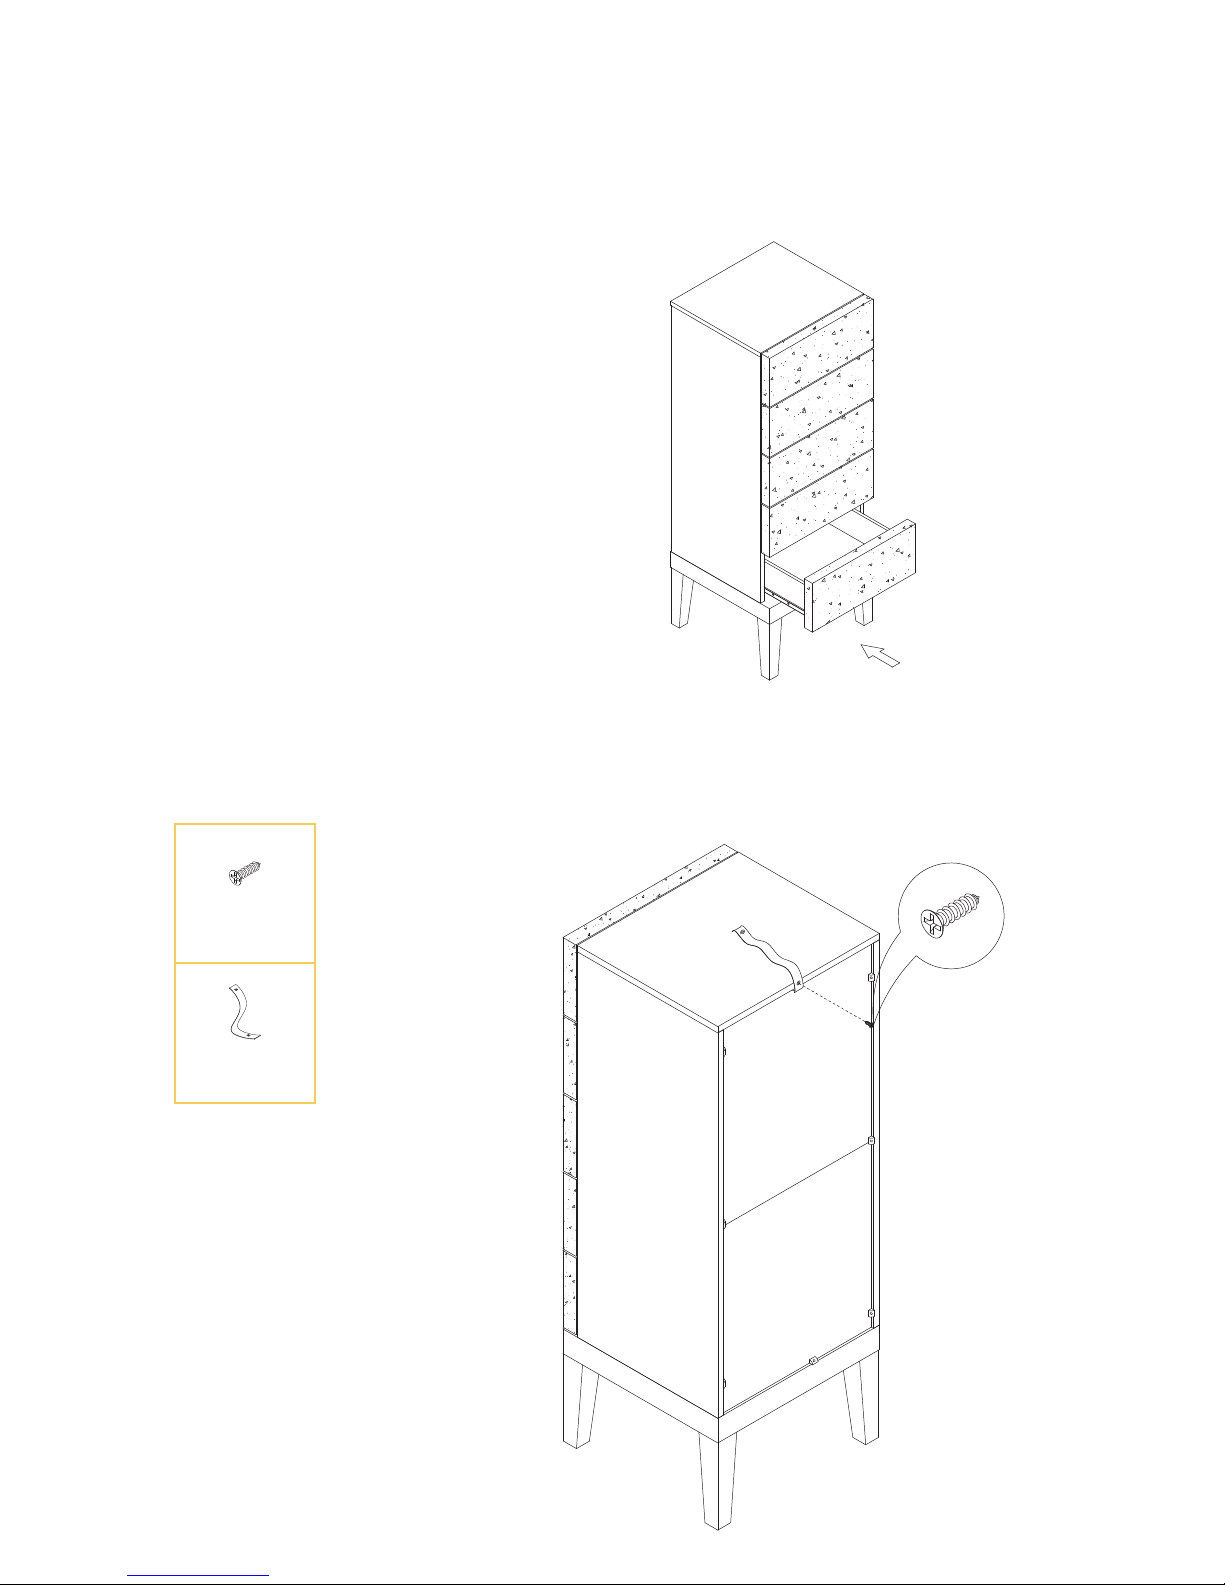
Step 12
Insert the draws into the body of the tall chest of
drawers one by one.
Step 13
Align the strap (U) to the back of the dresser and use a
screw (T) to secure into place.
U
T
T x 1
U x 1
Page 11
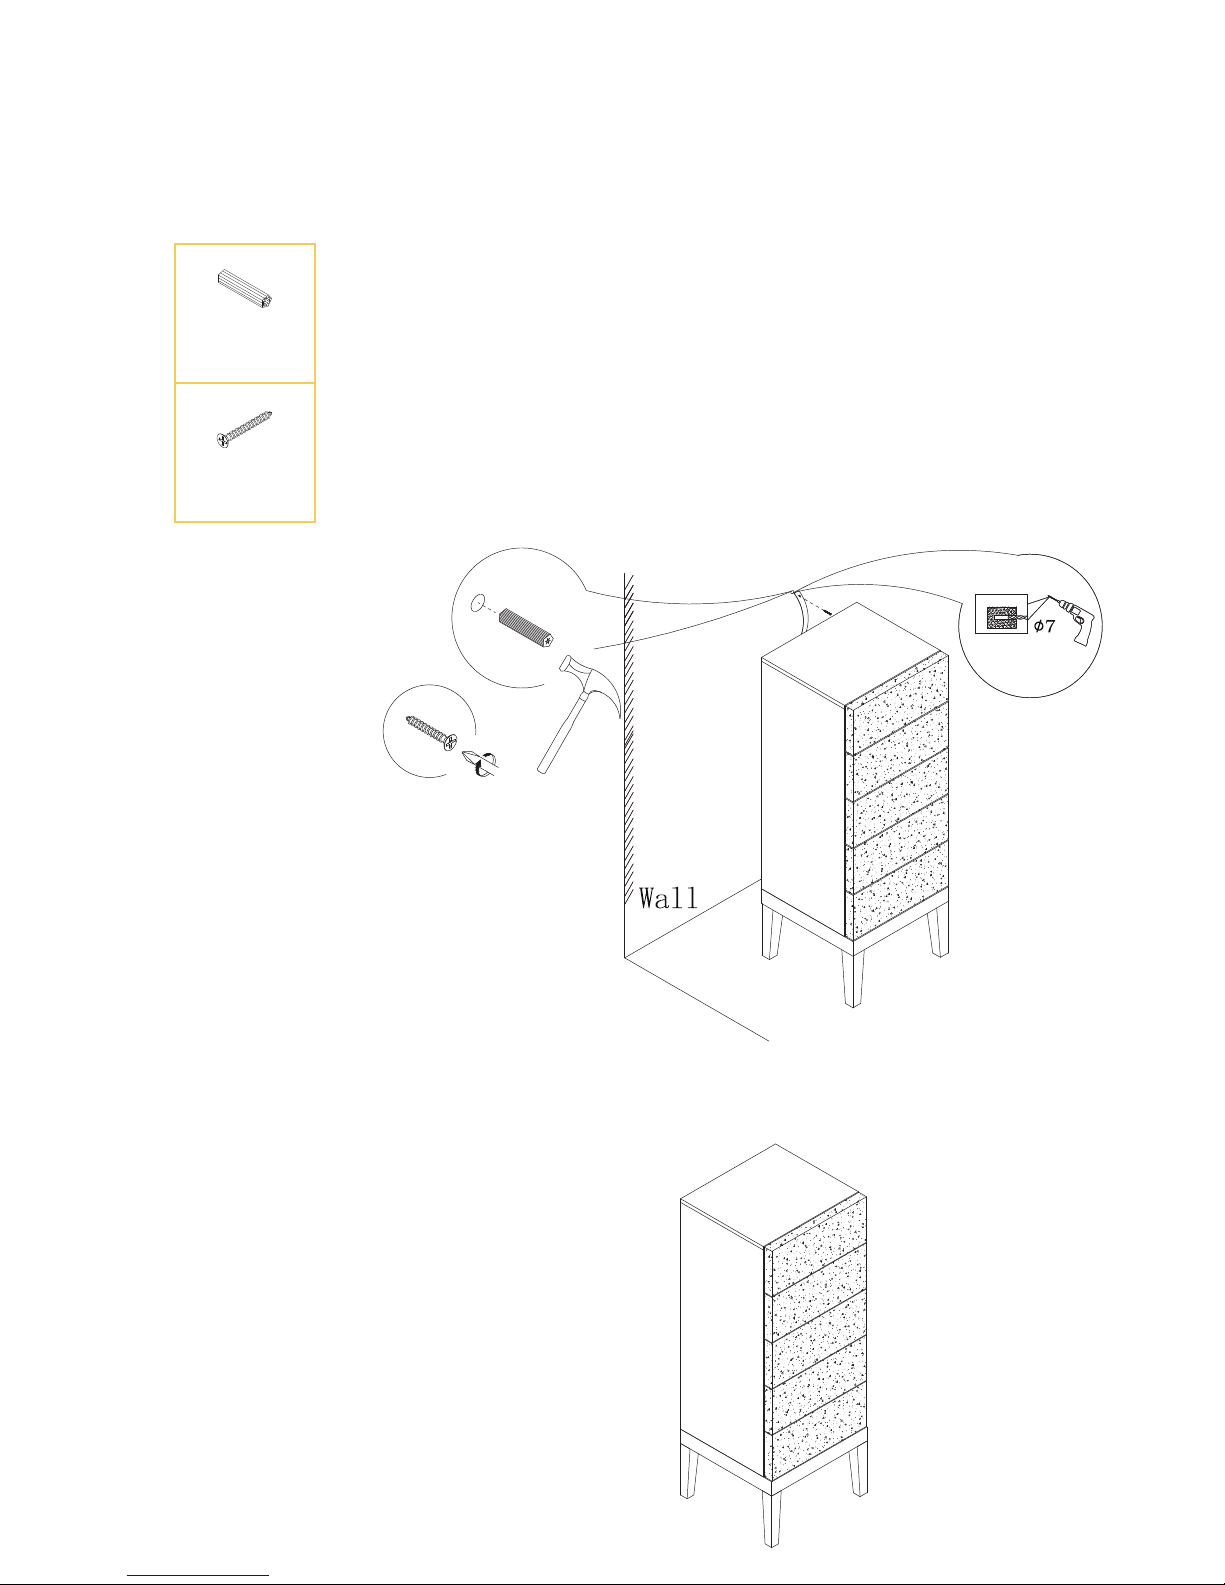
Step 14
14.1 At the location where the tall chest of drawers will
be placed, mark out the hole along the wall where you’ll
secure the strap. With a 7mm drill bit, drill the holes.
Warning: check the wall for hidden pipes and cables
before drilling any holes.
14.2 Insert an expansion bolt (V) into the wall by
hammering it gently into place followed by the screws
(S) to secure the straps to the wall.
Step 15
Enjoy your new tall chest of drawers!
V
S
V x 1
S x 1
Step 14.1
Step 14.2
 Loading...