

DPA51 HEAVY DUTY
STANDARD ROTISSERIE
INSTALLATION AND OPERATION INSTRUCTIONS
ABOUT ROTISSERIE COOKING
Because it rotates slowly over fire, lean meat or fowl cooked on a rotisserie requires less attention and
achieves an excellent flavor and appetizing appearance. Direct heat rotisserie cooking over a single burner
or side of a twin burner being fired is usually done at a low or medium burner setting.
The twin burner featured in some models allows indirect rotisserie cooking. The cooking grids must be
removed when using the rotisserie. Turn on one side of the burner and load the meat on the spit rod so that
it will rotate over the unfired side of the burner. Great barbeque flavor is still imparted into whatever food is
prepared yet even less attention is required during cooking. (After indirect cooking is completed, it is
suggested that the unfired side of the burner be lit for several minutes to burn off any droppings.)
CAUTION: Use protective gloves and care to protect you or your family from burns. Do not leave the
rotisserie unit unattended.
WARNING: Do not expose rotisserie to weather elements.
WARNING: Electrical Grounding Instructions
This appliance is equipped with a three-prong (grounding) plug for your protection against shock hazzard and
should be plugged directly into a properly grounded three-prong receptacle. Do not cut or remove the
grounding prong from this plug.
KEEP THIS OWNER’S MANUAL FOR FUTURE REFERENCE.
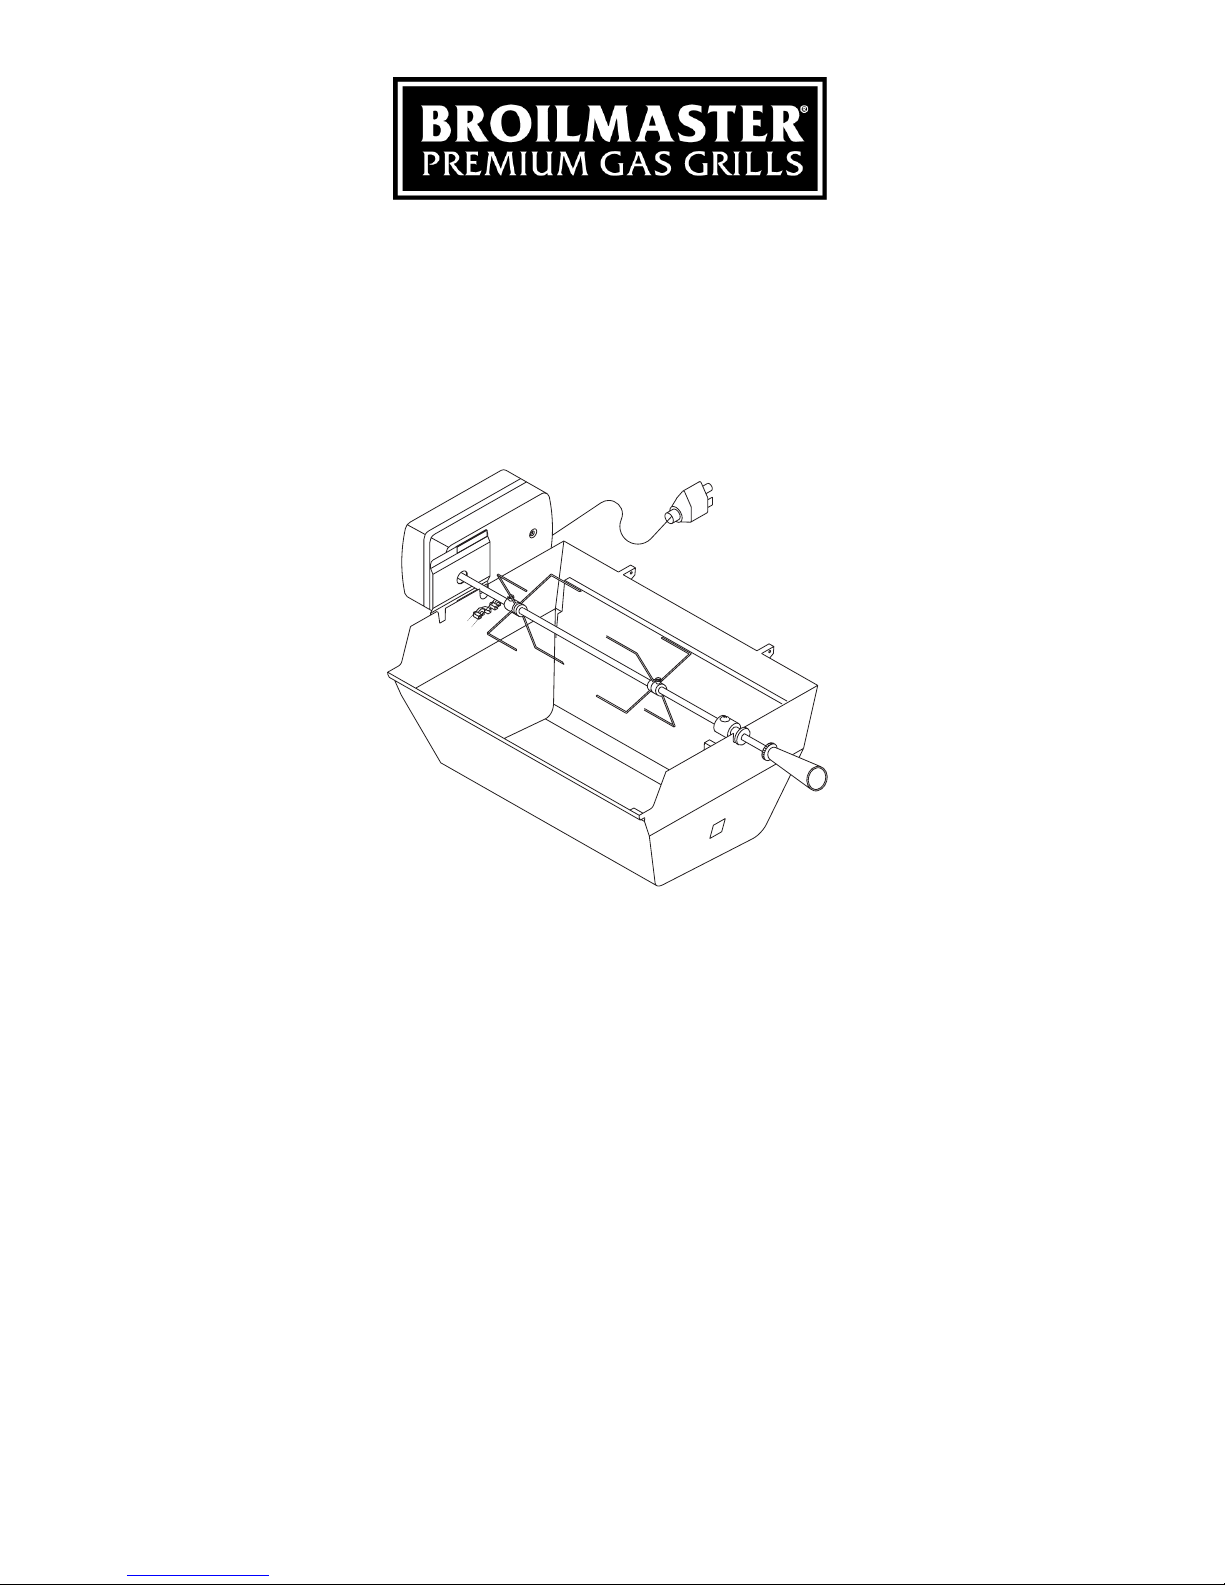
ROTISSERIE INSTALLATION 2
The optional rotisserie consists of the motor, spit
rod, meat holders, motor bracket, spit rod locator
sleeve and hardware.
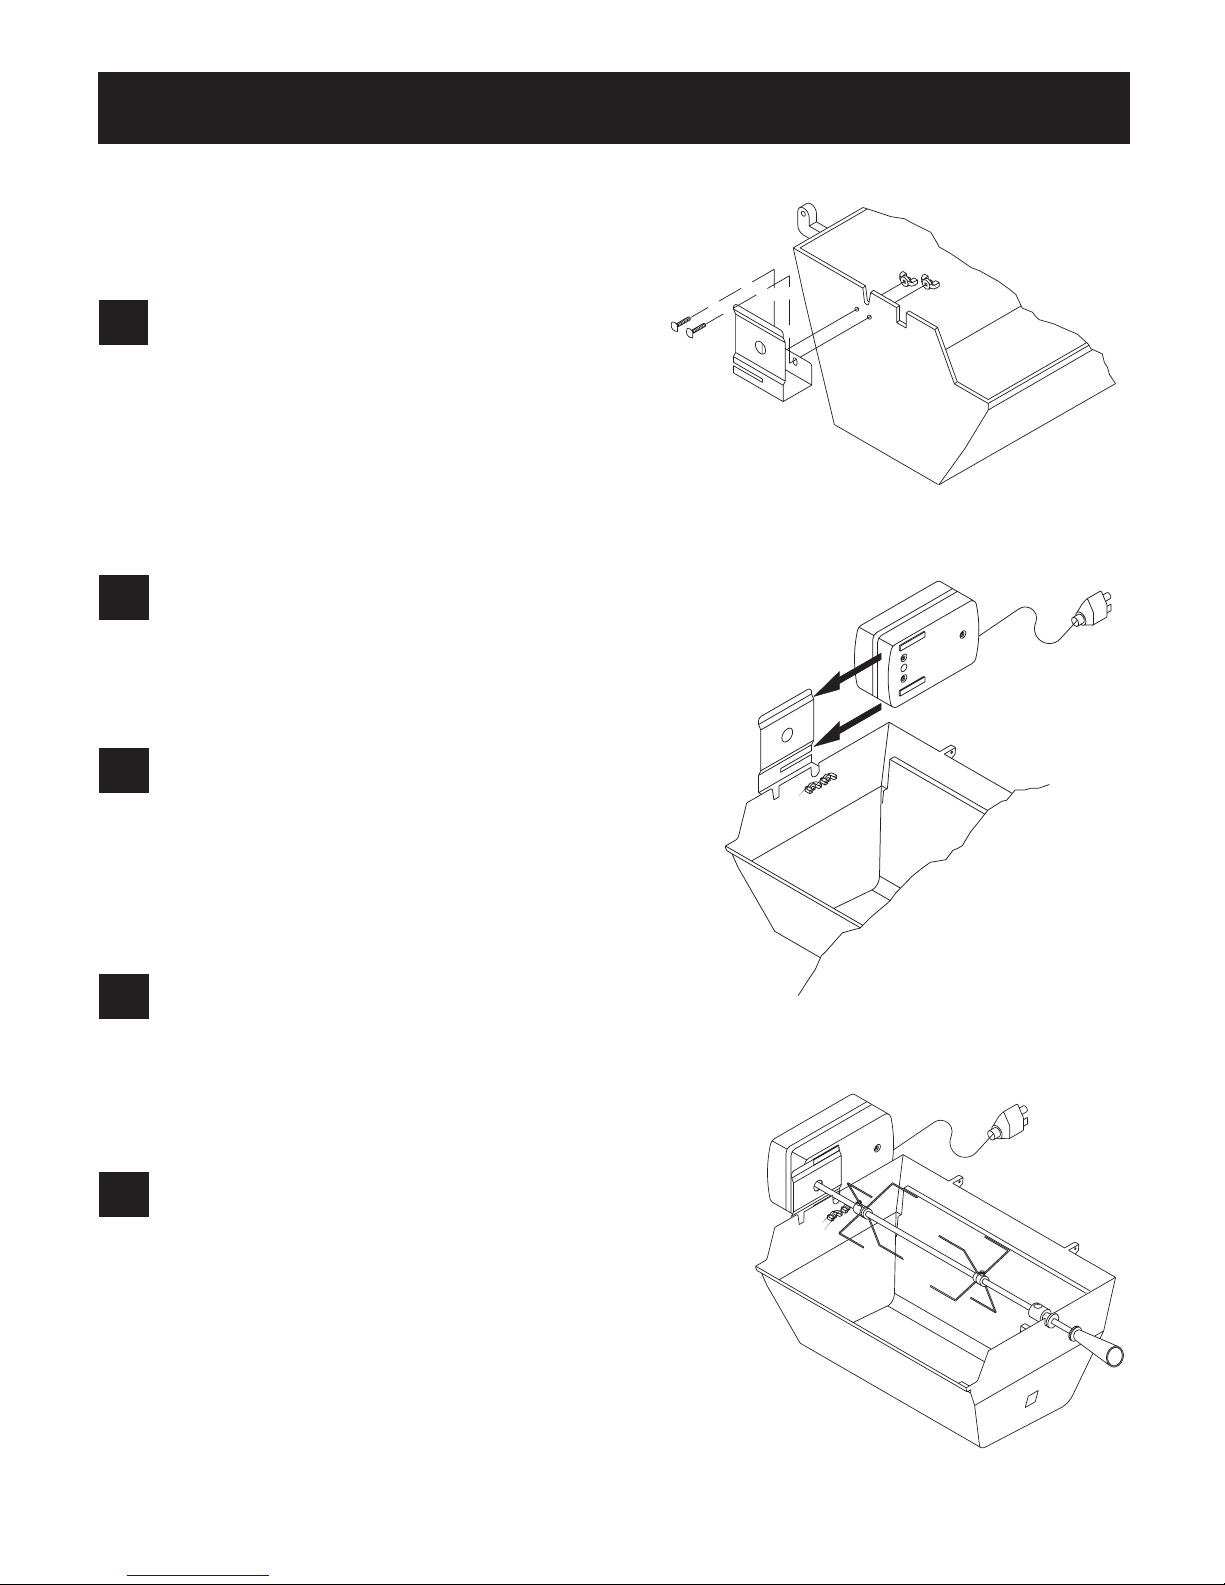
1
Fasten the motor bracket (3) to the left side of the
grill with two 10-24 x ˚ screws (2), and two 10-24
wing nuts (5). FIGURE 1.
2
FIGURE 1
Slide motor into position on motor bracket. F
2.
IGURE
3
If separated, tightly fasten handle and thumb nut (7)
onto threaded end of spit rod (8). Slide locator
sleeve (9) on spit rod with set screw on inside of
grill. Slide meat holders on spit rod and insert spit
rod into rotisserie motor. F
IGURE 3.
4
Slide locator sleeve (9) on spit rod until sleeve rests
in slot on right side of grill.
5
FIGURE 2
FIGURE 3
Tighten screw in locator sleeve.
 Loading...