

Broil King 955050 OWNER'S MANUAL
OWNER'S MANUAL
FOR USE WITH
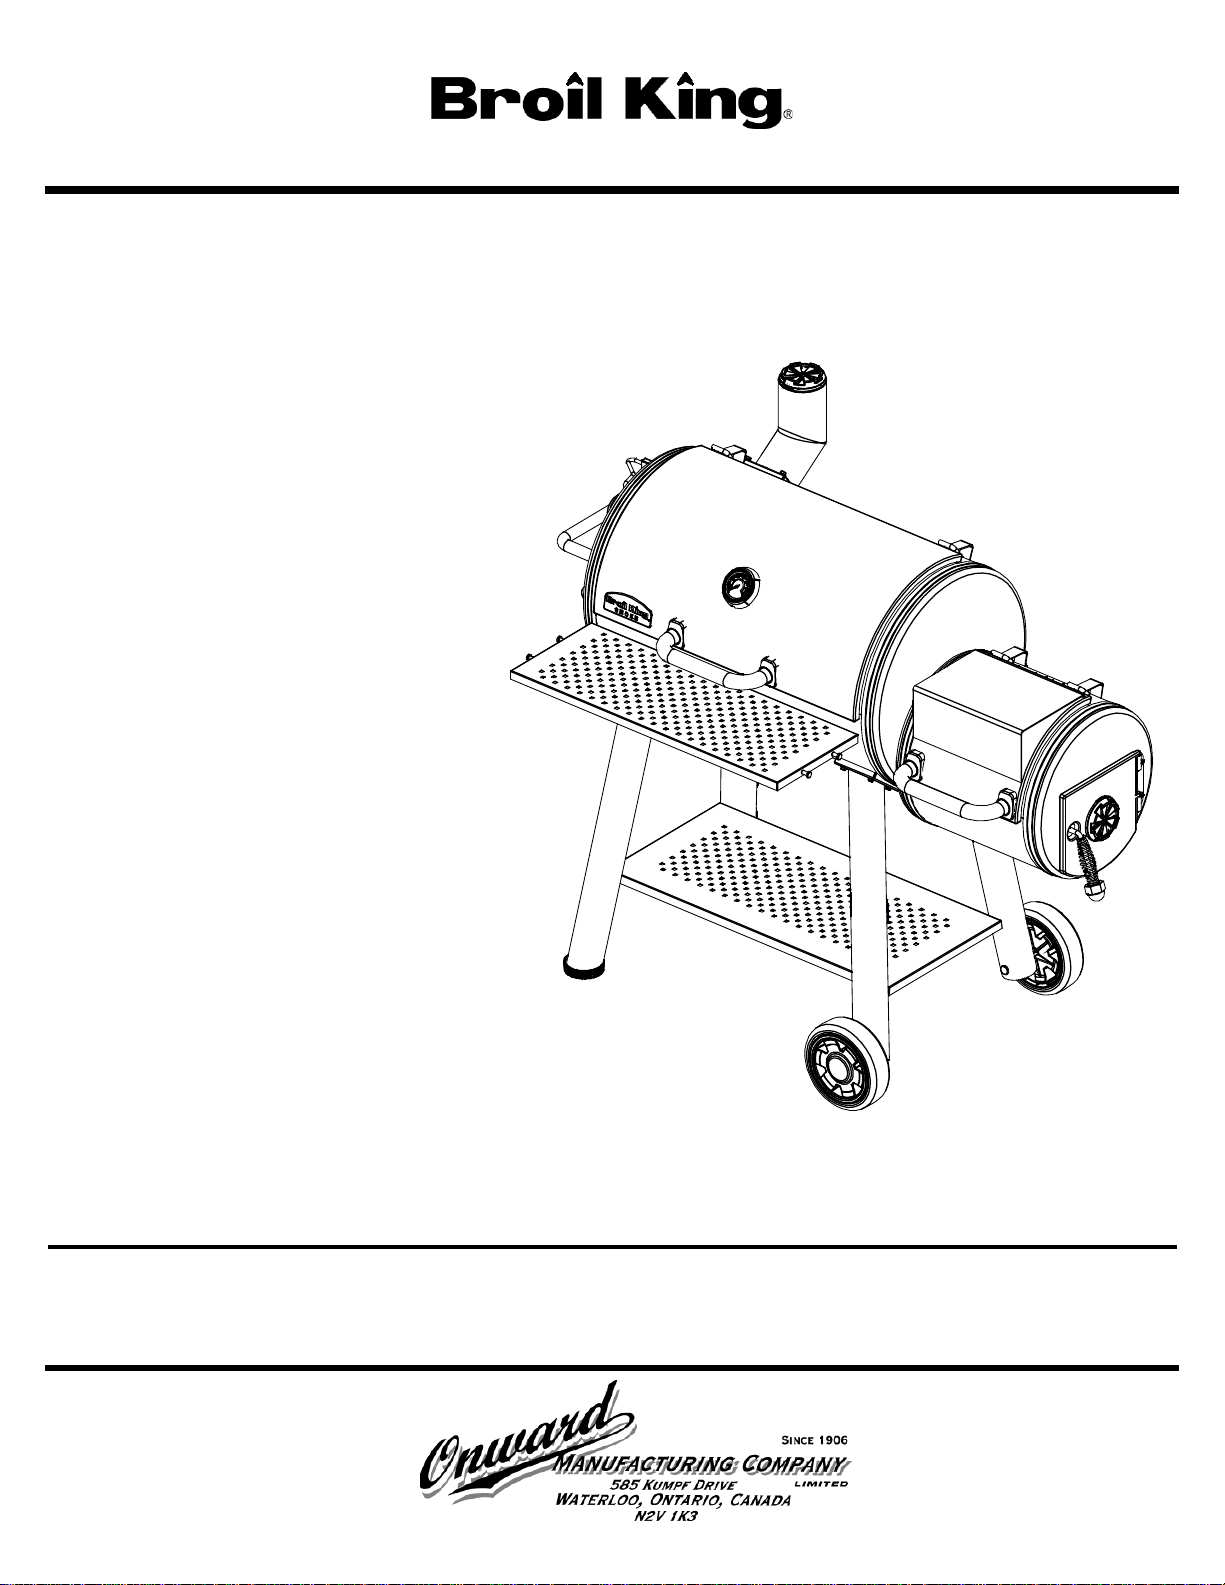
Broil King® Smoke™ Offset Smoker
CONTENTS
INTRODUCTION ............................................... 2
SAFETY ............................................................. 2
SMOKER PARTS .............................................. 3
CHARCOAL ...................................................... 4
GETTING STARTED ......................................... 4
LIGHTING .......................................................... 5
OPERATION ..................................................... 6
MAINTENANCE ................................................ 8
RECIPES ........................................................... 9
WARRANTY .................................................... 10
GUIDE DE L’UTILISATEUR ........................... 11
MANUAL DEL USUARIO ............................... 21
This instruction manual contains important information necessary for the proper assembly and
safe use of the appliance. Read and follow all warnings and instructions before assembling and
using the appliance. Follow all warnings and instructions when using the appliance.
Keep this manual for future reference.
1-800-265-2150
info@omcbbq.com
40094-E20 REV A 04/17
INTRODUCTION SAFETY
BROIL KING® SMOKE™ OFFSET SMOKER
The Broil King® Smoke™ Offset Smoker is designed to
create mouth-watering, authentic smoke flavored foods.
Every detail of this smoker has been precisely engineered;
this attention to detail is evident throughout the offset
smoker. From durable construction and stylish accents to
exceptional cooking versatility, Broil King® brings it
altogether. Great food, great flavor, great barbecues every
time.
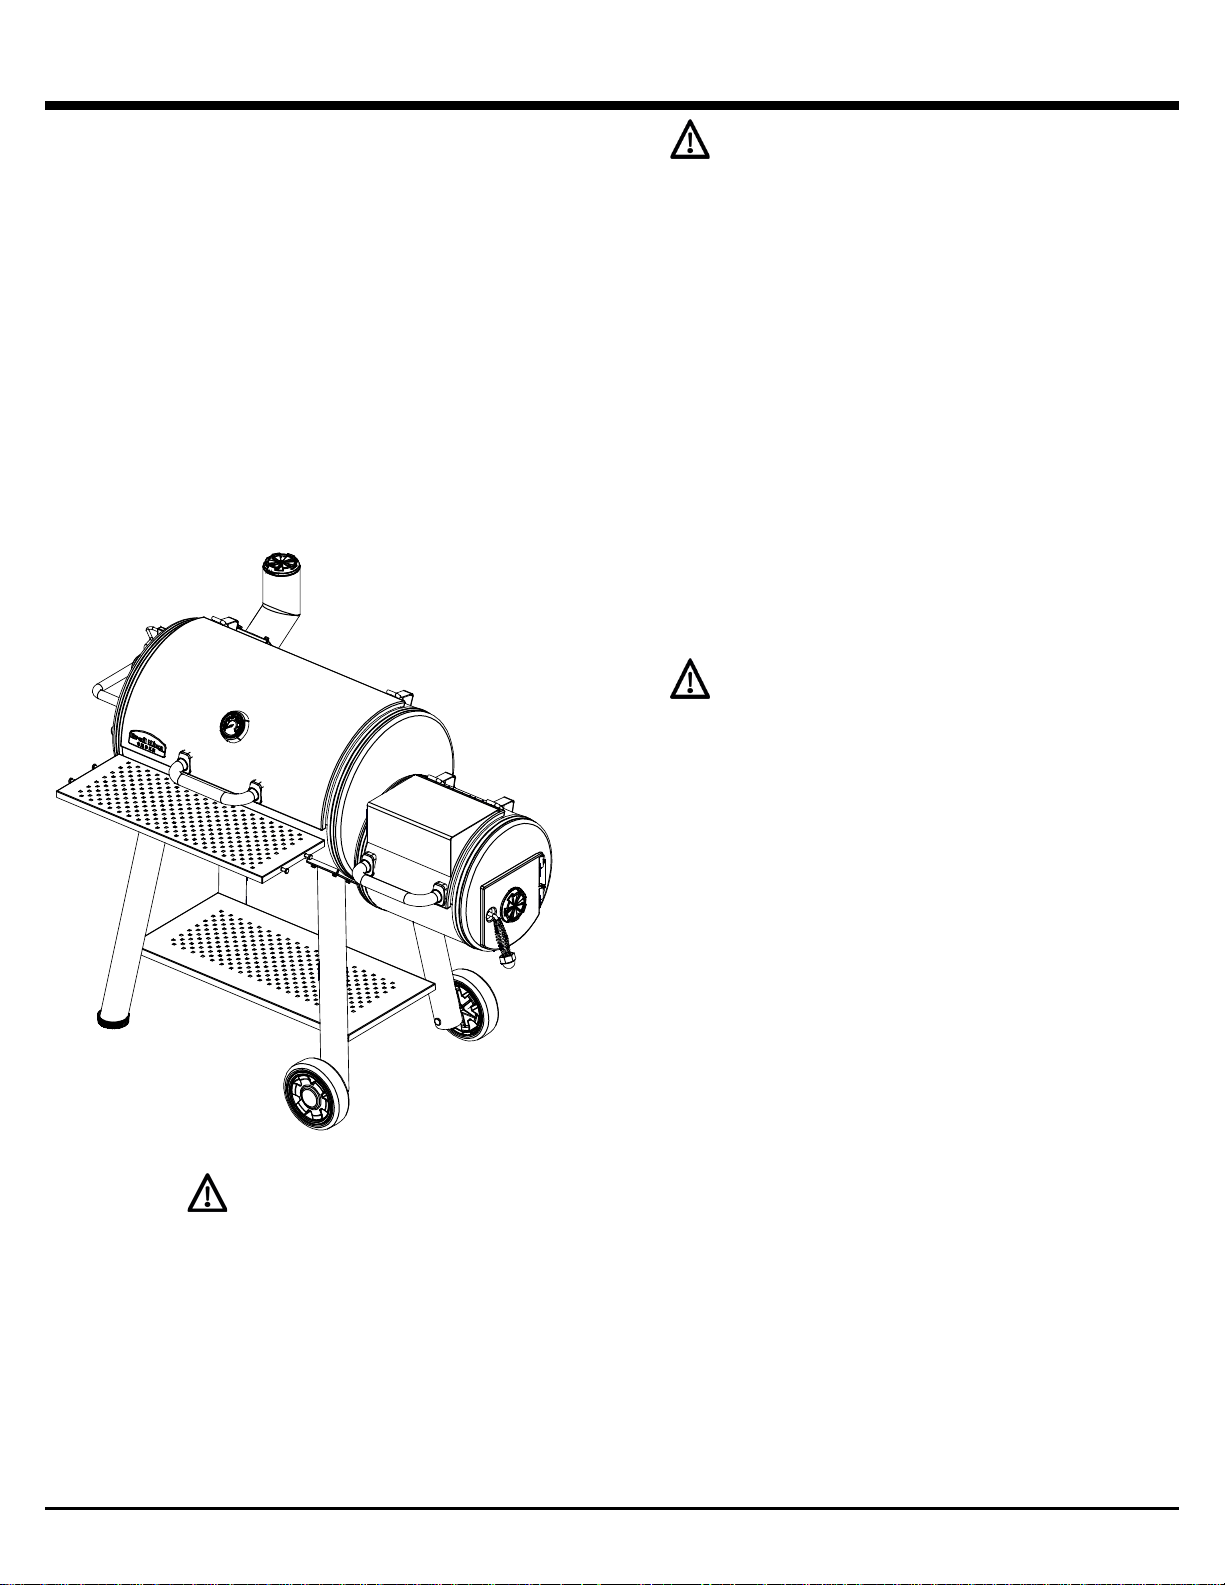
Your Broil King® Smoke™ Offset smoker is equipped with
Roto-Draft™ Intake and Exhaust dampers to give you
precise temperature control. It also includes an internal
damper between the large and small cook box. This feature
allows you to adjust the size of the opening between
chambers, providing maximum control in a variety of
cooking conditions and helps reduce pre-heat and cooldown time.
WARNING!
DO NOT OPERATE OVER 650°F / 325°C
MULTIPLE PATENTS PENDING
DANGER
• This grill is designed for outdoor use
only. If used indoors, toxi c f umes will
accumulate and cause serious bodily
injury or death.
• Do not add charcoal starter fluid or
charcoal impregnated with starter fluid to
hot or warm charcoal.
• Do not leave children or pets unattended
near a hot grill.
• Do not attempt to move a hot grill.
• Do not use grill within ten f eet of any
combustible material.
• Do not use unless grill is fully assembled
and all parts are in place.
• Do not remove ashes until all charcoal is
completely burne d ou t and fully
extinguished
• Do not use grill in high win ds
WARNING
• Keep the grill in a level posi tion at all
times.
• Always use charcoal trays and grates.
• Never touch the charcoal tray or grate to
see if they are hot.
• Use barbecue mitts or hot pads to protect
hands while cooking or adjusting the
dampers.
• Use proper barbecuing tools with long,
heat-resistant hand les.
• To extinguish the coals, close the doors
and dampers completely. Do not use
water, it may damage the smo ker’s finish.
• Warning! Do not burn c ha r c oal in both
cooking chambers at the same ti me.
• WARNING! Do not use spirit or petrol for
lighting or re-lighting! Use only
firelighters complying t o EN 1860-3!
• WARNING! Keep children and pets away.
Failure to heed these danger and warning
statements may cause serious injury or death;
or fire or explosion result ing in damage to
property.
2
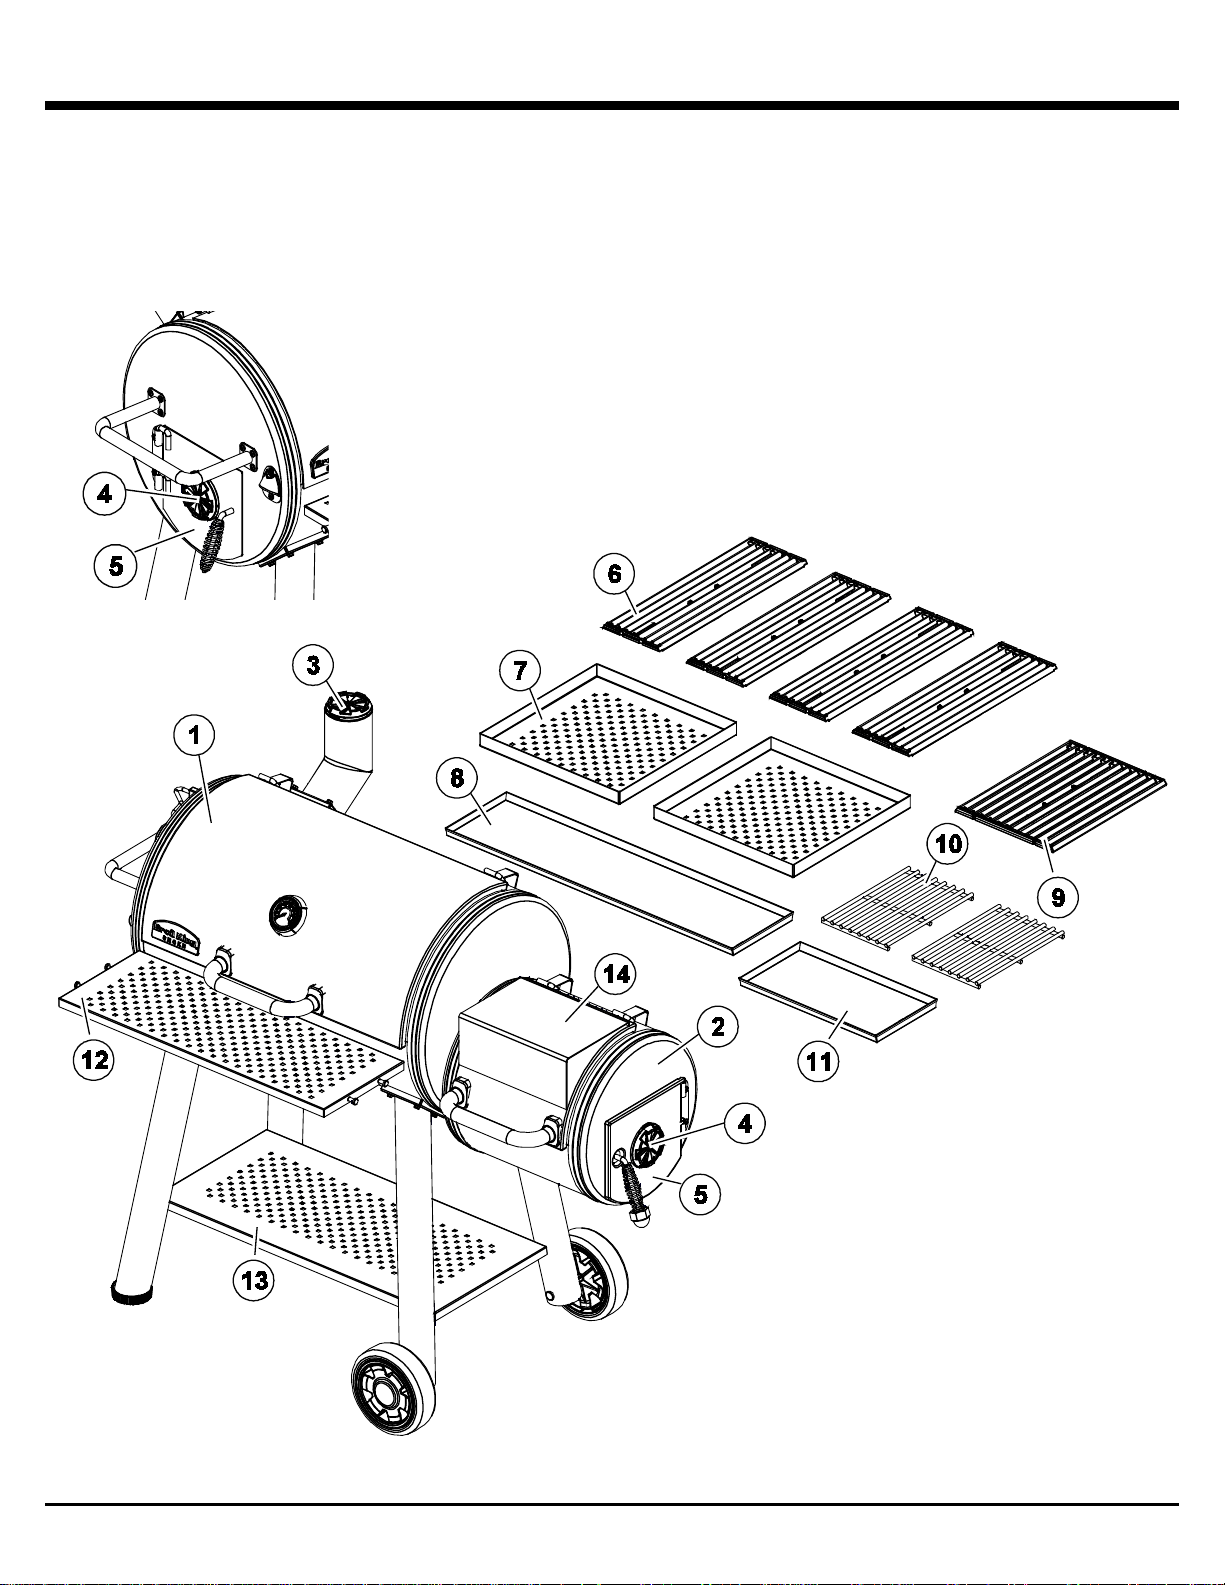
BROIL KING® SMOKE™ OFFSET SMOKER
1. Main Chamber
2. Firebox Chamber
3. Roto Draft™ Exhaust Damper
4. Roto Draft™ Intake Damper
5. Clean Out Door
6. Reversible Cast Grids - Large Cook
Box
7. Smoke Diffuser Trays
8. Ash Tray - Large Cook Box
9. Reversible Cast Grids - Small Cook
Box
10. Charcoal Grates
11. Ash Tray - Small Cook Box
12. Work Shelf
13. Lower Shelf
14. Warming Shelf
3
CHARCOAL GETTING STARTED
Remove the grates, diffuser trays and ash trays; wash
thoroughly in warm, soapy water. Rinse completely and dry
with a soft towel, don’t air dry, and don’t ever put in
dishwasher.
SEASONING Y OUR CAST IRON CO OKING GRIDS:
Coat your cast iron cooking grids with olive oil or grapeseed
oil. Use a paper towel or cloth to coat cover all edges. In
your smoker or oven, bake the cooking grids at 400°F
(205°C) for up to 1 hour. Cool and place in smoker for use.
INITIAL ‘BURN-IN’
Before you start to cook on your Broil King® Smoke™
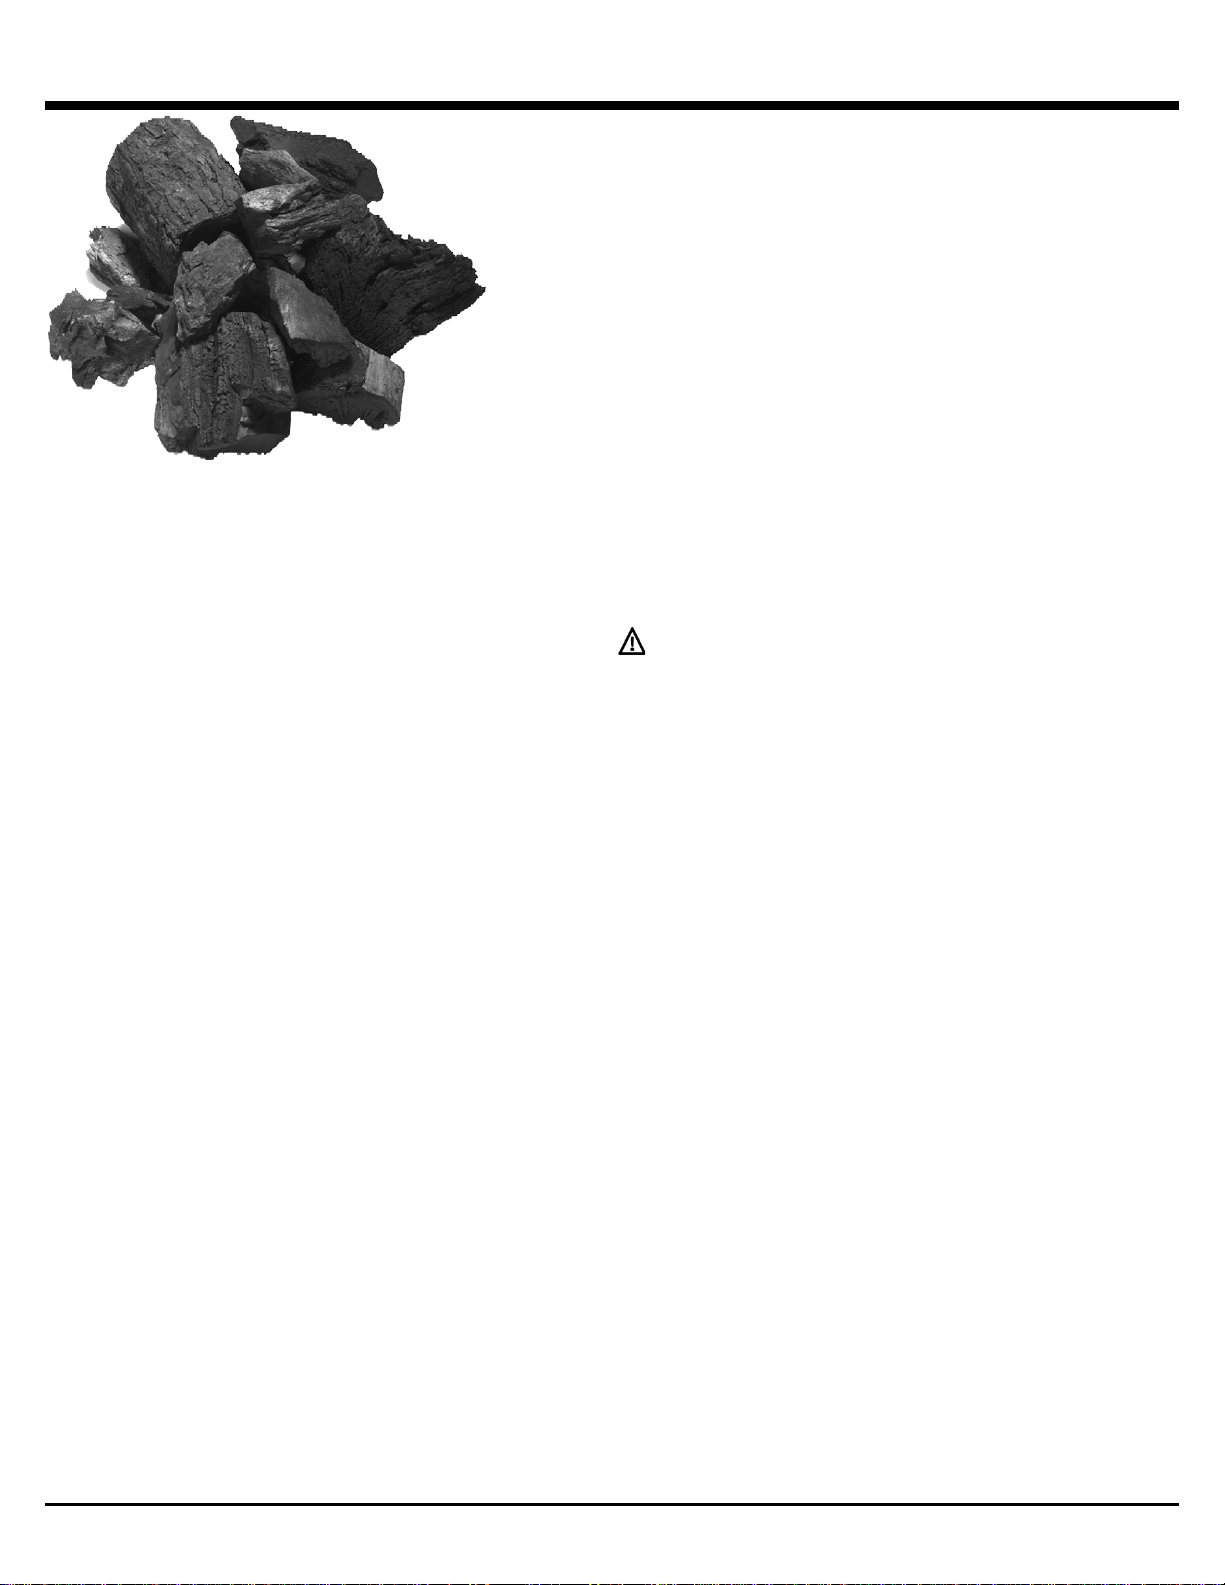
NATURAL LUMP CH ARCOAL
Natural Lump Charcoal - Your Broil King® Smoke™ Offset
Smoker will run on many types of fuel including traditional
charcoal briquettes and even wood chunks; however, it
works best with Broil King® Hardwood Lump Charcoal.
Good natural lump charcoal contains no chemicals,
additives, or fillers. This means your fire burns hotter,
cleaner, and creates less ash than with charcoal briquettes.
Broil King® Hardwood Lump Charcoal (# TCF5506) is
recommended.
COOKING WITH WOOD CHUNKS
Wood chunks are a great fuel source for your offset
smoker, they provide a powerful burst of heat and flavor.
Using a combination of charcoal and wood chunks, you can
build a substantial fire in the fire box. Using soaked wood
chips or chunks will provide smoke over a longer time
period. It is recommended to check the fire every hour
during the cooking process. Add charcoal and wood as
required to maintain the desired cook temperature.
FIRE STARTER STICKS
Fire Starters - Starter sticks / cubes made from natural
products work best. Charcoal chimney starters or electric
charcoal starters also work well. Avoid using lighter fluid, as
it imparts an unnatural flavor into the cooking area.
Offset Smoker you have to burn off the protective residues
from manufacturing. Light your smoker, as outlined on page
5: lighting your smoker, and maintain a fire with both intake
and exhaust vents wide open for a minimum of one hour.
This will burn off any of the protective coating from
manufacturing and begin the process of smoke- curing the
internal components of the smoker. The more you use your
smoker, the better the seasoning will be.
WARNING
Always use caution when opening the fire box access door.
Carefully open the door a crack, allow 5 seconds before
opening all the way. This allows some of the heat around
the charcoal tray to escape and limits chances of flare-up
4
LIGHTING
CHARCOAL
FOR SMOKING / INDIRECT COOKING (USING
SMALL CHAMBER AS FIRE BOX)
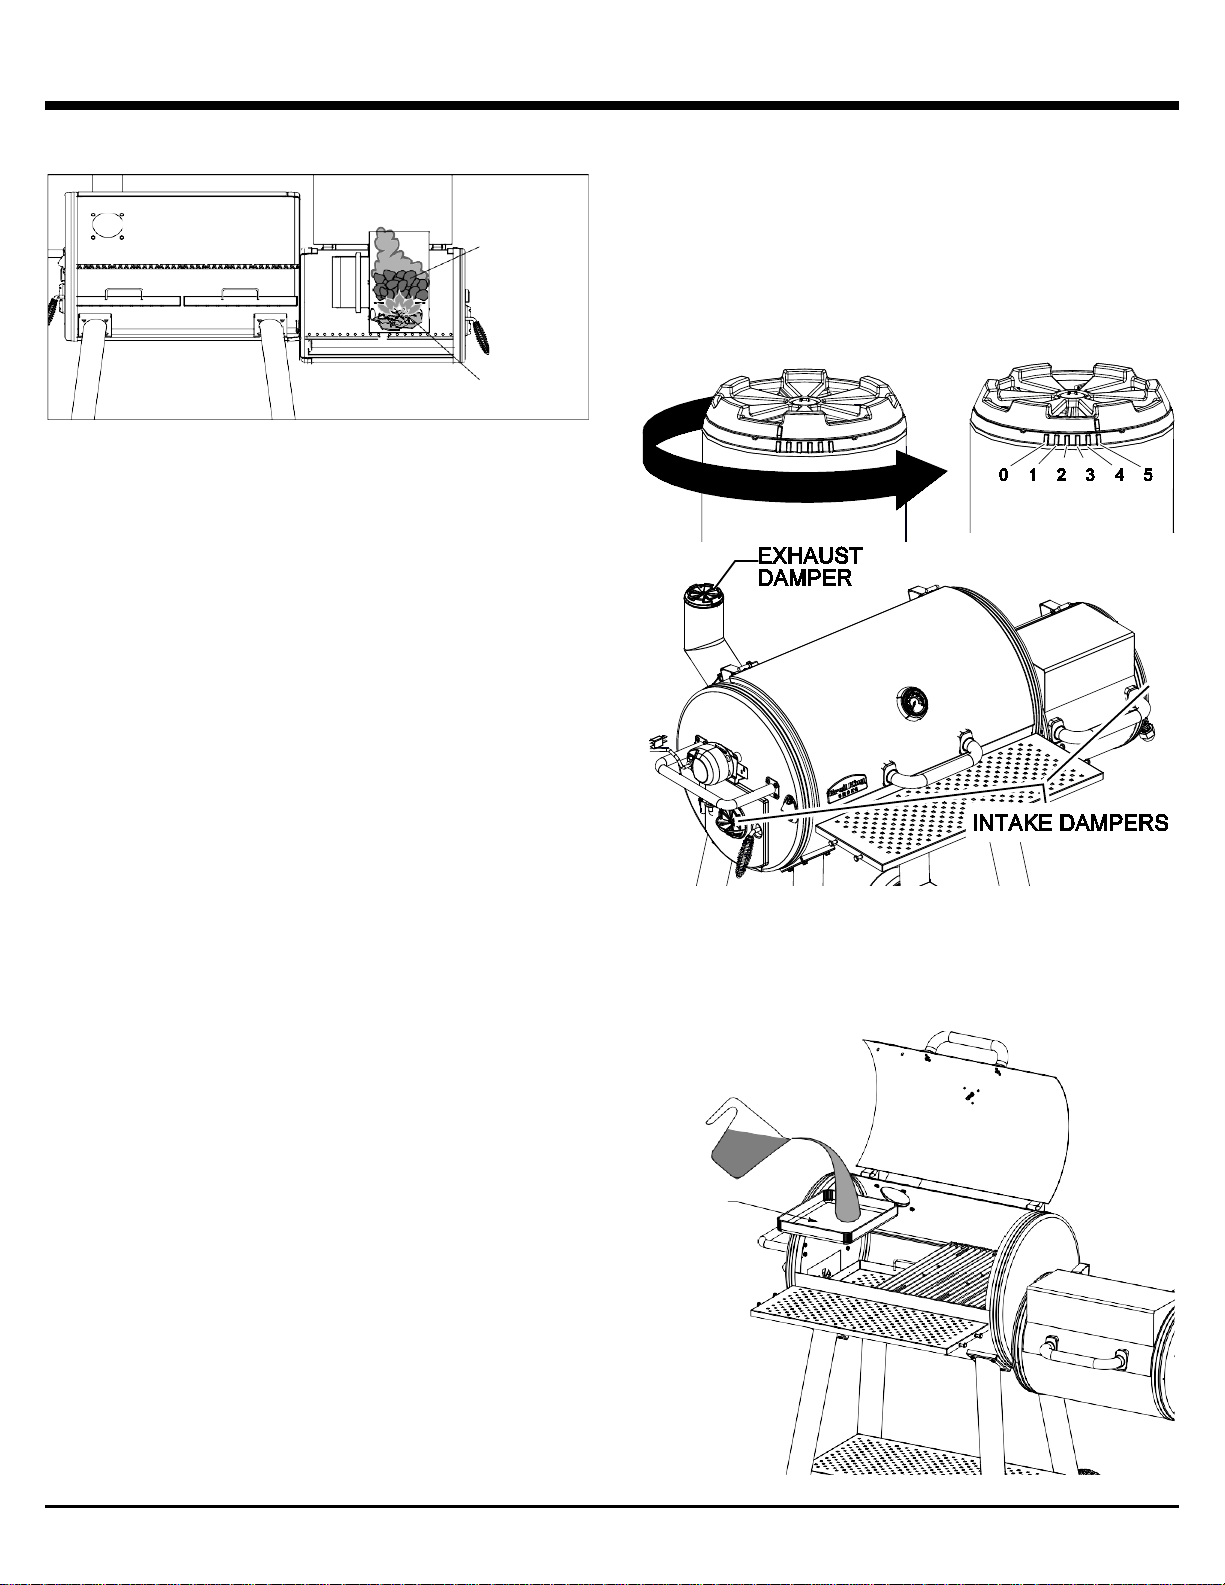
Step 1:
Set the Roto Draft™ intake and exhaust dampers to
position 5 (wide open) to let the maximum amount of air in
to fuel the fire.
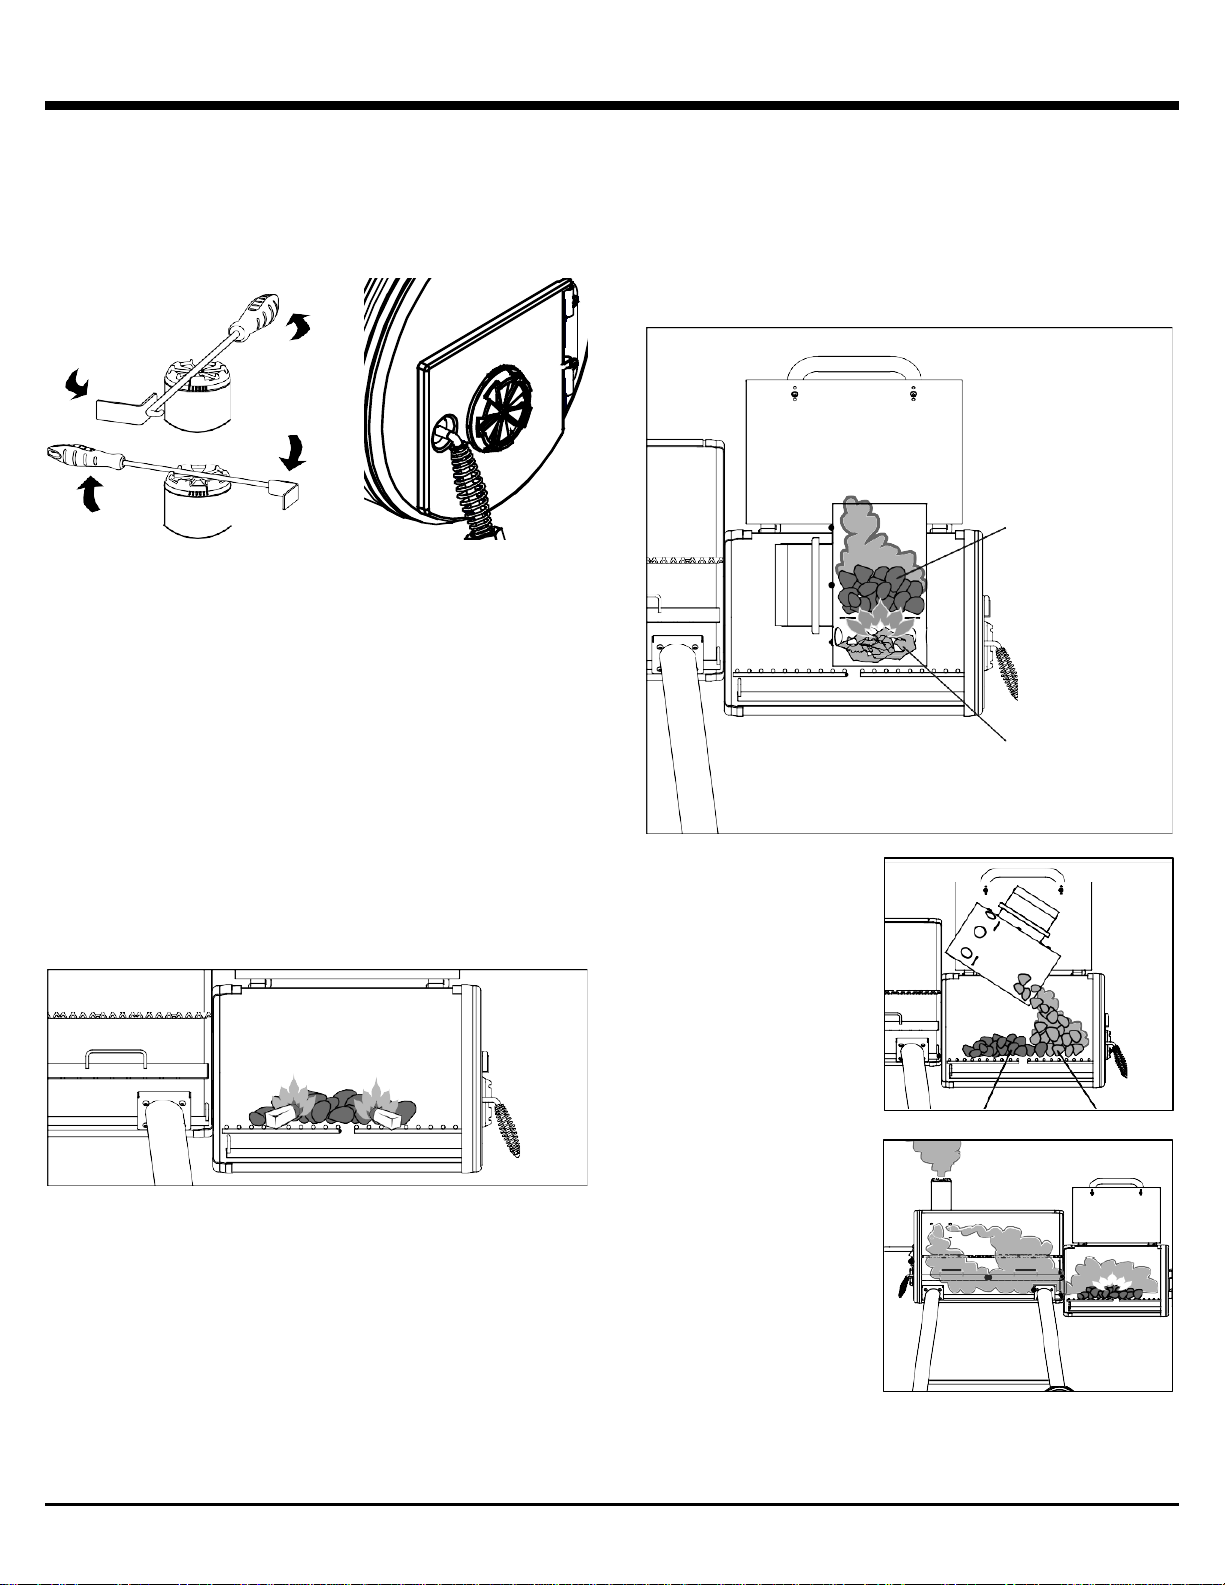
When preheating your smoker, open the internal damper
completely using the included multi-tool (Item# KA5527).
As you approach your target temperature lower the internal
damper using multi-tool to just below the level of the smoke
diffusers. This will push the majority of the hot air and
smoke below the diffuser trays for even smoking.
Step 2:
Open the lid on the small cook box, remove the cooking
grids using the grid lifter provided (Item # 60750), and fill
the tray with roughly 4 lbs. of hardwood lump charcoal.
As you become more familiar with the Broil King® Smoke™
Offset Smoker, you will get a feel for how much charcoal
you need for various cook times and temperatures.
Step 3: Lighting
If using starter sticks, light them and place into the top of
the charcoal bed at two or three locations.
If using a stainless steel chimney starter, fill the Broil
King® Charcoal Chimney Starter (Item # 63980) with
charcoal. Fill the bottom of the chimney starter with one or
two pieces of newspaper. Place the chimney starter on
the charcoal grate in the fire box. Once charcoal is lit, add
carefully to the charcoal tray on top of unlit charcoal.
Placing burning charcoal closer to the intake damper will
encourage the fire to burn evenly through the burn
chamber.
PAPER /
CARDBOARD
Step 4:
Allow the charcoal to
ignite with the fire door
open until charcoal is
aflame.
Step 5:
Adjust dampers to
achieve desired
temperature - Start
closing dampers 50
degrees before target
temperature.
5
LIGHTING OPERATION
FOR DIRECT GRILLING (USING M AIN
CHAMBER AS CHARCOAL GRILL)
Follow lighting instructions abo ve, but fi ll diff us er tra ys in
the large cook box with lit charcoal, arrange to an even
depth, and control temperature using intake dampers and
exhaust. The best option is using a chimney starter for
lighting larger volumes of charcoal. Once lit, arrange
charcoal in the trays, and replace cooking grids using grid
lifter provided. Note: Charcoal burns hotter with more
access to airflow, having the lid open when grilling will
produce more intense heat.
SHUTTING DOWN:
When you’re ready to shut down the Bro il King® Sm oke™
Offset Smoker, close the dampers to snuff the fire out
completely
CONTROLLING TEMPERATURE:
The Broil King® Smoke™ Offset Smoker allows you to
control cooking temperature by regulating airflow through
the intake dampers and exhaust damper. The more you
open the dampers, the more air will flow through to the
charcoal. The more air that gets to the charcoal the hotter
the temperature will get. Small adjustments to the dampers
will make significant changes to the cooking temperature.
Adjust Roto-Draft™ dampers using the included multi-tool.
WATER PAN:
Given the amount of airflow for cook times exceeding 3
hours, adding a water pan to the main chamber may be
warranted – this will keep food from drying out. Using
disposable foil drip trays (Item # 50420) is a convenient
way to do so.
50420
Aluminum
Foil Pan
6
OPERATION
TECHNIQUES:
Smoking: Less than 275°f (135°c)
This classic form of barbecue involves indirect cooking of
larger cuts of meat at low temperatures (less than 275°f
(135°c) for a relatively long time (often 4+ hours). Using
charcoal and wood chips infuses slow cooked meats and
other items with smoky barbecue flavor and yields
incredibly tender results.
Smoke Roasting: 275°f – 400°f (135°c - 205°c)
Also known as indirect grilling, this is similar setup to
smoking; smoke roasting is an accelerated version of the
same principles. It works well for more conventional roasts,
chickens and items that are frequently oven roasted. The
combination of smoke and cooking time creates great flavor
in a shorter time than true smoking.
Tips & Tricks for Smoking and Smoke Roasting:
Due to the construction of offset smokers, the side of the
cook chamber closest to the fire (right side) may be hotter
than the opposite end (left side) – building a small sacrificial
fire may help to preheat your offset smoker and promote
more even cooking.
Direct grilling: 400°F ( 205° C) or more
Direct – as in directly above the burning charcoal and wood
chips. This method is the traditional backyard cook-out or
barbecue. Ideal for smaller items – steaks, chops, burgers,
vegetables. The high heat sears the exterior while cooking
the interior.
For more information, visit www.broilkingbbq.com
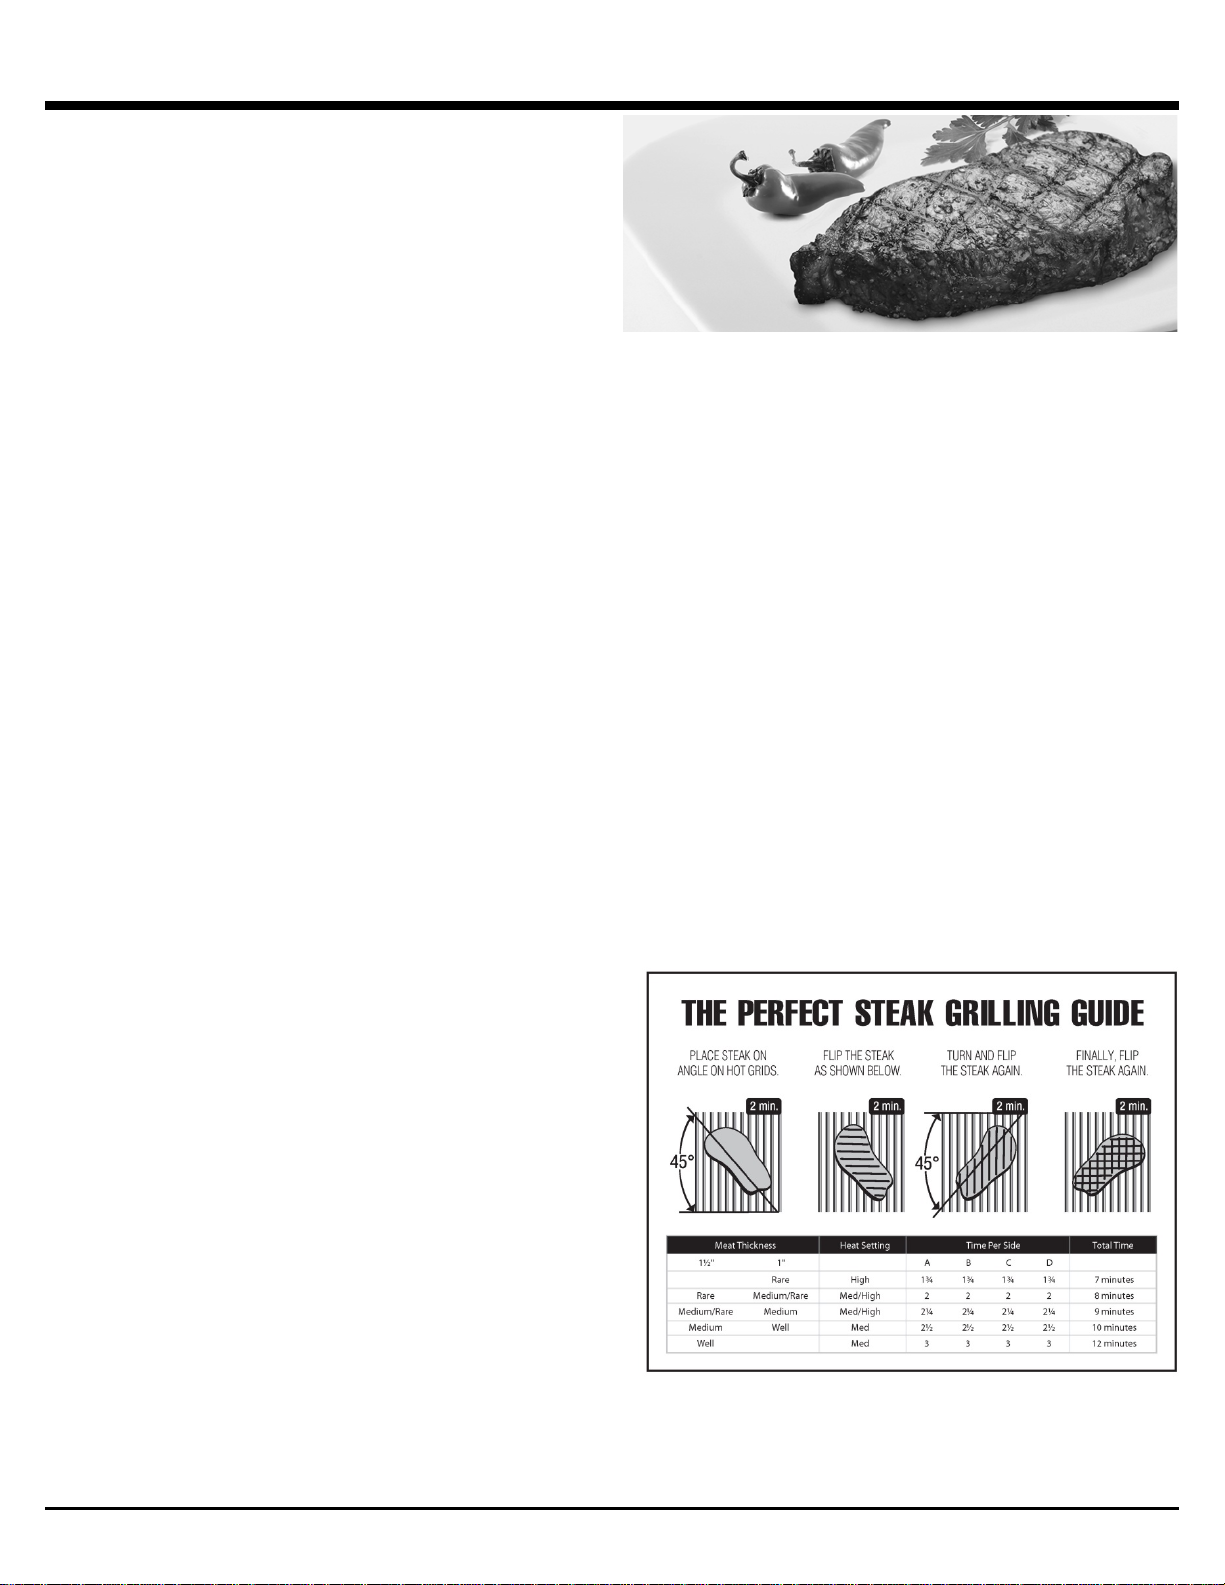
The Perfect Steak Grilling Guide Ingredients
4 steaks (preferably New York Strip), 1” thick
2 cloves garlic minced or pressed
2 tbsp worcestershire sauce
2 tbsp balsamic vinegar and freshly ground pepper
2 tsp dijon mustard
2 tbsp soy sauce
2 tbsp olive oil
Preparing The Steaks
Trim excess fat from the steaks. In a heavy, resealable
plastic bag combine the remaining ingredients. Marinate
the steaks for 1 hour at room temperature or up to 24 hours
in the refrigerator. If refrigerating, bring steaks close to
room temperature 1 hour before grilling for more even
cooking.
PERFECT GRILLING TIPS
A.
Brush grids with vegetable or olive oil and preheat t he
barbecue to 450oF / 275oC. Place food on the
barbecue at a 45 angle and cook according to the
timing on the cooking charts below.
B.
Turn the steak over grilling on the same 45 angle.
C.
Turn the steak over and grill on the opposite 45 angle.
D.
Finally, turn the steak over and grill on the same 45
angle.
7
MAINTENANCE
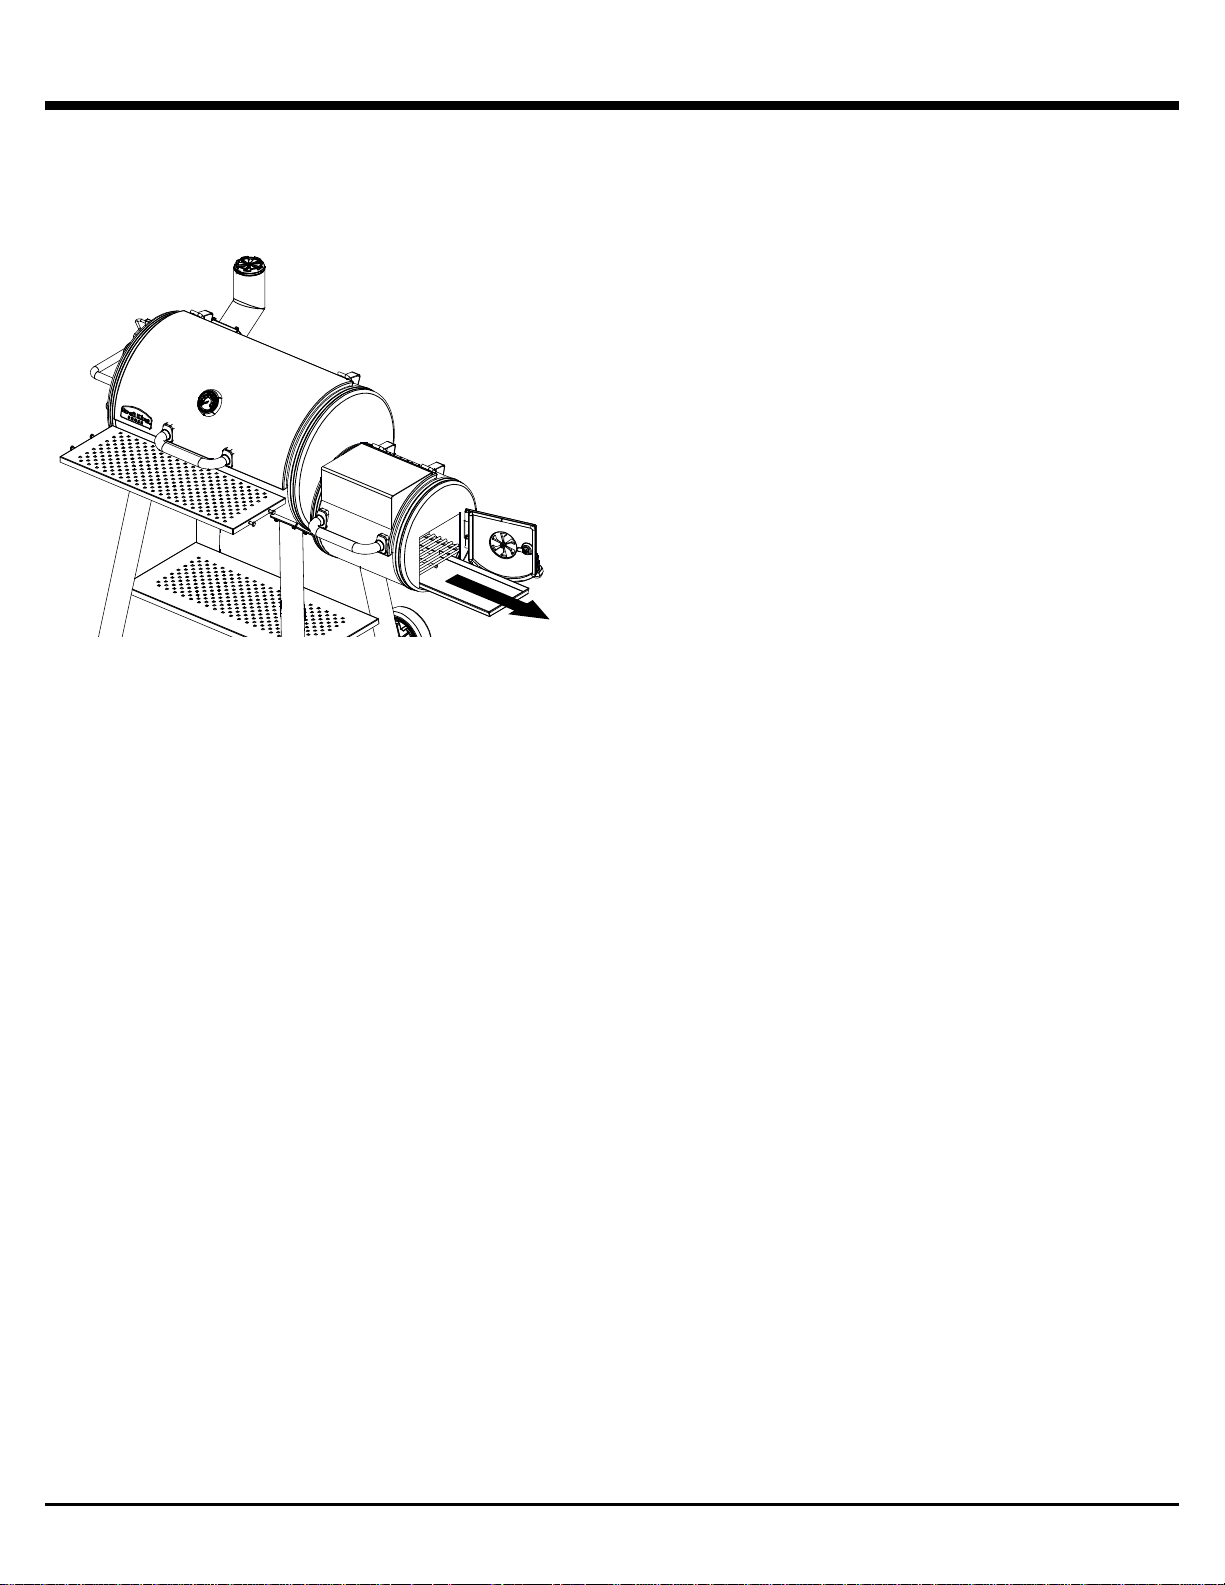
CLEAN OUT
After each cook, it will be necessary to empty the ash
trays. Once cool, open the firebox access doors and
carefully remove the ash tray. Empty into a bucket or
other container for disposal.
CARE AND MAIN TENANCE
The Broil King® Smoke™ Offset Smoker will give you
many years of great service with minimal care. The
seasoning process will help preserve the internal steel
components. Use a stainless steel brush to clean cooking
grids and components that are soiled.
It may be necessary to clean and re-season your cooking
grids. Brush them thoroughly with a stainless steel grill
brush to remove any debris and apply a thin layer of olive
or grapeseed oil. Then, place the cooking grids into your
smoker, and cook at 400°F (205°C) for 1 hour. Repeat as
desired. This coating of oil will protect your cooking grids
and provide years of trouble free use.
Clean the exterior using warm, soapy water.
To clean the interior , use a wire-bristle grill brush to
remove any debris from the cook box. The layer of oils
that accumulates inside the smoker – the seasoning – is
protective and does not need to be scrubbed clean with
any frequency.
Always keep your Broil King® Smoke™ Offset Smoker
covered when not in use - use Broil King® Cover # 67050
8

RECIPES
BBQ RUB
- 2 tablespoons brown sugar
- 1 teaspoon kosher salt
- 1 teaspoon freshly ground black pepper
- 1 tablespoon cumin
- 2 teaspoons dry mustard
- 2 teaspoons paprika
- 2 tablespoons chili powder
- 1 teaspoon onion salt
- 1 teaspoon celery salt
- 1 teaspoon garlic powder
- 1 tablespoon oregano
SMOKED CHICKEN
- Preheat smoker to 275°f (135°c)
- 1 whole chicken, separated, or chicken pieces – thighs,
wings, drumsticks, up to 5 lbs.
- Rub chicken pieces with general purpose BBQ rub, let
stand 30 minutes
- Add water pan to smoker
- Add handful of apple or other wood chips to burning
charcoal
- Arrange chicken on cooking grids
- Cook 2.5 – 4 hours
- Internal temperature must reach 165°f (74°c)
- Cover, let stand 10 minutes
- Serve and enjoy
RIBS
- Preheat smoker to 250°f (121°c)
- 4 racks pork ribs
- Peel membrane from ribs
- Season liberally with barbecue rub
- Add water pan with apple juice to smoker
- Add handful of apple or other wood chips to burning
charcoal
- Arrange ribs on cooking grids, or in the included rib rack
- Cook 3-4 hours
- If desired, apply barbecue sauce at this time and finish
using your Broil King Gas Barbecue at 400°f for 10 – 20
minutes.
- Remove from smoker, cover and let stand 10 minutes
- Serve and enjoy
PULLED PORK
- Preheat smoker to 225°f (107°c)
- 4 – 15 lb. Pork Shoulder (Smaller cuts will often be
labelled Bost on Butt or picn ic shou lder)
- Season liberally with barbecue rub
- Add water pan with apple juice to smoker, set pork
shoulder above pan
- Add handful of wood chips to burning charcoal
- Place pork shoulder on cooking grids
- Cook 4 + hours to an internal temperature of at least
185°f (85°c)
- Remove from smoker, wrap with foil, let stand 30
minutes
- Chop using Broil King® Super Flipper (#64011) or pull
using Broil King® Meat Claws (#64070)
- Apply sauce as desired
- Serve and enjoy
9

WARRANTY
WARRANTY & CUSTOMER SERVICE
The OMC Warranty is effective from date of purchase and is limited to the repair or replacement of parts at no charge which
prove to be defective under normal domestic use.
In Canada and the United States replacement is FOB Factory.
In all other countries replacement is FOB OMC Distributor. (Consult your dealer for name of OMC Distributor.)
All other costs are the responsibility of the owner.
This warranty is extended only to the original purchaser as indicated on the warranty registration and applies only to products
sold at retail and only when used in country where purchased.
WHAT IS COVERED:
High Heat Coated Cook Box 5 years
Remaining parts & paint 2 years
WHAT IS NOT COVERED:
• Any failures or operating difficulties due to accident, abuse, misuse, alteration, misapplication, vandalism, improper
installation or improper maintenance or service, or failure to perform normal and routine maintenance as set out in the
owner’s manual.
• Deterioration or damage due to severe weather conditions such as hail, hurricanes, earthquakes or tornadoes, discoloration
due exposure to chemicals either directly or in the atmosphere.
• Shipping or transportation costs.
• Removal or re-installation costs.
• Labor costs for installation and repair.
• Cost of service calls.
• Liability for indirect or consequential damages.
REPLACEMENT PARTS:
“Genuine OMC Replacement Parts” must always be used for replacement. Use of any other parts will automatically nullify the
above warranty.
WARRANTY CLAIMS:
All warranty is handled directly by OMC. Parts must be returned to OMC Warranty Department, shipping charges prepaid,
accompanied by model #, Serial #, and if your gril l is not register ed, proof of purchase (copy of sales slip or invoice). If
inspection confirms the defect, OMC will repair or replace such part in accordance with the terms of the warranty. On receipt of
letter or fax (not by phone) OMC may, at is option, not require part or parts to be returned.
OUTSIDE NORTH AMERICA:
The above warranty is administered by the OMC distributor in your country. Contact your dealer for the name of your OMC
distributor.
10
 Loading...