

Page 1
30 June, 2016, www.brodit.com, © 2016 Brodit AB
Product 536835
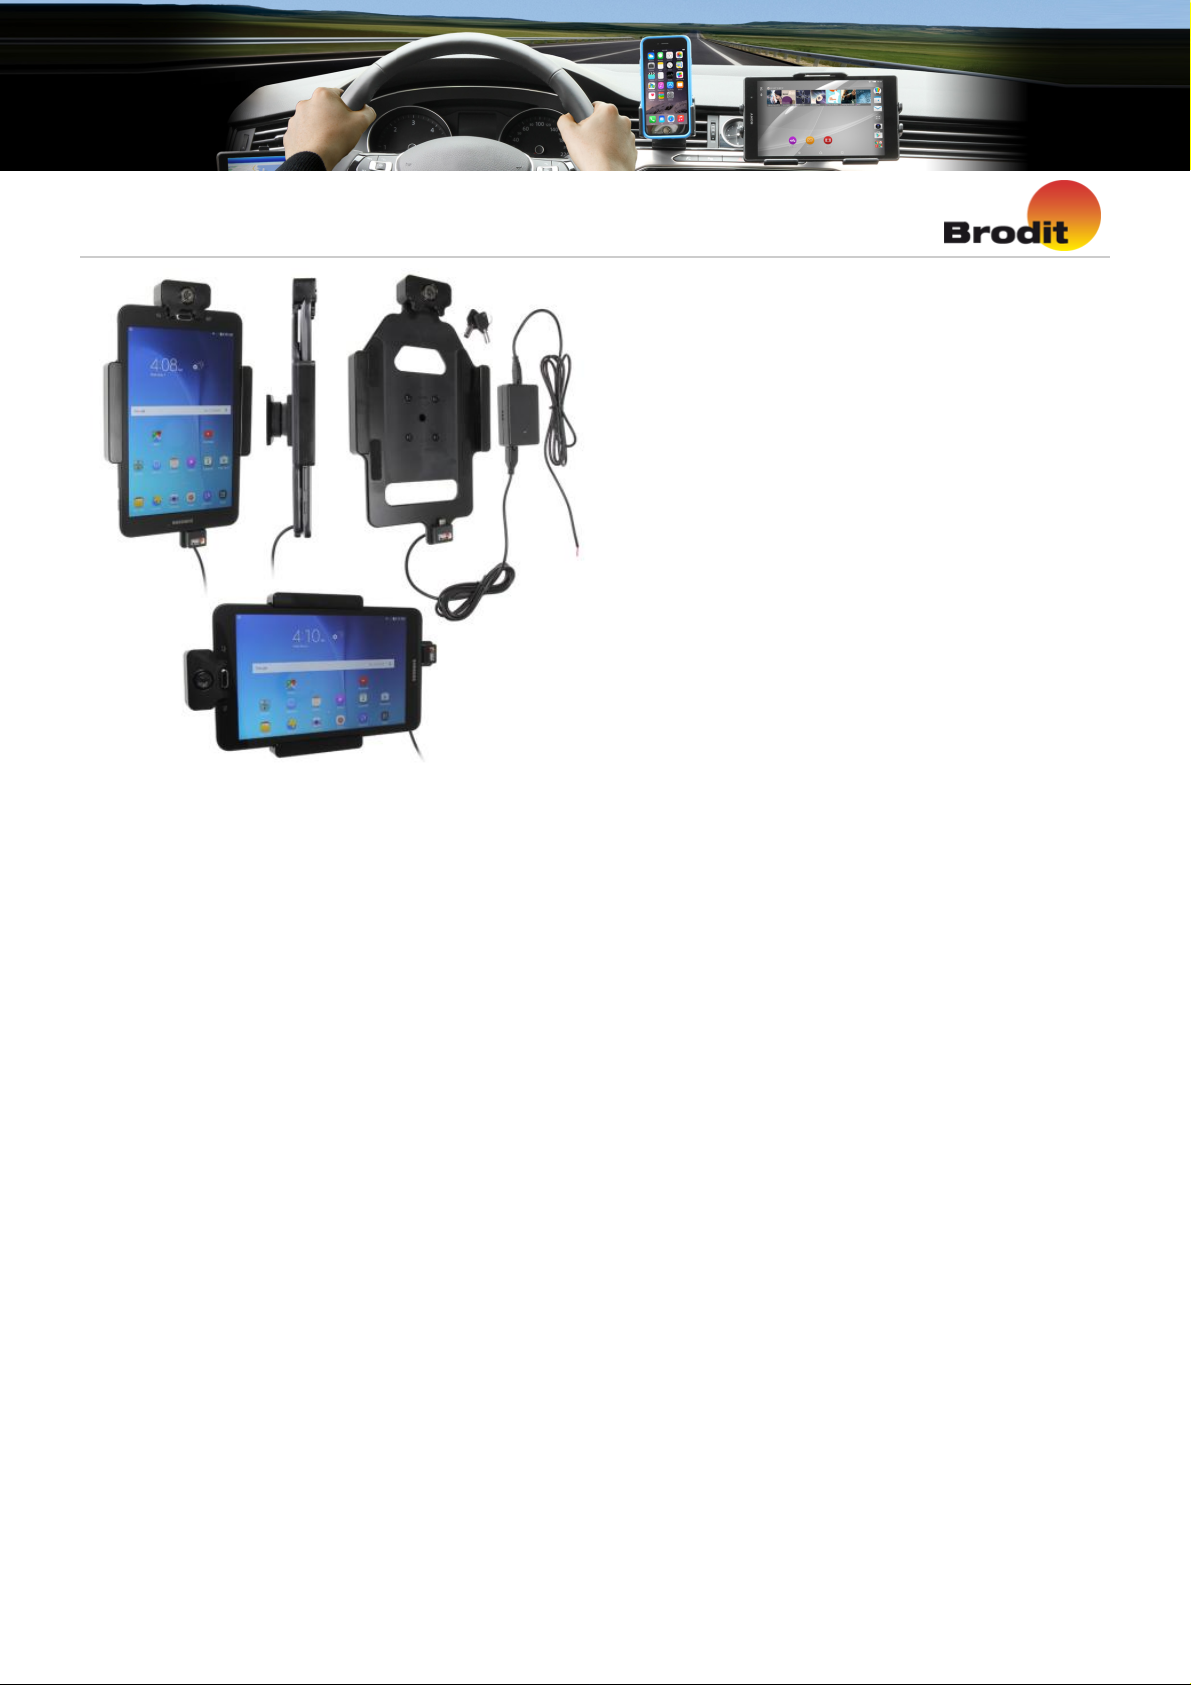
536835 Holder with lock. Active holder for fixed installation. With tilt swivel. With lock, 2 keys included.
The choice when you want to have your tablet safely locked in place and still easily accessable, for example in
shops, exhibitions, events, trucks, boats etc. The holder has a built-in lock, in order to take the device out from
the holder you need a key (2 keys included).
For fixed installation, provides a discreet installation without any visible cables. 12/24 Volt. E-approved. Connect
power cable with a 2 A fuse. 2 A charger. Professional installation recommended. Equipped with a tilt swivel so
you can adjust the angle and switch between portrait and landscape mode.
Tablets should not be installed onto a car’s dashboard if they block the view or block key controls. The ProClip is
designed for installation of smaller devices (phones), not for large devices (tablets). If you want to place a tablet
onto the car’s dashboard, each combination of tablet-car must be examined in detail by you in order to determine
if such an installation is possible in the specific case. Consideration should be given to the position and how firmly
the ProClip is in place, as well as the size of the tablet you wish to use. Brodit will not give any recommendations
for such installations.
An installation of a tablet onto a vehicle’s dashboard is always done on the customer’s own responsibility. Brodit
recommends to use tablets on the car’s headrest, installed onto the Brodit headrest mount.
Charging specifications:
Input voltage: DC/10-30V
Charging voltage: DC/4.75-5.3V
Output current(Typ): 2.0A
Input & output protection: Input polarity reversal/Output over voltage/Output over current/Output short protection
LED charging indicator: Power input indicator(Green), Ovp/Ocp/Output short(Red)
Operating temperature: 0°C ~ +40°C
Storage temperature: -20°C ~ +80°C
RoHS compliant: ROHS
EAN: 7320285368354
Item no 536835 fits:
1(3)
Page 2

Samsung Galaxy Tab E 8.0 (For all countries)
2(3)
Page 3
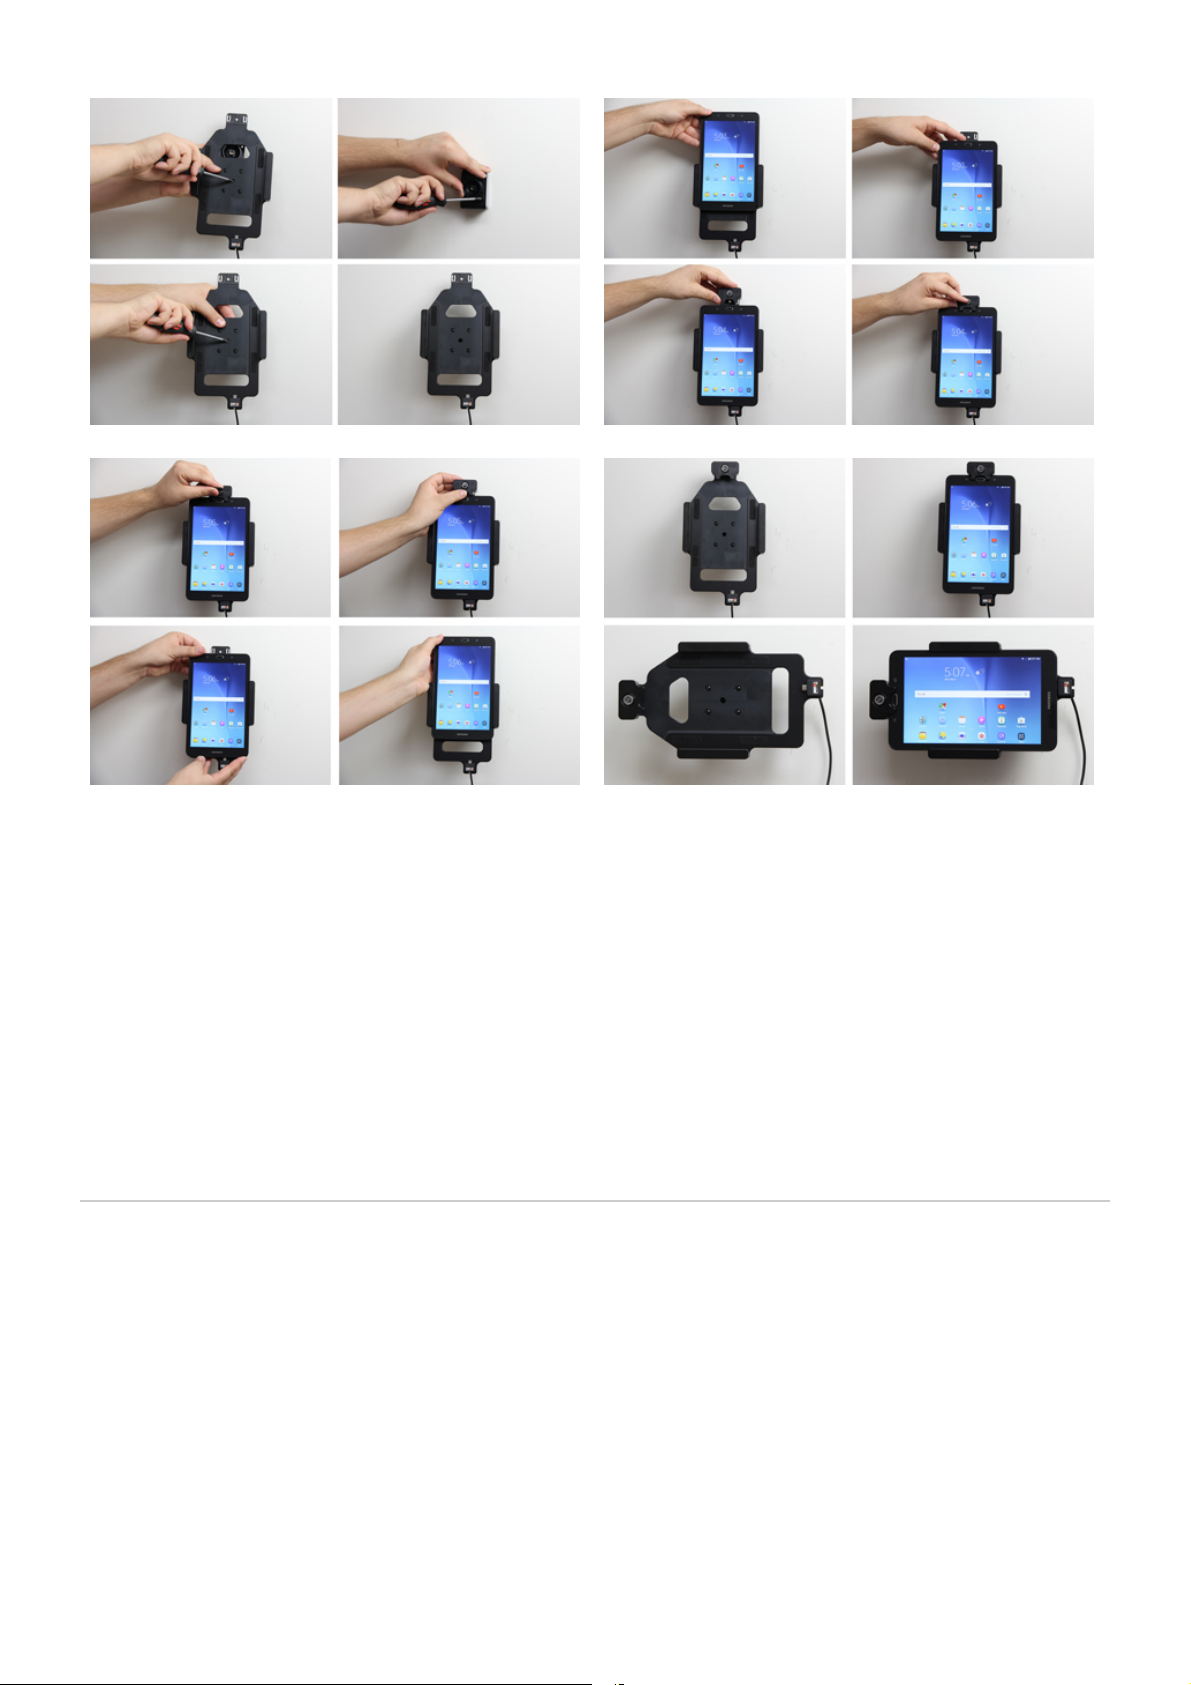
INSTALLATION INSTRUCTIONS
1. 2.
4.3.
Important Note: The charger unit is fused internally with 2 A automotive re-settable thermal fuse, but if an external
fuse is to be installed then connect a 2 A fuse holder and fuse inline with the Red wire close to the power source.
Route the cable from the holder into the vehicle dashboard and secure the charger unit in place with the adhesive
tape provided. Ensure the charger unit is securely mounted behind the dashboard in a well ventilated area that
does not get hot! Connect as follows: 1. Connect the White wire to a Negative Ground connection of the vehicle
or the vehicle chassis. 2. Connect the Red wire to a 12/24 Volt power supply in the vehicle that is controlled by
the ignition switch of the vehicle. Installation of the holder:
Please read all of the instructions and look at the pictures before attaching the holder. 1. Loosen the screw in the
center of the holder so you can remove the tilt swivel attaching plate on the back. Place the attaching plate onto
the desired position. Screw the attaching plate into place with the enclosed screws. Place the holder over the
attaching plate so the screw fits in the hole in the tilt swivel. Tighten the screw until the holder is firmly in place,
but still can be adjusted. 2. Slide the device carefully into the holder from above. Press the lock onto the top part
of the holder. Press the button to lock. 3. use the enclosed key to open the lock. Remove the lock by sliding it
upwards away from the holder. Slide the device carefully upwards out of the holder. 4. The holder is in place.
Switch between portrait and landscape mode by turning the holder into desired position.
3(3)
 Loading...