

Page 1
5 September, 2016, www.brodit.com, © 2016 Brodit AB
Product 513770
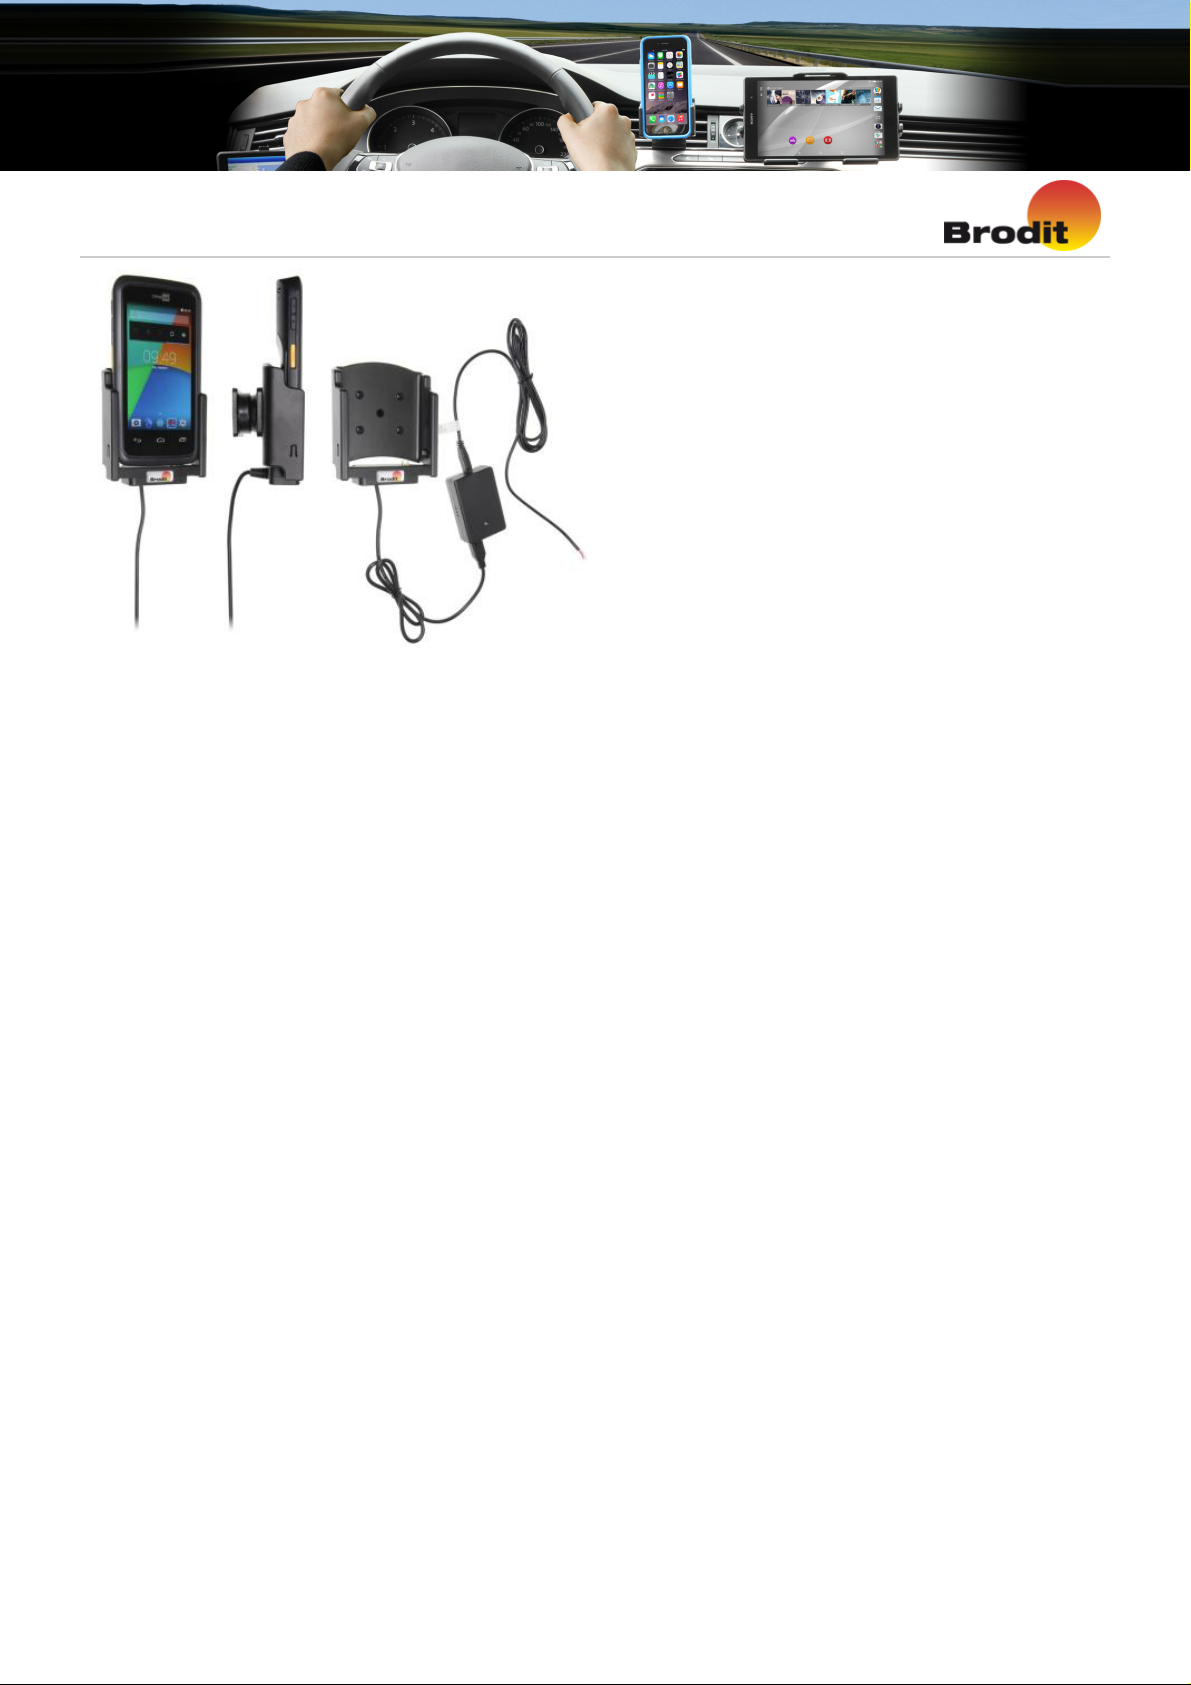
513770 Active holder for fixed installation With tilt swivel, with Molex adapter system. 2A charger. For device
without bumper.
An active holder which is to be connected inside the dashboard, this gives a discreet, neat installation without
cables hanging over the interior!
You can choose to use the holder as an active holder for charging of your device only, or to connect an adapter
to the Molex connector for additional features. Then you can use the holder also for power supply of a GPS
receiver or other own solutions (can not be used for data communication or audio connection).
12/24 Volt. The product is E-approved. Connect the power cable with a 2 A fuse. 2 A charger. Professional
installation recommended. The holder is attached onto a tilt swivel so you can easily adjust your device in order
to avoid light reflection. Attach onto a ProClip Mounting Platform.
Charging specifications:
Input voltage: DC/10-30V
Charging voltage: DC/4.75-5.3V
Output current(Typ): 2.0A
Input & output protection: Input polarity reversal/Output over voltage/Output over current/Output short protection
LED charging indicator: Power input indicator(Green), Ovp/Ocp/Output short(Red)
Operating temperature: 0°C ~ +40°C
Storage temperature: -20°C ~ +80°C
RoHS compliant: ROHS
EAN: 7320285137707
Item no 513770 fits:
CipherLab RS30 Series (For all countries)
1(2)
Page 2
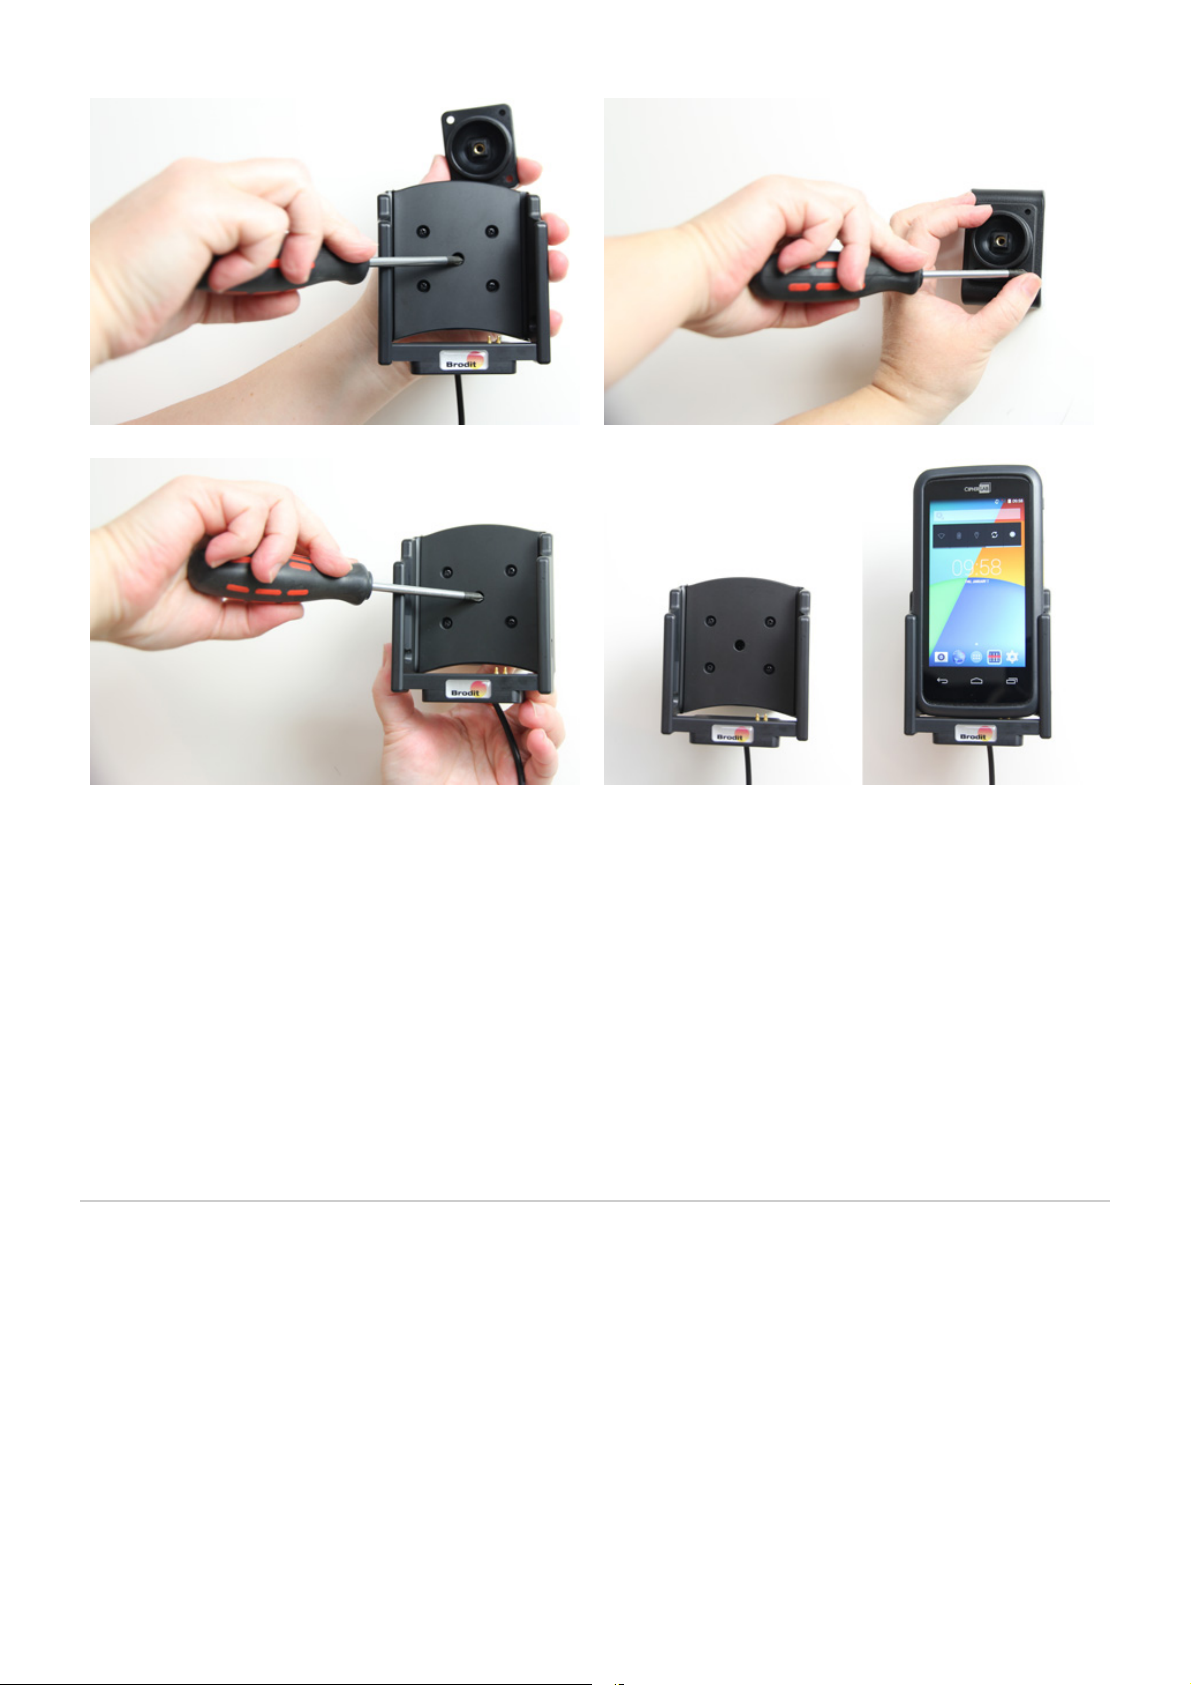
INSTALLATION INSTRUCTIONS
1. 2.
4.3.
Please read all of the instructions and look at the pictures before attaching the holder. Important Note: Route the
cable from the holder into the vehicle dashboard and route the power cable from the charger unit to the power
supply source in the vehicle and connect as follows: 1. Connect the White wire to a Negative Ground connection
of the vehicle or the vehicle chassis. 2. Connect the Red wire to a 12/24 Volt power supply in the vehicle that is
controlled by the ignition switch of the vehicle.
1. Loosen the screw in the center of the holder so you can remove the tilt swivel attaching plate on the back.
2. Place the attaching plate onto the desired position. Screw the attaching plate into place with the enclosed
screws.
3. Place the holder over the attaching plate so the screw fits in the hole in the tilt swivel. Tighten the screw until
the holder is firmly in place, but still can be adjusted.
4. The holder is in place.
2(2)
 Loading...