

Page 1

QUICK START GUIDE
AVoIP HDMI/VGA
Encoder(Tx)- LBN-MST
Decoder(Rx)- LBN-MSR
Controller- LBN-MSC
Page 2
1
STEP 1: CONNECTING THE HARDWARE
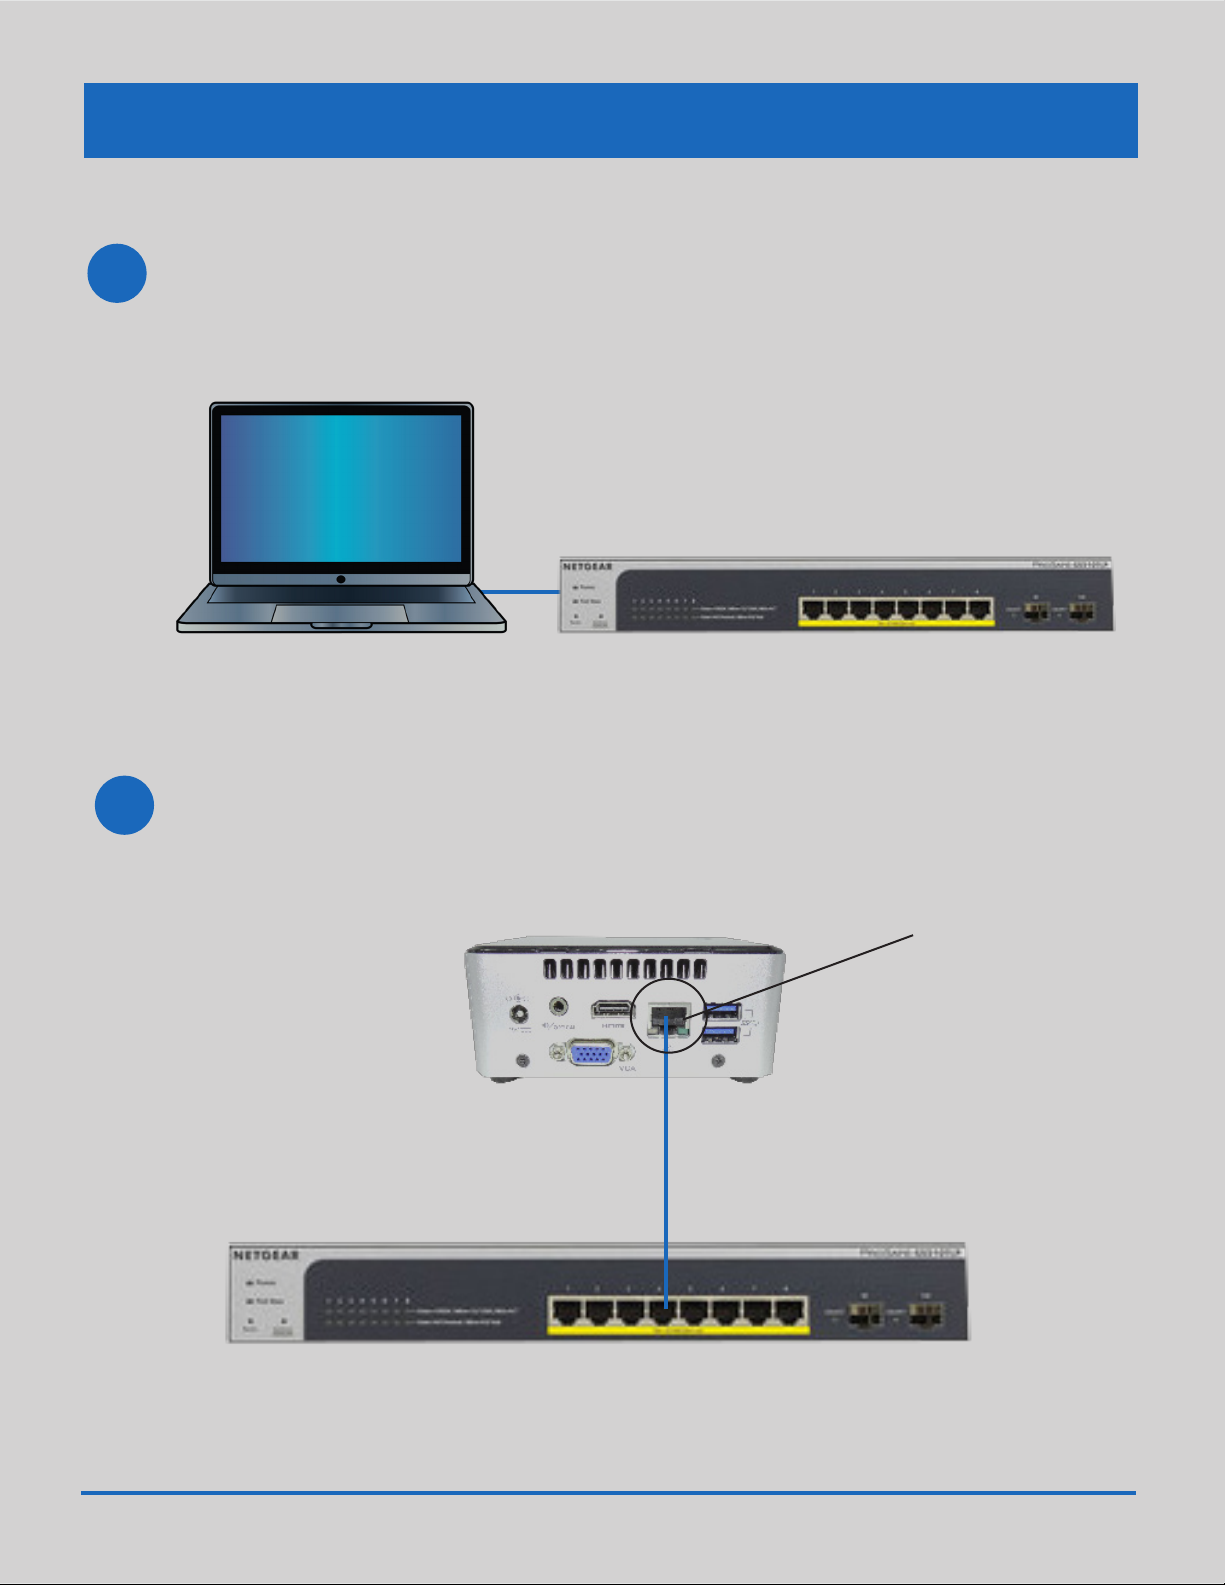
Connect the Ethernet Port on the PC/Laptop Computer using a Category 5
(CAT5) Unshielded Twisted-Pair (UTP) cable to any available Ethernet Port on the
Network Switch.
PC or Laptop Computer
2
Connect the Ethernet Port on the AVoIP Controller to any available Ethernet Port
on the Network Switch. Use a CAT5 UTP cable terminated with a RJ-45 connector
to make the connection.
AVoIP Matrix Switching Controller
Back Panel
Network Switch Front Panel
Ethernet Port
Quick Install Guide-LBN-MSx2
Page 3
3
STEP 1: CONNECTING THE HARDWARE
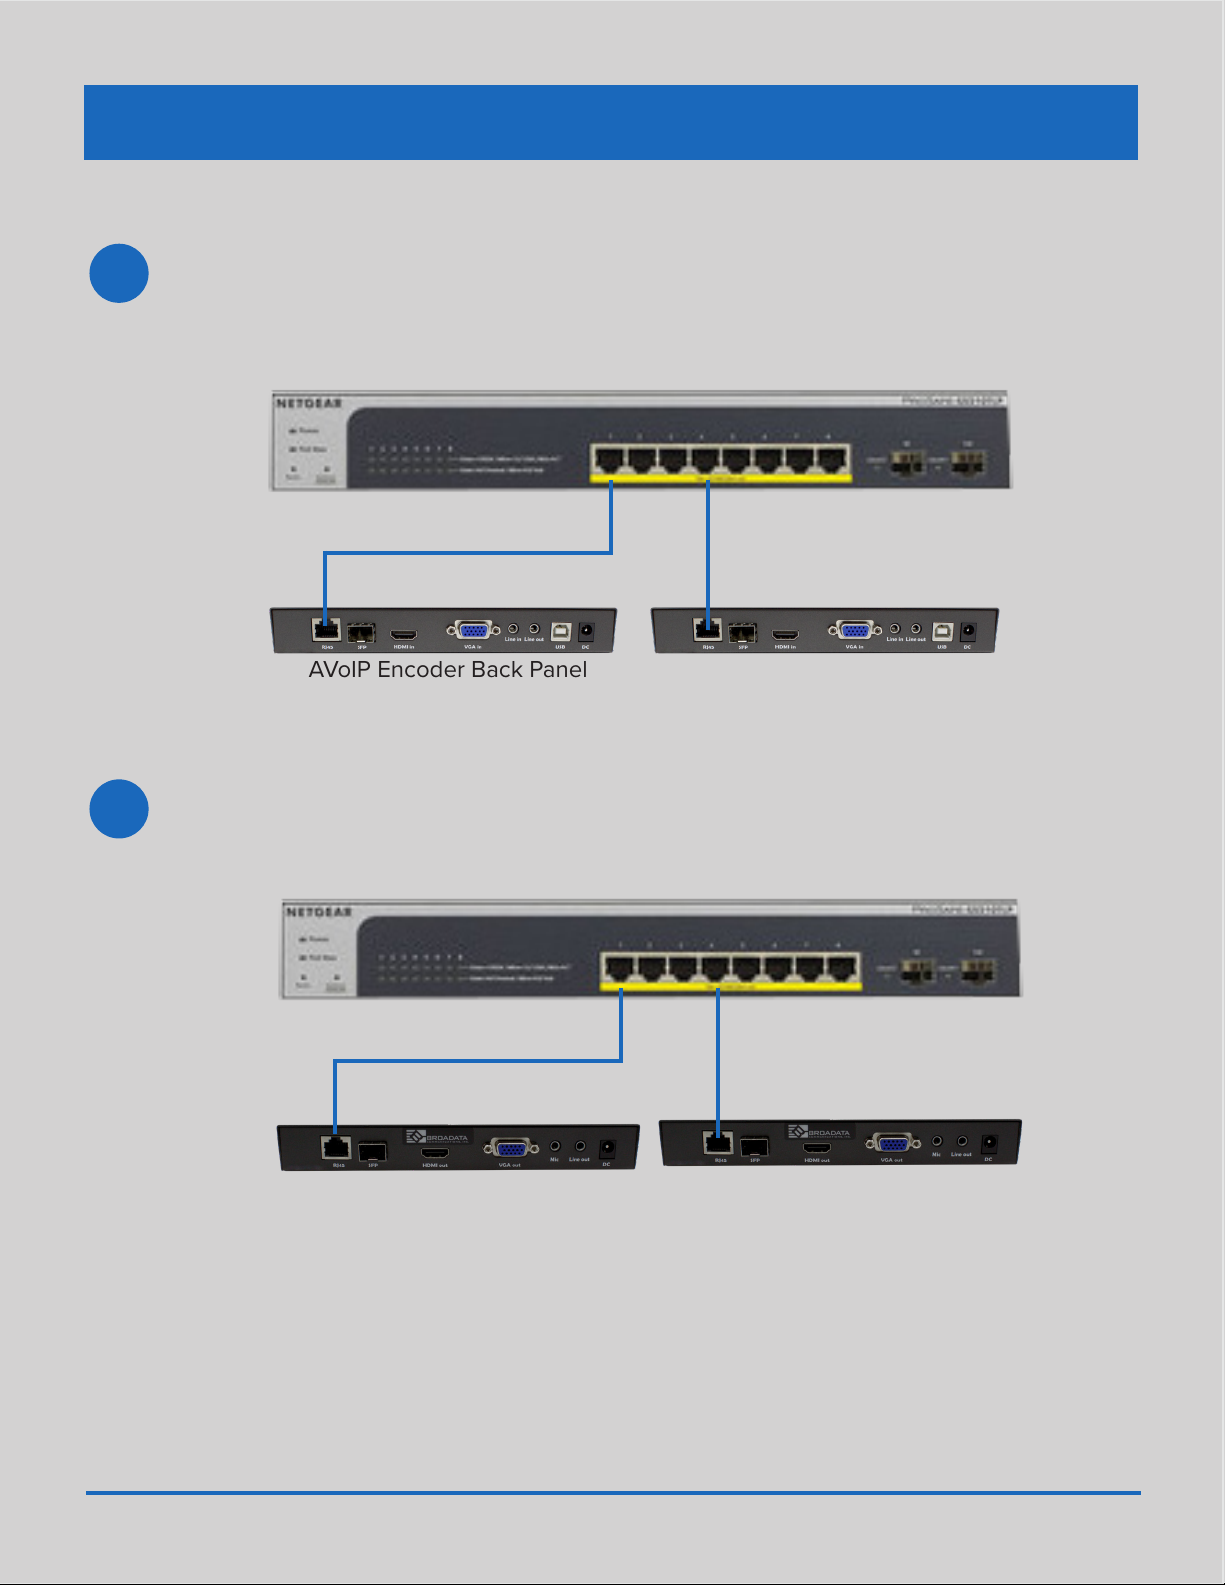
Connect each AVoIP Encoder to an RJ45 network port on the Switch front panel.
Use Category 5 Unshielded Twisted-Pair (UTP) cable terminated with a RJ-45
connector to make these connections.
Network Switch Front Panel
AVoIP Encoder Back Panel AVoIP Encoder Back Panel
4
Connect each AVoIP Decoder to an RJ45 network port on the Switch front panel.
Use Category 5 Unshielded Twisted-Pair (UTP) cable terminated with a RJ-45
connector to make these connections.
Network Switch Front Panel
AVoIP Decoder Back Panel
AVoIP Decoder Back Panel
Quick Install Guide-LBN-MSx 3
Page 4
!
5
STEP 2: POWERING UP THE DEVICES
Power Over Ethernet (PoE) allows you to supply power to the AVoIP
Encoders and Decoders via a PoE-enabled Network Switch, removing the
need for additional power supplies at each location.
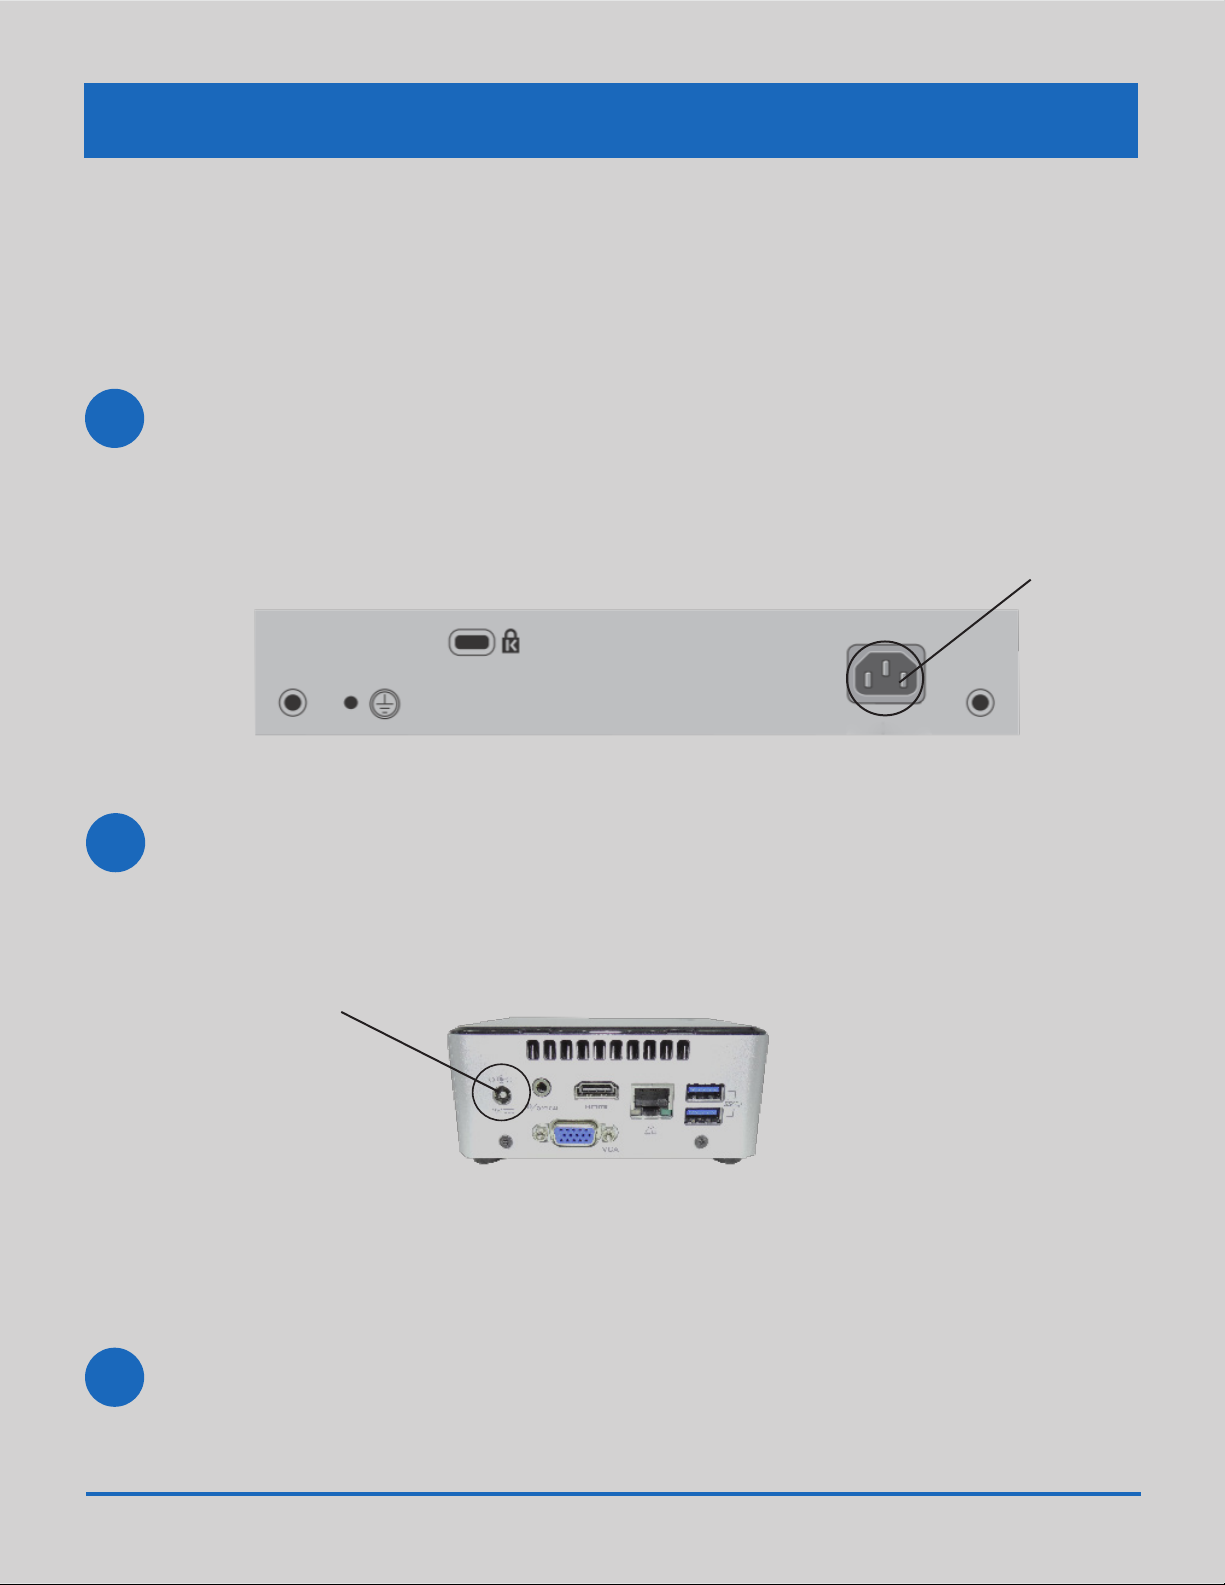
Connect the supplied AC Power Cord to the power recepticle on the back of the
switch and the other end to a power source such as an electrical outlet or surge
protector.
Power Recepticle
Network Switch Back Panel
6
!
7
Connect the supplied Power adapter to the 19V Power Port on the back of the
AVoIP Matrix Switching Controller and the other end to a power source such as an
electrical outlet or surge protector.
AVoIP Matrix Switching Controller
Back Panel
Power Port
Allow 1-2 minutes for the Switch and Controller to initialize to supply power
to all connected devices.
You are now ready to connect Audio/Video Sources to the HDMI or VGA Connector
on the Encoder and Monitors/Displays to the AVoIP Decoder.
Quick Install Guide-LBN-MSx4
Page 5
8
STEP 3: ACCESSING AND CONFIGURING THE SYSTEM
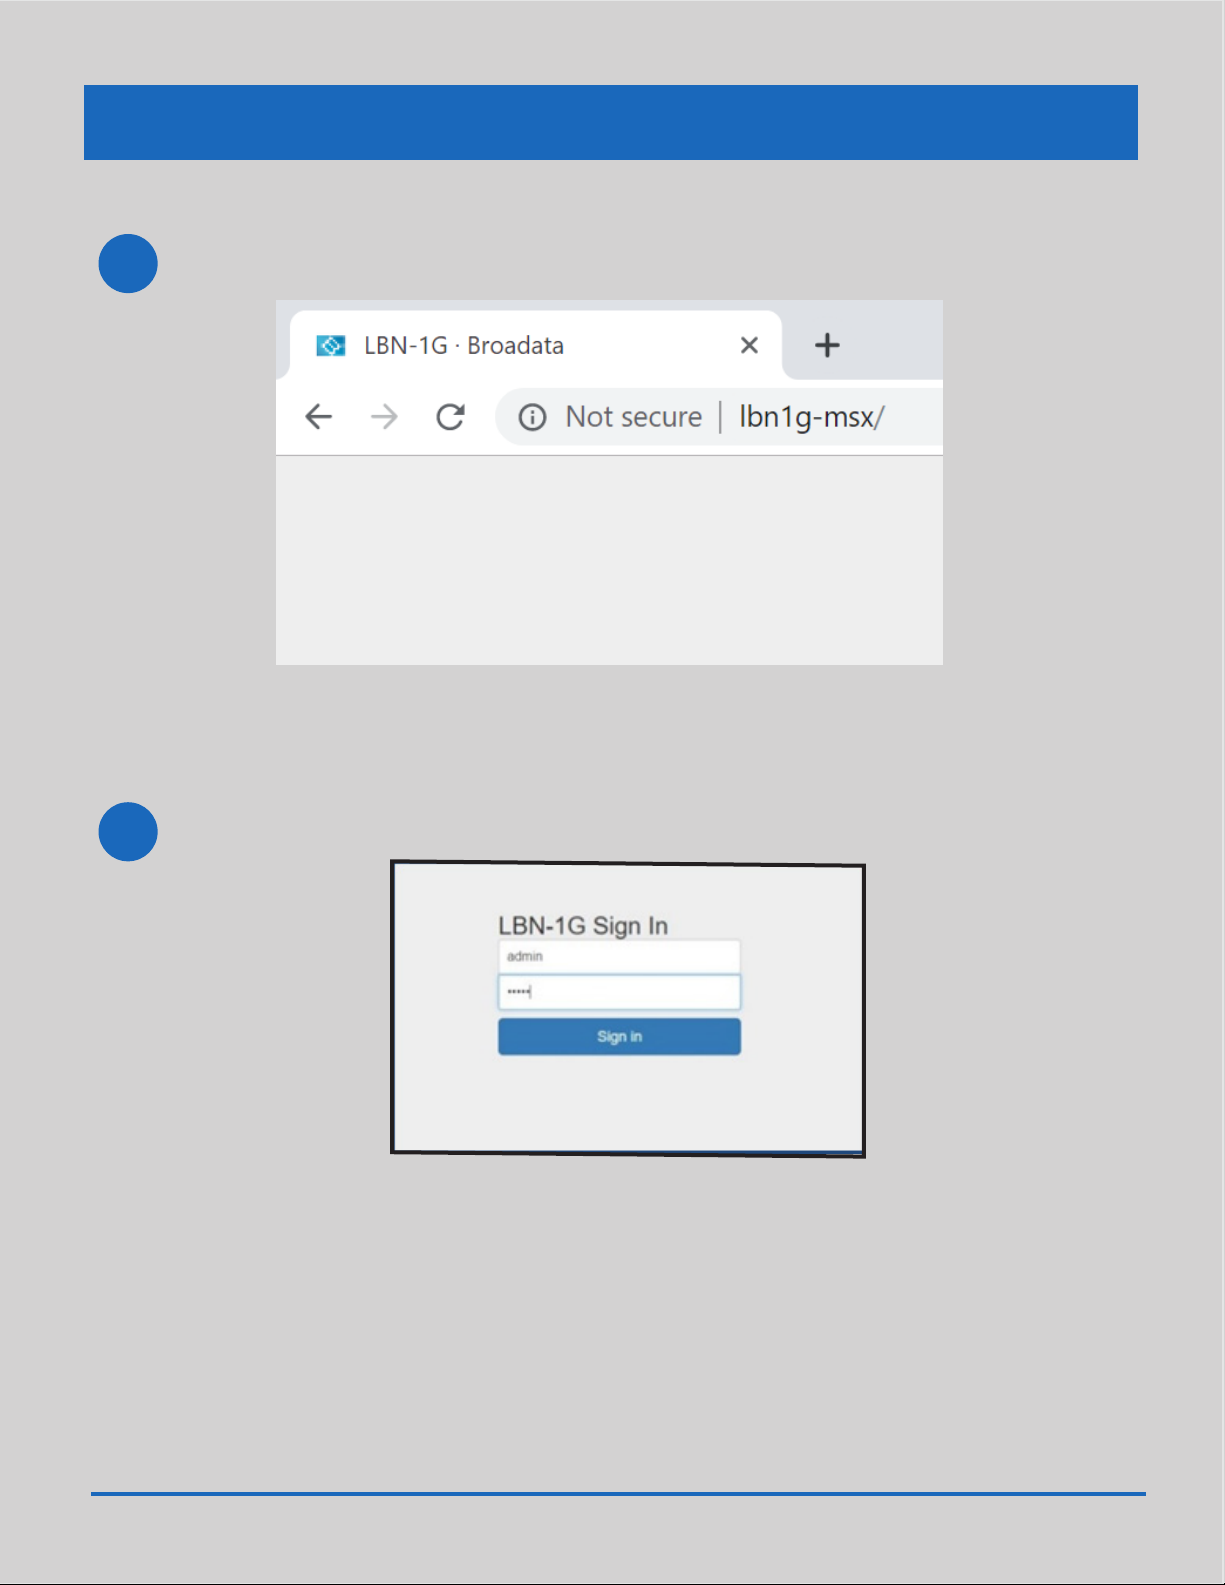
Open a web browser and enter the URL http://lbn1g-msx to access the WebGUI
9
!
The following AVoIP Controller Login Window Appear:
Enter the User Name and Password as provided:
Default User Name: admin
Default Password: admin
Quick Install Guide-LBN-MSx 5
Page 6
10
STEP 3: ACCESSING AND CONFIGURING THE SYSTEM
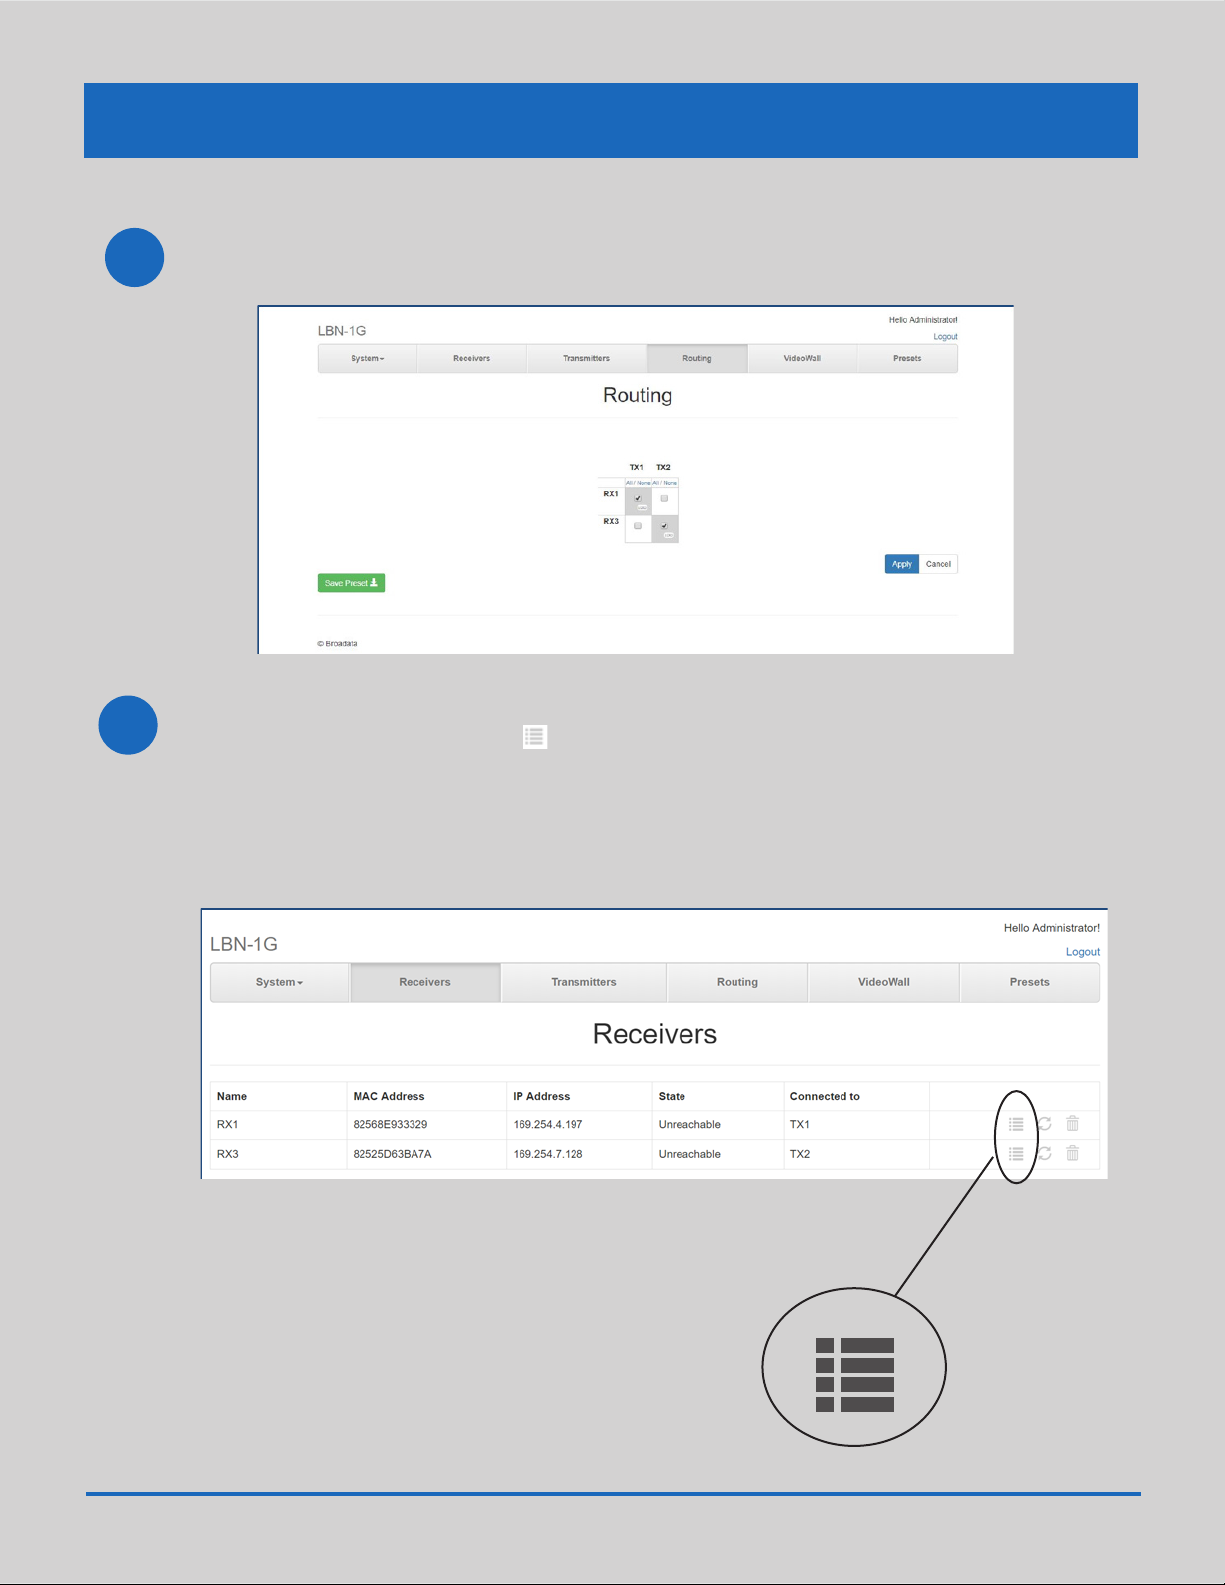
The Routing Page will appears and displays all AVoIP Encoders and Decoders that
have been added to the Network
11
Click on the Receivers or Transmitter tabs and you are now ready to configure the
networked devices. Select the icon for each Encoder(Tx) and Decoder(Rx) to
edit settings.
Icon
Quick Install Guide-LBN-MSx6
Page 7

BROADATA COMMUNICATIONS, INC.
BROADATA COMMUNICATIONS, INC.
2545 WEST 237TH STREET
2545 WEST 237TH STREET
TORRANCE, CA 90505
TORRANCE, CA 90505
800.214.0222
800.214.0222
www.broadatacom.com
www.broadatacom.com
Quick Install Guide-LBN-MSx
Quick Install Guide-LBN-MSx
78000-0001-C
78000-0001-C
 Loading...