

Page 1

Hello
Look inside to see how to set up
your new Wireless Booster
Set Up Guide
Page 2

2
Contents
Get Connected
Check what’s in the box 5
Connect
(a) your Wireless Booster by
WPS button
7
(b) your Wireless Booster manually 10
Position your Wireless Booster
in the best location 14
Congratulations you are now
up and running 16
Other Stuff
Icon Guide 19
Help 20
Using your equipment safely 21
Recycling 23
Page 3

4
Get connected
Check
Connect
Position
Congratulations
4
Page 4
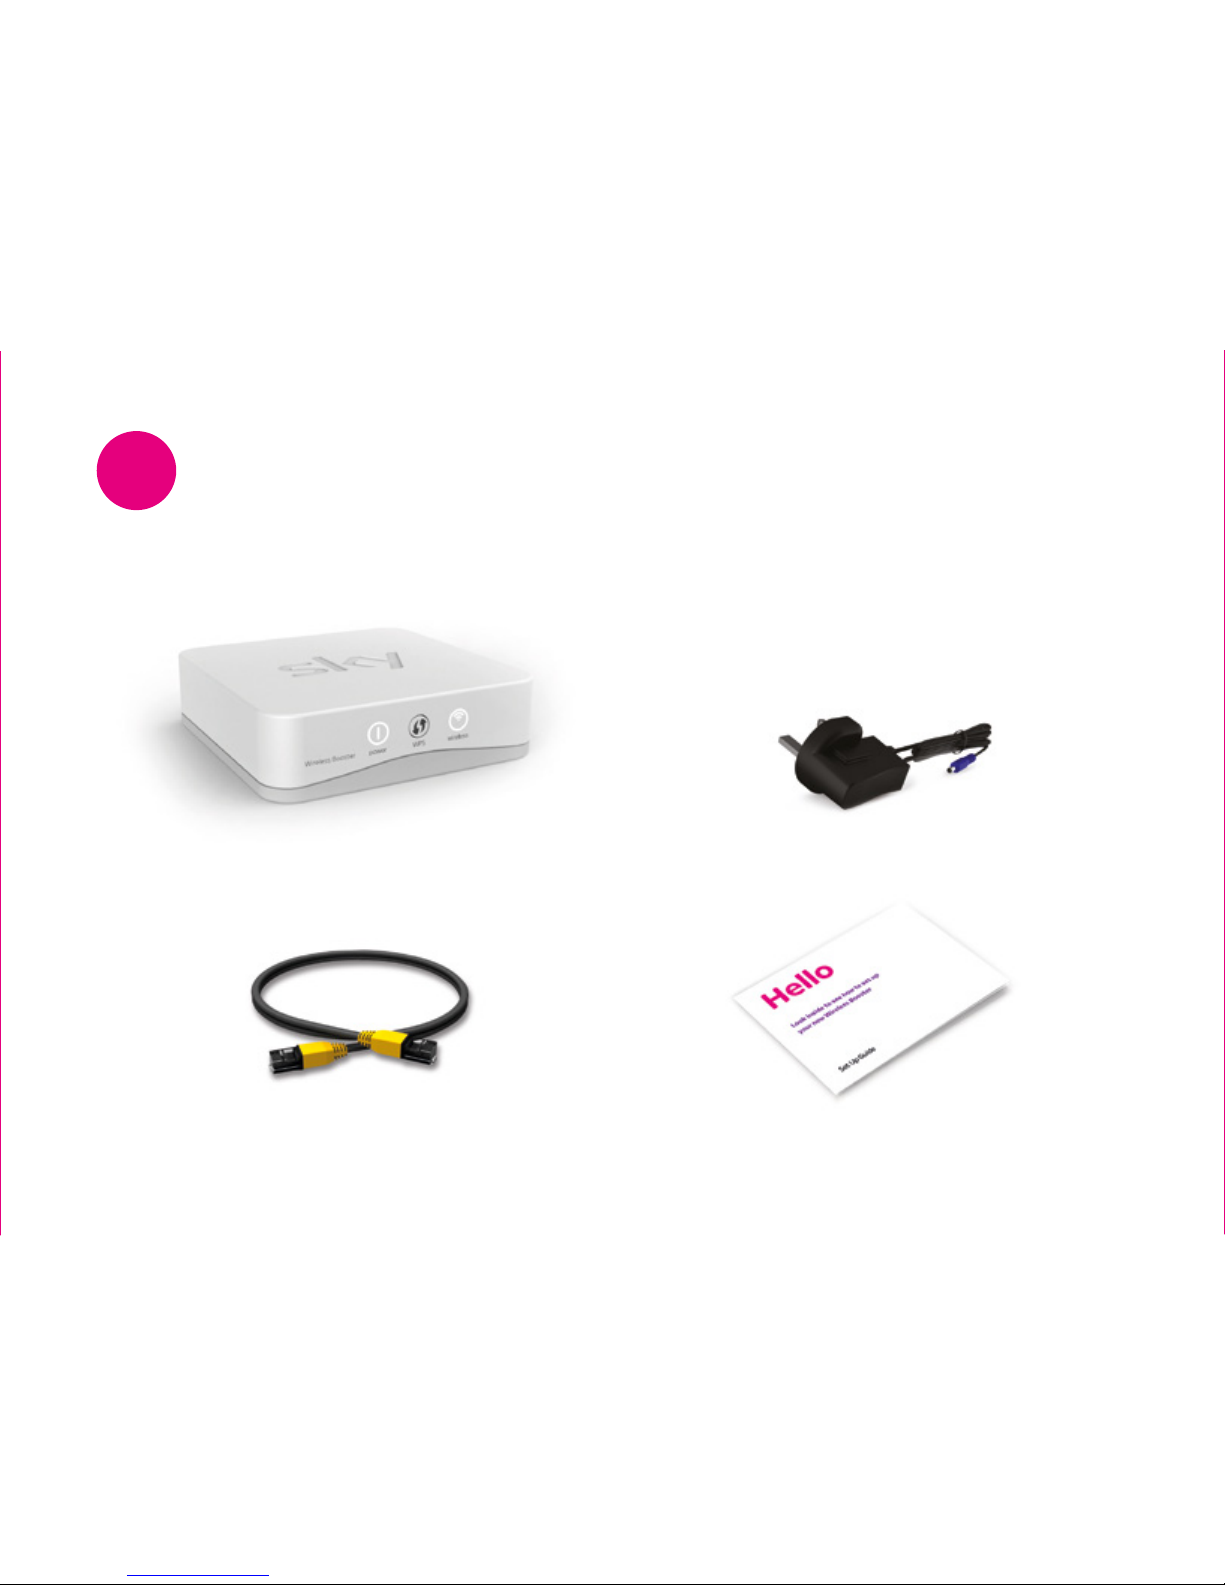
5
Set Up Guide
Black Ethernet Cable
Wireless Booster Black Power Cable
Check
what’s in the box
1
Page 5
6
Connect
2
your Wireless Booster to your Broadband Router
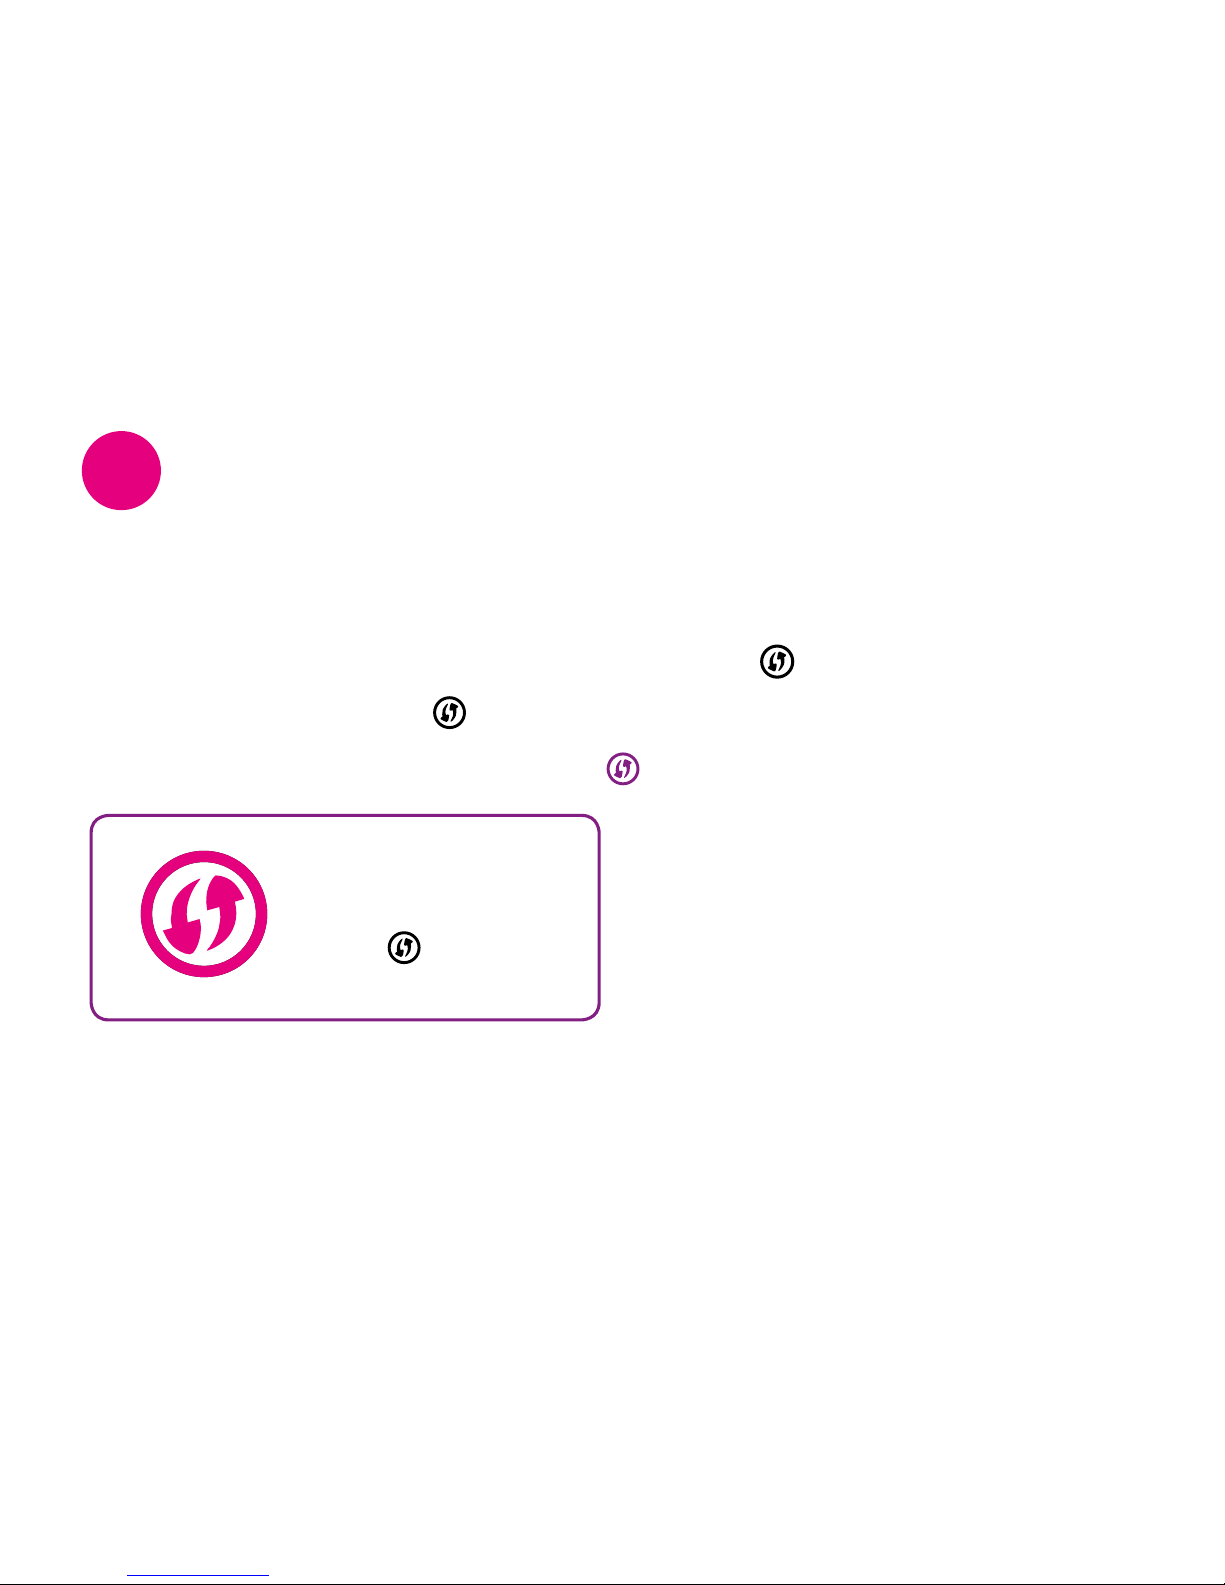
Does your Broadband Router have a WPS button
If so, we recommend you use WPS to connect your Wireless Booster to your Broadband Router.
This is the quickest and simplest method of connection, follow the instructions
(a) Connect your Wireless Booster by WPS button
on pages 7–9.
If your Broadband Router does not have WPS you will have to connect manually, follow the
instructions (b) Connect your Wireless Booster manually on pages 10–13.
Check your Broadband
Router for a button
marked
or WPS
Page 6
7
(a) Connect
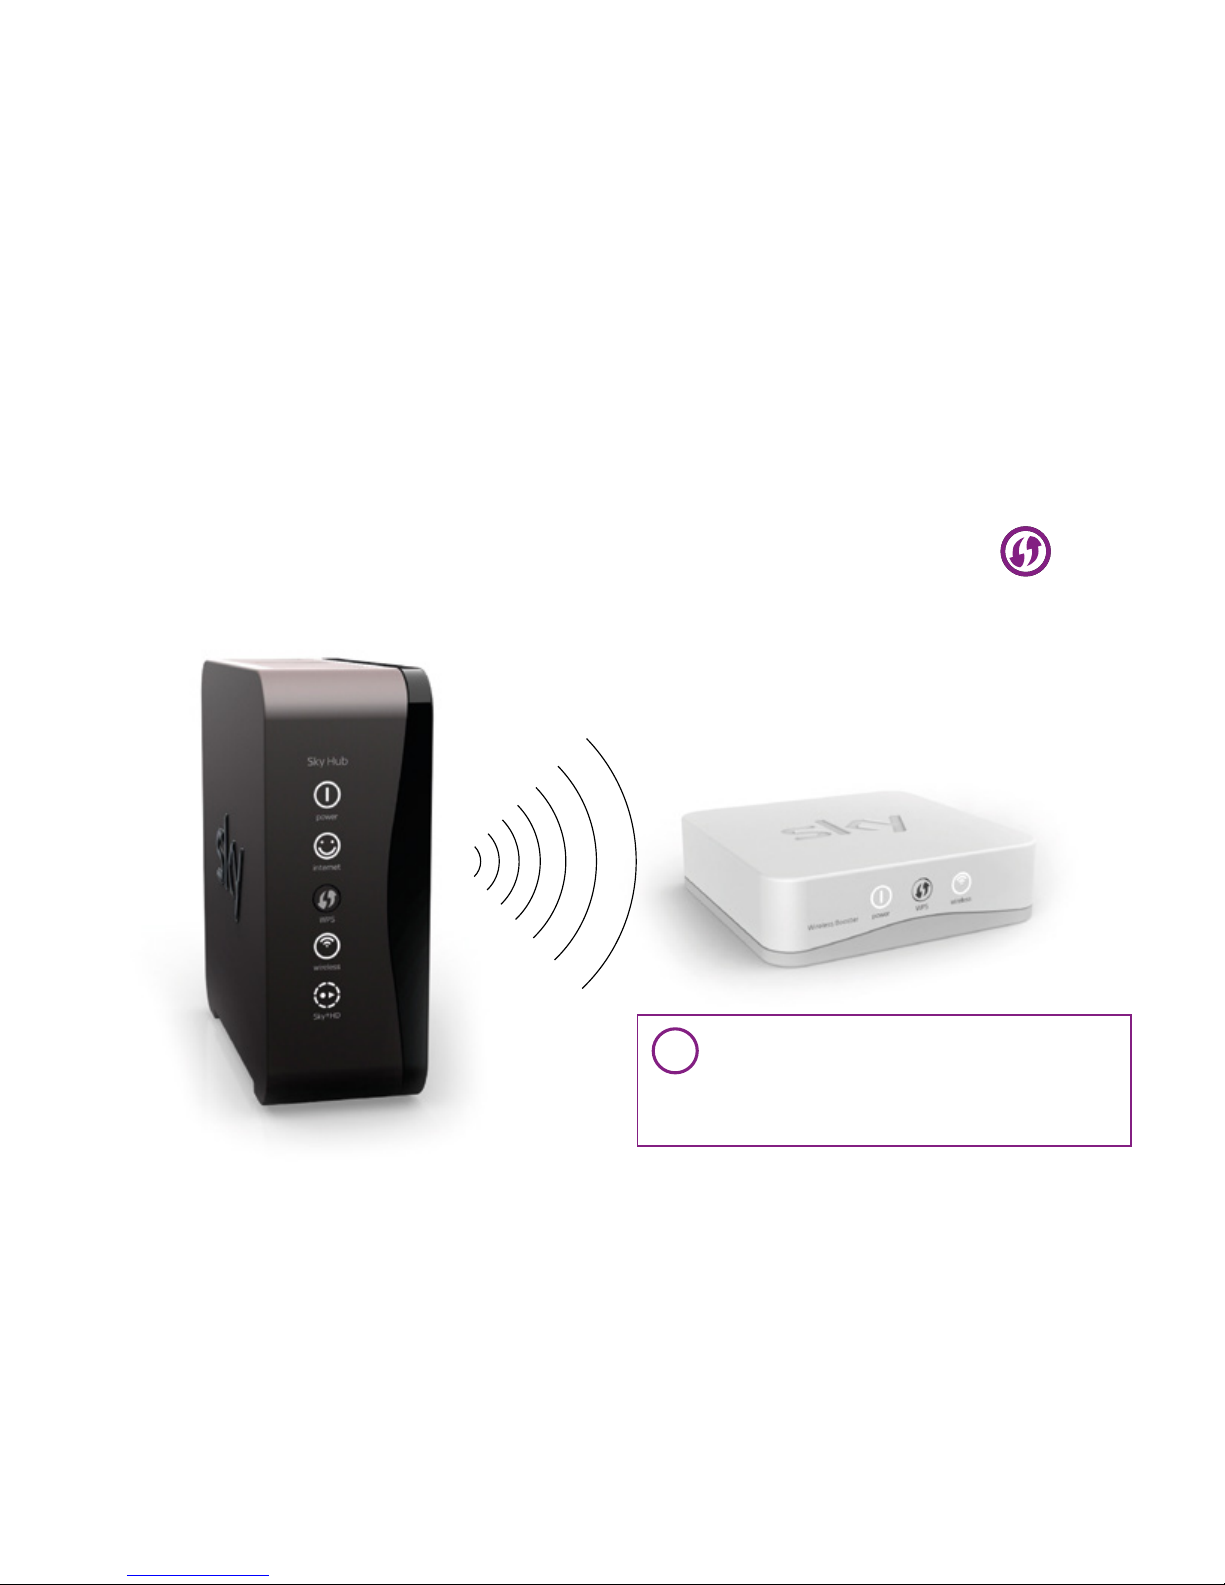
your Wireless Booster by WPS button
Your Broadband Router may differ in appearance.
i
WPS? Wi-Fi Protected Setup:
An easy and secure way to set up a
Wi-Fi connection between compatible
WPS devices.
Page 7
8
In the first instance you need to connect your
Wireless Booster to your Broadband Router,
you only need to complete this step once.
When the connection is made, you can move
your Wireless Booster to the best location.
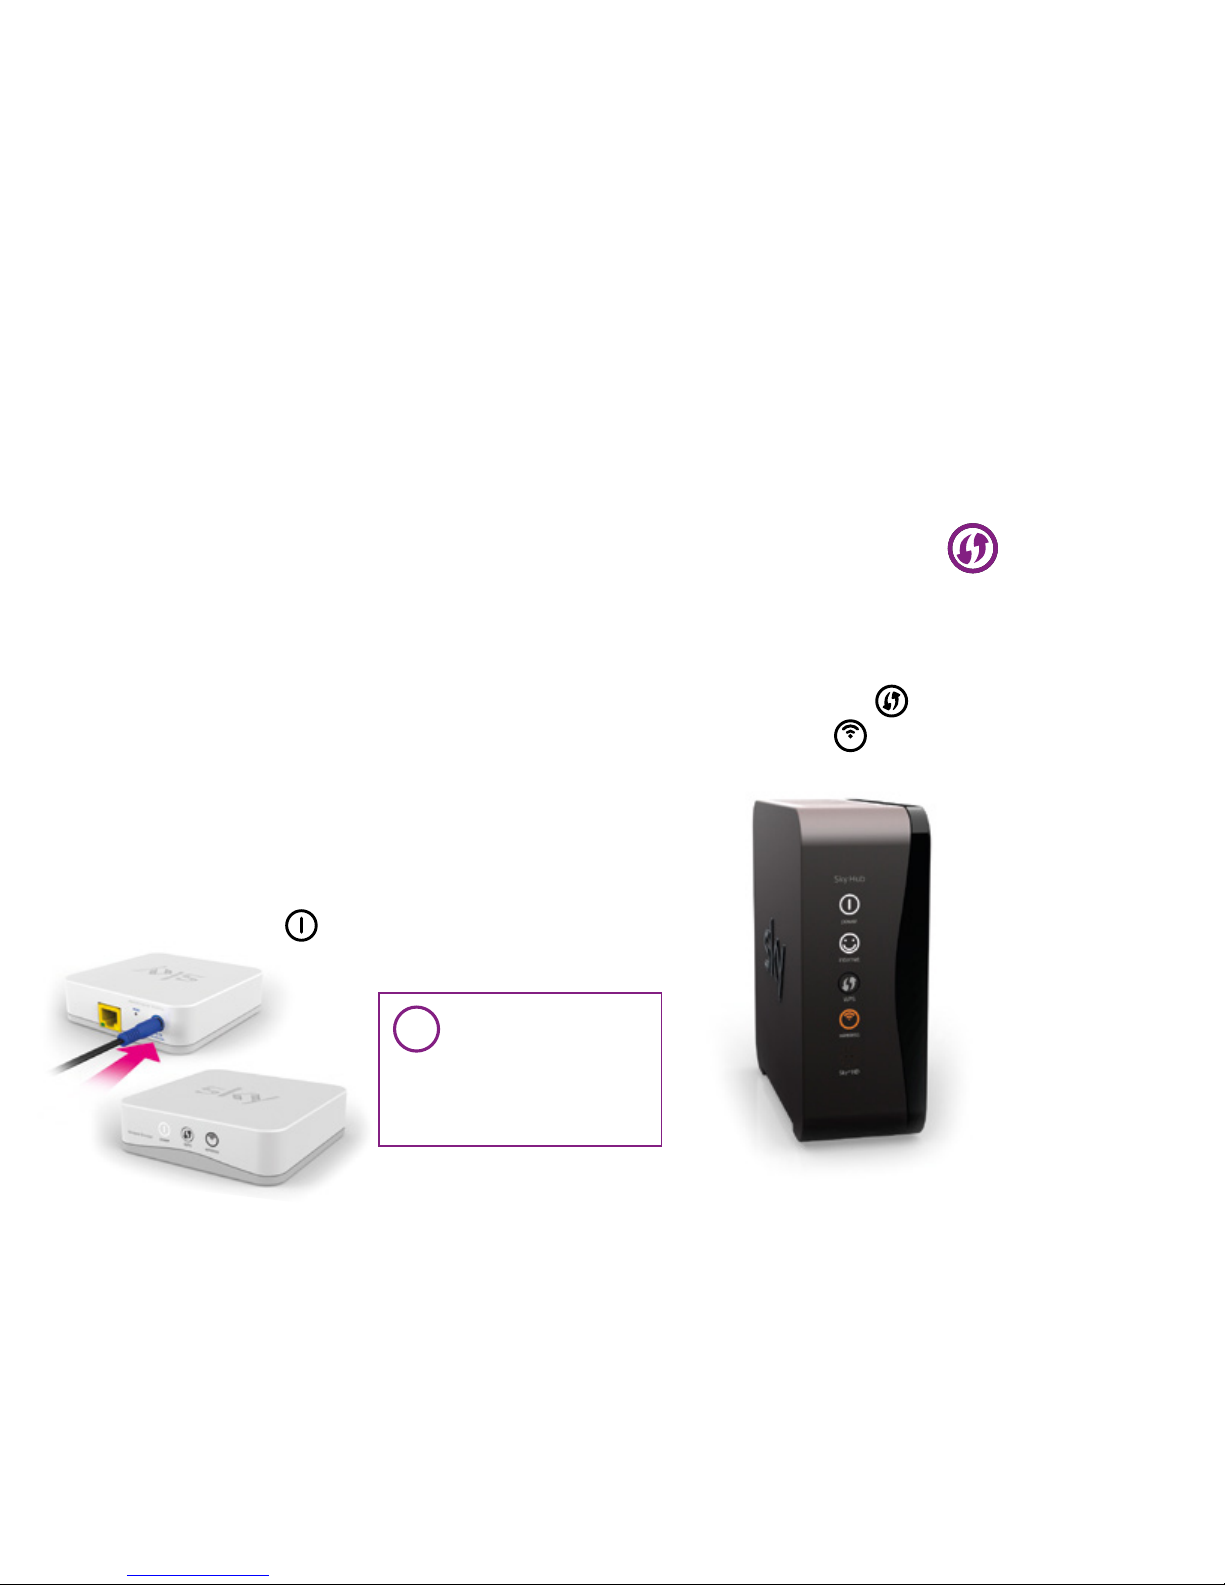
1. Plug the black power cable into the blue
power port on the back of your Wireless
Booster, then plug it in at the mains.
The power icon
will go solid white.
2. Go to your Broadband Router, press and
hold the WPS button
for 2 seconds.
The wireless icon
will flash amber.
i
It is recommended
that you do this
close to where
your Broadband
Router is located.
Your Broadband
Router may differ
in appearance.
(a) Connect
your Wireless Booster by WPS button
Page 8
9
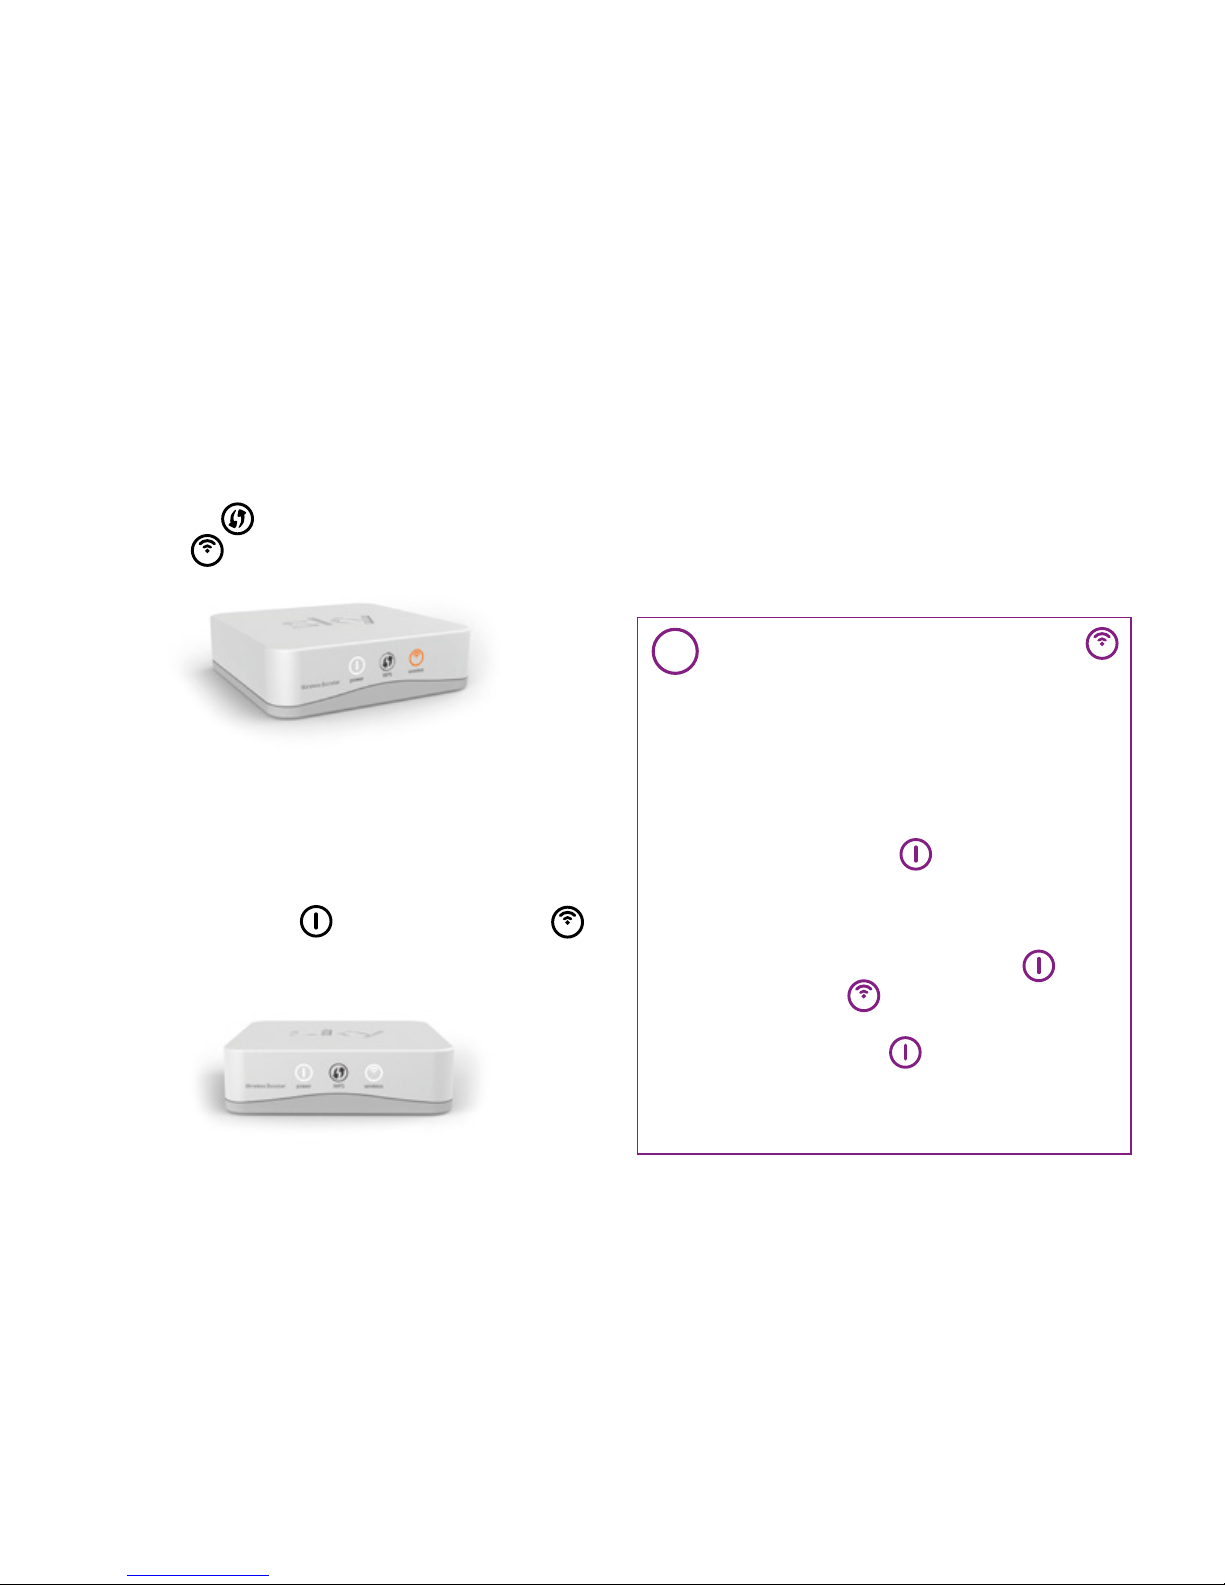
3. Return to your Wireless Booster and
within 2 minutes press and hold the WPS
button
for 2 seconds. The wireless
icon
will flash amber.
4. Wait approximately 2 minutes while a
connection between your Broadband
Router and Wireless Booster is made.
When the connection is successful both
the power icon
and the wireless icon
will go solid white on your Wireless Booster.
i
If the set up fails and the wireless icon
isn’t solid white on your Wireless
Booster, please reset the unit and
repeat steps 2 to 4. If you still can’t get
connected please try the manual set up
on the next page.
Resetting your Wireless Booster
Ensure the power
icon is solid white.
Next, insert the end of a paper clip
(or similar) into the reset aperture
on the back of the unit, then push in
and hold until both the power
and wireless
icons flashes rapidly.
This can take up to 20 seconds.
When the power
icon turns solid
white, your Wireless Booster will be
ready for connecting to your Broadband
Router again.
Your Wireless Booster is now connected to
your Broadband Router. You now need to move
your Wireless Booster to the best location in
your home, go section 3 Position on page 14
and follow the instructions.
Page 9
9
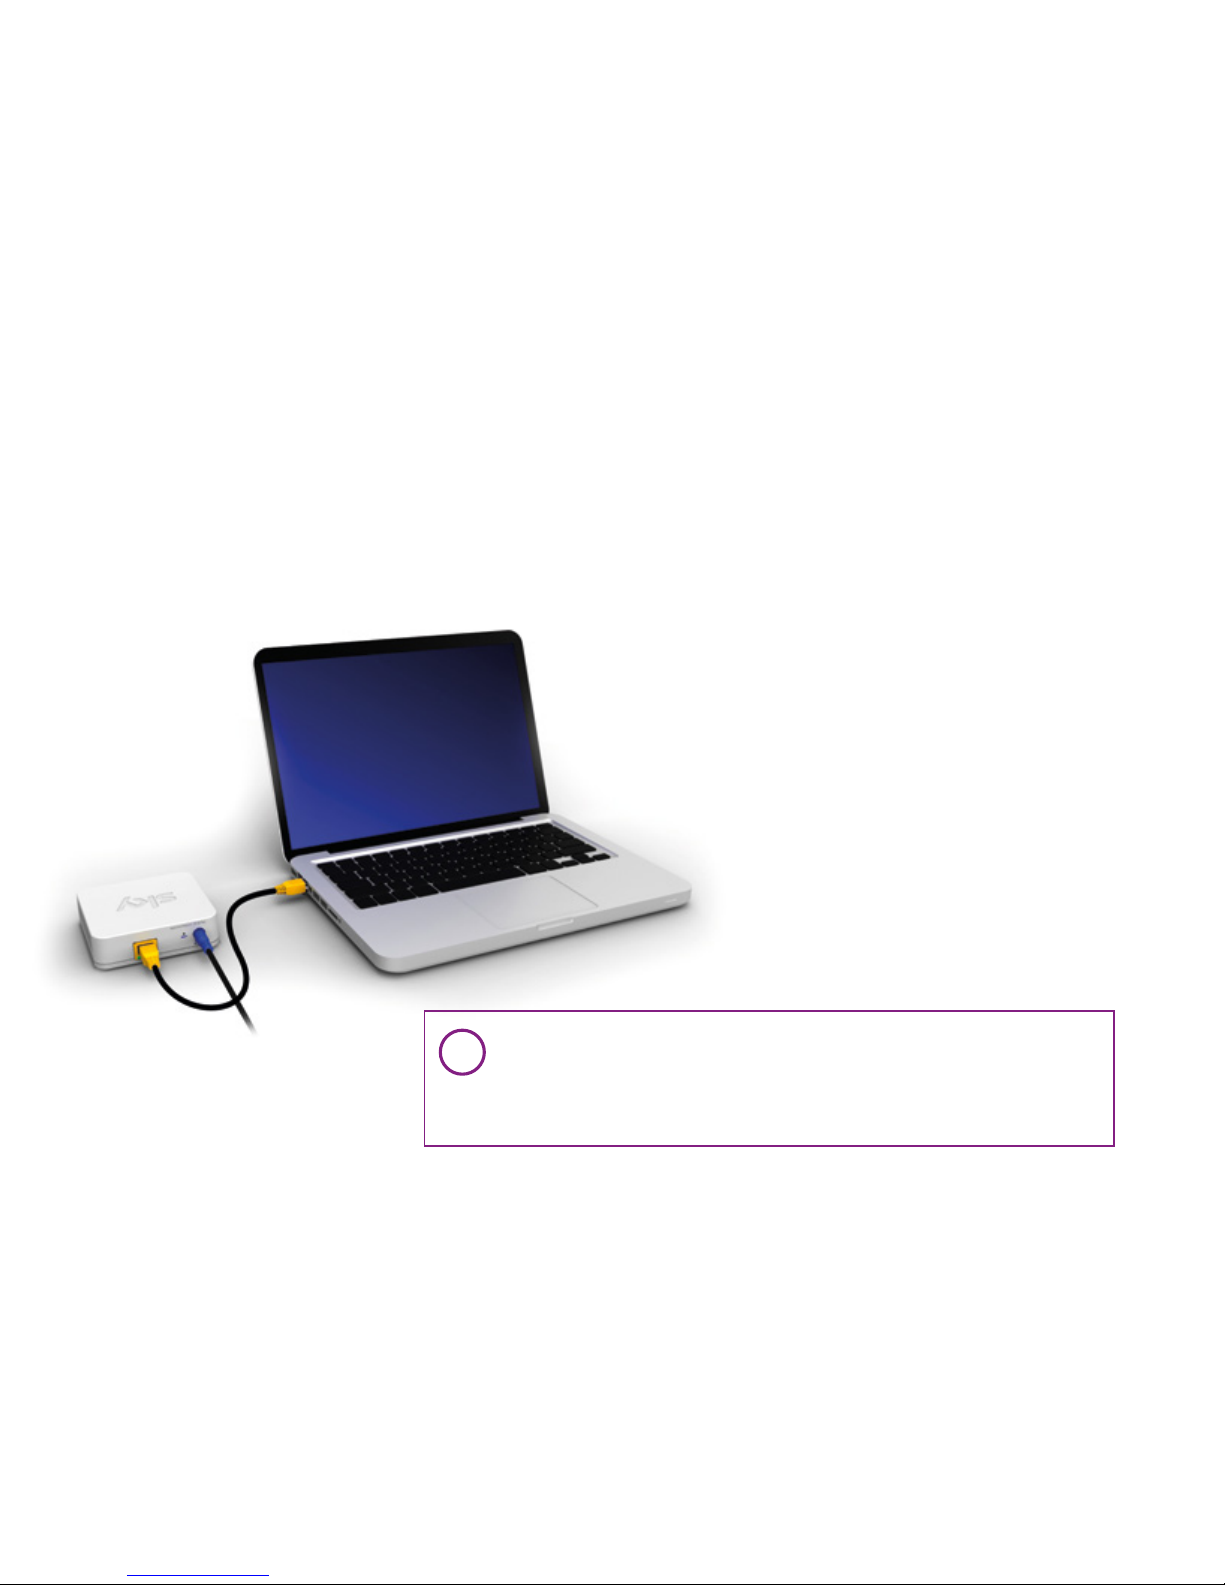
i
You only need to connect your Wireless Booster manually
if your Broadband Router does not have WPS functionality.
It is recommended that you do this close to where your
Broadband Router is located.
your Wireless Booster manually
(b) Connect
Page 10
11
1. Make a note of the Network Name (this
is also called the SSID) and Password of
your existing Broadband Router. They can
typically be found on the back/bottom of
your existing Broadband Router, unless
you have changed them manually.
2. Plug the black power cable into the blue
power port on the back of your Wireless
Booster, then plug it in at the mains. The
power icon
will go solid white.
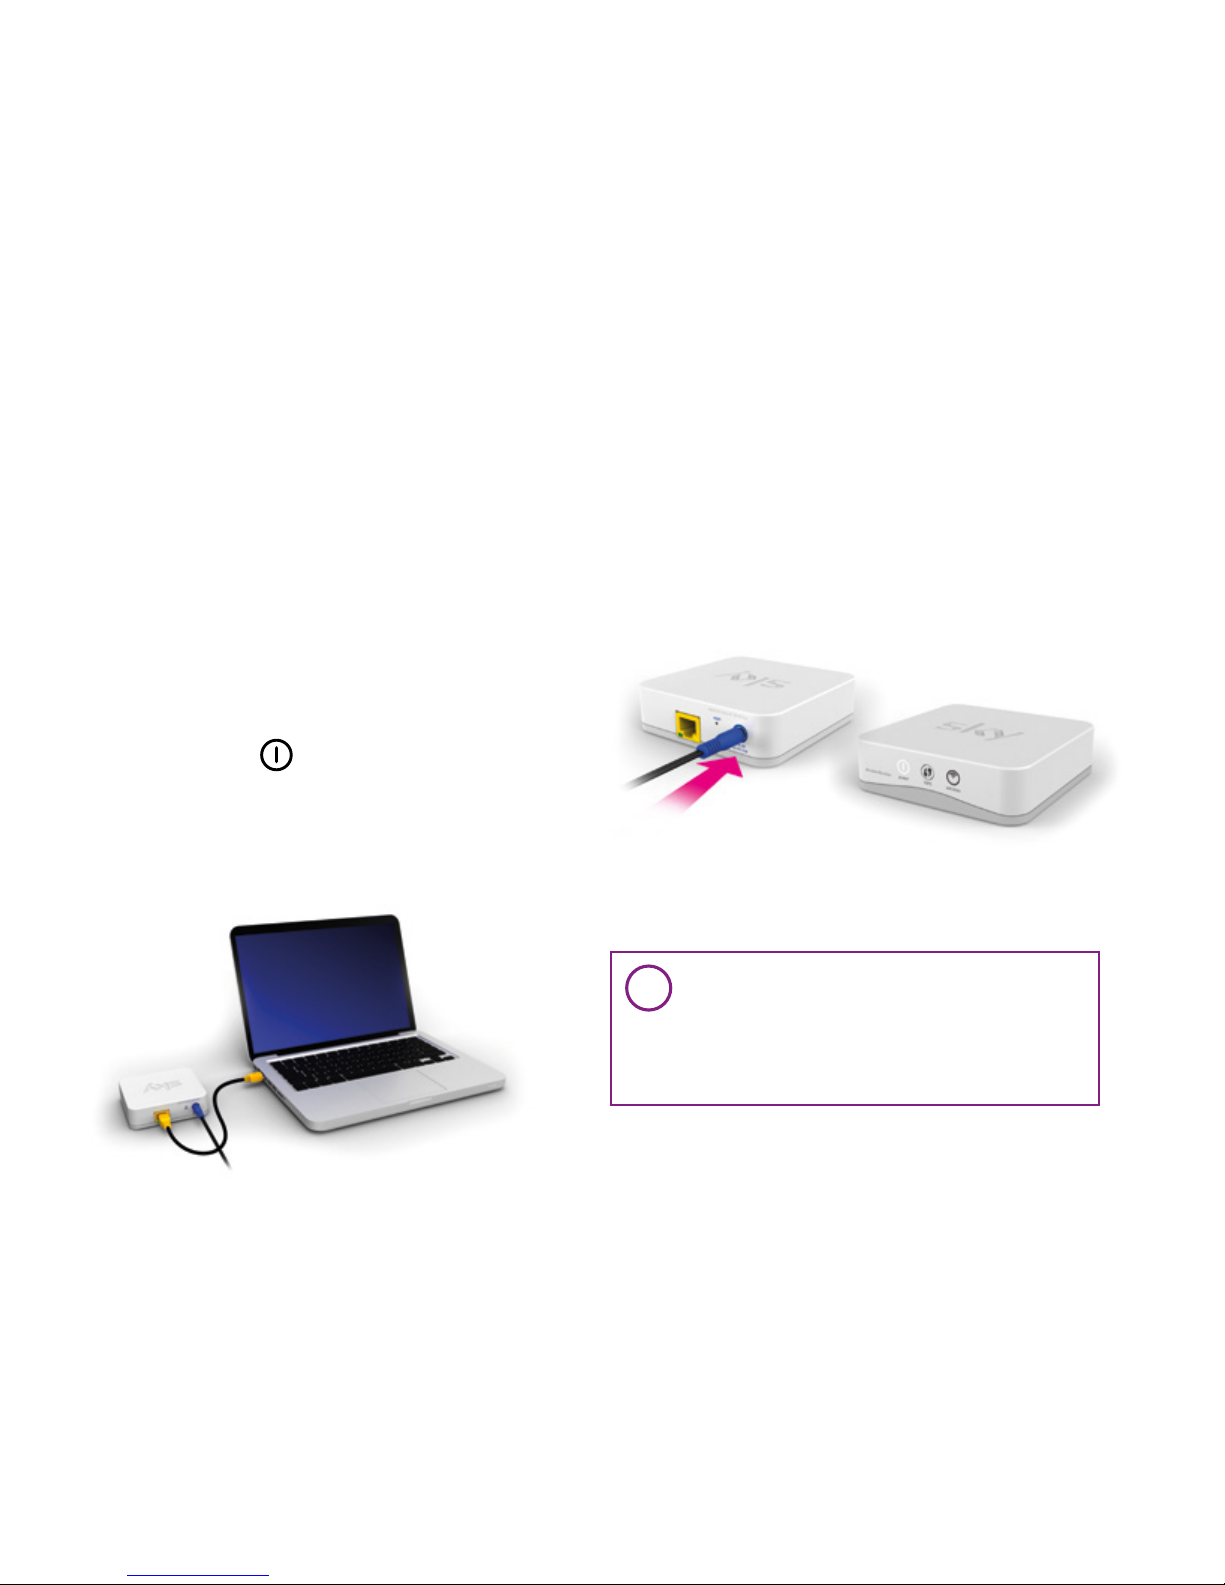
3. Connect your Wireless Booster to your
computer/laptop using the black Ethernet
cable provided.
i
Ensure that the green and amber lights
on the back of your Wireless Booster
are on or flashing. If neither green or
amber lights are on, please turn off the
Wi-Fi on your computer/laptop.
Page 11
12
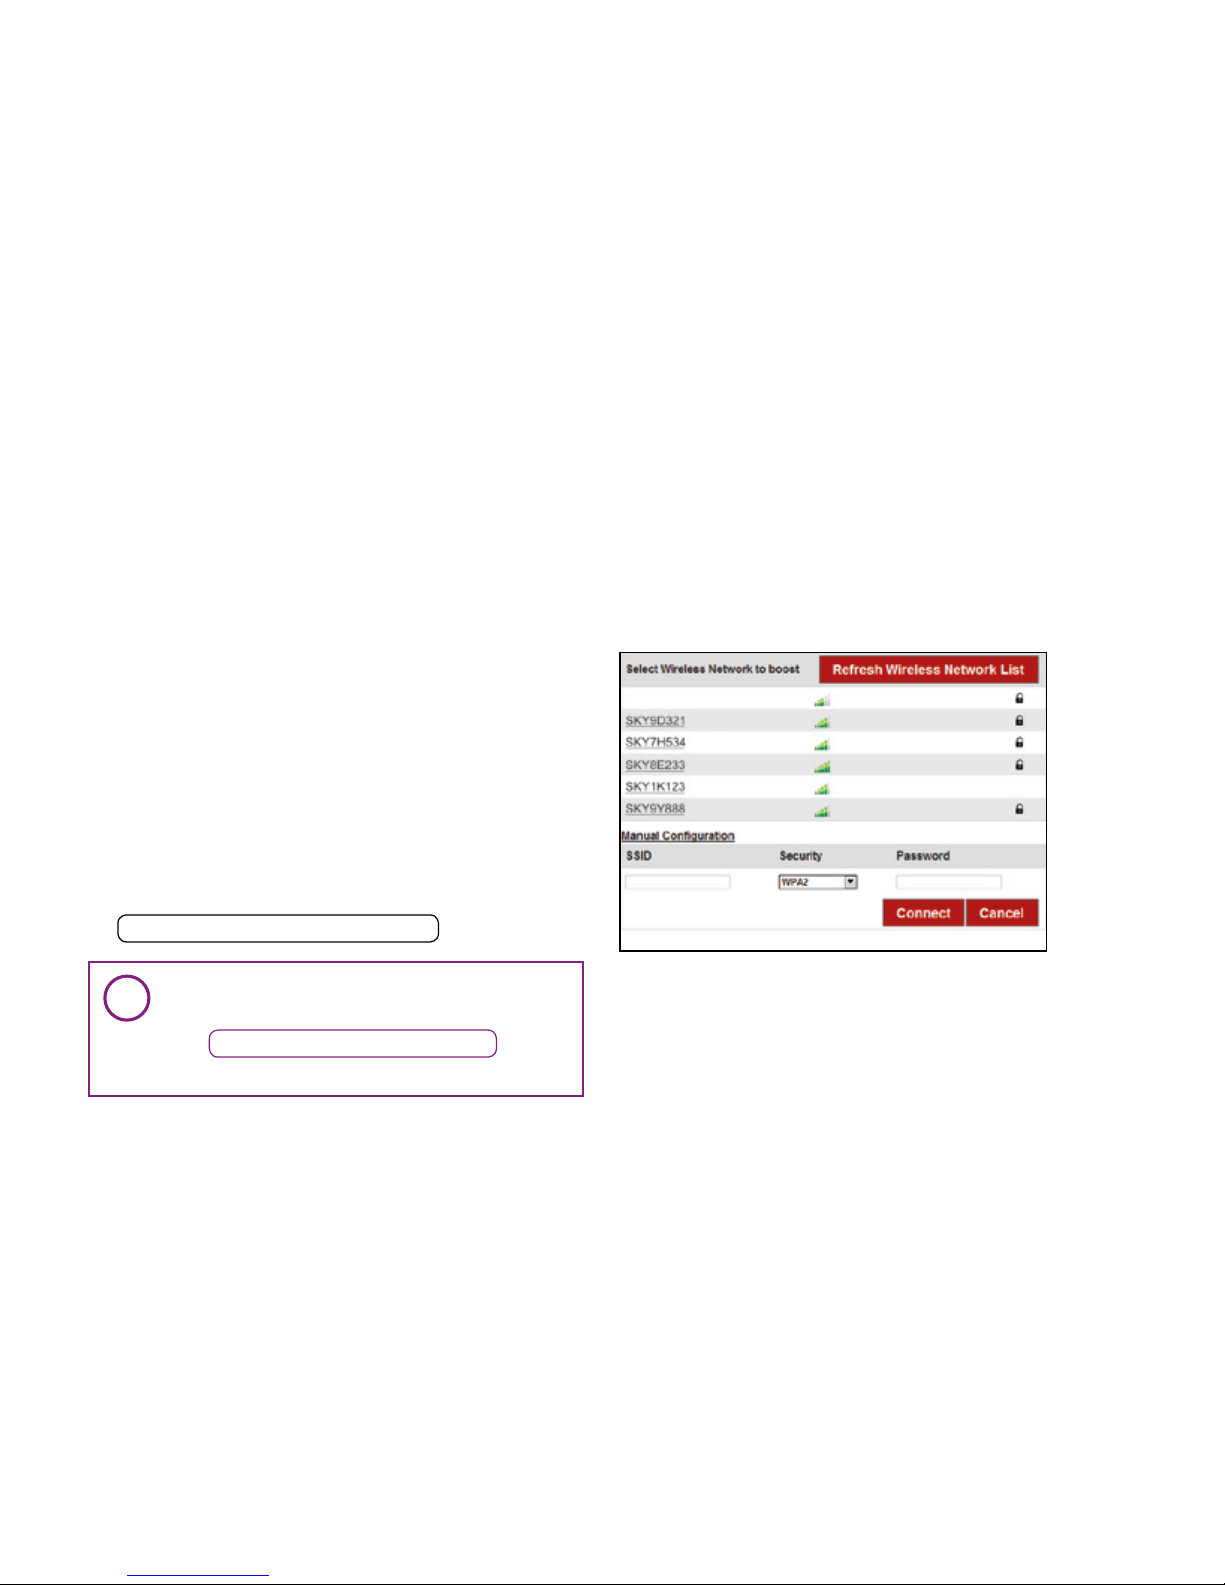
4. Open a new browser page, type
http://skywirelessbooster.local
in the address bar and click enter
A quick set up page will appear with
a list of wireless networks. Your wireless
network name should appear on this list.
(If you don’t see your wireless network
name in the list click on the
Refresh Wireless Network List button).
i
If you still cannot see your Wireless
Network name in the list after clicking on
the Refresh Wireless Network List button
refer to the Help section on page 20.
your Wireless Booster manually
(b) Connect
Page 12
13
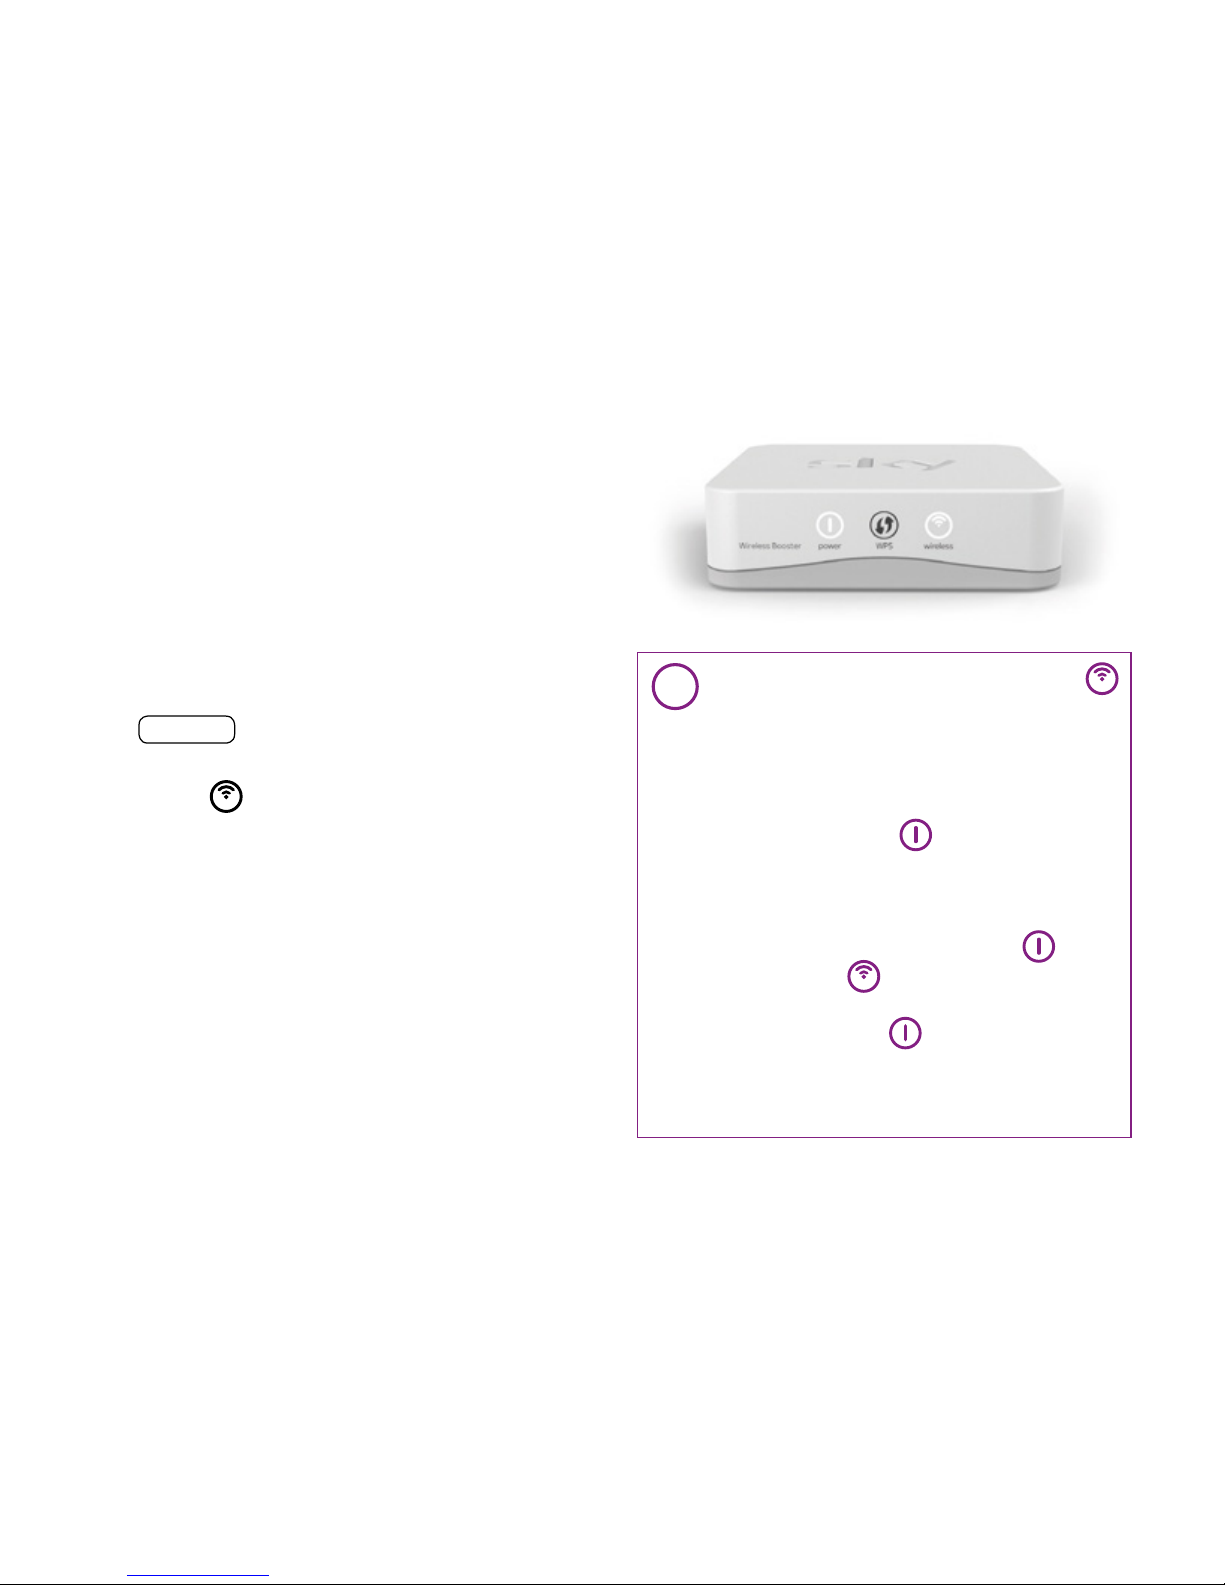
5. Select your Wireless Network name. If
prompted enter your Password and click
Connect button.
• In approximately 30 seconds the wireless
icon
will go solid white on your Wireless
Booster.
Your Wireless Booster is now connected to
your Broadband Router. You now need to move
your Wireless Booster to the best location in
your home, go to 3 Position on page 14 and
follow the instructions.
i
If the set up fails and the wireless icon
isn’t solid white on your Wireless
Booster, please reset the unit and
repeat steps 4 and 5.
Resetting your Wireless Booster
Ensure the power
icon is solid white.
Next, insert the end of a paper clip
(or similar) into the reset aperture
on the back of the unit, then push in
and hold until both the power
and wireless
icons flashes rapidly.
This can take up to 20 seconds.
When the power
icon turns solid
white, your Wireless Booster will be
ready for connecting to your Broadband
Router again.
Page 13
14
Position
3
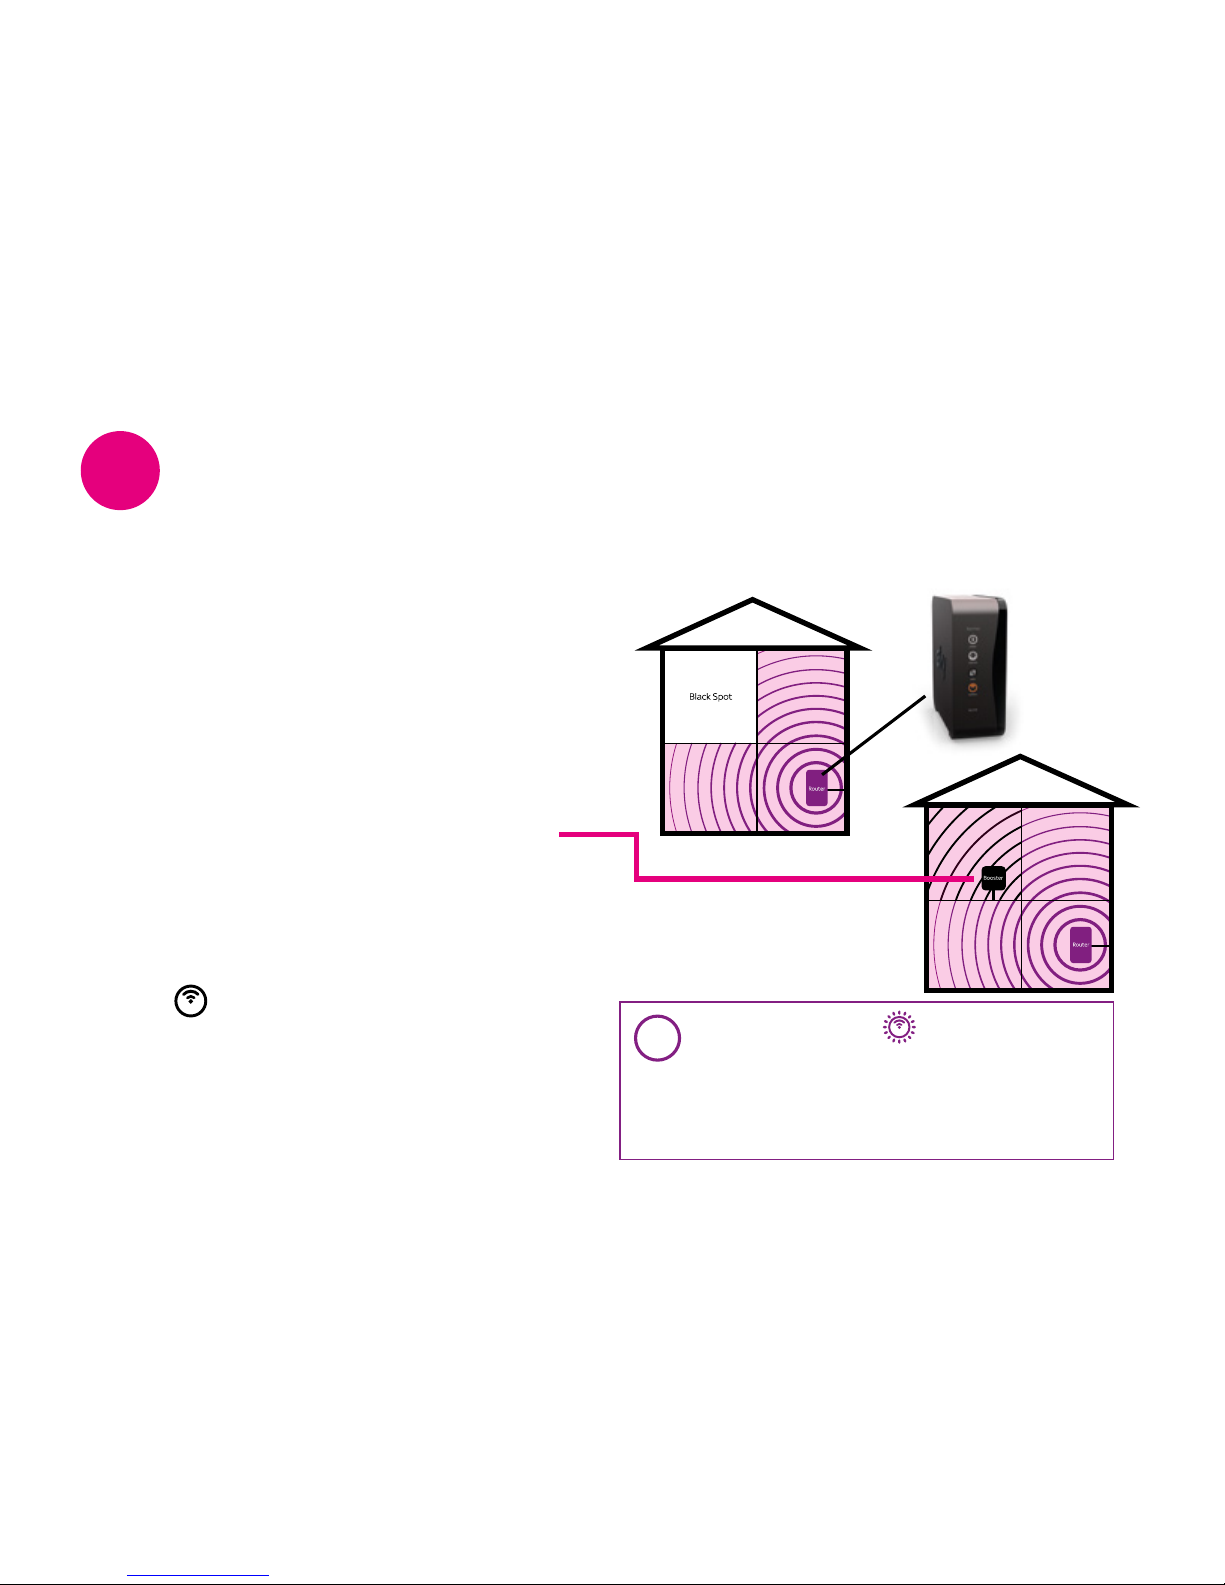
your Wireless Booster in the best location
Positioning your Wireless Booster in the best
location is essential to ensure best performance.
1. Switch off and unplug your Wireless Booster
at the mains. Don’t worry, your Wireless
Booster will automatically reconnect to your
Broadband Router when powered on again.
2. Take your Wireless Booster to the room or
area in your home where the black spot is,
plug it into a power socket closest to your
Broadband Router and switch it on at the mains.
3. Within approximately 30 seconds the wireless
Icon
will turn solid white.
Great, your Wireless Booster is now re-connected
to your Broadband Router and Wi-Fi coverage has
been extended in your home.
Go to the 4 Congratulations section on page 16.
i
If the wireless icon is flashing white
this means your Wireless Booster is
out of range of your Broadband Router
and you have not extended the Wi-Fi
coverage, refer to next page.
Page 14
15
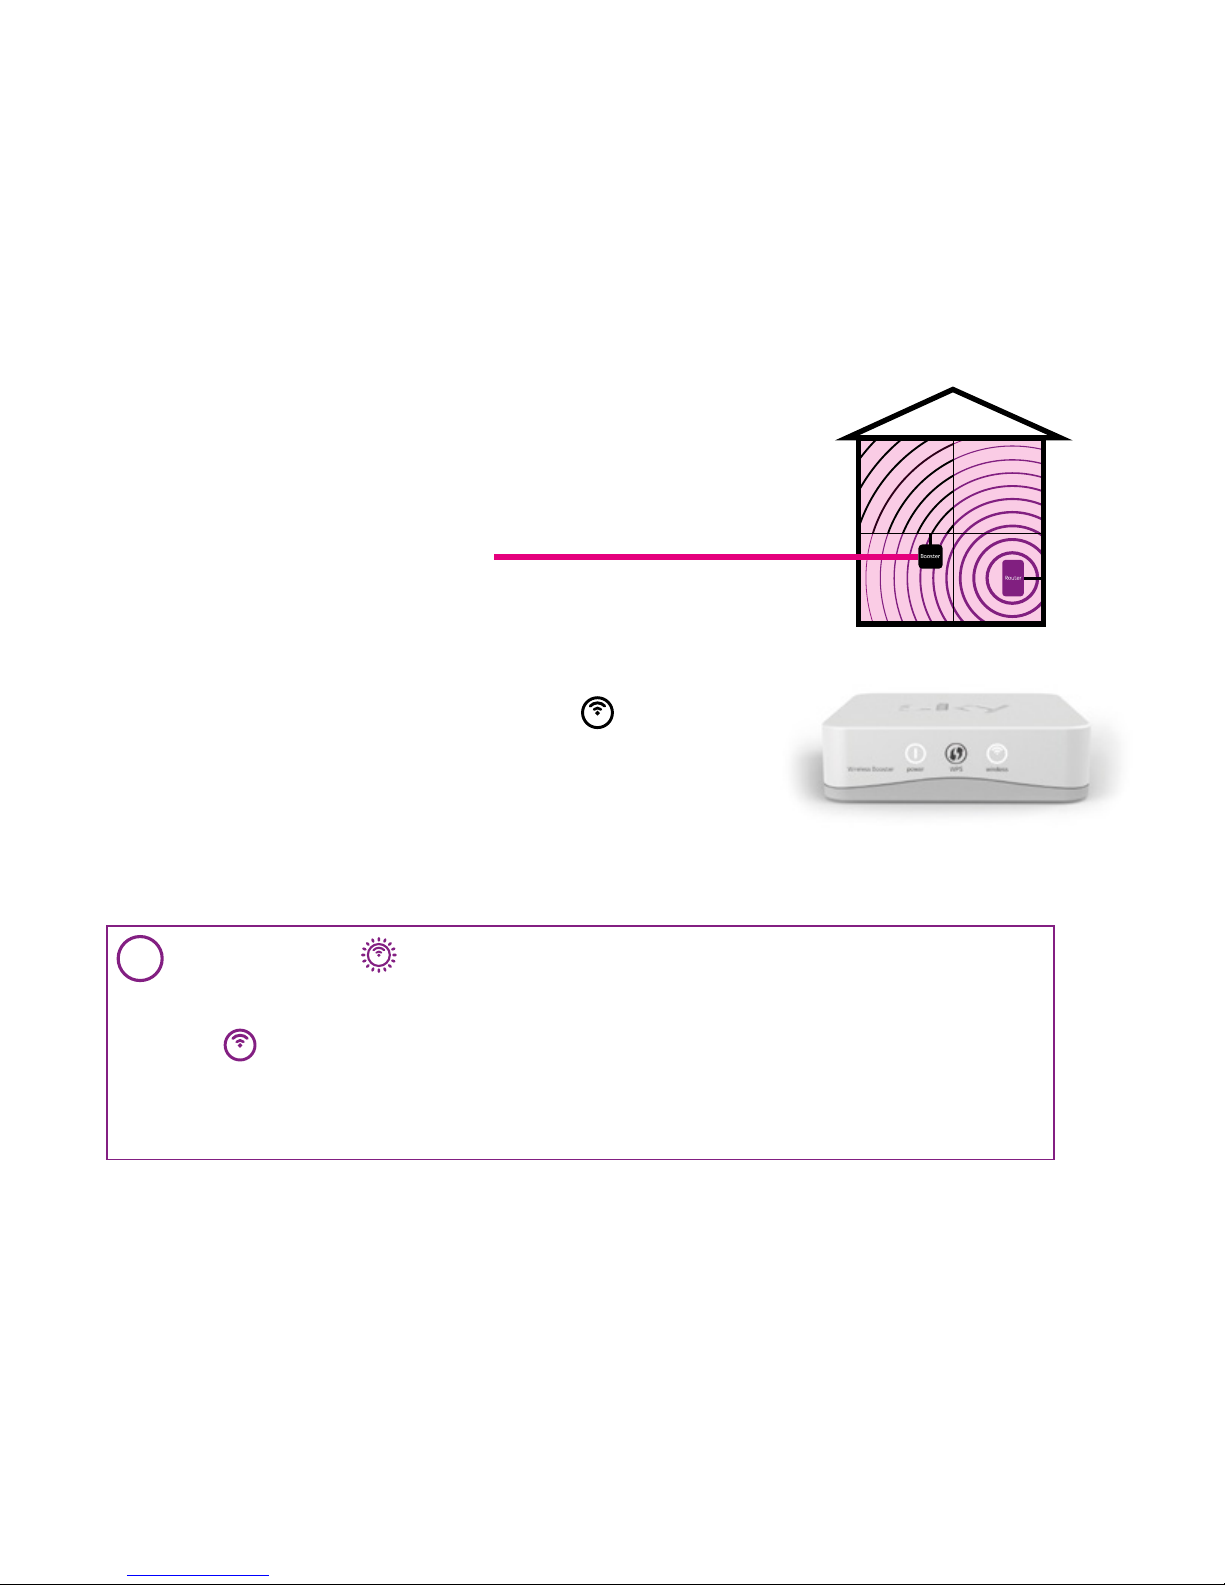
4. Find another power socket closer to your Broadband Router.
This may not be in the same room.
5. Plug your Wireless Booster into the power socket and switch
it on at the mains.
6. If you are now in range of your Broadband Router, within
approximately 30 seconds the wireless Icon
will turn
solid white.
Great, your Wireless Booster is now re-connected to your
Broadband Router and Wi-Fi coverage has been extended
in your home.
Go to 4 Congratulations section on page 16.
i
If the wireless icon is flashing white this means your Wireless Booster is out of range
of your Broadband Router and you have not extended the Wi-Fi coverage.
Repeat steps 4 to 6 in another location nearer your Broadband Router until the wireless
icon
turns solid white, only then is your Wireless Booster re-connected to your
Broadband Router and Wi-Fi coverage has been extended in your home.
You should avoid putting your Wireless Booster in the same room as your Broadband
Router as this could cause interference.
Reposition your Wireless Booster if out of range
Page 15
16
Going on holiday or want to save energy?
Just switch off your Wireless Booster at the mains power. When you turn it
back on, it will automatically connect to your Broadband Router as long as
it is still within range.
Congratulations
4
Your Wireless Booster is now up and running
and wireless coverage is being extended in your
home. Your wireless devices can now connect to
either the Wireless Booster or your Broadband
Router depending on their location.
you are now up and running
Page 16

16
Getting the best from your Wireless Booster
More than one Black Spot in your home?
If you have more than one black spot in your home, you might want to consider
re-positioning your Wireless Booster for the area you want improved the most. Whilst
it may be possible to position the booster to a location that covers all the black spots,
Wireless Booster performance is optimised for one black spot.
Is your wireless device connected to the strongest signal?
If you notice a drop in Wi-Fi signal in other areas around the home it may indicate that
your wireless device is not connected to the strongest Wi-Fi signal (some devices do
not select the strongest signal automatically). To ensure connection to the strongest
signal, go to ‘Settings’ on your wireless device and turn the Wi-Fi OFF and ON again.
i
To find out how to turn the Wi-Fi OFF and ON again on your wireless device,
please refer to the user guide for your wireless device.
Page 17

17
Other stuff
Icon guide
Help
Using your equipment safely
Recycling
Page 18
19
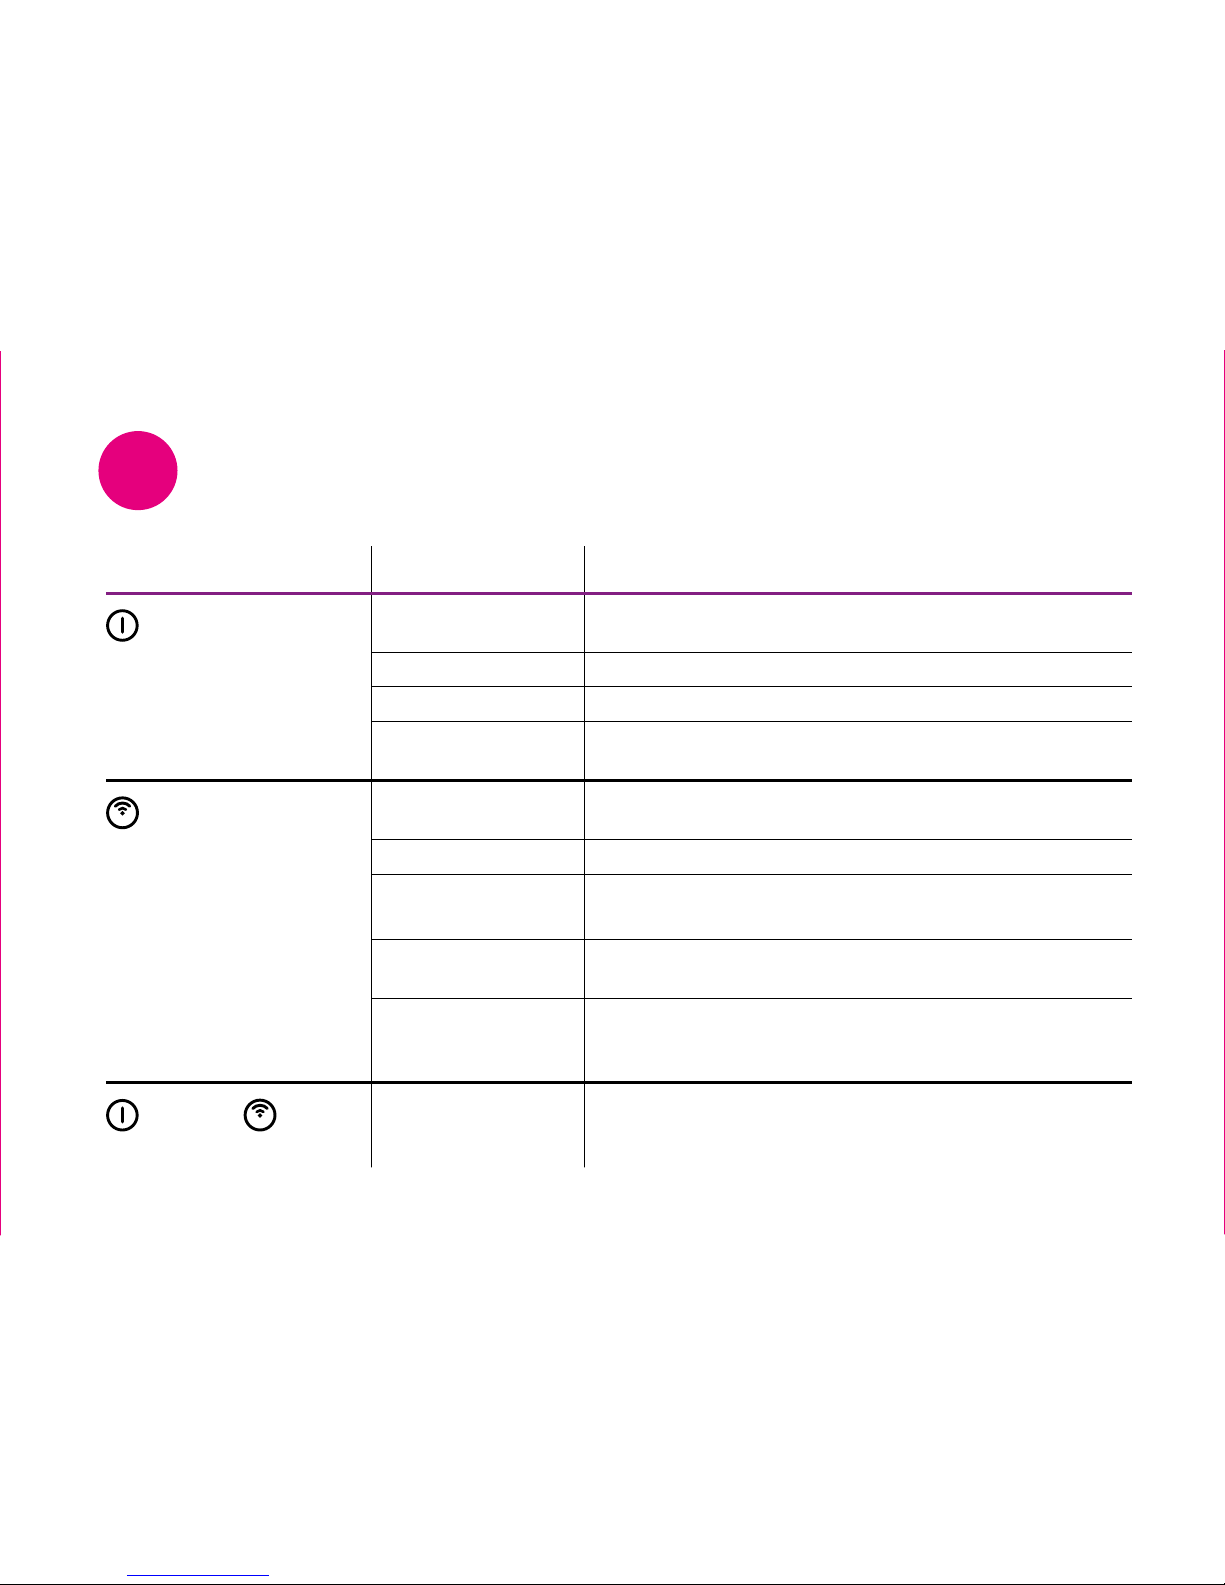
Icon guide
1
Icon Status What it means
Power
Off No Power to Wireless Booster. Check the black power
cable is plugged in and switched on at the mains
Amber solid Power on. Boot-up in progress
White solid Wireless Booster is powered on
White flashing Wireless Booster is upgrading software. Do not unplug
from power or interrupt until the icon goes solid white
Wireless
Off No wireless connection established. Make sure Wireless
Booster is connected to your Broadband Router
Amber flashing WPS in progress
Amber flashing
(rapid flash)
WPS error. Re-start WPS session by pressing and holding
the WPS button on Wireless Booster for 2 seconds
White solid Wireless connection established and device is fully
operational
White flashing Wireless Booster configured but signal from your
Broadband Router is weak. Move the Wireless Booster
closer to your Broadband Router until icon goes solid white
Power and Wireless
simultaneously
Rapid white flashing Factory reset performed successfully
Page 19
20
Help
2
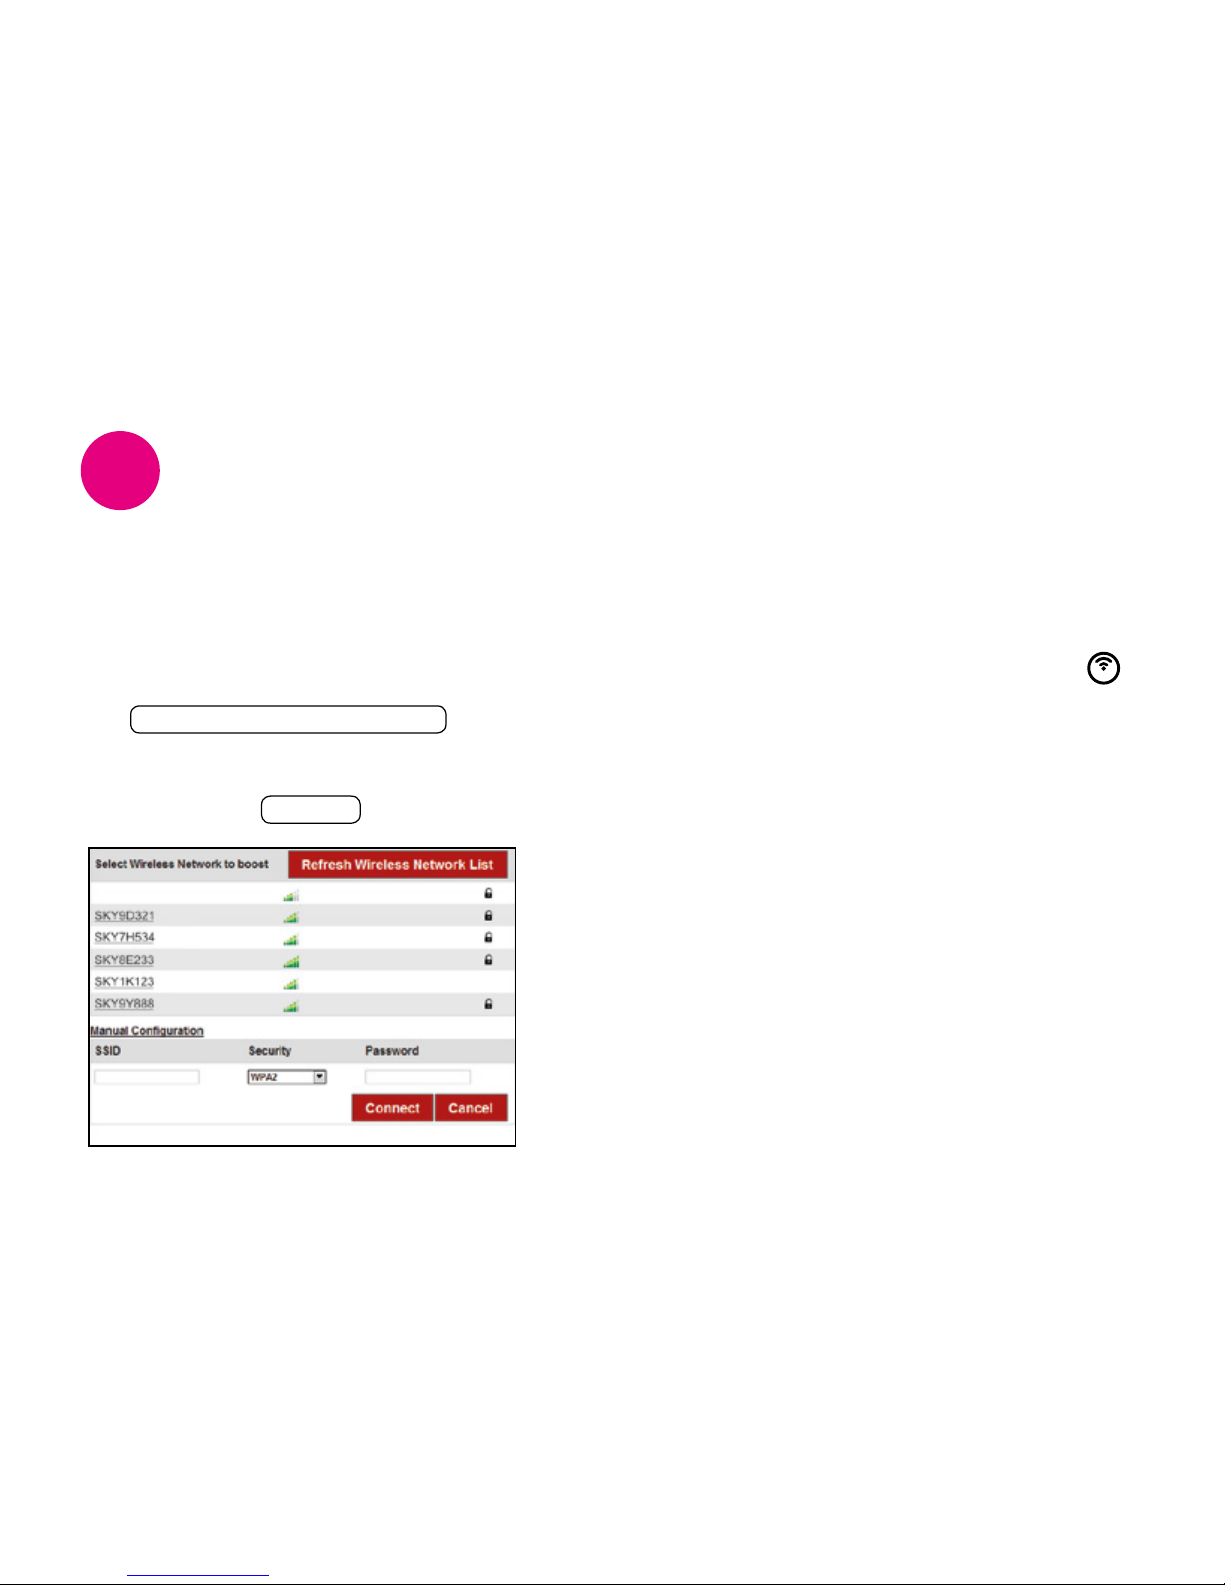
If you still cannot see your Wireless
Network name on the list after clicking on
the Refresh Wireless Network List button,
you can enter your wireless network details
manually in the SSID and Password fields
then click on the Connect button.
In approximately 30 seconds the wireless icon
will go solid white on your Wireless Booster.
Experiencing difficulties?
Your Wireless Booster is now connected to
your Broadband Router. You now need to move
your Wireless Booster to the best location
in your home, go to the 3 Position section on
page 14 and follow the instructions.
Still not working?
If you’ve followed all the steps in this guide and
still experiencing difficulties, you can go onliine
sky.com/boosterhelp for additional help. Or call
Sky Technical Support on 08442 410 515.
Connect your Wireless Booster manually
Page 20

21
Using your
equipment safely
3
Your Wireless Booster has been manufactured
to meet international safety standards, but you
must take care if you want it to perform properly
and safely. It’s important that you read this
section completely, especially the ‘Warnings
and Cautions’ instructions. You should follow
the instructions set out in your Set Up Guide.
If you’ve any doubts about the set up process,
operation or safety of your Wireless Booster,
please contact Sky.
Warnings and Cautions
Remember that contact with 230V AC
mains can be lethal or can cause a severe
electric shock.
To avoid this risk:
• Never remove the cover of your Wireless Booster.
There are no user-serviceable parts inside
• Don’t attempt to repair your Wireless Booster.
Instead, please contact Sky Customer Services
• If you move your Wireless Booster between
locations at different temperatures, allow
it to reach room temperature before you
connect it to the mains supply
• Make sure that all electrical connections are
properly made
• Don’t connect your Wireless Booster to the
mains supply until you’ve properly connected
all the other cables
Page 21

22
• Disconnect your Wireless Booster from the
mains supply before you disconnect any other
equipment from its rear panel
• Never push anything into holes, slots or other
openings in the casing of your Wireless Booster
• Your Wireless Booster is intended for use in
moderate climates. Don’t use or store your
Wireless Booster in hot, cold, damp or dusty
places
• In order to ensure a free flow of air around
your Wireless Booster, allow at least 10cm
of space above and on all sides. Don’t cover
any ventilation holes and slots
• Ensure the ventilation holes and slots don’t
become impeded with items such as newspapers,
tablecloths and curtains or similar items
• Don’t place your Wireless Booster close to
sources of heat such as a heater or direct
sunlight. The maximum temperature should
not exceed 40°C
• Don’t put anything on your Wireless Booster
which might drip or spill into it. Never stand
objects filled with liquids, such as vases, on top
• Never place naked flame sources, such as
lighted candles, on or adjacent to your
Wireless Booster
Connecting to the mains supply
Your Wireless Booster should only be used with
the black power cable supplied. The black power
cable shouldn’t be used for any other product.
If you’re in any doubt about anything relating
to the external mains supply, consult a
competent electrician.
Page 22

23
Recycling
4
Make a difference with Sky
Give your old Sky product a new life.
We can reuse most parts of your old
Sky product and any parts we can’t,
we recycle. The crossed out wheeled
bin symbol is used to mark products
that should not be disposed of with general
household waste, but collected separately
for reuse or recycling. The product contains
materials that when processed correctly can
be recovered, reused or recycled.
Old Sky equipment can be reused or recycled,
and the good news is that it’s really easy to do.
We have three options for you:
1. If you’re a customer in the United Kingdom,
send it to us for free, and we’ll make sure it
gets reused or recycled. Package it carefully
and include a note to say that it is for reuse
or recycling, then send it to: Sky Accessories,
FREEPOST RTEE-ZRZA-SSXL, Unipart Technology
Logistics, Unit 6020, Siskin Parkway West,
Middlemarch Business Park, Coventry, CV3 4UP.
2. If you’re a customer in the Republic of Ireland,
send it to us for free and we’ll make sure it
gets reused or recycled. Package it carefully
and include a note to say that it is for reuse
or recycling, then send it to:
c/o City Air Express Ltd, Unit M1 North Ring
Business Park, Santry, Freepost F4939,
Dublin 9, Ireland.
Household customers can also take their old
Page 23

23
© Copyright British Sky Broadcasting Limited 2013.
Sky, Sky±HD, Sky Box, My Sky, Sky Go and
Believe in Better are trade marks owned by the
British Sky Broadcasting group of companies.
The Wi-Fi CERTIFIED logo is a certification mark of
the Wi-Fi Alliance.
The Wi-Fi Protected Setup Identifier Mark logo is a
mark of the Wi-Fi Alliance.
Wi-Fi and Wi-Fi Alliance are registered trade marks
of the Wi-Fi Alliance.
Wi-Fi CERTIFIED and Wi-Fi Protected Setup are trade
marks of the Wi-Fi Alliance.
This product contains Free/Open Source Software.
For further information please log in to the web
interface of the product and click on ‘Licence
Information’ or visit sky.com/opensourcesoftware
This product is intended for use in the UK and
Republic of Ireland only.
YM.AP.S601.UM.EN.D03
Household customers can also take their
old or redundant electrical equipment to
their nearest Local Designated Collection
Facility. Please go to www.weeeireland.ie
to find the locations of these.
3. Or give it to your Sky engineer next time
they visit. For more information on reuse
and recycling your old Sky products,
and to find more about what we do,
go to sky.com/environment
 Loading...