

Page 1

Page 2

Contents
Safety Information . . . . . . . . . . . . . . . . . . . . . . . . . . . . . . . . . . . . 2–5
Vehicle Safety Belts . . . . . . . . . . . . . . . . . . . . . . . . . . . . . . . . . . . . . 6
Vehicle Seating Positions. . . . . . . . . . . . . . . . . . . . . . . . . . . . . . . . . 7
Features . . . . . . . . . . . . . . . . . . . . . . . . . . . . . . . . . . . . . . . . . . . 8–9
Adjustments . . . . . . . . . . . . . . . . . . . . . . . . . . . . . . . . . . . . . . 10–11
Securing the Child . . . . . . . . . . . . . . . . . . . . . . . . . . . . . . . . . . 12–13
Care and Maintenance . . . . . . . . . . . . . . . . . . . . . . . . . . . . . . . 14–15
Warranty. . . . . . . . . . . . . . . . . . . . . . . . . . . . . . . . . . . . . . . . . . . . 16
This product and its components are subject to change without notice.
© 2004 Britax Child Safety, Inc. All rights reserved.
Printed in U.S.A.
P230000 R3:05/04
Page 3
32
in this booklet to
•
The primary protection for occupants of a vehicle in a collision is
the body of the vehicle itself; a child restraint will not protect a
child when the vehicle is seriously impacted. However, correctly
installed, a child restraint will substantially improve the chances
for survival in most crashes. Make sure that all users fully
understand the correct ways to use this child restraint in a vehicle.
•
Do not, except as described in this book, attempt to disassemble
or modify any part of the booster seat or vehicle belts.
•
Do not leave loose objects, e.g. books, bags, etc., in the back of a
vehicle. In the event of a sudden stop, loose objects will keep
moving, potentially causing serious injuries.
•
Do not leave folding vehicle seats unlatched. In the event of a
sudden stop, a loose seat back could prevent the restraint from
protecting the child as well as it should.
•
Do not use anything to raise the booster seat off the vehicle seat.
•
Do not allow children to play with this booster seat.
•
Do not leave children alone in a vehicle, even for a short time.
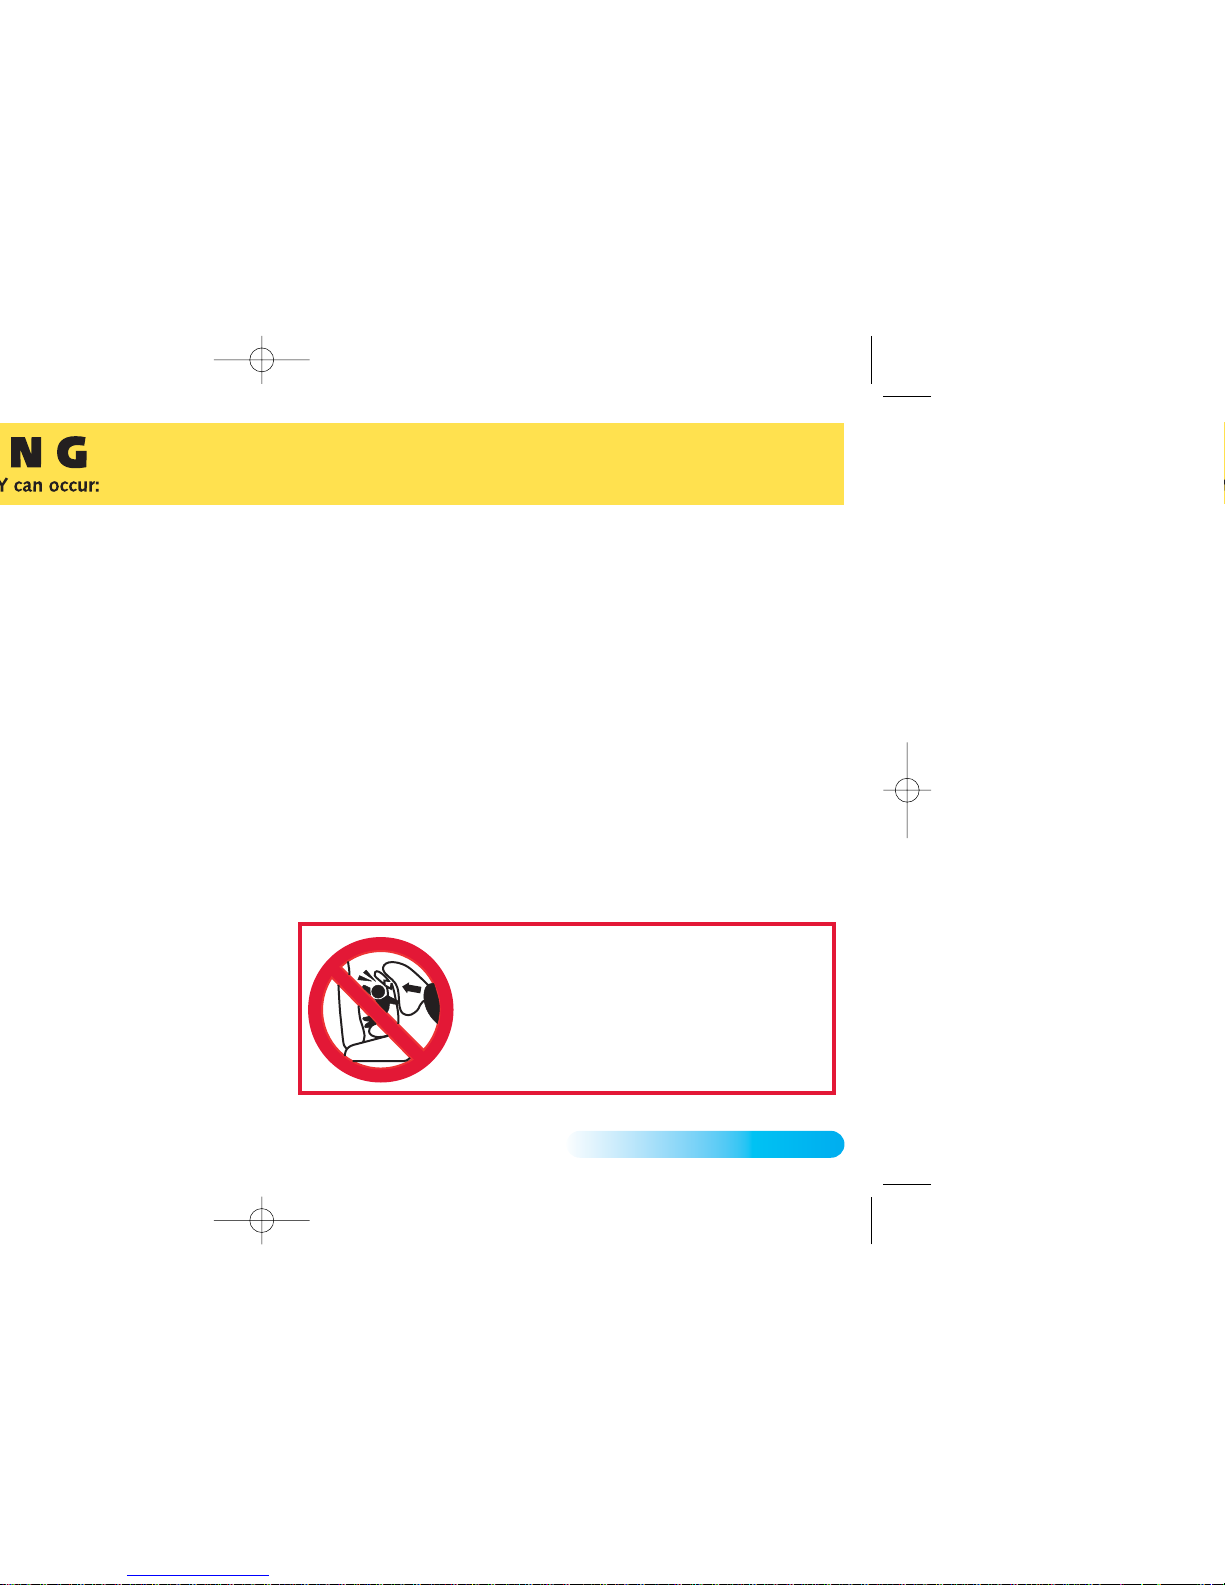
DO NOT place a child restraint in the front
seat of a vehicle with a passenger air bag
unless the air bag is turned off. DEATH or
SERIOUS INJURY can occur. The back seat
is the safest place for children under 12.
Page 4

Safety Information
5
Important Notes
•
Set a good example by always wearing your seat belt. Make
it a firm rule that the vehicle does not move until everyone is
buckled up. Make no exceptions for adults or children.
• Cover the booster with a towel or blanket when the vehicle is
parked in direct sunlight. Parts of the booster seat could
become hot enough to burn the child.
• Store the booster seat in a safe place when not in use. Do not
place heavy objects on top of the booster while in storage.
•
To prevent injury due to deterioration, hidden damage, lost
instructions, outdated technology, etc., discontinue use of a
booster seat that is older than six years or has been in a
severe crash.
Page 5

Vehicle Seating Positions
7
WARNING!
•
Britax and the U.S. Department of Transportation warn that
children 12 and under must ride in the rear seats, away from
front air bags. The only exception is if the air bag is turned off.
When using in vehicle with air bags, refer to the vehicle
owner’s manual for additional child restraint installation
instructions and precautions.
•
Forward facing vehicle seats MUST be used with this booster
seat. Side facing or rear facing seats in vans, station wagons or
trucks CANNOT be used.
Page 6

Features
9
3
10
11
12
9
2
1
2
4
5
6
7 Lock-off Release
8 Seat Compartment
9 Base
10 Headrest Adjust Handle
11 Recline Flap
12 Recline Handle
Page 7

Adjustments
11
Adjusting Headrest Height
Use the eleven-position headrest to adjust
the height of the booster seat.
1
Check the current fit with the child
seated in the booster seat.
•
Make note of the approximate adjustment
required to achieve a fit that brings the
beltguides even with the child’s shoulders.
2
Squeeze the handle to release headrest
lock (
Fig. D
).
3
Slide headrest up or down so the
beltguides are even with, or just above,
the child’s shoulders (
Fig. D
).
4
Release handle to lock position of
headrest.
Adjusting Backrest Angle
Use the two-position recline flap to adjust
the back angle of the booster seat.
•
Reclined Backrest Position: Pull flap
out, then slide down until in reclined
position (
Fig. E
).
•
Upright Backrest Position: Pull flap
out, then slide up until in upright
position, flush with backrest (
Fig. F
).
IMPORTANT: Whether in reclined or
upright position, recline flap should always
be in full contact with vehicle seat when
booster is installed.
D
F
E
A
B
C
Page 8

13
Securing the Child
7
Push down on each armrest to close
the lock-offs and lock the vehicle belt in
position (
Fig. D
).
•
Verify that only the lap portion is routed
through the lock-offs prior to closing. Route
shoulder portion over the armrest closest to
the buckle.
•
A positive click indicates that the lock-off is
fully locked.
8
Verify that installation is correct (
Fig. E
).
TIP: After initial setup, it is only necessary
to release the lock-off closest to the buckle
and unbuckle the vehicle belt to allow the
child to exit the restraint. To secure child
using this method, buckle vehicle belt,
remove slack, then secure lock-off over lap
portion of belt.
IMPORTANT: This restraint is certified to
FMVSS 213 with both lock-offs used. The
lock-offs link the booster to the vehicle so
the seat belt carries the inertia load of the booster in a crash.
Removal
1
Open both lock-offs by lifting up on the lock-off release.
2
Unbuckle vehicle belt.
3
Remove vehicle belt from lock-offs.
D
A
B
E
C
Page 9

Care and Maintenance
1514
Fig. A-7
).
Refitting the Cover
TIP: Use a blunt wooden rod (pencil, chopstick, etc.) to assist with
tucking the cover under the hooks on the shell.
1 To refit headrest cover, place cover over headrest, then:
•
Hook elastic loops (2x) to attachment point on beltguides (
Fig.
A-6
).
•
Hook elastic loops (2x) to attachment points on lower rear of
backrest (
Fig. A-4
).
•
Tuck cover under hooks (2x) at top of headrest (
Fig. A-7
).
2 To refit backrest cover, place cover over backrest, then:
•
Hook elastic loops (2x) to attachment points on upper rear of
backrest (
Fig. A-3
).
•
Hook elastic loops (2x) to attachment points on lower rear of
backrest (
Fig. A-4
).
•
Tuck cover under hooks (4x) on sides of backrest (
Fig. A-5
).
3 To refit base cover, place cover over base, then:
•
Fasten buttons (2x) on bottom front edge of base (
Fig. A-1
).
•
Fasten hook and loop strap around lower backrest (
Fig. A-2
).
Cleaning the Cover
HAND WASH, using cold water and mild soap.
LINE DRY, to prevent cover from shrinking.
DO NOT:
Bleach, machine wash, or machine dry.
Cleaning the Shell
SPONGE CLEAN, using warm water and mild soap.
TOWEL DRY
DO NOT:
Use solvents, abrasive cleaners, or disassemble
booster in any way, except as instructed.
1
2
4
3
5
6
7
Page 10

Page 11

 Loading...