

Page 1
BrioConnect™ Gateway
Quick Start Guide
Rev. 1.1
04/04/2018
Page 2

BrioConnect™ Gateway – Quick Start Guide
Table of Contents
1. Document revision history .................................................................................................................... 3
2. Overview ............................................................................................................................................... 4
2.1. Package Contents .......................................................................................................................... 5
3. Initial setup ........................................................................................................................................... 6
4. Device configuration ............................................................................................................................. 9
4.1. Configure the APN using the local web interface ......................................................................... 9
4.2. Device registration on the cloud ................................................................................................. 12
5. LED ...................................................................................................................................................... 14
6. Support................................................................................................................................................ 15
www.briowireless.com Copyright © 2018 Briowireless Inc. All rights reserved.
2
Page 3
BrioConnect™ Gateway – Quick Start Guide
1. Document revision history
Revision Date Comments
1.0 2018-04-02 First release
1.1 2018-04-04 Minor update
www.briowireless.com Copyright © 2018 Briowireless Inc. All rights reserved.
3
Page 4
BrioConnect™ Gateway – Quick Start Guide
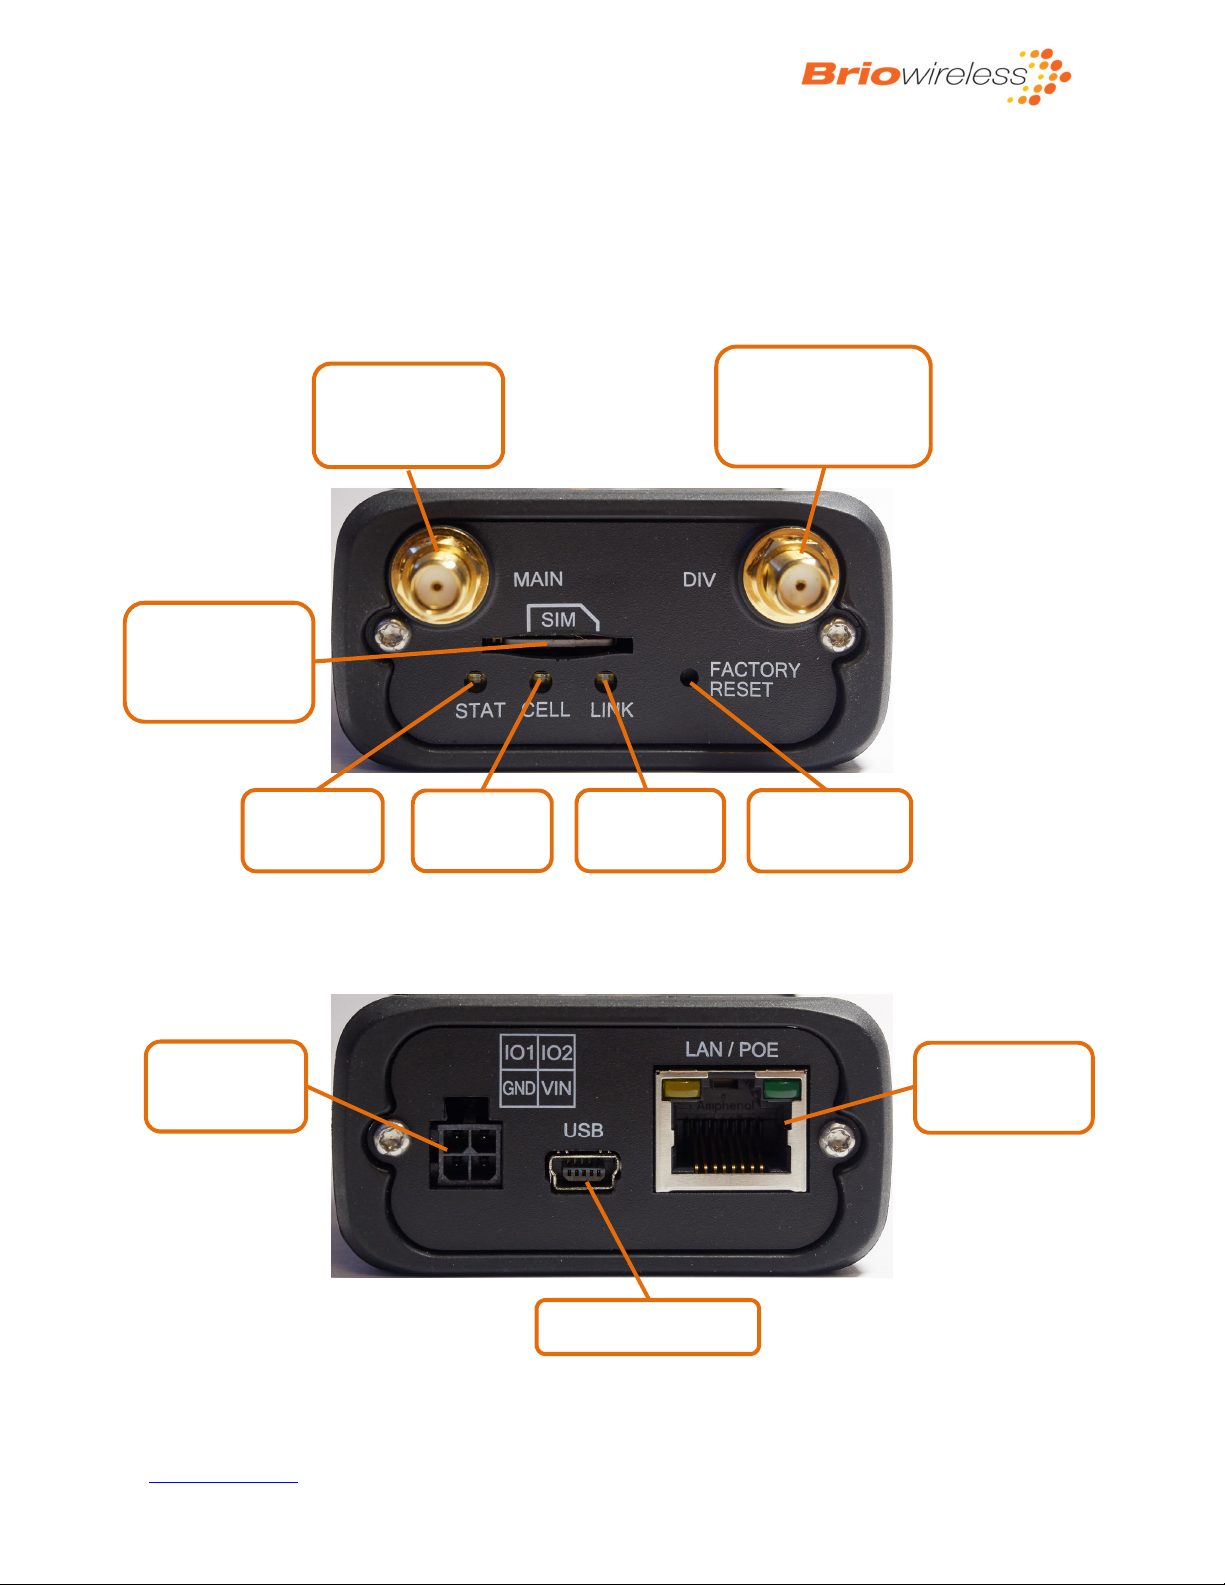
Micro
-
SIM
Cellular
status LED
Factory reset
button
General
status LED
Link status
LED
Power & I/O
Mini
-
USB connector
LAN/PoE RJ
-
45
Diversity antenna
2. Overview
The purpose of this document is to get the user up and running as quick as possible. Please refer to the
complete User Manuel for more details on the product.
The pictures below show both the front and back panels of the BrioConnect™ device.
Main antenna
SMA connector
SMA connector
(some models)
card slot
(user provided)
Figure 2-1. BrioConnect™ Front
connector
Figure 2-2. BrioConnect™ Back
www.briowireless.com Copyright © 2018 Briowireless Inc. All rights reserved.
connector
4
Page 5
BrioConnect™ Gateway – Quick Start Guide
2.1. Package Contents
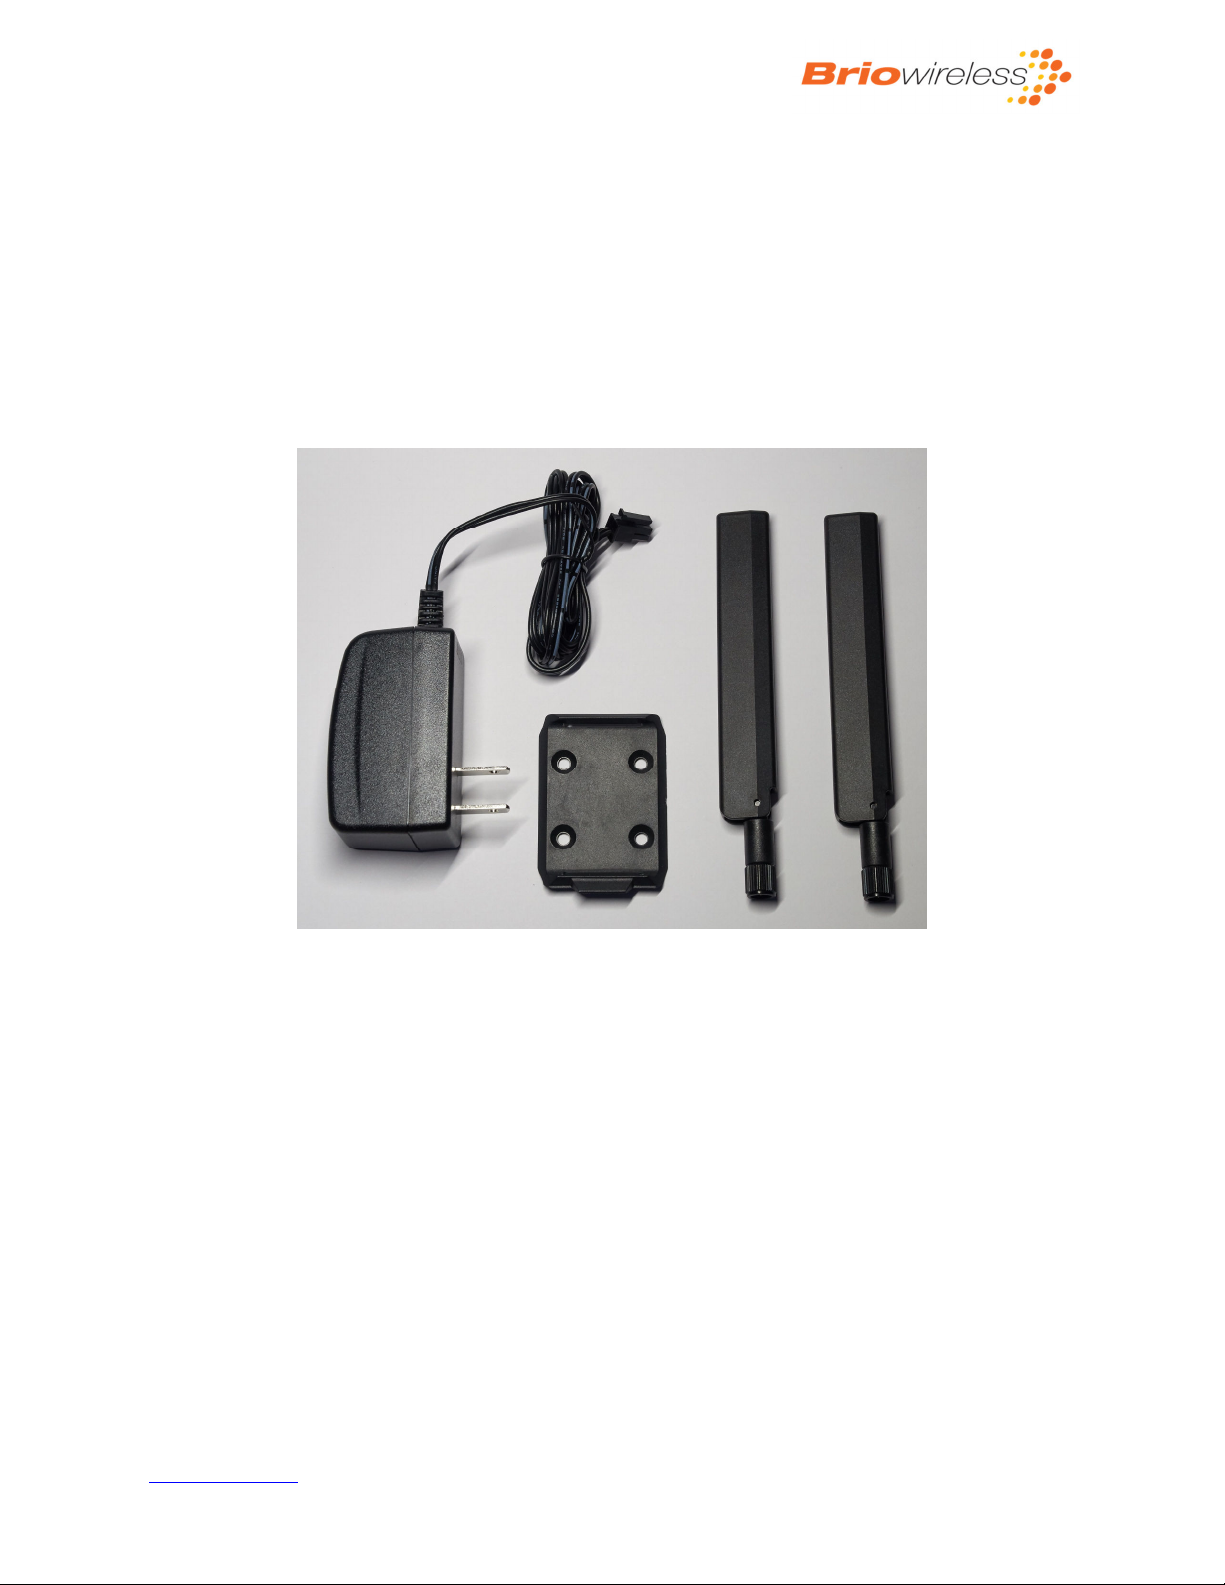
BrioConnect™ device ships with the following content:
• BrioConnect™ Gateway
• Mounting bracket
• Antennas (x2)
• Power Adapter
Figure 2-3. BrioConnect™ accessory kit
www.briowireless.com Copyright © 2018 Briowireless Inc. All rights reserved.
5
Page 6
BrioConnect™ Gateway – Quick Start Guide
To the
3. Initial setup
1. Close the WiFi of the laptop.
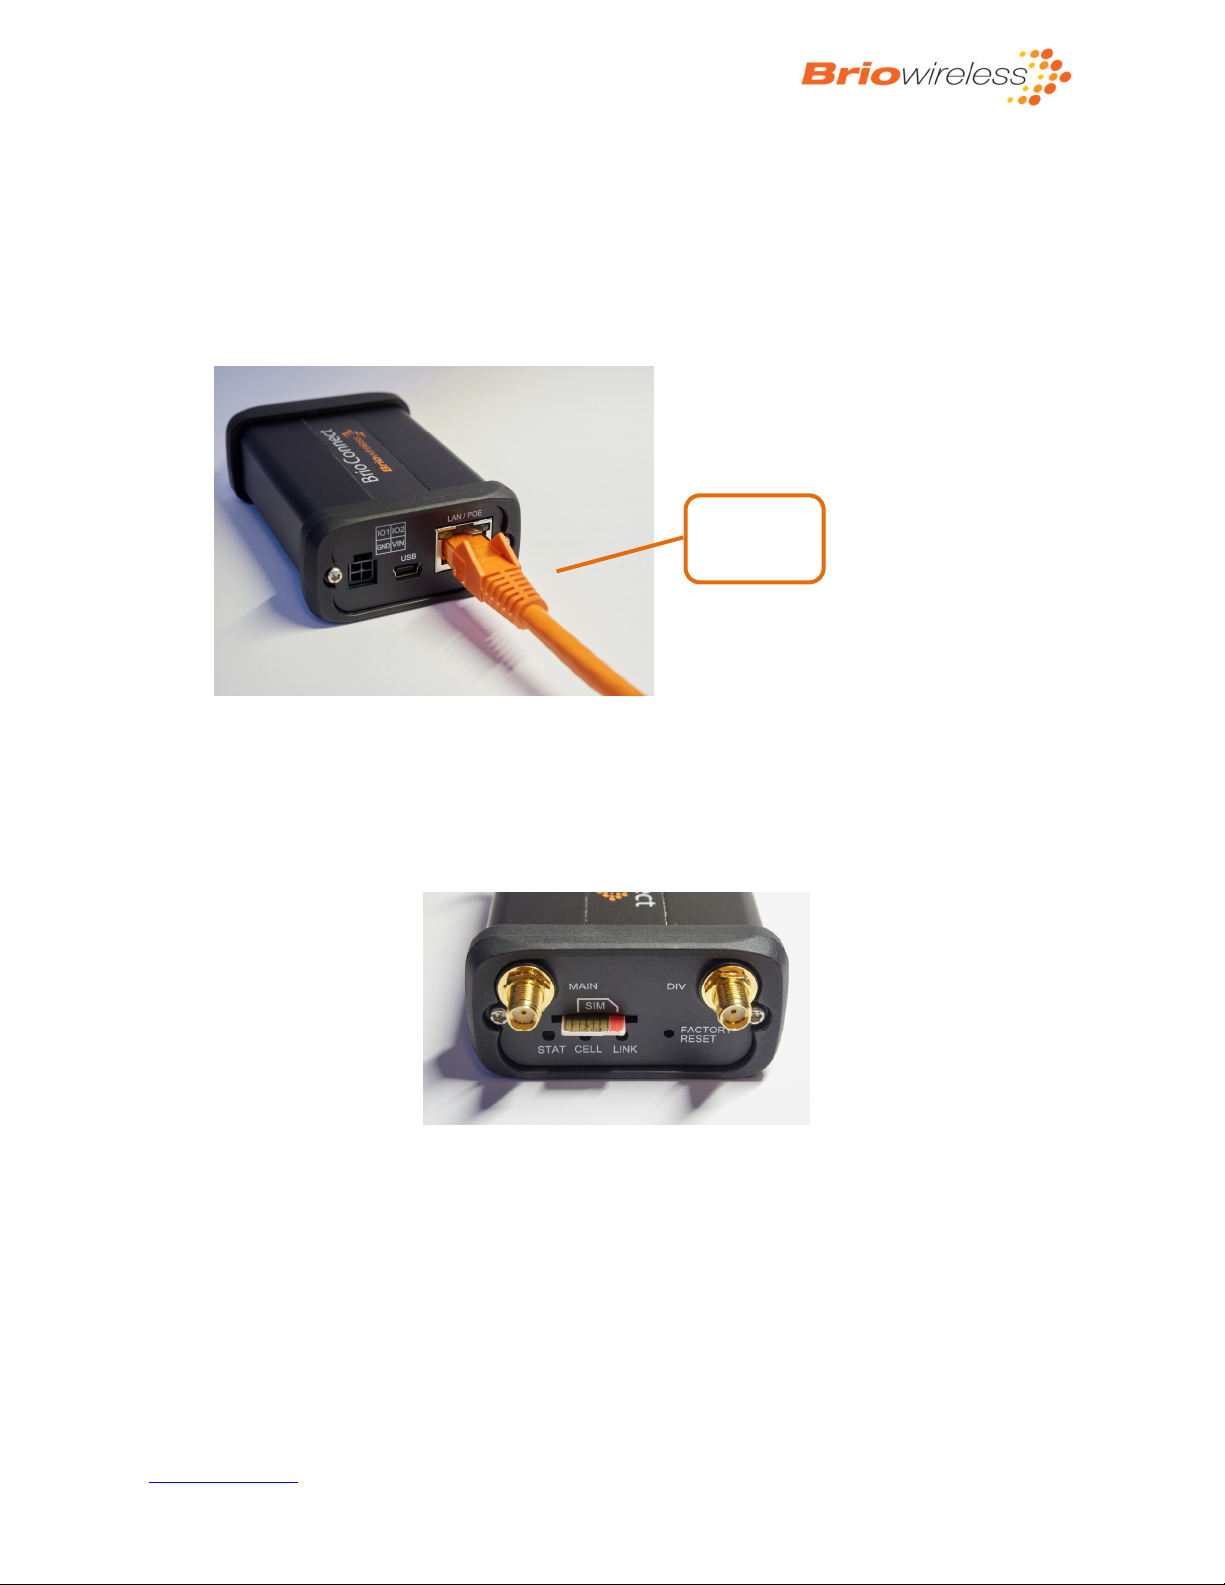
2. Connect a regular Ethernet cable (not crossover) from the Brioconnect™ to a laptop.
laptop
Figure 3-1. Ethernet connection
3. Insert the 3FF Micro-SIM Card with the contacts facing up as shown below. A “click” will be felt
when the SIM card has been fully inserted.
Figure 3-2. 3FF Micro-SIM Card Installation
www.briowireless.com Copyright © 2018 Briowireless Inc. All rights reserved.
6
Page 7
BrioConnect™ Gateway – Quick Start Guide
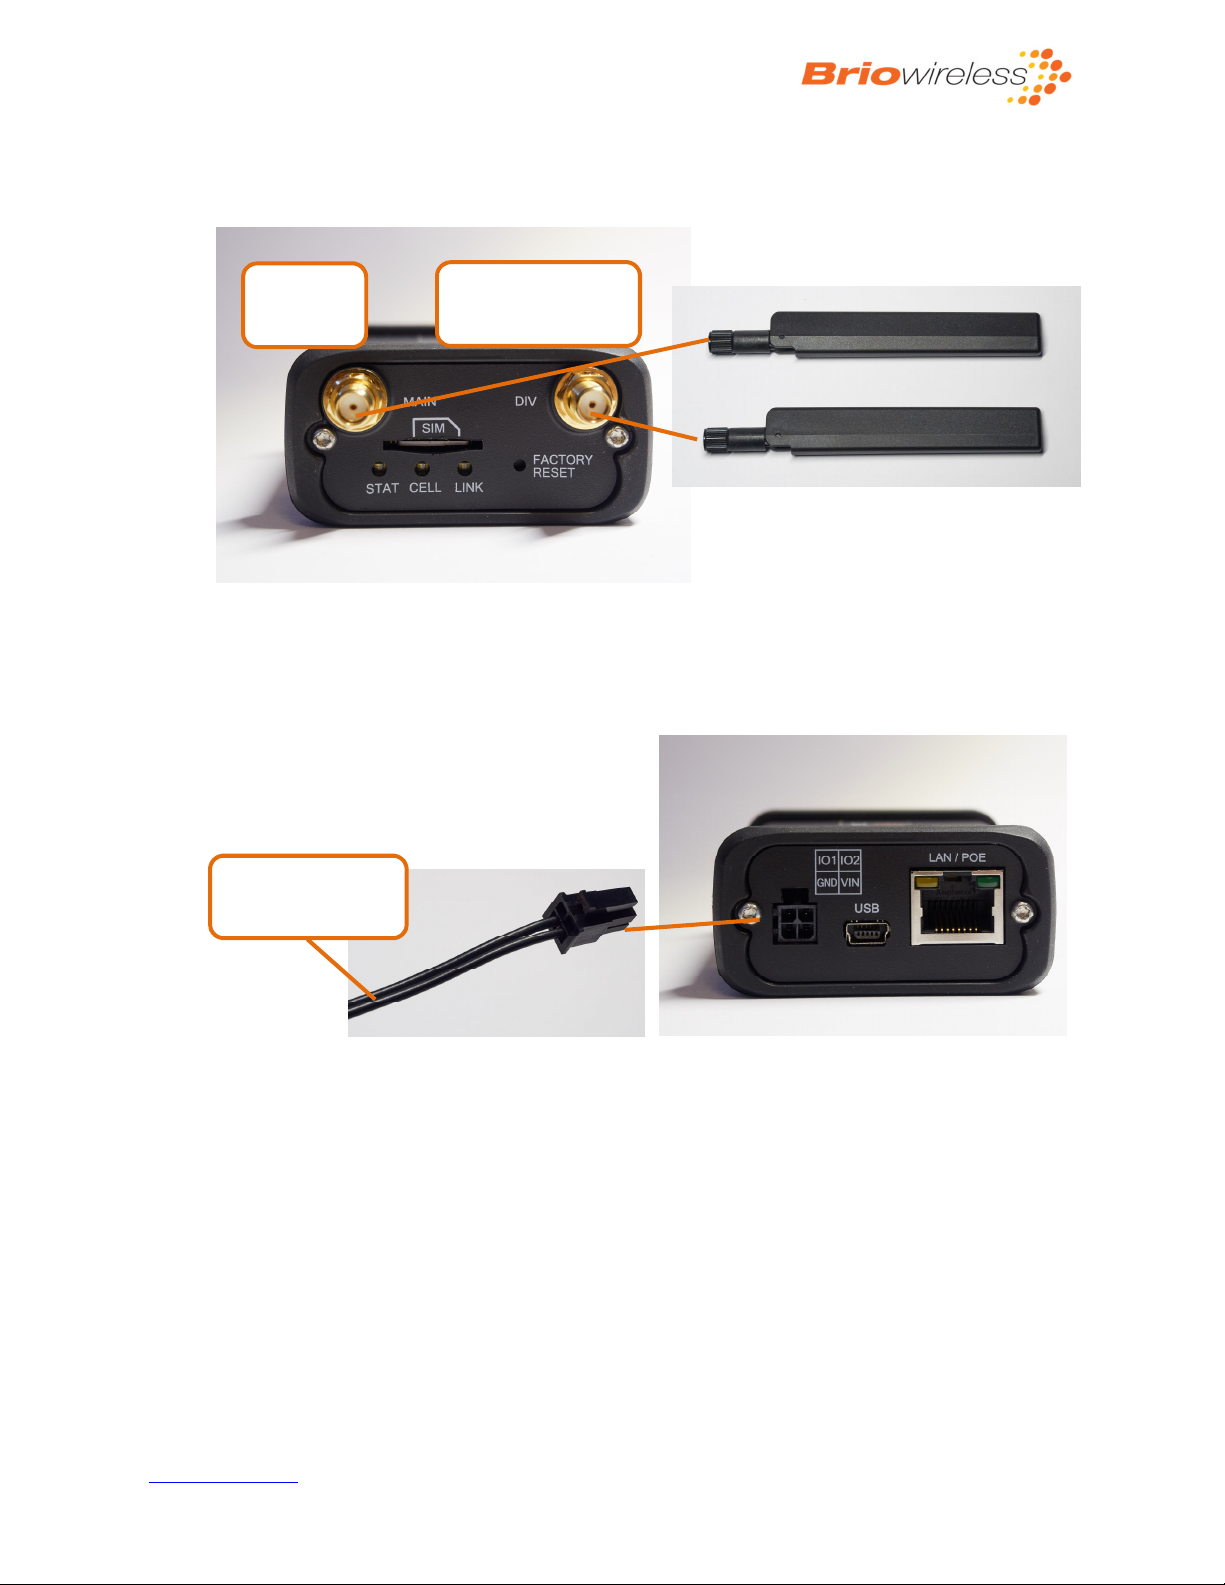
Power supply
adapter
Main
antenna
Diversity antenna
(some models)
4. Connect antennas to the device.
Figure 3-3. Antennas installation
5. Power on the BrioConnect™ using the supplied power supply
Figure 3-4. Powering the device
www.briowireless.com Copyright © 2018 Briowireless Inc. All rights reserved.
7
Page 8
BrioConnect™ Gateway – Quick Start Guide
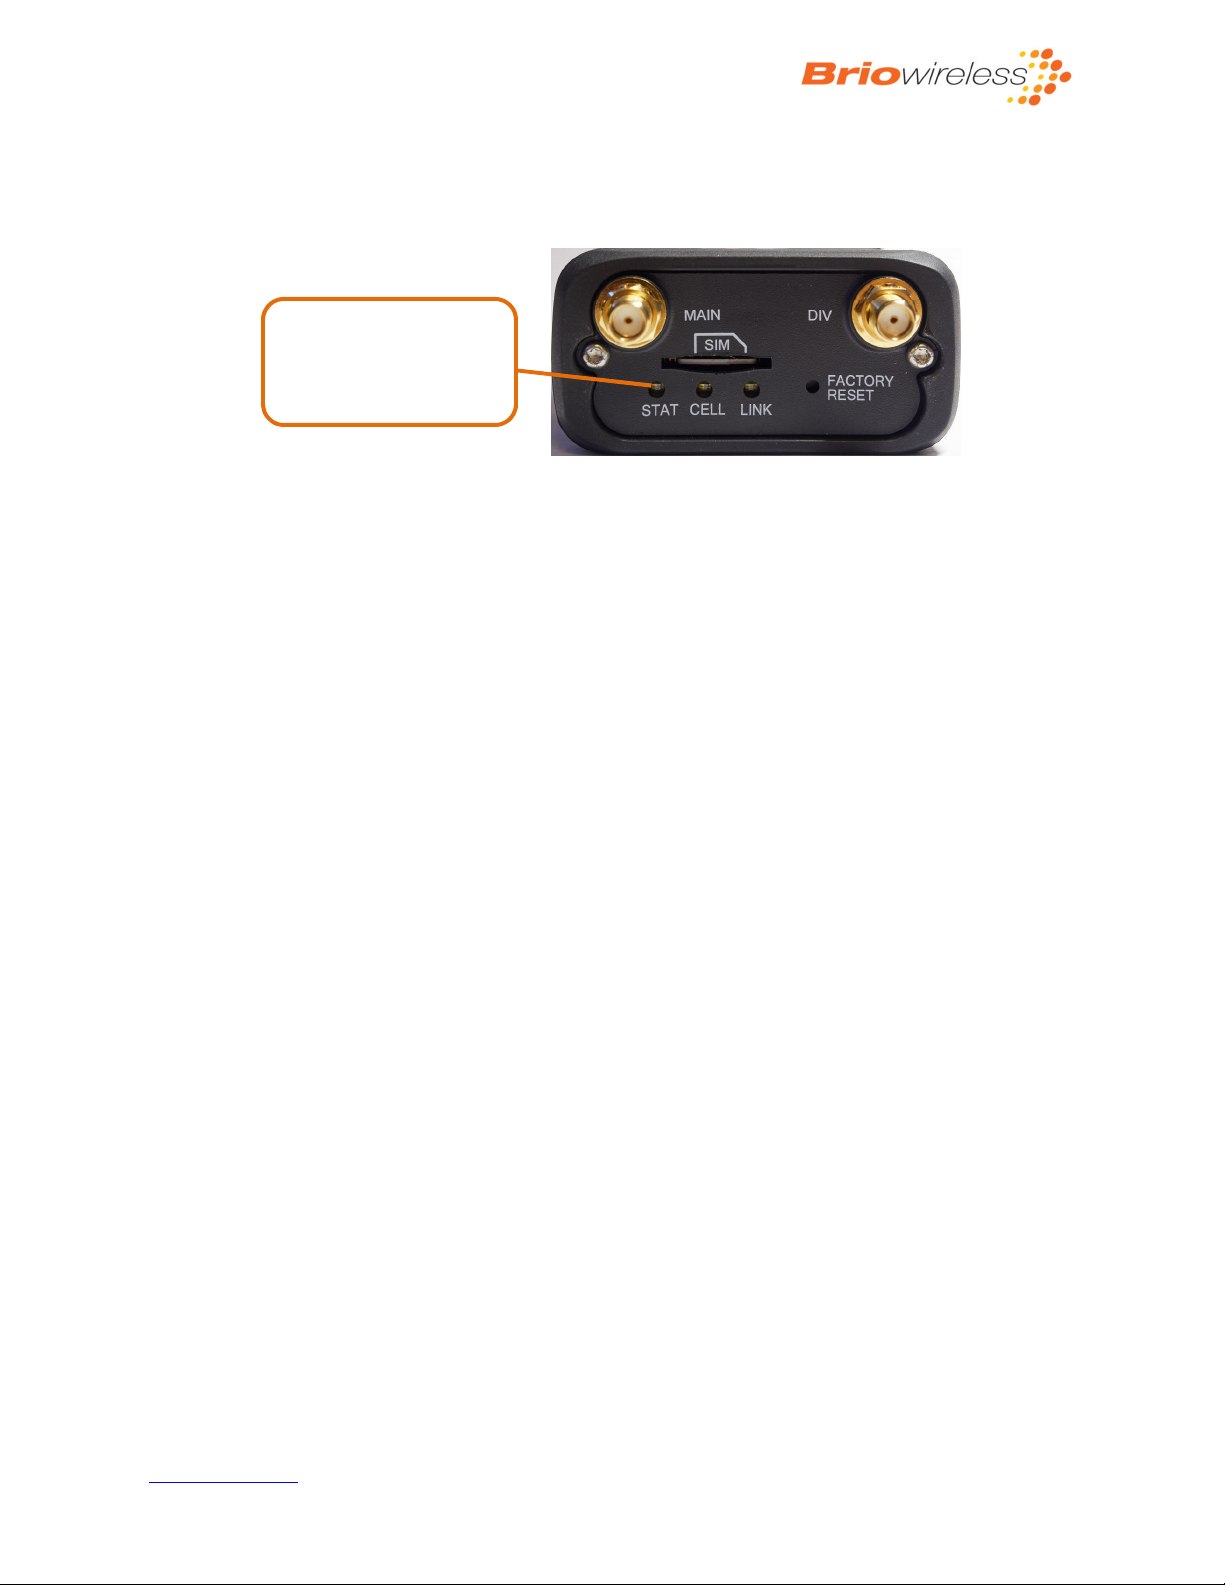
STAT LED:
6. Wait about 2 minutes for the unit to boot and to receive an IP address from the DHCP server.
The STAT LED will turn green when the boot is finish.
Orange (booting up)
Green (CPU running)
Figure 3-5. Led indicators
www.briowireless.com Copyright © 2018 Briowireless Inc. All rights reserved.
8
Page 9
BrioConnect™ Gateway – Quick Start Guide
4. Device configuration
This section walks the user through connecting the gateway for the first time. The initial configuration
of the BrioConnect™ unit will be done locally using the web page interface. Later on, it will be possible
to manage the device remotely via a cloud-based device management platform provided freely by
Briowireless.
4.1. Configure the APN using the local web interface
Once the device is powered up, the mobile settings first need to be configured on the device to be able
to connect to the cellular network. The user should follow the steps below:
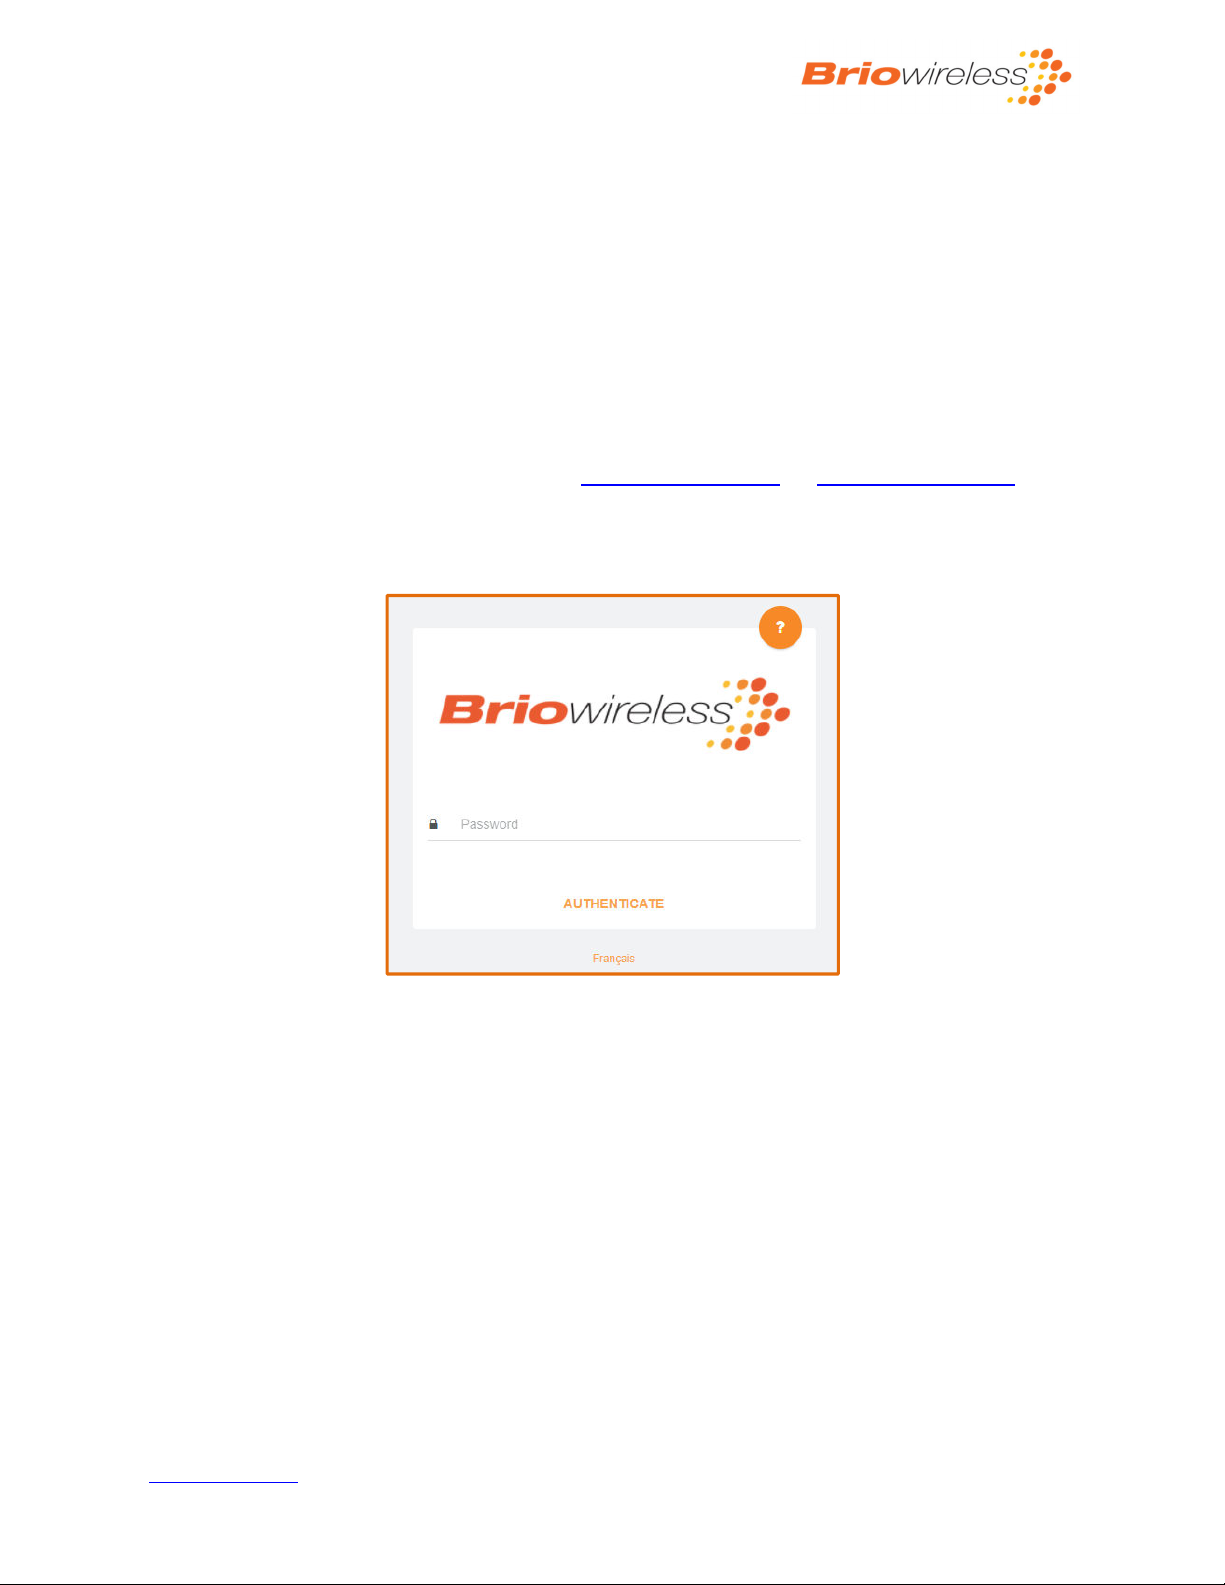
1- Open a web browser and navigate to https://brioconnect.io or https://192.168.202.1. If the
connection is successful, the login screen is displayed where the password should be entered.
The default password is admin.
Figure 4-1. Login to the local web interface
For security, we recommend changing the default password immediately after first log in.
www.briowireless.com Copyright © 2018 Briowireless Inc. All rights reserved.
9
Page 10
BrioConnect™ Gateway – Quick Start Guide
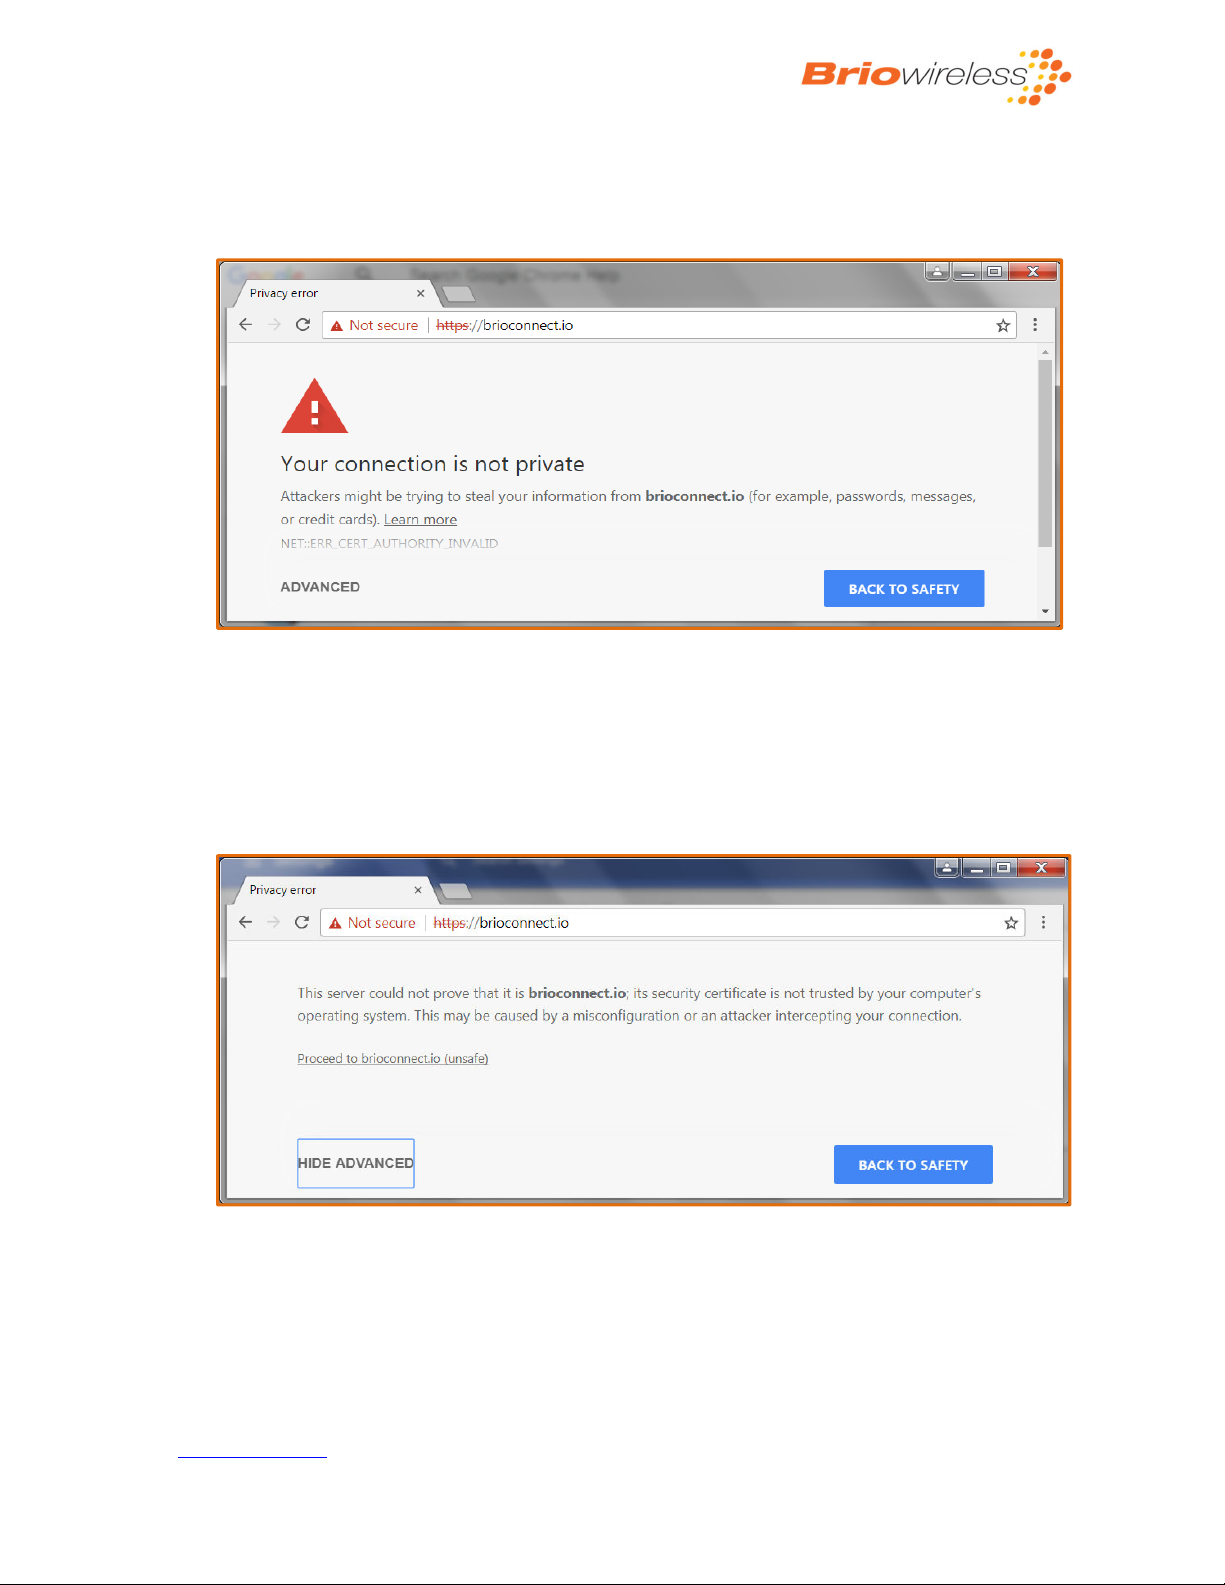
The browser may show a warning indicating that the brioconnect.io is not secure due to a
problem in the verification of the certificate issuer's authority. The figure below shows a
warning message on Chrome web browser.
Figure 4-2. Security warning message on Chrome browser
In fact, there are no security issues to worry about as the BrioConnect™ implements a secured
HTTPS using a self-assigned certificate. This message can be safely ignored and the user should
click on the ADVANCED button on the warning page and then on Proceed to brioconnect.io
(unsafe).
Figure 4-3. Security warning message on Chrome browser
www.briowireless.com Copyright © 2018 Briowireless Inc. All rights reserved.
10
Page 11
BrioConnect™ Gateway – Quick Start Guide
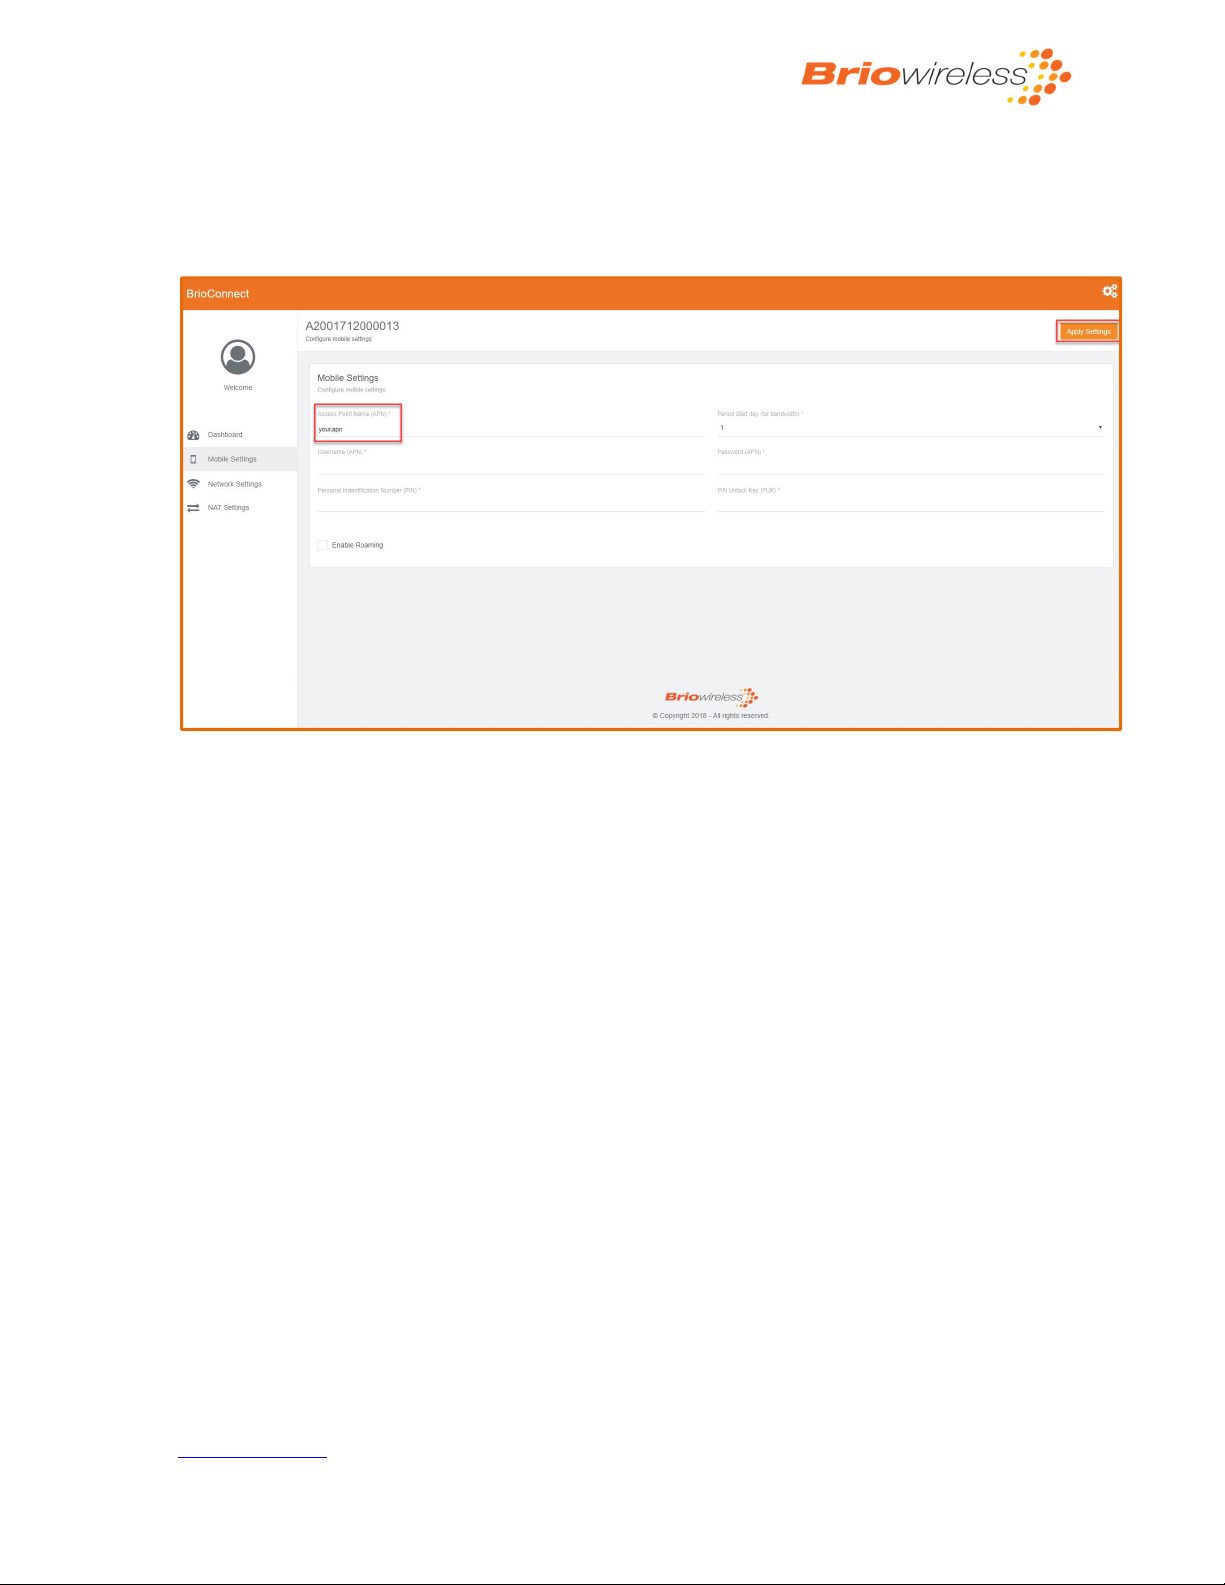
2- An APN needs to be configured to allow the BrioConnect™ to register to the cellular network.
On the local web interface, click on the Mobile Setting sub menu and enter the APN in the
Access Point Name field as shown in the following screen.
Figure 4-4. Configure the APN
3- Click Apply Settings to save the setting.
4- The device will initiate the connection to the cellular network and the CELL LED should turn
green in few seconds.
5- From there you can continue to use the local web interface, or you can go to the next section to
register the device to the Cloud.
www.briowireless.com Copyright © 2018 Briowireless Inc. All rights reserved.
11
Page 12
BrioConnect™ Gateway – Quick Start Guide
4.2. Device registration on the cloud
The BrioConnect™ gateway can also be configured from the cloud at https://briosphere.io. The
Briowireless Cloud is a free solution that allows users to access, control and maintain their devices from
a remote location. For the BrioConnect™ device to be used with the cloud, it needs to be registered with
the user’s account. The device doesn’t necessarily need to be connected to cellular during the
registration process.
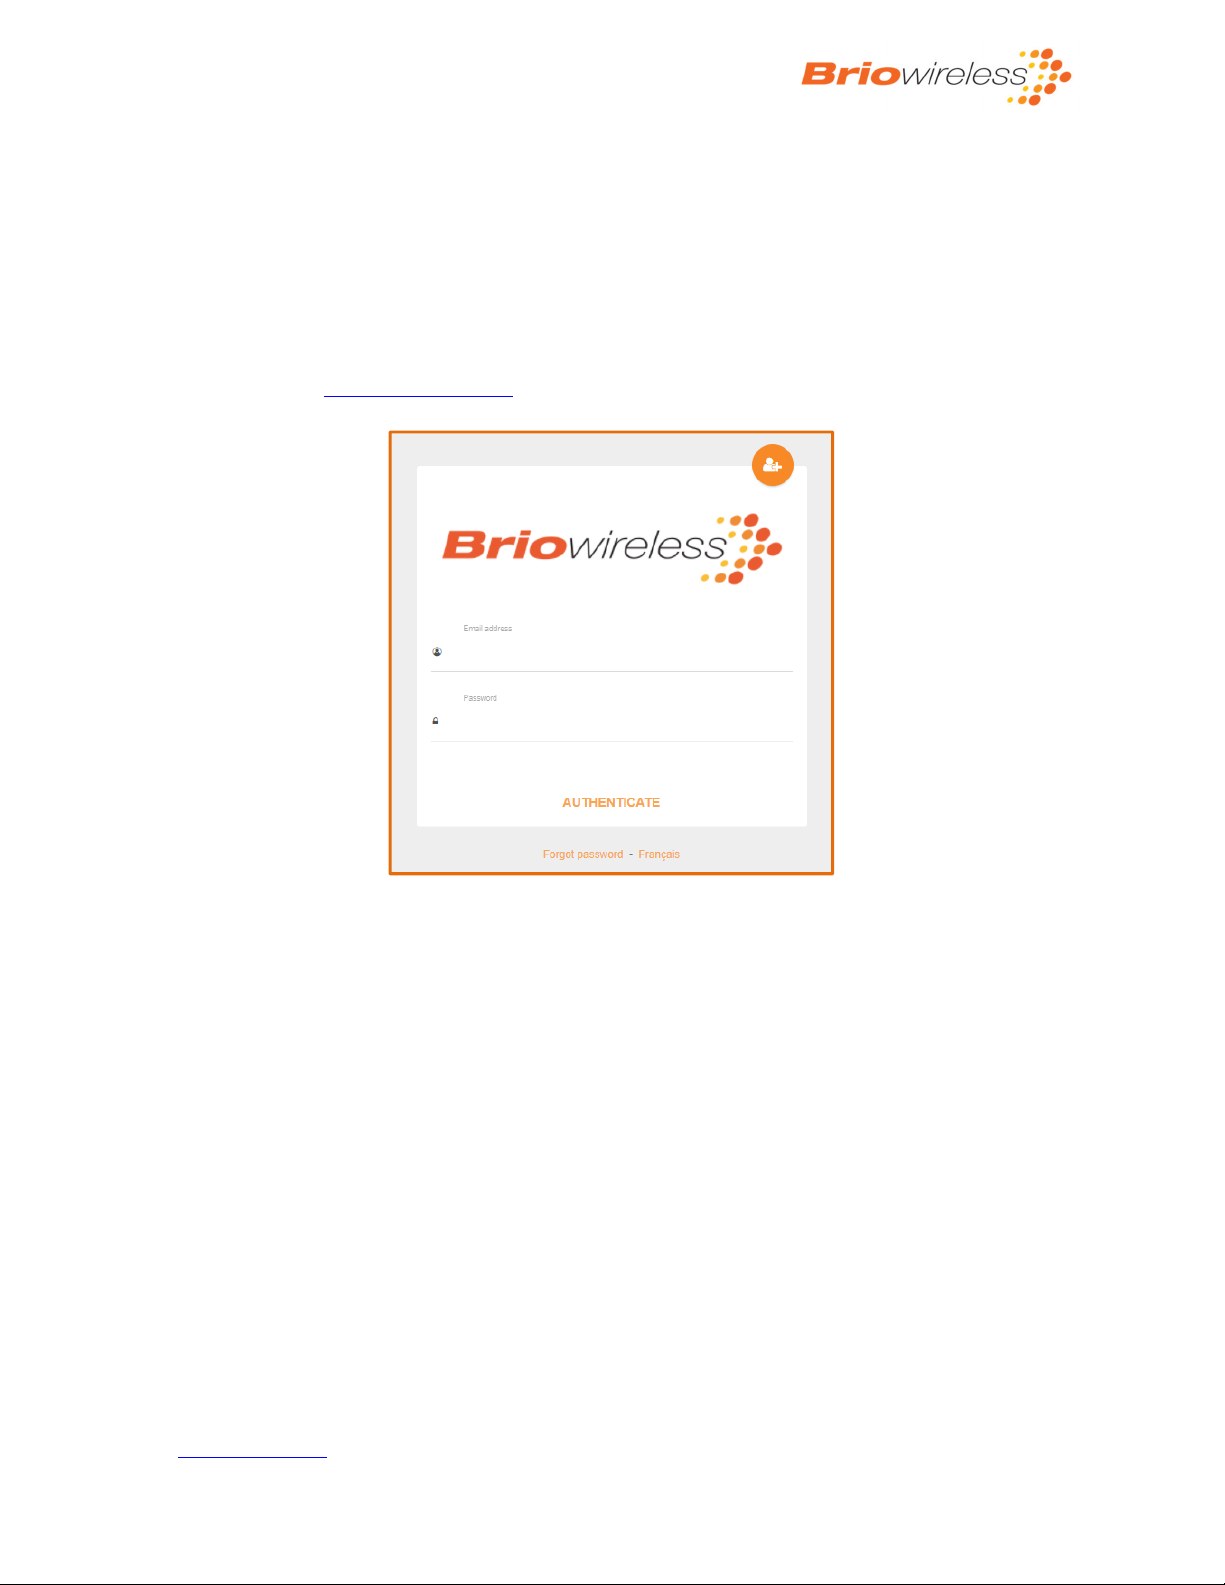
1- Navigate to https://briosphere.io . If successful, the login screen will be displayed.
Figure 4-5 Login screen
2- To add a new account, the user should click on the add symbol located in the top right corner of
the login screen.
www.briowireless.com Copyright © 2018 Briowireless Inc. All rights reserved.
12
Page 13
BrioConnect™ Gateway – Quick Start Guide
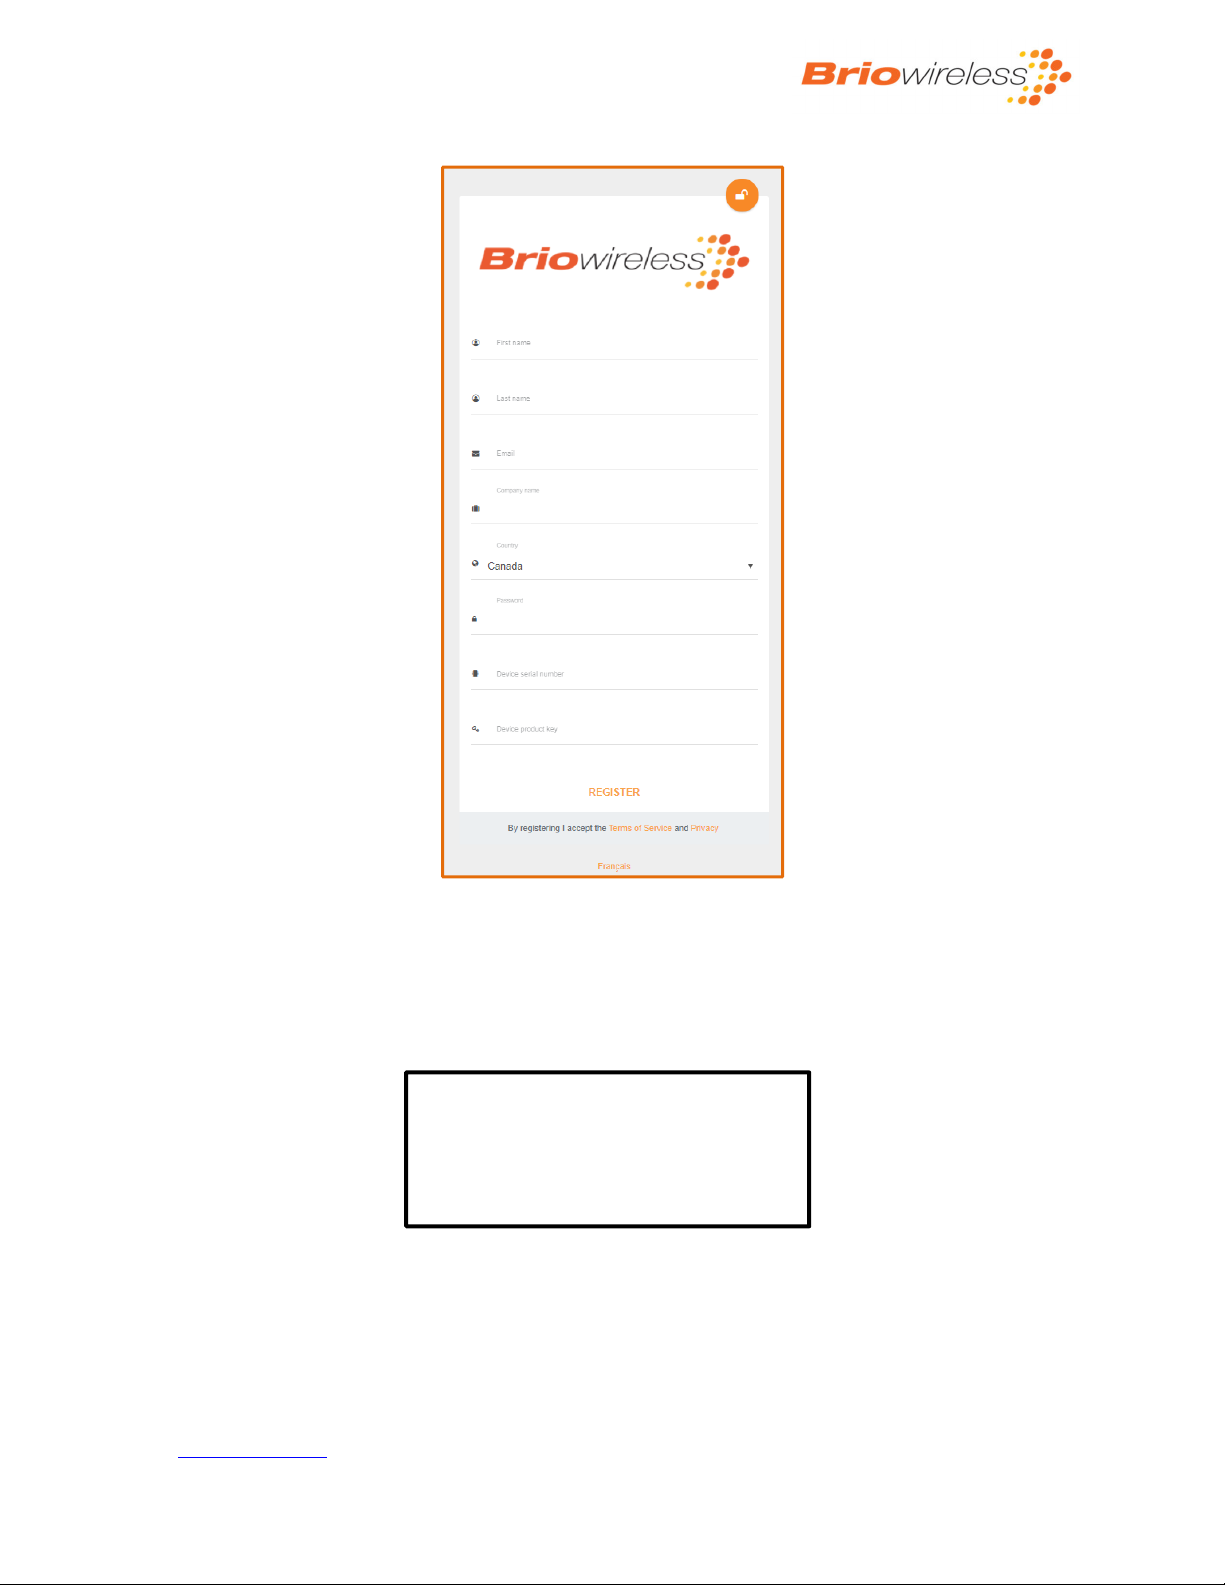
Figure 4-6. Register to the Cloud service
3- The user information including an email and a password needs to be entered. The association of
the BrioConnect™ with the user’s account is made through the unit serial number (SN) and
product key that are printed on a label attached on the back of the unit. The following is an
example of a label.
SKU: BCON-43G1-US-EPU2
SN: A20018xxxxxxxx
IMEI: 0147xxxxxxxxxxx
PRODUCT KEY: xxxxxxxx
Figure 4-7. Device identification
4- Once all the information is filled, the REGISTER button should be clicked. An account will be
created and if the device has not been previously registered with another account, the user
should receive an e-mail confirming the registration.
www.briowireless.com Copyright © 2018 Briowireless Inc. All rights reserved.
13
Page 14
BrioConnect™ Gateway – Quick Start Guide
5. LED
The following table describes the states of the LEDs located at the front of the unit.
LED
Name
STAT
CELL
LINK
Flashing
State Details
Steady Green The power is present, and device is running normally.
Steady Orange Device is booting.
Flashing Orange
Flashing Red The LED flashes 3 times to indicate that the device has being
Steady Red A problem is encountered during boot. The device needs to be
Steady Green Cellular data connection is established.
Flashing Green Cellular data activity. Data is being transferred to/from cellular
Steady Orange Cellular network connected, but no data communications
Steady Red Fault in data connection or no cellular network connection.
Off Device is booting, network registration has not started yet.
Green RSSI - strong signal
Orange RSSI - medium signal
Red RSSI - weak signal
Off There is no cellular connection, or in case of connection error.
Twice periodically 2G cellular access
3 times periodically 3G Cellular access
4 times periodically 4G (LTE) Cellular access
Device is performing a firmware upgrade.
reset to Factory Default settings. This happens when the
Factory Reset button is pressed for about 20 seconds after the
device power up.
reset.
network.
available. The unit is trying to establish data connection.
This also includes SIM card errors.
www.briowireless.com Copyright © 2018 Briowireless Inc. All rights reserved.
14
Page 15

BrioConnect™ Gateway – Quick Start Guide
6. Support
For online support or to download the latest version of this document, go to:
https://briowireless.com/product/BrioConnect-gateway/
www.briowireless.com Copyright © 2018 Briowireless Inc. All rights reserved.
15
 Loading...