

Page 1

1
GSM/GPRS Handset
SN51D
User’s Manual
Page 2

2
CONTENTS
4
SAFETY INFORMATION
12
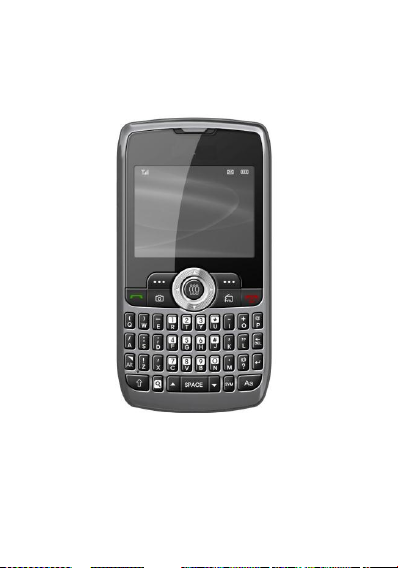
DESCRIPTION OF KEYS
16
Getting started
18
CALL FUNCTIONS
22
FUNCTION MENU
22
Calls
24
STK
25
Games
26
Extra
Page 3

3
30
Phonebook
33
Portal Movil
33
Messages
37
Camera / Multimedia
40
Ideas
41
Settings
42
Search
43
MP3 AND MP4 INSTRUCTION
44
TROUBLESHOOTING
Page 4

4
50
LIMITED WARRANTY
STATEMENT
Page 5

5
SAFETY INFORMATION
PERSONAL USE
Operation of any radio equipment
including mobile phones may interfere
with the function of inadequately shielded
medical devices such as hearing aids and
pacemakers. Please consult the
manufacturer of these devices or your
physician before use.
In oil depots and chemical factories where
explosive gas or other products are stored,
the user should pay close attention to the
restriction on the use of mobile phone.
Even if your phone is in the idle mode, it
will still transmit radio frequency signals.
Therefore, you must switch off when
requested to do so.
Note traffic safety. When you are driving,
please do no use your mobile phone. Stop
on the side of the road when you do need
to use it. Avoid making calls with your
Page 6

6
cellular phone in stormy weather.
Safety Information related with children:
■ Be cautious of children swallowing
the small parts such as the SIM card.
■ Prevent children from playing with
your cell phone as toys. For
example, behaviors like throwing,
biting the phone, or immersing it into
water should be avoided.
■ Do not let children less than 14
years old hang the phone around
the neck.
MOBILE PHONE USE
Please use only the accessories or parts
offered by the manufacturer or those
authorized by the manufacturer. Use of
unauthorized accessories might influence
the performance of the phone. What’s
worse, your phone might get damaged
and harm will be caused to your body. It
might even violate the national regulations
on the telecommunication terminal
products.
Page 7

7
Do not use chemical products like
cleaning solvents or detergents to clean
your phone. It is recommended that you
use slightly damp and static electricity
proof cloth instead of cloth that is dry and
easy to catch static electricity. Before
cleaning, you should switch off your
phone.
Your mobile phone produces magnetic
fields. Do not place it next to magnetic
storage media such as computer diskettes.
Operating your mobile phone close to
other electrical equipment such as
televisions, phones, radios and personal
computers may cause interference and
therefore influence the performance of
your phone.
Please do not link it to other unnecessary
equipments.
Note! Non-professionals must not try to
dissemble the phone.
Page 8

8
Phone Precautions!
■ Use your phone battery only for its
intended purpose, and never use
any battery charger which is
damaged or worn out.
■ When you unplug your phone from
its charger, grasp and pull the plug,
not the power cord.
■ Do not use harsh chemicals,
cleaning solvents, or strong
detergents to clean your phone.
Wipe it with a soft cloth slightly
dampened in a mild soap-and-water
solution.
■ Do not attempt to open the casing
on your phone or its battery.
■ Always keep SIM card out of
children’s reach.
BATTERY USE
Do not short-circuit the battery terminals.
Page 9

9
This is dangerous and will damage the
battery, produce heat and may cause a
fire.
Never dispose of batteries in a fire as it
can cause explosion. Return waste
batteries to your supplier or an approved
recycling center. Do not dispose along
with household wastes.
Warning! If the battery case is broken,
avoid contact with the contents. Wash
contaminated skin with lots of water and
seek medical attention.
Battery Precautions!
■ Avoid dropping the cell phone.
Dropping it, especially on a hard
surface, can potentially cause
damage to the phone and battery. If
you suspect damage to the phone or
battery, take it to a service center for
inspection.
■ Never use any charger or battery
Page 10

10
that is damaged in any way.
■ Use the battery only for its intended
purpose.
■ If you use the phone near the
network’s base station, it uses less
power; talk and standby time are
greatly affected by the signal
strength on the cellular network and
the parameters set by the network
operator.
■ Battery charging time depends on
the remaining battery charge and
the type of battery and charger used.
The battery can be charged and
discharged hundreds of times, but it
will gradually wear out. When the
operation time (talk time and
standby time) is noticeably shorter
than normal, consider purchasing a
new battery.
■ If left unused, a fully charged battery
will fully discharge itself over time.
■ Extreme temperatures will affect the
charging capacity of your battery: it
Page 11

11
may require cooling or warming first.
■ Do not leave the battery in hot or
cold places, such as in a car in
summer or winter conditions, as it
will reduce the capacity and life of
the battery. Always try to keep the
battery at room temperature. A
phone with a hot or cold battery may
temporarily not work, even when the
battery is fully charged. Batteries are
particularly affected by temperatures
below 32°F.
■ The device could work properly
between temperatures -10°C ~55°C .
■ Do not place the phone in areas that
may get very hot, such as on or near
a cooking surface, cooking
appliance, iron, or radiator.
■ Prevent your phone or battery from
getting wet. Even though they will
dry and appear to operate normally,
the circuitry could slowly corrode
and pose a safety hazard.
■ Avoid a battery out of the phone in
Page 12

12
coming contact with metal objects,
such as coins, keys or jewelry.
Page 13
13
Page 14

14
DESCRIPTION OF KEYS
Left Soft Key
■ Performs the functions indicated by
the text in the left bottom line of the
display screen above it.
Right Soft Key
■ Performs the functions indicated by
the text in the right bottom line of the
display screen above it.
■ Go to Calls in idle screen.
Send Key
■ Access call log from idle.
■ Press to dial a Number.
■ Press to answer an incoming Call.
End Key
■ Press to end a call or reject an
incoming call.
■ The phone will switch ON or OFF if
it is pressed and held.
■ Also in the menu mode, enables you
to return to the idle mode (screen) .
Central(OK) Key
■ Open main Menu in idle.
■ Confirm/ok/select in other state.
Page 15

15
Extra Key
In the idle mode, each key has the
following function.
■ Left Extra Key: go to Camera
preview mode.
■ Right Extra Key: go to FM Radio
menu.
0~9 Numeric Keys
■ By pressing the keys, you can edit
numbers and characters.
Volume Key
■ When the phone is in the idle mode,
you can adjust the volume of the key
tone.
■ During a call, when the MP3 player
is working, you can adjust the
volume of the voice or music.
Hook Button on the headset
■ If you insert the headset, you can
use it as below
■ You can answer or end a call by
pressing the hook button on the
Page 16

16
headset.
Backlight
A backlight illuminates the display and the
keypad. When you press digit key, the
backlight comes on. It goes off when no
keys are pressed within a given period of
time.
BATTERY
The phone comes with Li-ion battery
which is only half charged but can be put
into use immediately after the package is
opened. However, the battery should be
thoroughly discharged and fully recharged
for at least 3 recycling times successively
to achieve optimum performance.
How to Charge the Battery
○ Plug your charger into the main
socket first.
○ Connect the lead from the charger
to the upper side of the phone.
○ When the battery is charging, the
icon on the upper right corner which
Page 17

17
indicates the battery charge level
will flash in cycle. If the phone has
powered off, a charging screen will
show that the battery is charging
now.
○ When the bars in the icon are fully
filled and has stopped flashing, it
tells you that the battery has been
fully charged. If the phone has
powered off, the screen will tell you
verbally that the charging has
finished. Generally, it takes 2~3
hours to fully charge the battery.
Normally, the battery, the phone and
the charger might get heated in the
process.
○ Release the charger from the power
socket and the phone.
○ Warning! You must only use the
supplied charger. Unauthorized
charger might result in danger and
any malfunction or damage caused
by the use of unapproved charger
will void the product warranty and it
Page 18

18
will not be acknowledged by the
manufacturer.
Page 19

19
Getting started.
Insert the SIM Card
○ Insert the SIM card under the SIM
card holder.
○ When you need to remove the SIM
card, you should first switch off the
phone, remove the battery and take
it away from under the SIM card
holder.
○ Always handle the SIM card with
care and insert with the gold
contacts facing down.
Insert & Remove the Micro SD
Card
○ Insert the Micro SD card under the
Micro SD card holder.
Power ON/OFF
○ Make sure that the battery is
attached. You can switch your phone
On/Off by long pressing the [End]
Page 20

20
key.
○ If you switch the phone on without a
SIM card :
○ The phone will promote “Insert
SIM” ― In this case, you can make
emergency call.
○ The phone will promote “Network
Emergency”― which means it is
searching for network but has failed
to link.
Page 21

21
CALL FUNCTIONS
Making a call
○ In the idle mode, you will enter the
dialing mode by pressing any
numeric key. By pressing the [Send]
key, you can make a call.
○ Key operation: You can end a call by
pressing, [End] key or the hook
button on the headset.
Adjusting the Call Volume
○ During a call, if you want to adjust
volume, use the Up/Down-volume
key. Press Volume up key to increase
the volume level, press the Volume
down key decrease the volume level.
International Call
○ You should press [+/O] key , the
symbol “+” appear on the screen. By
doing so, you can make an
international call in whatever country
Page 22

22
without having to input the
international dialing code. When you
are dialing an international call, you
should omit the digit “0” before the
city code.
○ To dial a fixed number: “+”Country
code + complete number + [Send]
key
Call from the List
○ Your phone automatically stores
each number dialed or answered in
its memory. You can view the Dialed
Call numbers by pressing [Send] key.
You can also dial the numbers in the
list by pressing [Send] key.
Emergency Call
○ In whichever countries covered by
the digital GSM network, you can
make an emergency call if you are
within the coverage of the network.
The network signal strength indictor
will tell you whether you can make it
Page 23

23
or not. If no service is available, you
can make an emergency call even
without the SIM card in place.
○ ! Note: Some network may not allow
the emergency call and may request
to insert SIM card.
Receiving a call
○ When you receive an incoming call ,
press the [Send] key to talk and hang
up using [End] key.
○ Press the [Send] key to answer a call
as a default setting. To change the
answering mode, press Menu> Calls
> Call settings > Advanced settings >
Answer Mode.
Available functions during the call
○ These options are visible only when
you are during the process of a call.
The multi-part call function should
get support by the network. Please
contact you network service provider
for further information.
Page 24

24
○ The following options are available:
“Hold”, “End single call”, “New call”,
“Phonebook”, “Call history”,
“Messaging”, “Sound recorder”,
“DTMF (You can set it ON or OFF)”
and etc.
Page 25

25
FUNCTION MENU
Calls
Call history
In the call records menu screen, you can
see the number of Missed Calls, Dialed
Calls, and Received Calls.
Following options are available in the submenu of Call History:
View : View the call history.
Call : Call back the caller.
Send text message : You can send SMS
to the selected number.
Send multimedia message : You can
send MMS to the selected number.
Save to Phonebook : Save the selected
number to the Phonebook.
Delete : Delete the selected record.
Delete all : Delete all records.
Advanced : Call timers/Call cost/Text
msg. counter/GPRS counter
Page 26

26
All calls
○ This menu lets you view all calls.
you can view the details of the
record by pressing the left soft key.
Then select view option. In the view
screen you can make a call to the
number by pressing the [Send] key.
Dialed calls
○ This menu lets you view the last
some dialed calls.
Missed calls
○ This menu lets you view the latest
missed calls.
Received calls
○ This menu lets you view the
received calls.
Call settings
○ Call ID : Set whether to display your
number on the other party’s phone.
Page 27

27
It can also depend on the network.
○ Call waiting : Three options are
available: Activate, Deactivate and
Query status.
○ Call divert : You can divert the
coming calls on your own setting.
○ Call barring : You can bar the
“Outgoing calls”, “Incoming calls”
and “Cancel all” settings. Also, you
can change the barring password.
○ Group List :
Advance Settings
○ Blacklist / Whitelist
○ Auto redial
○ IP dial
○ Call time display / Call time reminder
○ Auto quick end
○ Reject by SMS / Connect notice
○ Answer mode
STK
You can enjoy SIM Card Menu.
Page 28

28
Games
There are games for your enjoyment. This
game has Best Grades, Game Help
function.
○ You can configure of game setting
with “Game Setting” menu
Page 29

29
Extra
Calendar
Press left soft key “Option” and the
following are available:
▪ View : You can view today schedules
all. In the menu, you can edit
Date/Time, Description, Alarm,
Repeat, Repeat until, Location and
Priority. You can choose the due date
by pressing Numeric key. You can
Delete the Schedule and Add a New
Schedule.
▪ View all : You can view all schedules
recorded.
▪ Add event: You can add a new
schedule.
▪ Delete event: You can delete a
schedule.
▪ Jump to date: View the designated
date.
▪ Go to today /Go to weekly view
Page 30

30
Tasks
You can check the schedule arranged
on the current date. To edit schedule
Alarm
World Clock
Notes
This menu allows you to set the
alarm to ring at a specific time. Five
options are available. The default
mode is OFF. You may set one or all
ON if necessary. The time, Repeat,
Snooze and Alert type of each alarm
can be set separately.
You can view the current time for
GMT and the other cities around the
world by pressing the navigation key.
you can insert Notes.
Page 31

31
■ Calculator
○ Enter numbers by pressing [0]—[9].
Press [.] for a decimal point. Press
the [Del] key to clear your input.
○ You can press the Up, Down, Left,
Right navigation keys to enter the
symbols of addition, subtraction,
multiplication and division.
○ Clear the latest input digit or result
by pressing the [Del] key. Long
press the [Del] key to clear all the
input or the result.
○ Press the left soft key to calculate
and the result will appear on the
screen.
○ Note! The precision of the calculator
is limited for the round off error.
■ Stopwatch
Your phone can be used as a typical
stopwatch or nWay stopwatch.
There are Split Timing and Lap
Timing stopwatch functions in this
typical stopwatch menu. You can
Page 32

32
view the record in this menu.
E-Book reader
○ You can read E-Book with this menu.
E-Book refers to “E-book” folder
from phone or memory card in File
Manager.
Page 33

33
Phonebook
! Note: If the SIM card is changed, Phone
show the message “Copy all from SIM to
Phone?”
The SIM card memory and phone
memory is physically separated but they
are searched as a single entity.
■ Caller groups
○ You can set different alert Associate
ringtone, Associate picture and
Member list to each of the groups.
Navigation key is for you to choose
specific objects.
■ Phonebook settings
○ Preferred storage: You can select
“SIM/Phone/Both” to save the
contact.
○ Speed dial : You can set a speed
dial.
○ My number : You can edit or send
your vCard.
Page 34

34
○ Extra numbers : you can set Owner
numbers, Fixed dial and SOS
numbers.
○ Memory status: You can see the
memory status of the contact list.
○ Copy contacts : Copy the records
stored in the memory of SIM card
and the phone memory respectively.
○ Move contacts : Move the records
stored in the memory of SIM card
and the phone memory respectively.
○ Delete all contacts : Delete all the
records stored in SIM card and
Phone memory respectively.
! Note Options of Phonebook
○ If you press option soft key after
View:
You can go through the list of telephone
numbers stored in the contact.
locating the menu cursor to the name
you wish to do an action, the
following options are available.
Page 35

35
Send Text Message:
Send SMS to a number selected from the
contact.
Send Multimedia Message:
Send MMS to a number selected from the
contact.
Call:
Call to this contact.
IP Dial :
Call to this contact by IP dial.
Edit:Edit names, Number and etc.
Delete:
Delete the selected information/record.
Copy:
You can copy the selected information
either from Phone memory to SIM card
memory or vice versa.
Move:
You can move the selected information
either from Phone memory to SIM card
memory or vice versa.
Page 36

36
Send business Card:
You can send business card out or save
them to archives by means of SMS, MMS,
etc.
Add to Blacklist :
add this contact to Blacklist
Page 37

37
Portal Movil
Direct access to the Portal WAP / UMTS.
Messages
Write message
Text message
You can also create your own text
messages. You can add the message
module to the new message you are
editing.
▪ Multimedia message
A multimedia message can contain text,
images, and sound clips.
When a message is readily finished, you
can choose to send it at once or save it
for later use.
Inbox
With this menu, you can view the new
messages or the read messages. Sender
number or name(if stored in the Contact)
are displayed on the list.
Page 38

38
Drafts
▪ With this menu, you can view a list
of any draft messages that have
been created in the ‘write message
mode’ and you can save the draft
messages here.
Outbox
▪ If you send a message, it will be
▪ If you send a message, it will be
Sent messages
▪ With this menu, you can view a list
saved to the “Outbox” after the
message isn’t successfully send.
The unsent messages are saved to
the “Drafts” and “No Number” is
displayed, which indicates that there
is no destination.
saved to the “Sent” after the
message is successfully send.
of the sent message.
Page 39

39
Email
With this menu, you can send and
receive Emails.
You must set the “Email account” first
for use this menu.
Broadcast Message
○ Receive mode: You can set
activation “ON” or “OFF”.
○ Channel settings
○ Languages: You can set the
○ Read messages: You can read the
Select: You can select the
channel you want.
Add: You can add the channel
you want. Type “Channel
title” and “Channel ID”.
Edit: You can edit the existing
channel.
Delete: You can delete the
channel you want.
language type you want.
message.
Page 40

40
! Note: The Voice mail service may not be
available on all networks. For more detail,
please contact your network service
provider.
Templates
▪ Users can insert a preset phrase
into a text message which is being
composed.
▪ When you are sending a message,
you can quickly use a preset phrase.
Message settings
▪ Text message
SIM/Memory status/Save sent
message/Preferred storage
▪ Multimedia message
Data account : You can activate or
edit MMS Profile.
Common settings:
Compose/Sending/Retrieval/
Preferred storage/Memory status
Page 41

41
▪ Service message
Enable push
Enable service loading
Page 42

42
Camera
○ In the camera main screen, you can
take photos, set camera options or
view the saved pictures.
○ To take a photo, press “OK” key
○ If there is not enough memory to
save a new photo, you need to
create free space by deleting old
pictures or other files.
Multimedia
Image viewer
○ You can view the saved photos in
this menu.
○ The same as the option of Photos.
Video recorder
○ In the video main screen, you can
take video.
○ To take a video, press “OK” key
○ If there is not enough memory to
save a new video, you need to
create free space by deleting old
pictures or other files in the menu.
Page 43

43
Video player
○ In the video player, you can play the
saved video clip.
○ You can set the corresponding
options and enter the video player
menu to see the saved video clip.
Audio player
○ In the audio player, you can play the
saved audio clip.
○ You can set the corresponding
options.
Sound recorder
○ In the sound recorder, you can
record the sound.
○ You can set the corresponding
options and enter the audio player
menu to see the saved audio clip.
Page 44

44
FM radio
Press the left soft key for “Option” to bring
the follow menus:
▪ Channel list: You can define 1~30
channel shortcut.
▪ Manual input: You can input the
frequency manually. [./M] key is
assigned to point “.”
▪ Auto search: FM Tuner search all
available channels for preset list.
▪ Setting :
You can select the following setting
value:
Background play / Audio quality /
Record storage option
Tip! Press [navi up] key, turn on/off
search algorism
Press [navi down ]key, turn on/off
power
▪ Record : you can record FM radio.
▪ Append : you can append FM radio
to the selected file.
Page 45

45
▪ File list : you can check file manager.
Page 46

46
File Manager
You can realize the management of
images, video clips, sounds, MP3, folder,
etc. through this function menu.
It is to manage your files of audio, eBook,
photos, images, my music, received and
video as default. It works as “My
Document” in Window O/S.
Select drive between phone and memory
card (only in case that you are using
Micro SD). You can have the following
options:
○ Open: Open the folder. If you create
a folder, it will be generated in here.
○ New Folder: Create a folder as you
want.
○ Format: Format all folders and its
properties.
Ideas
Access to Applications section in America
Movil which may be, for example, Radio
Ideas, Ideas Code, etc..
Page 47

47
Page 48

48
Settings
Many different features of your phone can
be customized to suit your preferences.
All of these features are accessed via the
Setting menu.
User profiles
You can use the sound setting features to
customize various settings such as ring
type, vibrator, and volume depending on
environments: General, Silent, Meeting.
Outdoor, Power Saving, My style.
Phone settings : Time and date,
Schedule power on/off, Language,
Preferred writing language, Encoding,
Display, Dedicated key, Auto update time,
Flight mode
Network settings
Security settings
Connectivity : Bluetooth, Data account,
WLAN(WiFi connection setting menu),
Data service
Restore factory settings
Page 49

49
Shortcuts
Search
Search Ideas.
Page 50

50
MP3 AND MP4 INSTRUCTION
Connect your phone to the computer
using the USB cable.
If the phone is connected, the computer
will show a sign that an external memory
device is connected. Select an mp3 file of
your choice from the computer and copy it
to the My Music folder in the USB
memory. For mp4 files, you can copy it to
the Video Folder.
After canceling the connection of the
external memory device through the
computer, disconnect the USB Cable from
the computer.
Use the follow the sequence “Menu >
Multimedia > Audio Player/Video Player”
to activate the player.
In case play music with headset: To play
music, short press ear button of headset.
If you long press the ear button, the
Page 51

51
phone will dial the last call made
Page 52

52
TROUBLESHOOTING
If you meet a trouble on your phone
operation, please check the followings.
These checks enable you to save time
and expense due to unnecessary afterservice.
When Enter PIN appears at the powerup…
☞ The PIN check is currently enabled. You
must enter the PIN supplied together with
your SIM card. You can disable the PIN
check if you want, please see Security
Setting menu.
When Enter PUK appears at the powerup…
☞ PUK (Personal Unblocking Key) is used
to unblock the blocked SIM card due to
incorrectly entered PIN. PUK code is
composed of 8 digits, and usually
provided with your SIM card. If the PUK
code is entered incorrectly several times
Page 53

53
in succession, PUK will be blocked and
your SIM card will be automatically lockup and the SIM Blocked message will be
displayed. Once you see the message,
you need to contact your network service
provider for a new SIM card.
When Insert SIM screen appears at the
power-up…
☞ Please, check that your SIM card is
inserted properly.
When Enter Lock Code appears at the
power-up…
☞ Your phone is phone locked. You must
enter the Lock Code supplied together
with your phone.
When No Service appears…
☞ You probably are in the area out of the
coverage of a GSM/ GPRS or EDGE
network.
When Emergency Only appears even
Page 54

54
though a number of the signal bar are
indicated…
☞ You probably are in the area out of the
coverage of your home GSM, GPRS or
EDGE network. You probably are in the
coverage of another GSM, GPRS or
EDGE network but you are not allowed to
be registered to the network.
If any tone is not generated when you
press a keypad…
☞ You need to check the quick silence
mode setting. If you can find icon on
the top of the main display screen it is the
quick silence mode. By pressing and
holding [Space] key on the idle screen,
you can switch it off. You need to check
the Key Tone Type of Sound Setting menu.
You need to check Key Tone Volume of
the profile option that you have set on
Profiles menu.
If an audible alert is not made when a call
is received…
Page 55

55
☞ You need to check the quick silence
mode setting. If you can find icon on
top of the main display screen it is the
quick silence mode. By pressing and
holding [Space] key on the idle screen,
you can switch it off. You need to check
Ring Type and Ring Volume of the profile
option that you have set on Profiles menu.
If an audible alert is not made when an
alarm is expired…
☞ You need to check the quick silence
mode setting. If you can find icon on
top of the main display screen it is quick
silence mode. By pressing and holding
[Space] key on the idle screen, you can
switch it off.
If an outgoing call is not made…
☞ You have probably set an outgoing calls
barring option. You need to check Call
Barring menu. Otherwise, you have
probably set to Hide Number in Caller
Number menu of Call Setting menu. In
Page 56

56
some network, when you make a call with
hiding the telephone number, the network
does not allow to make the call.
If an incoming call is not made…
☞ You have probably set an incoming
calls barring option. You need to check
Call Barring menu.
If an outgoing SMS message is not sent…
☞ You need to check the Message Center
option in SMS Setting menu.
If all audible key tones are muted and all
audible alerts are changed to vibrator
alert…
☞ You need to check the quick silence
mode setting. If you can find icon on
top of the main display screen it is the
quick silence mode. By pressing and
holding [Space] key on the idle screen,
you can switch it off.
If some audible action is not prompted on
Page 57

57
a menu of Sound Setting menu…
☞ You need to check the quick silence
mode setting. If you can find icon on
top of the main display screen it is the
quick silence mode. By pressing and
holding [Space] key on the idle screen,
you can switch it off.
If the image on the screen is blurred when
you try to take a picture…
☞ You need to check that the protection
film is detached or the lens is clean. To
remove fingerprints or other stains, wipe
the lens with soft cloth.
Page 58

58
LIMITED WARRANTY
STATEMENT
1. WHAT THIS WARRANTY
COVERS:
IDENTITY offers you a limited warranty
that the enclosed subscriber unit will be
free from defects in material and
workmanship, according to the following
terms and conditions:
The limited warranty extends only to the
original purchaser of the product and is
not assignable or transferable to any
subsequent purchaser/end user.
This warranty is good only to the original
purchaser of the product during the
warranty period as long as it is in the
purchased local area.
The external housing and cosmetic parts
shall be free of defects at the same time
of shipment and, therefore, shall not be
covered under these limited warranty
terms.
Upon request from IDENTITY, the
Page 59

59
customer must provide information
reasonably prove the date of purchasing.
The customer shall bear the cost of
shipping the product to the Customer
Service Center of IDENTITY. IDENTITY
shall bear the cost of shipping the product
back to the customer after the completion
of service under this limited warranty.
2. WHAT THIS WARRANTY DOES
NOT COVER:
Defects or damages resulting from use of
the product in other than its normal and
customary manner.
Defects or damages from abnormal use,
abnormal conditions, improper storage,
exposure to moisture or dampness,
unauthorized modifications, unauthorized
connections, unauthorized repair, misuse,
neglect, abuse, accident, alteration,
improper installation, or other acts which
are not the fault of IDENTITY, including
damage caused by shipping, blown fuses,
spills of food or liquid.
Page 60

60
Breakage or damage to antennas unless
caused directly by defects in material or
workmanship.
That the Customer Service Department at
IDENTITY was not notified by consumer
of the alleged defect or malfunction of the
product during the applicable limited
warranty period.
Products which have had the serial no.
removed or made illegible.
This limited warranty is in lieu of all other
warranties, express or implied either in
fact or by operations of law, statutory or
fitness for a particular use.
Damage resulting from use of nonIDENTITY approved accessories.
All plastic surfaces and all other externally
exposed parts that are scratched or
damaged due to normal customer use.
Products operated outside published
maximum ratings.
Products used or obtained in a rental
program.
Consumables (such as fuses).
Page 61

61
3. STATE LAW RIGHT:
No other express warranty is applicable to
this product. THE DURATION OF ANY
IMPLIED WARRANTIES, INCLUDING
THE IMPLIED WARRANTY OF
MARKETABILITY, IS LIMITED TO THE
DURATION OF THE EXPRESS
WARRANTY HEREIN. IDENTITY SHALL
NOT BE LIABLE FOR THE LOSS OF
THE USE OF THE PRODUCT,
INCONVENIENCE, LOSS OR ANY
OTHER DAMAGES, DIRECT OR
CONSEQUENTIAL, ARISING OUT OF
THE USE OF, OR INABILITY TO USE,
THIS PRODUCT OR FOR ANY BREACH
OF ANY EXPRESS OR IMPLIED
WARRANTY, INCLUDING THE IMPLIED
WARRANTY OF MARKETABILITY
APPLICABLE TO THIS PRODUCT.
Some states do not allow the exclusive of
limitation of incidental or consequential
damages or limitations on how long an
implied warranty lasts: so these limitations
or exclusives may not apply to you. This
Page 62

62
warranty gives you specific legal rights
and you may also have other rights which
vary from state to state.
4. HOW TO GET WARRANTY
SERVICE:
To obtain warranty service, please conta
ct the retailer where you purchased this
handset.
FCC Regulations:
This mobile phone complies with part 15
of the FCC Rules. Operation is subject to
the following two conditions: (1) This
device may not cause harmful
interference, and (2) this device must
accept any interference received,
including interference that may cause
undesired operation.
This mobile phone has been tested and
found to comply with the limits for a Class
B digital device, pursuant to Part 15 of the
Page 63

63
FCC Rules. These limits are designed to
provide reasonable protection against
harmful interference in a residential
installation. This equipment generates,
uses and can radiated radio frequency
energy and, if not installed and used in
accordance with the instructions, may
cause harmful interference to radio
communications. However, there is no
guarantee that interference will not occur
in a particular installation If this equipment
does cause harmful interference to radio
or television reception, which can be
determined by turning the equipment off
and on, the user is encouraged to try to
correct the interference by one or more of
the following measures:
-Reorient or relocate the receiving
antenna.
-Increase the separation between the
equipment and receiver.
-Connect the equipment into an outlet on
a circuit different from that to which the
Page 64

64
receiver is connected.
-Consult the dealer or an experienced
radio/TV technician for help.
Changes or modifications not expressly
approved by the party responsible for
compliance could void the user‘s authority
to operate the equipment.
The antenna(s) used for this transmitter
must not be co-located or operating in
conjunction with any other antenna or
transmitter.
Page 65

65
RF Exposure Information (SAR)
This mobile phone meets the
government’s requirements for exposure
to radio waves.
This phone is designed and manufactured
not to exceed the emission limits for
exposure to radio frequency (RF) energy
set by the Federal Communications
Commission of the U.S. Government.
The exposure standard for wireless
mobile phones employs a unit of
measurement known as the Specific
Absorption Rate, or SAR. The SAR limit
set by the FCC is 1.6W/kg. *Tests for
SAR are conducted using standard
operating positions accepted by the FCC
with the phone transmitting at its highest
certified power level in all tested
frequency bands. Although the SAR is
determined at the highest certified power
level, the actual SAR level of the phone
while operating can be well below the
Page 66

66
maximum value. This is because the
phone is designed to operate at multiple
power levels so as to use only the power
required to reach the network. In general,
the closer you are to a wireless base
station, the lower the power output.
The highest SAR value for the model
phone as reported to the FCC when
tested for use at the ear is 0.624 W/kg
and when worn on the body, as described
in this user guide, is 1.43 W/kg (Bodyworn measurements differ among phone
models, depending upon available
accessories and FCC requirements.)
While there may be differences between
the SAR levels of various phones and at
various positions, they all meet the
government requirement.
The FCC has granted an Equipment
Authorization for this model phone with all
reported SAR levels evaluated as in
Page 67

67
compliance with the FCC RF exposure
guidelines. SAR information on this
model phone is on file with the FCC and
can be found under the Display Grant
section of www.fcc.gov/oet/ea/fccid after
searching on FCC ID: WVBASN51D.
For body worn operation, this phone ha
s been tested and meets the FCC RF
exposure guidelines for use with an ac
cessory that contains no metal and the
positions the handset a minimum of 1.
5 cm from the body. Use of other acc
essories may not ensure compliance wi
th FCC RF exposure guidelines. If yo
u do not use a body-worn accessory a
nd are not holding the phone at the ea
r, position the handset a minimum of 1.
5 cm from your body when the phone
is switched on.
 Loading...