

Page 1
Operating Instructions
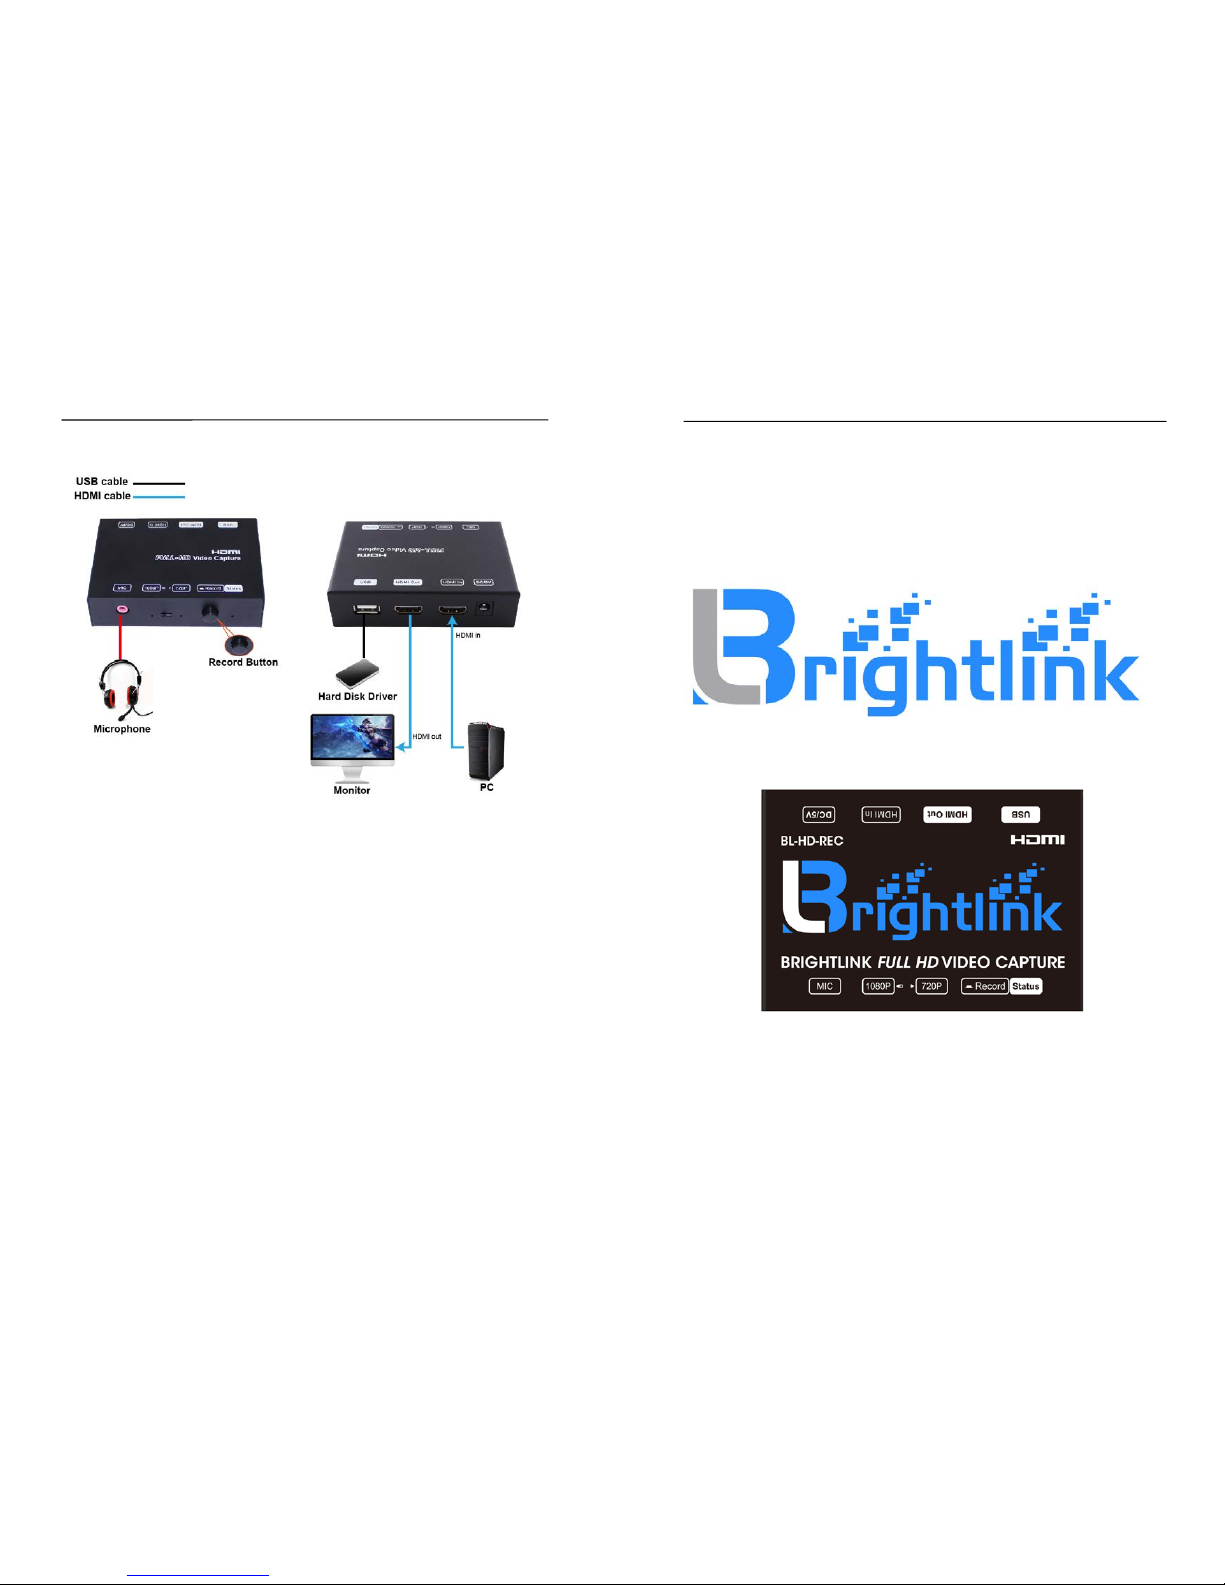
Typical Application
WARRANTY
If your product does not work properly because of a defect in materials or
workmanship, our Company (referred to as "the warrantor" ) will, for the length of the
period indicated as below, (Parts(2)Year, Labor(90) Days) which starts with the
date of original purchase ("Limited Warranty period"), at its option eith er(a) repair
your product with new or refurbished parts, or (b) replace it with a new of a
refurbished product. The decision to repair or replace will be made by the warrantor.
During the "Labor" Limited Warranty period there will be no charge for labor.
During the "Parts" warranty period, there will be no charge for parts. You must mail-in
your product during the warranty period. This Limited Warranty is extended only to
the original purchaser and only covers produc t purchased as new. A purchase
receipt or other proof of original purchase date is required for Limited Warranty
service.
MAIL-IN SERVICE
When shipping the unit carefully pack and send it prepaid, adequat ely insured and
preferably in the original carton. Include a letter detailing the complaint and provide a
day time phone and/or email address where you can be reached.
5
Operating Instructions
BRIGHTLINK Full HD 1080P Video Game Capture
H.264 encoder
MODEL: BL-HD-GAME-CAP
Operating Instructions
BRIGHTLINKAV.COM
Dear Customer
Thank you for purchasing this product. For optimum performance and safety,
please read these instructions carefully bef ore connecting, operating or adjusting
this product. Please keep this manual for future reference.
1
Page 2

FEATURES
Support HDMI signal source of PlayStation 4, Xbox One and Xbox 360 game
play in brilliant 1080p@60HZ with advanced H.264 encoding.
Recording with one-click, easy to use, no need any set up.
Just click “RECORD” button to record your game play and re-click to stop
recording.
Support NTFS/FAT32 format.
Support USB 2.0 Host.
Automatically split the video up to 2GB per file.
Support record video format of MPEG-4 and audio format of RCA L/R 3.5mm
microphone input.
Support by pass mode or downscaling 1080P/1080i to 720P.
NOTICE
Our com pany reserves the right to make changes in the hard ware, packaging and
any accompanying documentation without prior written notice.
2
Operating Instructions
TABLE OF CONTENTS
Specifications
Package Contents
Panel Descriptions
Connecting and Operating
Maintenance
Product Service
Warranty
SPECIFICATIONS
Operating Temperature Range -5 to +35℃(+23 to +95℉)
Operating Humidity Range 5 to 90%RH (No Condensation)
Output Video Format MPEG-4
encoder H.264
Input resolution
720x480(60HZ);720x576(50HZ);1280X720P(50HZ/60HZ)
1920X1080i(50HZ/60HZ);
1920X1080P(24HZ/25HZ/30HZ/50HZ/60HZ)
Capture resolution
720x480(60HZ);720x576(50HZ);1280X720P(50HZ/60HZ)
1920X1080i(50HZ/60HZ);
1920X1080P(24HZ/25HZ/30HZ)
Support Audio Format LPCM
Bandwidth 2.25Gbps
USB 2.0
Power consumption 3watts(Maximum)
Dimension (L×W×H) 102.2x70.1x27.1mm
Net Weight 220g(Pcs)
PACKING CONTENTS
1) Game capture
2) 5V/1A x1 PCS
3) Operating Instructions
3
Page 3
Operating Instructions
PANEL DESCRIPTIONS
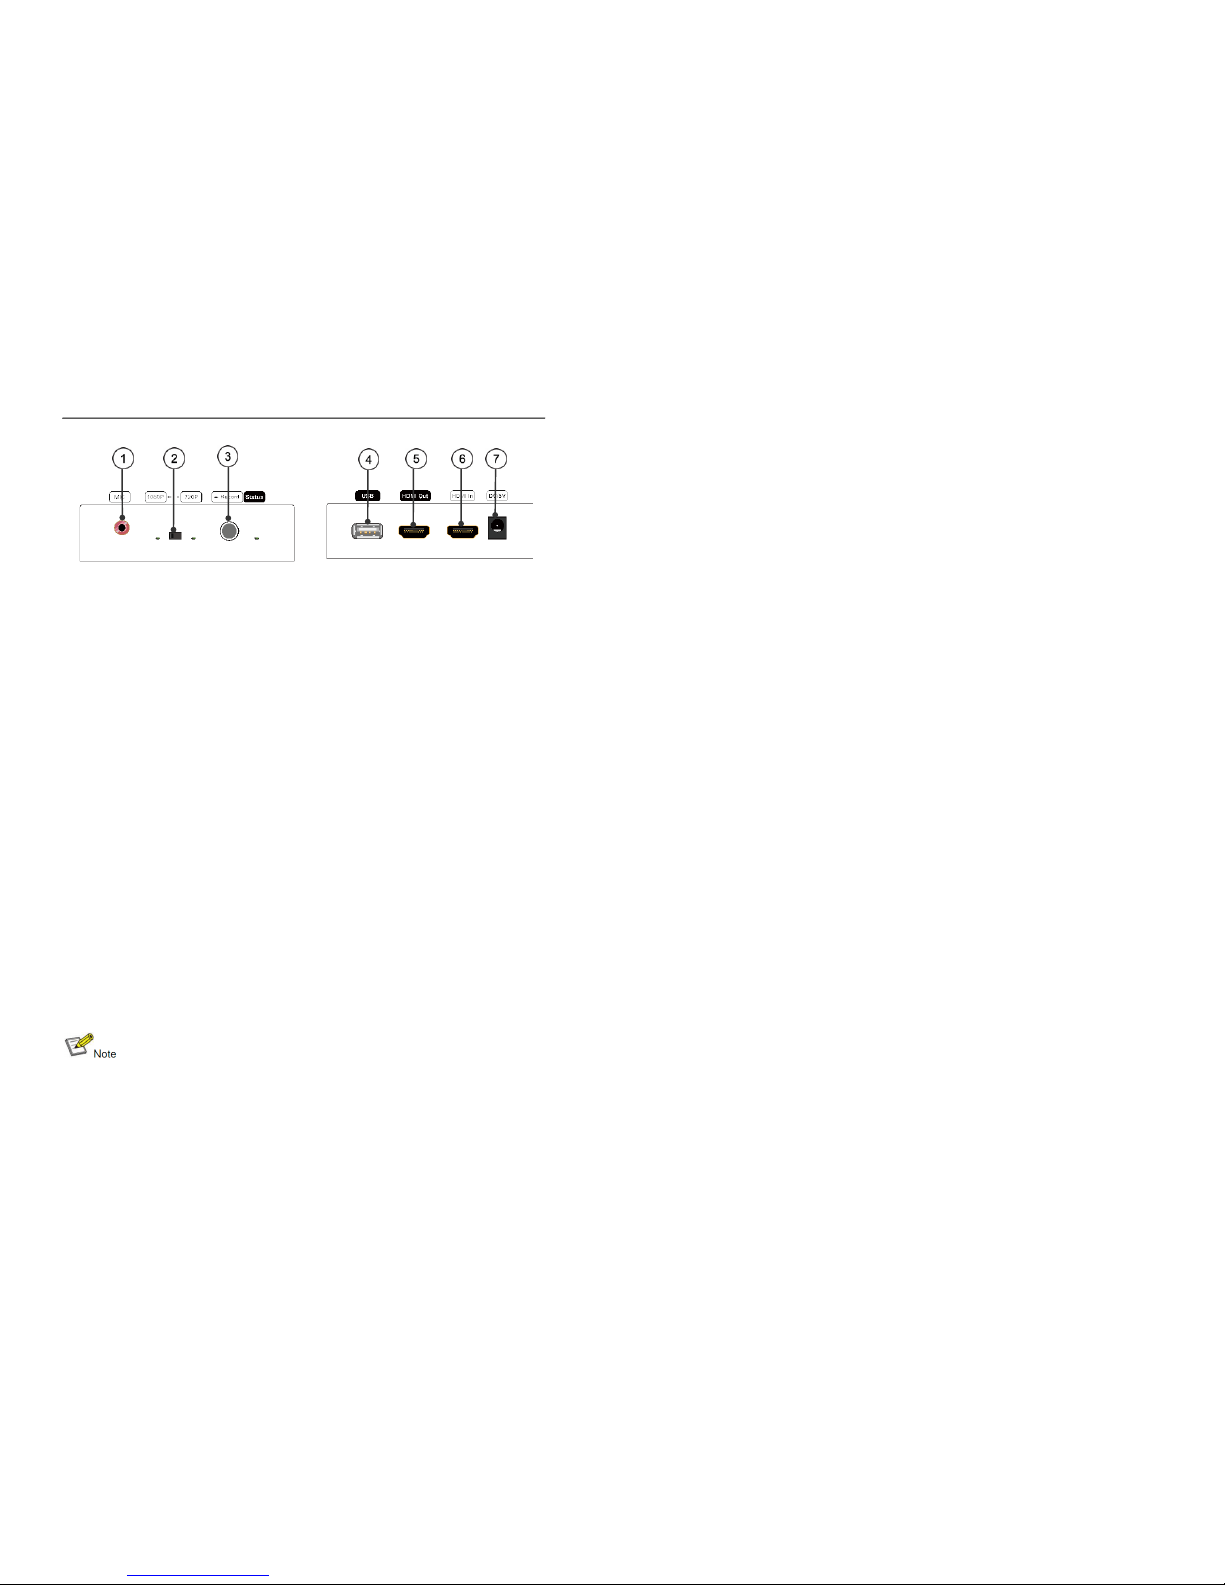
1) 3.5 microphone in
2)1080P/720 Switch Button
● When the input resolution is 1080p, you can switch to 1080p by pass mode
or downscale to 720P.
●When the input resolution is 1080P@60hz, the capt ure resolution will
be 1080P@30hz.
● When the input resolution is 1080i@50hz, 1080i@60hz, you can switch to
1080P@24hz or downscale to 720p.
● When the input resolution is 720p or lower than 720p, please switch to
"720P" position, it is by pass mode.
3) “RECORD” button (click “RECORD” button to r ecord your game play and re-click
to stop recording)
4) USB port 5) HDMI output
6) HDMI input 7) Power input
CONNECTING AND OPERATING
1) Connect the HDMI signal sources (Such as Industry HD Camera, PlayStation 4,
Xbox 360 etc).
2) Connect the HDMI Output (Such as Computer, TV).
3) Connect the USB host (Such as HDD or USB flash).
4) Connect the microphone to the “Mic” hole.
5) Connect the DC 5V1A power supply.
6) Power on and click the “RECORD” button to start recor di ng.
7) The LED status will flash when start recording.
8) Re-click the “RECORD” button to stop recording.
9) The LED status will stop flashing and keep lighting when finishing recording.
Attention:
1). It is suggested to use HDD for recording.
2). Do not pull out the HDD when recording.
3). Make sure the limited space for HDD is above 80M, otherwise it's unavailable
for recording.
4
 Loading...