

Briggs & Stratton PRO3600 Operator's Manual

Not for
Reproduction
PRO3600
Pressure Washer
Operator’s Manual
Manual No. 80019847 Rev -

Not for
Reproduction
Thank you for purchasing this quality-built Briggs & Stratton® pressure washer. We are pleased that you’ve
placed your condence in the Briggs & Stratton brand. When operated and maintained according to the
instructions in this manual, your Briggs & Stratton pressure washer will provide many years of dependable service.
This manual contains safety information to make you aware of the hazards and risks associated with pressure
washers and how to avoid them. Because Briggs & Stratton does not necessarily know all the applications this
pressure washer could be used for, it is important that you read and understand these instructions thoroughly
before attempting to start or operate this equipment. Save these original instructions for future reference.
This pressure washer requires nal assembly before use. Refer to the Assembly section of this manual for
instructions on nal assembly procedures. Follow the instructions completely.
Where to Find Us
You never have to look far to nd Briggs & Stratton support and service for your pressure washer. There are
thousands of Briggs & Stratton authorized service dealers worldwide who provide quality service. You can also
contact Briggs & Stratton Customer Service by phone at 1800-356-632 (AUS) or 0800-484-282 (NZ), or on the
Internet at BRIGGSandSTRATTON.com.au.
Pressure Washer Engine
Model Number _____________________ Model Number ______________________
Revision __________________________ Type Number _______________________
Serial Number ______________________ Code Number _______________________
Date Purchased ___________________
Table of Contents
Operator Safety....................... 3
Assembly............................ 6
Features and Controls ................ 10
Operation........................... 11
Maintenance ........................ 16
Troubleshooting ..................... 22
Warranty ........................... 23
Product Specications ................ 24
Common Service Parts ............... 24
Copyright © 2016. Briggs & Stratton Power Products Group, LLC
Milwaukee, WI, USA. All rights reserved.
BRIGGS & STRATTON POWER PRODUCTS is a registered
trademark of Briggs & Stratton Corporation
Milwaukee, WI, USA
2 BRIGGSandSTRATTON.com.au
Not for
Reproduction
Operator Safety
Equipment Description
Read this manual carefully and become
familiar with your pressure washer. Know
its applications, its limitations, and any
hazards involved.
This pressure washer operates at a maximum of
3,600 PSI (248 BAR or 24.8 MPa) at a ow rate of up
to 9.5 liters (2.5 gallons) per minute. This high quality
residential system features 30.5 cm (12 in.) wheels,
triplex pump with stainless steel pistons, automatic
cool down system, detergent siphoning system, quick
connect spray tips, heavy duty 10.7 m (35 ft.) hose,
and more.
This machine is not intended for use by persons
(including children) with reduced physical, sensory or
mental capabilities, or lack of experience and knowledge.
Every eort has been made to ensure that information
in this manual is accurate and current. However, we
reserve the right to change, alter, or otherwise improve
the product and this document at any time without prior
notice.
Important Safety Information
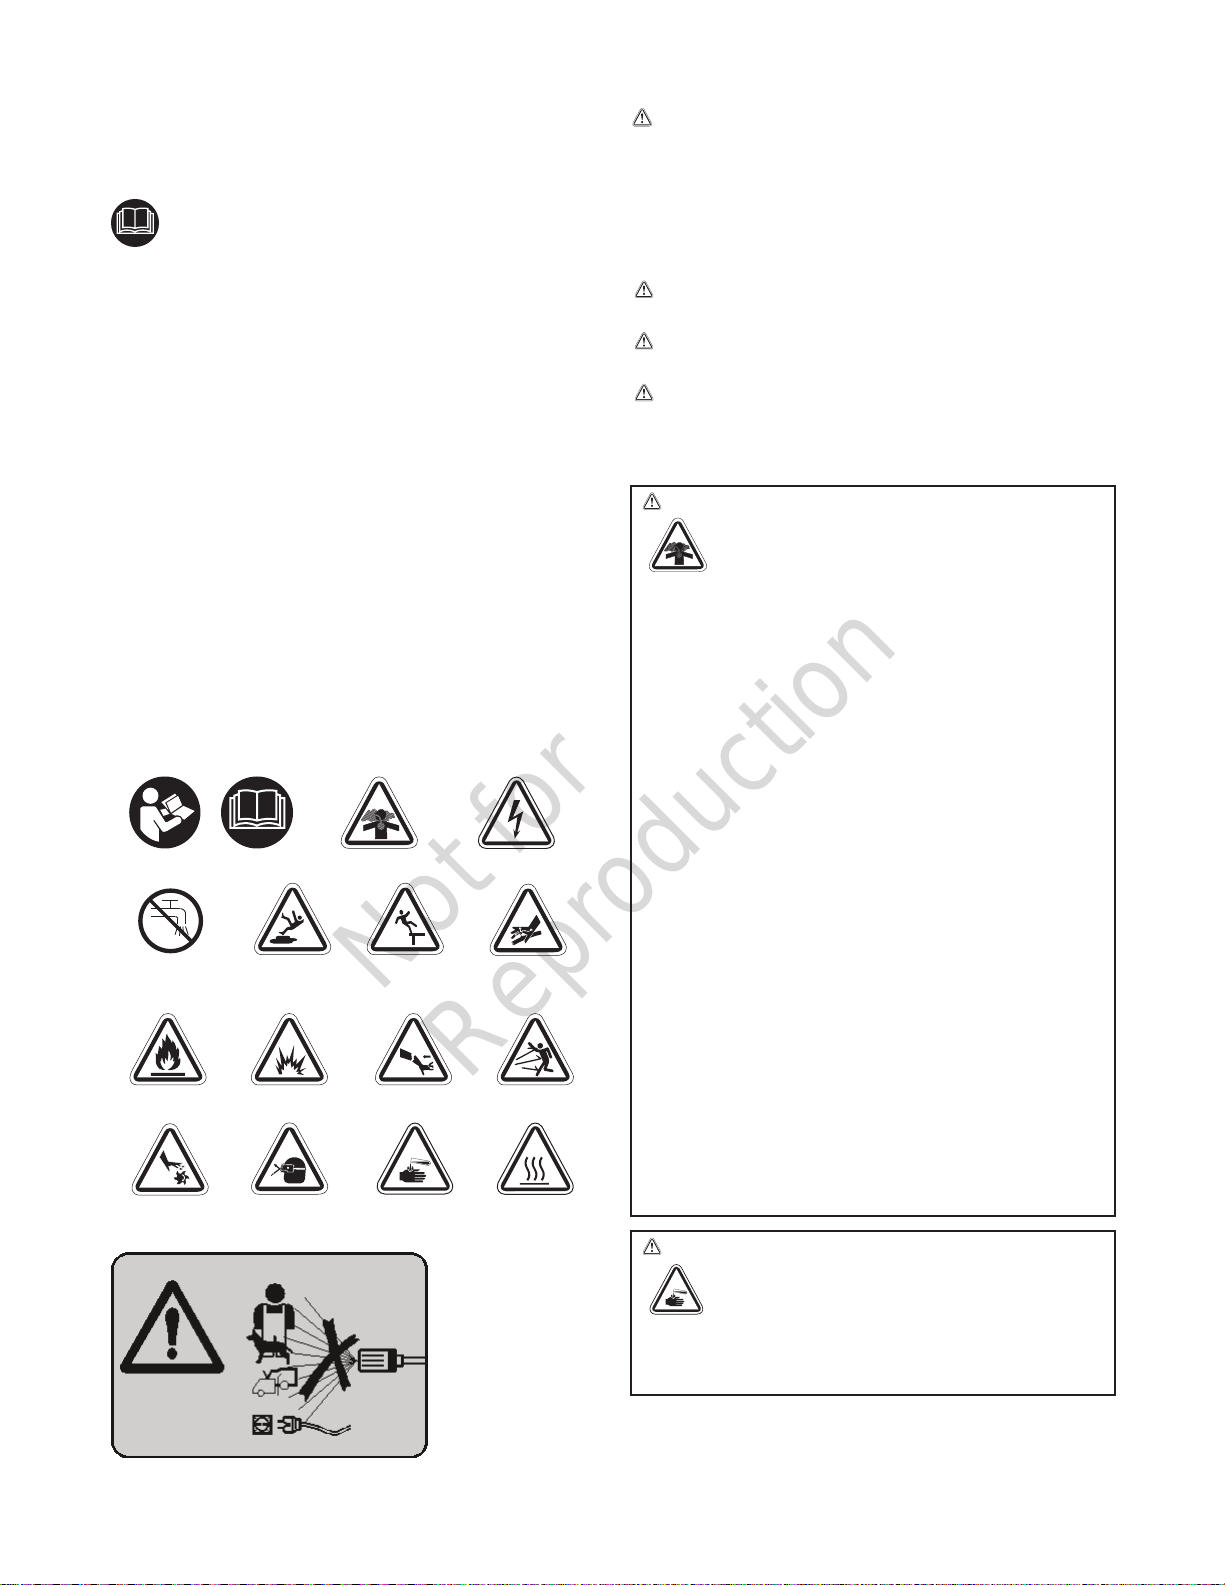
Safety Symbols and Meanings
Read Manual
Non-Potable
Water
Fire
Moving
Parts
Slippery
Surface
Explosion
Flying
Objects
Toxic Fumes
Fall
Kickback
Chemical
Electrical Shock
Fluid Injection
Projectile
Hot Surface
Burn
Never spray
yourself, others,
animals, power
sources, or the
unit itself.
The safety alert symbol indicates a potential
personal injury hazard. A signal word (DANGER,
WARNING, or CAUTION) is used with the alert symbol
to designate a degree or level of hazard seriousness. A
safety symbol may be used to represent the type of
hazard. The signal word NOTICE is used to address
practices not related to personal injury.
DANGER indicates a hazard which, if not avoided,
will result in death or serious injury.
WARNING indicates a hazard which, if not
avoided, could result in death or serious injury.
CAUTION indicates a hazard which, if not avoided,
could result in minor or moderate injury.
NOTICE indicates information considered important,
but not hazard-related.
WARNING POISONOUS GAS HAZARD.
Engine exhaust contains carbon monoxide,
a poisonous gas that could kill you in
minutes. You CANNOT smell it, see it, or
taste it. Even if you do not smell exhaust fumes, you
could still be exposed to carbon monoxide gas.
Some chemicals or detergents could be harmful if
inhaled or ingested, resulting in death, serious
injury, nausea, fainting or poisoning.
• Operate this product ONLY outside far away from
windows, doors and vents to reduce the risk of carbon
monoxide gas from accumulating and potentially being
drawn towards occupied spaces.
• Install battery-operated carbon monoxide alarms or
plug-in carbon monoxide alarms with battery back-up
according to the manufacturer’s instructions. Smoke
alarms cannot detect carbon monoxide gas.
• DO NOT run this product inside homes, garages,
basements, crawlspaces, sheds, or other partially-
enclosed spaces even if using fans or opening doors
and windows for ventilation. Carbon monoxide can
quickly build up in these spaces and can linger for hours,
even after this product has shut o.
• ALWAYS place this product downwind and point the
engine exhaust away from occupied spaces.
If you start to feel sick, dizzy, or weak while using this
product, get to fresh air RIGHT AWAY. See a doctor. You
may have carbon monoxide poisoning.
• Use a respirator or mask whenever there is a chance that
vapors may be inhaled when using chemicals.
• Read all instructions with mask so you are certain the
mask will provide the necessary protection against
inhaling harmful vapors when using chemicals.
WARNING Chemical Burn Hazard.
Chemicals could cause burns resulting in
death or serious injury.
• DO NOT use caustic liquid with pressure washer.
• Use ONLY pressure washer safe detergents/ soaps.
Follow all manufacturers instructions.
3
Not for
Reproduction
WARNING Exhaust heat/ gases could ignite
combustibles, structures or damage
fuel tank causing a re, resulting in
death or serious injury.
Contact with muer area could cause burns
resulting in serious injury.
• DO NOT touch hot parts and AVOID hot exhaust gases.
• Allow equipment to cool before touching.
• Keep at least 1.5 m (5 ft.) of clearance on all sides of
pressure washer including overhead.
• Contact the original equipment manufacturer, retailer,
or dealer to obtain a spark arrester designed for the
exhaust system installed on this engine.
• Replacement parts must be the same and installed in the
same position as the original parts.
WARNING Risk of electrocution.
Contact with power source could cause
electric shock or burn resulting in death or
serious injury.
• NEVER spray near power source.
WARNING Use of pressure washer could
create puddles and slippery
surfaces causing you to fall
resulting in death or serious injury.
Kickback from spray gun (33.4 N) could cause you
to fall resulting in death or serious injury.
• Operate pressure washer from a stable surface.
• The cleaning area should have adequate slopes and
drainage to reduce the possibility of a fall due to slippery
surfaces.
• Be extremely careful if you must use the pressure washer
from a ladder, scaolding, or any other similar location.
• Firmly grasp spray gun with both hands when using high
pressure spray to avoid injury when spray gun kicks
back.
WARNING Fuel and its vapors are extremely
ammable and explosive which
could cause burns, re or explosion
resulting in death or serious injury.
WHEN ADDING OR DRAINING FUEL
• Turn pressure washer engine OFF and let it cool at least
2 minutes before removing fuel cap. Loosen cap slowly to
relieve pressure in tank.
• Fill or drain fuel tank outdoors.
• DO NOT overll tank. Allow space for fuel expansion.
• If fuel spills, wait until it evaporates before starting engine.
• Keep fuel away from sparks, open ames, pilot lights,
heat, and other ignition sources.
• Check fuel lines, tank, cap and ttings frequently for
cracks or leaks. Replace if necessary.
• DO NOT light a cigarette or smoke.
WHEN STARTING EQUIPMENT
• Ensure spark plug, muer, fuel cap, and air cleaner are in
place.
• DO NOT crank engine with spark plug removed.
WHEN OPERATING EQUIPMENT
• DO NOT operate this product inside any building,
carport, porch, mobile equipment, marine applications, or
enclosure.
• DO NOT tip engine or equipment at angle which causes
fuel to spill.
• DO NOT spray ammable liquids.
WHEN TRANSPORTING, MOVING OR REPAIRING
EQUIPMENT
• Transport/move/repair with fuel tank EMPTY or with fuel
shuto valve OFF (0).
• DO NOT tip engine or equipment at angle which causes
fuel to spill.
• Disconnect spark plug wire.
WHEN STORING FUEL OR EQUIPMENT WITH FUEL IN
TANK
• Store away from furnaces, stoves, water heaters, clothes
dryers, or other appliances that have pilot light or other
ignition source because they could ignite fuel vapors.
WARNING Starter cord kickback (rapid
retraction) will pull hand and arm toward
engine faster than you can let go which
could cause broken bones, fractures,
bruises, or sprains resulting in serious injury.
• NEVER pull starter cord without rst relieving spray gun
pressure.
• When starting engine, pull cord slowly until resistance is
felt and then pull rapidly to avoid kickback.
• After each starting attempt, where engine fails to run,
always point spray gun in safe direction, press red button
and squeeze spray gun trigger to release high pressure.
• Firmly grasp spray gun with both hands when using high
pressure spray to avoid injury when spray gun kicks
back.
4 BRIGGSandSTRATTON.com.au
Not for
Reproduction
WARNING The high pressure stream of water
that this equipment produces could cut
through skin and its underlying tissues,
resulting in serious injury and possible
amputation.
Spray gun traps high water pressure, even when
engine is stopped and water is disconnected, which
could result in serious injury.
• If cut by uid, call physician immediately. DO NOT treat
as a simple cut.
• DO NOT allow CHILDREN to play with or operate
pressure washer.
• NEVER repair high pressure hose. Replace it.
• NEVER repair leaking connections with sealant of any
kind. Replace o-ring or seal.
• NEVER connect high pressure hose to nozzle extension.
• Keep high pressure hose connected to pump and spray
gun while system is pressurized.
• ALWAYS point spray gun in safe direction, press red
button and squeeze spray gun trigger to release high
pressure, every time you stop engine.
• NEVER aim spray gun at people, animals, or plants.
• DO NOT secure spray gun in open position.
• DO NOT leave spray gun unattended while machine is
running.
• NEVER use a spray gun which does not have a trigger
lock or trigger guard in place and in working order.
• Always be certain spray gun, nozzles and accessories
are correctly attached.
WARNING Risk of eye or bodily injury.
Spray could splash back or propel
objects resulting in serious injury.
• Always wear indirect vented (chemical splash) safety
goggles marked to comply with AS/NZS 1337 (ANSI Z87.1
equivalent) when using or in vicinity of this equipment.
• NEVER substitute safety glasses or dry-condition
goggles for indirect vented safety goggles.
• Always wear protective clothing such as a long-sleeved
shirt, long pants and close-toed shoes.
• NEVER operate pressure washer when barefoot or
wearing sandals or shorts.
CAUTION
could result in minor injury.
Excessively low speeds impose a heavy load.
• DO NOT tamper with governor spring, links or other
parts to increase engine speed. Pressure washer
supplies correct rated pressure and ow when running at
governed speed.
• DO NOT modify pressure washer in any way.
NOTICE High pressure spray could damage fragile
items including glass.
• DO NOT point spray gun at glass when using red (0°) spray
tip.
• NEVER aim spray gun at plants.
Excessively high operating speeds
WARNING Unintentional sparking could cause
re or electric shock resulting in
death or serious injury.
WHEN ADJUSTING OR MAKING REPAIRS TO YOUR
PRESSURE WASHER
• Disconnect the spark plug wire from the spark plug and
place the wire where it cannot contact spark plug.
WHEN TESTING FOR ENGINE SPARK
• Use approved spark plug tester.
• DO NOT check for spark with spark plug removed.
WARNING Starter and other rotating parts
could entangle hands, hair, clothing, or
accessories resulting in serious injury.
• NEVER operate pressure washer without protective
housing or covers.
• DO NOT wear loose clothing, jewelry or anything that
could be caught in the starter or other rotating parts.
• Tie up long hair and remove jewelry.
NOTICE Improper treatment of pressure washer
could damage it and shorten its life.
• If you have questions about intended use, ask dealer or
contact qualied service center.
• NEVER operate units with broken or missing parts, or
without protective housing or covers.
• DO NOT by-pass any safety device on this machine.
• DO NOT tamper with governed speed.
• DO NOT operate pressure washer above rated pressure.
• DO NOT modify pressure washer in any way.
• Before starting pressure washer in cold weather, check all
parts of the equipment to be sure ice has not formed there.
• NEVER move machine by pulling on hoses. Use handle
provided on unit.
5
Not for
Reproduction
Assembly
Read entire operator’s manual before you
attempt to assemble or operate your new
pressure washer.
Your pressure washer requires some assembly and is
ready for use after it has been properly serviced with
the recommended oil and fuel.
If you have any problems with the assembly of your
pressure washer, please call the pressure washer
helpline at 1800-356-632 (AUS) or 0800-484-282
(NZ). If calling for assistance, please have the model,
revision, and serial number from the identication label
available.
Unpack Pressure Washer
1. Remove the parts bag, accessories, and inserts
included with pressure washer.
2. Open carton completely by cutting each corner
from top to bottom.
3. Ensure you have all included items prior to
assembly.
Items in the carton include:
• Main Unit
• Handle
• High Pressure Hose
• Spray Gun
• Nozzle Extension with Quick Connect Fitting
• Parts Bag (which includes the following):
• Operator’s Manual
• Ba g containing 5 Multi–Colored Spray Tips
• Garden Hose Adapter
• Hardware Kit (which includes):
• Carriage Bolts (4)
• Plastic Knobs for Handle (2)
• Metal Spring Clips (2)
• Plastic Knobs (2)
To prepare your pressure washer for operation,
you will need to perform these tasks:
1. Attach handle to main unit.
3. Add oil to engine crankcase.
4. Add fuel to fuel tank.
5. Connect high pressure hose to spray gun and
pump.
6. Connect water supply to pump.
7. Attach nozzle extension to spray gun.
8. Select/attach quick connect spray tip to nozzle
extension.
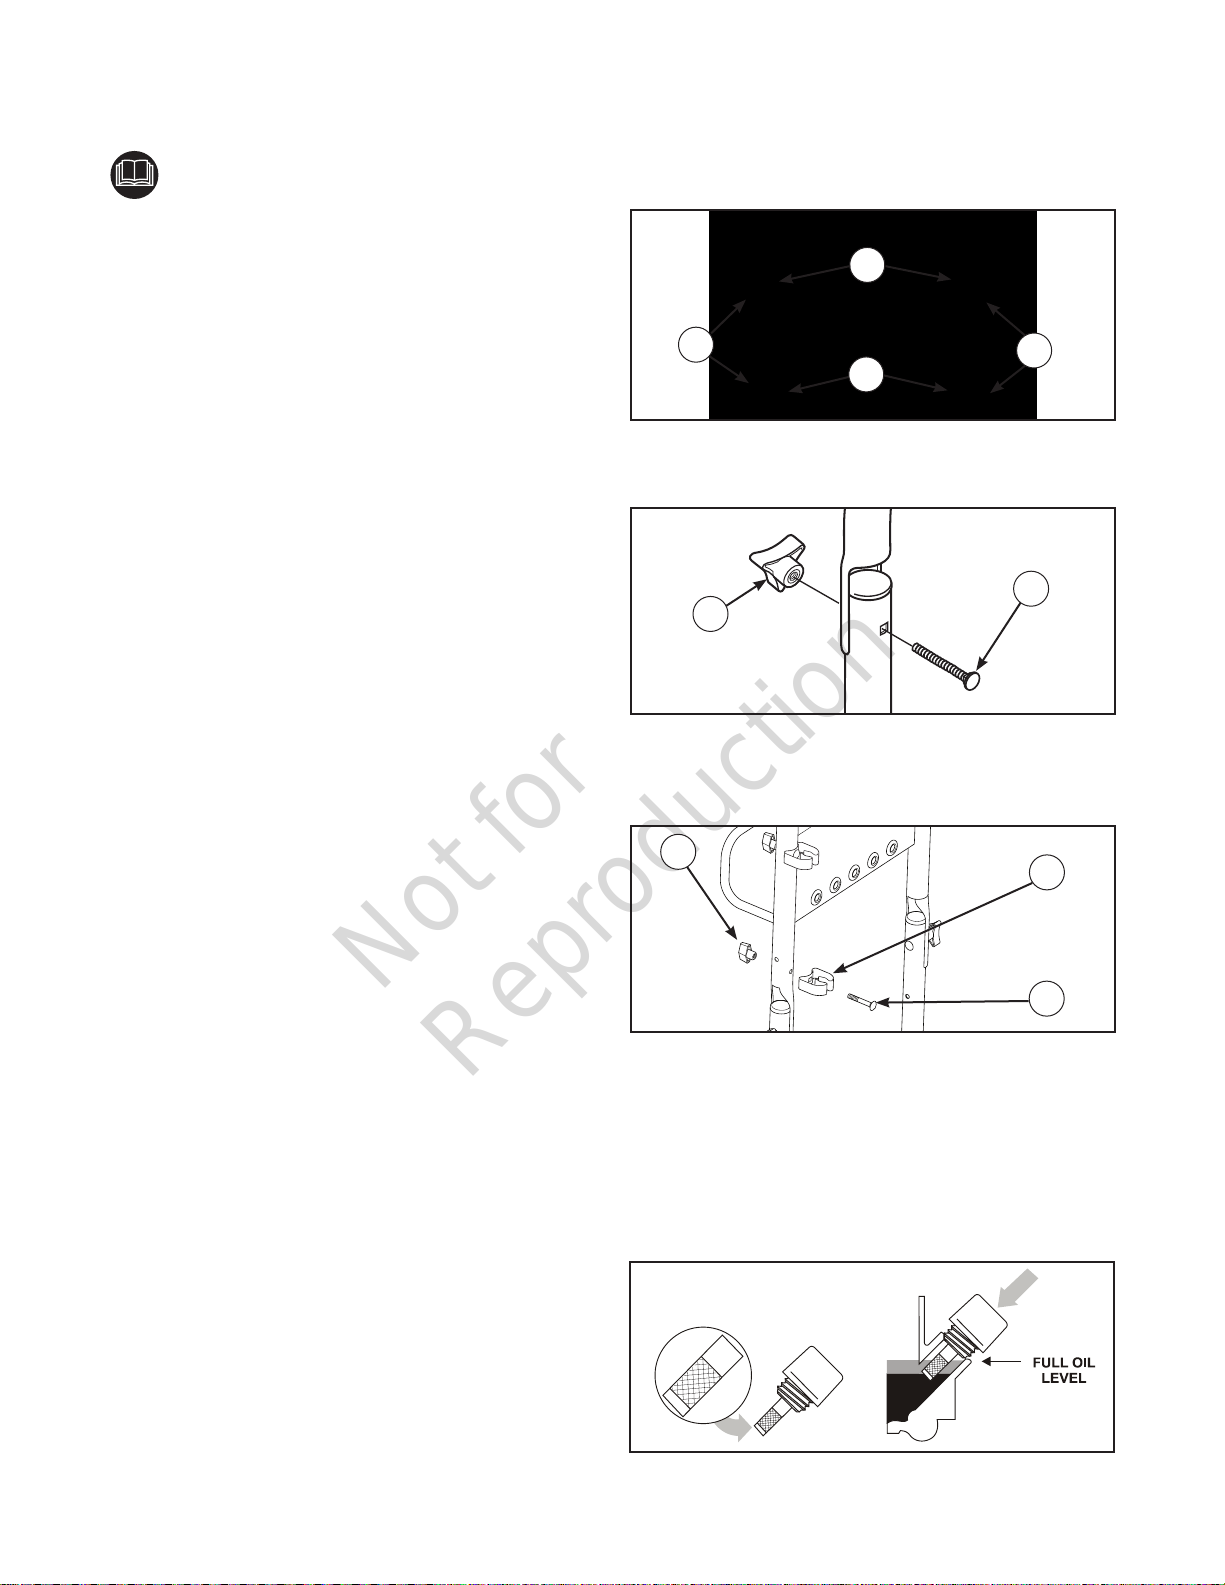
Attach Handle
1. Place handle (A) onto handle supports (B)
connected to main unit. Make sure holes (C) in
handle align with holes (C) on handle supports.
A
C
B
2. Insert handle carriage bolts (D) through holes from
inside of unit and attach a plastic knob (E) from
outside of unit. Tighten by hand.
E
3. Attach metal spring clips (F) by installing carriage
bolts (D) through holes on left side of handle
(facing front of unit). Attach plastic knobs (G) and
tighten by hand.
G
C
D
F
D
Add Engine Oil
1. Place pressure washer on a at, level surface.
2. Clean area around oil ll and remove yellow oil ll
cap/ dipstick.
3. Slowly pour engine oil into oil ll opening.
Checking oil level frequently, ll to point of
overowing.
6 BRIGGSandSTRATTON.com.au
Not for
Reproduction
NOTICE Pause to permit oil to settle. Wipe dipstick
clean each time oil level is checked. DO NOT overll.
3. Install fuel cap and let any spilled fuel evaporate
before starting engine.
NOTICE Improper treatment of pressure washer
could damage it and shorten its life.
• DO NOT attempt to crank or start the engine before it has
been properly serviced with the recommended oil. This
could result in an engine failure.
5. Replace oil ll cap/ dipstick and fully tighten.
Add Fuel
Fuel must meet these requirements:
• Clean, fresh, unleaded gasoline.
• A minimum of 91 RON (87 octane/87 AKI). For
high altitude use, see High Altitude.
• Gasoline with up to 10% ethanol (gasohol) is
acceptable.
WARNING Fuel and its vapors are extremely
ammable and explosive which
could cause burns, re or explosion
resulting in death or serious injury.
WHEN ADDING FUEL
• DO NOT use unapproved gasoline such as E15 and
E85.
• DO NOT mix oil in gasoline or modify engine to run on
alternate fuels.
• Turn pressure washer engine OFF and let it cool at least
2 minutes before removing fuel cap. Loosen cap slowly to
relieve pressure in tank.
• Fill fuel tank outdoors.
• DO NOT overll tank. Allow space for fuel expansion.
• If fuel spills, wait until it evaporates before starting engine.
• Keep fuel away from sparks, open ames, pilot lights,
heat, and other ignition sources.
• Check fuel lines, tank, cap and ttings frequently for
cracks or leaks. Replace if necessary.
• DO NOT light a cigarette or smoke.
To protect the fuel system from gum formation, mix
in a fuel stabilizer when adding fuel. See Storage.
All fuel is not the same. If you experience starting or
performance problems after using fuel, switch to a
dierent fuel provider or change brands. This engine is
certied to operate on gasoline. The emission control
system for this engine is EM (Engine Modications).
1. Clean area around fuel ll cap, remove cap.
2. Slowly add unleaded gasoline (A) to fuel tank (B).
Be careful not to ll above the bae (C). This allows
adequate space for fuel expansion as shown.
High Altitude
t altitudes over 1524 m (5,000 ft.), a minimum
85 octane / 85 AKI (89 RON) gasoline is acceptable.
To remain emissions compliant, high altitude
adjustment is required. Operation without this
adjustment will cause decreased performance,
increased fuel consumption, and increased emissions.
See an Authorized Briggs & Stratton dealer for high
altitude adjustment information. Operation of the
engine at altitudes below 762 m (2,500 ft.) with the
high altitude kit is not recommended.
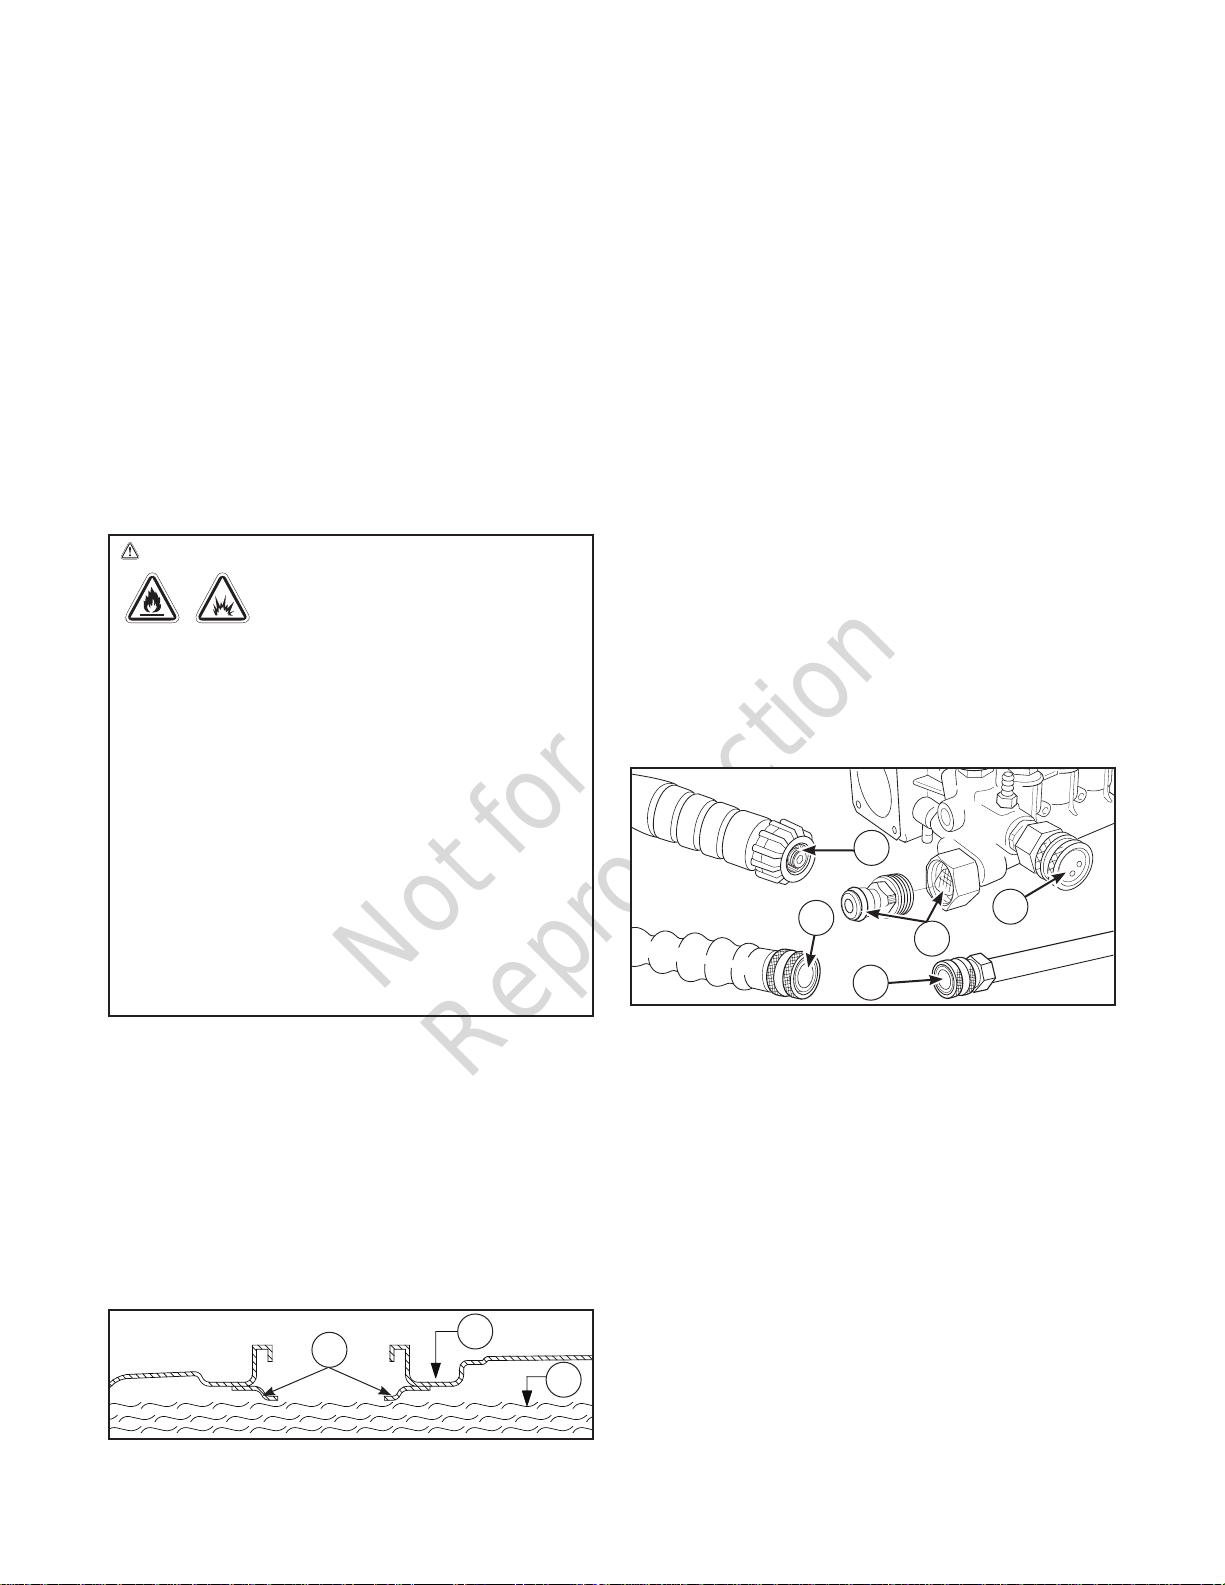
Lubricate O-Rings
Lubrication of o-rings is extremely important for
installation and operation. The use of a lubricant
(petroleum or synthetic grease) during assembly helps
seat o-rings properly and provides an improved seal. It
also helps protect the o-ring from damage by abrasion,
pinching or cutting and extends the life of the o-ring.
NOTICE ALWAYS apply a small amount of lubricant
on o-rings prior to assembling the garden hose to the
pump inlet (D), high pressure hose to pump outlet (E),
high pressure hose (F), spray gun (G), and nozzle
extension (H).
G
F
D
H
Lubricate all connections shown, following these
instructions:
1. Inspect and clean connecting surfaces prior to
lubrication and assembly.
2. Use lubricants sparingly during assembly; a light
lm is all that is required.
3. Use a small brush or cotton swab to apply grease
directly to o-rings where they are not accessible
(QC tting, M22 tting).
E
B
C
TANK
FUEL
A
7
Not for
Reproduction
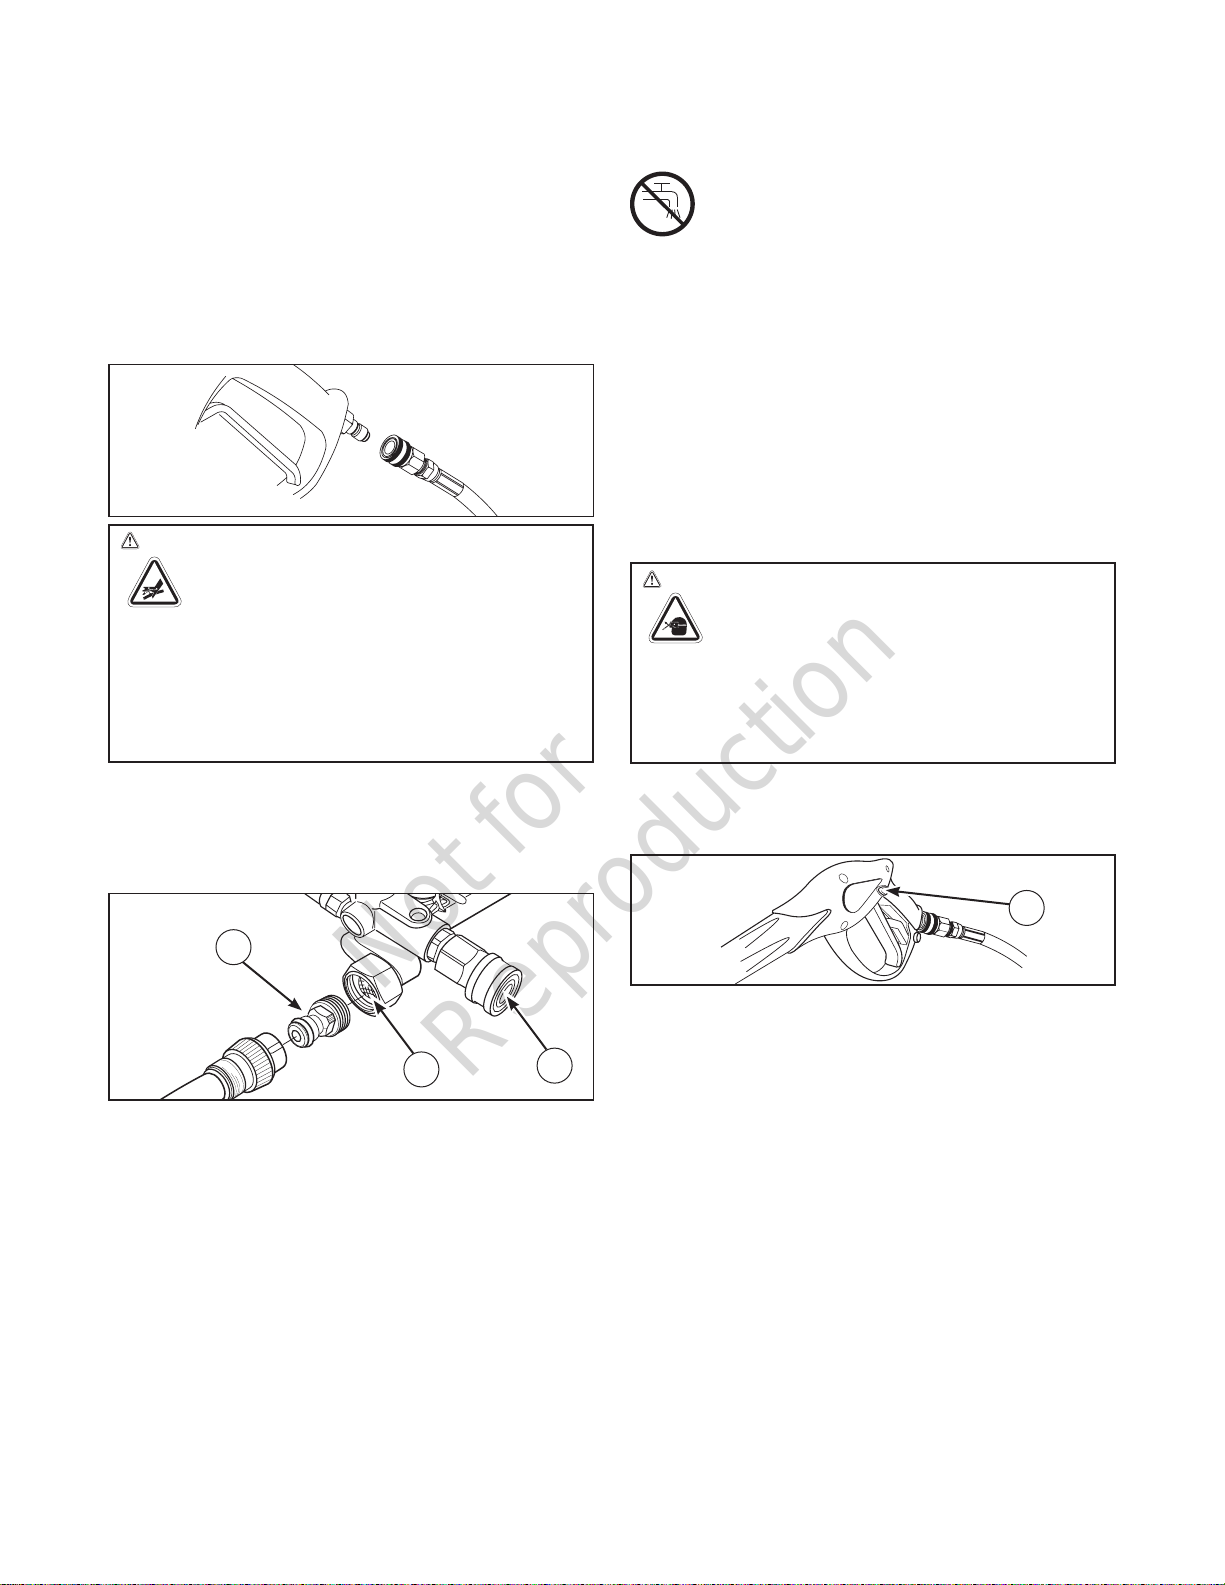
Connect Hose and Water Supply to Pump
NOTICE DO NOT run the pump without the water
supply connected and turned on.
• Damage to equipment resulting from failure to follow this
instruction will void warranty.
1. Uncoil high pressure hose and attach quick
connect end of hose to base of spray gun. Pull
down on collar of quick connect, slide onto spray
gun and let go of collar. Tug on hose to be sure of
tight connection.
WARNING The high pressure stream of water
that this equipment produces could cut
through skin and its underlying tissues,
resulting in serious injury and possible
amputation.
• NEVER connect high pressure hose to nozzle extension.
• Keep high pressure hose connected to pump and spray
gun while system is pressurized.
• Always be certain spray gun, nozzles and accessories
are correctly attached.
NOTICE DO NOT siphon standing water for the water
supply. Use ONLY cold water (less than 38°C (100°F)).
WARNING! Water that has owed through a
backow preventer is considered to be non-
potable.
NOTICE Using a One Way Valve (vacuum breaker
or check valve) at pump inlet could cause pump or
inlet connector damage.
• There MUST be at least 3 m (10 ft) of unrestricted garden
hose between the pressure washer inlet and any device,
such as a vacuum breaker or check valve.
• Damage to equipment resulting from failure to follow this
instruction will void warranty.
6. Connect garden hose (not to exceed 15.24 m
(50 ft) in length) to water inlet. Pull back on collar
of quick connect, slide tting onto water inlet and
let go of collar. Pull on garden hose to be sure of a
tight connection.
WARNING Risk of eye injury.
Spray could splash back or propel objects
resulting in serious injury.
• Always wear indirect vented (chemical splash) safety
goggles marked to comply with AS/NZS 1337 (ANSI Z87.1
equivalent) when using or in vicinity of this equipment.
• NEVER substitute safety glasses or dry-condition
goggles for indirect vented safety goggles.
2. Similarly, attach other end of high pressure hose
to high pressure outlet (A) on pump. Pull down
on collar of quick connect, slide onto pump and
let go of collar. Pull on hose to be sure of tight
connection.
C
B
3. Before connecting garden hose to water inlet,
inspect inlet screen (B). Clean screen if it contains
debris or have it replaced if damaged. DO NOT
run pressure washer if inlet screen is damaged.
4. Attach garden hose adapter (C) to water inlet.
Tighten by hand.
5. Run water through your garden hose for
30 seconds to clean out any debris.
A
6. Turn ON the water, press red button (D) on the
gun and squeeze the trigger to purge the pump
system of air and impurities.
D
Checklist Before Starting Engine
Review the unit’s assembly to ensure you have
performed all of the following.
1. Make sure handle is in place and secure.
2. Check that oil has been added to proper level in
the engine crankcase.
3. Add proper fuel to fuel tank.
4. Check for properly tightened hose connections.
5. Check to make sure there are no kinks, cuts, or
damage to high pressure hose.
6. Provide a proper water supply at an adequate ow.
7. Be sure to read Operator Safety and Operation
before using pressure washer.
8 BRIGGSandSTRATTON.com.au
 Loading...