

Briggs & Stratton 1695969 Operator's Manual
ATTACHMENT
Not for
Reproduction
OPERATOR’S
MANUAL
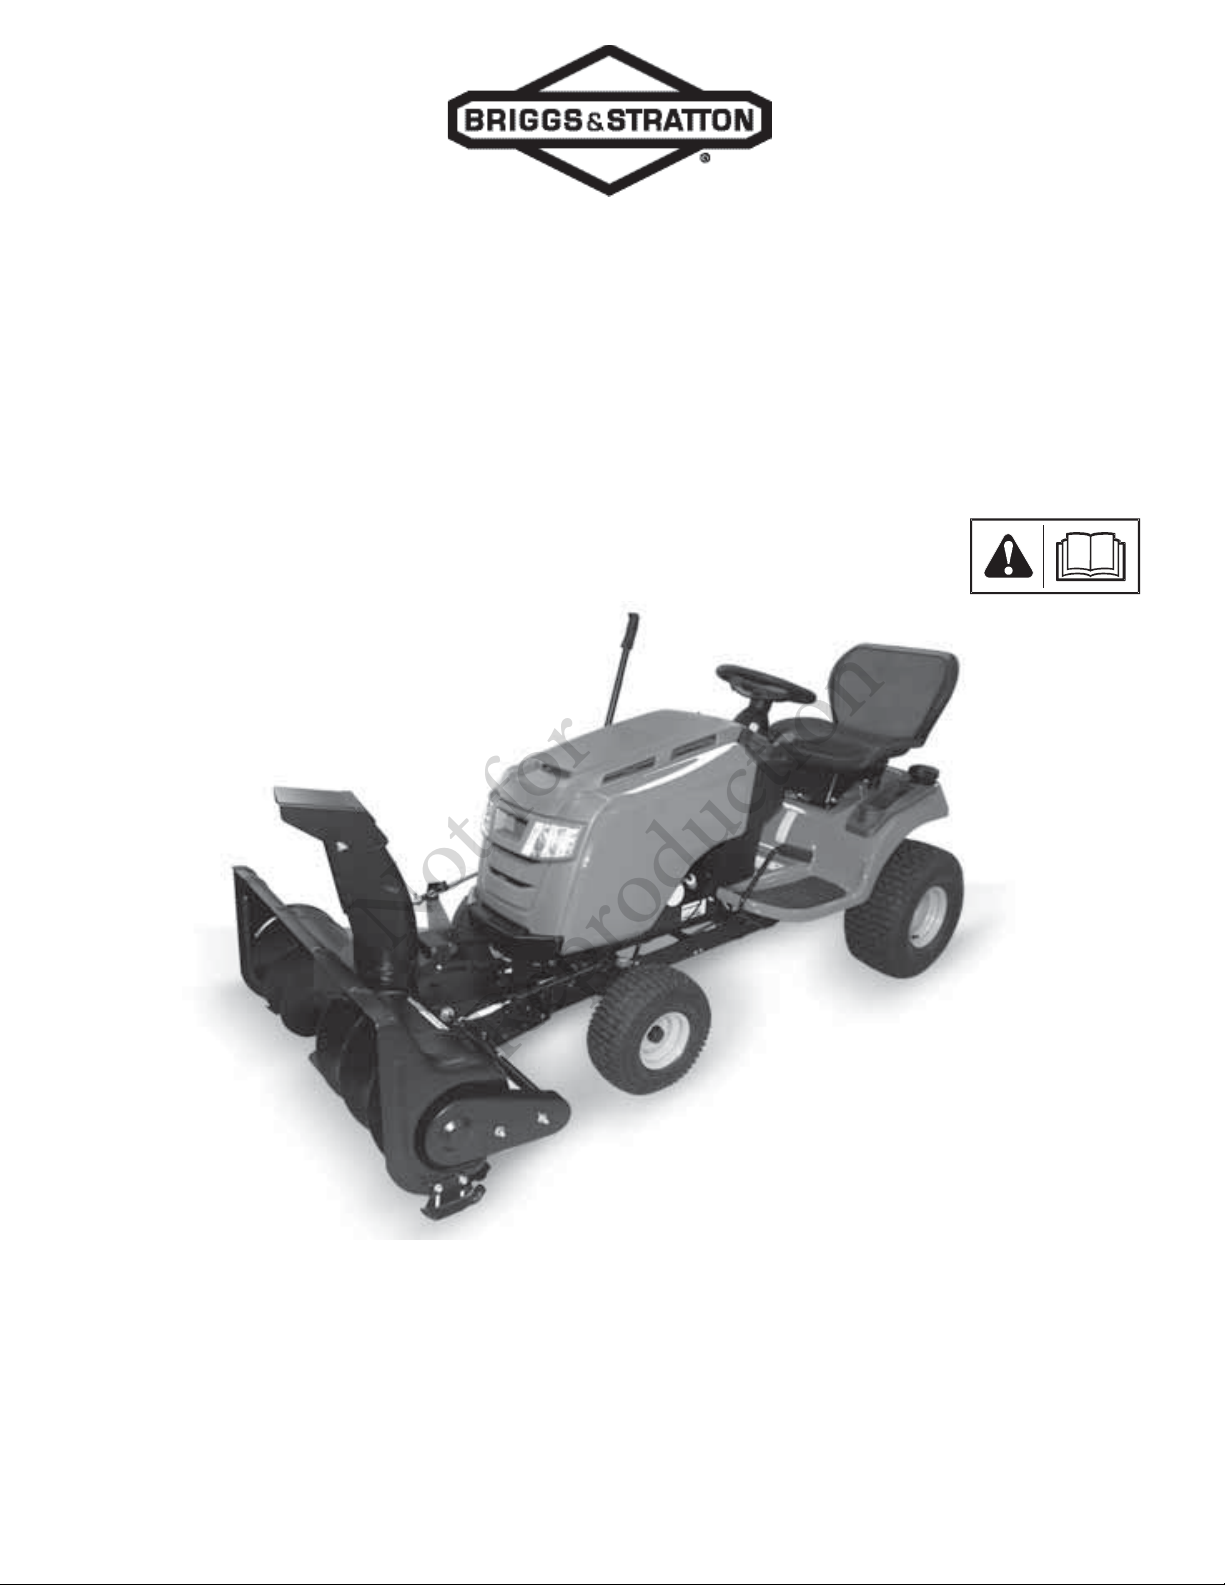
42” Single-Stage Snowthrower
Model No. Description
1695969 42” Single Stage Snowthrower
Copyright © 2011 Briggs & Stratton Power Products Group, LLC
Milwaukee, WI, All rights reserved.
1751631
Rev: A

Not for
Reproduction
2

Table of Contents
Not for
Reproduction
Hardware ........................................................................................ 4
Bag Contents ............................................................................ 4
Box Contents ............................................................................. 5
Operator Safety ............................................................................. 6
Training ...................................................................................... 6
Preparation ................................................................................ 6
Operation .................................................................................. 6
Children ..................................................................................... 7
Clearing a Clogged Discharge Chute ....................................... 7
Service, Maintenance and Storage ........................................... 7
Decals ....................................................................................... 8
Accessories ................................................................................... 8
Required Accessories ............................................................... 8
Recommended Accessories ..................................................... 8
Features & Controls ...................................................................... 9
Control Functions ...................................................................... 9
Tractor Controls ......................................................................... 9
Assembly ....................................................................................... 10
Unpacking ................................................................................. 10
Chute Assembly ........................................................................ 10
Install Hitch Assembly ............................................................... 11
Attach Snowthrower to Tractor ................................................... 12
Attach Lift Arm Assembly to Tractor ........................................... 12
Attach Chute Motor Wiring Harness (Non-electric Deck Lift Models) ....... 14
Attach Chute Motor Wiring Harness (Electric Deck Lift Models) ............ 15
Install Refl ectors ........................................................................ 16
Operation ....................................................................................... 17
Checks Before Starting ............................................................. 17
Engine & Ground Speed Selection ............................................ 17
Transporting ............................................................................. 17
Snow Removal Suggestions ...................................................... 18
Storage ........................................................................................... 18
Daily Storage ............................................................................. 18
Off -Season Storage................................................................... 18
Troubleshooting, Adjustments & Service .................................. 19
Troubleshooting Chart ............................................................... 19
Skid Shoe Adjustment ............................................................... 20
Electric Chute Rotator Gear ...................................................... 20
Lift Adjustment .......................................................................... 20
Belt Tension Adjustment ............................................................ 20
Maintenance .................................................................................. 21
Schedule for Normal Care ......................................................... 21
General Lubrication ................................................................... 21
Warranty ......................................................................................... 22
Table of Contents
NOTE: In these instructions, “left” and “right” are referenced from the
operating position.
3
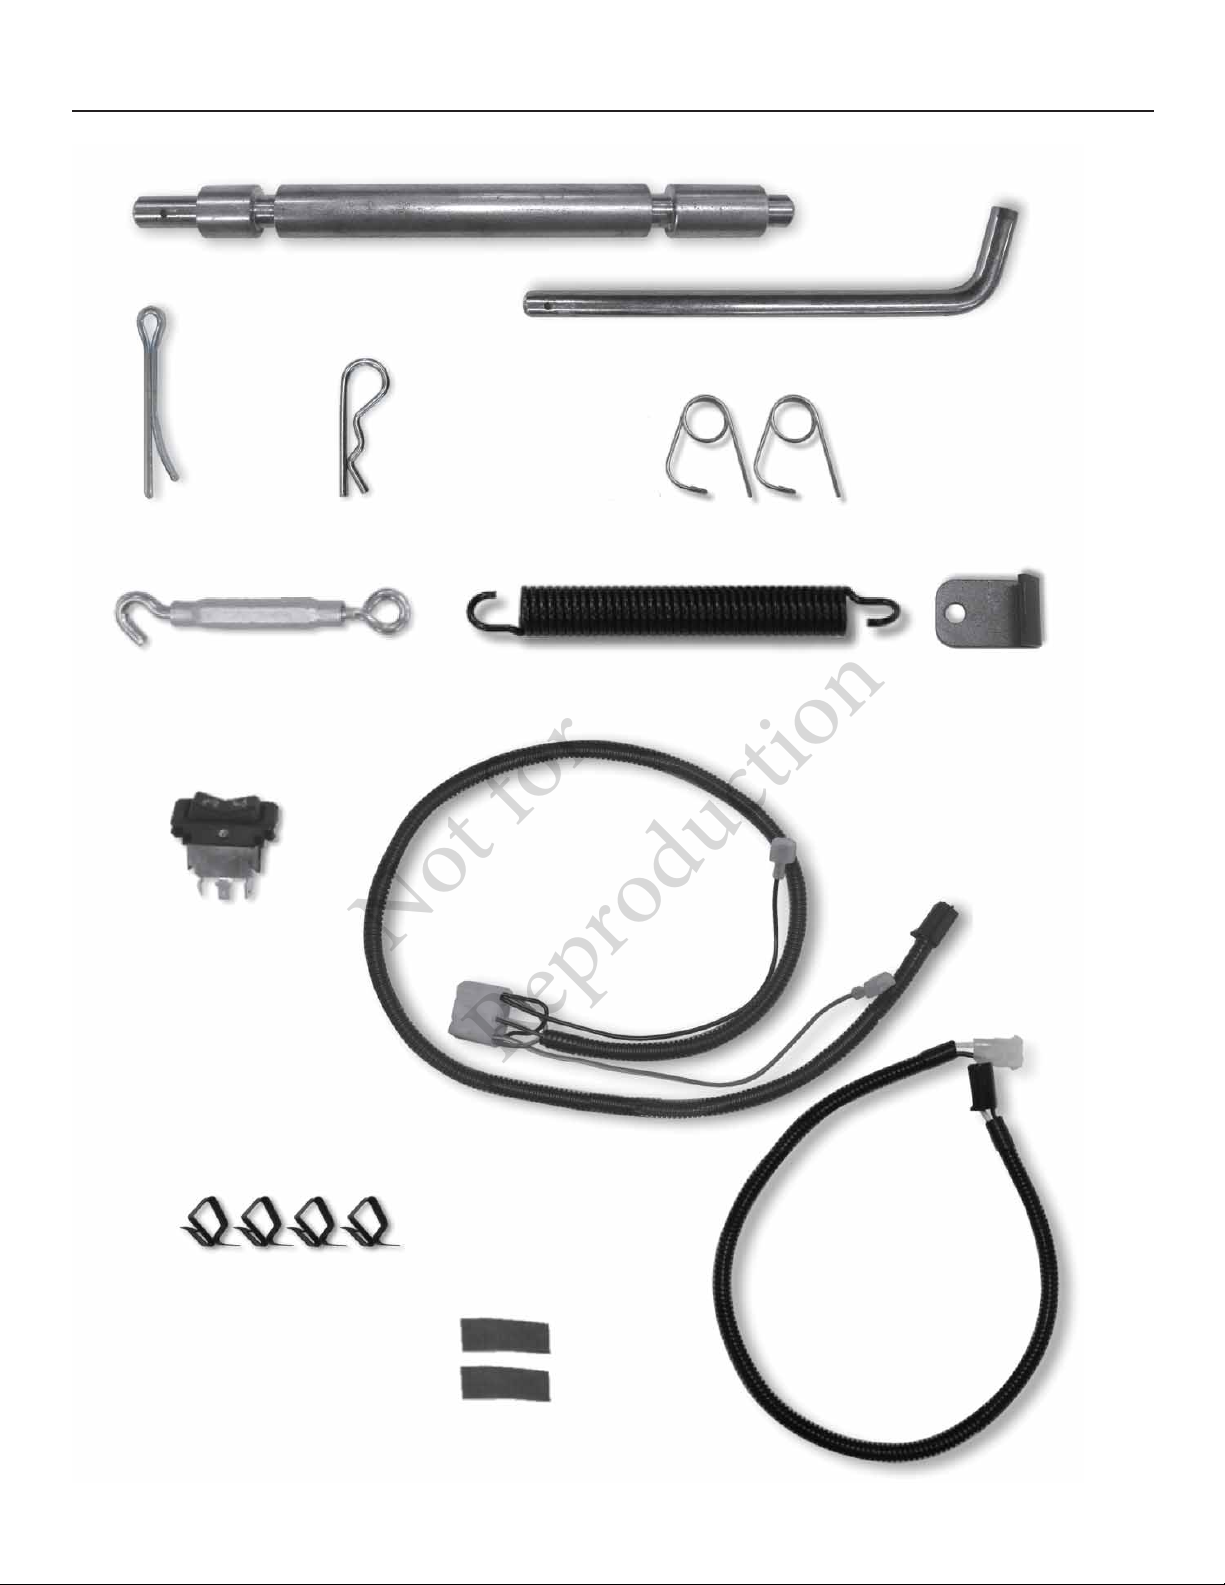
Hardware Bag Contents
Not for
Reproduction
A - HITCH SUPPORT SHAFT
B - HITCH LATCH PIN
C - COTTER PIN D - HAIR PIN
I - SWITCH J - UPPER WIRE HARNESS
E - SAFETY CLIP (Qty. 2)
H - AXLE CLAMPF - TURNBUCKLE G - SPRING
L - CLIPS (Qty. 4)
4
K - EXTENSION
WIRE HARNESS - 26”
M - REFLECTORS (Qty. 2)
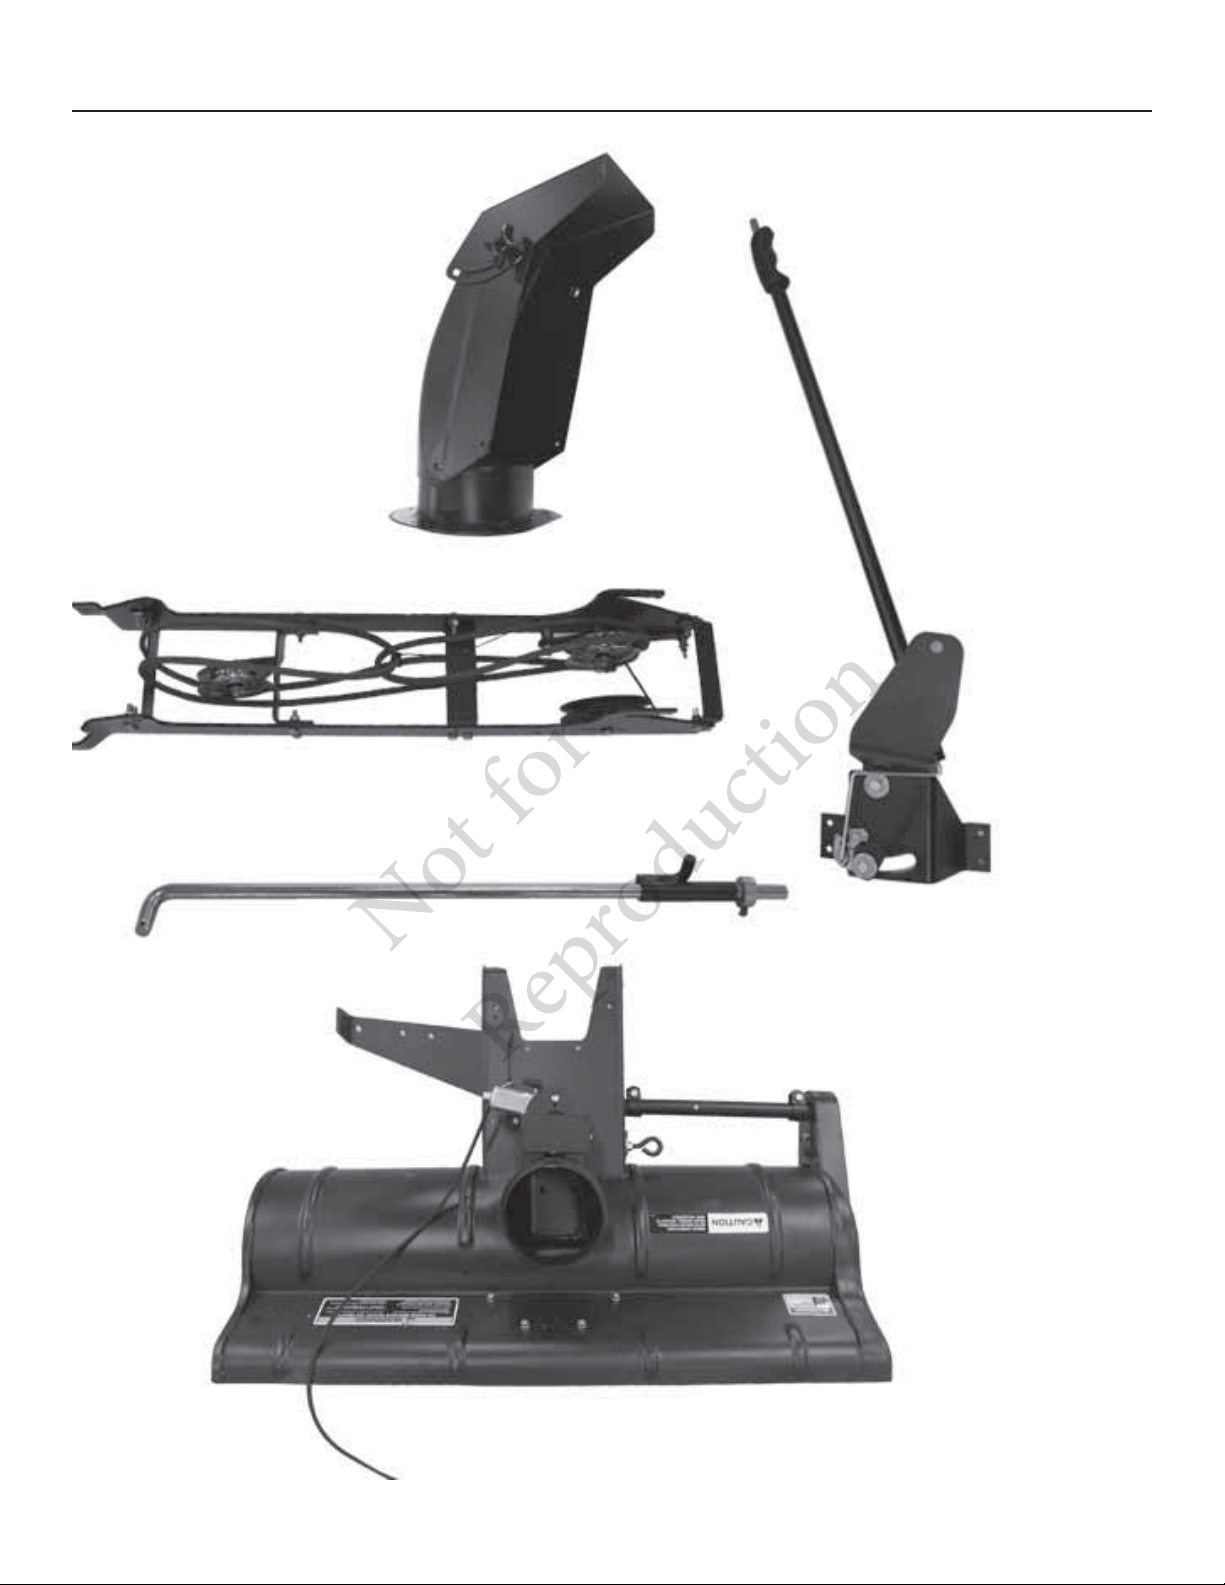
Hardware Box Contents
Not for
Reproduction
O - LIFT ARM ASSEMBLYN - CHUTE
P - HITCH ASSEMBLY
Q - LIFT ROD ASSEMBLY
R - SNOWTHROWER
5

Operator Safety
Not for
Reproduction
WARNING
This machine is capable to amputating hands and feet and throwing objects. Read these safety rules and follow
them closely. Failure to obey these rules could result in loss of control of unit, severe personal injury or death to you,
or bystanders, or damage to property or equipment. The triangle in text signifies important cautions or warnings
which must be followed.
TRAINING
1. Read, understand, and follow all instructions on the
machine and in the manuals before operating this unit. Be
thoroughly familiar with the controls and the proper use of
the equipment. Know how to stop the unit and disengage
the controls quickly.
2. Never allow children to operate the equipment. Never
allow adults to operate the equipment without proper
instruction.
3. Keep the area of operation clear of all persons, par-ticularly
small children and pets.
PREPARATION
1. Thoroughly inspect the area where the equipment is to be
used and remove all doormats, sleds, boards, wires, and
other foreign objects.
2. Disengage all clutches and shift into neutral before starting
engine (motor).
3. Do not operate the equipment without wearing ade-quate
winter outer garments. Avoid loose fitting cloth-ing that
can get caught in moving parts. Wear foot-wear that will
improve footing on slippery surfaces.
4. Handle fuel with care; it is highly flammable. (a) Use an
approved fuel container. (b) Never add fuel to a running
engine or hot engine. (c) Fill fuel tank outdoors with
extreme care. Never fill fuel tank indoors. Replace fuel cap
securely and wipe up spilled fuel. (d) Never fill containers
inside a vehicle or on a truck or trailer bed with a plastic
liner. Always place con-tainers on the ground, away from
your vehicle, before filling. (e) When practical, remove
gas-powered equipment from the truck or trailer and refuel
it on the ground. If this is not possible, then refuel such
on a trailer with a portable container, rather than from a
gasoline dis-penser nozzle. (f) Keep nozzle in contact with
the rim of the fuel tank or container opening at all times,
until refueling is complete. Do not use a nozzle lock-open
device. (g) Replace gasoline cap securely and wipe up
spilled fuel. (h) If fuel is spilled on clothing, change clothing
imme-diately.
5. Adjust the collector housing height to clear gravel or
crushed rock surfaces.
6. Never attempt to make any adjustments while the engine
(motor) is running (except when specifically recommended
by the manufacturer).
7. Let engine (motor) and machine adjust to outdoor
temperatures before starting to clear snow.
8. Always wear safety glasses or eye shields during operation
or while performing an adjustment or repair to protect eye
from foreign objects that may be thrown from the machine.
OPERATION
1. Do not put hands or feet near or under rotating parts. Keep
clear of the discharge opening at all times.
2. Exercise extreme caution when operating on or crossing
gravel drives, walks, or roads. Stay alert for hidden
hazards or traffic. Do not carry Passengers.
3. After striking a foreign object, stop the engine (motor),
remove the wire from the spark plug, disconnect the cord
on electric motors, thoroughly inspect the snowthrower for
any damage, and repair the damage before restarting and
operating the snowthrower.
4. If the unit should start to vibrate abnormally, stop the
engine (motor) and check immediately for the cause.
Vibration is generally a warning of trouble.
5. Stop the engine (motor) whenever you leave the operating
position, before unclogging the collector/impeller housing
or discharge guide, and when mak-ing any repairs,
adjustments, or inspections.
6. When leaving the machine unattended, disengage the
power take-off (PTO), lower the attachment, set the parking
brake, stop the engine, and remove the key.
7. When cleaning, repairing, or inspecting make cer-tain
the collector/impeller and all moving parts have stopped.
Disconnect the spark plug wire and keep the wire away
from the plug to prevent accidental starting. Do not run
the engine indoors except for starting the engine or for
transporting the snowthrower in or out of the building.
Open the outside doors; exhaust fumes are dangerous.
8. Exercise extreme caution when operating on slopes. Do
not attempt to clear steep slopes.
9. Never operate the snowthrower without proper guards
plates, or other safety protective devices in place and
working.
10. Never direct the discharge toward people or areas where
property damage can occur. Keep children and others
away.
11. Do not overload the machine capacity by attempting to
clear snow at too fast a rate.
12. Never operate the machine at high transport speeds
on slippery surfaces. Look behind and use care when
operating in reverse.
13. Disengage power to the collector/impeller when
snowthrower is transported or not in use.
14. Use only attachments and accessories approved by the
manufacturer of the snowthrower (such as wheel weights,
counterweights, or cabs).
6

Operator Safety
Not for
Reproduction
15. Never operate the snowthrower without good visibility or
light. Always be sure of your footing, and keep a firm hold
on the handles. Walk, never run.
16. Never touch a hot engine or muffler.
17. Never operate the snowthrower near glass enclosures,
automobiles, window wells, drop-offs, and the like without
proper adjustment of the discharge angle.
18. Never direct discharge at bystanders or allow anyone in
front of the unit.
19. Never leave a running unit unattended. Always disengage
the auger and traction controls, stop engine, and remove
keys.
20. Do not operate the unit while under the influence of alcohol
or drugs.
21. Keep in mind the operator is responsible for accidents
occurring to other people or property.
22. Data indicates that operators, age 60 years and above, are
involved in a large percentage of power equipment-related
injuries. These operators should evaluate their ability to
operate the unit safely enough to protect themselves and
others from injury.
23. DO NOT wear long scarves or loose clothing that could
become entangled in moving parts.
24. Snow can hide obstacles. Make sure to remove all
obstacles from the area to be cleared.
CHILDREN
Tragic accidents can occur if the operator is not alert to the
presence of children. Children are often attracted to the
unit and the operating activity. Never assume that children
will remain where you last saw them.
1. Keep children out of the area and under the watchful care
of another responsible adult.
2. Be alert and turn unit off if children enter the area.
3. Never allow children to operate the unit.
4. Use extra care when approaching blind corners, shrubs,
trees, or other objects that may obscure vision.
CLEARING A CLOGGED DISCHARGE CHUTE
Hand contact with the rotating impeller inside the discharge
chute is the most common cause of injury associated
with snowthrowers. Never use your hand to clean out the
discharge chute.
To clear the chute:
1. SHUT OFF THE ENGINE.
2. Wait 10 seconds to be sure the impeller blades have
stopped rotating.
3. Always use a clean out tool, not your hands.
2. Never store the machine with fuel in the fuel tank inside a
building where ignition sources are present such as hot
water and spacer heaters, or clothes dryers. Allow the
engine to cool before storing in any enclosure.
3. Always refer to the operator’s manual for important details if
the snowthrower is to be stored for an extended period.
4. Maintain or replace safety and instruction labels as
necessary.
5. Run the machine a few minutes after throwing snow to
prevent freeze-up of the collector/impeller.
6. If fuel is spilled, do not attempt to start the engine but
move the machine away from the area of spillage and
avoid creating any source of ignition until fuel vapors have
dissipated.
7. Always observe safe refueling and fuel handling practices
when refueling the unit after transportation or storage.
8. Always follow the engine manual instructions for storage
preparations before storing the unit for both short and long
term periods.
9. Always follow the engine manual instructions for proper
start-up procedures when returning the unit to service.
10. Maintain or replace safety and instruction labels as
necessary.
11. Keep nuts and bolts tight and keep equipment in good
condition.
12. Never tamper with safety devices. Check their proper
operation regularly and make necessary repairs if they are
not functioning properly.
13. Components are subject to wear, damage, and
deterioration. Frequently check components and replace
with manufacturer’s recommended parts, when necessary.
14. Check control operation frequently. Adjust and service as
required.
15. Use only factory authorized replacement parts when
making repairs.
16. Always comply with factory specifications on all settings
and adjustments.
17 Only authorized service locations should be utilized for
major service and repair requirements.
18. Never attempt to make major repairs on this unit unless you
have been properly trained. Improper service procedures
can result in hazardous operation, equipment damage and
voiding of manufacturer’s warranty.
19. Check shear bolts and other bolts at frequent intervals
for proper tightness to be sure the equipment is in safe
working condition.
SERVICE, MAINTENANCE, AND STORAGE
1. Check shear bolts and other bolts at frequent intervals
for proper tightness to be sure the equipment is in safe
working condition.
7

Operator Safety
Not for
Reproduction
Accessories
Safety Decals
This unit has been designed and manufactured to provide
you with the safety and reliability you would expect from an
industry leader in outdoor power equipment manufacturing.
Although reading this manual and the safety instructions
it contains will provide you with the necessary basic
knowledge to operate this equipment safely and effectively, we have placed several safety labels on the unit
to remind you of this important information while you are
operating your unit.
All DANGER, WARNING, CAUTION and instructional
messages on your unit should be carefully read and
obeyed. Personal bodily injury can result when these
instructions are not followed. The information is for your
safety and it is important! The safety decals below are on
your unit.
If any of these decals are lost or damaged, replace them at
once. See your local dealer for replacements.
These labels are easily applied and will act as a constant
visual reminder to you, and others who may use the
equipment, to follow the safety instructions necessary for
safe, effective operation.
Accessories
Required Accessories
• It is required that tire chains and two rear wheel weights
or Quick Tach Weights are used. Never operate on
slopes greater than 17.6% (10°).
• A Lift Lever Kit is required for some of the models
covered by this manual, and must be installed as part of
hitch installation.
Recommended Accessories
• A rear-mounted weight box can also be added for
additional traction. The maximum weight added to the
tractor should not exceed 35 lbs. per wheel, plus 100
additional pounds in the rear weight box.
• For operation on slopes greater than 15% (8.5°), Quick
Tach Weights, tire chains, and wheel weights are
recom-mended. Never operate on slopes greater
than 17.6% (10°).
PART NO. 1716532
Auger Danger Decal
PART NO. 1716531
Main Operation Warning Decal
ATON
PART NO. 1716540
Rear Wheel Weights Required
PART NO. 1722674
Discharge Chute Danger Decal
N OP RAT N
T NOTRO R
R AR T
AR R R .
171654
8
 Loading...