

Page 1
OPERATOR’S
MANUAL
Turboless Twin Catcher
Mfg. No. Description
1695353 38” Turboless Twin Catcher
Turboless Twin Catcher
Manual Part No. 1734772
Revision 01
Rev. Date 05/2007
TP 100-4528-01-AT-SMAN
CCAAUUTTIIOONN:: RReeaadd aanndd
ffoollllooww aallll iinnssttrruuccttiioonnss..
Page 2
SAVE THESE INSTRUCTIONS
READ THE MANUAL
The operator’s manual contains important safety information you need to be aware of BEFORE you
operate your unit as well as DURING operation.
Safe operating techniques, an explanation of the product’s features and controls, and maintenance
information is included to help you get the most out of your equipment investment.
Failure to obey the safety rules could result in loss of control of the unit, sever personal injury or death to
you, or bystanders, or damage to property or equipment.
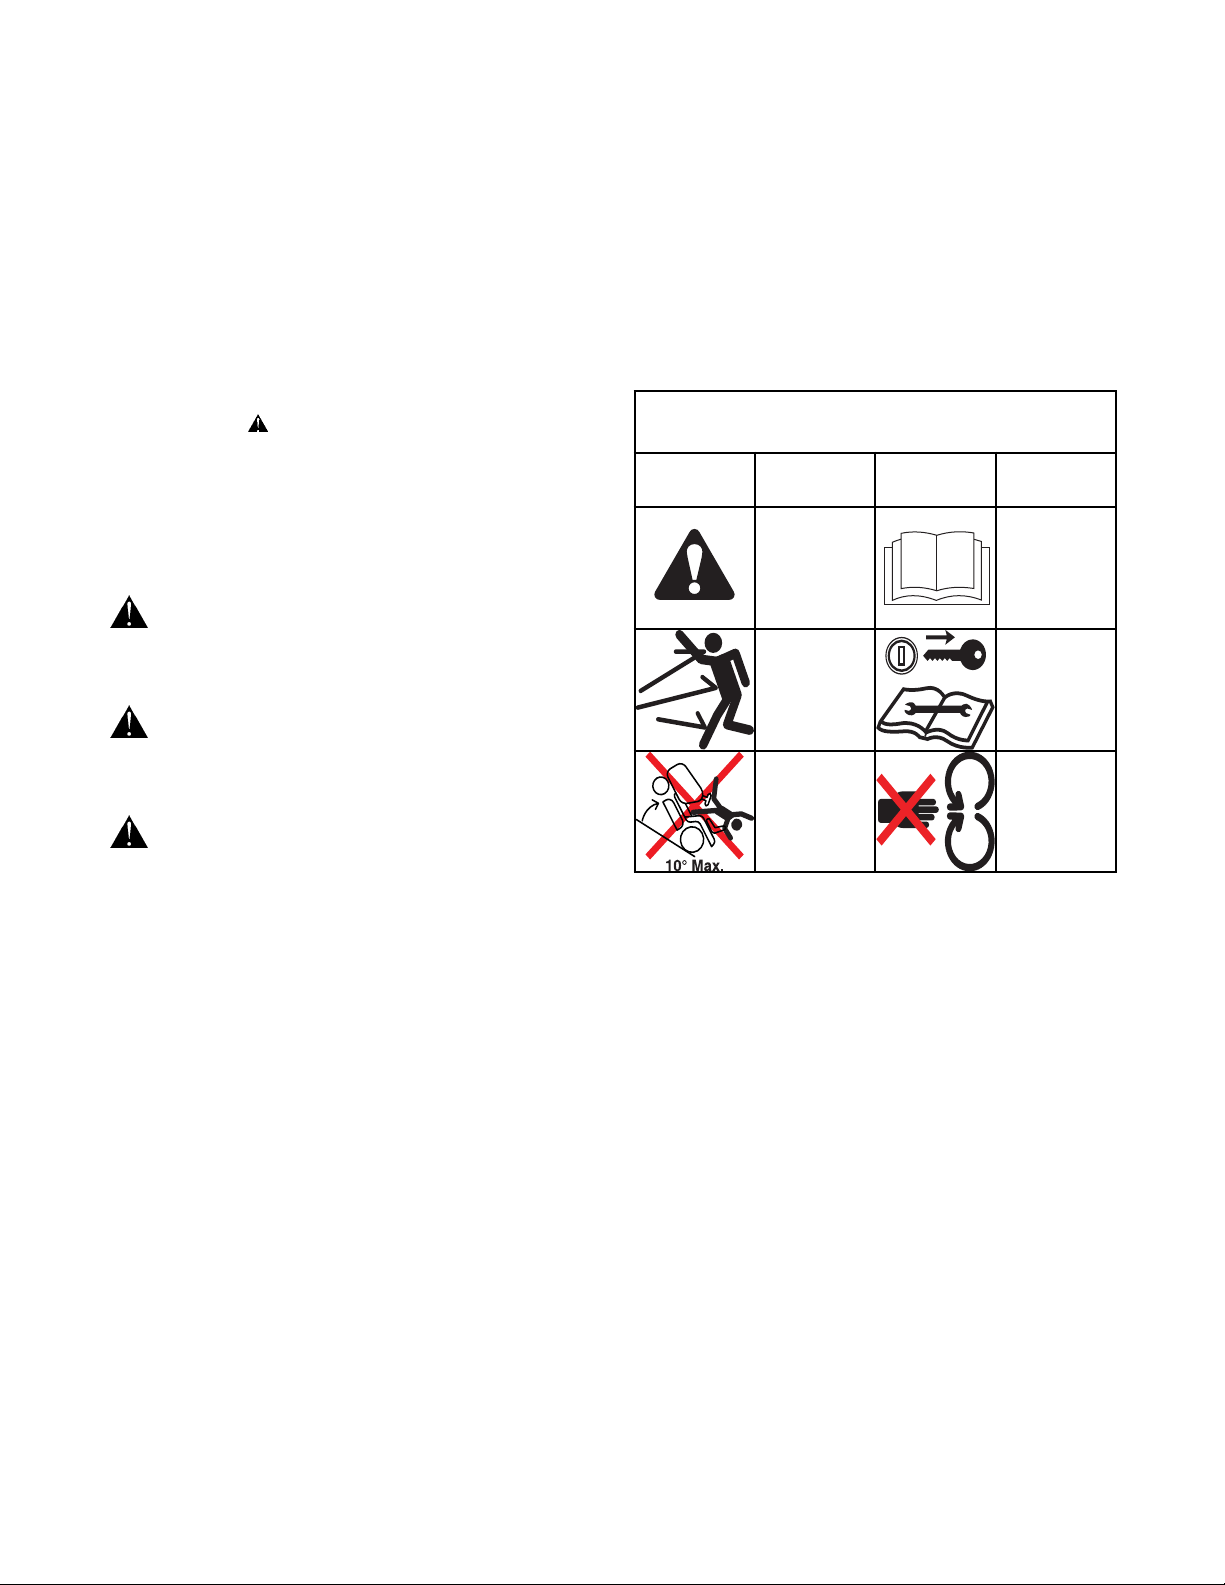
Hazard Symbols and Meanings
Safety Icon Hazard Safety Icon Hazard
Alert Read the
Manual
Thrown
Objects
Remove Key
Before
Servicing
Machine
Rollover
Rotating
Parts – Do
Not Touch
Safety Icons
The alert symbol is used to identify safety information
about hazards that can result in personal injury. A signal
word (DANGER, WARNING, or CAUTION) is used with the
alert symbol to indicate the likelyhood and the potential
severity of the injury. In addition, a hazard icon may be used
to represent the type of hazard. An explanation of hazard
levels and icons are as follows:
DANGER
This indicates a hazard which, if not avoided, will result in
serial injury or death.
WARNING
This indicates a hazard which, if not avoided, could result in
serial injury or death.
CAUTION
This indicates a hazard which, if not avoided, might result in
minor or moderate injury.
Page 3

Table of Contents
Operator Safety . . . . . . . . . . . . . . . . . . . . . . . . . . . . . . . . . . . . . . . . . . 2
Operator Safety . . . . . . . . . . . . . . . . . . . . . . . . . . . . . . . . . . . . . . . . . . . . . . 2
Safety Decals . . . . . . . . . . . . . . . . . . . . . . . . . . . . . . . . . . . . . . . . . . . . . . . . 2
Mowing with the Catcher. . . . . . . . . . . . . . . . . . . . . . . . . . . . . . . . . . . . . . . 3
Before Operation . . . . . . . . . . . . . . . . . . . . . . . . . . . . . . . . . . . . . . . . . . . . . 3
After Operation . . . . . . . . . . . . . . . . . . . . . . . . . . . . . . . . . . . . . . . . . . . . . . 3
Storing the Catcher . . . . . . . . . . . . . . . . . . . . . . . . . . . . . . . . . . . . . . . . . . . 3
Assembly . . . . . . . . . . . . . . . . . . . . . . . . . . . . . . . . . . . . . . . . . . . . . . 5
Install Mounting Plates & Spacers (Broadmoor/1600/2600/LT Series) . . . . 5
Install Baffle and Blade . . . . . . . . . . . . . . . . . . . . . . . . . . . . . . . . . . . . . . . . 6
Install Lower Chute Components. . . . . . . . . . . . . . . . . . . . . . . . . . . . . . . . . 7
Install Bag and Cover Support . . . . . . . . . . . . . . . . . . . . . . . . . . . . . . . . . . . 8
Install Hitch and Upright Support Assembly . . . . . . . . . . . . . . . . . . . . . . . . 8
Install Cover Assembly . . . . . . . . . . . . . . . . . . . . . . . . . . . . . . . . . . . . . . . . 8
Install Collector Bags . . . . . . . . . . . . . . . . . . . . . . . . . . . . . . . . . . . . . . . . . . 9
Install Lower Discharge Chute . . . . . . . . . . . . . . . . . . . . . . . . . . . . . . . . . . 9
Install Discharge Tube . . . . . . . . . . . . . . . . . . . . . . . . . . . . . . . . . . . . . . . 10
Normal Removal & Installation. . . . . . . . . . . . . . . . . . . . . . . . . . . . . . . 11
Lower Discharge Chute . . . . . . . . . . . . . . . . . . . . . . . . . . . . . . . . . . . . . . . 11
Bagger Removal. . . . . . . . . . . . . . . . . . . . . . . . . . . . . . . . . . . . . . . . . . . . . 12
1
Normal Removal
& Installation
AssemblyOperatror Safety
Page 4

2
Safety
• Know the unit’s controls and how to stop quickly.
READ THE OPERATOR’S MANUALS.
• Read and obey all safety decals.
• Only allow responsible adults, who are familiar with
the instructions, to operate the unit.
• Disengage the PTO.Shut off the engine and wait
for all moving parts to stop before attaching,
adjusting, or disconnecting any part of the
collection system.
• Check the collection system to make sure it is
bolted tightly to the unit.
• DO NOT operate the unit without either the entire
grass catcher or the deflector in place.
• Turn off the PTO to disengage the blades when not
mowing.
• DO NOT mow in reverse unless absolutely
necessary. Always look down and behind before
and while travelling in reverse.
• DO NOT turn sharply when travelling alongside a
building or any object.Slow down before turning.
• DO NOT carry passengers.
• When collection system is removed from the
mower deck, the deflector must be properly
installed.
• Collector bags are subject to deterioration and
wear during normal use. Inspect the bag
periodically for tears, holes, or weak spots and
replace with a new bag that meets manufacturer’s
durability standards.
• If the mower stalls or the collector chute plugs:
1. Disengage the PTO;
2. Stop the engine and remove the key;
3. Set the par king brake, and wait for all moving
parts to stop.
4. Remove the foreign object or clear the chute
with a piece of wood before restarting the engine.
NEVER place hands into COLLECTOR OR
MOWER housing to clear jammed objects.
Blower OR MOWER may rotate when object is
removed.
• For added stability and to prevent tipping or loss of
control:
a. Use reduced speed on uneven ground and
when turning corners.
b.Reduce loads on hillsides. It is recommended
that the collection system be kept only half full
when negotiating any slopes. Star t mowing on
slopes when the collection system is empty.
c. Mow up and down the face of slopes; never
across the face of any slope.
• Never operate on slopes greater than 17.6%
(10°).
GENERAL WARNINGS
SAFETY DECALS
This unit has been designed and manufactured to
provide you with the safety and reliability you would
expect from an industry leader in outdoor power
equipment manufacturing.
Although reading this manual and the safety
instructions it contains will provide you with the
necessary basic knowledge to operate this equipment
safely and effectively, we have placed several safety
labels on the unit to remind you of this important
information while you are operating your unit.
All DANGER, WARNING, CAUTION and
instructional messages on your rider, attachments
and mower should be carefully read and obeyed.
Personal bodily injury can result when these
instructions are not followed.The information is for
your safety and it is important! The safety decals
below are on your product.
If any decals are lost or damaged, replace them at
once. See your local dealer for replacements.
TP 600-2562-01-AT-SMA
Attachment Decal
These labels are easily applied and will act as a
constant visual reminder to you, and others who may
use the equipment, to follow the safety instructions
necessary for safe, effective operation.
Decal - WARNING Thrown
Objects Hazard
Part Number 1732819
Read and obey all operation and warning decals.
WARNING
Thrown objects hazard
• Objects thrown by the mower can seriously
injure or kill you.
• Do not open the hopper while the mower blades
are turning.
• Do not operate the mower without the complete
catcher in place.
1732819
Page 5
3
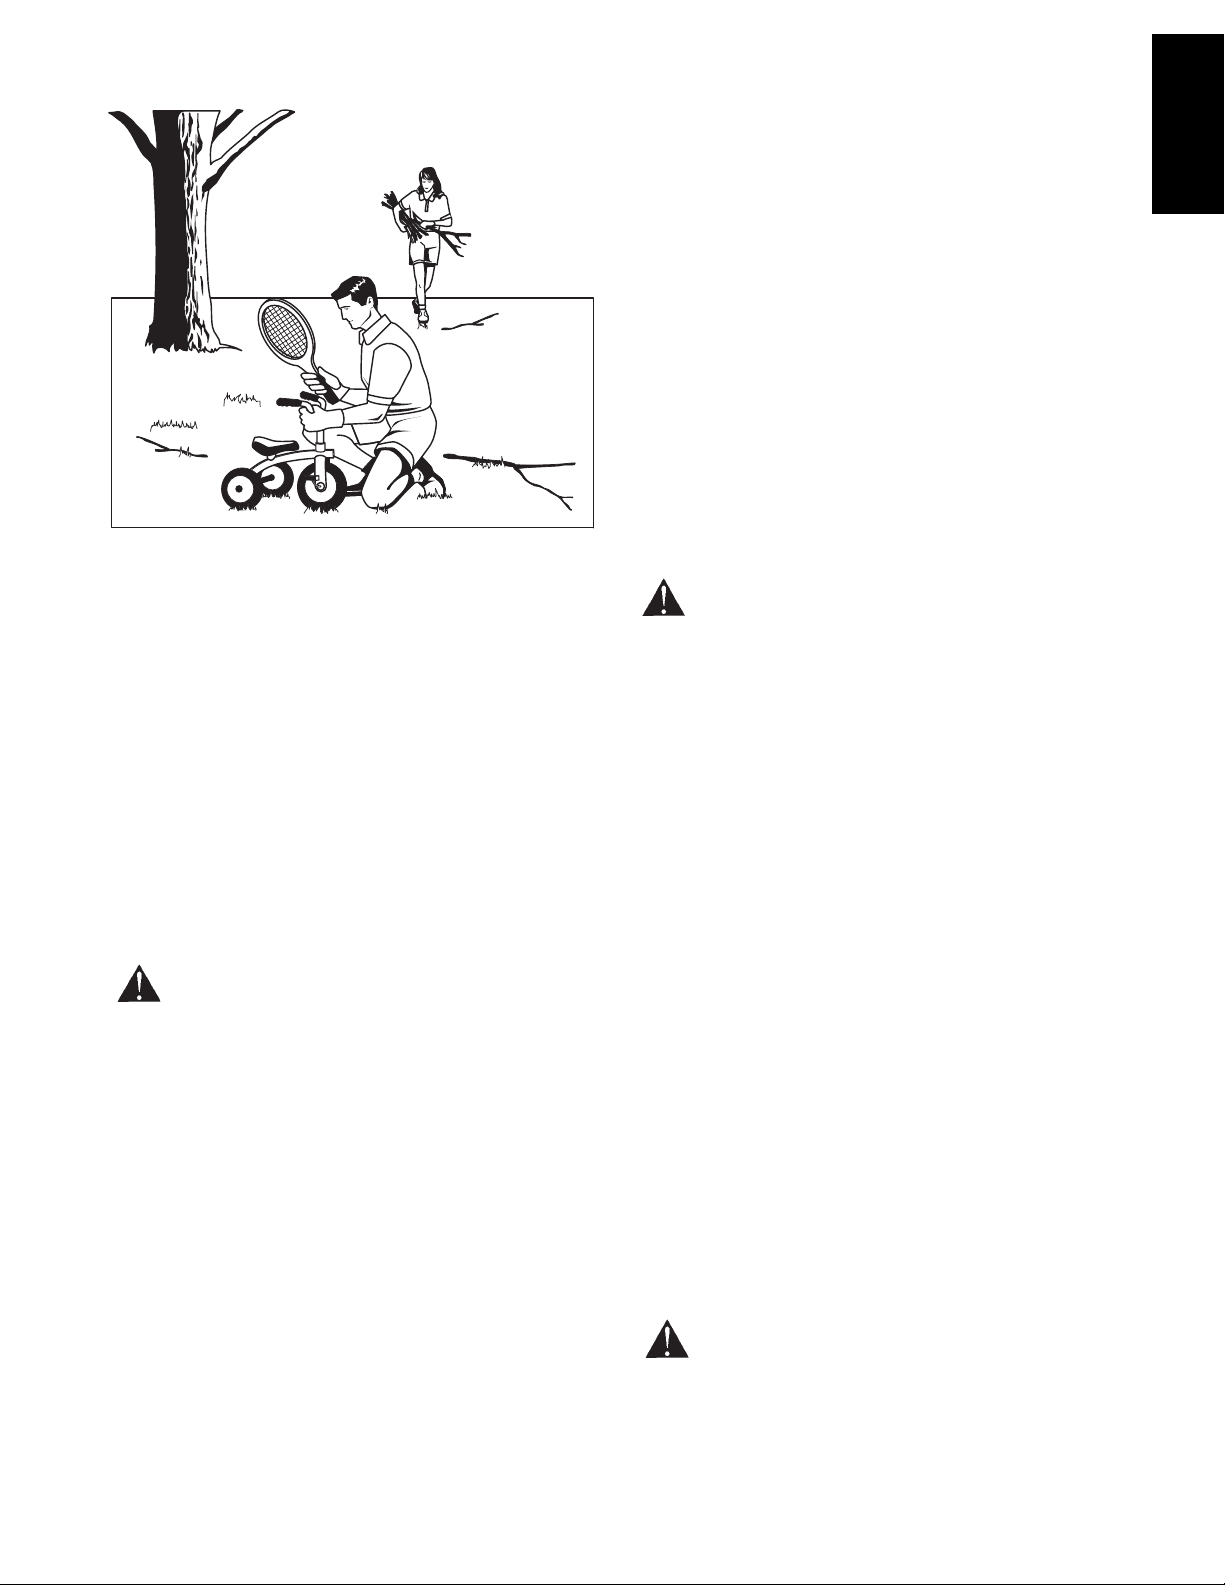
Before Operation
Clear the lawn of all sticks, stones, wire and other
debris which may be caught or thrown by the mower
blades.
Check grass condition.If wet, wait until later in the
day. If grass is wet, the grass catcher is likely to
become plugged.
For efficient bagging, air circulation under the
mower deck, through the chute and into the bag
is very important.
For this reason, BEFORE YOU BEGIN MOWING you
should make certain the underside of the mower and
the underside of the catcher lid are free from grass
and debris.
Make sure that there is a snug fit between mower
deck, blower housing, tubes, and grass catcher cover.
Mowing with the Catcher
Always operate with throttle at full speed when
mowing.
Grass should be cut often, and not too short. If grass
is too long or lush it may be necessary to keep
ground speed to a minimum or to cut only half the
width of the mower to prevent clogging. If grass is
long, operate with mower in high cutting position for
first pass, cutting again in a lower position on a
second pass.
Do not open the cover with mower engaged.
If a large amount of cut grass is spilling out from
under deck, the tube may be plugged or the bags
may be full— discontinue mowing, stop the unit,
disengage the PTO, shut off the engine and then
empty the catcher or clear the tube.
WARNING
ALWAYS shut off the tractor. Disengage the
PTO, and allow all moving parts to stop
BEFORE disconnecting or clearing tube, or
emptying catcher.
Before leaving the operator’s position for any
reason, engage the parking brake, disengage
the PTO, stop the engine and remove the key.
To reduce fire hazard, keep the engine, rider
and mower free of grass, leaves and excess
grease. Do not stop or park rider over dry
leaves, grass or combustible materials.
Never operate on slopes greater than 17.6% (10°).
After Operation
Remove any debris from the the screen on the
underside of the lid.
The blower housing and tube should be removed for
cleaning.
Inspect the grass bags for wear or damage. Make
sure that there is a snug fit between mower deck,
blower housing, tubes, and grass catcher cover.
Storing The Grass Catcher
Clean the grass catcher thoroughly using a mild
detergent (other products may damage the tube).
Remove any debris from the screen on the underside
of the lid.
If paint has been scratched on metal parts, touch up
with paint, or apply a thin film of oil to prevent
corrosion.
Store in a dry area. Dry thoroughly before storing for
a long period of time. Always store away from
moisture.
Do not leave grass in bagger containers.
Empty containers after each use and before
storing. Failure to do so may result in
spontaneous combustion which could develop
into a fire.
CAUTION
CAUTION
Before you begin operating the unit be certain
you have read all of the safety and operational
information of this instruction sheet, as well as
the Operator’s Manual for the tractor and any
other attachments.
Safety
Page 6

4
Notes
Page 7

5
INSTALL MOUNTING PLATES BROADMOOR / 1600 / 2600 / LT
SERIES
Install Plates & Spacers
1. Mount the side brackets (C, Figure 1) to both
sides of the frame using the holes shown. Secure
with one 3/8-16 x 1 capscrew (D), 3/8 lockwasher
(B), and 3/8-16 nut (A) per side.
2. Install the rear spacers (C, Figure 2). Secure with
two 1/2-13 x 2-1/2 capscrews (E), washers (D),
spacers (C), and 1/2-13 nylock nuts (A) per side.
Figure 1. Install Side Brackets
A. Nut, 3/8-16
B. Lockwasher, 3/8
C. Side Bracket
D. Capscrew, 3/8-16 x 1
C
D
Figure 2. Install Rear Spacers
A. Nylock Nuts, 1/2-13
B. Capscrew, 1/2-13 x 2-1/2
C. Spacers
D. Washers, 1/2
A
C
D
D
B
Assembly
Assembly
B
A
Page 8

6
Assembly
Install Baffle and Blade
Note: Units with an anti-blowout baffle do not require
the Clean Sweep baffle.
1. Remove mower deck. See OPERATOR’S
MANUAL.
2. Install notched side of baffle (A, Figure 3) to
discharge side of deck securing with 5/16-18 x 2
carriage bolt (C) and 5/16-18 locknut (D). Install
5/16-18 wing nut (F) and locknut (G) to carriage
bolt (C) as shown.
3. Secure center of baffle (A) to deck using 5/16-18 x
2 carriage bolt (C), spacer (B) and nut (D).
Secure LH end of baffle (A) to deck using 5/16-18
x 5/8 carriage bolt (E) and nut (D).
4. Remove right hand blade (A, Figure 5). Use a
block of wood to prevent blade rotation while
loosening the capscrew.
5. Reinstall the large washer (B, Figure 6), spring
washer (C) and capscrew (D).Use a wooden
block (A) to prevent blade rotation while tightening
the capscrew (D) to 45-55 ft. lbs. (61-75 Nm).
Figure 3. Baffle Assembly
A. Baffle (New)
B. Spacer (New)
C. Carriage Bolts,
5/16-18 x 2 (New)
D. Locknuts,WHIZ Lock,
5/16-18 (New)
E. Carriage Bolt,
5/16-18 x 5/8 (New)
F. Wing Nut Assembly,
Large, 5/16-18 (New)
G. Locknut, Center Lock,
5/16-18 (New)
H. Grass Shield (Existing)
I. Blade, High Lift (New)
J. Hex Washer (Existing)
K. Washer (Existing)
L. Capscrew,
7/16-14 x 1-1/4 (Existing)
D
J
B
D
E
H
G
F
I
K
L
A
C
LOOSEN
Figure 4. Blade Removal
A. Blade
Figure 5. Blade Installation Mowers
A. 4x4 Wood Block
B. Hex Washer
C. Spring Washer
D. Blade Capscrew
A
B
C
D
Torque Capscrew to
45-55 ft. lbs. (61-75 Nm)
A
Page 9
7
Assembly
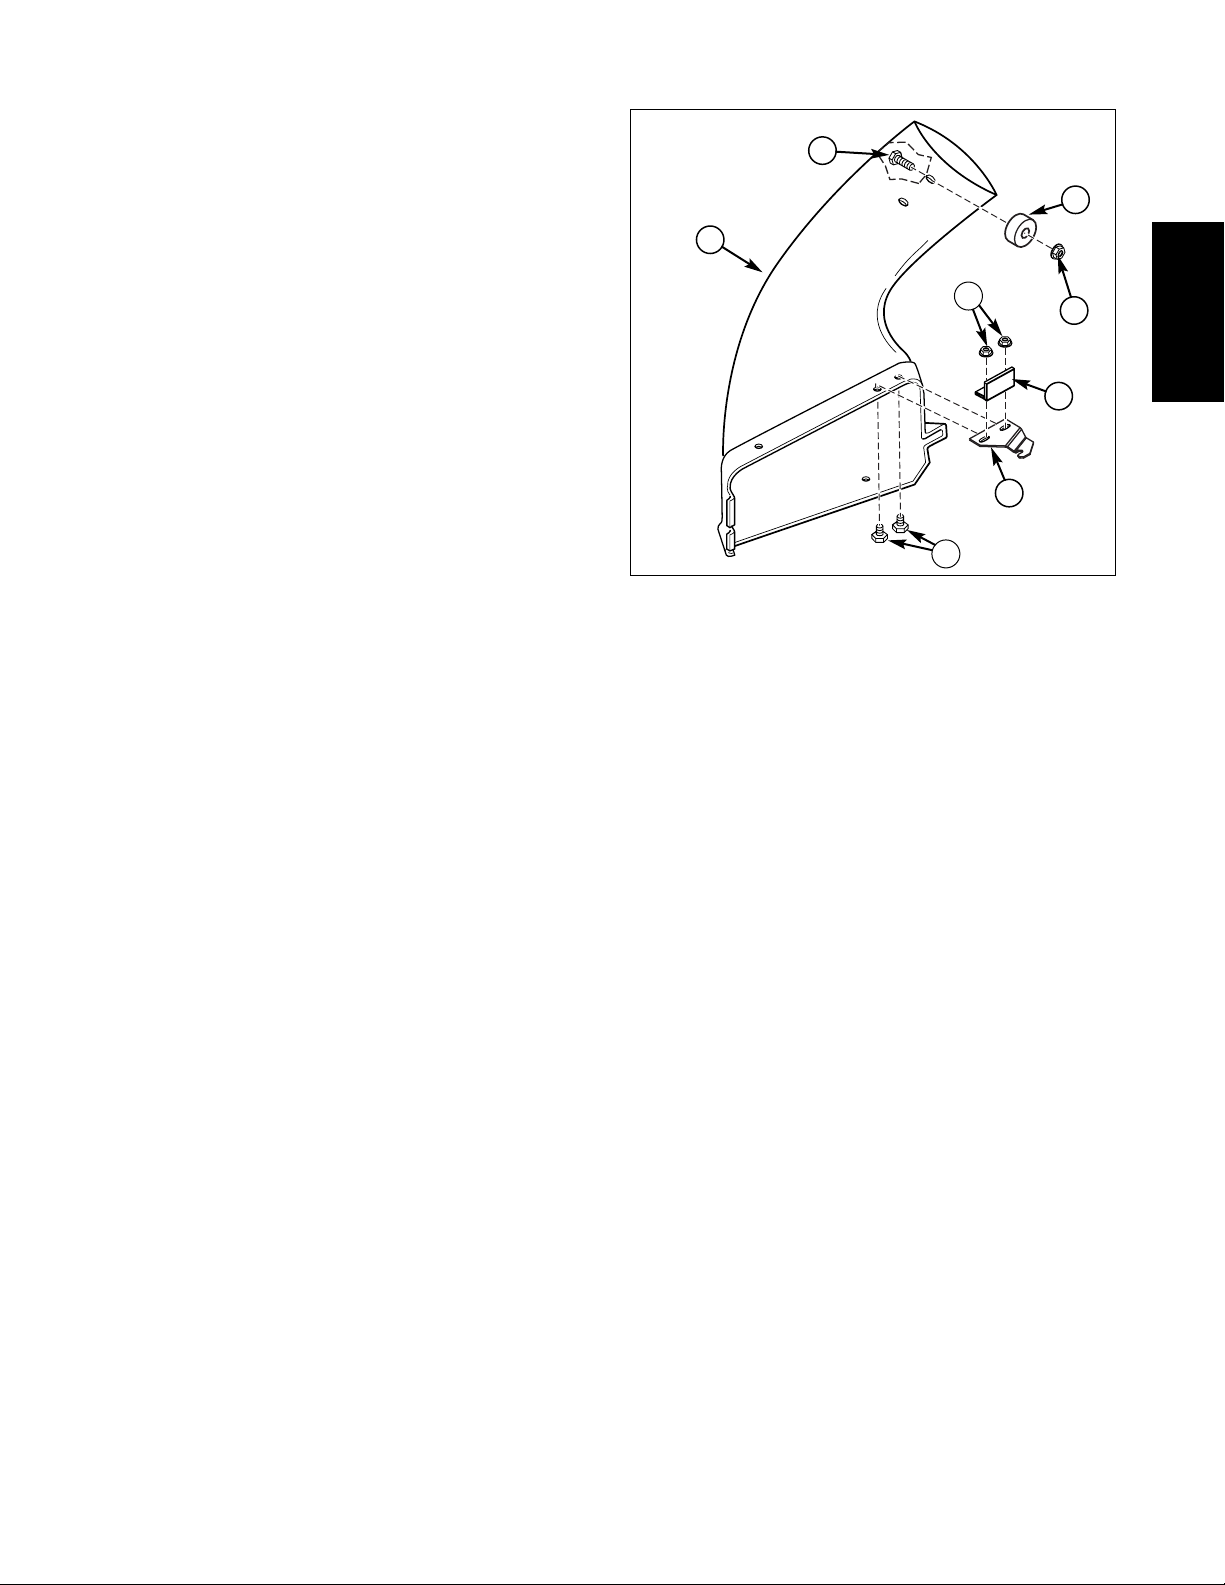
Figure 6. Install Pin and Bracket
A. Lower Chute
B. Locknut, 1/4-20
C. Puck, Metal
D. Capscrews,Thin Head, 5/16-18 x 3/4
E. Locknuts, 5/16-18
F. Bracket
G. Defflector Prop
A
C
F
G
D
D
E
Install Lower Chute Components
INSTALL BRACKET AND PIN ON LOWER CHUTE
1. Secure the puck (C, Figure 6) to lower chute (A)
using 5/16-18 x 3/4 capscrew (D) and 5/16-18
locknut (E).
2. Install bracket (F) and deflector prop (G) to lower
chute (A) using 5/16-18 x 3/4 capscrews (D) and
5/16-18 locknuts (E).
F
Page 10

8
Figure 9. Install Cover Assembly
A. Bag Support Bracket
B. Cover Assembly
C. Cover Hinge Pins
D. Hair Pins
E. Hinge Pivots
D
INSTALL COVER ASSEMBLY
1. Attach cover assembly (B, Figure 9) to bag
support bracket (A) using hinge pivots (E). Secure
cover using cover hinge pins (C) and hair pins (D)
as shown.
C
E
A
B
C
D
E
Figure 8. Attach Hitch and Upright Support
A. Hitch and Upright Support Assembly
B. Frame spacers
A
INSTALL HITCH AND UPRIGHT SUPPORT ASSEMBLY
1. Attach hitch and upright suppor t assembly (A,
Figure 8) to frame spacers (B) as shown.
A
B
B
INSTALL BAG AND COVER SUPPORT
1. Install the bag and cover support (B, Figure 7) to
upright support (A) using reinforcement plate (C)
and 3/8-16 x 1 capscrews (D) and 3/8-16 locknuts
(E) as shown.
A
C
B
Figure 7. Install Bag and Cover Support
A. Upright Support
B. Bag and cover Support
C. Reinforcement Plate
D. Capscrews, 3/8-16 x 1
E. Locknuts, 3/8-16
E
D
Assembly
Page 11

9
INSTALL COLLECTOR BAGS
1. Raise the cover (A, Figure 10).
2. Attach collector bags (B) using grass bag hanger
(C) to bag hanger post (D).
Figure 10. Install Collector Bags
A. Cover
B. Collector Bag
C. Grass Bag Hanger
D. Bag Hanger Posts
A
B
C
D
C
E
D
A
B
Figure 11. Install Lower Discharge Chute
A. Lower Chute
B. Wing Nut
C. Nut
D. Carriage Bolt
E. Discharge Deflector
F. Deflector Hinge Rod
G. Bracket
G
INSTALL LOWER DISCHARGE CHUTE
1. Lift discharge deflector up (E, Figure 11).
2. Slide the notch of bracket (G) on to deflector hinge
rod (F).
3. Secure the front of lower chute (A) to carriage bolt
(D) using wing nut (B) and locknut (C).
Note: Locknut (C) is intended to keep wing nut (B)
permanently on carriage bolt (D).
Assembly
F
Page 12

10
INSTALL DISCHARGE TUBE
1.Slide discharge tube (B, Figure 12) into seal (C). It
may be necessary to lengthen several slits (F) in
order for tube (A) to fit into seal (B)
2. Attach the discharge tube (B and Inset) to boot (A)
and secure the tube by moving wire form (E) down
over metal puck (D).
Assembly
D
A
B
C
Figure 12. Install Discharge Tube
A. Boot
B. Discharge T ube
C. Seal
D. Puck, Metal
E. Wire Form
F. Slits
A
B
E
D
E
F
Page 13

11
Normal Removal
& Installation
Normal Removal & Installation of
Lower Discharge Chute
Note: See previous pages for more detailed
installation and operation instructions if necessary.
1. Lift discharge deflector up (E, Figure 13).
2. Slide the notch of bracket (G) on to deflector hinge
rod (F).
3. Secure the front of lower chute (A) to carriage bolt
(D) using wing nut (B) and locknut (C).
Note: Locknut (C) is intended to keep wing nut (B)
permanently on carriage bolt (D).
A
F
B
Figure 13. Install Lower Discharge Chute
A. Lower Chute
B. Wing Nut
C. Locknut
D. Carriage Bolt
E. Discharge Deflector
F. Deflector Hinge Rod
G. Bracket
D
C
E
G
Page 14

12
E
G
D
B
Figure 14. Normal Installation & Removal
C
I
J
K
A
WARNING
OPERA TION WITHOUT BA GGER
For operation without bagger, the mower
deflector MUST be properly installed in the
down position and retained by the spring latch.
H
F
D
C
L
Normal Removal
& Installation
L
A. Hitch Support
Assembly
B. Cover
C. Pin
D. Hair Pins
E. Bag
F. Grass Bag Hanger
G. Discharge T ube
H. Wire Form
I. Puck
J. Boot
K. Seal
L. Frame Spacers
Bagger Removal
1. Disconnect the discharge tube (G, Figure 14) from
boot (J) by moving wire form (H) up and out from
metal puck (I). Remove discharge tube (G) from
seal (K).
2. Remove hair pin clips (D) and pins (C) then
remove cover (B) see Figure 9.
Note: To prevent loss of parts reinstall pins (C) and
hair pins (D) in support assembly hinge pivots (E,
Figure 9).
3.Remove and empty bags (E, Figure 10).
4. Lift discharge deflector up (E, Figure 13).
5. Loosen (do not remove) wing nut (B) and lock nut
(C).
6. Slide lower chute (A) off carriage bolt (D) and
deflector hinge rod (F).
Page 15

13
Normal Removal
& Installation
Page 16

Briggs & Stratton Yard Power Products Group
Copyright © 2007 Briggs & Stratton Cor poration
Milwaukee, WI USA. All Rights Reser ved
500 N Spring Street / PO Box 997
Port Washington, WI 53074-0997
www.MasseyLawn.com
MANUFACTURING, INC.
500 N Spring Street / PO Box 997
Port Washington, WI 53074-0997
www.SimplicityMfg.com
500 N Spring Street / PO Box 997
Port Washington, WI 53074-0997
AGCOLawn.com
PRODUCTS
535 Macon Street
McDonough, GA 30253
www.Snapper.com
 Loading...