

Page 1
BrickHouse Security Video Monitoring Setup
User’s Guide
Thank you for purchasing a BrickHouse Security network camera, powered by Alarm.
com!
This document will give you all the information you need to set up your camera. You will
be able to enjoy all video features through most browsers, including Internet Explorer,
Firefox, Chrome and Safari on both Windows PCs and Macs.
In the box you will nd the camera, its charger, wireless antenna, mounting bracket,
and an installation guide.
1
Note: If your router does not have a WPS button or you have trouble connecting
devices to your network, connect the camera with an Ethernet cable (not included) to
your router directly Do this rst before connecting to the AC Adapter. Please do steps
1, 2 and then skip to step 6.
Installation Guide
Step 1:
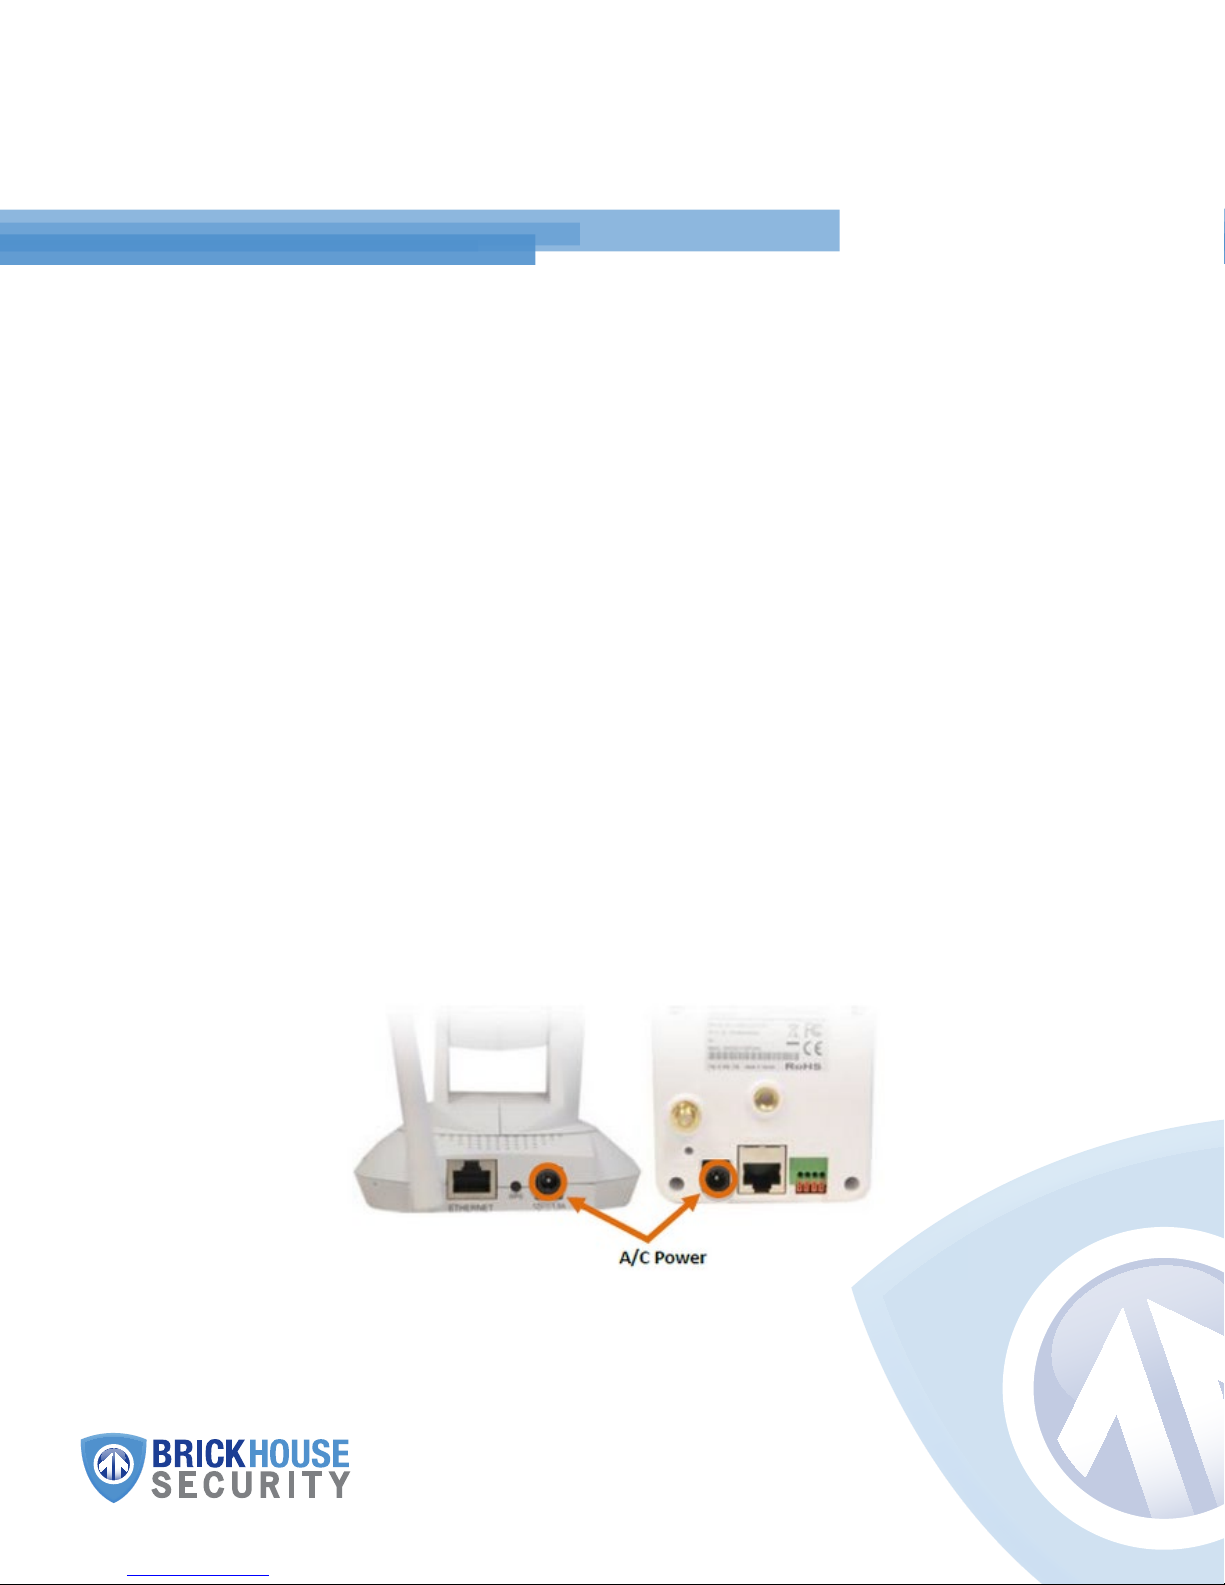
adapter and plug it into an outlet with consistent power (non-switched). The camera’s
red LED should turn on.
Plug the antenna into the back of the camera. Next, connect the camera’s AC
WHEN YOU NEED TO KNOW.
Page 2
Step 2: Wait for the camera to nish its startup process. For models ADC-V520, ADC-
V520IR, and ADC-V720 the LED will change slowly change from no light, to a solid red,
to blinking and then to solid green. For model ADC-V620PT wait until the device stops
rotating.
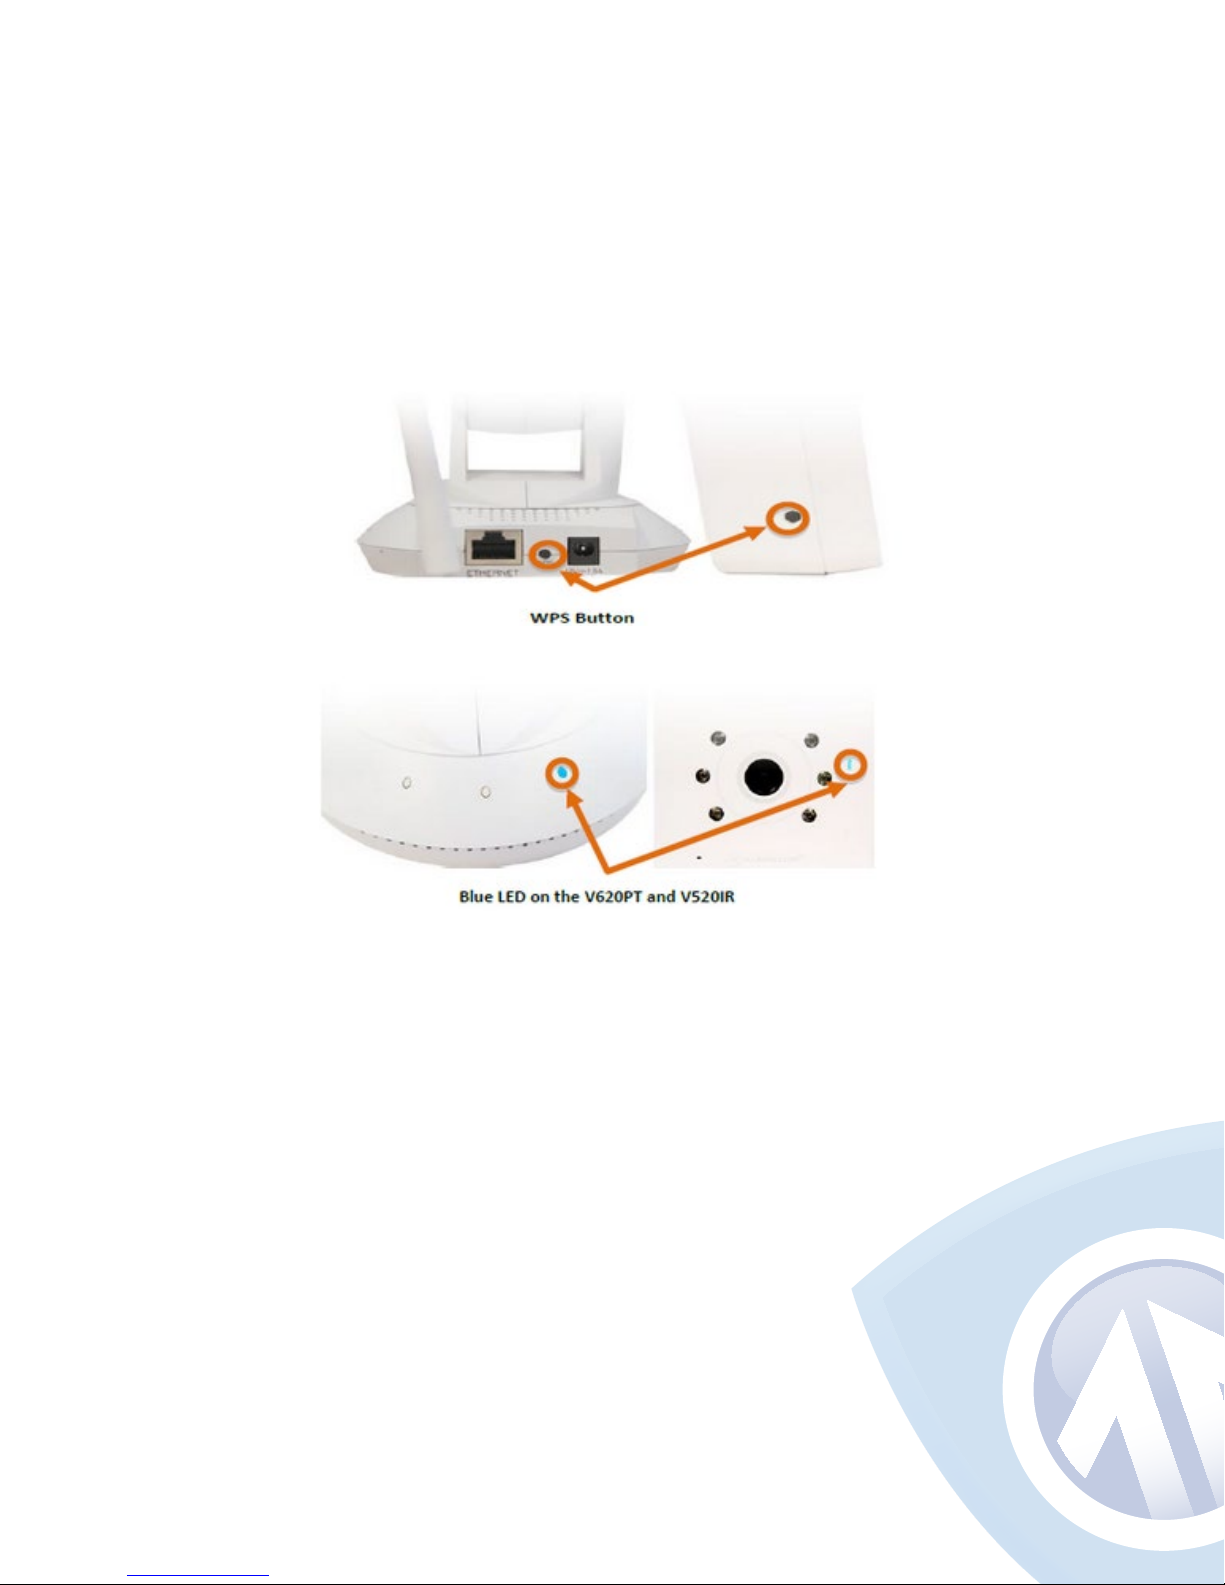
Step 3: Press and hold the camera’s WPS button for 5 seconds and release. The blue
LED should start ashing. If the blue LED is solid Blue, hold down the WPS button for a
few seconds to clear the light and try again. If the blue LED is not on at all, try pressing
the WPS button again.
2
Step 4: Press the corresponding WPS button on the router. You may have to hold this
button for a few seconds. Often, a light will ash on the router to show that it’s working.
Page 3
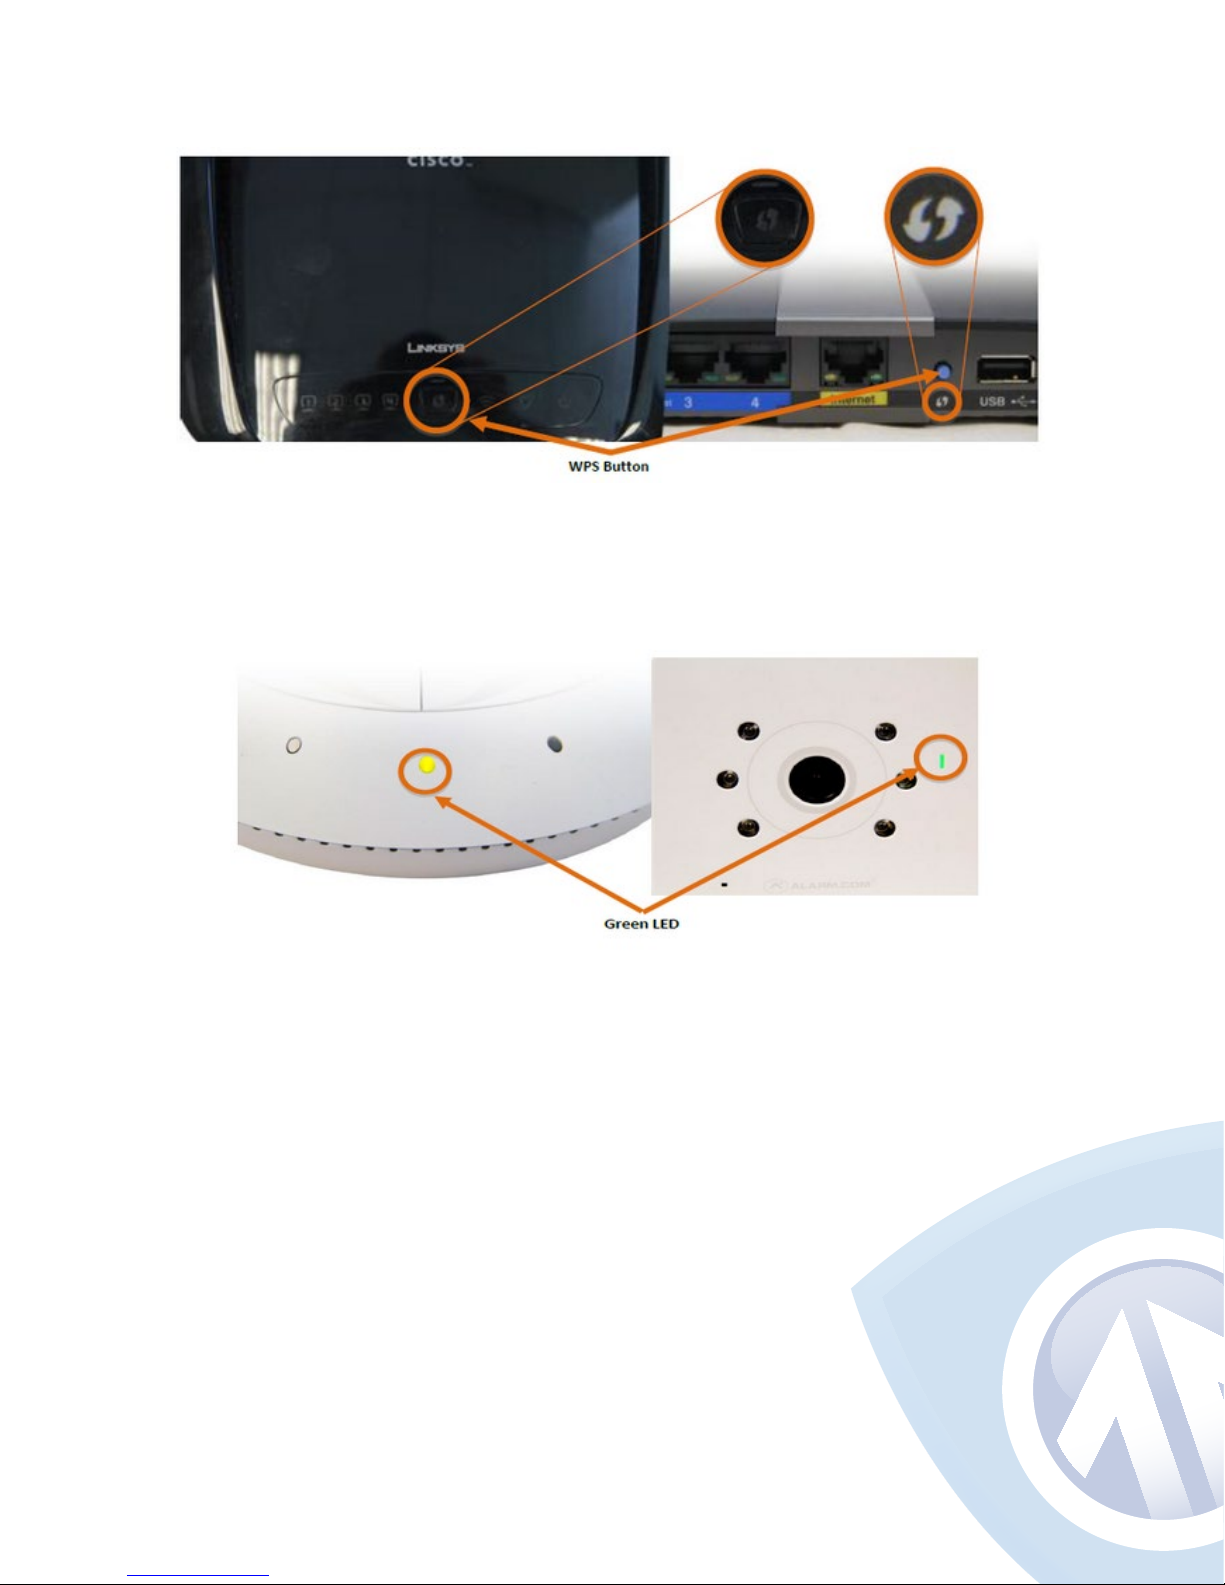
Step 5: When the camera’s green LED starts ashing, the WPS setup is complete.
After a few seconds, the LED will turn Solid green and the camera is ready to install.
3
Step 6: From a computer on the same network as the camera, log into your account.
To reach the login page go to brickhousesecurity.com and hover over the Login menu
at the top of the homepage. Select Video Monitoring to enter your login information.
Step 7: Accept Terms > Enter new Password and answer security questions > Follow
the onscreen instructions.
Step 8: Click Find Camera.
Page 4
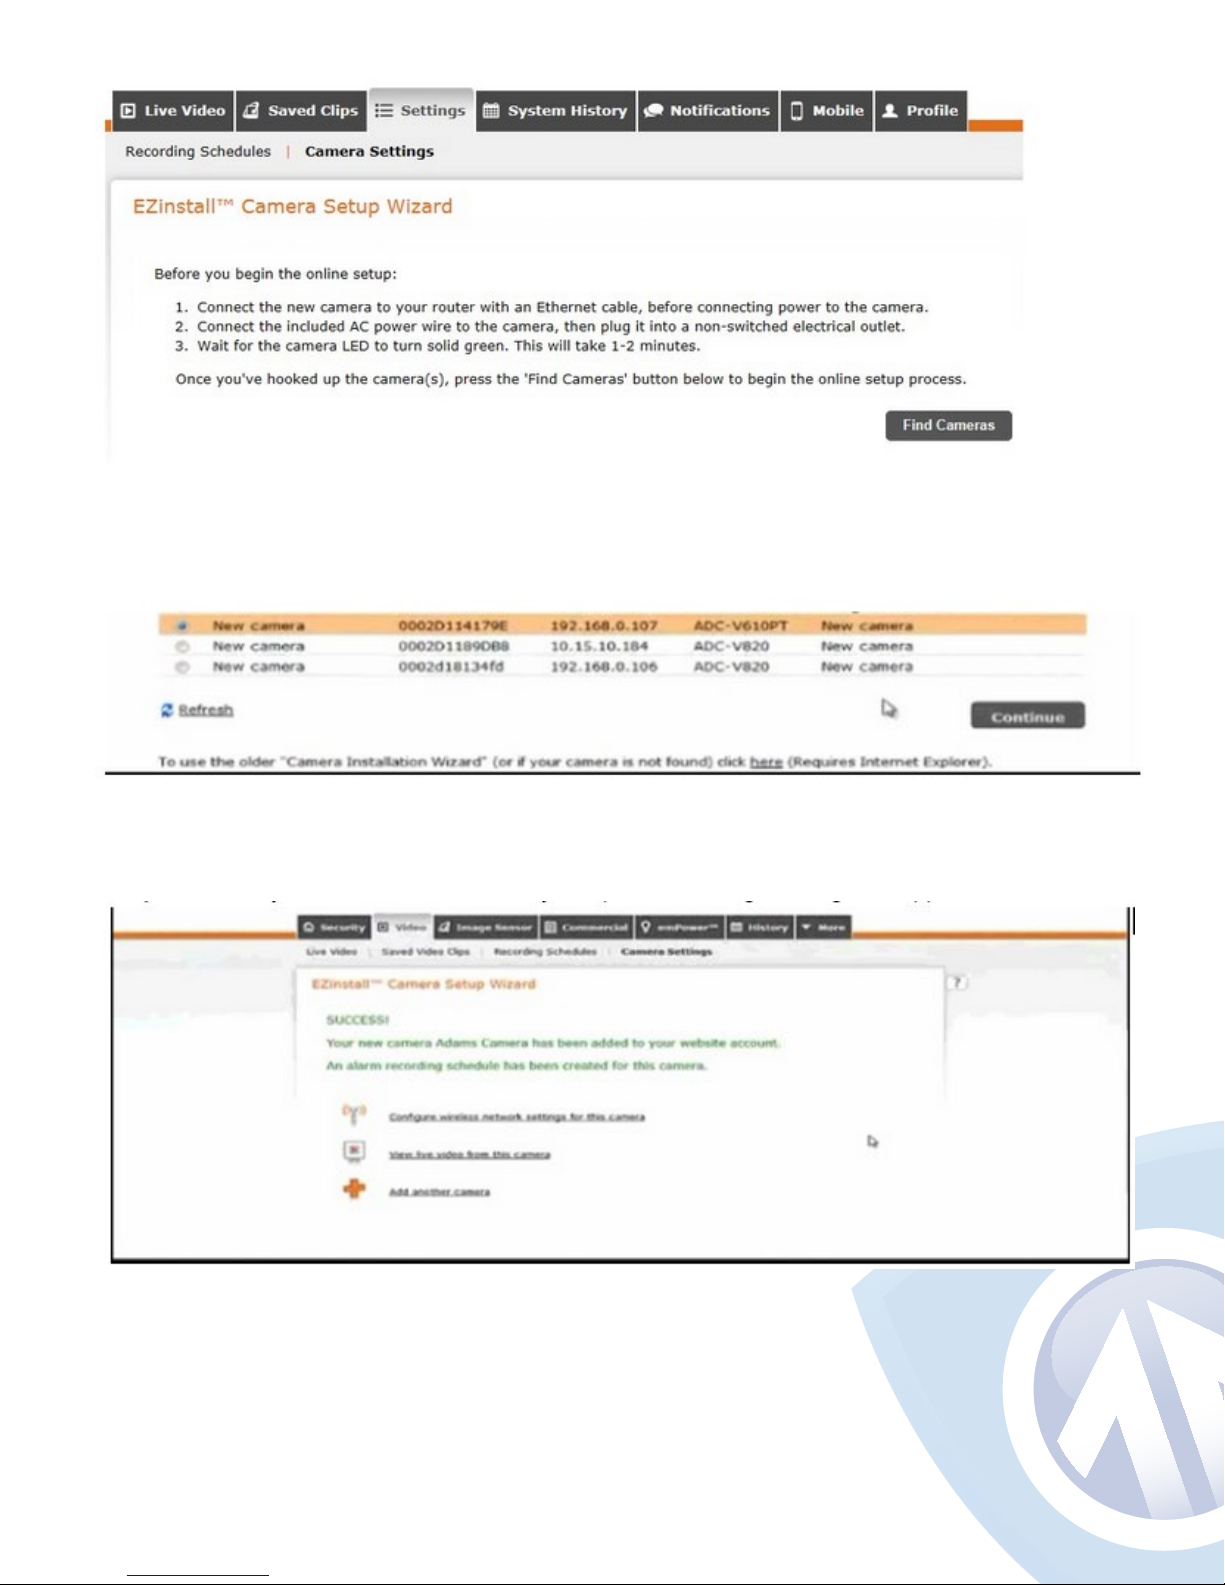
Step 9: Once the camera has been detected, select it from the list of available
cameras and follow the onscreen instructions to add it to the BrickHouse Security
Video Service account.
4
Step 10: When your camera is successfully setup, the following message will appear:
Step 11: Click on the Congure Wireless Network Settings link for this camera link
and follow the onscreen instructions.
Note: When using the camera on a wireless network, you will need to know:
• The case-sensitive SSID (wireless network name)
• The network WEP or WPA key (if encryption is enabled at the router)
Page 5

• Troubleshooting Tips:
• For the initial setup, We recommend connecting this near the computer or mobile
device that you will need to set up. You can move the camera after the setup is
complete. If you are using a (WPS) wireless connection for the setup please be
aware of the wireless signal strength when placing the device.
• If the wireless (WPS) isn’t working, try connecting directly to the router with an
ethernet connection (cable not included). You can congure the wireless connection
afterwards.
• If you receive any error messages setting up the camera, press the reset button on
the back of the camera or delete the camera from the account (in the Settings tab),
remove it from power and start again from the beginning.
• You will need the most updated version of Java installed for your web browser in
order to view the video on a desktop computer. You can get it here: http://www.java.
com/en/.
5
• Motion detection scenarios need to be set up on a desktop computer.
• For additional inquiries, visit help.brickhousesecurity.com, or call (800) 654-7966.
Powered By
 Loading...