

Breville VCF041 User Manual
Breville Moments
™
hot drink maker
2
! This appliance generates heat during use. Adequate precaution must be taken to
prevent the risk of burns, scalds, res or other damage to persons or property caused
by touching the exterior whilst in use or during cooling.
! Never use this appliance for anything other than its intended use. This appliance is for
household use only. Do not use this appliance outdoors.
! Always ensure that hands are dry before handling the plug or switching on the
appliance.
! Always use the appliance on a stable, secure, dry and level surface.
! Do not position the appliance under a cupboard or shelf to prevent the risk of injury
from released steam.
! This appliance must not be placed on or near any potentially hot surfaces (such as a
gas or electric hob).
! Do not use the appliance if it has been dropped, if there are any visible signs of
damage or if it is leaking.
! Ensure the appliance is switched off and unplugged from the supply socket after use
and before cleaning. Always allow the appliance to cool before cleaning or storing.
! Never immerse any part of the appliance or power cord and plug in water or any other
liquid.
! Never let the power cord hang over the edge of a worktop, touch hot surfaces or
become knotted, trapped or pinched.
! Never leave the appliance unattended when in use.
! Never place anything on top of the appliance.
! Never ll the water boiler with any liquid other than water. To prevent damage, never
use the appliance without water.
! Never ll the milk tank above the MAX marking.
product safety
READ CAREFULLY AND KEEP FOR FUTURE REFERENCE
This appliance can be used by children aged from 8 years and above and persons
with reduced physical, sensory or mental capabilities or lack of experience and
knowledge if they have been given supervision or instruction concerning use
of the appliance in a safe way and understand the hazards involved. Children
shall not play with the appliance. Cleaning and user maintenance shall not
be made by children unless they are older than 8 and supervised. Keep the
appliance and its cord out of the reach of children aged less than 8 years.
If the supply cord is damaged, it must be replaced by the manufacturer, its
service agent or similarly qualied persons in order to avoid a hazard.
Ensure that the appliance control lever is in the OFF position when the
milk tank assembly is detached from the main housing unit.
Never use the appliance without the mixing chamber in place, or remove
the mixing chamber while the appliance is turned on.

3
parts
1. Mixing chamber and lid
2. Quick ll funnel
3. Steam pipe
4. Milk pipe
5. Milk tank
6. Milk tank housing
7. Drip tray
8. Milk level window
9. Water boiler cap
10. Hinged lid
11. Control lever
12. Location guide
1
2
3
4
5
6
7
9
8
10
11
12
MILK TANK ASSEMBLY MAIN HOUSING UNIT
4
Remove your Breville Moments™ hot drink maker carefully from the box. Remove any
packaging and promotional material and position the unit on a dry, level, secure work
surface away from the edge.
Before using for the rst time, wash the milk tank assembly.
Cleaning the milk tank assembly
All parts of the milk tank assembly are dishwasher safe. DO NOT put the water boiler cap
in the dishwasher.
Always remove the milk tank assembly as one complete unit.
For clarity, all of the unit’s parts that must be cleaned regularly are coloured red, or are
transparent or stainless steel.
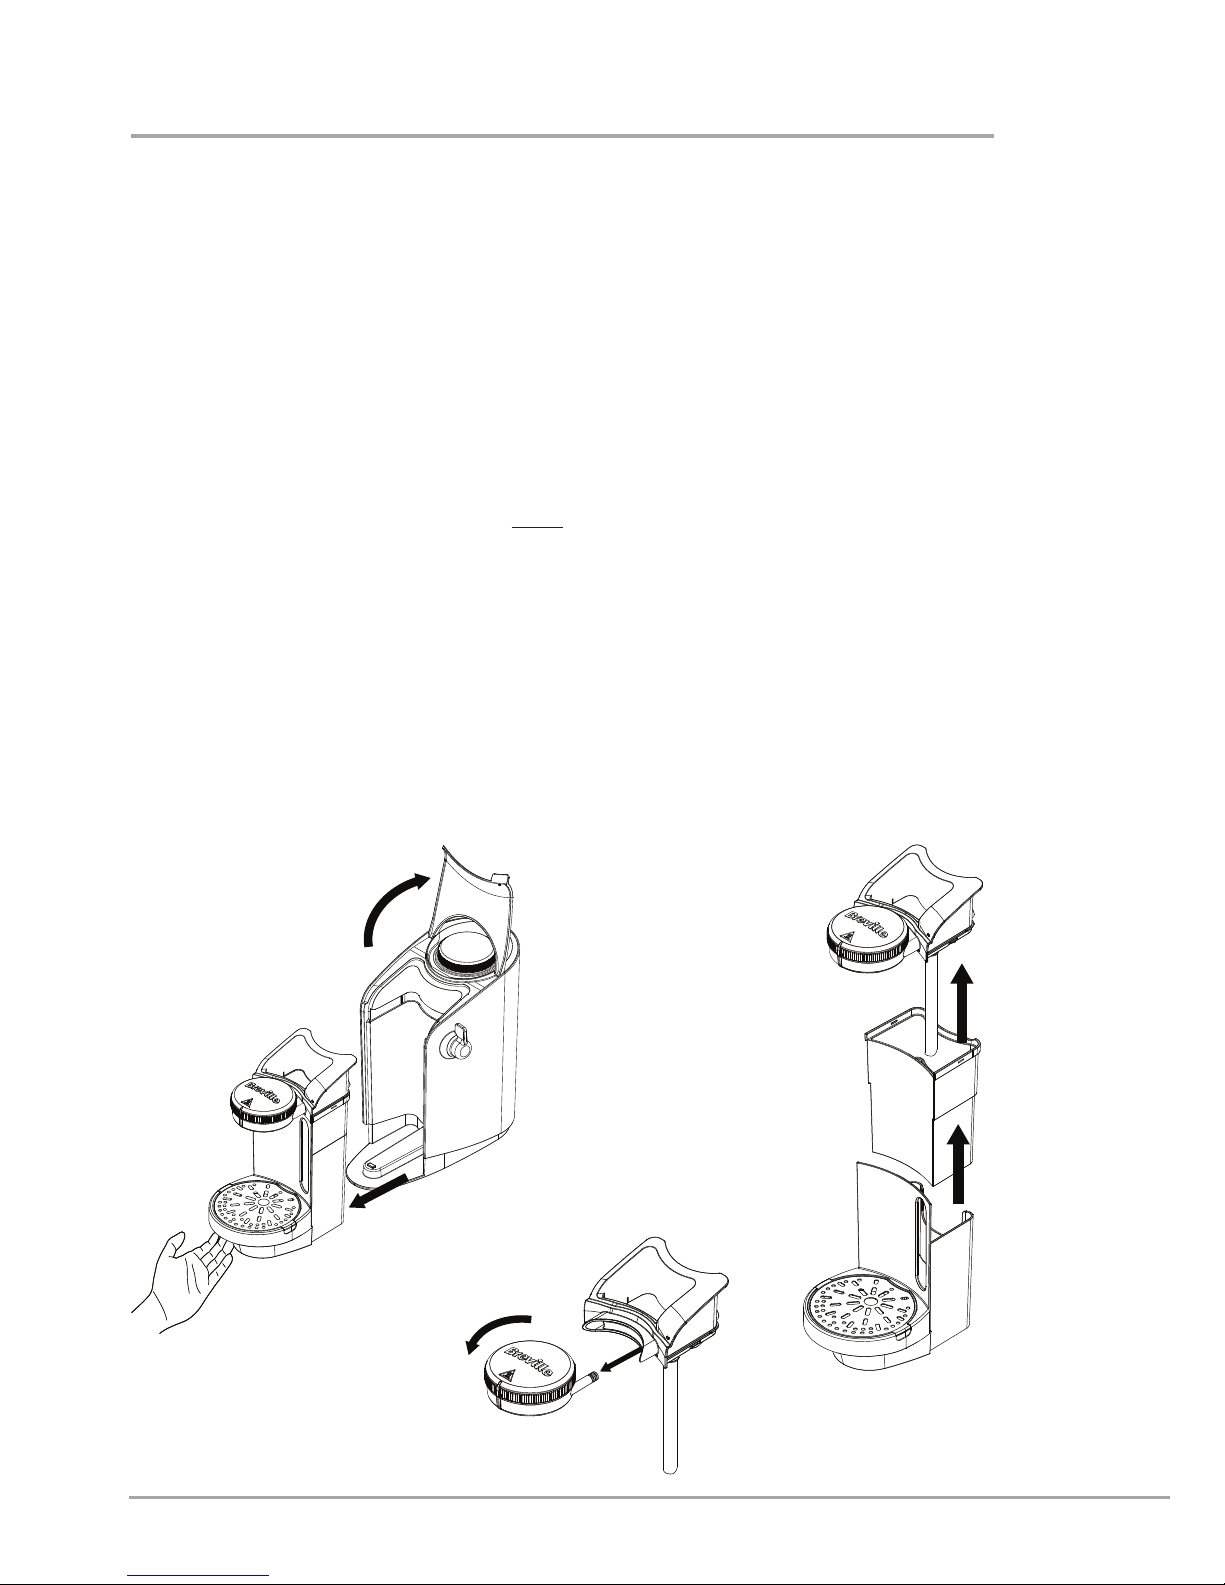
1. Lift the unit’s hinged lid and gently pull out the milk tank assembly using the
indentation underneath the drip tray.
2. Lift out the milk tank from its housing and separate the quick ll funnel and mixing
chamber assembly.
3. Pull out the mixing chamber from the quick ll funnel and remove the mixing chamber
lid by turning it anti‑clockwise. Do not try to remove the mixing chamber when it is
in position on the milk tank assembly because there is a tab that prevents you from
doing this.
cleaning
w
e
q
5
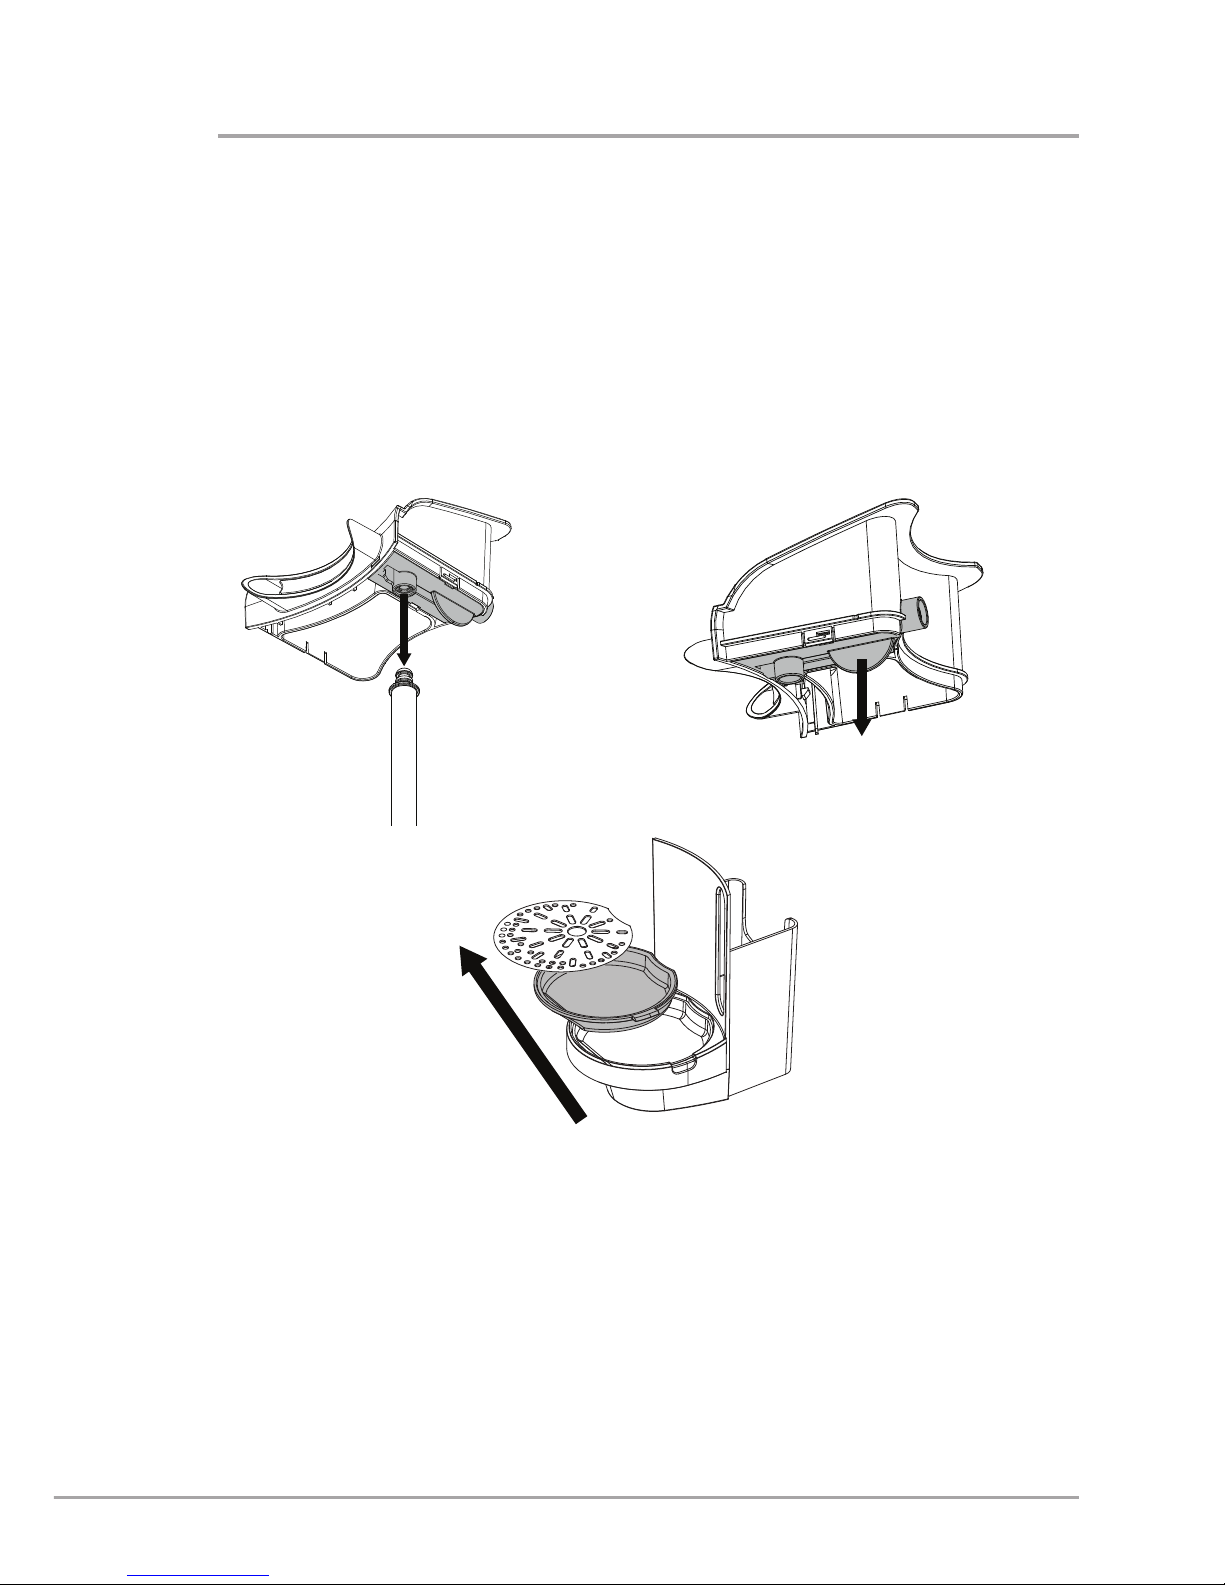
4. Pull out the milk pipe from its connector on the steam pipe (coloured red) underneath
the quick ll funnel.
5. Remove the steam pipe from the quick ll funnel by pulling the tab.
6. Lift out the drip tray (coloured red) using the side tabs and remove the stainless steel
drip tray cover.
7. Wash the parts in the dishwasher, or by hand in warm soapy water. Wipe dry before
reassembling (perform steps 1 to 6 in reverse order, with reference to Reassembling
the steam and milk pipe on page 6.)
y
r t
cleaning

6
Reassembling the steam and milk pipe
1. Locate the dip at the front of the steam pipe before pivoting downwards into position
on the quick ll funnel.
2. Insert the milk pipe into its connector on the steam pipe.
cleaning
wq
Cleaning the main unit
Wipe the outside of the unit with a damp soapy cloth, then wipe dry with a soft cloth.
If the Breville Moments
™
hot drink maker is not going to be used for a period of time, the
water boiler can be emptied. Make sure that the unit is turned off and unplugged, and has
been allowed to cool before commencing. Remove all loose parts. Empty any remaining
water by tipping upside down over a sink.
7
before first use
To ensure that any residue left over from the manufacturing process is removed, ush the
unit with clean water as described in the following procedure:
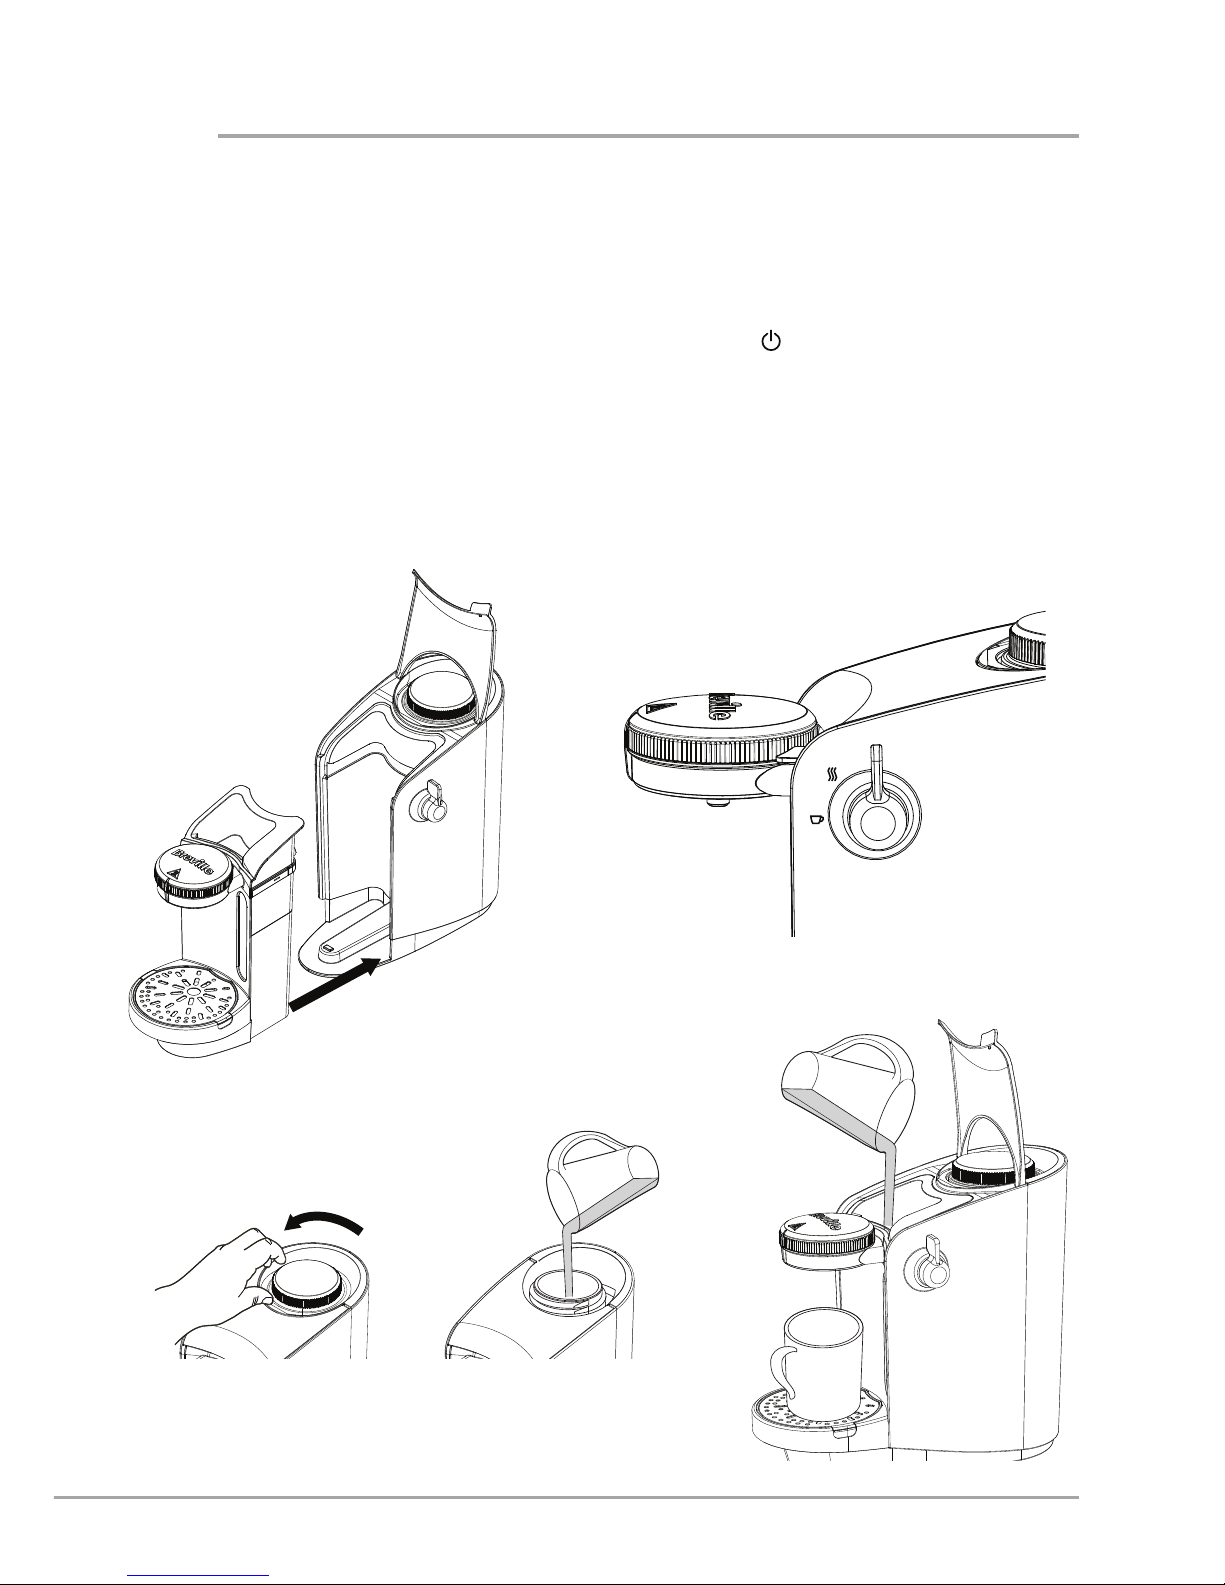
1. Reassemble the milk tank assembly after initial cleaning and push rmly into position
on the main housing unit using the location guide.
2. Make sure that the control lever is in the OFF position (
).
3. Remove the water boiler cap by turning it anti‑clockwise and lifting off. Fill the
boiler with a maximum of 400ml of water and replace the cap securely by turning it
clockwise.
4. Lift the unit’s hinged lid and half ll the milk tank with clean water by pouring directly
into the quick ll funnel. Lower the hinged lid and click into place. Place your mug or
cup on the drip tray under the dispensing nozzle.
wq
e
r
8
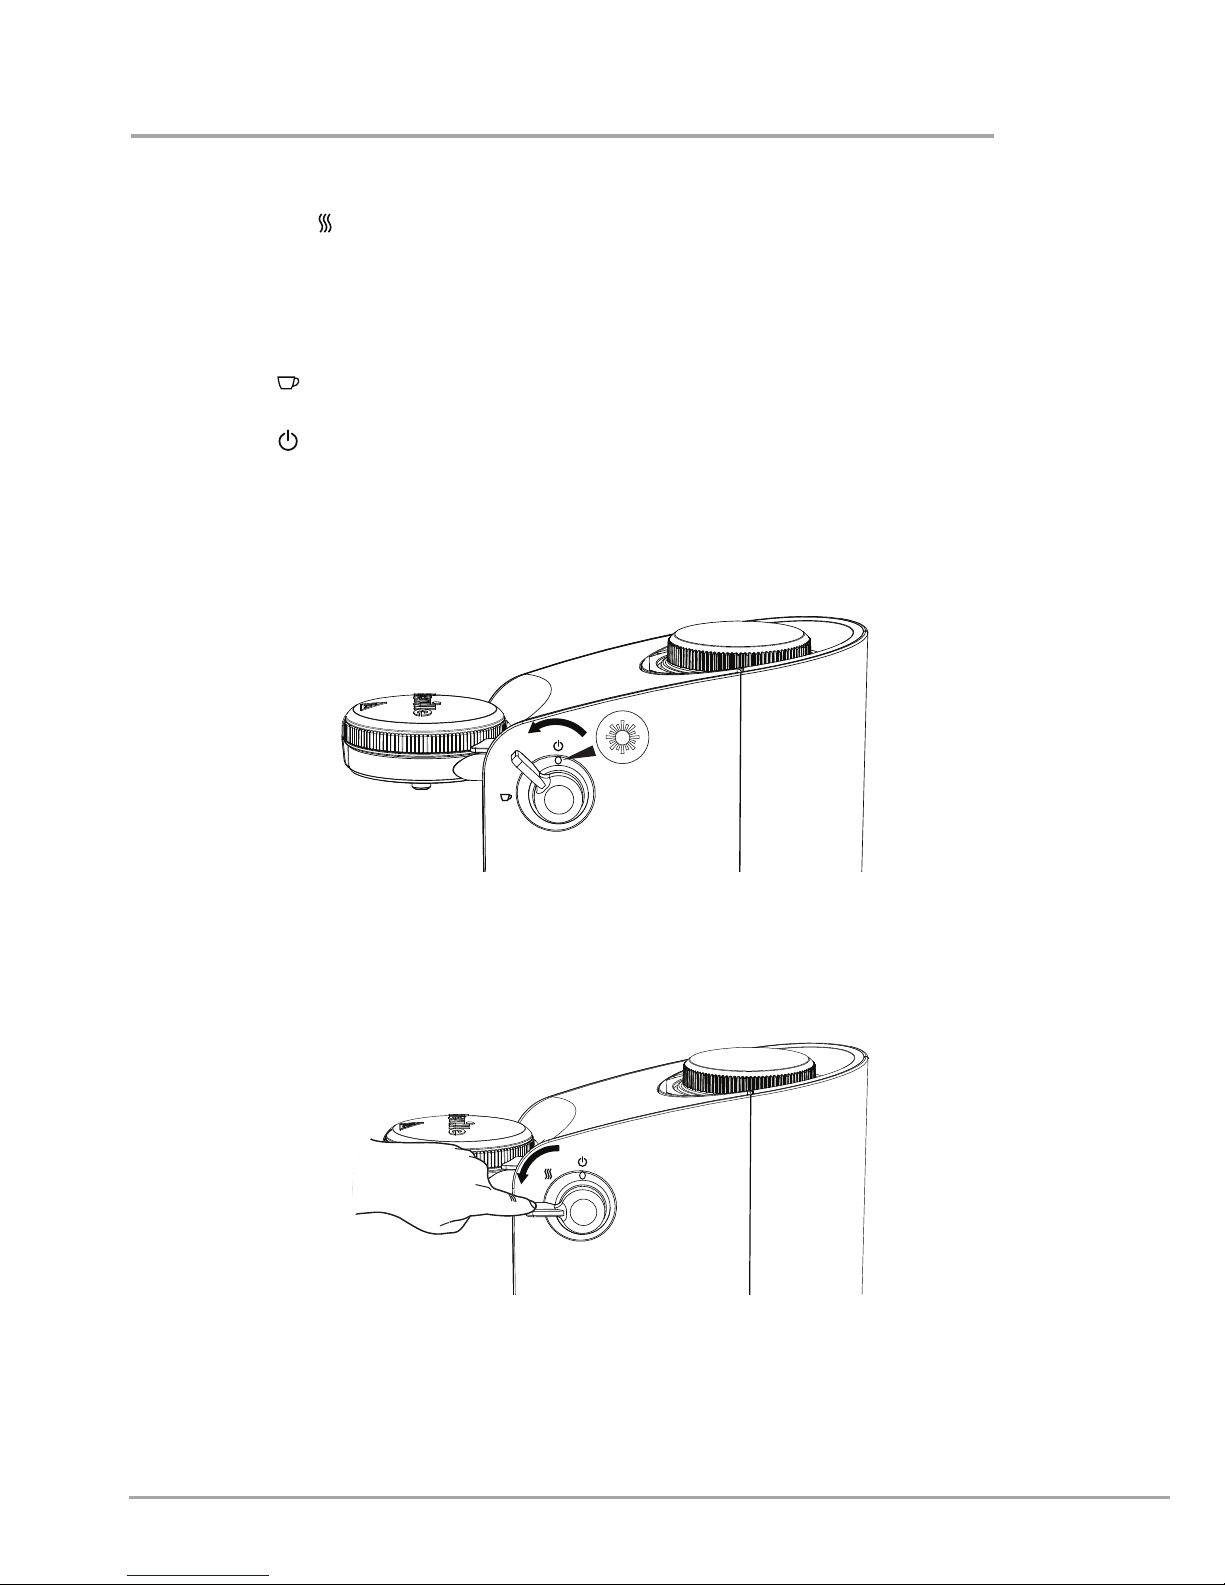
5. Plug the unit into the mains supply and switch on. Turn the control lever to the HEAT
UP position ( ). The power indicator light will ash. After approximately 3 minutes
the power indicator light will remain on to show that the water is hot.
Note that the time taken for the water to heat fully will depend on the amount of water
in the boiler.
6. To start cleaning, turn the control lever anti‑clockwise and hold in the DISPENSE
position (
). Clean water will be ushed through the unit into the cup. When all of
the water from the milk tank has ushed through, turn the control lever to the OFF
position (
). A small amount of water will continue to be dispensed. Remove and
empty the cup.
Your Breville Moments
™
hot drink maker is now clean and ready for use.
before first use
t
y
 Loading...