

Page 1
INSTRUCTIONS FOR USE
AND RECIPE BOOK
Commercially designed for professional results
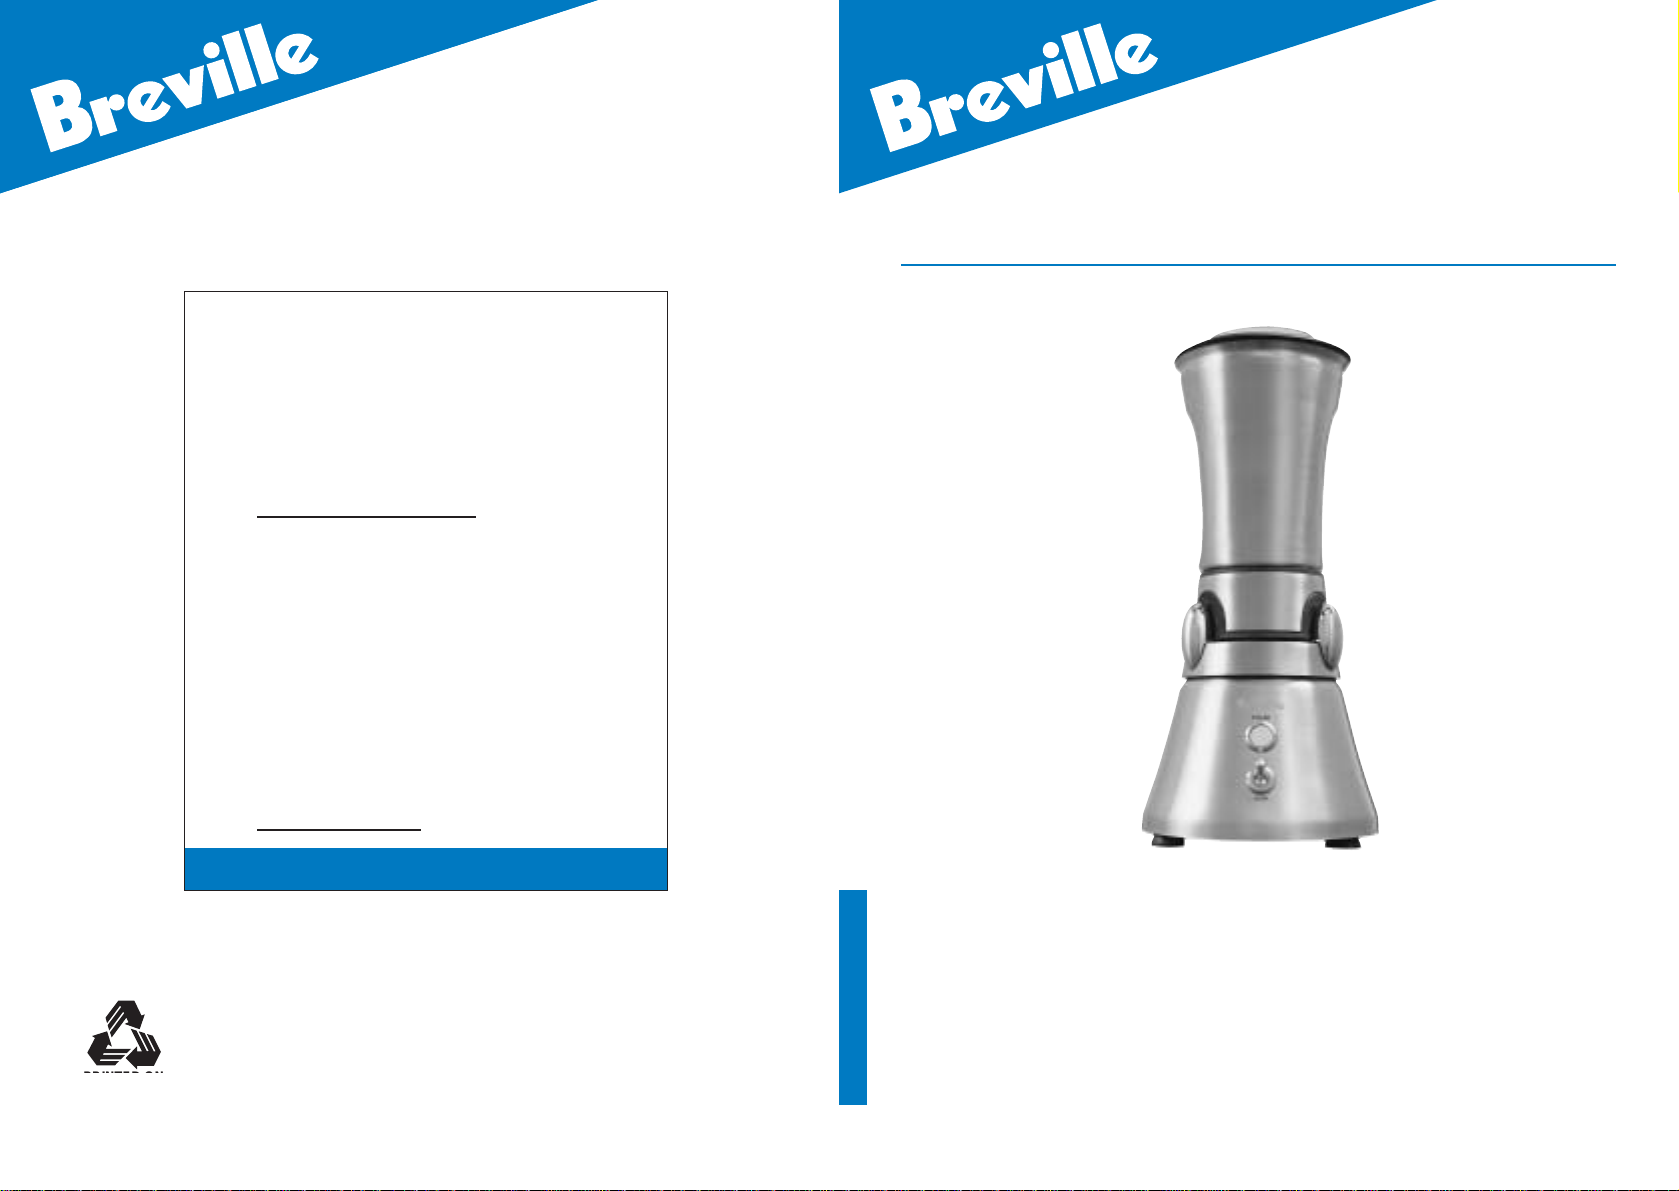
Moda Bar Blender
™
®
®
®
Breville is a registered trademark of Breville Pty. Ltd.
Breville es una marca registrada de Breville Pty. Ltd.
Breville Customer Service
Breville Centro de Servicio al Cliente
US Customers
Para Clientes en Estados Unidos
☎
Email askus@brevilleUSA.com
Canada Customers
Para Clientes en Canada
✉
☎
Fax
Email askus@breville.ca
Centro de Servicio al Cliente: 1 (866) BREVILLE
Anglo Canadian
2555, avenue Aviation
Pointe-Claire (Montréal) Québec
H9P 2Z2
Centro de Servicio al Cliente: 1 (866) BREVILLE
(514) 683-5554
www.breville.com
IMPRESO EN PAPEL
RECICLADO
PRINTED ON
RECYCLED PAPER
Due to continual improvements in design or otherwise,
Este manual esta registrado. Cualquier uso de los gráficos
o fotografías se considera una violación a los derechos de
© Copyright. Breville Pty. Ltd. 2003
the product you purchase may differ slightly from
the one illustrated in this booklet.
© 2003, Breville Pty. Ltd.
Breville Pty. y se actuará conforme a la ley.
Debido a los continuas modificaciones en el diseño
y otros elementos, el producto que aparece en este
follete puede ser ligeramente diferente.
Model CBL30XL
Issue 1/03
PACKAGING CODE - AM
Model CBL30XL
Page 2

CONTENTS
Page
Breville recommends safety first 4
Know your Breville blender 6
Operating your Breville blender 7
Tips on how to use your Breville blender 8
Safety reset switch 9
Care and cleaning 10
A guide to suggested uses for the Breville blender 11
Quantities and handy hints 11
Recipes 12
Warranty 18
Spanish instructions 19
Moda Bar Blender
™
Congratulations
on your purchase of your new Breville Blender
2
Page 3
BREVILLE RECOMMENDS SAFETY FIRST
BREVILLE RECOMMENDS SAFETY FIRST cont’d
We at Breville are very safety conscious. We design and manufacture consumer products with
the safety of you, our valued customer foremost in mind. In addition, we ask that you exercise a
degree of care when using any electrical appliance and adhere to the following precautions:
IMPORTANT SAFEGUARDS
• Read all instructions before operating.
• To protect against electrical shock, do not
immerse cord, plug or blender body in
water or any other liquid.
• Always use the appliance on a dry,
level surface.
• Always switch the appliance to OFF,
and then remove the plug from the outlet
when the appliance is not being used and
before cleaning.
• Avoid contacting moving parts.
• Blades are sharp. Handle carefully.
• To reduce the risk of injury, never place
cutter-assembly blades on the base
without the pitcher properly attached.
• Always operate the blender with the cover
in place.
• The use of attachments, which are not
recommended or sold by the
manufacturer may cause a risk of injury
to persons, fire or electric shock.
• Do not remove blender pitcher from the
motor base while blender is in operation.
• Do not place hands in the pitcher unless the
unit is disconnected from the power outlet.
Disconnect blender from the power outlet
before removing the pitcher from the base.
4
• Keep hands or utensils out of the blender
pitcher while the blender is operating to
reduce the risk of severe injury to persons
or damage to the blender. A plastic or
rubber spatula may be used but only
when the blender is not running and has
been unplugged.
• Do not use this blender for anything other
than food or beverage preparation.
• Do not blend a dry, thick or heavy mixture
for more than 60 seconds without turning
the blender off and then stirring the
ingredients before continuing to blend.
• When blending hot liquids, remove center
piece measuring cup of two-piece pitcher lid.
• Make sure the motor and blade have
completely stopped before disassembling.
• Regularly inspect the supply cord, plug and
actual appliance for any damage.
If found damaged in anyway, immediately
cease use of the appliance and call Breville
Customer Service on 1-866-BREVILLE.
• The appliance is not intended for use
by young children or infirm persons
without supervision.
• Do not leave the appliance unattended
when in use. Young children should be
supervised to ensure that they do not play
with the appliance.
• Do not let the cord hang over the edge of
a table or counter, touch hot surfaces, or
become knotted.
• Do not place this appliance on or near a
hot gas or electric burner, or where it
could touch a heated oven.
• This appliance is for household use only.
Do not use this appliance for anything other
than its intended use. Do not use outdoors.
Your Breville appliance
comes with the unique
“As sist Plug™”,
conveniently designed with
a finger hole in the power
plug, for easy and safe
removal from the outlet.
For safety reasons it is
recommended you plug
your Breville appliance
directly into the power
outlet. DO not use in
conjunction with a power
strip or extension cord.
SAVE THESE INSTRUCTIONS
FOR HOUSEHOLD USE ONLY
IMPORTANT: TO CRUSH ICE
Place 1 cup of ice cubes into the pitcher.
Replace lid and push the PULSE button in
short bursts until a snowy textured ice is
achieved. This will take approximately 15
seconds. When crushing ice, place your
hand on the pitcher lid.
ELECTRIC CORD STATEMENT
Your blender has a short cord as a safety
precaution to prevent personal injury or
property damage resulting from pulling,
tripping or becoming entangled with the
cord. Do not allow children to be near or use
this appliance without close adult
supervision. If you must use a longer cordset
or an extension cord when using the
appliance, the cord must be arranged so it
will not drape or hang over the edge of a
countertop, tabletop or surface area where it
can be pulled on by children or tripped over.
To prevent electric shock, personal injury or
fire, the electrical rating of the extension
cord you use must be the same or more than
the wattage of the appliance (wattage is
marked on the underside of the appliance).
5
Page 4
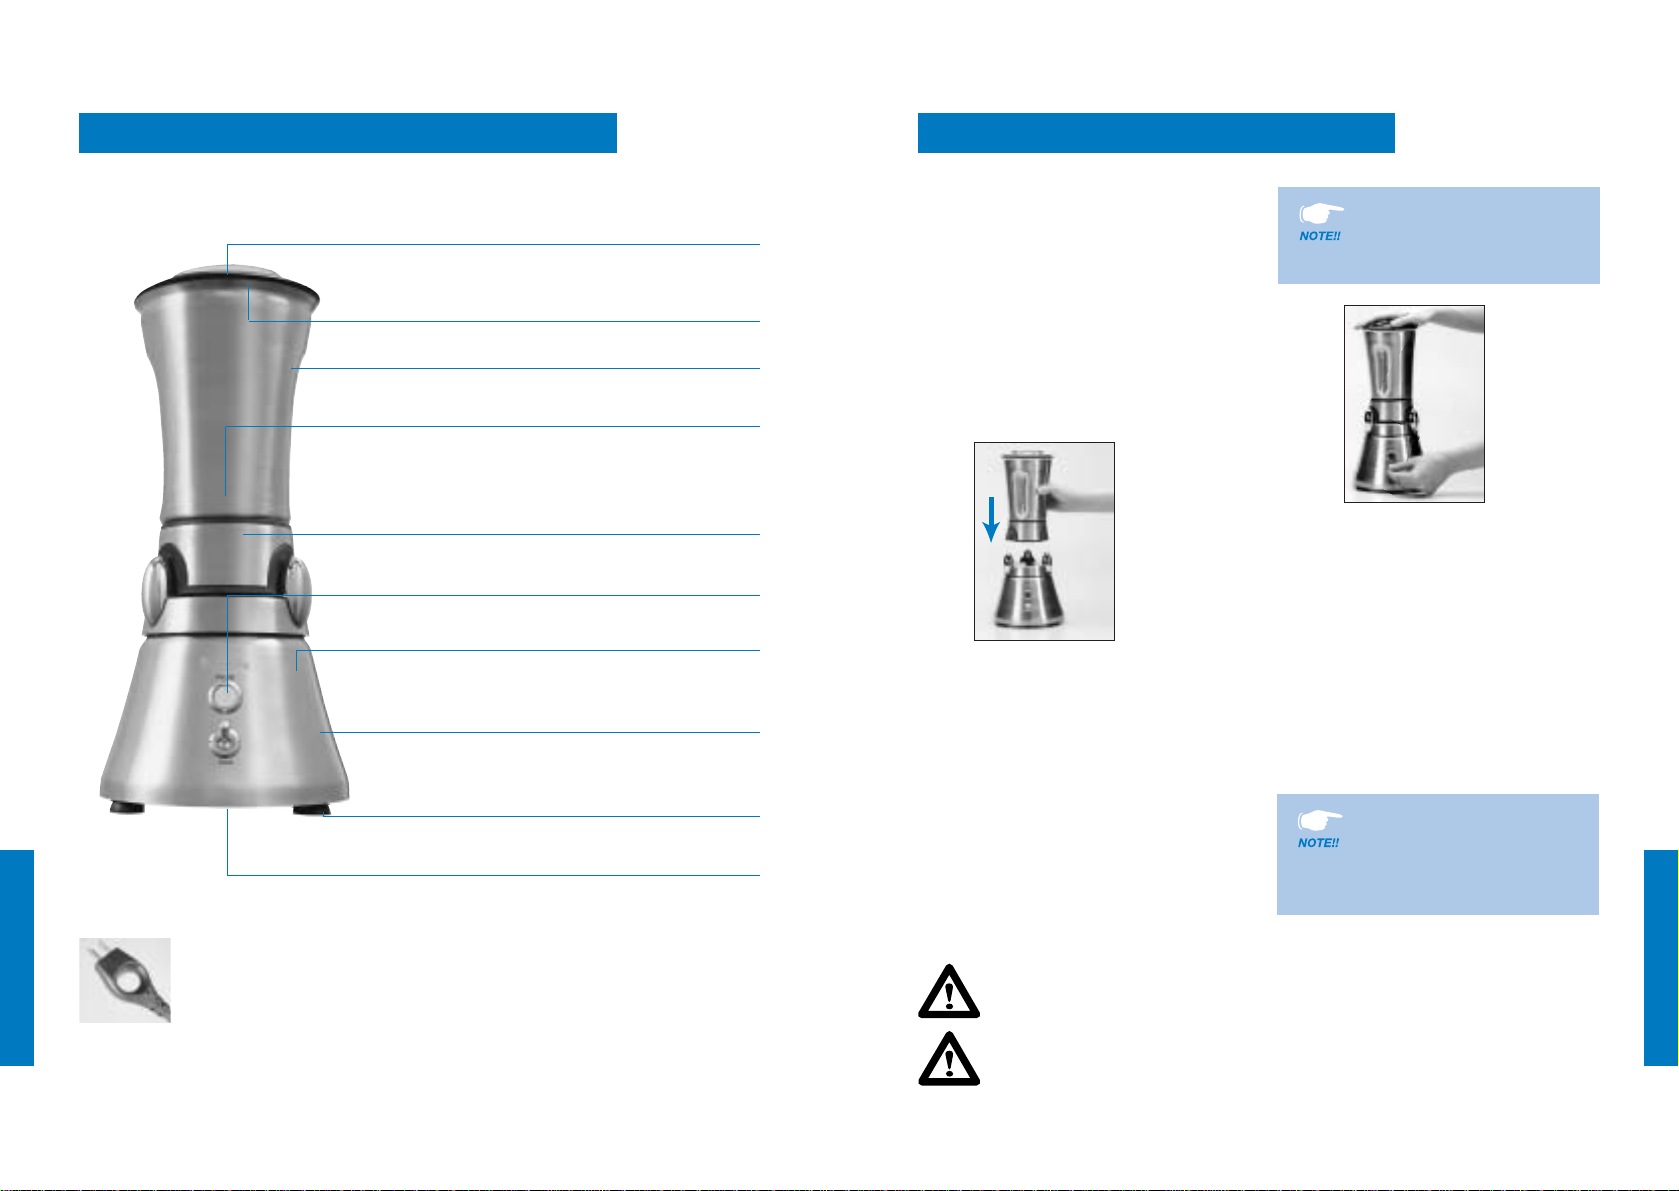
KNOW YOUR BREVILLE BREVILLE BLENDER
OPERATING YOUR BREVILLE BLENDER
Features the unique
Breville Assist Plug™.
Easier to insert, easier
to remove.
Rubber sealed lid
2 fl oz (60ml) removable centrally
located inner lid
1.1 quart (1 liter) stainless steel pitcher
Advanced 4-way stainless steel blade system
Stainless steel blender base
with heavy duty construction for
professional performance
Two speeds plus PULSE
Powerful 500 watt motor
Heavy duty power
cord with ‘Assist Plug™’
Non skid feet for stability
during blending operations
Motor protection button (Reset Switch)
BEFORE FIRST USE
Remove all promotional labels and wash
the blender pitcher in warm, soapy water.
Dry thoroughly.
Step 1.
Place the motor base on a flat, dry surface and
ensure that the blender is unplugged and the
speed control switch is set to the OFF position.
Step 2.
Place pitcher onto the motor base. (See fig 1)
fig 1
Step 3.
Add food or liquid into the pitcher and place the
lid firmly into position on the top of the pitcher.
Step 4.
Then, plug into a 120V power outlet and
switch on.
Step 5.
Set the speed by lifting the speed control
switch to desired setting 1 or 2. The speed
can be changed at any time during the
blending process.
When starting to blend,
firmly hold the blender lid
in place. (See fig 2)
fig 2
For ingredients that require short bursts of
power, push the PULSE button. This is ideal
for crushing ice and processing nuts.
Step 6.
During the blending process, you may find that
ingredients stick to the sides of the blender
pitcher. To push the food back onto the blades,
first switch the unit to the OFF position and
then unplug from the outlet. Use a plastic
spatula to scrape down the sides of the pitcher
before recommencing blending.
If any moisture or liquid
appears on top of the motor
base, wipe immediately
with paper towelling.
NEVER PLACE ANYTHING OTHER THAN FOOD AND LIQUIDS IN THE
BLENDER WHILE THE MOTOR IS RUNNING.
6
Registered design.
7
ALWAYS HOLD THE LID DOWN WHEN STARTING TO BLEND.
Page 5

TIPS ON HOW TO BEST USE YOUR BREVILLE BLENDER
MOTOR PROTECTION BUTTON (RESET BUTTON)
DO
• Speed 1 is best for dressings, marinades
and foods that require mixing until
just combined.
• Speed 2 is best for pureeing or
making cocktails.
• Use PULSE for foods that only require
short bursts of power such as processing
herbs, nuts and small vegetables. The
PULSE setting is recommended for
crushing ice.
• Ensure all parts have been thoroughly
washed and dried before assembly.
• Ensure the blender is correctly assembled
before operating (see page 7).
• Ensure the base of the pitcher is
thoroughly dry before placing onto
blender base.
• Ensure the blender is placed on a clean,
dry surface to operate.
• Liquids should be placed into blender
before solid ingredients, except where
specified in recipes.
• All foods should be cut into cubes
approximately 1"-1
achieve an even result.
• When necessary use a plastic or rubber
spatula to wipe food down the sides of the
pitcher only when blender is in the OFF
position and has been unplugged. Ensure
the blades have stopped rotating. Do not
use metal utensils as they may damage
the blades or pitcher.
• Do hold the lid down when starting to blend.
1
/2" (2-3cm) square to
DON’T
• Do not blend dry, thick or heavy mixture
for more than 60 seconds without turning
off the blender and then stirring the
ingredients, before recommencing blending.
• Do not place any objects, other than food
into the pitcher while the motor is running.
• Do not use the pitcher to store food.
• As air does not circulate when blending,
this appliance will not beat egg whites,
knead dough or mash potatoes.
• Do not remove the pitcher while the
blender is in operation. Always unplug the
appliance before removing the pitcher.
• Overloading the blender with more than
the specified quantity as stated in these
instructions could cause the motor to
stall. Turn the blender OFF, unplug the
appliance and remove a portion of the
mixture before continuing.
The safety reset button has been added to
the blender to preserve the motor life.
The switch will be activated when the
motor becomes too hot, or the load too
heavy. The unit will cease to operate. The
switch located under the motor base will
need to be reset by depressing the red
button; this can only take place after 10
minutes. The motor will need to rest for 10
minutes before blending can resume.
Reset Button
8
9
Page 6

CARE AND CLEANING
SUGGESTED USES FOR YOUR BREVILLE BLENDER
• To clean the blender pitcher, particularly
when a variety of food has been used, half
fill the pitcher with luke warm water and
a small amount of dishwashing soap.
Switch to either of the speed control
buttons (1 or 2) and operate briefly.
Switch the blender OFF; remove the
pitcher from the motor base. Rinse and
dry thoroughly.
• Remove the lid and inner lid and wash in
warm soapy water.
• Switch the blender OFF, then unplug the
unit. Wipe the motor base with a soft,
damp cloth.
Never immerse the motor
base in water or any
other liquid.
Blade does not disassemble
from stainless steel pitcher
for cleaning.
Crush ice:
Place 1 cup of ice cubes into pitcher and blend
using PULSE button until ice is crushed.
Nuts:
Process 3⁄4cup of nuts at a time. Use the PULSE
button as this will give more even results.
Drinks:
Fill the container to at least 1⁄4full,
remember to leave room to allow froth to
form as the drink is aerated.
QUANTITIES AND HANDY HINTS
• Thick mixtures puree more efficiently if
the blender is
• When using several ingredients, place
liquid ingredients in the pitcher first.
• When blending thick mixtures it may be
necessary to stop the blender and scrape
down the sides of the pitcher, once or
twice during blending.
• Your blender is not designed to
process meat or extract juice from fruit
and vegetables.
1
⁄4to 1⁄2full.
10
11
Page 7

COCKTAILS
COCKTAILS cont’d
SUGAR SYRUP
Place 1 cup of white sugar and 1 cup of
water into a saucepan and bring to the boil.
Place the syrup into a screw top jar and
refrigerate until required. This is also called
simple syrup, it is used to sweeten drinks
and provide a liquid to help blending.
MARGARITA
2 fl oz (60ml) Tequila
2 fl oz (60ml) Cointreau
2 1/2fl oz (80ml) lime juice
12 ice cubes
1. Place Tequila, Cointreau, lime juice and
ice cubes into pitcher.
2. Using speed 2, blend until well combined
and ice is crushed.
Serve in salt rimmed glasses.
DAIQUIRIS
Assorted types of fruit (approximately 1 cup)
4 fl oz (120ml) white spirits (white rum,
vodka or kirsch or fruit liqueur, a
combination can also be used)
2 fl oz (60ml) sugar syrup
1 cup ice cubes
1. Place all ingredients into the pitcher and
puree using speed 2.
Most fresh fruit and berries can be used, if
using frozen fruit defrost first. Any fruit with
hard skin or pits must have them removed
before pureeing. Large fruit must be diced
first.
WATERMELON AND
VODKA SLUSHIE
2 cups water melon diced
2 fl oz (60ml) vodka
1 cup ice cubes
1. Place all ingredients into the blender,
combine using high speed until thick.
Serve in parfait glasses with drizzle of
fresh lime juice.
PEAR AND VODKA FRAPPÉ
1 cup diced green pear, skin on
1 cup ice cubes
2 fl oz (60ml) vodka
1. Place all ingredients into the blender.
2. Blend using speed 1 until combined.
Serve in martini glasses.
BLOODY MARY FREEZER
1 cup tomato juice
2 fl oz (60ml) vodka
2 fl oz (60ml) lemon juice
1 egg white
salt and pepper
1
⁄4teaspoon Tabasco sauce
1
⁄4teaspoon Worcestershire sauce
1 cup ice cubes
celery leaves
1. Place tomato juice, vodka, lemon juice,
egg white, salt, pepper, Tabasco sauce,
Worcestershire sauce and ice cubes
into pitcher.
2. Blend on speed 2, until well combined
and ice is crushed.
Serve garnished with celery leaves.
12
13
Page 8

OLD FAVOURITES
NON-ALCOHOLIC DRINKS
14
FLUFFY DUCK
1 fl oz (30ml) white rum
1 fl oz (30ml) advocaat
2 fl oz (60ml) orange juice
1 fl oz (30ml) cream
6 ice cubes
1. Place rum, advocaat, orange juice, cream
and ice cubes into pitcher.
2. Using speed 2, blend until well combined
and ice is crushed.
BRANDY ALEXANDER
4 fl oz (120ml) brandy
4 fl oz (120ml) crème de cocoa
2 scoops ice cream
ground nutmeg
1. Place all ingredients into the pitcher.
2. Blend on speed 2 until the ingredients
are mixed together.
Serve in martini glasses dusted
with nutmeg.
PINA COLADA
4 fl oz (120ml) pineapple juice
2 fl oz (60ml) coconut cream
2 fl oz (60ml) dark rum
1
⁄2cup ice cubes
1. Place all ingredients into the pitcher.
2. Blend on speed 2 until the ingredients
are mixed together.
Serve garnished with pineapple leaves.
MELON DREAM
1 fl oz (30ml) Triple Sec
1 fl oz (30ml) Galliano
1 fl oz (30ml) cream
1 fl oz (30ml) orange juice
1 cup chopped cantaloupe
1 cup ice cubes
1. Place Triple Sec, Galliano, cream,
orange juice, cantaloupe and ice cubes
into pitcher.
2. Using speed 2, blend until well combined
and ice is crushed.
FRUIT COCKTAIL
8 fl oz (240ml) pineapple juice
1 banana, peeled and chopped
1 orange, skin and pith removed then
quartered
8 flo oz (240ml) soda water
2 tablespoons passion fruit pulp
1. Place pineapple juice, banana, and
orange into pitcher. Blend on speed 2,
until well combined.
Stir in passion fruit pulp and soda water
and serve.
CRANBERRY CRUSHER
1 cup peeled and chopped pink grapefruit
4 fl oz (120ml) orange juice
4 fl oz (120ml) cranberry juice
1 tablespoon superfine sugar
8 fl oz (240ml) ginger ale
1. Place grapefruit, orange juice, cranberry
juice, sugar into blender jug.
2. Blend on high speed, until well combined.
Pour over ginger ale to serve.
CANTALOUPE AND
PINEAPPLE FRAPPÉ
1 cup chopped cantaloupe
1 cup canned pineapple pieces
1 cup ice cubes
mint leaves to serve
1. Place all ingredients into the pitcher.
2. Blend on speed 2until all ingredients are
crushed and thick.
Serve with chopped mint leaves.
PEAR AND LEMON FRAPPÉ
1 cup canned pear slices
1 cup ice cubes
1 tablespoon lemon juice
1. Place all ingredients into the pitcher.
2. Blend on speed 2 until all ingredients are
crushed and thick.
PINEAPPLE COCONUT
CREAM COOLER
8 fl oz (240ml) pineapple juice
1
⁄2cup coconut cream
1
⁄2cup ice cubes
1. Place pineapple juice, coconut cream and
ice into pitcher.
2. Blend on speed 2, until well combined.
LIME CRUSH
2 fl oz (60ml) fresh lime juice
1 tablespoon superfine sugar
8 fl oz (240ml) soda water
1 cup ice cubes
1 lime, thinly sliced
1. Place lime juice, sugar, soda water and
ice into pitcher.
2. Blend on speed 2 until well combined.
Serve with lime slices.
15
Page 9

SMOOTHIES AND MILKSHAKES
SMOOTHIES AND MILKSHAKES cont’d
MANGO SMOOTHIE
1 mango, peeled and sliced
3
⁄4cup plain yogurt
4 fl oz (120ml) orange juice
1. Place mango, yogurt and orange juice
into pitcher.
2. Blend on speed 2 until smooth.
Serve immediately.
STRAWBERRY SMOOTHIE
5 oz (150g) strawberries
8 fl oz (240ml) milk
2 scoops vanilla ice cream
strawberry topping to serve
1. Place the strawberries, milk and ice
cream into the pitcher.
2. Blend on speed 2 until smooth
and combined.
Serve with strawberry topping drizzled over.
BANANA SMOOTHIE
1 banana, peeled and chopped
1
⁄2cup plain yogurt
4 fl oz (120ml) milk
1 tablespoon honey
1. Place banana, yogurt, milk and honey
into pitcher.
2. Blend on speed 2, until well combined.
Serve immediately.
BANANA, SOY AND
PEANUT SMOOTHIE
1 banana, peeled and chopped
8 fl oz (240ml) soy milk
1 tablespoon smooth peanut butter
1
⁄3cup plain yogurt
1. Place banana, milk, peanut butter and
yogurt into pitcher.
2. Blend on speed 2, until well combined.
Serve immediately.
CHOCOLATE MILKSHAKE
8 fl oz (240ml) milk
2 scoops chocolate ice cream
1 tablespoon chocolate syrup
2 teaspoons honey (optional)
1. Place all ingredients into the pitcher.
2. Blend on speed 2 until combined.
Serve immediately.
POWER SHAKE
2 tablespoons cocoa powder
1 teaspoon instant coffee
1 fl oz (30ml) boiling water
2 tablespoons sugar
1 egg
1 tablespoon wheat germ
8 fl oz (240ml) cold milk
1. Dissolve cocoa and coffee in
boiling water.
2. Combine with sugar, egg, wheat germ,
and milk.
3. Pour into pitcher. Blend on speed 2 until
smooth and frothy.
Serve immediately.
16
17
Page 10

MANUAL DE INSTRUCCIONES
Y RECETARIO
Diseñada comercialmente para obtener resultados profesionales
Moda Bar Blender
™
®
ONE YEAR LIMITED WARRANTY
Breville®* warrants this Breville® appliance
against defects that are due to faulty
material or workmanship for a period of one
(1) year from the date of original consumer
purchase. This warranty does not cover
damage from abuse, neglect, use for
commercial purposes, or any other use not
found in the printed “Instructions for use”
booklet. There is no warranty for glass parts,
glass containers, filter basket, blades and
agitators. HWI Breville® expressly disclaim
all responsibility for consequential damages
for incidental losses caused by use of this
appliance. Some states or provinces do not
allow this exclusion or limitation for
incidental or consequential losses, so the
foregoing disclaimer may not apply to you.
ANY WARRANTY OF MERCHANTABILITY OR
FITNESS WITH RESPECT TO THIS PRODUCT
IS ALSO LIMITED TO THE ONE YEAR
LIMITED WARRANTY PERIOD. Some states
or provinces do not allow disclaimer of the
implied warranty with respect to consumer
goods, so the foregoing disclaimer may not
apply to you.
This warranty gives you specific legal rights
and you may also have other legal rights
which vary from state to state or province
to province.
If the appliance should become defective
within the warranty period, do not return the
appliance to the store. Please contact our
Customer Service Center.
Toll free phone number:
1-866-BREVILLE (1-866-273-8455)
Internet email:
AskUs@BrevilleUSA.com
AskUs@Breville.ca (in Canada)
*HWI Breville® products are distributed in
Canada by Anglo Canadian Housewares,
L.P. and in USA by Metro/Thebe Inc.
18
Modelo CBL30XL
Page 11

CONTENIDO
Página
Recomendaciones Básicas de Seguridad 22
Componentes y Características 24
Modo de Empleo 25
Sugerencias en el Modo de Empleo 26
Interruptor de Seguridad 27
Cuidado y Limpieza 28
Guía de Sugerencias para uso de su Licuadora 29
Cantidades y Sugerencias Prácticas 29
Recetas 30
Garantia 36
Moda Bar Blender
™
F elicidades
en la compra de su Licuadora nueva Breville
20
Page 12

RECOMENDACIONES BASICAS DE SEGURIDAD
RECOMENDACIONES BASICAS DE SEGURIDAD cont
22
En Breville estamos conscientes de la importancia en la seguridad. Diseñamos y fabricamos
productos para la seguridad del consumidor, teniendo en mente a nuestros valiosos clientes
que son ustedes. Además le pedimos, que por favor tenga cuidado al usar cualquier
electrodoméstico y tome en cuenta las siguientes recomendaciones:
IMPORTANTES MEDIDAS
DE SEGURIDAD
• Lea todas las instrucciones antes de usar
la licuadora.
• Para protegerse de una descarga
eléctrica, nunca sumerja el cordón, el
enchufe o la base del motor en agua u
otro liquído.
• Siempre utilice la licuadora en una
superficie seca y nivelada.
• Siempre apague (OFF) su licuadora,
desconectela cuando no la este usando y
antes de limpiarla.
• No permita el contacto con las partes
en movimiento.
• Las cuchillas estan filosas. Tenga cuidado
al usarlas.
• Para reducir el riesgo de lesión, nunca
coloque las cuchillas en la base sin armar
bien la jarra.
• Siempre utilice la licuadora con la
tapadera puesta.
• El uso de accesorios, que no son
recomendados o vendidos por el fabricante
pueden causar riesgo de lesiones a las
personas, fuego o descarga eléctrica.
• No quite la jarra de la base del motor
mientras este funcionando.
• No ponga las manos en la jarra de la
licuadora a menos que este
desconectada. Desconecte la licuadora y
retire la jarra de la base.
• Mantenga sus manos y utensilios fuera de
la jarra mientras este licuando para reducir
el riesgo severo de lesiones a las personas
o se dañe la licuadora. Una espátula de
plástico o goma se puede utilizar
únicamente cuando la licuadora no este
funcionando o se encuentre desconectada.
• No use la licuadora más que para la
preparación de comidas o bebidas.
• No licue mezclas secas o espesas por
más de 60 segundos sin apagar la
licuadora y revolver los ingredientes antes
de seguir licuando.
• Al licuar líquidos calientes, remueva la
taza de medir del centro de la tapadera
de la jarra.
• Asegúrese de que el motor y las cuchillas
no esten funcionando antes de desarmar.
• Revise regularmente el cable eléctrico y la
licuadora para verificar si tienen algún
daño. Si encuentra cualquier anomalía, no
la use más y llame al Centro de Servicio al
Cliente Breville al 1-866-BREVILLE.
• Esta licuadora no debe ser usada por
niños, o personas no aptas sin supervisión.
• No deje la licuadora funcionando sin
supervisión. Se deberá cuidar a los niños
para que no jueguen con la licuadora.
• No permita que el cable cuelgue, se
tuerza, o toque superficies calientes.
• La licuadora no deberá estar cerca de la
estufa de gas o eléctrica, o en contacto
con un horno caliente.
• Esta licuadora es para uso doméstico
solamente. No la utilice para otro uso que
no sea para el que esta diseñada. No la
use en el exterior.
Su Licuadora Breville viene
NOTA!!
con un sistema único de
Enchufe (Assist Plug™),
diseñado convenientemente,
con un hueco que permite al
dedo apalancarse para
desconectar fácilmente, y
con mayor seguridad la
licuadora. Por razones de
seguridad conecte su
licuadora directamente a la
pared, no la conecte a
ningúna extensión.
IMPORTANTE:
PARA TRITURAR HIELO
Vierta una taza de hielo en cubos en la jarra
de la licuadora: Ponga la tapa y presione el
botón ‘PULSE’ en intervalos cortos de
tiempo hasta que el hielo adquiera la textura
de nieve. Esto le tomará aproximadamente
15 segundos. Cuando este triturando el
hielo, ponga su mano en la tapa de la jarra.
INFORMACIÓN DEL
CABLE ELÉCTRICO
Su licuadora tiene un cable corto como
medida de precaución para prevenir lesiones
o daño a la propiedad al jalar, tropezar o
enredarse con el cable. No permita que los
niños se acerquen o utilicen la licuadora sin
supervisión adecuada. Si necesita un cable o
una extensión más grande, el cable deberá
arreglarse de manera que no cuelgue de la
superficie donde se utilizará para que no se
tropiezen los niños. Para prevenir descarga
eléctrica, lesión, o fuego, la extensión
deberá ser del mismo voltaje del aparato (el
voltaje se encuentra marcado en la parte de
abajo del aparato).
GUARDE ESTAS INSTRUCCIONES
PARA USO DOMESTICO SOLAMENTE
23
Page 13

COMPONENTES Y CARACTERISTICASBREVILLE
MODO DE EMPLEO
Presentando el nuevo enchufé
Breville Assist Plug™.
Más fácil de conectar,
fácil de desconectar.
Tap a de goma sellada
Tapa interior removible de 2 onzas (60ml),
localizada en el centro
Jarra de acero inoxidable de
1.1 cuarto (1 litro)
Sistema avanzado de cuchillas de acero
inoxidable de 4 direcciones
Base de acero inoxidable pulido con
construcción de alta duración para una
ejecución professional
Dos velocidades más PULSO
Motor potente de 500 vatios
Cable resistente con sistema único de
conexión ‘Assist Plug™’
Base anti-deslizante para mayor estabilidad.
Botón de protección para el motor
(interruptor de reinicio)
ANTES DE USAR LA
LICUADORA POR PRIMERA VEZ
Remueva todas las etiquetas promocionales
y lave la jarra en agua tibia y jabonosa.
Sequela completamente.
Paso 1.
Coloque el motor en una superficie nivelada
y seca, asegúrese de que la licuadora este
desconectada y el botón de control este
apagado (OFF).
Paso 2.
Coloque la jarra en la base del motor.
(ilustración 1)
ilustración 1
Paso 3.
Agregue comida o líquido a la jarra de la
licuadora, y apriete firmemente la tapadera.
Paso 4.
Después, conecte la licuadora si el voltaje es
120 voltios y enciendala (ON).
Paso 5.
Seleccione la velocidad al levantar el control
de velocidades deseado a 1 o 2. La velocidad
puede cambiarse en cualquier momento
mientras usted usa su licuadora.
Al momento de estar
NOTA!!
Para ingredientes que requieren la velocidad
de intervalos cortos, pulse el botón ‘PULSE’.
Este ciclo es ideal para triturar hielo y nueces.
Paso 6.
Mientras este licuando, puede encontrar
ingredientes que se pegan a los lados de la
jarra. Para despegar la comida y enviarla a
las cuchillas, apague la licuadora ‘OFF’ y
desconectela. Utilice una espátula de
plástico y talle a los lados de la jarra antes
de empezar a licuar nuevamente.
NOTA!!
usando su licuadora,
apriete firmemente
la tapadera. (ilustración 2)
ilustración 2
Si llegará aparecer
humedad en la base del
motor, limpie
inmediatamente con una
servilleta de papel.
24
Diseño registrado.
SIEMPRE SUJETE LA TAPADERA CUANDO USE LA LICUADORA!
25
NUNCA COLOQUE NADA QUE NO SEA COMIDA Y LIQUIDOS EN LA
LICUADORA MIENTRAS ESTE FUNCIONANDO EL MOTOR!
Page 14

SUGERENCIAS EN EL MODO DE EMPLEO
INTERRUPTOR DE SEGURIDAD PARA EL MOTOR
26
QUE DEBE HACER
• La velocidad 1 es mejor para los
aderezos, marinadas y comidas que
requieren mezclarse, como batidos.
• La velocidad 2 es para purés o cócteles.
• Use el PULSO (PULSE) para comidas que
requieren un ciclo corto como el procesar
hierbas, nueces y vegetales pequeños. La
velocidad PULSO (PULSE) se recomienda
para triturar hielo.
• Asegúrese que todas las partes esten
completamente limpias antes de armarlas.
• Asegúrese de que la licuadora este
correctamente armada antes de usarla.
(Ver página 25).
• Asegúrese de que la jarra de la licuadora
este completamente seca antes de
colocarla en la base del motor.
• Asegúrese de que la licuadora este en
una superficie limpia, seca y nivelada
antes de usarla.
• Los líquidos deberán colocarse en la
licuadora antes que los ingredientes
sólidos, excepto cuando se especifíque en
las recetas.
• Toda la comida deberá cortarse en cubos
de aproximadamente 1"-11/2" (2-3cm)
para obtener resultados uniformes.
• Cuando sea necesario, use una espátula
de plástico para raspar las paredes de la
jarra de comida, solamente cuando la
licuadora este apagada (OFF) y
desconectada. Asegúrese de que las
cuchillas ya no estan rotando. No utilice
utensilios de metal ya que estos podrían
dañar las cuchillas o la jarra.
• Sujeta la tapadera cuando use
la licuadora.
LO QUE NO DEBE HACER
• No licue mezclas gruesas o espesas por
más de 60 segundos sin apagar la
licuadora. Remueva los ingredientes, y
siga licuando.
• No introduzca a la jarra de la licuadora
ningún objeto que no sea comida,
mientras este licuando.
• No utilice la jarra para guardar comida.
• Cuando se está licuando el aire no
circula, así que usted no podrá licuar
claras de huevo, masas o puré de papas.
• Nunca quite la jarra cuando este
licuando. Siempre desconecte la
licuadora antes de quitar la jarra.
• Sobrecargar la licuadora con cantidades
más de lo específicado en las
instrucciones, ocasionará que el motor no
trabaje. Apague la licuadora (OFF)
desconectela, y saque parte de la mezcla
antes de continuar.
El botón de seguridad se añadio a la
licuadora para conservar la vida del motor.
El interruptor se activará cuando el motor
este muy caliente, o este sobrecargado.
El motor no trabajará. El interruptor está
en la parte de abajo del motor y se puede
reconectar al presionar el botón rojo.
El motor deberá descansar 10 minutos y
luego volverá a funcionar.
Interruptor
de reinicio
27
Page 15

CUIDADO Y LIMPIEZA
GUÍA DE SUGERENCIAS
• Para limpiar la jarra, particularmente
cuando se ha usado variedad de comida,
llene la jarra hasta la mitad con agua tibia
y una pequeña porción de jabón. Presione
los botones de velocidad (1 o 2) y licue
brevemente. Apague la licuadora (OFF),
quite la jarra de la base del motor.
Enjuague y seque completamente.
• Quite la tapadera y la tapa interior y
lavelas en agua tibia y jabonosa.
• Apague la licuadora (OFF), luego
desconecte. Limpie la base del motor con
una toalla ligeramente húmeda y suave.
Nunca sumerja la base del
NOTA!!
NOTA!!
motor en agua o cualquier
otro líquido.
Las cuchillas no se
desarman de la jarra
de acero inoxidable
para limpiar.
Hielo triturado:
Vierta 1 taza de hielo en cubos en la jarra y
licue con la velocidad Pulso (PULSE) hasta
que el hielo este triturado.
Nueces:
Licue3⁄4de taza de nuez a la vez. Utilice la
velocidad Pulso (PULSE) ya que le dara
resultados uniformes.
Bebidas:
Llene la jarra hasta 1⁄4, recuerde que es
necesario dejar espacio para la espuma que
produce la bebida al ser licuada.
CANTIDADES Y
SUGERENCIAS PRÁCTICAS
• Las mezclas espesas se licuan mejor si la
licuadora se llena de 1⁄4a 1⁄2.
• Al usar varios ingredientes, vierta los
líquidos en la jarra primero.
• Al licuar mezclas espesas será necesario
apagar la licuadora y raspar las paredes
de la jarra hacia abajo una o dos veces
mientras este licuando.
• Su licuadora no esta diseñada para
procesar carne o extraer jugo de fruta
y vegetales.
28
29
Page 16

CÓCTELES
CÓCTELES cont
SIROPE DE AZÚCAR
Vierta una taza de azúcar blanca y 1 taza de
agua en un sartén a hervir. Vierta el azúcar
en un recipiente con rosca y refrigérelo
hasta que lo necesite. Está mezcla es
simplemente sirope. Es para endulzar
bebidas y líquido para licuar.
MARGARITA
2 onzas (60ml) de Tequila
2 onzas (60ml) de Cointreau
1
2
/2onzas (80ml) de jugo de lima
12 cubos de hielo
1. Vierta el Tequila, Cointreau, el jugo de
lima y los cubos de hielo en la jarra de
la licuadora.
2. Seleccione la velocidad alta, licue hasta
que los ingredientes se mezclen bien y el
hielo este triturado.
Sirva en vasos con sal en el borde.
DAIQUIRIS
Variedad de frutas (aproximadamente 1 taza)
4 onzas (120ml) de licores blancos (ron
blanco, vodka, kirsch o licor de frutas, se
pueden utilizar en la combinación)
2 onzas (60ml) sirope de azúcar
1 taza de hielo en cubos
1. Vierta todos los ingredientes en la jarra y
licue en velocidad 2.
Se puede usar frutas frescas y variedad de
cerezas o fresas, si usa fruta congelada,
descongele primero. Debe quitar la cascara o
quitar las semillas de cualquier fruta. Las
frutas grandes deberán ser cortadas en trozos.
SLUSHIE (RASPA) DE
SANDIA Y VODKA
2 tazas de sandía en trozos
2 onzas (60ml) de vodka
1 taza de hielo en cubos
1. Vierta todos los ingredientes en la
licuadora, licue en velocidad alta hasta
que la mezcla espese.
Sirva en vasos de parfait y rocíe con jugo
fresco de lima.
FRAPPÉ DE PERA Y VODKA
1 taza de pera verde cortada en cubos, no
quite la cascara
1 taza de hielo en cubos
2 onzas (60ml) de vodka
1. Vierta todos los ingredientes en
la licuadora.
2. Licue en velocidad 1, hasta que este lista
la mezcla.
Sirva en vasos de martini.
BLOODY MARY CONGELADO
1 taza de jugo de tomate
2 onzas (60ml) de vodka
2 onzas (60ml) de jugo de limón.
1 huevo
sal y pimienta
1
⁄4cucharadita de salsa Tabasco
1
⁄4cucharadita de salsa Worcestershire
1 taza de hielo en cubos
hojas de apio
1. Vierta el jugo de tomate, vodka, jugo de
limón, huevo, sal, pimienta, salsa
Tabasco, salsa Worcestershire y hielo en
la jarra.
2. Licue en velocidad 2, hasta que este lista
la mezcla y el hielo triturado.
Sirvalo adornado con hojas de apio.
30
31
Page 17

FAVORITOS DE SIEMPRE
BEBIDAS SIN ALCOHOL
32
FLUFFY DUCK
1 onza (30ml) de ron blanco
1 onza (30ml)de advocaat
2 onzas (60ml) de jugo de naranja
1 onza (30ml) de crema
6 cubos de hielo
1. Vierta el ron, advocaat, jugo de naranja,
la crema y los cubos de hielo en la jarra.
2. Licue en velocidad 2, hasta que la mezcla
este lista y el hielo triturado.
BRANDY ALEXANDER
4 onzas (120ml) de brandy
4 onzas (120ml) de crema de coco
2 bolas de nieve
Nuez moscada molida
1. Vierta todos los ingredientes en la jarra.
2. Licue en velocidad 2 hasta que los
ingredientes se mezclen.
Sirva en vasos de martini y espolvoree con
la nuez.
PIÑA COLADA
4 onzas (120ml) de jugo de piña
2 onzas (60ml) de crema de coco
2 onzas (60ml) de ron obscuro
1
⁄2taza de cubos de hielo
1. Vierta todos los ingredientes en la jarra.
2. Licue a velocidad 2, hasta que los
ingredientes se mezclen.
Sirva adornando con hojas de piña.
SUEÑO DE MELÓN
(MELON DREAM)
1 onza (30ml)de Triple Sec
1 onza (30ml) de Galliano
1 onza (30ml) de crema
1 onza (30ml) de jugo de naranja
1 taza de melón en trozos
1 taza de cubos de hielo
1. Vierta el Triple Sec, Galliano, la crema,
el jugo de naranja, el melón y los cubos
de hielo en la jarra.
2. Licue a velocidad 2, hasta que la mezcla
este lista y el hielo triturado.
CÓCTEL DE FRUTAS
8 onzas (240ml) de jugo de piña
1 plátano, sin cascara y en trozos
1 naranja en cuatro pedazos, sin cascara
y semillas
8 onzas (240ml) de agua gaseosa
2 cucharaditas de pulpa de frutas de la
pasión (passion fruit)
1. Vierta el jugo de piña, plátano y la
naranja en la jarra. Licue a velocidad 2,
hasta que la mezcla este lista.
Sirva con jugo de frutas de la pasión y agua.
BEBIDA DE ARÁNDANOS
(CRANBERRY CRUSHER)
1 taza de toronja sin cascara y en trozo
4 onzas (120ml) de jugo de naranja
4 onzas (120ml) de jugo de arándanos
1 cucharada de azúcar super fina
8 onzas (240ml) de cerveza de jengibre
1. Vierta la toronja, el jugo de naranja, el
jugo de arándanos y azúcar en la jarra.
2. Licue a velocidad 2, hasta que la mezcla
este lista.
Vierta la mezcla en la cerveza de jengibre
y sirva.
FRAPPÉ DE PIÑA Y MELÓN
1 taza de melón en trozos
1 taza de piña de lata en trozos
1 taza de hielo en cubos
hojas de menta para decorar
1. Vierta todos los ingredientes en la jarra.
2. Licue a velocidad 2 hasta que los
ingredientes esten triturados y la
mezcla espesa.
Sirva con hojas de menta.
FRAPPÉ DE LIMÓN CON PERA
1 taza de pera de lata en rebanadas
1 taza de hielo en cubos
1 cucharada de jugo de limón
1. Vierta todos los ingredientes en la jarra.
2. Licue a velocidad 2 hasta que los
ingredientes esten triturados y la
mezcla espesa.
BEBIDA HELADA CREMOSA DE
PIÑA Y COCO
8 onzas (240ml) de jugo de piña
1
⁄2taza de crema de coco
1
⁄2taza de hielo en cubos
1. Vierta el jugo de piña, la crema de coco y
el hielo en la jarra.
2. Licue a velocidad 2, hasta que este lista
la mezcla.
BEBIDA DE LIMA
(LIME CRUSH)
2 onzas (60ml) de jugo fresco de lima
1 cucharada de azúcar super fina
8 onzas (240ml) de agua gaseosa
1 taza de hielo en cubos
1 lima, en rebanada delgadas
1. Vierta el jugo de lima, azúcar, agua, y
hielo en la jarra.
2. Licue a velocidad 2, hasta que este lista
la mezcla.
Sirva con las rebanadas de lima.
33
Page 18

LICUADOS Y MALTEADAS
LICUADOS Y MALTEADAS cont
MALTEADA DE MANGO
1 mango, en rebanadas y sin cascara
3
⁄4taza de yogurt natural
4 onzas de jugo de naranja
1. Vierta el mango, el yogurt y el jugo de
naranja en la jarra.
2. Licue a velocidad 2, hasta que
este consistente.
Sirva inmediatamente.
MALTEADA DE FRESA
5 onzas (150g) de fresas
8 onzas (240ml) de leche
2 bolas de nieve de vainilla
fresas para decorar al servir
1. Vierta las fresas, la leche y la nieve en
la jarra.
2. Licue a velocidad 2 hasta que este lista
la mezcla.
Sirva y decore con fresas.
MALTEADA DE PLÁTANO
1 plátano, sin cascara y en trozos
1
/2taza de yogurt natural
4 onzas (120ml) de leche
1 cucharada de miel
1. Vierta el plátano, el yogurt, la leche y la
miel en la jarra.
2. Licue a velocidad 2, hasta que este lista
la mezcla.
Sirva inmediatamente.
LICUADO DE SOYA,
PLÁTANO Y CACAHUATE
1 plátano, sin cascara y en trozos
8 onzas (240ml) de leche de soya
1 cucharada de mantequilla de cacahuate
1
/3de taza de yogurt natural
1. Vierta el plátano, la leche, la mantequilla
de cacahuate y el yogurt en la jarra.
2. Licue a velocidad 2, hasta que este lista
la mezcla.
Sirva inmediatamente.
MALTEADA DE CHOCOLATE
8 onzas (240ml) leche
2 bolas de nieve de chocholate
1 cucharada de sirope de chocolate
2 cucharaditas de miel (opcional)
1. Vierta todos los ingredientes en la jarra.
2. Licue a velocidad 2, hasta que este lista
la mezcla.
Sirva inmediatamente.
LICUADO ENERGÉTICO
2 cucharadas de polvo de cocoa
1 cucharadita de café instantáneo
1 onza (30ml) de agua hirviendo
2 cucharadas de azúcar
1 huevo
1 cucharada de germen de trigo
8 onzas (240ml) de leche fría
1. Disuelva la cocoa y el café en
agua hirviendo.
2. Agregue el azúcar, el huevo, el germen
de trigo y la leche.
3. Vierta todo en la jarra. Licue a velocidad
2, hasta obtener una mezcla suave
y espumosa.
Sirva inmediatamente.
34
35
Page 19

SERVICIO AL CLIENTE UN AÑO DE GARANTIA LIMITADA
NOTA
HWI/Breville® le garantizá que esté
producto se encuentrá libre de cualquier
defecto en el material y mano de obra por
un período de (1) año a partir de la compra
original, excepto como se hace notar. No hay
garantía con respecto a lo siguiente, que se
puede adquirir con esté aparato: partes de
cristal, recipientes de cristal, filtros de
canasta, cuchillas y/o agitadores. Está
garantía se extiende solamente al
comprador original y no cubre los siguientes
daños, por abuso negligencia, uso comercial,
y cualquier otro uso que no se encuentre en
las instrucciones. HWI/Metro-Thebe, INC.
NO TIENE RESPONSABILIDAD POR EL USO
INDEBIDO O ACCIDENTES CAUSADOS POR
ESTE APARATO. Algunos estados o
provincias no permiten está exclusión o
limitación de incidentes o consecuencias de
perdidas, así que está explicación no aplica.
Si usted tiene alguna queja bajo esta
garantía, NO REGRESE ESTE APARATO A LA
TIENDA!! Por favor hable al SERVICIO AL
CLIENTE (Para un servicio más rápido tenga
a la mano el modelo y número de serie al
hablar con la operadora.)
NUMERO DE SERVICIO AL CLIENTE
1-866-BREVILLE (1-866-273-8455)
GUARDE ESTE NUMERO PARA
REFERENCIAS FUTURAS!!!
Está garantía le da derechos especifícos
legales, y usted podrá tener algunos
otros derechos que varían del estado o
provincia en que usted vive.
_ _ _ _ _ _ _ _ _ _ _ _ _ _ _ _ _ _ _ _ _ _ _ _ _ _ _ _ _ _ _ _ _ _ _ _ _ _ _ _ _ _ _ _ _ _ _ _ _ _ _ _ _ _ _ _ _ _ _ _ _ _ _ _ _ _ _ _ _ _ _ _ _ _ _ _ _ _ _ _ _ _ _ _ _ _ _ _ _ _ _ _ _ _ _ _ _ _ _ _ _
_ _ _ _ _ _ _ _ _ _ _ _ _ _ _ _ _ _ _ _ _ _ _ _ _ _ _ _ _ _ _ _ _ _ _ _ _ _ _ _ _ _ _ _ _ _ _ _ _ _ _ _ _ _ _ _ _ _ _ _ _ _ _ _ _ _ _ _ _ _ _ _ _ _ _ _ _ _ _ _ _ _ _ _ _ _ _ _ _ _ _ _ _ _ _ _ _ _ _ _ _
_ _ _ _ _ _ _ _ _ _ _ _ _ _ _ _ _ _ _ _ _ _ _ _ _ _ _ _ _ _ _ _ _ _ _ _ _ _ _ _ _ _ _ _ _ _ _ _ _ _ _ _ _ _ _ _ _ _ _ _ _ _ _ _ _ _ _ _ _ _ _ _ _ _ _ _ _ _ _ _ _ _ _ _ _ _ _ _ _ _ _ _ _ _ _ _ _ _ _ _ _
_ _ _ _ _ _ _ _ _ _ _ _ _ _ _ _ _ _ _ _ _ _ _ _ _ _ _ _ _ _ _ _ _ _ _ _ _ _ _ _ _ _ _ _ _ _ _ _ _ _ _ _ _ _ _ _ _ _ _ _ _ _ _ _ _ _ _ _ _ _ _ _ _ _ _ _ _ _ _ _ _ _ _ _ _ _ _ _ _ _ _ _ _ _ _ _ _ _ _ _ _
_ _ _ _ _ _ _ _ _ _ _ _ _ _ _ _ _ _ _ _ _ _ _ _ _ _ _ _ _ _ _ _ _ _ _ _ _ _ _ _ _ _ _ _ _ _ _ _ _ _ _ _ _ _ _ _ _ _ _ _ _ _ _ _ _ _ _ _ _ _ _ _ _ _ _ _ _ _ _ _ _ _ _ _ _ _ _ _ _ _ _ _ _ _ _ _ _ _ _ _ _
_ _ _ _ _ _ _ _ _ _ _ _ _ _ _ _ _ _ _ _ _ _ _ _ _ _ _ _ _ _ _ _ _ _ _ _ _ _ _ _ _ _ _ _ _ _ _ _ _ _ _ _ _ _ _ _ _ _ _ _ _ _ _ _ _ _ _ _ _ _ _ _ _ _ _ _ _ _ _ _ _ _ _ _ _ _ _ _ _ _ _ _ _ _ _ _ _ _ _ _ _
_ _ _ _ _ _ _ _ _ _ _ _ _ _ _ _ _ _ _ _ _ _ _ _ _ _ _ _ _ _ _ _ _ _ _ _ _ _ _ _ _ _ _ _ _ _ _ _ _ _ _ _ _ _ _ _ _ _ _ _ _ _ _ _ _ _ _ _ _ _ _ _ _ _ _ _ _ _ _ _ _ _ _ _ _ _ _ _ _ _ _ _ _ _ _ _ _ _ _ _ _
_ _ _ _ _ _ _ _ _ _ _ _ _ _ _ _ _ _ _ _ _ _ _ _ _ _ _ _ _ _ _ _ _ _ _ _ _ _ _ _ _ _ _ _ _ _ _ _ _ _ _ _ _ _ _ _ _ _ _ _ _ _ _ _ _ _ _ _ _ _ _ _ _ _ _ _ _ _ _ _ _ _ _ _ _ _ _ _ _ _ _ _ _ _ _ _ _ _ _ _ _
_ _ _ _ _ _ _ _ _ _ _ _ _ _ _ _ _ _ _ _ _ _ _ _ _ _ _ _ _ _ _ _ _ _ _ _ _ _ _ _ _ _ _ _ _ _ _ _ _ _ _ _ _ _ _ _ _ _ _ _ _ _ _ _ _ _ _ _ _ _ _ _ _ _ _ _ _ _ _ _ _ _ _ _ _ _ _ _ _ _ _ _ _ _ _ _ _ _ _ _ _
_ _ _ _ _ _ _ _ _ _ _ _ _ _ _ _ _ _ _ _ _ _ _ _ _ _ _ _ _ _ _ _ _ _ _ _ _ _ _ _ _ _ _ _ _ _ _ _ _ _ _ _ _ _ _ _ _ _ _ _ _ _ _ _ _ _ _ _ _ _ _ _ _ _ _ _ _ _ _ _ _ _ _ _ _ _ _ _ _ _ _ _ _ _ _ _ _ _ _ _ _
_ _ _ _ _ _ _ _ _ _ _ _ _ _ _ _ _ _ _ _ _ _ _ _ _ _ _ _ _ _ _ _ _ _ _ _ _ _ _ _ _ _ _ _ _ _ _ _ _ _ _ _ _ _ _ _ _ _ _ _ _ _ _ _ _ _ _ _ _ _ _ _ _ _ _ _ _ _ _ _ _ _ _ _ _ _ _ _ _ _ _ _ _ _ _ _ _ _ _ _ _
_ _ _ _ _ _ _ _ _ _ _ _ _ _ _ _ _ _ _ _ _ _ _ _ _ _ _ _ _ _ _ _ _ _ _ _ _ _ _ _ _ _ _ _ _ _ _ _ _ _ _ _ _ _ _ _ _ _ _ _ _ _ _ _ _ _ _ _ _ _ _ _ _ _ _ _ _ _ _ _ _ _ _ _ _ _ _ _ _ _ _ _ _ _ _ _ _ _ _ _ _
36
_ _ _ _ _ _ _ _ _ _ _ _ _ _ _ _ _ _ _ _ _ _ _ _ _ _ _ _ _ _ _ _ _ _ _ _ _ _ _ _ _ _ _ _ _ _ _ _ _ _ _ _ _ _ _ _ _ _ _ _ _ _ _ _ _ _ _ _ _ _ _ _ _ _ _ _ _ _ _ _ _ _ _ _ _ _ _ _ _ _ _ _ _ _ _ _ _ _ _ _ _
_ _ _ _ _ _ _ _ _ _ _ _ _ _ _ _ _ _ _ _ _ _ _ _ _ _ _ _ _ _ _ _ _ _ _ _ _ _ _ _ _ _ _ _ _ _ _ _ _ _ _ _ _ _ _ _ _ _ _ _ _ _ _ _ _ _ _ _ _ _ _ _ _ _ _ _ _ _ _ _ _ _ _ _ _ _ _ _ _ _ _ _ _ _ _ _ _ _ _ _ _
_ _ _ _ _ _ _ _ _ _ _ _ _ _ _ _ _ _ _ _ _ _ _ _ _ _ _ _ _ _ _ _ _ _ _ _ _ _ _ _ _ _ _ _ _ _ _ _ _ _ _ _ _ _ _ _ _ _ _ _ _ _ _ _ _ _ _ _ _ _ _ _ _ _ _ _ _ _ _ _ _ _ _ _ _ _ _ _ _ _ _ _ _ _ _ _ _ _ _ _ _
_ _ _ _ _ _ _ _ _ _ _ _ _ _ _ _ _ _ _ _ _ _ _ _ _ _ _ _ _ _ _ _ _ _ _ _ _ _ _ _ _ _ _ _ _ _ _ _ _ _ _ _ _ _ _ _ _ _ _ _ _ _ _ _ _ _ _ _ _ _ _ _ _ _ _ _ _ _ _ _ _ _ _ _ _ _ _ _ _ _ _ _ _ _ _ _ _ _ _ _ _
_ _ _ _ _ _ _ _ _ _ _ _ _ _ _ _ _ _ _ _ _ _ _ _ _ _ _ _ _ _ _ _ _ _ _ _ _ _ _ _ _ _ _ _ _ _ _ _ _ _ _ _ _ _ _ _ _ _ _ _ _ _ _ _ _ _ _ _ _ _ _ _ _ _ _ _ _ _ _ _ _ _ _ _ _ _ _ _ _ _ _ _ _ _ _ _ _ _ _ _ _
_ _ _ _ _ _ _ _ _ _ _ _ _ _ _ _ _ _ _ _ _ _ _ _ _ _ _ _ _ _ _ _ _ _ _ _ _ _ _ _ _ _ _ _ _ _ _ _ _ _ _ _ _ _ _ _ _ _ _ _ _ _ _ _ _ _ _ _ _ _ _ _ _ _ _ _ _ _ _ _ _ _ _ _ _ _ _ _ _ _ _ _ _ _ _ _ _ _ _ _ _
37
Page 20

NOTA
NOTA
_ _ _ _ _ _ _ _ _ _ _ _ _ _ _ _ _ _ _ _ _ _ _ _ _ _ _ _ _ _ _ _ _ _ _ _ _ _ _ _ _ _ _ _ _ _ _ _ _ _ _ _ _ _ _ _ _ _ _ _ _ _ _ _ _ _ _ _ _ _ _ _ _ _ _ _ _ _ _ _ _ _ _ _ _ _ _ _ _ _ _ _ _ _ _ _ _ _ _ _ _
_ _ _ _ _ _ _ _ _ _ _ _ _ _ _ _ _ _ _ _ _ _ _ _ _ _ _ _ _ _ _ _ _ _ _ _ _ _ _ _ _ _ _ _ _ _ _ _ _ _ _ _ _ _ _ _ _ _ _ _ _ _ _ _ _ _ _ _ _ _ _ _ _ _ _ _ _ _ _ _ _ _ _ _ _ _ _ _ _ _ _ _ _ _ _ _ _ _ _ _ _
_ _ _ _ _ _ _ _ _ _ _ _ _ _ _ _ _ _ _ _ _ _ _ _ _ _ _ _ _ _ _ _ _ _ _ _ _ _ _ _ _ _ _ _ _ _ _ _ _ _ _ _ _ _ _ _ _ _ _ _ _ _ _ _ _ _ _ _ _ _ _ _ _ _ _ _ _ _ _ _ _ _ _ _ _ _ _ _ _ _ _ _ _ _ _ _ _ _ _ _ _
_ _ _ _ _ _ _ _ _ _ _ _ _ _ _ _ _ _ _ _ _ _ _ _ _ _ _ _ _ _ _ _ _ _ _ _ _ _ _ _ _ _ _ _ _ _ _ _ _ _ _ _ _ _ _ _ _ _ _ _ _ _ _ _ _ _ _ _ _ _ _ _ _ _ _ _ _ _ _ _ _ _ _ _ _ _ _ _ _ _ _ _ _ _ _ _ _ _ _ _ _
_ _ _ _ _ _ _ _ _ _ _ _ _ _ _ _ _ _ _ _ _ _ _ _ _ _ _ _ _ _ _ _ _ _ _ _ _ _ _ _ _ _ _ _ _ _ _ _ _ _ _ _ _ _ _ _ _ _ _ _ _ _ _ _ _ _ _ _ _ _ _ _ _ _ _ _ _ _ _ _ _ _ _ _ _ _ _ _ _ _ _ _ _ _ _ _ _ _ _ _ _
_ _ _ _ _ _ _ _ _ _ _ _ _ _ _ _ _ _ _ _ _ _ _ _ _ _ _ _ _ _ _ _ _ _ _ _ _ _ _ _ _ _ _ _ _ _ _ _ _ _ _ _ _ _ _ _ _ _ _ _ _ _ _ _ _ _ _ _ _ _ _ _ _ _ _ _ _ _ _ _ _ _ _ _ _ _ _ _ _ _ _ _ _ _ _ _ _ _ _ _ _
_ _ _ _ _ _ _ _ _ _ _ _ _ _ _ _ _ _ _ _ _ _ _ _ _ _ _ _ _ _ _ _ _ _ _ _ _ _ _ _ _ _ _ _ _ _ _ _ _ _ _ _ _ _ _ _ _ _ _ _ _ _ _ _ _ _ _ _ _ _ _ _ _ _ _ _ _ _ _ _ _ _ _ _ _ _ _ _ _ _ _ _ _ _ _ _ _ _ _ _ _
_ _ _ _ _ _ _ _ _ _ _ _ _ _ _ _ _ _ _ _ _ _ _ _ _ _ _ _ _ _ _ _ _ _ _ _ _ _ _ _ _ _ _ _ _ _ _ _ _ _ _ _ _ _ _ _ _ _ _ _ _ _ _ _ _ _ _ _ _ _ _ _ _ _ _ _ _ _ _ _ _ _ _ _ _ _ _ _ _ _ _ _ _ _ _ _ _ _ _ _ _
_ _ _ _ _ _ _ _ _ _ _ _ _ _ _ _ _ _ _ _ _ _ _ _ _ _ _ _ _ _ _ _ _ _ _ _ _ _ _ _ _ _ _ _ _ _ _ _ _ _ _ _ _ _ _ _ _ _ _ _ _ _ _ _ _ _ _ _ _ _ _ _ _ _ _ _ _ _ _ _ _ _ _ _ _ _ _ _ _ _ _ _ _ _ _ _ _ _ _ _ _
_ _ _ _ _ _ _ _ _ _ _ _ _ _ _ _ _ _ _ _ _ _ _ _ _ _ _ _ _ _ _ _ _ _ _ _ _ _ _ _ _ _ _ _ _ _ _ _ _ _ _ _ _ _ _ _ _ _ _ _ _ _ _ _ _ _ _ _ _ _ _ _ _ _ _ _ _ _ _ _ _ _ _ _ _ _ _ _ _ _ _ _ _ _ _ _ _ _ _ _ _
_ _ _ _ _ _ _ _ _ _ _ _ _ _ _ _ _ _ _ _ _ _ _ _ _ _ _ _ _ _ _ _ _ _ _ _ _ _ _ _ _ _ _ _ _ _ _ _ _ _ _ _ _ _ _ _ _ _ _ _ _ _ _ _ _ _ _ _ _ _ _ _ _ _ _ _ _ _ _ _ _ _ _ _ _ _ _ _ _ _ _ _ _ _ _ _ _ _ _ _ _
_ _ _ _ _ _ _ _ _ _ _ _ _ _ _ _ _ _ _ _ _ _ _ _ _ _ _ _ _ _ _ _ _ _ _ _ _ _ _ _ _ _ _ _ _ _ _ _ _ _ _ _ _ _ _ _ _ _ _ _ _ _ _ _ _ _ _ _ _ _ _ _ _ _ _ _ _ _ _ _ _ _ _ _ _ _ _ _ _ _ _ _ _ _ _ _ _ _ _ _ _
_ _ _ _ _ _ _ _ _ _ _ _ _ _ _ _ _ _ _ _ _ _ _ _ _ _ _ _ _ _ _ _ _ _ _ _ _ _ _ _ _ _ _ _ _ _ _ _ _ _ _ _ _ _ _ _ _ _ _ _ _ _ _ _ _ _ _ _ _ _ _ _ _ _ _ _ _ _ _ _ _ _ _ _ _ _ _ _ _ _ _ _ _ _ _ _ _ _ _ _ _
_ _ _ _ _ _ _ _ _ _ _ _ _ _ _ _ _ _ _ _ _ _ _ _ _ _ _ _ _ _ _ _ _ _ _ _ _ _ _ _ _ _ _ _ _ _ _ _ _ _ _ _ _ _ _ _ _ _ _ _ _ _ _ _ _ _ _ _ _ _ _ _ _ _ _ _ _ _ _ _ _ _ _ _ _ _ _ _ _ _ _ _ _ _ _ _ _ _ _ _ _
_ _ _ _ _ _ _ _ _ _ _ _ _ _ _ _ _ _ _ _ _ _ _ _ _ _ _ _ _ _ _ _ _ _ _ _ _ _ _ _ _ _ _ _ _ _ _ _ _ _ _ _ _ _ _ _ _ _ _ _ _ _ _ _ _ _ _ _ _ _ _ _ _ _ _ _ _ _ _ _ _ _ _ _ _ _ _ _ _ _ _ _ _ _ _ _ _ _ _ _ _
_ _ _ _ _ _ _ _ _ _ _ _ _ _ _ _ _ _ _ _ _ _ _ _ _ _ _ _ _ _ _ _ _ _ _ _ _ _ _ _ _ _ _ _ _ _ _ _ _ _ _ _ _ _ _ _ _ _ _ _ _ _ _ _ _ _ _ _ _ _ _ _ _ _ _ _ _ _ _ _ _ _ _ _ _ _ _ _ _ _ _ _ _ _ _ _ _ _ _ _ _
_ _ _ _ _ _ _ _ _ _ _ _ _ _ _ _ _ _ _ _ _ _ _ _ _ _ _ _ _ _ _ _ _ _ _ _ _ _ _ _ _ _ _ _ _ _ _ _ _ _ _ _ _ _ _ _ _ _ _ _ _ _ _ _ _ _ _ _ _ _ _ _ _ _ _ _ _ _ _ _ _ _ _ _ _ _ _ _ _ _ _ _ _ _ _ _ _ _ _ _ _
_ _ _ _ _ _ _ _ _ _ _ _ _ _ _ _ _ _ _ _ _ _ _ _ _ _ _ _ _ _ _ _ _ _ _ _ _ _ _ _ _ _ _ _ _ _ _ _ _ _ _ _ _ _ _ _ _ _ _ _ _ _ _ _ _ _ _ _ _ _ _ _ _ _ _ _ _ _ _ _ _ _ _ _ _ _ _ _ _ _ _ _ _ _ _ _ _ _ _ _ _
_ _ _ _ _ _ _ _ _ _ _ _ _ _ _ _ _ _ _ _ _ _ _ _ _ _ _ _ _ _ _ _ _ _ _ _ _ _ _ _ _ _ _ _ _ _ _ _ _ _ _ _ _ _ _ _ _ _ _ _ _ _ _ _ _ _ _ _ _ _ _ _ _ _ _ _ _ _ _ _ _ _ _ _ _ _ _ _ _ _ _ _ _ _ _ _ _ _ _ _ _
_ _ _ _ _ _ _ _ _ _ _ _ _ _ _ _ _ _ _ _ _ _ _ _ _ _ _ _ _ _ _ _ _ _ _ _ _ _ _ _ _ _ _ _ _ _ _ _ _ _ _ _ _ _ _ _ _ _ _ _ _ _ _ _ _ _ _ _ _ _ _ _ _ _ _ _ _ _ _ _ _ _ _ _ _ _ _ _ _ _ _ _ _ _ _ _ _ _ _ _ _
_ _ _ _ _ _ _ _ _ _ _ _ _ _ _ _ _ _ _ _ _ _ _ _ _ _ _ _ _ _ _ _ _ _ _ _ _ _ _ _ _ _ _ _ _ _ _ _ _ _ _ _ _ _ _ _ _ _ _ _ _ _ _ _ _ _ _ _ _ _ _ _ _ _ _ _ _ _ _ _ _ _ _ _ _ _ _ _ _ _ _ _ _ _ _ _ _ _ _ _ _
_ _ _ _ _ _ _ _ _ _ _ _ _ _ _ _ _ _ _ _ _ _ _ _ _ _ _ _ _ _ _ _ _ _ _ _ _ _ _ _ _ _ _ _ _ _ _ _ _ _ _ _ _ _ _ _ _ _ _ _ _ _ _ _ _ _ _ _ _ _ _ _ _ _ _ _ _ _ _ _ _ _ _ _ _ _ _ _ _ _ _ _ _ _ _ _ _ _ _ _ _
_ _ _ _ _ _ _ _ _ _ _ _ _ _ _ _ _ _ _ _ _ _ _ _ _ _ _ _ _ _ _ _ _ _ _ _ _ _ _ _ _ _ _ _ _ _ _ _ _ _ _ _ _ _ _ _ _ _ _ _ _ _ _ _ _ _ _ _ _ _ _ _ _ _ _ _ _ _ _ _ _ _ _ _ _ _ _ _ _ _ _ _ _ _ _ _ _ _ _ _ _
_ _ _ _ _ _ _ _ _ _ _ _ _ _ _ _ _ _ _ _ _ _ _ _ _ _ _ _ _ _ _ _ _ _ _ _ _ _ _ _ _ _ _ _ _ _ _ _ _ _ _ _ _ _ _ _ _ _ _ _ _ _ _ _ _ _ _ _ _ _ _ _ _ _ _ _ _ _ _ _ _ _ _ _ _ _ _ _ _ _ _ _ _ _ _ _ _ _ _ _ _
38
_ _ _ _ _ _ _ _ _ _ _ _ _ _ _ _ _ _ _ _ _ _ _ _ _ _ _ _ _ _ _ _ _ _ _ _ _ _ _ _ _ _ _ _ _ _ _ _ _ _ _ _ _ _ _ _ _ _ _ _ _ _ _ _ _ _ _ _ _ _ _ _ _ _ _ _ _ _ _ _ _ _ _ _ _ _ _ _ _ _ _ _ _ _ _ _ _ _ _ _ _
_ _ _ _ _ _ _ _ _ _ _ _ _ _ _ _ _ _ _ _ _ _ _ _ _ _ _ _ _ _ _ _ _ _ _ _ _ _ _ _ _ _ _ _ _ _ _ _ _ _ _ _ _ _ _ _ _ _ _ _ _ _ _ _ _ _ _ _ _ _ _ _ _ _ _ _ _ _ _ _ _ _ _ _ _ _ _ _ _ _ _ _ _ _ _ _ _ _ _ _ _
_ _ _ _ _ _ _ _ _ _ _ _ _ _ _ _ _ _ _ _ _ _ _ _ _ _ _ _ _ _ _ _ _ _ _ _ _ _ _ _ _ _ _ _ _ _ _ _ _ _ _ _ _ _ _ _ _ _ _ _ _ _ _ _ _ _ _ _ _ _ _ _ _ _ _ _ _ _ _ _ _ _ _ _ _ _ _ _ _ _ _ _ _ _ _ _ _ _ _ _ _
_ _ _ _ _ _ _ _ _ _ _ _ _ _ _ _ _ _ _ _ _ _ _ _ _ _ _ _ _ _ _ _ _ _ _ _ _ _ _ _ _ _ _ _ _ _ _ _ _ _ _ _ _ _ _ _ _ _ _ _ _ _ _ _ _ _ _ _ _ _ _ _ _ _ _ _ _ _ _ _ _ _ _ _ _ _ _ _ _ _ _ _ _ _ _ _ _ _ _ _ _
_ _ _ _ _ _ _ _ _ _ _ _ _ _ _ _ _ _ _ _ _ _ _ _ _ _ _ _ _ _ _ _ _ _ _ _ _ _ _ _ _ _ _ _ _ _ _ _ _ _ _ _ _ _ _ _ _ _ _ _ _ _ _ _ _ _ _ _ _ _ _ _ _ _ _ _ _ _ _ _ _ _ _ _ _ _ _ _ _ _ _ _ _ _ _ _ _ _ _ _ _
_ _ _ _ _ _ _ _ _ _ _ _ _ _ _ _ _ _ _ _ _ _ _ _ _ _ _ _ _ _ _ _ _ _ _ _ _ _ _ _ _ _ _ _ _ _ _ _ _ _ _ _ _ _ _ _ _ _ _ _ _ _ _ _ _ _ _ _ _ _ _ _ _ _ _ _ _ _ _ _ _ _ _ _ _ _ _ _ _ _ _ _ _ _ _ _ _ _ _ _ _
_ _ _ _ _ _ _ _ _ _ _ _ _ _ _ _ _ _ _ _ _ _ _ _ _ _ _ _ _ _ _ _ _ _ _ _ _ _ _ _ _ _ _ _ _ _ _ _ _ _ _ _ _ _ _ _ _ _ _ _ _ _ _ _ _ _ _ _ _ _ _ _ _ _ _ _ _ _ _ _ _ _ _ _ _ _ _ _ _ _ _ _ _ _ _ _ _ _ _ _ _
_ _ _ _ _ _ _ _ _ _ _ _ _ _ _ _ _ _ _ _ _ _ _ _ _ _ _ _ _ _ _ _ _ _ _ _ _ _ _ _ _ _ _ _ _ _ _ _ _ _ _ _ _ _ _ _ _ _ _ _ _ _ _ _ _ _ _ _ _ _ _ _ _ _ _ _ _ _ _ _ _ _ _ _ _ _ _ _ _ _ _ _ _ _ _ _ _ _ _ _ _
_ _ _ _ _ _ _ _ _ _ _ _ _ _ _ _ _ _ _ _ _ _ _ _ _ _ _ _ _ _ _ _ _ _ _ _ _ _ _ _ _ _ _ _ _ _ _ _ _ _ _ _ _ _ _ _ _ _ _ _ _ _ _ _ _ _ _ _ _ _ _ _ _ _ _ _ _ _ _ _ _ _ _ _ _ _ _ _ _ _ _ _ _ _ _ _ _ _ _ _ _
_ _ _ _ _ _ _ _ _ _ _ _ _ _ _ _ _ _ _ _ _ _ _ _ _ _ _ _ _ _ _ _ _ _ _ _ _ _ _ _ _ _ _ _ _ _ _ _ _ _ _ _ _ _ _ _ _ _ _ _ _ _ _ _ _ _ _ _ _ _ _ _ _ _ _ _ _ _ _ _ _ _ _ _ _ _ _ _ _ _ _ _ _ _ _ _ _ _ _ _ _
_ _ _ _ _ _ _ _ _ _ _ _ _ _ _ _ _ _ _ _ _ _ _ _ _ _ _ _ _ _ _ _ _ _ _ _ _ _ _ _ _ _ _ _ _ _ _ _ _ _ _ _ _ _ _ _ _ _ _ _ _ _ _ _ _ _ _ _ _ _ _ _ _ _ _ _ _ _ _ _ _ _ _ _ _ _ _ _ _ _ _ _ _ _ _ _ _ _ _ _ _
_ _ _ _ _ _ _ _ _ _ _ _ _ _ _ _ _ _ _ _ _ _ _ _ _ _ _ _ _ _ _ _ _ _ _ _ _ _ _ _ _ _ _ _ _ _ _ _ _ _ _ _ _ _ _ _ _ _ _ _ _ _ _ _ _ _ _ _ _ _ _ _ _ _ _ _ _ _ _ _ _ _ _ _ _ _ _ _ _ _ _ _ _ _ _ _ _ _ _ _ _
39
 Loading...