

Page 1

Nissan ZD30/TD42 Turbo400 automatic transmission adapter kit
Page 2

Parts List
(1) Bellhousing adapter
Hardware:
(4) 82° tapered seat allen drive bolts
(4) 5/16” NC x 2 ½” grade 8 flange-head bolts
(6) 5/16” NC x 1 ¼” grade 8 flange-head bolts
(9) Viton o-rings, front side, 7/16” OD (1 EXTRA)
(9) Viton o-rings, back side, 5/8” OD (1 EXTRA)
Tools Required (to install kit onto transmission)
3
/16” Allen socket
1
/2” socket
Torque wrench
Moly based grease
Transmission
The bellhousing needs to be machined off o f the TH400 case (Figure 5) to allow the ZD30
bellhousing and BDE adapter to be fitted. Fortunately, this is the very same requirement to
fit a JW Performance Ultrabell. Utilizing this technique allows the transmissio n to be easily
converted to any application that is serviced by the JW Ultrabell, so there is no value lost
with this modification to the transmission.
TIP: the transmission case must be machined 0.010” to 0.040” below the pump surface to
allow the adapter plate to position properly on the pump. This typically means that the
transmission will need to be disassembled to do it the right way. Do not cut the oil pan rail
to the same depth as the rest of the housing; the adapter plate is relieved on the botto m to
allow the oil pan rail to remain un-modified.
Note: some late TH400 pumps are only drilled for 6 bolts – do not be concerned if you have
this type of TH400 pump, 6 bolts torqued properly are more than enough to handle the loads.
Page 3
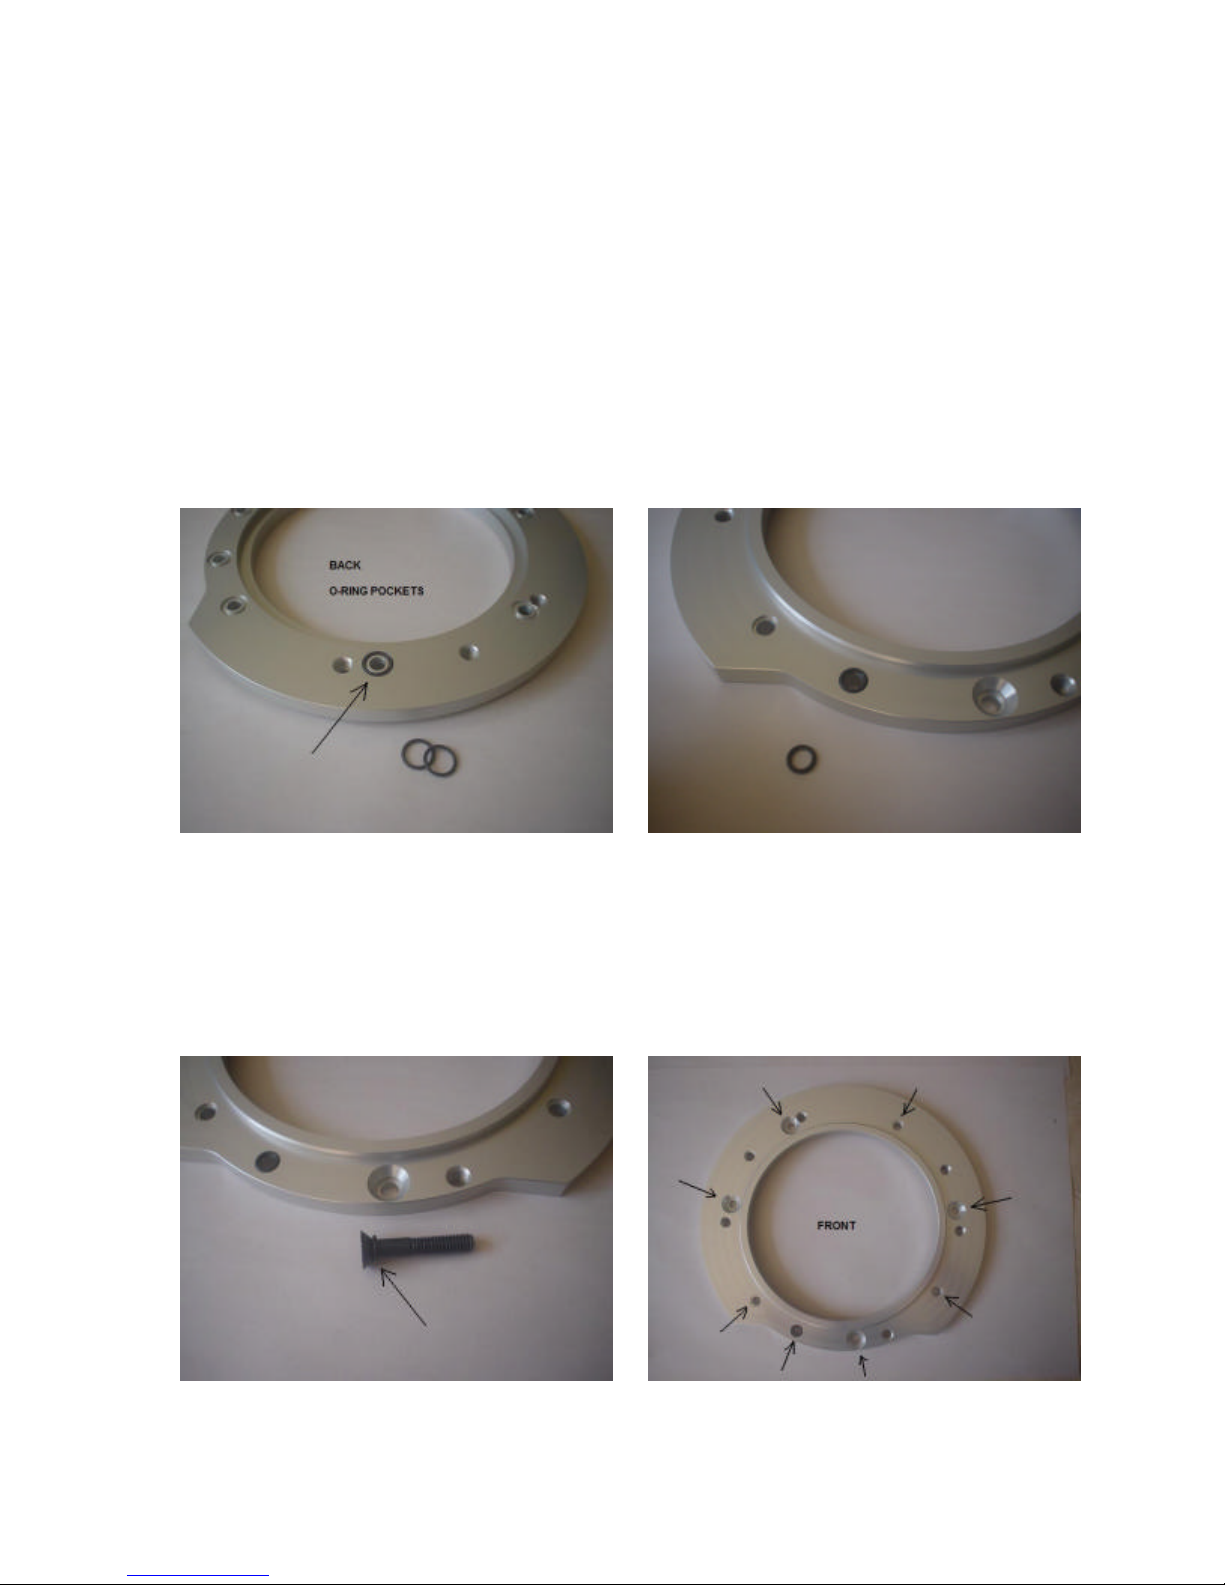
Bellhousing Adapter
Because of the way the TH400 is cast, it has the potential to leak fluid through the pump bolt
holes; GM used plastic washers under the bolt heads as gaskets to prevent this. The BDE
bellhousing adapter has o-rings engineered to seal both the bolt shank and the adapter to the
pump, thereby preventing leaks entirely.
• Remove the OE bolts from the front pump and discard.
• Clean the surface of the pump and ensure that the housing is machined lower than the
pump surface and that there are no raised burrs.
• Install eight (8) large Viton o-rings into the counter-bores on the back of the adapter
(Figure 1).
Figure 1 –adapter back o-rings Figure 2 – adapter front o-rings
• Install one small o-ring onto each of the four (4) tapered seat bolt shanks and grease
the shank, threads, and under-head surface entirely (Figure 3).
• Install the adapter with the o-rings towards the pump and thread the taper seat bolts
into the transmission. Leave these semi-loose until all four are installed and then snug
them all – this will help to center the adapter onto the transmission.
Figure 3 – front o-ring installed on tapered bolt Figure 4 – adapter front o-ring locations
Page 4
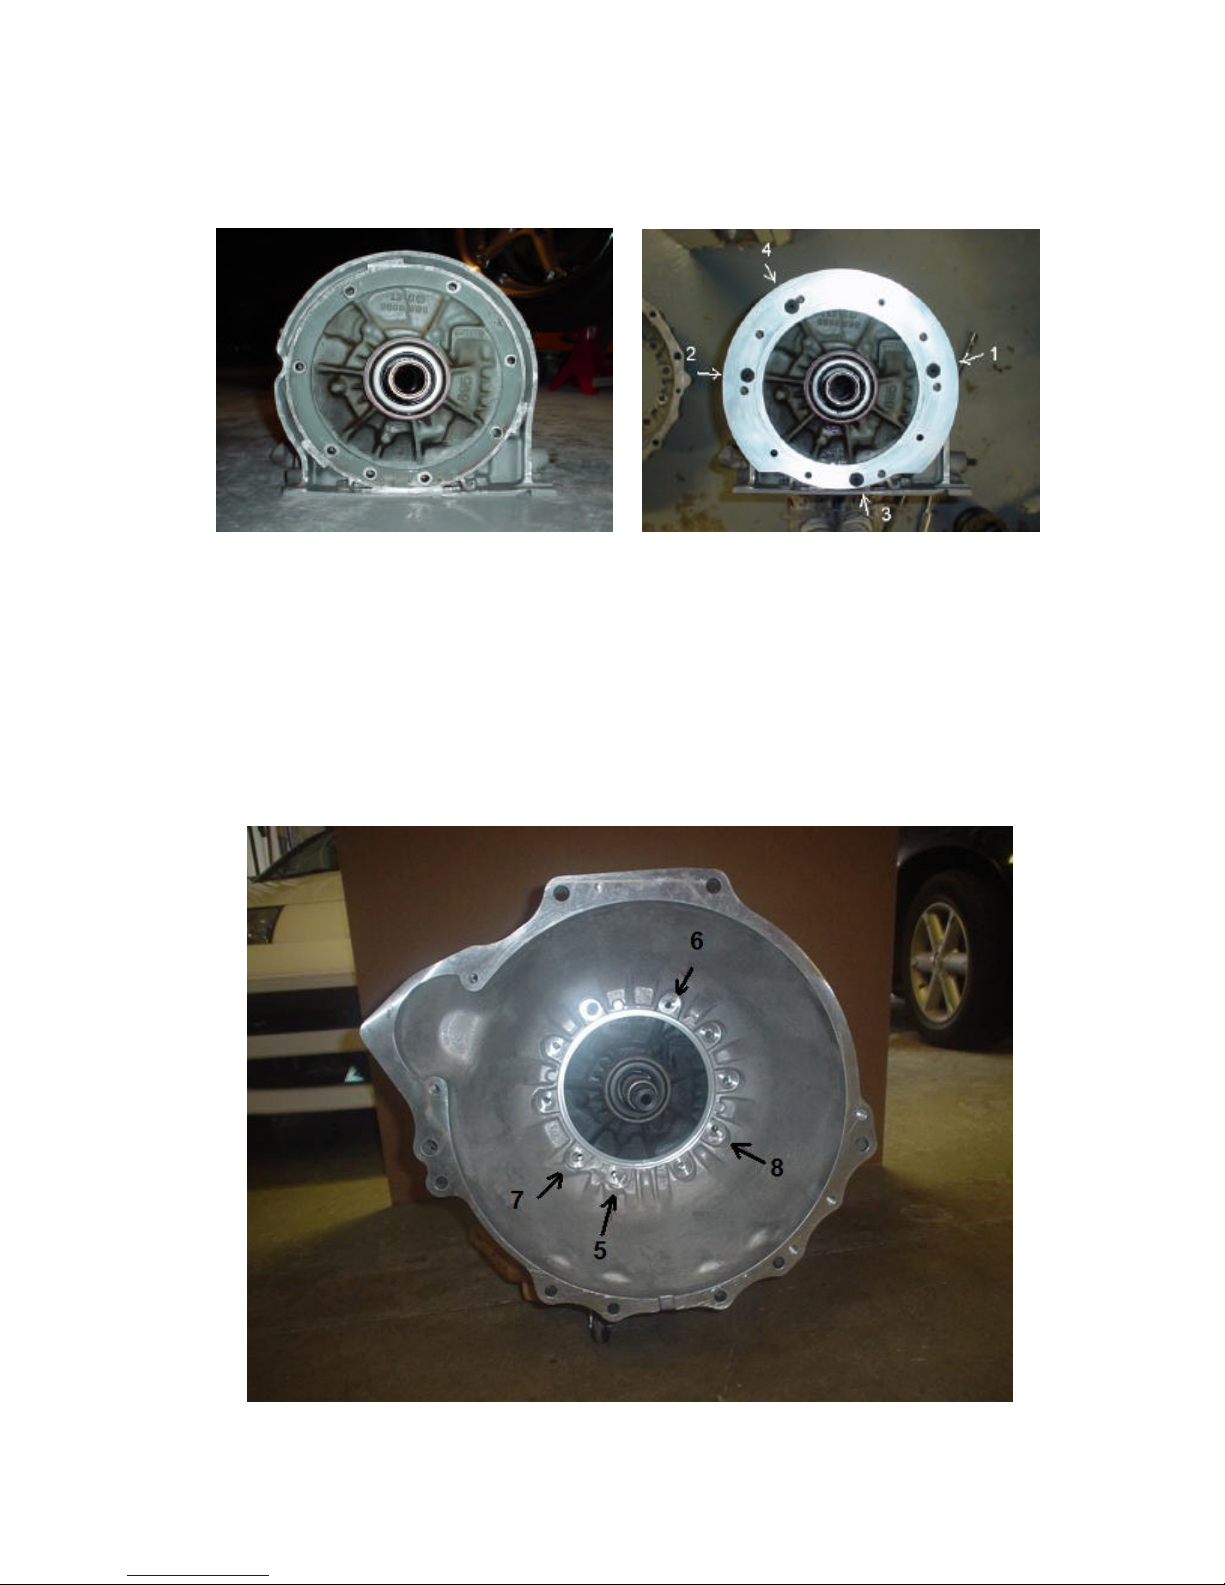
• When all four bolts are installed and snug, verify that none of the back o-rings have
become dislodged, preventing the adapter from sitting flat on the pump surface.
Figure 5 – Machined housing and pump face Figure 6 – Adapter installed, torque sequence
• Torque the bolts using a 3/16” Allen drive socket to 18 ft-lbs (see Figure 6 for torque
sequence) and wipe off any excess grease.
• Install the small o-rings into the remaining four (4) front adapter pockets (Figure 4),
smear some grease onto these so the bolts don’t tear them during assembly.
Bellhousing
• Place the bellhousing onto the adapter and rotate into position (sight through bolt
holes 5, 6, 7, and 8 [Figure 7] which index the entire assembly).
Figure 7 – ZD30 bellhousing installed, long bolt torque sequence
Page 5
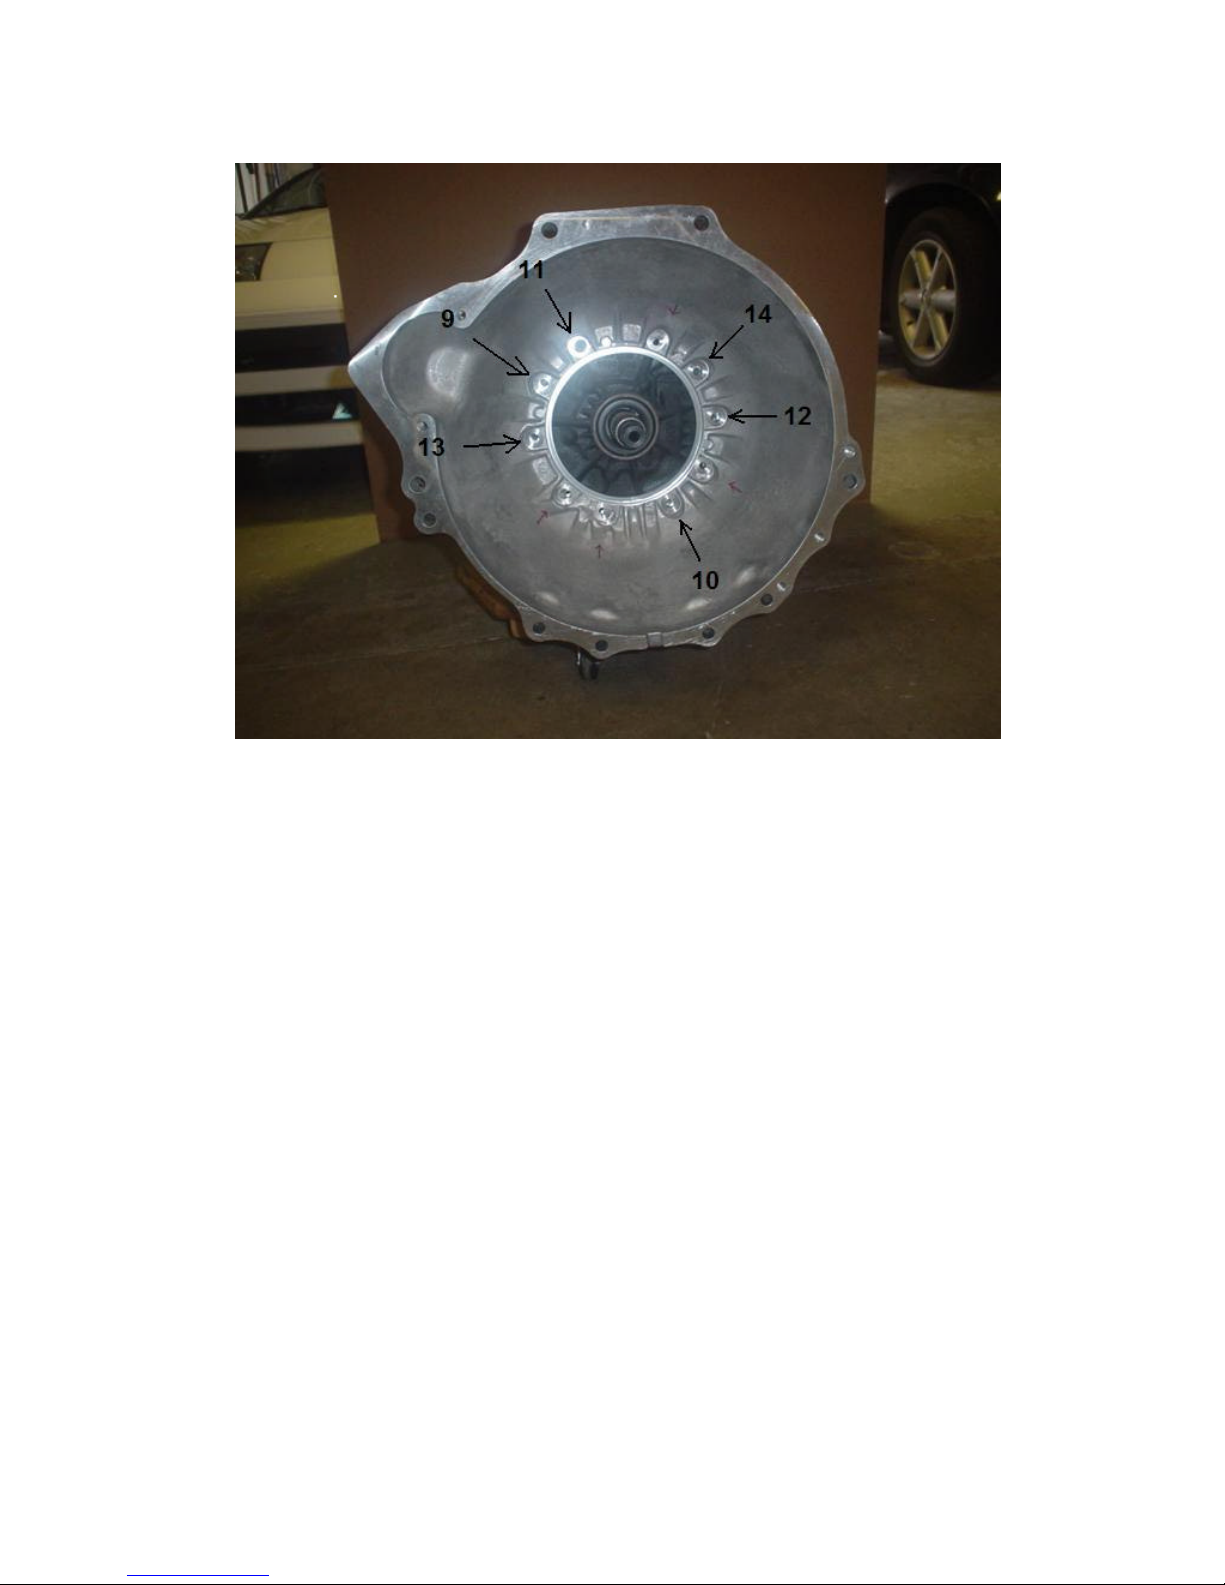
Figure 8 – Short bolt torque sequence
• Grease the entire shank and under-head washer surface of the four (4) 2 ½” long bolts
and thr ead into positions 5 - 8 (Figure 7) through the adapter o-rings and into the
transmission threads. Torque to 18 ft-lbs using Figure 7 torque sequence.
• Grease the remaining short bolt’s threads and under-head washer and install
• Torque bolts 9 – 14 to 18 ft-lbs using Figure 8 torque sequence.
 Loading...