

PAL MULTIMEDIA CART
TCPUL23 TCPUL23FF TCP23 TCP23FF
PARTS LIST
Qty Part# Description
1 022-2882 Cart Handle
1 TCPE10 12 Outlet Power Strip
1 TCDPT Data Pass Through Plate (Optional Accessory)
(“FF” Models Only)
HARDWARE LIST
Ref Qty Part# Description
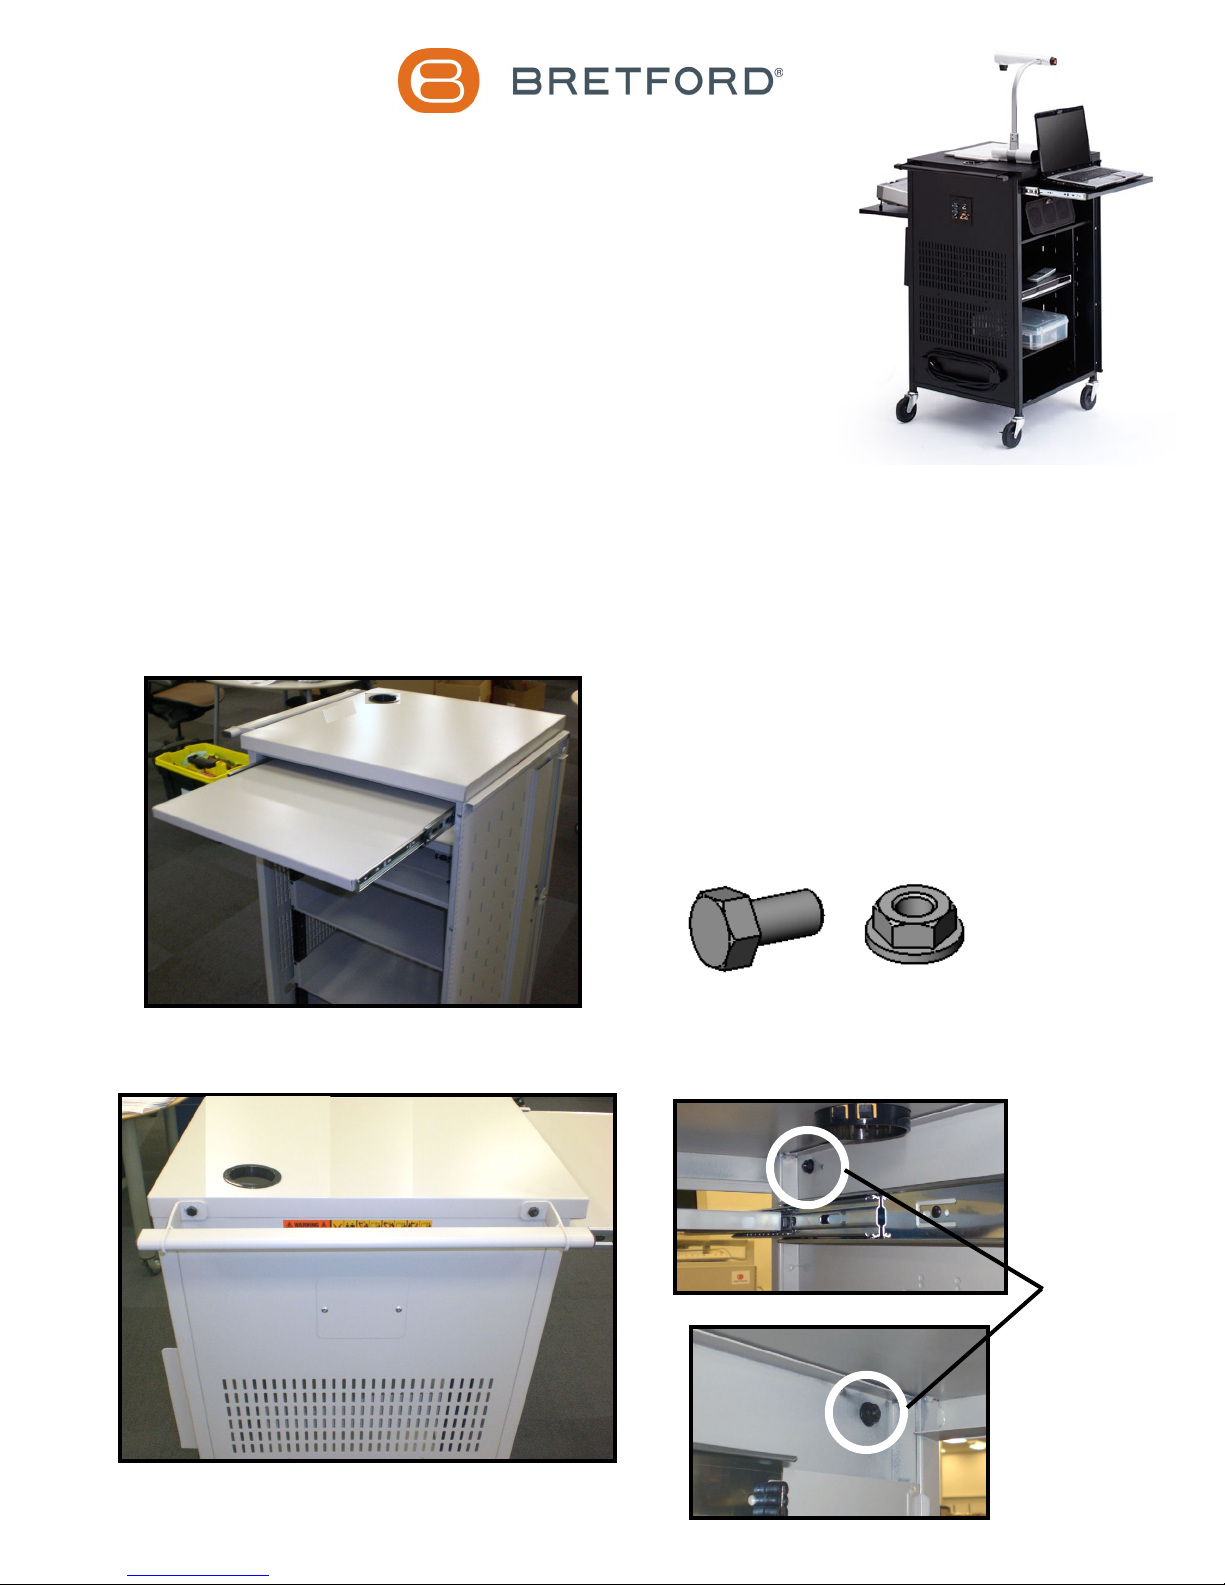
AA 2 030-0307 5/16-18 x 5/8” Hex Hd Screws
BB 2 030-0411 5/16-18 Serrated Nuts
CC 4 030-0915 10-32MT x 3/8” Self Tapping Screws (“FF” Models Only)
DD 2 030-0024 #6-32 Hex Nuts
EE 2 030-0312 #6-32 x 1/4” Phillips Truss Head Screws
INSTALL TOP SHELF HANDLE
STEP 1: Pull out laptop shelf.
STEP 2: Attach handle with screws (AA) and nuts (BB).
AA
BB
Secure nuts
through interior
of cart.
1 of 3
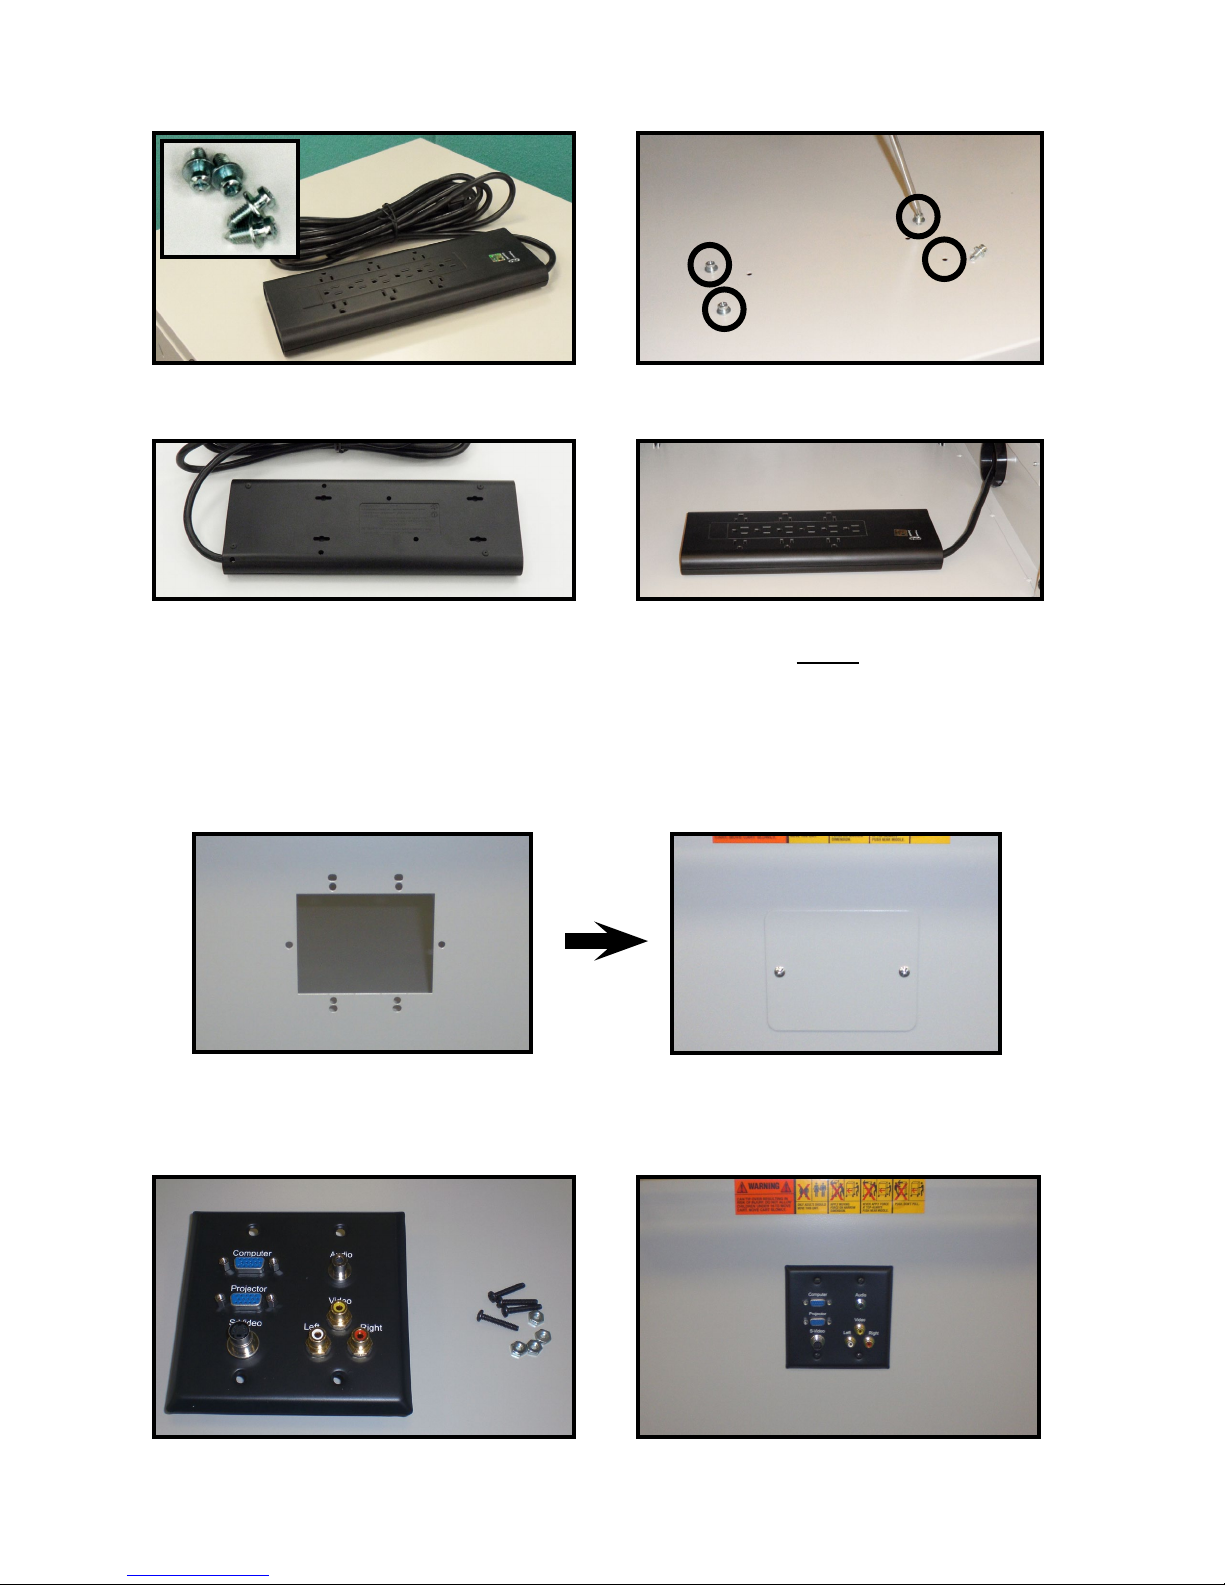
INSTALL OPTIONAL TCPE10 12-OUTLET POWER STRIP
Included on “FF” Models
STEP 1: Install screws (CC) into bottom shelf.
STEP 2: Remove the power strip from the steel plate by moving it sideways until it unsnaps.
STEP 3: Using the slot cutout on the back of the power strip, slide and snap power strip
onto installed screws toward the grommet hole on the side wall. NOTE: Your power
cord should be on the same side as the grommet hole as shown above.
INSTALL COVER PLATE OR OPTIONAL TCDPT DATA PASS THROUGH PLATE
STEP 1: Using the hardware provided install the cover plate under the handle.
STEP 2: Using the hardware provided with the Data Pass Through Plate, install the
TCDPT to the side panel.
2 of 3

Bretford® Bretford Ltd.
OPTIONAL LAPTOP TRAY SETTING
The laptop shelf may be inverted for use as a tray, this will provide additional room to store a laptop inside PAL for short
periods of time. Due to heat generated by the computer, it is not recommended that you leave your laptop on or charge
the battery in the tray for more than one hour when it is secured inside the cart.
STEP 1: With the laptop shelf fully extended release the tabs by pressing the left
tab down and the right tab up and ip the shelf over for the traysetting.
STEP 2: Realign the tray with the slides in the fully extended position, making sure that the tray slide ts
inside the extended slide. Slowly push the tray all the way back into the cart to re-lock the tabs.
Carefully extend the shelf once again. Install screw (EE) and nut (DD) into the hole near the front
of the shelf as shown. This will lock the shelf in place from the weight of the laptop.
11000 Seymour Avenue 2 Etongate
Franklin Park, IL 60131 110 Windsor Road, Slough
TEL: 847.678.2545 Berkshire SL1 2JA England
800.521.9614 TEL: 011 44 17 5353 9955
FAX: 847.678.0852 FAX: 011 44 17 5353 9478
800.343.1779
www.bretford.com
Part # 031-8158
Rev. 06.10.14 CG
3 of 3
 Loading...