

Bretford TCPUL23, TCP23FF, TCPUL23FF, TCP23 User Manual
PAL MULTIMEDIA CART
TCPUL23 TCPUL23FF TCP23 TCP23FF
PARTS LIST
Qty Part# Description
1 022-2882 Cart Handle
1 TCPE10 12 Outlet Power Strip
1 TCDPT Data Pass Through Plate (Optional Accessory)
(“FF” Models Only)
HARDWARE LIST
Ref Qty Part# Description
AA 2 030-0307 5/16-18 x 5/8” Hex Hd Screws
BB 2 030-0411 5/16-18 Serrated Nuts
CC 4 030-0915 10-32MT x 3/8” Self Tapping Screws (“FF” Models Only)
DD 2 030-0024 #6-32 Hex Nuts
EE 2 030-0312 #6-32 x 1/4” Phillips Truss Head Screws
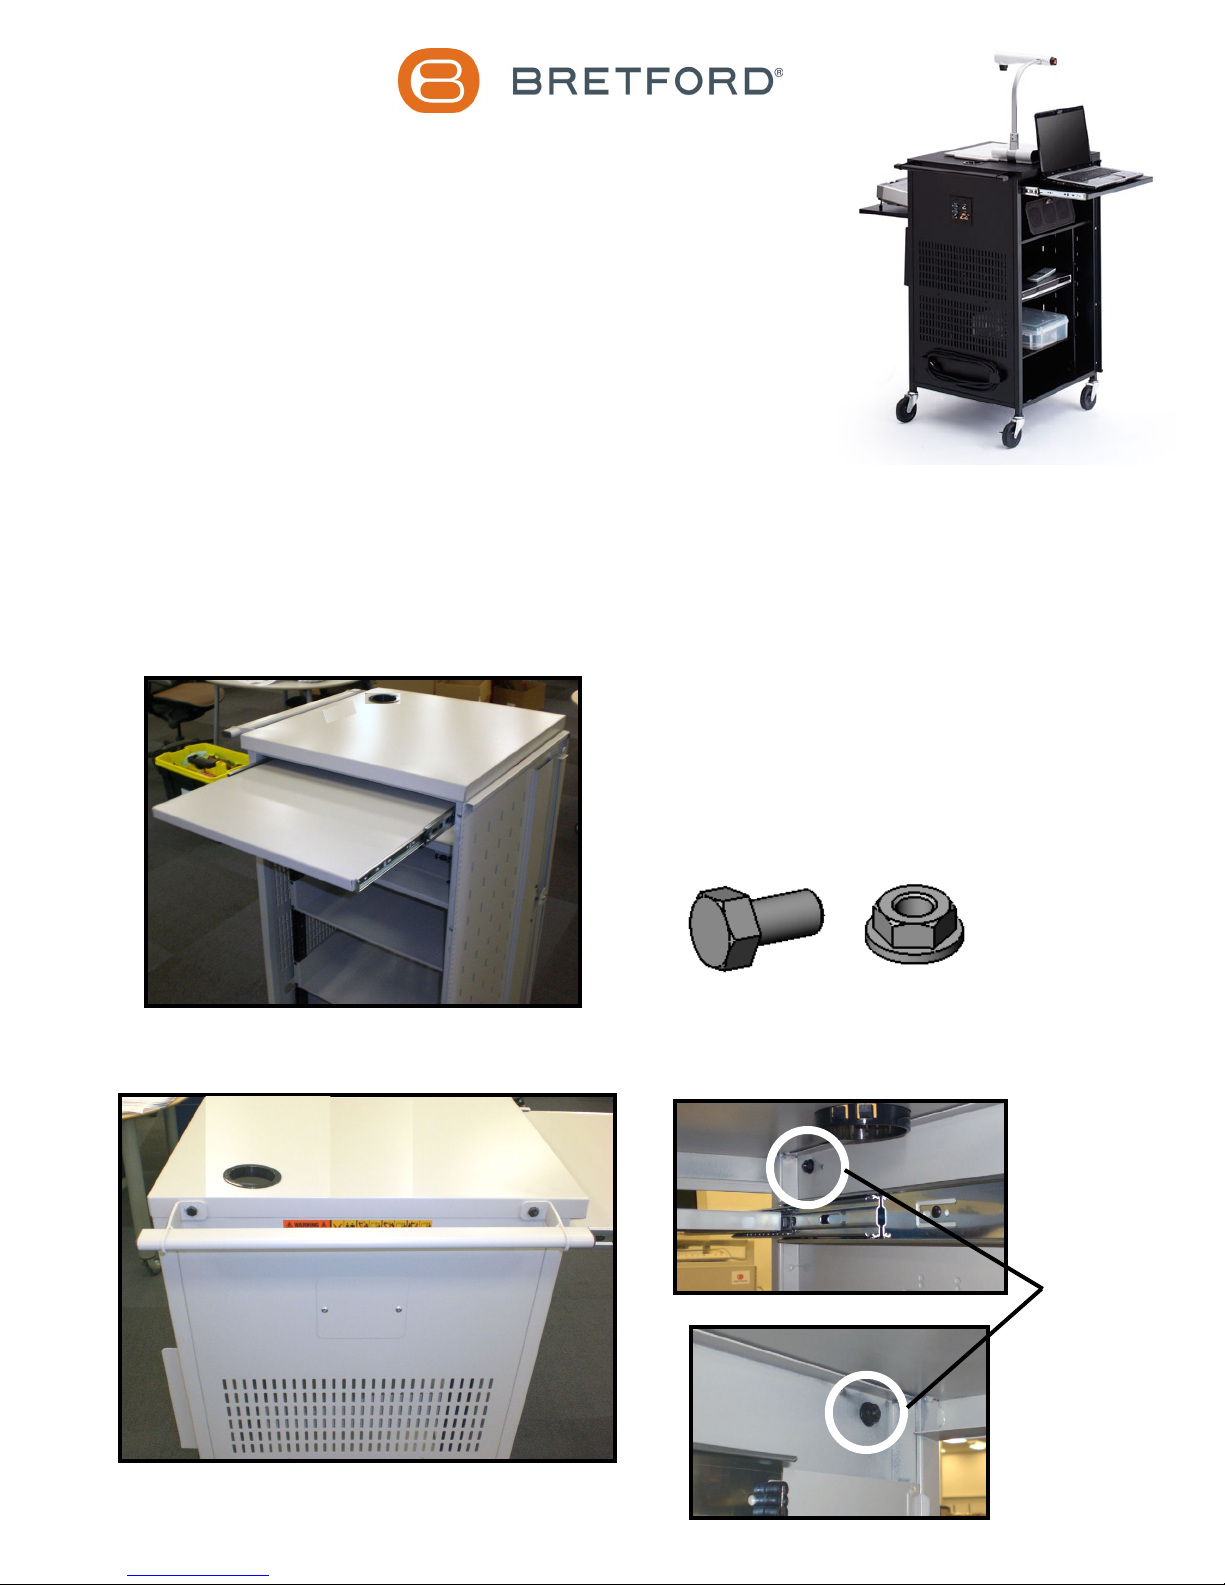
INSTALL TOP SHELF HANDLE
STEP 1: Pull out laptop shelf.
STEP 2: Attach handle with screws (AA) and nuts (BB).
AA
BB
Secure nuts
through interior
of cart.
1 of 3
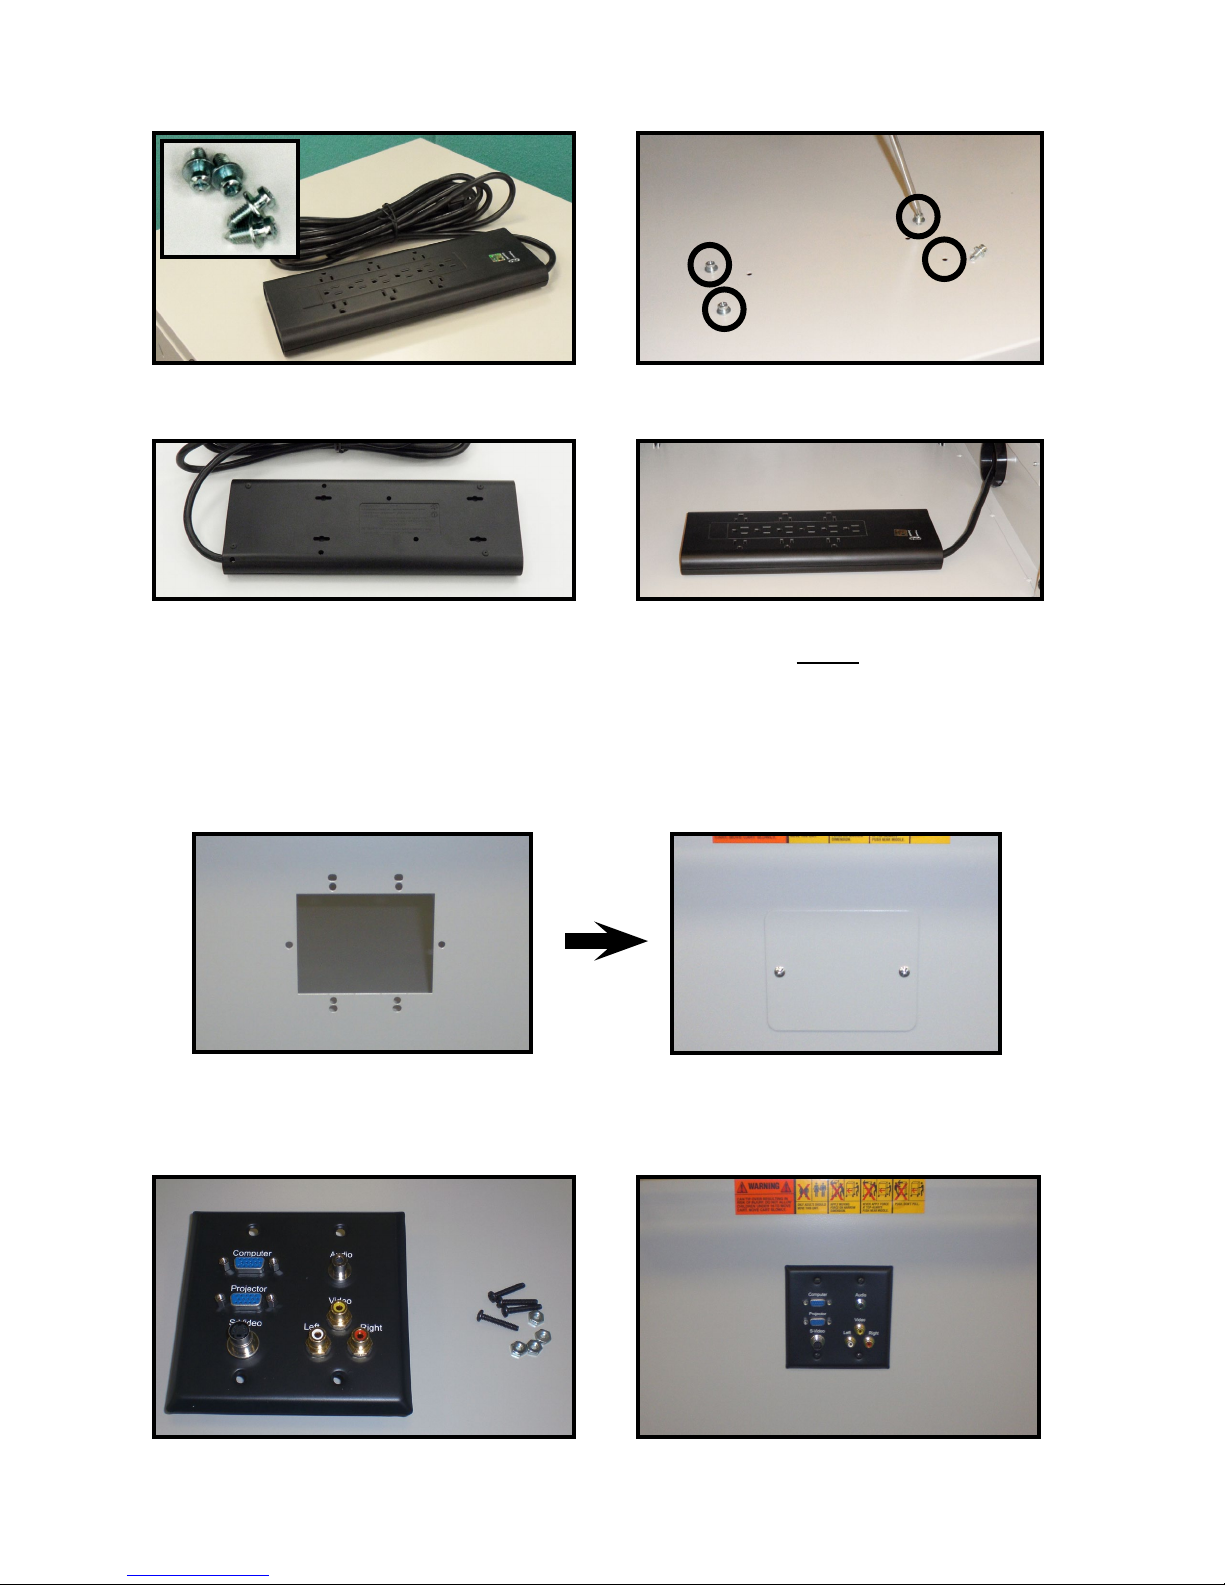
INSTALL OPTIONAL TCPE10 12-OUTLET POWER STRIP
Included on “FF” Models
STEP 1: Install screws (CC) into bottom shelf.
STEP 2: Remove the power strip from the steel plate by moving it sideways until it unsnaps.
STEP 3: Using the slot cutout on the back of the power strip, slide and snap power strip
onto installed screws toward the grommet hole on the side wall. NOTE: Your power
cord should be on the same side as the grommet hole as shown above.
INSTALL COVER PLATE OR OPTIONAL TCDPT DATA PASS THROUGH PLATE
STEP 1: Using the hardware provided install the cover plate under the handle.
STEP 2: Using the hardware provided with the Data Pass Through Plate, install the
TCDPT to the side panel.
2 of 3
 Loading...