

Bretford M-SUBC Assembly Instructions Manual
SUBSTATION AND CHANNEL
LIQUID WORKSPACE
Assembly Instructions
MODEL:
M-SUBC
TOOLS REQUIRED
1/2 WRENCH
PHILIPS SCREWDRIVER
3/8 WRENCH
ELECTRIC HAND DRILL
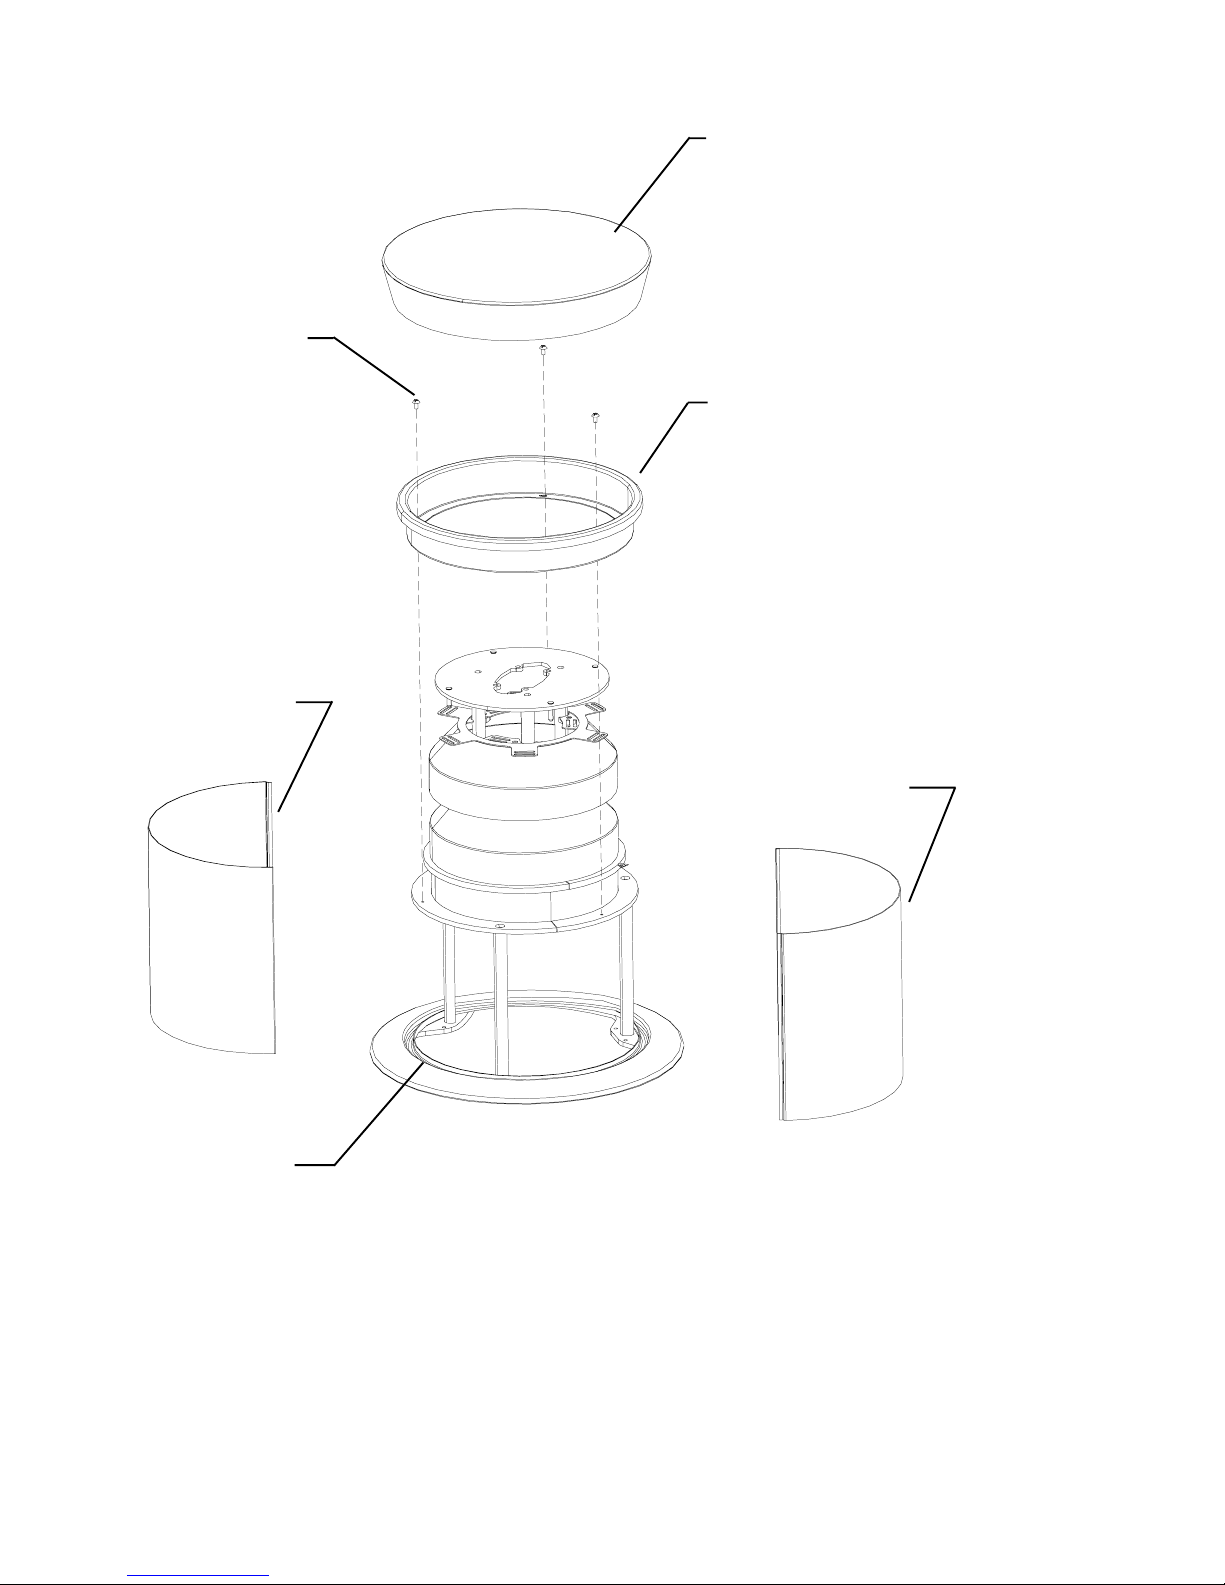
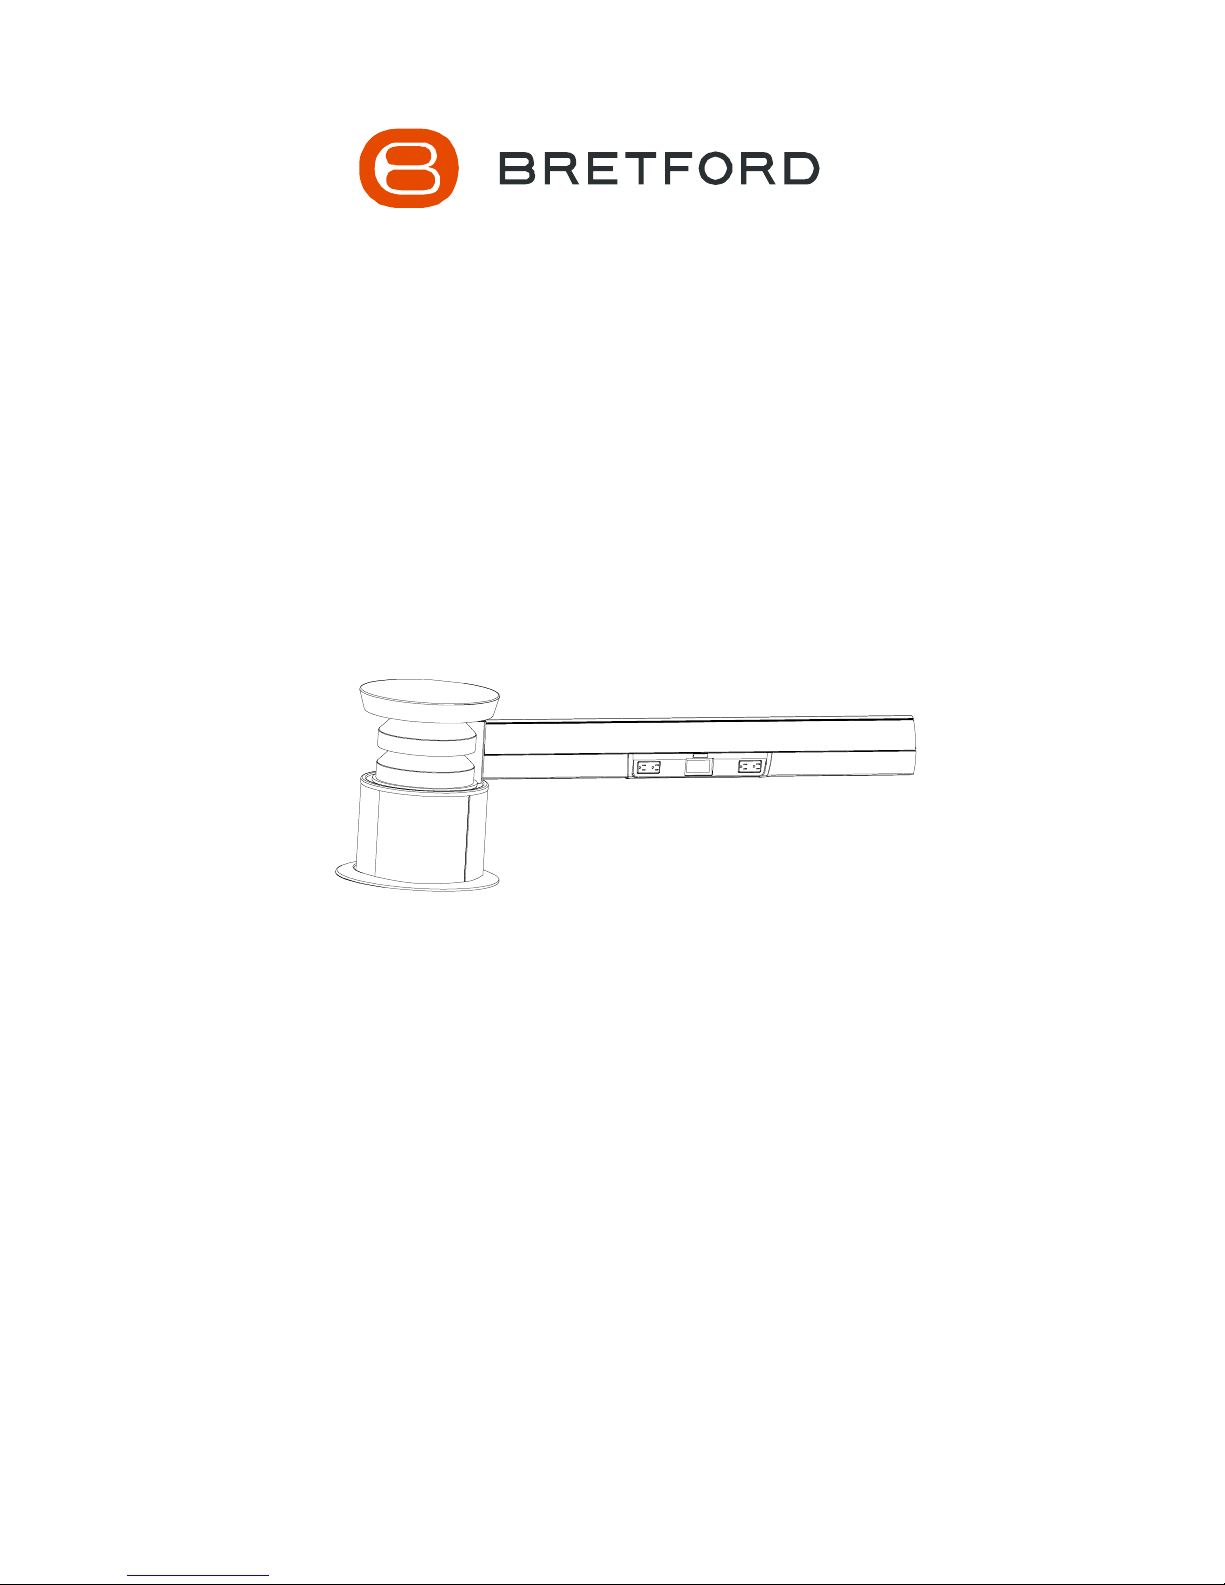
Substation
TracPlate
Screw
Substation Skin
Substation Top Cover
Substation Track
Plate
Substation Skin
Fig. 1
Substation Skirt
STEP 1
Remove Substation Top Cover by pulling it up. Disassemble Substation Track
Plate and Substation Skins by removing three Substation Track Plate screws (Fig.
1). Save hardware for reassembly.
Note:
Power connection using power infeed should be performed by
qualified electrician.
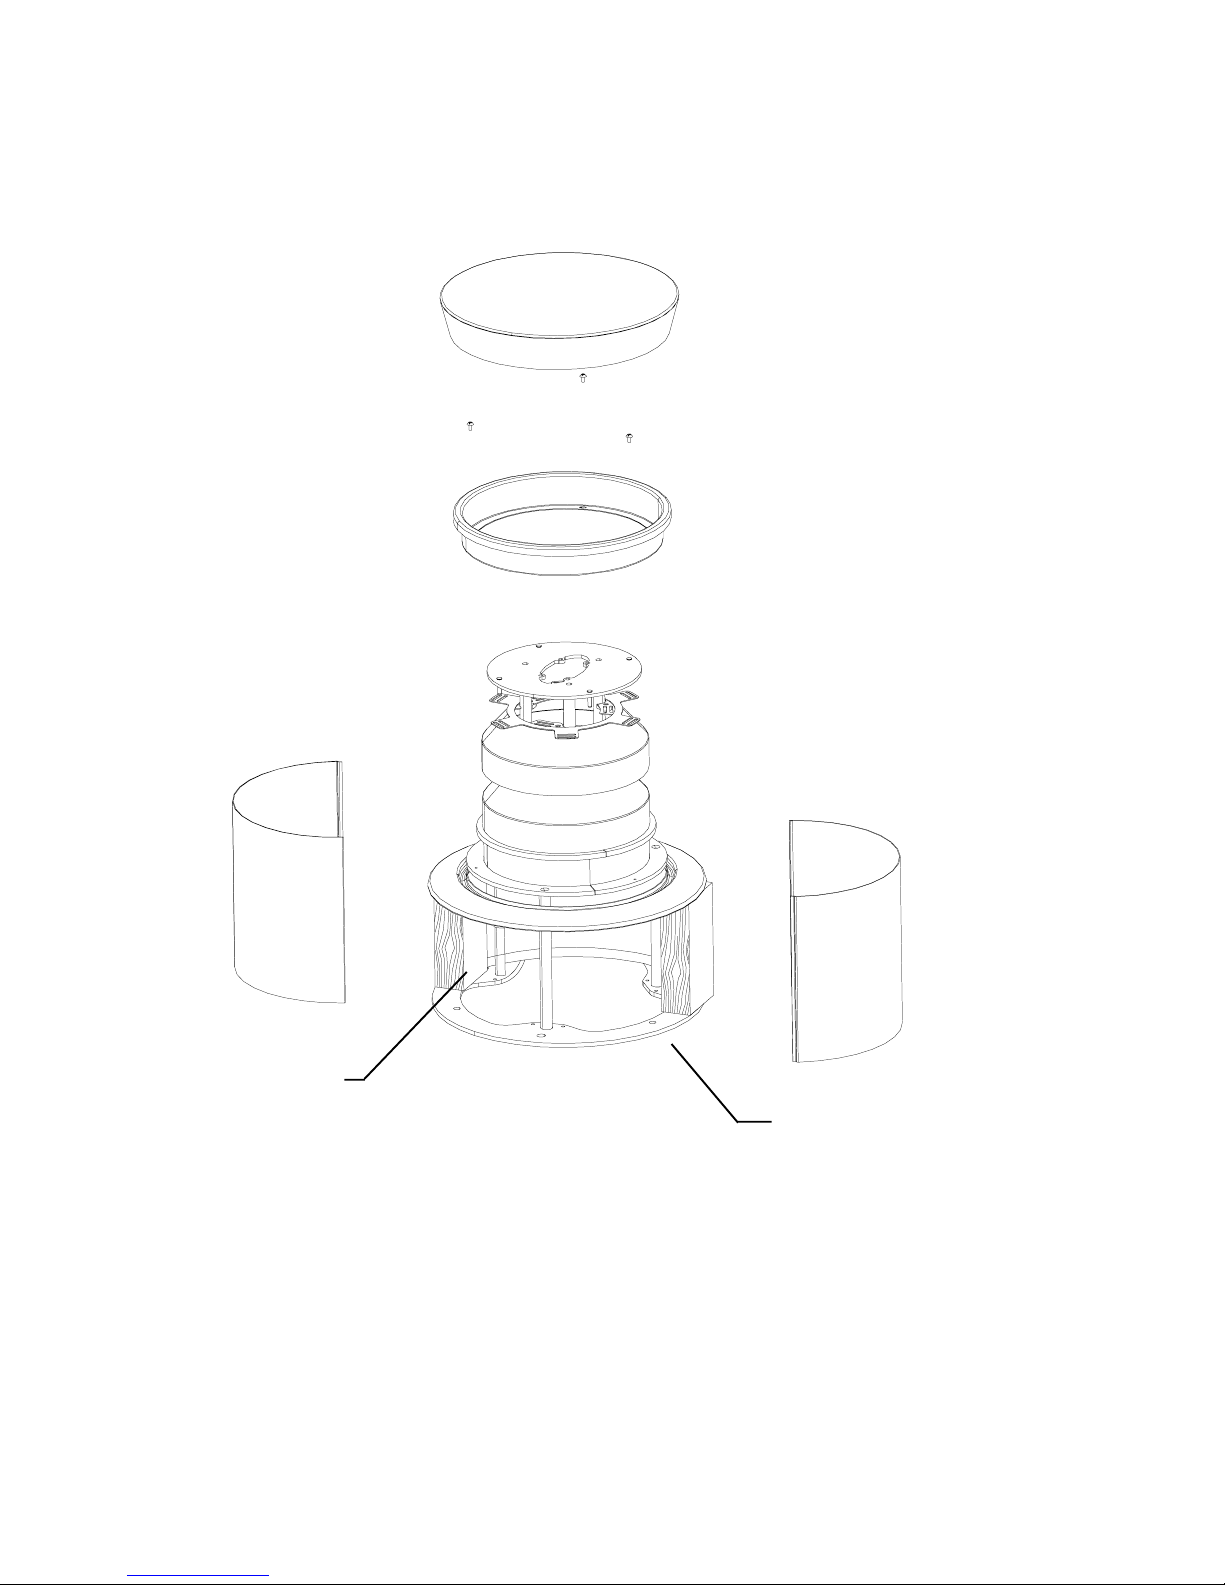
Wooden Block
Lift Substation Skirt up and hold it in place with two wooden blocks 7 long (Fig. 2).
Mark bolt hole pattern (3 holes) on the floor using hole locations in mounting plate
as template. Move Substation aside.
Fig. 2
STEP 2
Mounting plate
 Loading...