

Bretford FPPC72V200 Assembly Instructions Manual

FPPC72V200
72” FREE STANDING
DISPLAY CART
Assembly Instructions
Hardware List
Ref. Qty. Part No. Description
AA 2 SC1048B 1/4-20 45mm Joint Connector Bolts
BB 1 030-1217 1 3/4” Diameter Washer
CC 1 030-1129 5/8-11 UNC 1 3/4” Socket Hd Screw
DD 2 012-0761 Cable Clips
EE 8 030-0402 #10-32 x 5/8” Combo Screws
FF 10 030-0307 5/16-18 x 5/8” Hex Hd Screws
GG 10 030-0411 5/16-18 Serrated Nuts
HH 6 030-0306 1” x 21/64” x 1/16” Washers
II 2 030-1340 1/4-20 x 2” Hex Hd Bolts
JJ 2 030-0043 #10-1/4” Washers
KK 4 030-0713 3/8-16 x 5/8” Button Cap Screws
LL 4 030-0865 #6 x 1/2” Button Pin-In Hd Screws
MM 2 030-0354 10-32 x 1 1/2” Button Socket Screws
1 030-0353 1/8” T-Handle Allen Wrench
1 030-0397 3/16” Allen Wrench
1 HK1020 5/32” Allen Wrench
1 030-1237 1/2” Allen Wrench
1 030-1352 1/8” Security Pin-In Driver Bit
1 044-2124 Courtesy Monitor Hardware Pack
CAUTION: This mount is intended to support a at monitor having a diagonal screen size of 32-50”, a
weight of 170 lbs and having a monitor mounting hole pattern no larger than 700mm wide by 400mm
high. For added safety and ease of installation, use a qualied professional to properly install the correct
mounting hardware. Bretford will not be liable for the improper use or installation of its products.
**MOUNTING YOUR MONITOR
Bretford has tried to provide courtesy M4, M5 and M6 metric hardware to accommodate as many
styles of large monitors as possible. New monitor designs are constantly entering the market and your
monitor may require a metric hardware size not included with this model. Your local small hardware store
is usually the most effective place to source additional metric screws. If you are unsure of the hardware
size, please consult your monitor manufacturer for the appropriate wall mounting hardware size for your
monitor. NOTE: The minimum thread engagement required is the same as the diameter of the screw, for
instance, if the screw diameter is 8mm, the minimum thread engagement is also 8mm.
WARNING
The monitor bracket screws must be fully seated in the back of the monitor in order to create a
stable installation. If the monitor bracket screws are not fully seated, your installation will not be stable
and personal injury or damage to your monitor may result.
When mounting monitor brackets, do not use screws that exceed the depth of the monitor mounting
holes. Using screws that are too long may cause damage to your monitor. Never tighten fasteners past
the rst sign of resistance. Over tightening may cause serious damage to your monitor. Any doubt, the
installer should consult monitor manufacturer for mounting hole depth guidelines.
1
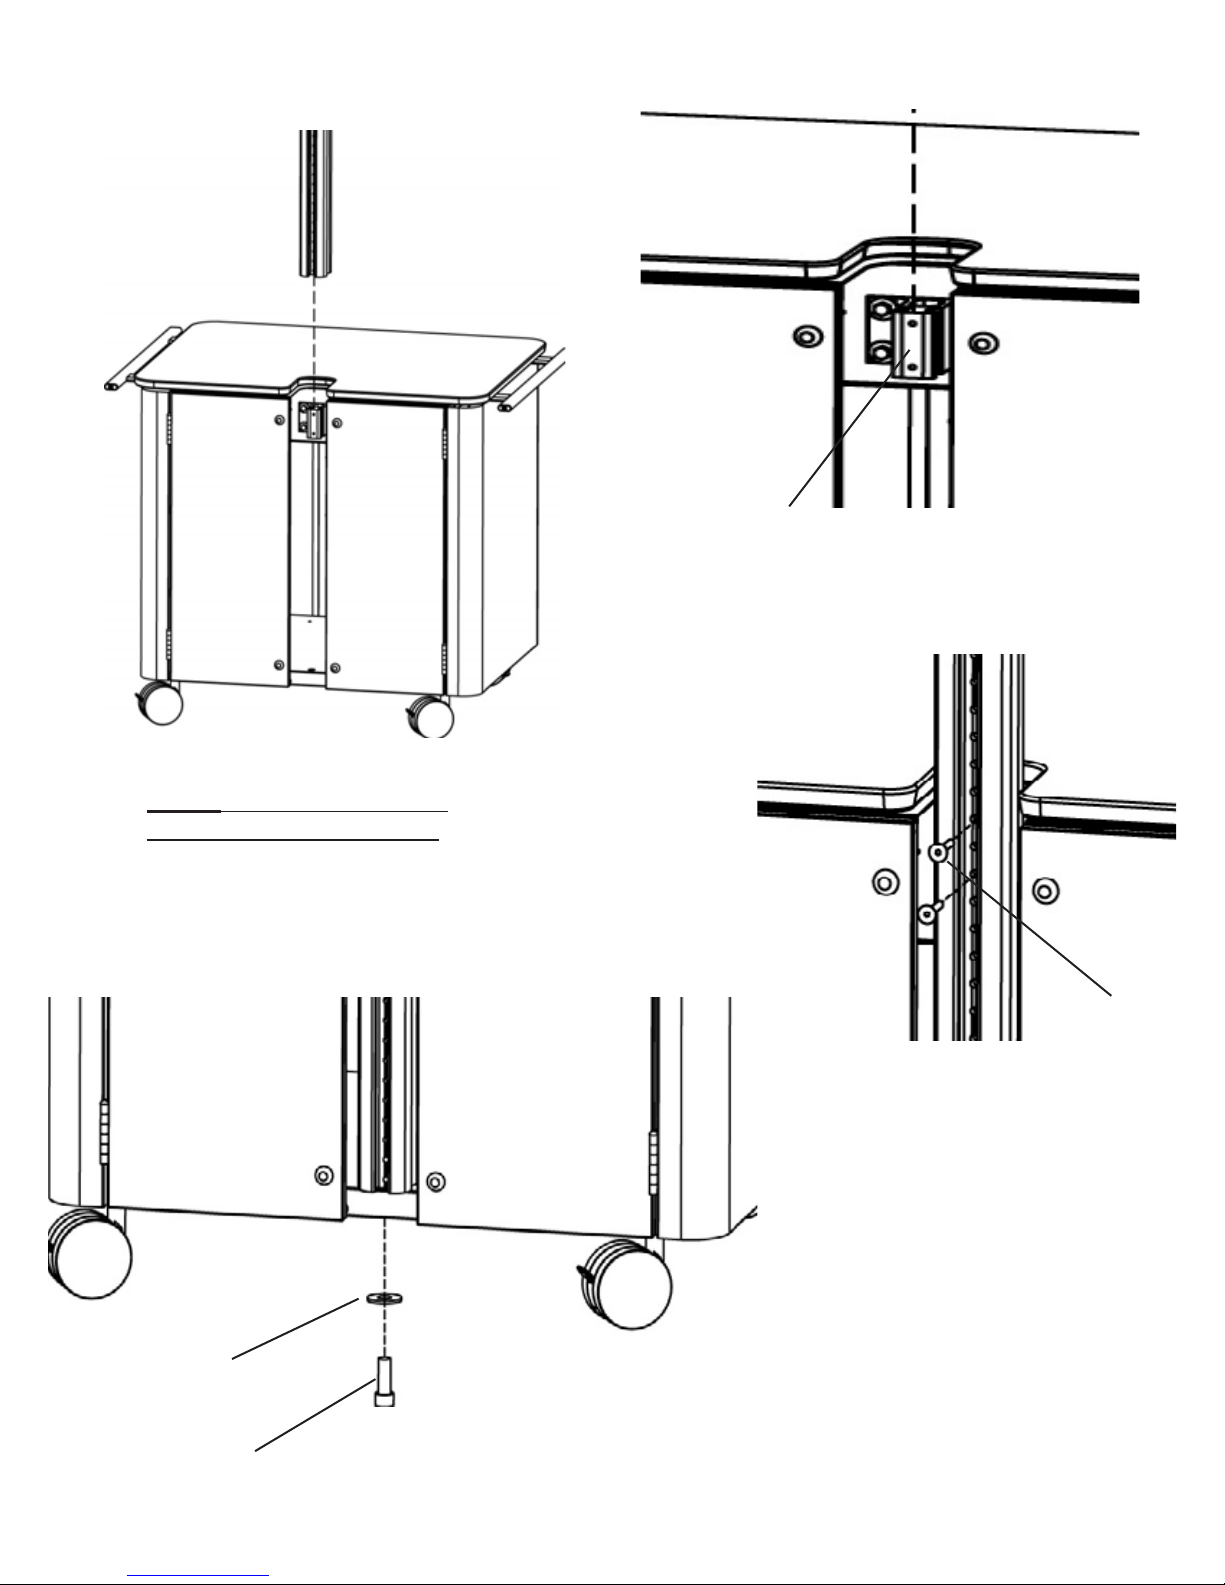
STEP 1
If necessary, loosen bolts
and slide bracket up or
down to align with the pole.
Slide pole onto cart as shown.
NOTE: Make sure pole sits
completely on bottom shelf.
AA
Secure pole to cart bracket
with screws (AA) as shown.
(Use 5/32” Allen wrench
provided)
BB
CC
(Use 1/2” Allen
Secure pole to bottom of cart with
washer (BB) and bolt (CC) as shown.
wrench provided)
2
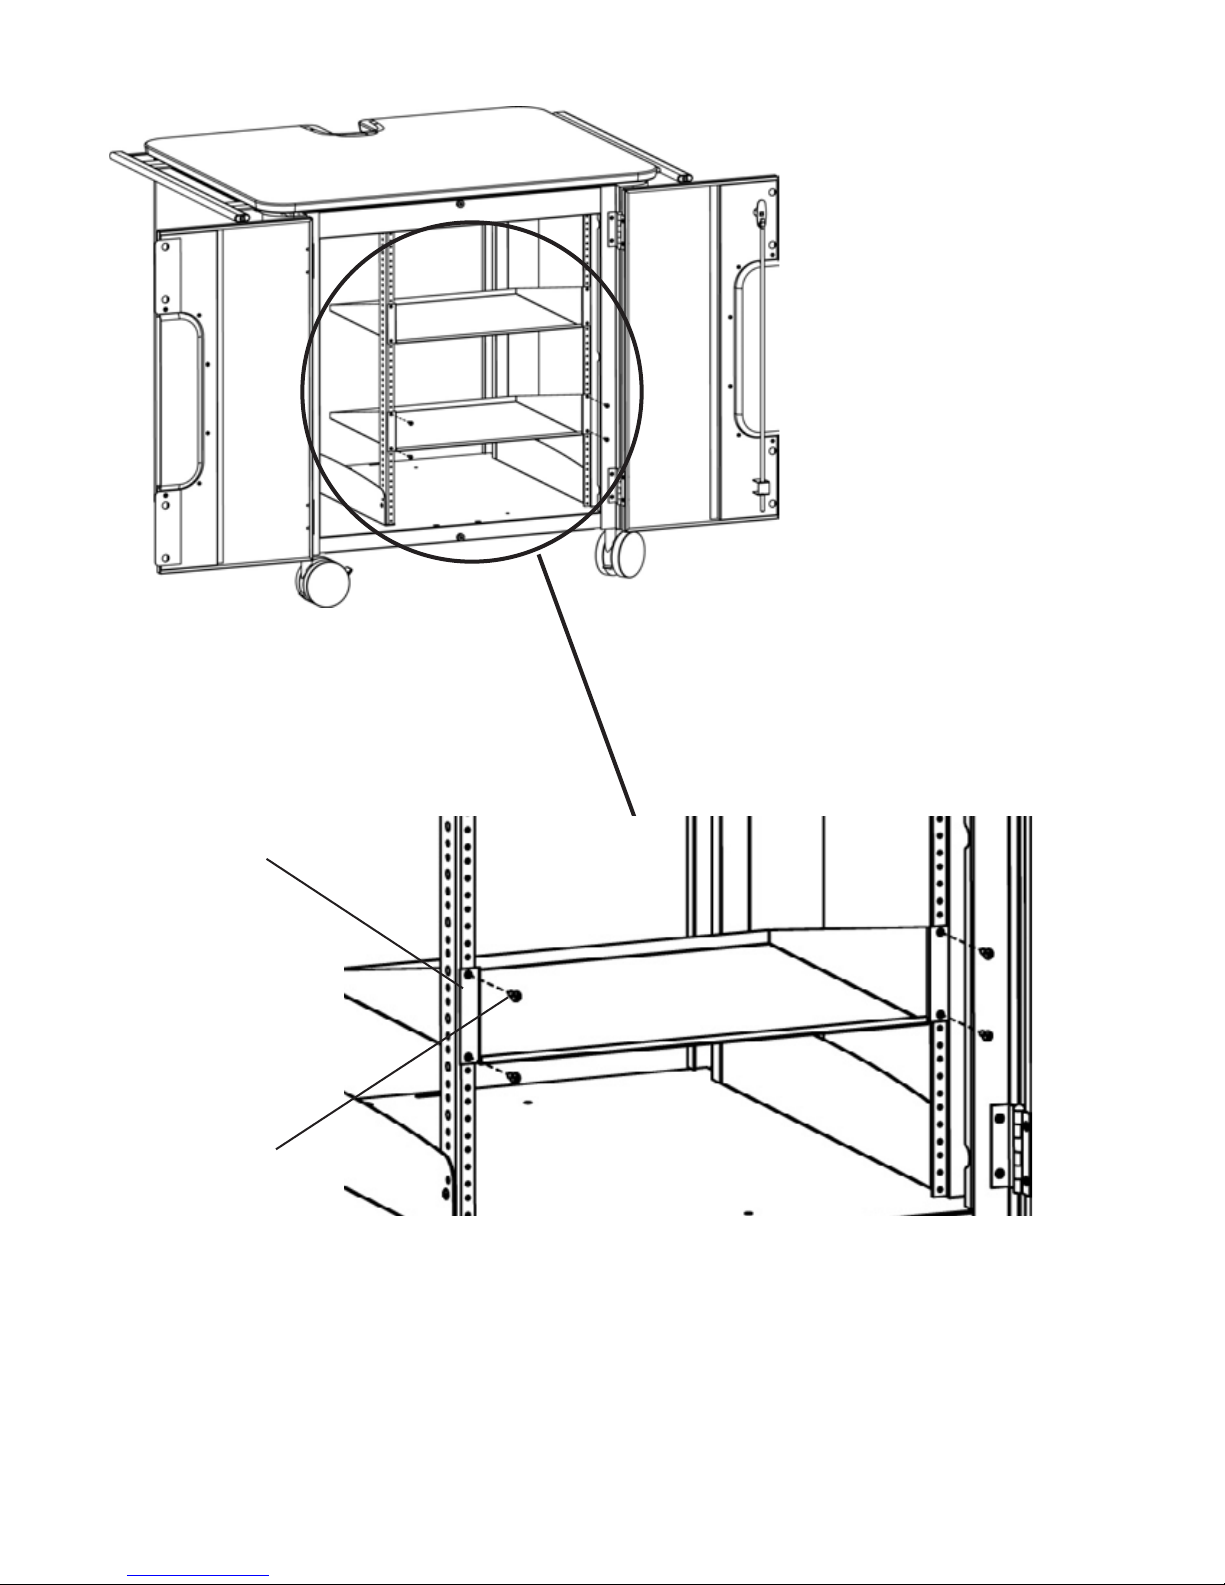
Flange in front
of rack rail
EE
Install each utility shelf to rack rail as shown using screws (EE).
Make sure shelf ange is in front of rack rail. Shelves may be
install at your own desired locations within the rails.
STEP 2
3
 Loading...