

Bretford CDQ2436, CDQ3042, CDQ3036, CDQ2442, CDQ2460 Assembly Instructions Manual
...
CDQ2436 CDQ3036 CDQ2442 CDQ3042 CDQ2460
CDQ3060 CDQ2472 CDQ3072 CDQ2484 CDQ3084
4 Leg Classroom Desk with Glides/Casters
Assembly Instructions
Parts List
Qty. Part No. Description
1** SA4236 24 x 36 Wood T op - CDQ2436
SA4241 30 x 36 Wood T op - CDQ3036
SA4237 24 x 42 Wood T op - CDQ2442
SA4242 30 x 42 Wood T op - CDQ3042
SA4238 24 x 60 Wood T op - CDQ2460
SA4243 30 x 60 Wood T op - CDQ3060
SA4239 24 x 72 Wood T op - CDQ2472
SA4244 30 x 72 Wood T op - CDQ3072
SA4240 24 x 84 Wood T op - CDQ2484
SA4245 30 x 84 Wood T op - CDQ3084
4 010-351 1 Corner Tie
4 017-0686 Bottom Leg
Models with All Glides
2 017-0687 R/Front or L/Rear Leg
2 017-0688 L/Front or R/Rear Leg
Models with 2 Glides & 2 Casters
1 017-0687 R/Front or L/Rear Leg (Glide)
1 017-0688 L/Front or R/Rear Leg (Glide)
1 017-0883 R/Front or L/Rear Leg (Caster)
1 017-0884 L/Front or R/Rear Leg (Caster)
**Skirts and upper leg frame assemblies are attached to
the wood top prior to shipment.
Hardware List
Qty. Part No. Description
4 030-0852 5/16-18 x 1-1/4" Hex Flange Cap Screws
8 030-0396 3/8-16 x 1/2" Set Screws
4* 015-0084 3/8-16" Glides
*For Models with glides and casters
(2) 015-0084 & (2) 015-0089
T ools Required
Philips Screwdriver
Allen Wrench
Adjustable Wrench
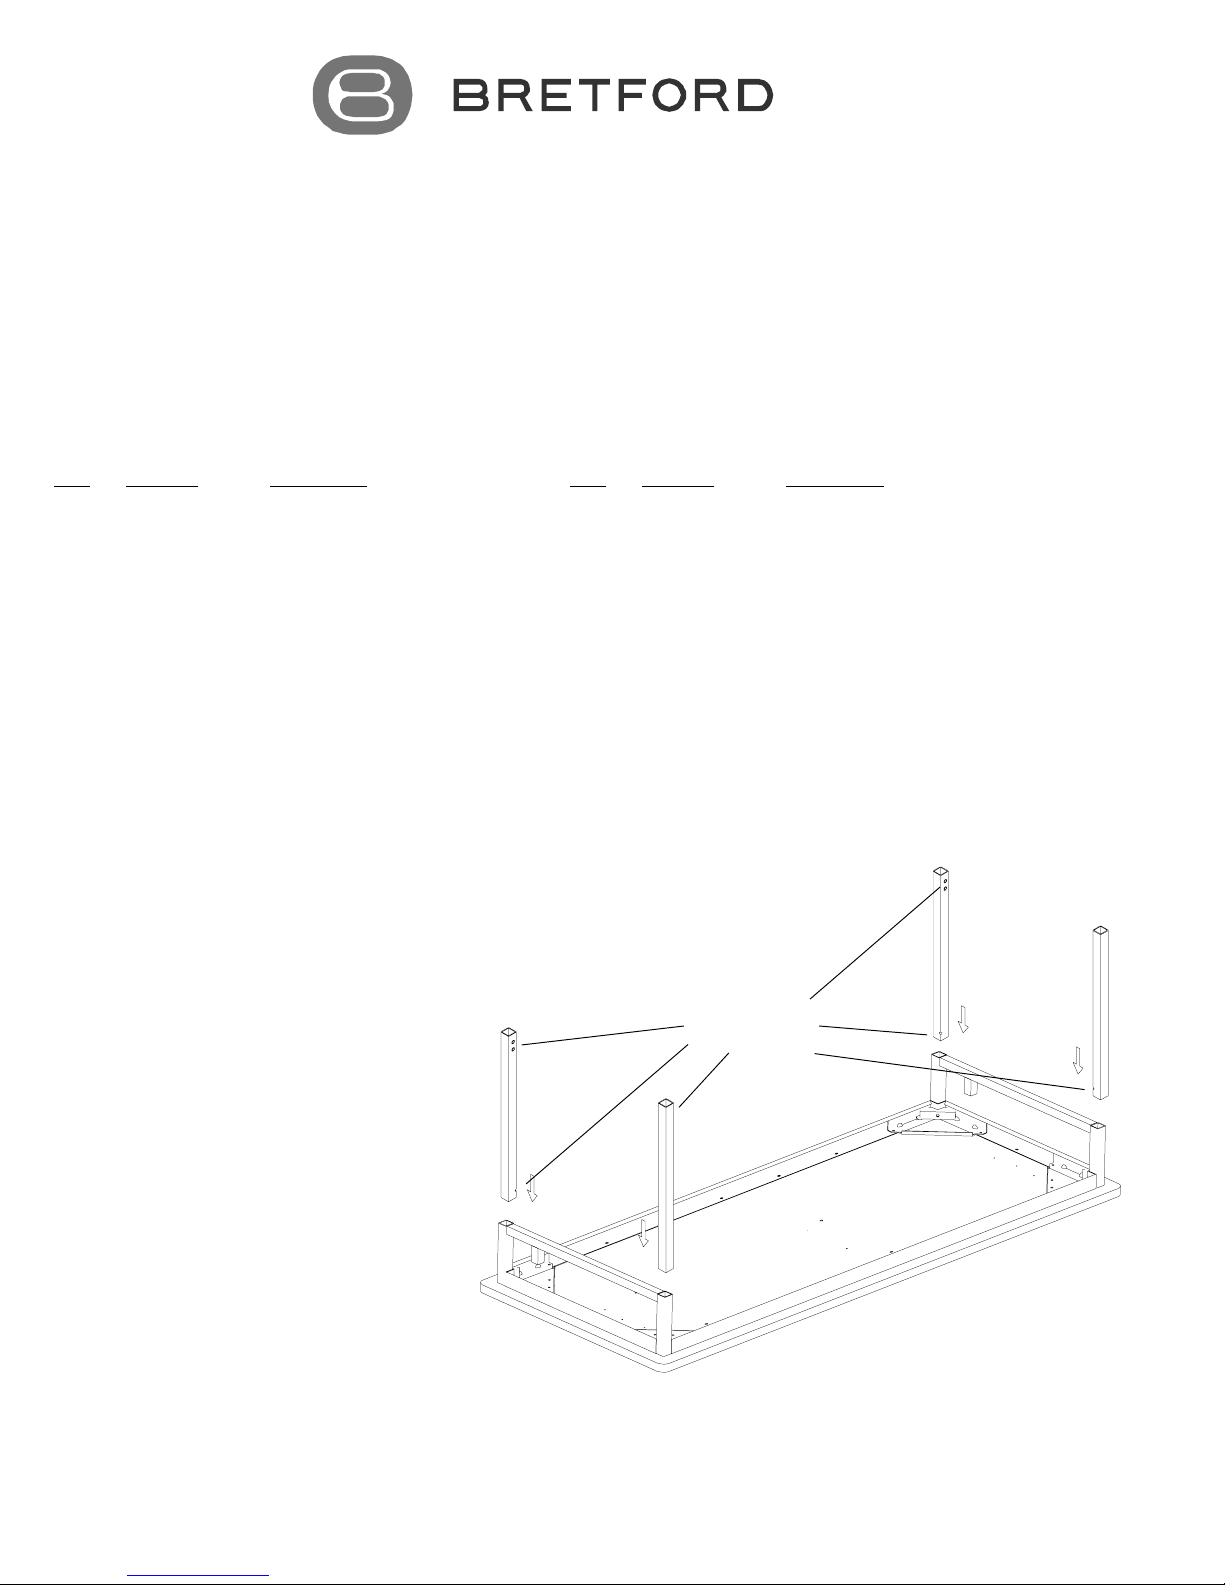
All Leg Holes
Face Inward
Lay wood top on a carpeted surface as shown. Insert the
legs into each corner with holes facing inward as shown.
STEP 1

SAFETY WARNING
Note: TWO PERSON
ASSEMBLY REQUIRED
Corner tie
010-351 1
STEP 2
Secure legs in place with corner ties
and cap screws as shown.
Cap Screw
030-0852
Glide
015-0084
OR Caster 015-0089
(Depending on your model)
Bottom Leg
017-0686
STEP 3
Screw glides and/or casters into bottom legs as
shown. Glides/casters should be fully installed
into legs so that the entire stem is inside of leg.
Set Screw
030-0396
STEP 4
Position holes in legs so that they face each other. Insert
bottom legs into top legs. Set desired height and insert
set screws into legs and tighten with Allen wrench. Stand
the unit upright.
Bretford Bretford Ltd.
11000 Seymour Avenue 2 Etongate
Franklin Park, IL 60131 110 Windsor Road
TEL: 847.678.2545 Slough, Berkshire SL1 2JA England
FAX: 847.678.0852 FAX: 01753 539478
800.521.9614 TEL: 01753 216531
800.343.1779
www.bretford.com
Part # 031-5989
Rev. 05.30.06 CZ
 Loading...