

Bretford 35SD27, 35SD21, 35SD25 Assembly Instructions Manual
35SD21 35SD25 35SD27
Connections Smart Deck Table
Assembly Instructions
PARTS LIST HARDWARE LIST
Qty Part# Description
1 Wood Top and Upper Leg Assembly
2 022-2361 Right/Left Lower Legs
1** 010-3026 Lower Inner Bracket
010-4977 Lower Inner Bracket for MT Models
**(2) for Model 35SD25 & 35SD27
1** 010-3027 Bottom Bracket
**(2) for Model 35SD25 & 35SD27
1** 010-3028 Top Bracket
**(2) for Model 35SD25 & 35SD27
1** 010-3030 Upper Outer Bracket
010-4979 Upper Outer Bracket for MT Models
**(2) for Model 35SD25 & 35SD27
1** 010-3031 Upper Inner Bracket
010-4978 Upper Inner Bracket for MT Models
**(2) for Model 35SD25 & 35SD27
Ref Qty Part# Description
AA 4 030-0396 3/8-16 x 1/2” Set Screws
BB 4 015-0045 Non-Swivel Glides
CC 5** 030-0272 1/4-20 x 1/2” Carriage Bolts
**(10) for Model 35SD25/27
DD 5** 030-0207 1/4-20 Flange Nuts
**(10) for Model 35SD25/27
EE 1** 031-1822 Velcro Hooks
**(2) for Model 35SD25/27
FF 1** 031-1823 Velcro Loops
**(2) for Model 35SD25/27
1 030-0397 3/16 Standard Allen Wrench
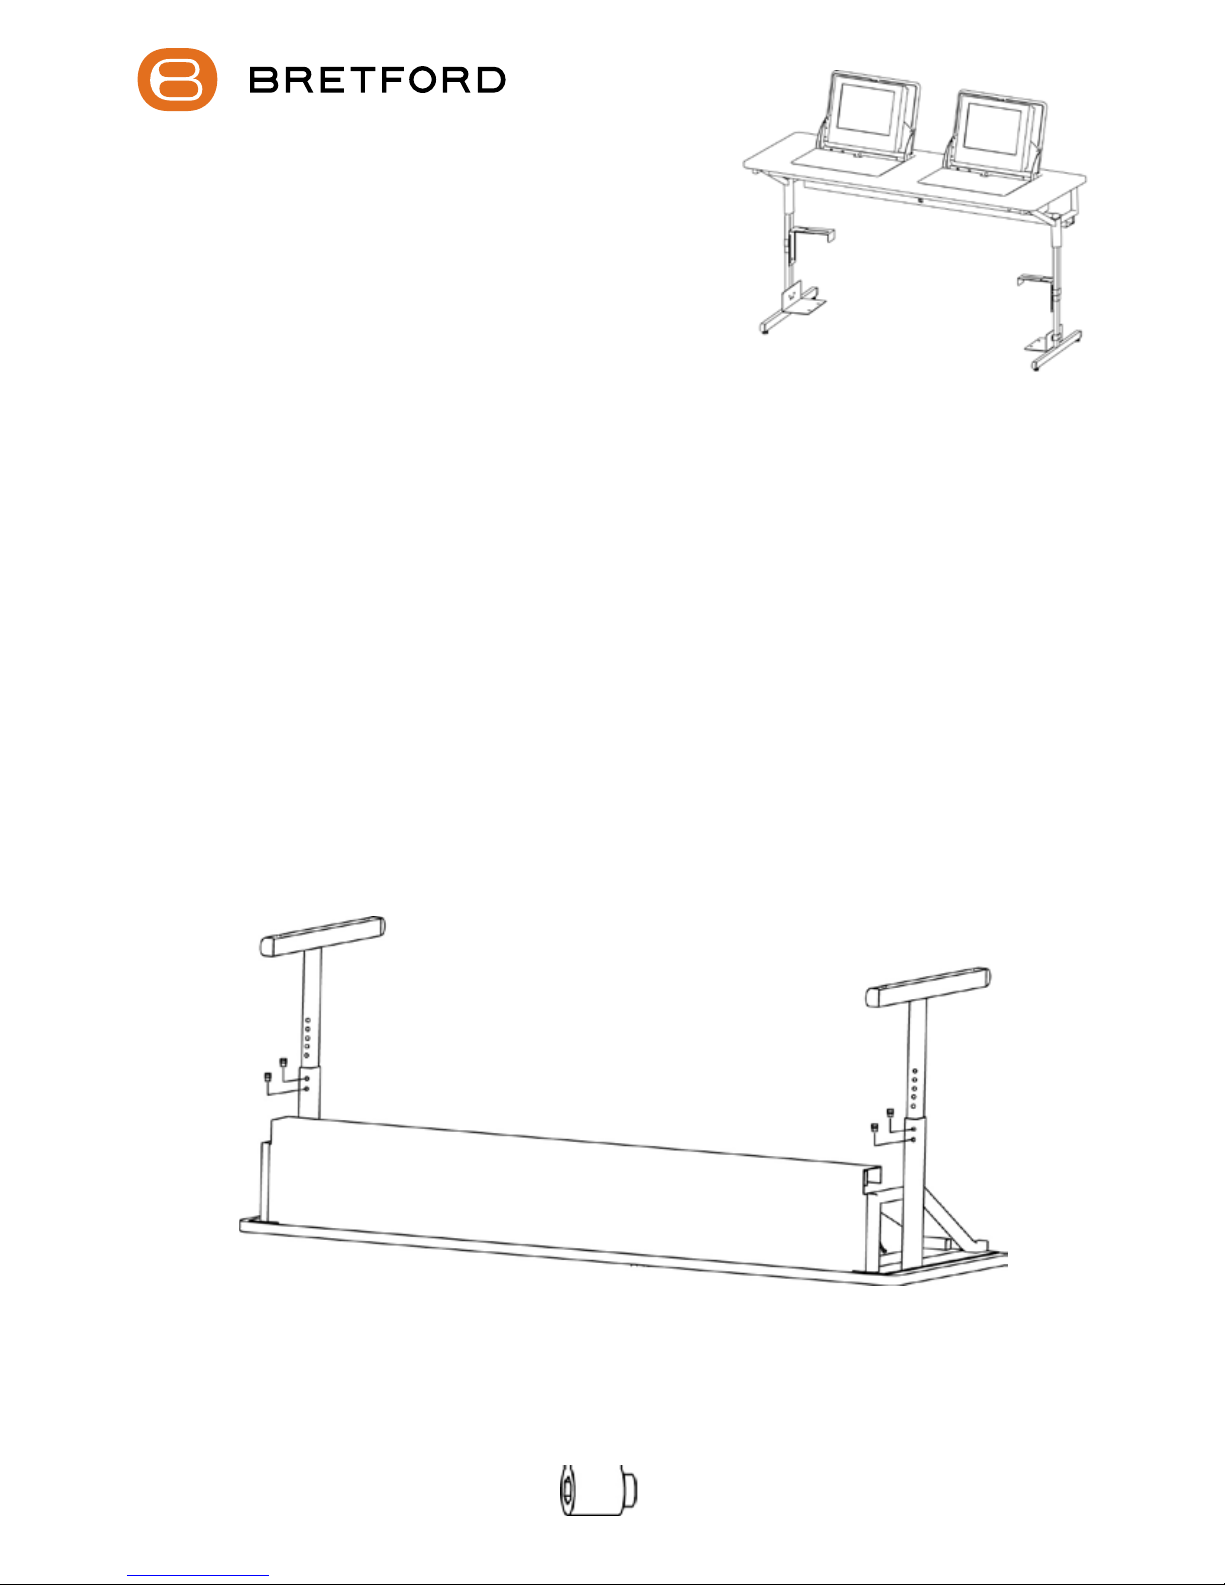
TABLE BACK EDGE
CAREFULLY lay the wood top/leg assembly on a carpeted surface as shown. Insert lower legs
into upper legs with holes facing the back edge as shown and set desired height. Insert set
screws (AA) into legs and tighten with Allen wrench (provided).
STEP 1
AA
1
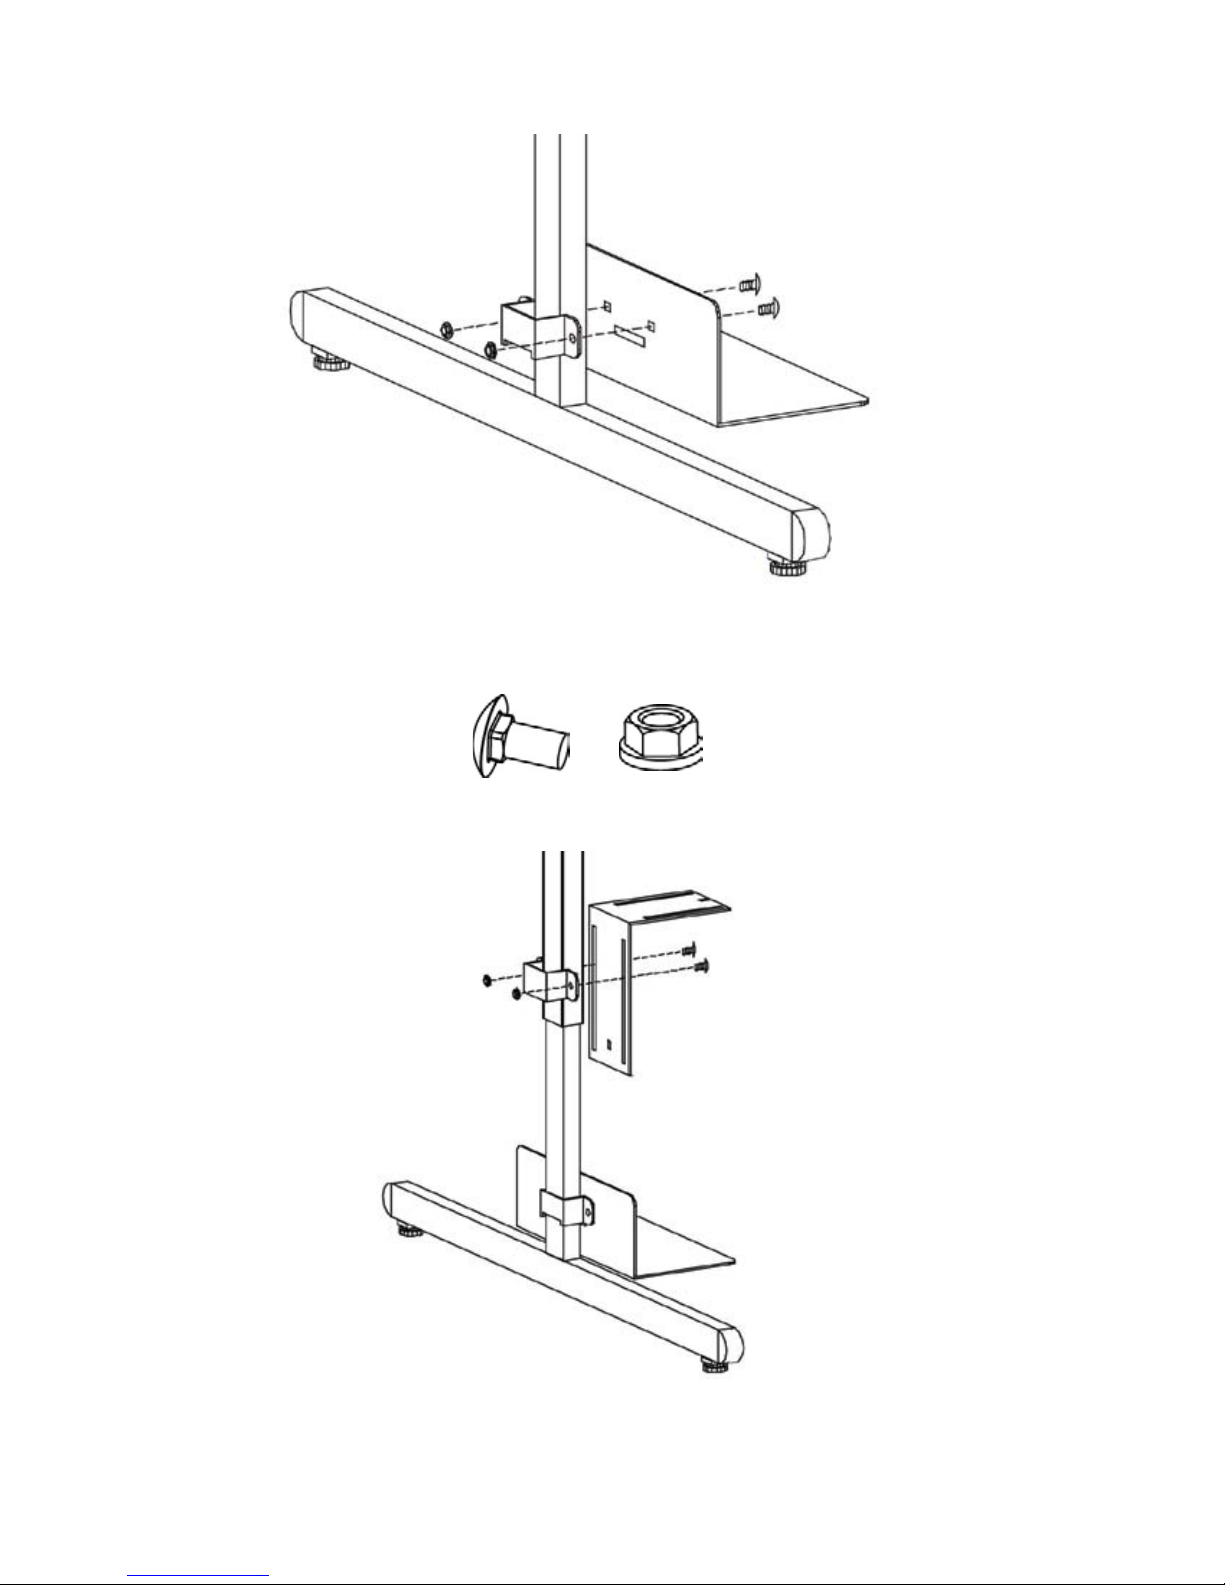
STEP 2
Position the bottom bracket (with notch) and the lower inner bracket to the bottom half of your pedestal
leg as shown. LOOSELY attach the brackets around the pedestal with bolts (CC) and nuts (DD).
CC
DD
Position the top bracket and the upper inner bracket around the upper half of your pedestal as
shown. LOOSELY attach together with bolts (CC) and nuts (DD). NOTE: These brackets can
be mounted above or below the set screws depending on the adjustment needed. Also the inner
bracket can be mounted with the long or short side facing the pedestal.
STEP 3
2
 Loading...