

Bresser SSL E-Mail/MMS 8MP Instruction Manual
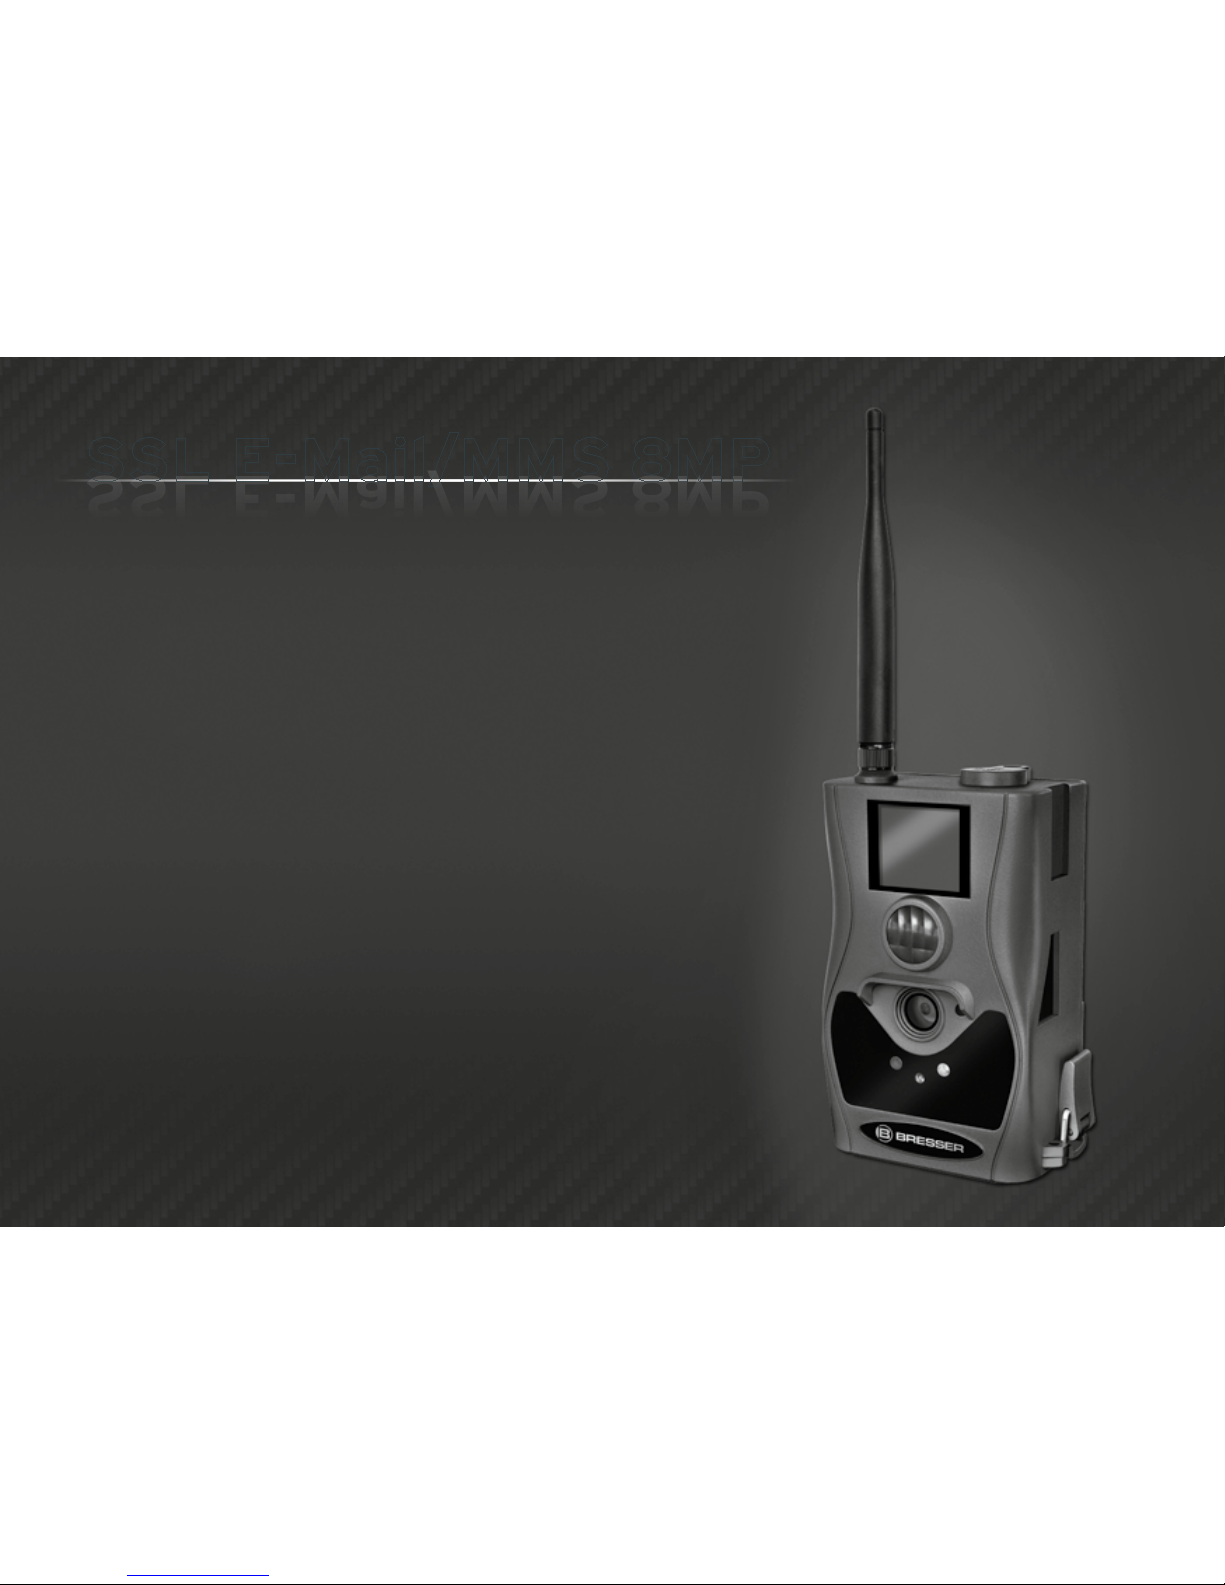
SSL E-Mail/MMS 8MP
Observation camera
Art. No. 33-40001
Instruction manual
SSL E-Mail/MMS 8MP
2
GB
Visit our website via the following QR Code or web link to nd further information on this product or the avail-
able translations of these instructions.
FR
Si vous souhaitez obtenir plus d’informations concernant ce produit ou rechercher ce mode d’emploi en
d’autres langues, rendez-vous sur notre site Internet en utilisant le code QR ou le lien correspondant.
NL
Bezoek onze internetpagina via de volgende QR-code of weblink, voor meer informatie over dit product of de
beschikbare vertalingen van deze gebruiksaanwijzing.
ES
Visite nuestra página de Internet utilizando el siguiente código QR o el
enlace web, para buscar más información sobre este producto o versiones
disponibles del presente manual de instrucciones en diferentes idiomas.
RU
Посетите нашу страницу в сети Интернет, используя QR-код или
Web-ссылку, для получения дополнительной информации по данному
устройству или для поиска доступных языковых версий данного руководства по эксплуатации.
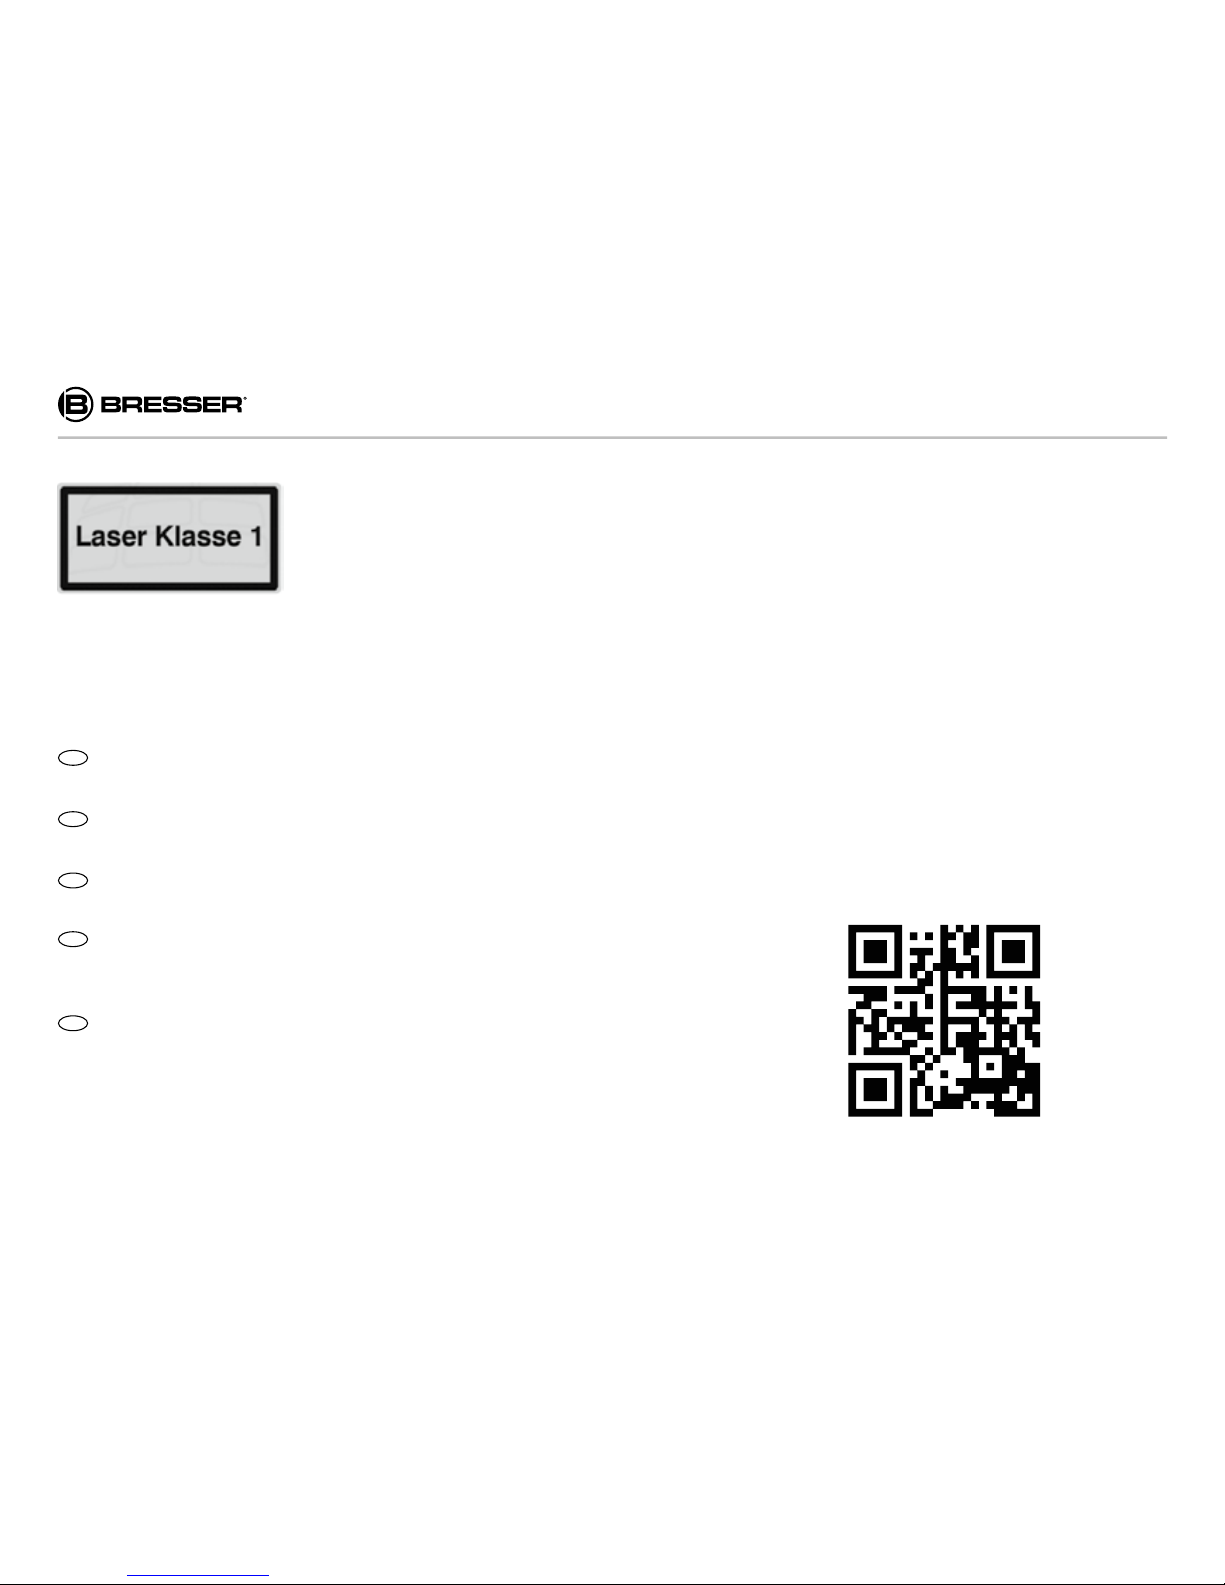
Safety note: CLASS 1 LASER PRODUCT
This device has been classied as a CLASS 1 LASER product according to IEC 60825-1.
The accessible laser radiation is safe under reasonably foreseeable conditions, and under
normal conditions of use. Do not open the housing. The device does not contain any parts
that can be serviced by the end consumer. Servicing of this unit must be left up to qualied
service personnel.
www.bresser.de/3340001
3
General Information
About this Instruction Manual
Please read the safety instructions in this manual
carefully. To avoid damage to the unit and the risk of
injury, only use this product as described in the manual.
Keep the instruction manual handy so that you can easily
look up information on all the functions.
DANGER!
You will nd this symbol before every section of
text that deals with the risk of minor to severe
injuries resulting from improper use.
ATTENTION!
You will nd this symbol in front of every section
of text which deals with the risk of damage to
property or the environment.
General Warnings
DANGER!
This device contains electronic components which
operate via a power source (power supply and/or
batteries). Only use the device as described in the
manual, or you run the risk of an electric shock.
Keep batteries out of the reach of children! Make sure
you insert the batteries correctly. Empty or damaged
batteries could cause burns if they come into contact
with the skin. If necessary, wear adequate gloves for
protection.
ATTENTION!
Do not disassemble the device. In the event of a defect,
please contact your dealer. The dealer will contact
the Service Centre and can send the device in to be
repaired, if necessary. Do not expose the device to
temperatures above 60°C.
Do not expose the device to high temperatures. Use
only the supplied power supply or the recommended
batteries. Do not short-circuit the device or batteries
or throw them into a re! Excessive heat or improper
handling could trigger a short-circuit, a re or an
explosion.
DE
4
Use only the recommended batteries. Always replace
weak or empty batteries with a new, complete set of
batteries at full capacity. Do not use batteries from
different brands or with different capacities. The batteries
should be removed from the unit if it has not been used
for a long time.
EC Declaration of Conformity
Bresser GmbH has issued a "Declaration of Conformity"
for this device (Observation camera / Art.No.:
33-40001) in accordance with applicable guidelines
and corresponding standards of Directive 1999/5/EG.
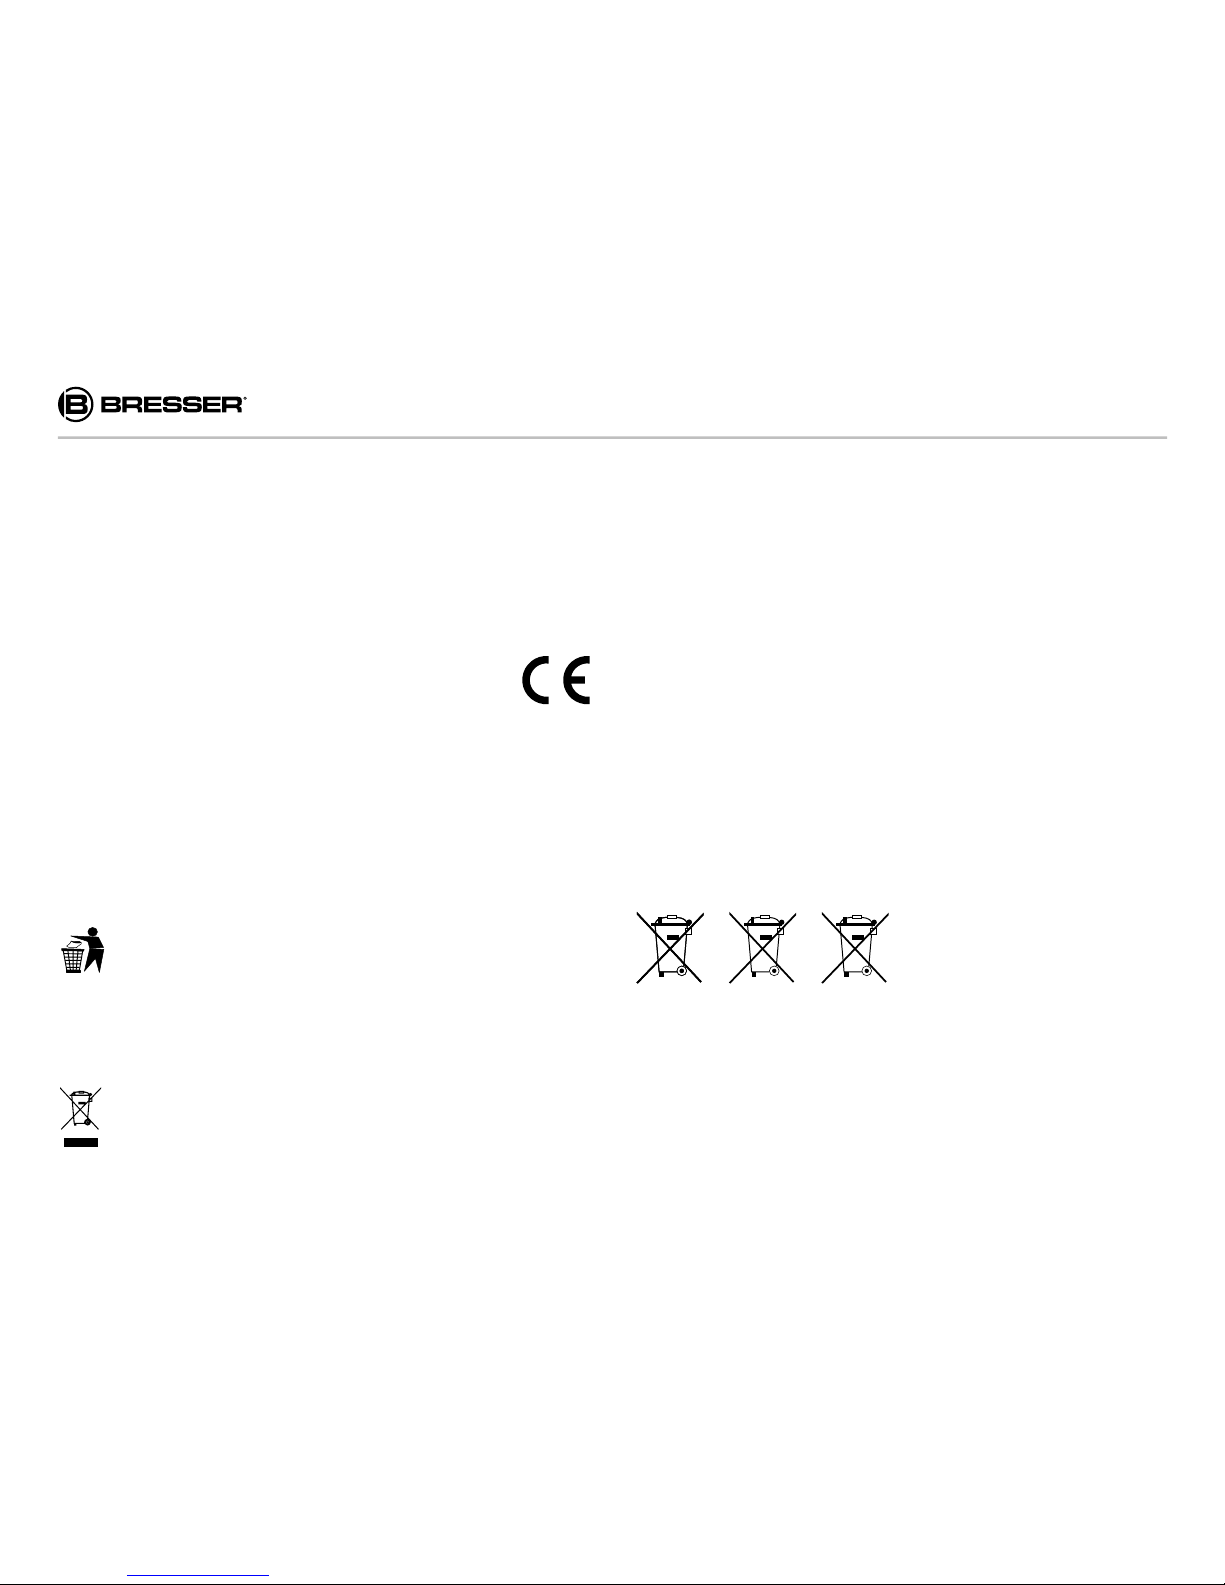
DISPOSAL
Dispose of the packaging materials properly,
according to their type, such as paper or
cardboard. Contact your local waste-disposal
service or environmental authority for information
on the proper disposal.
Do not dispose of electronic devices in the
household garbage! As per Directive 2002/96/
EC of the European Parliament on waste electrical and
electronic equipment and its adaptation into German
law, used electronic devices must be collected separately
and recycled in an environmentally friendly manner.
In accordance with the regulations concerning batteries
and rechargeable batteries, disposing of them in the
normal household waste is explicitly forbidden. Please
make sure to dispose of your used batteries as required
by law — at a local collection point or in the retail market.
Disposal in domestic waste violates the Battery Directive.
Batteries that contain toxins are marked with a sign and
a chemical symbol. "Cd" = cadmium, "Hg" = mercury,
"Pb" = lead.
Cd¹ Hg² Pb³
1
battery contains cadmium
2
battery contains mercury
3
battery contains lead

5
1. Instructions
1.1 General Description
This digital observation camera, with black IR illumination,
works fully automatically. The specic region of interested (ROI) is monitored by a high sensitive Passive Infrared
(PIR) motion sensor and can be triggered by the slightest
movement of either human or animal thus leading to automatic exposure of high quality pictures (up to 8MP interpolated) or recording of video clips (VGA) according to
default settings or preset customer settings. Images can
then be directly forwarded to your mobile phone or by
email via GSM/GPRS network. The automatic messaging
function sends you information when photos or videos are
triggered.
Colour photos and videos are possible when sufcient
light is available. In darkness the integrated infrared LEDs
illuminate the region of interest while the camera photographs (monochrome). It’s novel patented IR illumination
is not visible to animals and humans and has a range of
up to 18 meters.
The camera is water and snow resistant thus being ideal
for outdoor use. Furthermore, it can be used as a portable
digital camera.
Manual pictures and videos can be taken by pressing
on the remote control (please note that the “TEST” mode
needs to be activated as well as an SD-card inserted.)
Intended use
This surveillance camera is used for monitoring objects
or places (eg rooms, door and entrance areas, driveways
and wildlife, watching at feeding grounds, the feeding
place or deer crossing) with photo or video.
The camera is waterproof (IP44 rating) and thus not only
suitable for indoor surveillance, but also for mounting in a
protected spot outside.
Through motion, the integrated PIR sensor triggers a photo or video that is stored on a memory card. The photo can
be sent via MMS or email. If the ambient light is too weak,
the surveillance camera automatically turns on the built-in
infrared lighting and the camera turns for better sensitivity
into b / w mode.
The camera is powered by batteries. For stationary surveillance the camera can also be powered by an AC adapter*.
However, the network device* must be protected from
moisture and humidity.
DE
*not included with your purchase
6
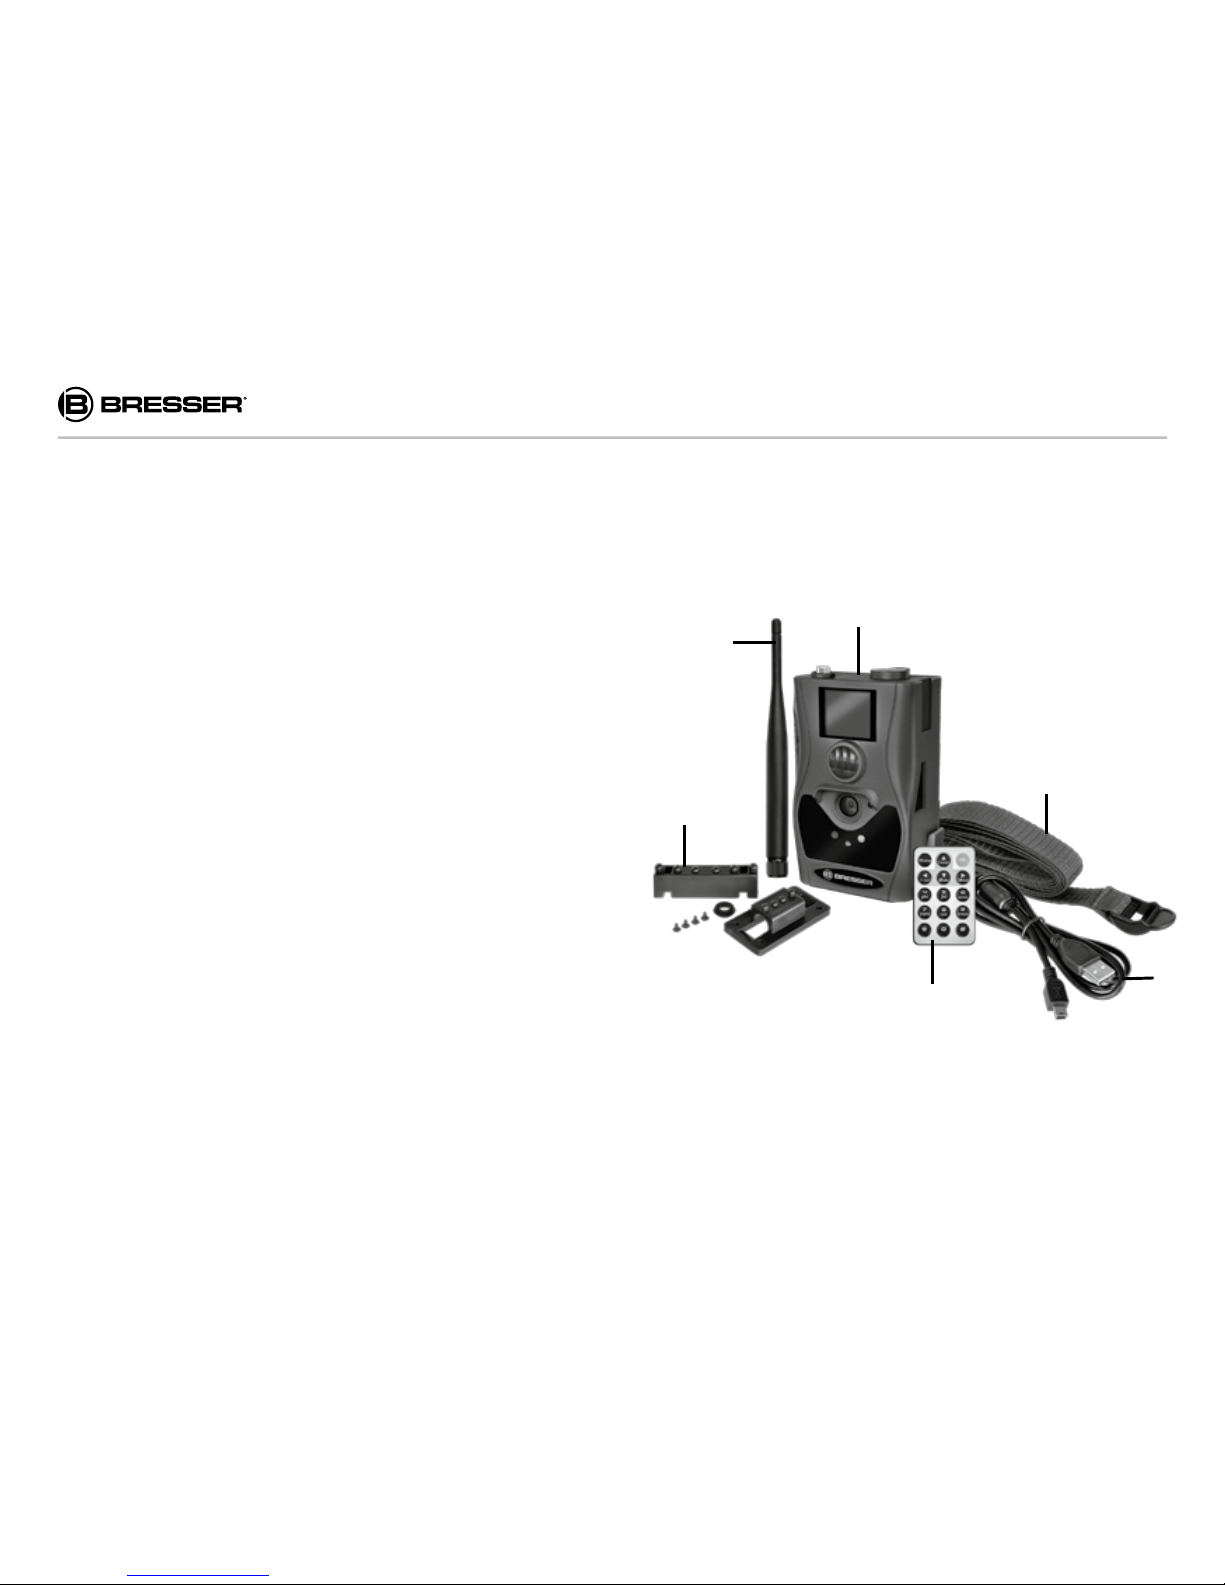
1.2 Included in delivery
(Fig. 1)
B
B
Digital camera C Antenna D Remote control
E
USB cable F Belt G Assembly accessories
C
F
D
G
E
1.3 Camera I/O Interfaces
The camera has the following I/O interfaces: Mini USB
connector, SD-card1 slot, TV output, SIM card1 slot and
The surveillance camera is designed exclusively for use in
private households. Any other use or modication of the
camera is considered improper use and could give rise to
considerable dangers. The manufacturer is not liable for
damage caused by improper use or incorrect operation.
*not included with your purchase
7
DE
external DC power connector.
There is a small hole in the battery compartment where
one can attach a lock for theft-protection.
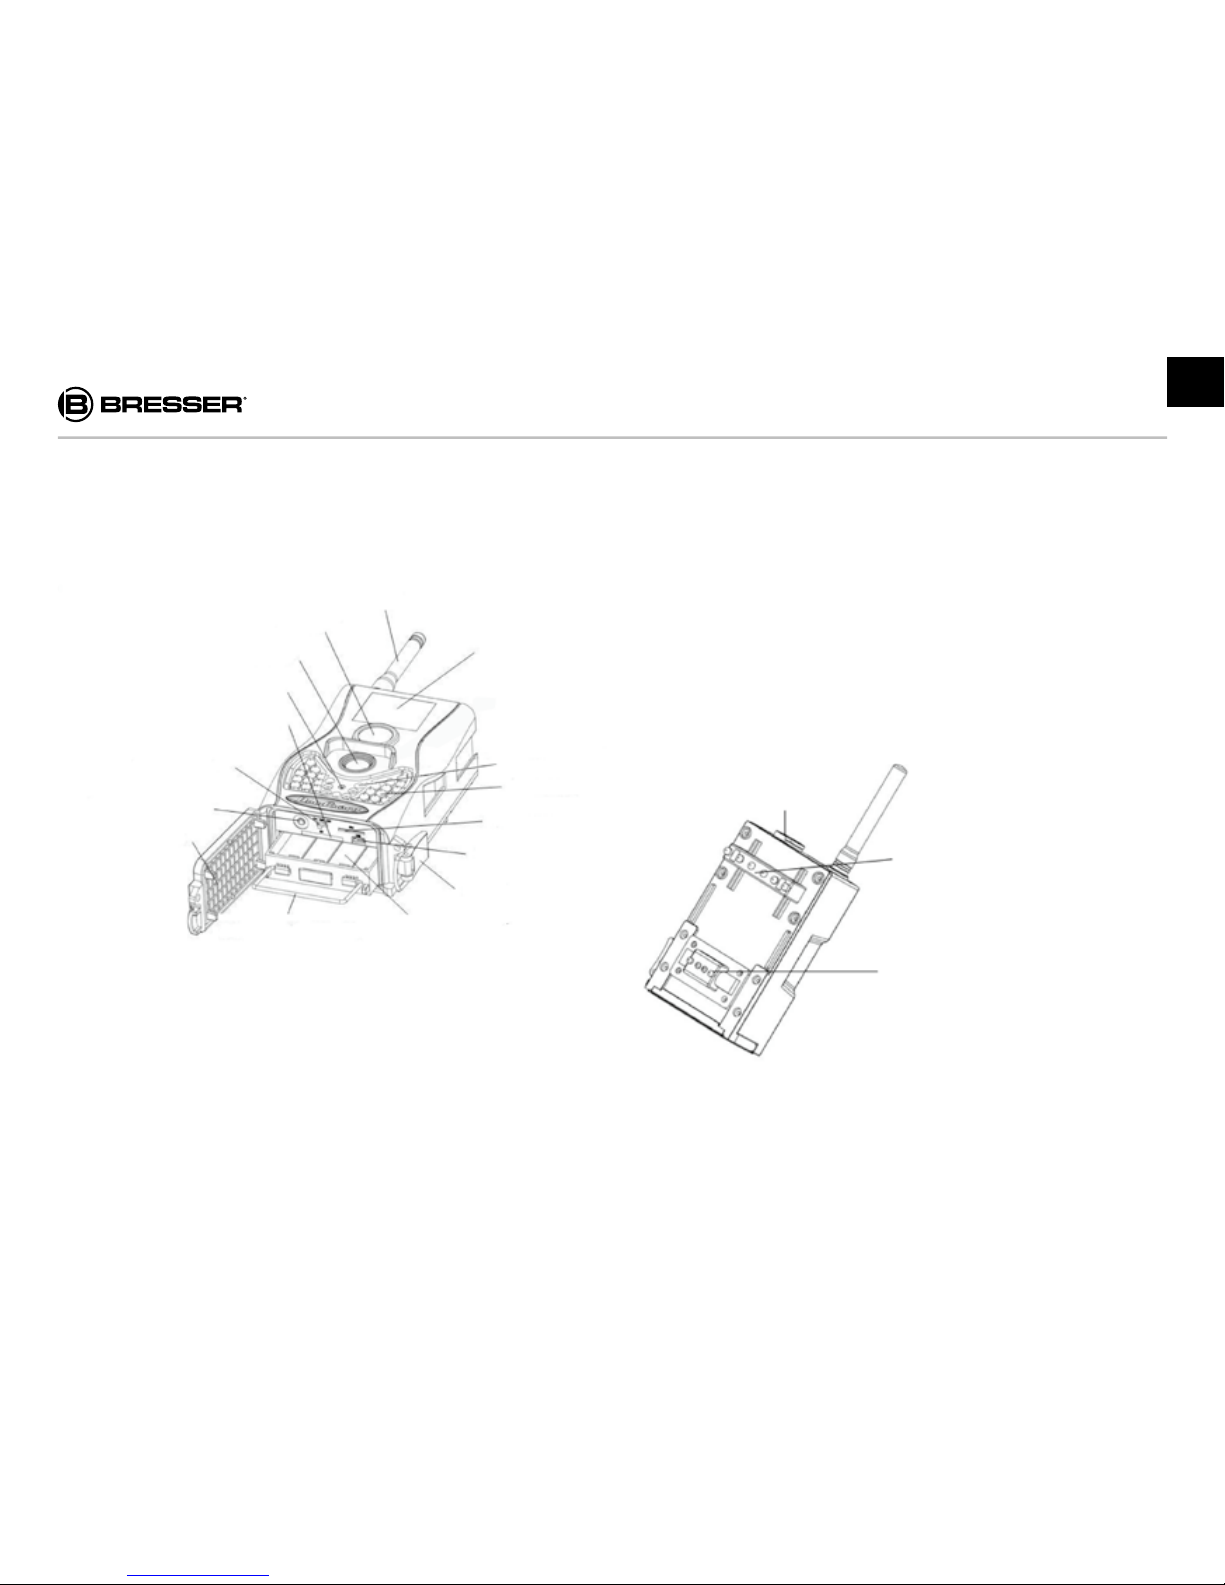
B
C
F
D
G
E
H
I
J
1!
1@
1#
1$
1%
1^
1)
1. Bottom Cover
2. TV-out connector
3. Power switch
4. SD-Card slot
5. Laser pointer
6. Camera lens
7. PIR (Passive Infrared motion sensor )
8. Antenna
9. LCD Display
10. Indication LED's
11. IR illumination
12. SIM card slot
13. USB connector
14. Lock
15. Battery compartment
16. Battery depot handle
1. DC power
connector
2. Tilt adjustment
3. Theft-protection
lock
B
C
D
*not included with your purchase
8
B
C
F
D
G
E
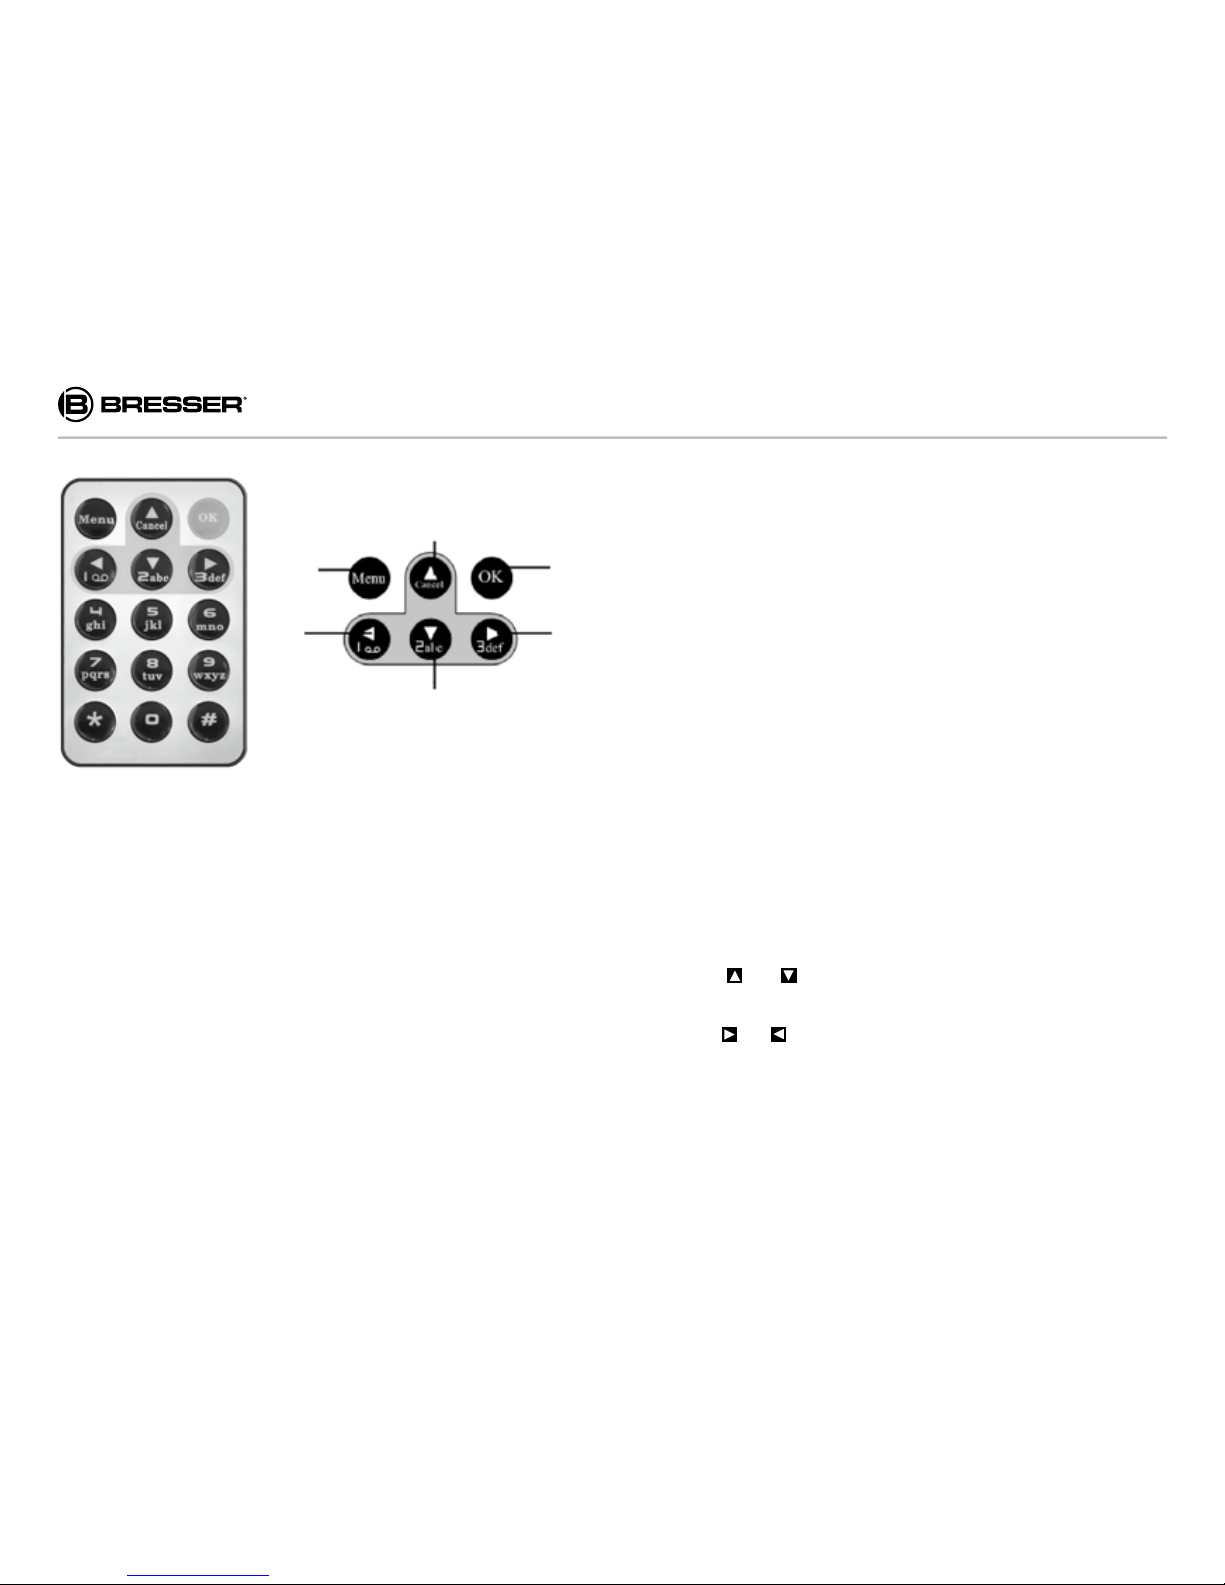
1.4 Remote Control
Camera settings can be adjusted using the remote control. The wireless infrared device has a reception range
of up to 9 meters.
Please note:
It can take up to 20 seconds, after the camera has been
switched on, before it receives signals from the remote
control.
The remote control has 15 function keys.
1. <Cancel> Select item (UP), Increase value
2. <OK> Make selection (OK)
3. <3def> Select option (RIGHT)
4. <2abc> Select item (DOWN), Decrease value
5. <1> Select option (LEFT)
6. <Menu> Display menus, Exit (MENU)
1.4.1 Navigation
Please note:
In order to navigate through the camera´s menu with
the remote control, an SD-card must be inserted and
„TEST“ mode must be activated (power switch in „Test“
position).
1. Press „Menu“ on remote control to start camera
menu.
2. Press or keys to switch between the different
menus.
3. Press
or keys to switch from a submenu to ano-
ther menu point.
4. Press „OK“ key to make a selction.
*not included with your purchase
9
DE
1.4.2 Entering special characters
Some helpful special characters may be entered using
the following key combinations:
1 . / : @ _ 0 + -
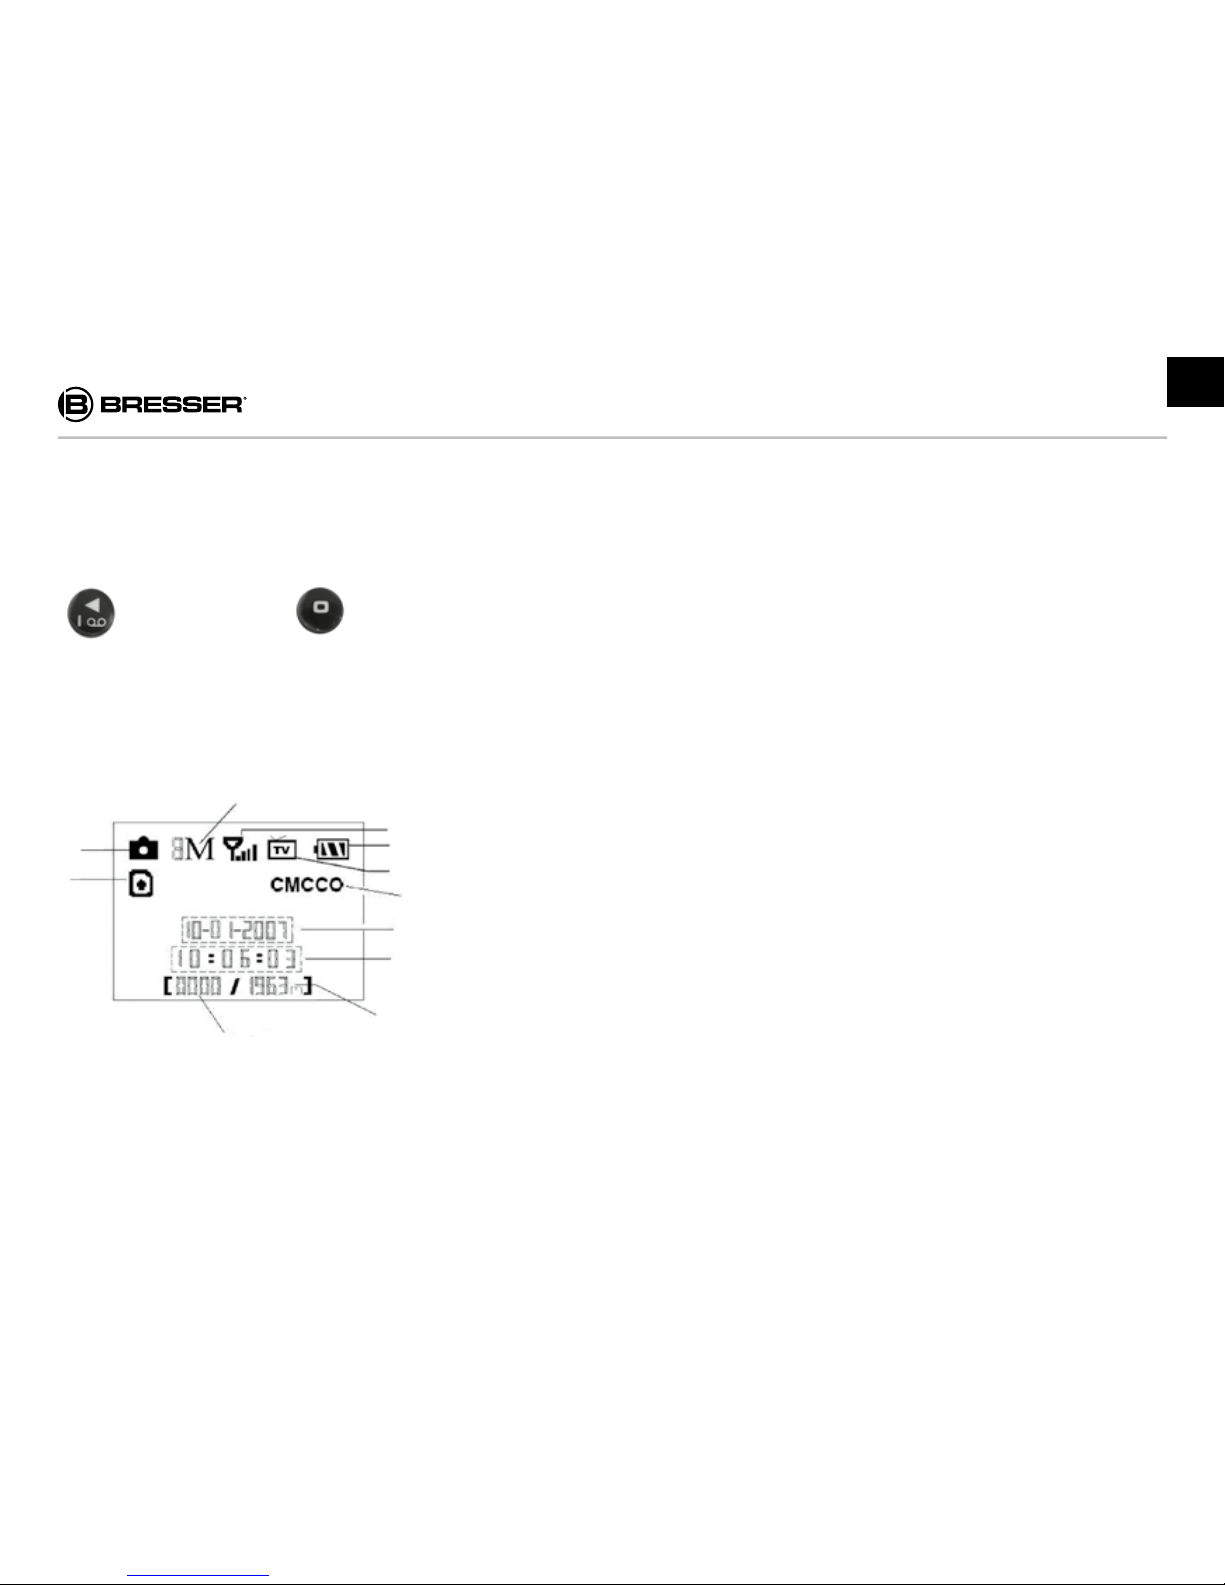
1.5 Camera Display
After the camera has been switched on (power switch
set to „ON“ or “TEST” position), the following information
will be shown on the display.
B
C
F
D
G
E
H
I
J
1)
1!
1. SIM-Card
2. Camera mode
3. Image resolution
4. Signal strength
5. Battery level
6. TV-connection
7. Mobile network provider
8. Date (Month/Day/Year)
9. Time (Hours/Minutes/Seconds)
10. Maximum numbers of images (according to the
memory capacity available)
11. Number of captured images
1.6 e-Mail/MMS Function
IMPORTANT:
In order to avail of this function, it´s necessary to have
a mobile network provider1 as well as a suitable SIMcard1. The extra costs generated are dependent on the
rates and conditions of your provider.
Prepaid cards may also be used. Please note that it is
only possible to recharge credit through your mobile
phone and not directly from the camera. The camera
operates mobile networking on the following frequencies: 850 MHz, 900 MHz, 1800 MHz and 1900 MHz.
For more information please read the section on „MMS
Settings“.
*not included with your purchase
1) For information on correct mail settings, please contact your email provider.
2) For information on GPRS mobile settings, please contact your mobile provider.
10
This camera can send images to your mobile device via
GSM/GPRS mobile network1. It’s also possible to program the camera to inform you daily when the camera
is activated.
Once you have inserted a SIM-card one of the following
icons is displayed:
SIM-card inserted and functional.
SIM-card inserted but not functional due to lack of signal
or other error of communication.
If no SIM-card is inserted no icon appears.
*Not included with your purchase
Please note:
Deactivate the PIN code query before inserting the SIMcard. This can be done via the settings menu of your
mobile phone. It is not possible to deactivate the query
directly via the camera.
There are 4 possible settings for the email and MMS
function: „Send Mode“, „MMS Set“, „GPRS Set“ and
„Send to“. Using the “Send Mode” you can determine
when you get an automatic message by camera exposure (see table in section on “Settings”). The extent of
the functionality of the “MMS Set” and “GPRS Set” is
dependant on the services available through your mobile phone provider. When using the “Send to “ option,
simply enter the correct mobile phone number or email
address where the camera should forward the images
to.
Beachten Sie:
The SSL/TLS encryption for sending emails is supported
by this device. Some providers require this setting activated in order to send emails. Please ask your Internet
provider whether this function is required.
11
DE
1.7 Supported formats
Important! Which le system you use for your SD-card
is normally not relevant, however one can experience
difculties reading data from the card. In this situation
please format the card again either in the camera or on
your computer and it's ready for use.
Item Format
Image JPG
Video AVI
File format FAT32
*Not included with your purchase
2. Important Safety Instructions!
• The working voltage of the camera is 6V. The camera
is supplied with 2 x 4 AA type batteries.
• Please install batteries according to polarity displayed.
• For camera operation an SD-card* (8 MB to 32 GB)
is necessary.
• Please unlock the write-protection function before inserting the SD-card.
• Please insert the SD-card before testing the camera
and ensure the power switch is at the OFF position.
The camera has no internal memory for saving images
or videos.
• Do not insert or remove the SD-card* or SIM-card*
when the power switch is at the ON position.
• When rst in use it is recommended to format the SDcard via the camera.
• The camera automatically changes to USB mode
when connected to the USB port of a computer. In
this case, the SD-card* functions as an exchangeable
memory device.
• In the TEST mode the camera shuts down automatically after 3 minutes if not in use. In this situation it’s
necessary to switch the power back on in order to
continue working with the remote control.
12
• The red lter in front of the lens moves automatically
when needed. It might seem to have no real function
the way it hangs halfway over the lens. However, this
is not a camera defect as long as the image quality
remains unaffected.
3. Basic Operations
3.1 Power supply
2x4 AA type batteries are necessary for power supply
for the camera. Optionally, the device may be powered
through an external power supply (extra accessory).
This manual only describes use with battery power supply.
ATTENTION!
The manufacturer does not take liability for any damage
caused by the wrong insertion of batteries or by the use
of a non-compatible power supply!
Open the bottom cover.
ATTENTION!
Make sure that the power switch is at the OFF position.
Using the handle open the battery compartment and pull
it out.
Insert fully charged batteries into the compartment according to the polarity shown in the battery slots. Always
insert two batteries with the same polarity in each slot.
The following batteries with 1.5V output can be used:
1. High-density alkaline batteries (recommended)
or Lithium ion batteries
2. Rechargeable alkaline batteries
3. Rechargeable NiMH batteries
*Not included with your purchase
13
DE
There are 4 battery slots.
Two slots are combined to one group. The slots of the
two groups are marked with “1” and “2”. For normal power supply only one group is needed but however it is
recommended to insert batteries in all the slots.
When the batteries are low the camera automatically
shuts down after two indication sounds. Please change
the batteries in time. Remove used batteries from the
device immediately! If the "Send" function is activated,
you will be informed about low-battery-status.
3.2 Inserting the SD-card and SIM-card
Open the bottom cover. Insert the SD-card* into the card
slot with the unmarked side facing upwards. Please note
that the card can only be inserted in one direction. Make
sure that the write-protect switch of the SD-card is in the
“write” position as otherwise the camera cannot be switched on.
To use MMS/SMS or eMail functions, a suitable SIMcard* must be inserted into the available card slot.
IMPORTANT:
This device operates only with Mini SIM-cards*. Micro
SIM-cards and Nano SIM-cards* are not compatible.
Please contact your mobile network provider for further
information about suitable Mini SIM-cards.
3.3 Switching the camera on
Before switching on, please pay attention to the following:
1. Avoid temperature and motional disturbances in front
of the camera; for example air-conditioner, chimney
or other heat sources. This can have a negative effect
on the camera’s trigger function.

14
2. Select the camera location according to the objects
under observation. A height of 1-2 metres is generally
recommended.
3. Switch on the camera by sliding the power switch to
the ON position.
Hint:
Before using the camera, you can use the integrated laser pointer to align the camera to the required monitoring
area. Read more in section on “Aligning the camera”.
After switching the camera on, the red LED indicator
blinks for approximately 10 seconds. This buffer allows
you to locate the camera according to wish. After the 10
seconds the camera automatically functions capturing
images or videos according to the selected mode.
IMPORTANT:
The remote control cannot be used when the camera is
in the “ON” position. The camera automatically captures
images or videos according to setting.
3.4 TEST function
In order to capture user-dened imagery one can adjust
the settings by using the “TEST” function of the camera.
This is done by turning the power switch from the “OFF”
or “ON” position to the “TEST” position.
Various features such as user-dened settings, manual
photography, preview or manual MMS messaging can be
selected accordingly through the remote control.
Hint:
The settings for automatic image capturing, MMS messages, etc., are deactivated when the camera is switched to “TEST” mode.
*Not included with your purchase
 Loading...