

Bresser AstroBoy 8841000 Instruction Manual
Instruction Manual
60mm Goto Refractor Telescope
FEATURES
• Alt-Azimuth Mount with computer control technology
• Real-time GOTO and tracking features
• 4,000+ object database with 256 user-definable objects.
• 4 line, 20-character LCD hand controller with backlit LED buttons for easy operation
• Dual-axis servomotor with optical encoders
• Drive motor with 5-speed setting for precise tracking
• Tabletop base
• 60mm achromatic refractor telescope for land and celestial objects observation
• Also attaches to photo tripods with 6.35 mm (¼”) camera screw
PACKAGE CONTENTS
• Telescope mount
• 60mm Refractor telescope
• Tabletop base
• Hand Controller
• 45º diagonal mirror
• 31.7mm (1.25”) H20mm eyepiece
• Plastic carrying case
NEVER USE A TELESCOPE TO LOOK AT THE SUN DIRECTLY!
Looking at or near the Sun will cause instant and irreversible damage to your eye.
Children should always have adult supervision while observing.
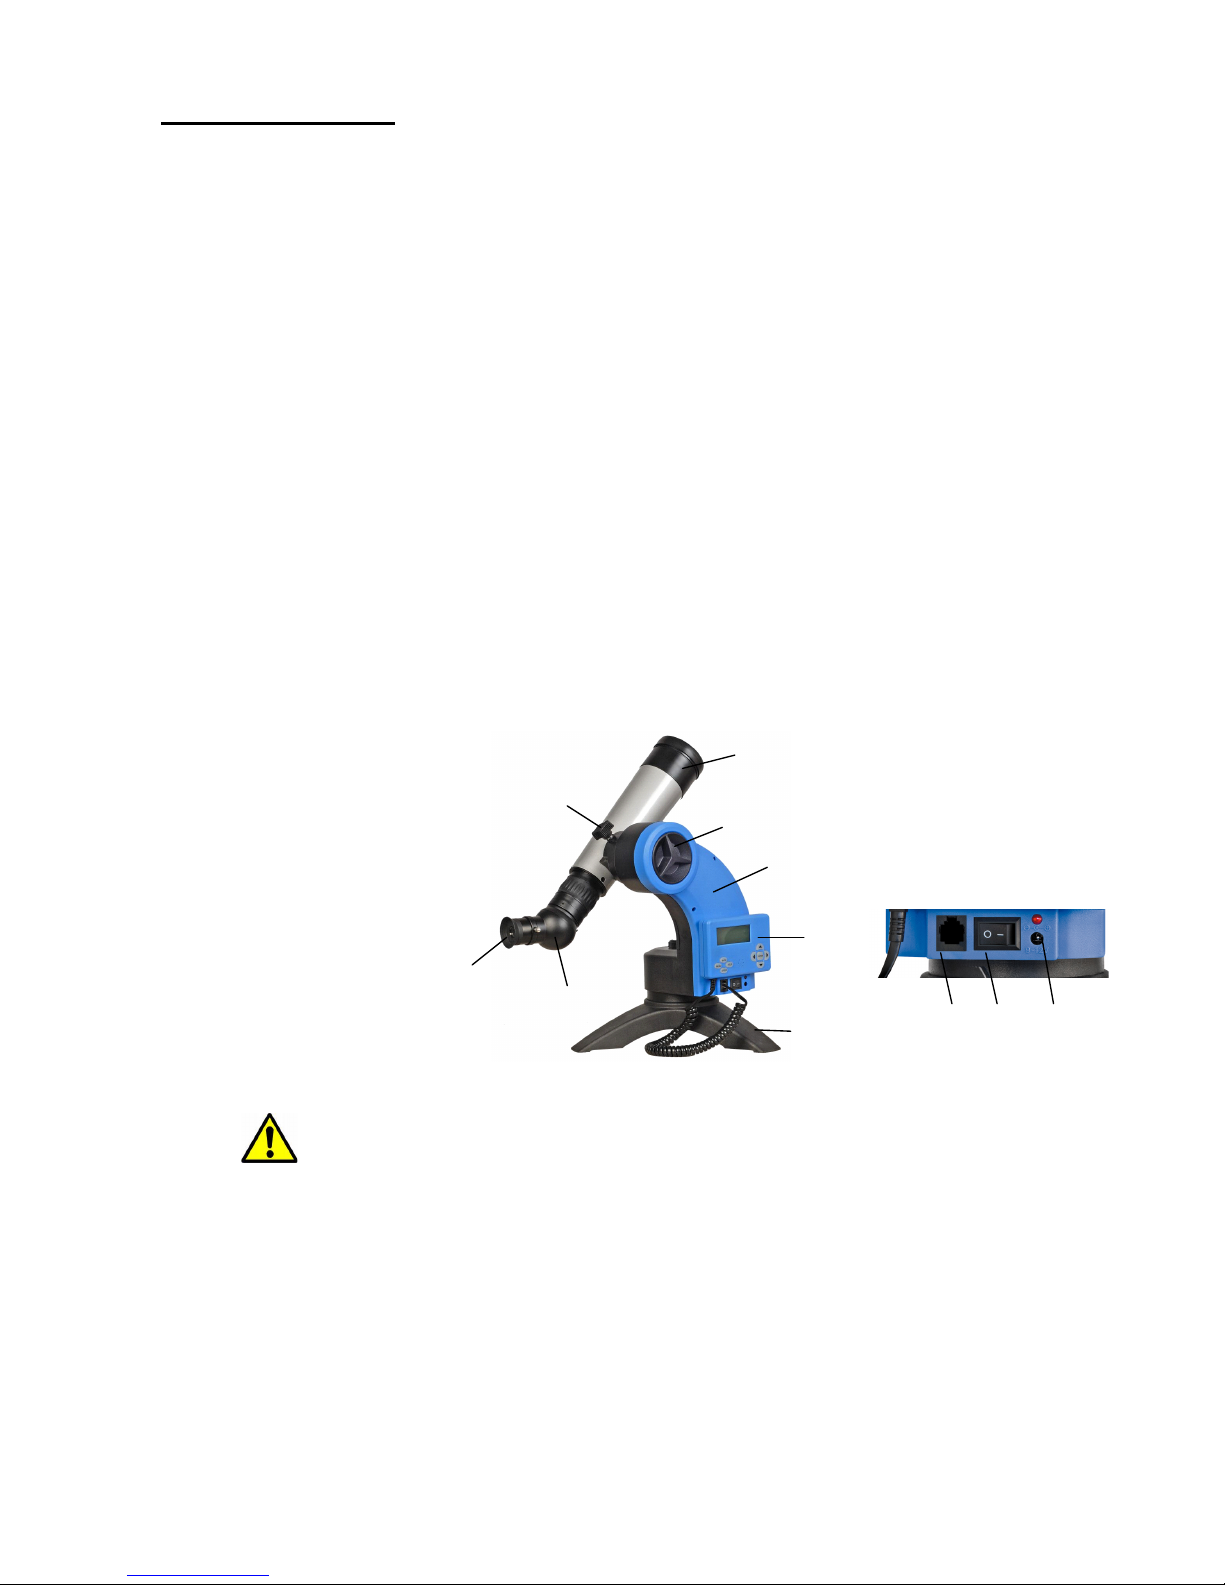
Assembly Terms
1. Telescope Tube
2. Dovetail Lock
3. Hand Controller
4. Altitude Lock
5. Mount
6. Diagonal
7. Eyepiece
8. Tabletop Base
9. HBX Port (Hand controller)
10. On/Off switch
11. DC Power connection
1
2 3 4 5 7 6 8
9
10
11
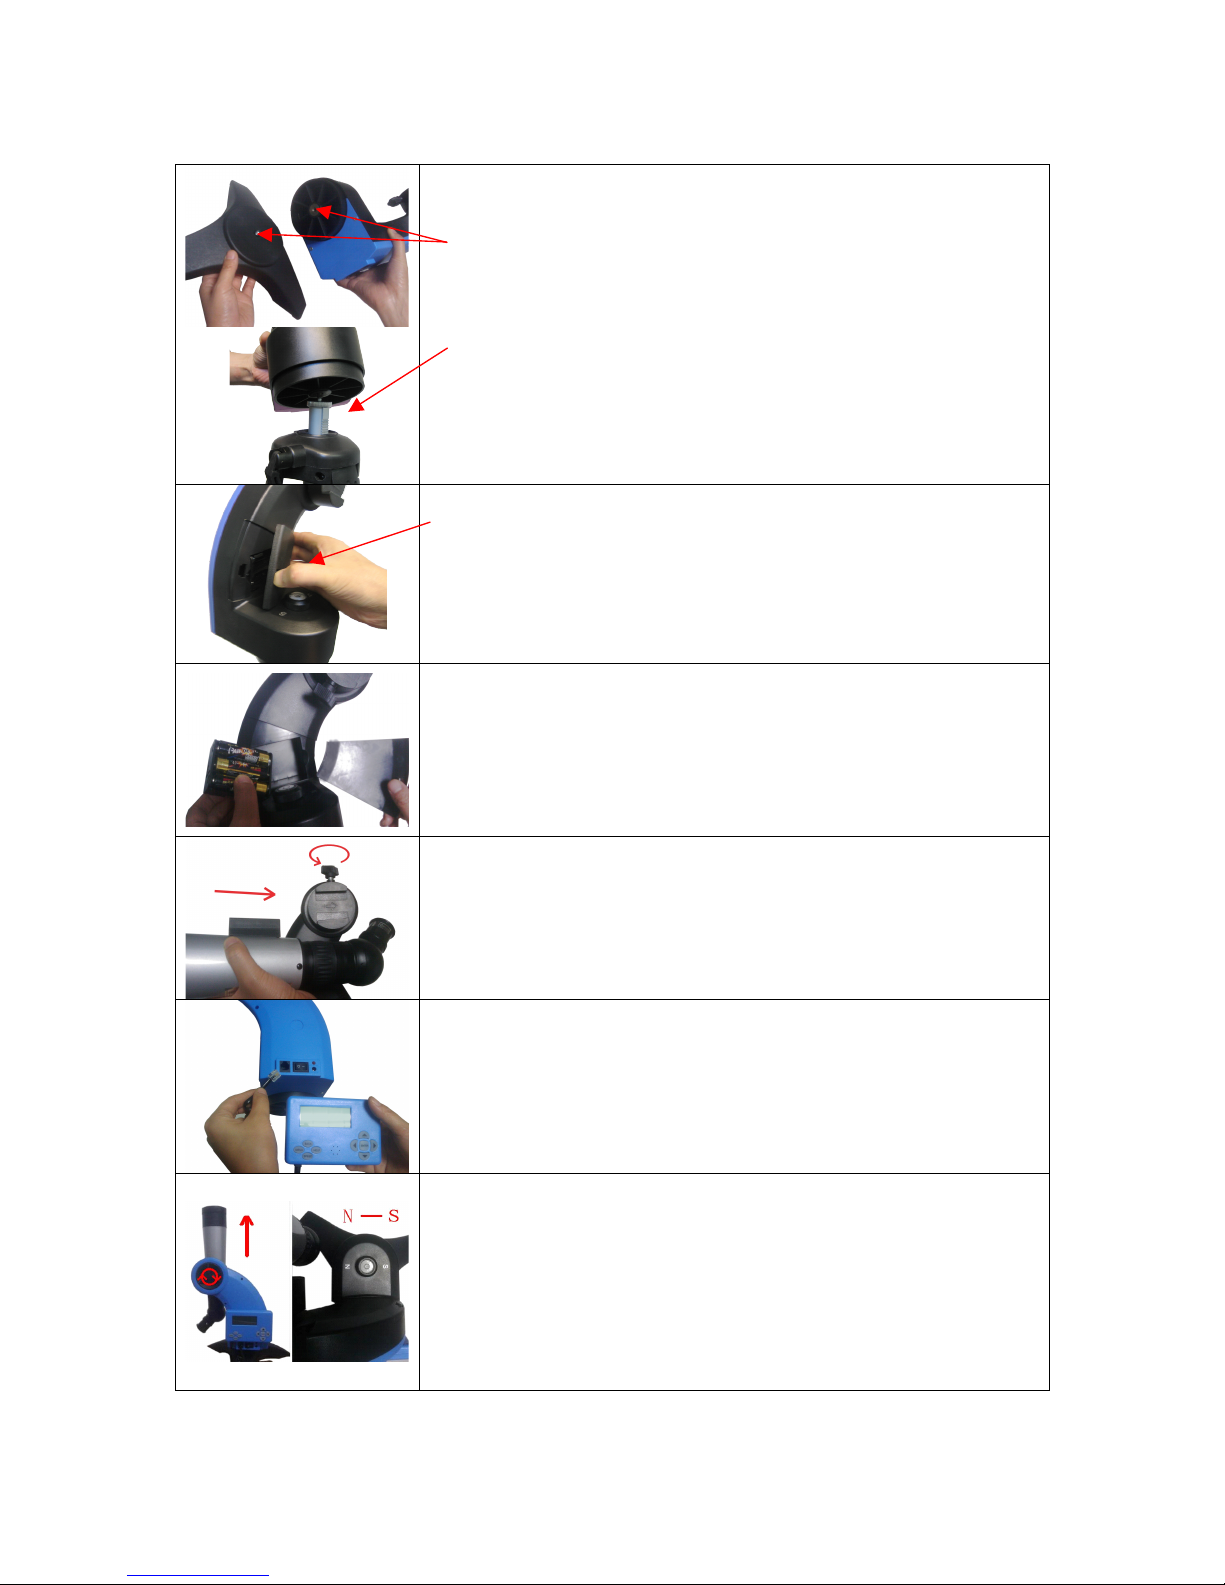
Quick Start Guide for AstroBoy® Computerized Telescopes
Step 1. (two options)
A. Attach to tabletop base. Take the mount and the tabletop base
out of the carrying box. Attach mount to base by securing the 6.35
mm (¼”) screw onto the base.
B. Attach to tripod. Attach mount to tripod by hand tightening onto
the tripod. Tripod can be purchased separately.
Step 2.
Lift the battery cover. Carefully pull out the battery holder from the
compartment. Be sure not to accidentally disconnect the wires.
Step 2a.
Insert 6 AA batteries (not included) in the holder. Refer to the diagram
on the holder to orient the batteries properly. Replace the holder back
into the battery compartment and replace the lid.
Use only fresh batteries. Using old or low batteries may cause error
messages.
Step 3.
Slide the telescope into the dovetail slot on mount and secure the
telescope using dovetail lock knob (#2). Note that the dovetail is tapered
and slides in one direction only (see arrow in photo).
Step 4.
Plug hand controller into the HBX port on the mount. The hand controller
can attach magnetically to the mount arm.
Step 5. Set telescope to PARK POSITION
If you are using the telescope for land object observing, skip to Step 6.
(1) Loosen the altitude clutch; point the telescope tube directly up at the
zenith. Tighten the clutch.
(2) Position the mount so that the “N-S” mark is aligned with the earth’s
magnetic north and south poles (a compass may be helpful).
(3) Level the mount using the bubble on the mount by adjusting the
height of the mount base or tripod legs.
!"#$%&'#
 Loading...