

Page 1
EN
Operating instructions
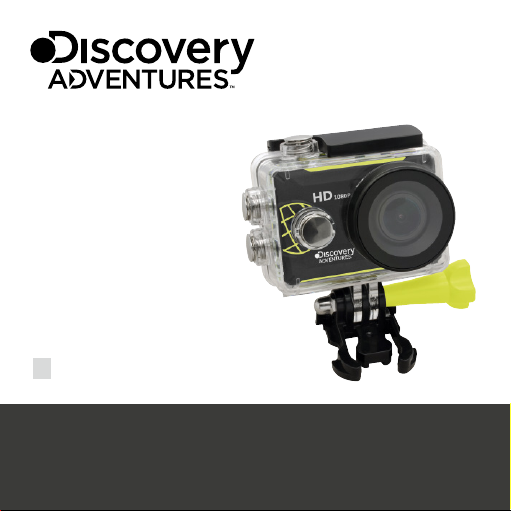
ACTION CAMERA
Scout // FULL HD 1080p
Art.No. 9685000
Page 2

DE
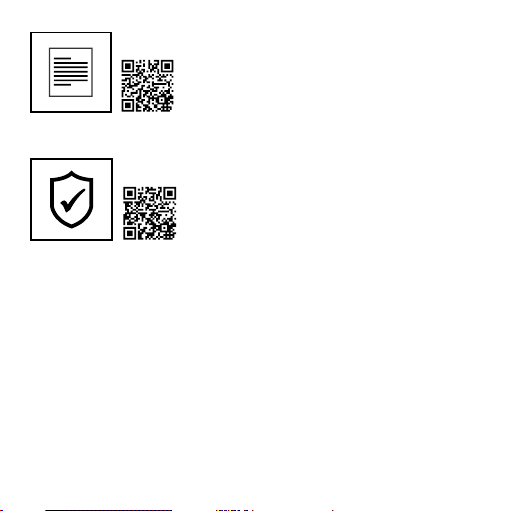
Besuchen Sie unsere Website über den folgenden QR Code oder Weblink um weitere Infor-
mationen zu diesem Produkt oder die verfügbaren Übersetzungen dieser Anleitung zu finden.
EN
Visit our website via the following QR Code or web link to find further information on this
product or the available translations of these instructions.
FR
Si vous souhaitez obtenir plus d’informations concernant ce produit ou rechercher ce mode
d’emploi en d’autres langues, rendez-vous sur notre site Internet en utilisant le code QR ou le lien
correspondant.
NL
Bezoek onze internetpagina via de volgende QR-code of weblink, voor meer informatie over
dit product of de beschikbare vertalingen van deze gebruiksaanwijzing.
IT
Desidera ricevere informazioni esaustive su questo prodotto in una lingua specifica? Venga a
visitare il nostro sito Web al seguente link (codice QR Code) per conoscere le versioni disponibili.
ES
Visite nuestra página de Internet utilizando el siguiente código QR o el enlace web, para
buscar más información sobre este producto o versiones disponibles del presente manual de
instrucciones en diferentes idiomas.
PT
Aceda à nossa página na Internet através do seguinte código QR ou hiperligação, para procu-
rar outras informações sobre este produto ou os idiomas disponíveis deste manual de instruções.
DK
Ønsker du en udførlig vejledning til dette produkt på et bestemt sprog? Så besøg vores
website ved hjælp af følgende link (QR-kode) for tilgængelige versioner.
PL
Odwiedź naszą stronę internetową, korzystając z kodu QR lub za pośrednictwem linka sieciowego, aby poszukać więcej informacji na temat tego produktu lub dostępnych wersji językowych
niniejszej instrukcji obsługi.
RU
Посетите нашу страницу в сети Интернет, используя QR-код или Web-ссылку, для
получения дополнительной информации по данному устройству или для поиска доступных
языковых версий данного руководства по эксплуатации.
TR
Bu ürünle ilgili daha fazla bilgi ile bu kılavuzun geçerli çevirileri için aşağıdaki Barkod Kodundan
ya da web bağlantısından internet sitemizi ziyaret edin.
2
Page 3
MANUAL & VIDEO DOWNLOAD:
www.bresser.de/download/9685000
SERVICE AND WARRANTY:
www.bresser.de/warranty_terms
3
Page 4
About this Instruction Manual
Please read the safety instructions and the operating instructions carefully before
use. Keep these instructions for renewed use at a later date. When the device is
sold or given to someone else, the instruction manual must be provided to the new
owner/user of the product.
Intended Use
This product is intended only for private use. It was developed as an electronic medium for
the use of multimedia services.
General Warnings
• Risk of choking — Keep packaging material, like plastic bags and rubber bands, out of
the reach of children, as these materials pose a choking hazard. This product contains
small parts that could be swallowed by children.
• Leaking battery acid can lead to chemical burns. Avoid contact of battery acid with skin,
eyes and mucous membranes. In the event of contact, rinse the affected region immediately with a plenty of water and seek medical attention.
• Risk of electric shock — Never bend, pinch or pull the power and connecting cables,
extensions and adapters. Protect the cables from sharp edges and heat.Before operating, check the device, cables and connections for damage. Never use a damaged unit or
a unit with damaged power cables. Damaged parts must be exchanged immediately by
an authorised service centre.
• Risk of property damage! — Do not disassemble the device. In the event of a defect,
please contact your dealer. The dealer will contact the Service Centre and can send the
device in to be repaired, if necessary.
• Do not expose the device to high temperatures. Do not short-circuit the device or throw
them into a fire. Excessive heat or improper handling could trigger a short-circuit, a fire
or an explosion.
4
Page 5
• Do not interrupt an on-going data connection to a computer before all data
has been transferred. This could lead to data loss for which the manufacturer
is not liable.
Notes on cleaning
• Turn off the camera
•
Clean the eyepieces and/or lenses only with a soft, lint-free cloth, (e.g. microfibre cloth). To
avoid scratching the lenses, use only gentle pressure with the cleaning cloth.
• Only use a dry cloth to clean the exterior of the device. To avoid damaging the electronics,
do not use any cleaning fluid.
• Clean the protective case after each use with clear, clean water and dry it thoroughly.
EC Declaration of Conformity
Bresser GmbH has issued a Declaration of Conformity‘ in accordance with applicable guidelines and corresponding standards. This can be viewed any time upon
request.
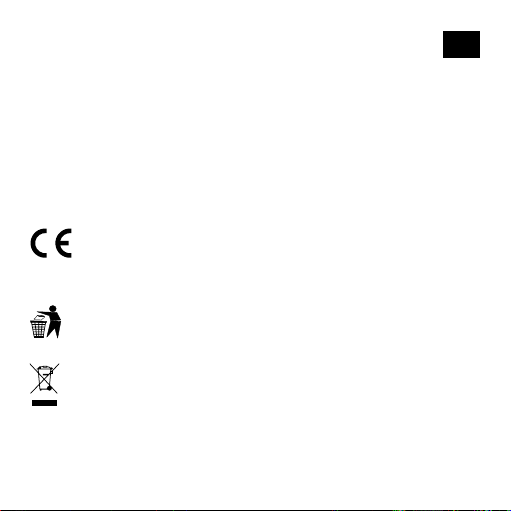
Disposal
Dispose of the packaging materials properly, according to their type, such as paper
or cardboard. Contact your local waste-disposal service or environmental authority
for information on the proper disposal.
Do not dispose of electronic devices in the household garbage!
As per the Directive 2002/96/EC of the European Parliament on waste electrical
and electronic equipment and its adaptation into German law, used electronic de-
vices must be collected separately and recycled in an environmentally friendly manner. Empty, old batteries must be disposed of at battery collection points by the consumer.
You can find out more information about the disposal of devices or batteries produced after
6 January 2006 from your local waste-disposal service or environmental authority.
EN
5
Page 6

The integrated battery must only be removed for disposal. Opening the device
housing can damage the unit.
Drain the battery completely before disposal. Remove all the screws in the housing and
open the device housing. Remove the connections to the battery and remove it. Cover the
open contacts with tape and package the battery in such a way that it cannot shift in the
packaging.
Warranty & Service
The regular guarantee period is 2 years and begins on the day of purchase. To benefit from
an extended voluntary guarantee period as stated on the gift box, registration on our website
is required. You can consult the full guarantee terms as well as information on extending the
guarantee period and details of our services at www.bresser.de/warranty_terms.
6
Page 7

Scope of delivery
b c
EN
d
E
Camera
b
Waterproof case
c
D Retaining clip for Base mount
E Thumb knob
Base for flat and curved surface
F
(e.g. as helmet mount)
USB cable
G
F
G
7
Page 8

First Steps
How to open and close the waterproof case:
B
C
C
B
How to open:
Press the clamp upward, to open
the housing (1).
Inserting microSD card*
• SDHC Class 10 or higher required
• Capacity up to 32 GB
Note: For best performance, please choose a branded Micro SD
card and format it on your computer before use. Unbranded cards
are not guaranteed to work flawlessly.
8
How to close:
Press the case door all the way down (1) and
then snap the clamp to the hinge (2). Now, simply
press the clamp down (3) to close.
D
SD
*microSD card not included
Page 9

Installing or removing the battery
A. Remove the battery compar tment cover.
B. Correctly install the battery into the camera.
C. Replace the battery compartment cover.
Battery cover
Charging
A. Charging can be done by connecting the action camera to a computer via the usb cable.
B. The action camera can record video while charging
C. Charging of the action camera can be done even when it’s powered off.
Turning camera on and off
Press and hold the power switch [
] for 3 to 5 seconds to turn the camera on or off.
EN
9
Page 10

Functions
B
D
E
F
G
H
C
I
J
1!
1@
1)
10
Page 11

1# 1$
EN
1. Power button (on/off)
& Menu & Mode button
2. Lens
3. Loudspeaker
4. Microphone
5. Micro HDMI port
6. microSD port
7. Micro USB port
8. Display
1^
9. Charge indicator
10. Working indicator light
11. UP button
12. DOWN button
13. OK button
(Record button)
14. Indicator light
15. Tripod thread
16. Battery cover
1%
11
Page 12

How to use the Base mount
Flat surface or curved surface mount:
Choose the flat or curved base depending on the surface.
= =
Base mount (e.g. for helmet mount):
12
Page 13

Operating
Mode Switching
Press the [Power ON/OFF / Mode] button [
the camera modes.
Camera mode
Video recording mode Record video
Photo shooting mode Take a single photo
Playback-Modus Play recording
Setup Adjust all camera settings
How to record videos and configure recording setting
Video Recording
Turn the camera on by pressing the power button [
ding mode. There will be an icon in the upper left corner. Insert a SD card and start
recording by pressing “OK” [
Photo shooting
Switch to photo shooting mode by pressing [
corner. Press ”OK” [ ] to take photos.
]. Press “OK” [ ] again if you want to stop the recording.
] repeatedly to cycle through
Description
] You will start with the video recor-
] There will be an icon in the upper left
EN
13
Page 14

File Storage & Play back
After you have finished recording use a USB cable to export the videos onto a computer for
play back. You can also take the microSD card out and access the image data with a card
reader.
Loop recording
With the Loop recording, you can set how long the camera records video. For example,
if you have set 1 minute, the camera will automatically record a new video every minute.
When the memory card is full, the camera automatically overwrites the first recorded video.
Playback Mode
Press the Up and Down buttons in Playback mode to switch between recordings. Press
„OK“ [ ] to play videos. By hitting the UP / DOWN buttons twice, you can forward and
rewind the videos.
Deleting videos or photos
Press the [
the last video / photo or all videos / photos under the menu item „Delete“.
] button repeatedly until you reach the settings menu. You can now delete
Settings
To access the settings, press [ ] several times until the symbol for the Settings [ ]
appears. Use the „UP“ and „DOWN“ buttons to select between the menu items. Press „OK“
[ ] to make a setting.
Video Resolution Change video resolution 1080p (30fps) / 720p
Exposure +2 / +1.66 / +1.33 / +1 / +0.66/ +0.33 / 0 /
14
(30fps)
-0.33 / -0.66/ -1 / -1.33 / -1.66 / -2
Page 15

EN
Motion sensor Off / On
Looping Video Off / 1 min / 2min / 3min / 5min/ 10min
Time lapse Off / 1s / 2s / 5s / 10s / 30s / 60s
WDR Off / On
Sound recording Off / On
Time stamp Off / On
Picture resolution VGA / 3M / 8M / 12M
Photo quality Fine / Standard / Economy
Capture mode Set recording interval Single / 3s / 5s / 10s / 20s
Continuous shooting (burst) Off / 3x / 5x /10x
Sharpness Strong / Standard / Soft
ISO Auto / 100 / 200
Anti-shaking Off / On
White balance Auto / Sunny / Cloudy / Artificial light / Neon light
Power frequency 50 Hz / 60Hz
OSD Mode Off / On
Turn off screen Off / 3min / 5min / 10min
Rotate screen (180°) Off / On
Power saving mode (automatic
shutdown)
Off / 1min / 3min
15
Page 16

Language Choose OSD language
Tastenton Menu button sound Off / On
Date/Time Set the current date and time
TV Switch TV Mode on/off
TV Format NTSC / PAL
Car Mode Off / On
Delete Delete last picture or all pictures
Format All data on the sd card will be deleted
Reset (default settings) Reset system to default settings
Version View current firmware version
Technical Data
TFT Display 2 inch (5.08 cm) display
Lens 140° wide angle
Waterproof Case Waterproof up to 30 m
Language options Deutsch, English, Español, Français,
Resolution of photos 12 MP (4048x3040), 8 MP (3264x2448),
Resolution of videos 1080p (30fps) , 720p (30fps)
Video format AVI
16
Italiano, Português, Polski
3 MP (2048x1536), VGA (640x480)
Page 17

Video compression (codec) mjpeg
Storage microSD Memory card (up to 32 GB)
Shooting mode Single photo / Loop recording / Time Lapse /
Frequency of optical source 50Hz/60Hz
Ports Micro-USB, Micro-HDMI,
Dimensions 60x30x41 mm
Weight 55 g
Note: Specifications could be subject to change due to upgrading or updating.
Please regard the actual product as the standard.
(not included)
(SDHC Class 10 or higher required)
Burst mode
microSD card slot
EN
17
Page 18

© 2017 & TM Discovery Communications, LLC. Discovery Adventures™ and
logo are trademarks of Discovery Communications, LLC, used under license.
All rights reserved.
OFFICIAL LICENSED PRODUCT
Bresser GmbH
Gutenbergstr. 2
DE-46414 Rhede
www.bresser.de · info@bresser.de
Errors and technical changes reserved.
Manual_9685000_ActionCam-Scout_en_DISCADV_v052017a
 Loading...