

Page 1
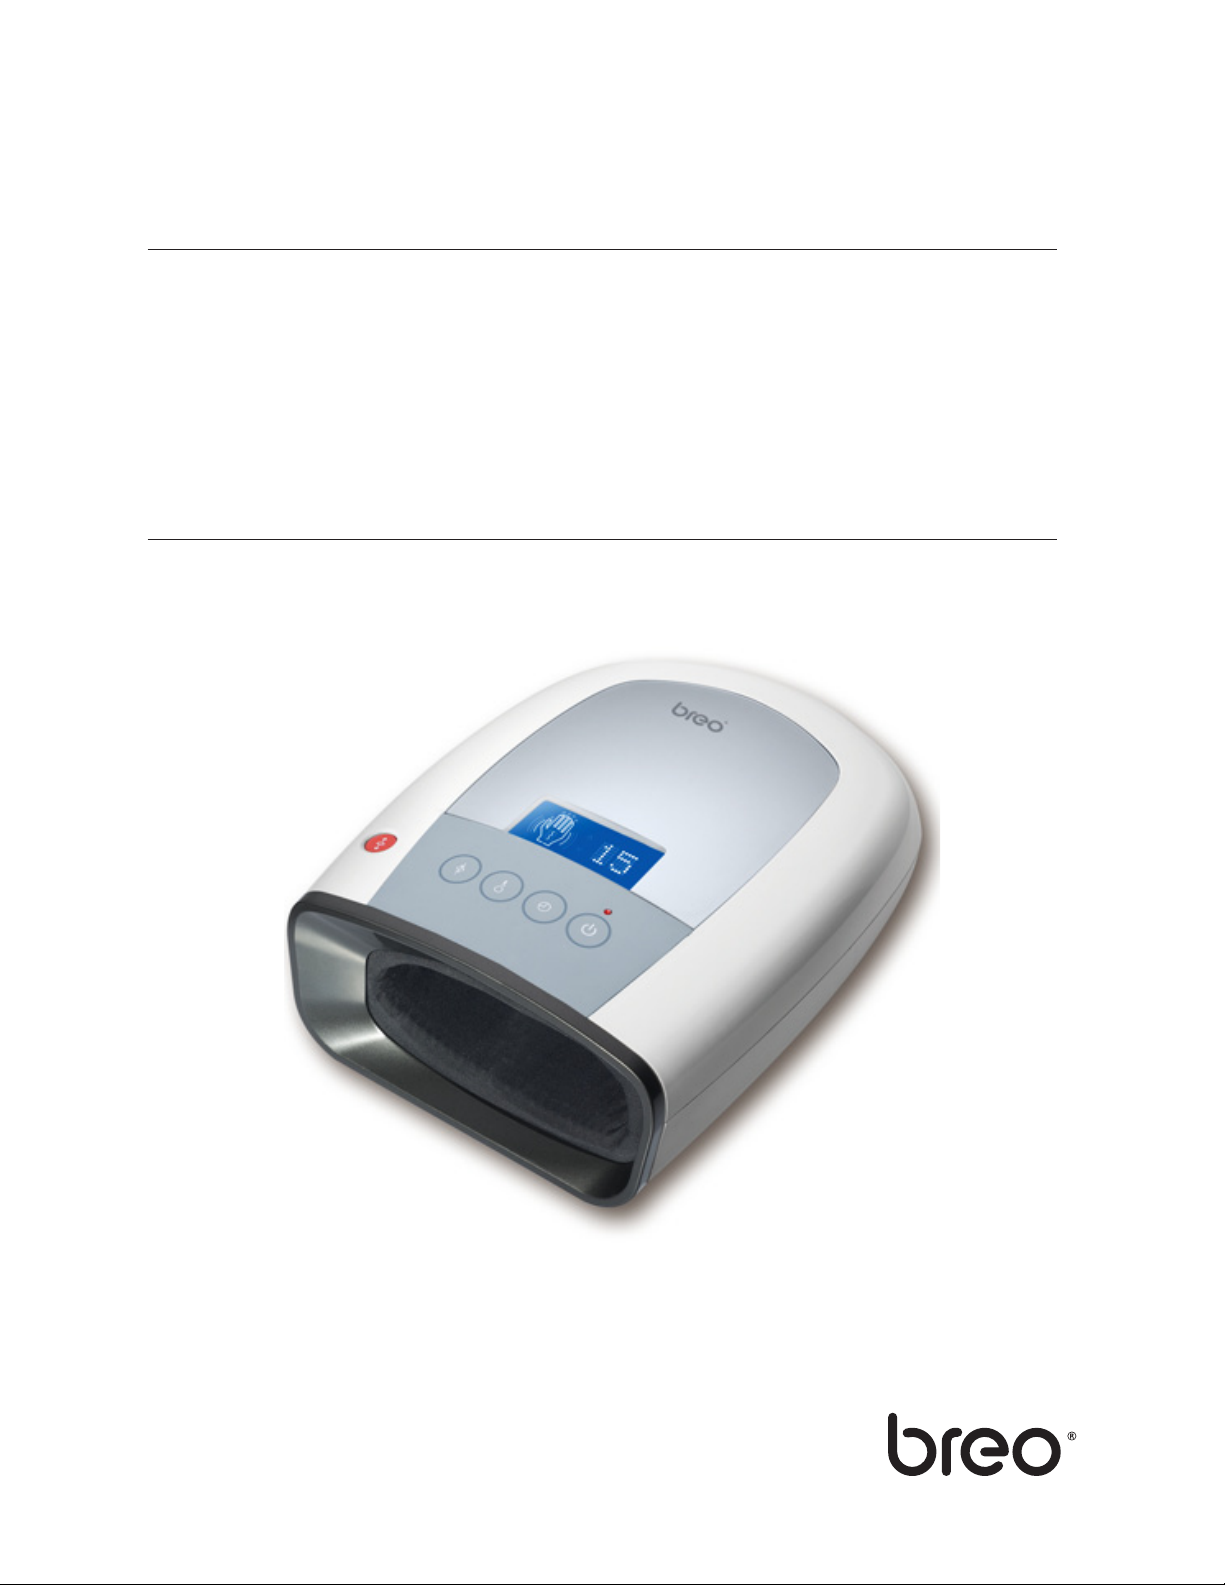
iPalm520
MASSAGER
USER
MANUAL
OBM Distribution / Breo-USA
13900 Sycamore Way
Chino, CA 91710
http://www.breousa.com
[email protected]
Page 2

Thank you for purchasing
BREO iPalm520.
Please read this manual carefully before using
the product, and keep it in a safe place for future
reference.
Page 3

Contents
Introduction
Inside the Package
Function Deployment
Preparation
Operation
Precautions
Troubleshooting
Technical Parameters 9
3
3
4
5
6
7 -- 8
9
2
Page 4
Introduction
iPalm 520 adopts air pressure and hot compress massaging
technology. It relaxes the hands by rubbing and vibration massaging the
pressure points of the palms and fingers.
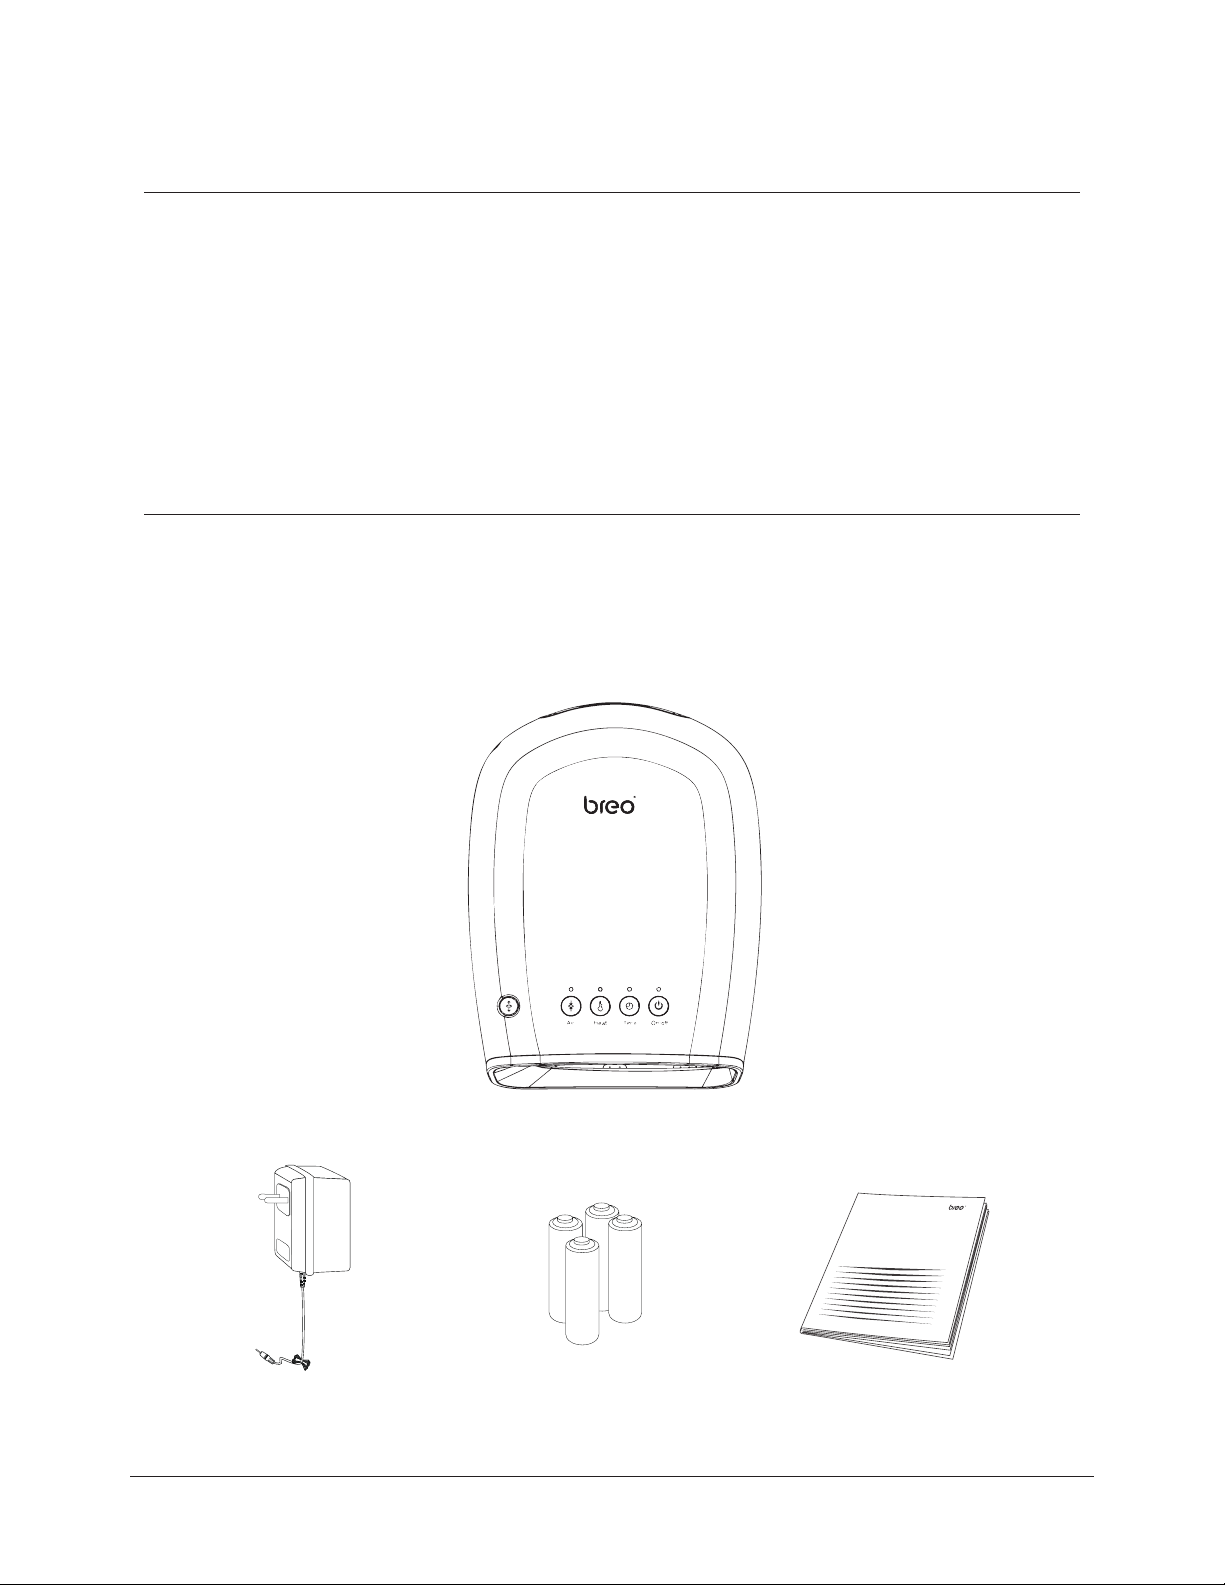
Inside the Package
The package includes: Main Unit, AC Adapter, Batteries, User
Manual.
Main Unit
BatteriesAC Adapter
User Manual
3
Page 5
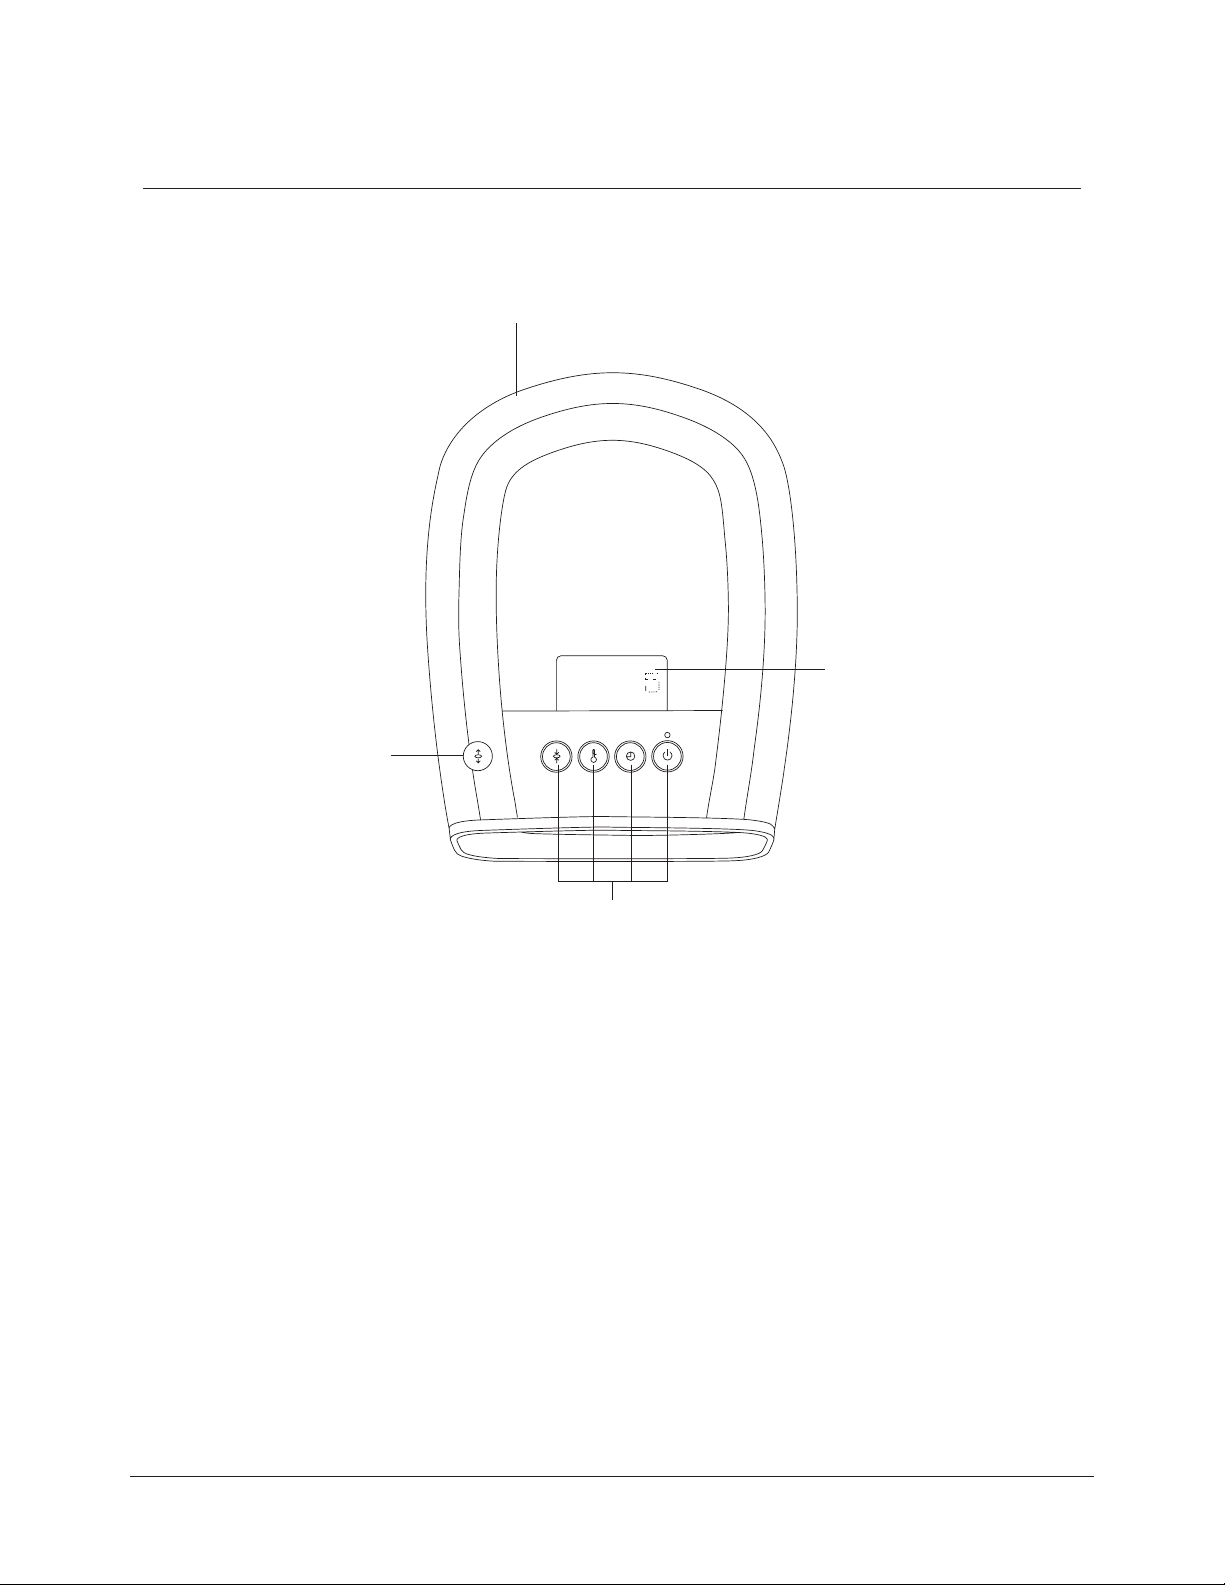
Function Deployment
D
C
B
A
A. Operating Buttons
From right to left: Power/Time/Heat/Air pressure
B. Air Pressure Reduction Valve
C. LCD Screen
D. DC Power Port
4
Page 6
Preparation
Prior to use, check the integrity of the machine and
accessories:
No damage on connection between controller and main unit
a.
Battery power is sufficient
b.
No damage on AC adapter
c.
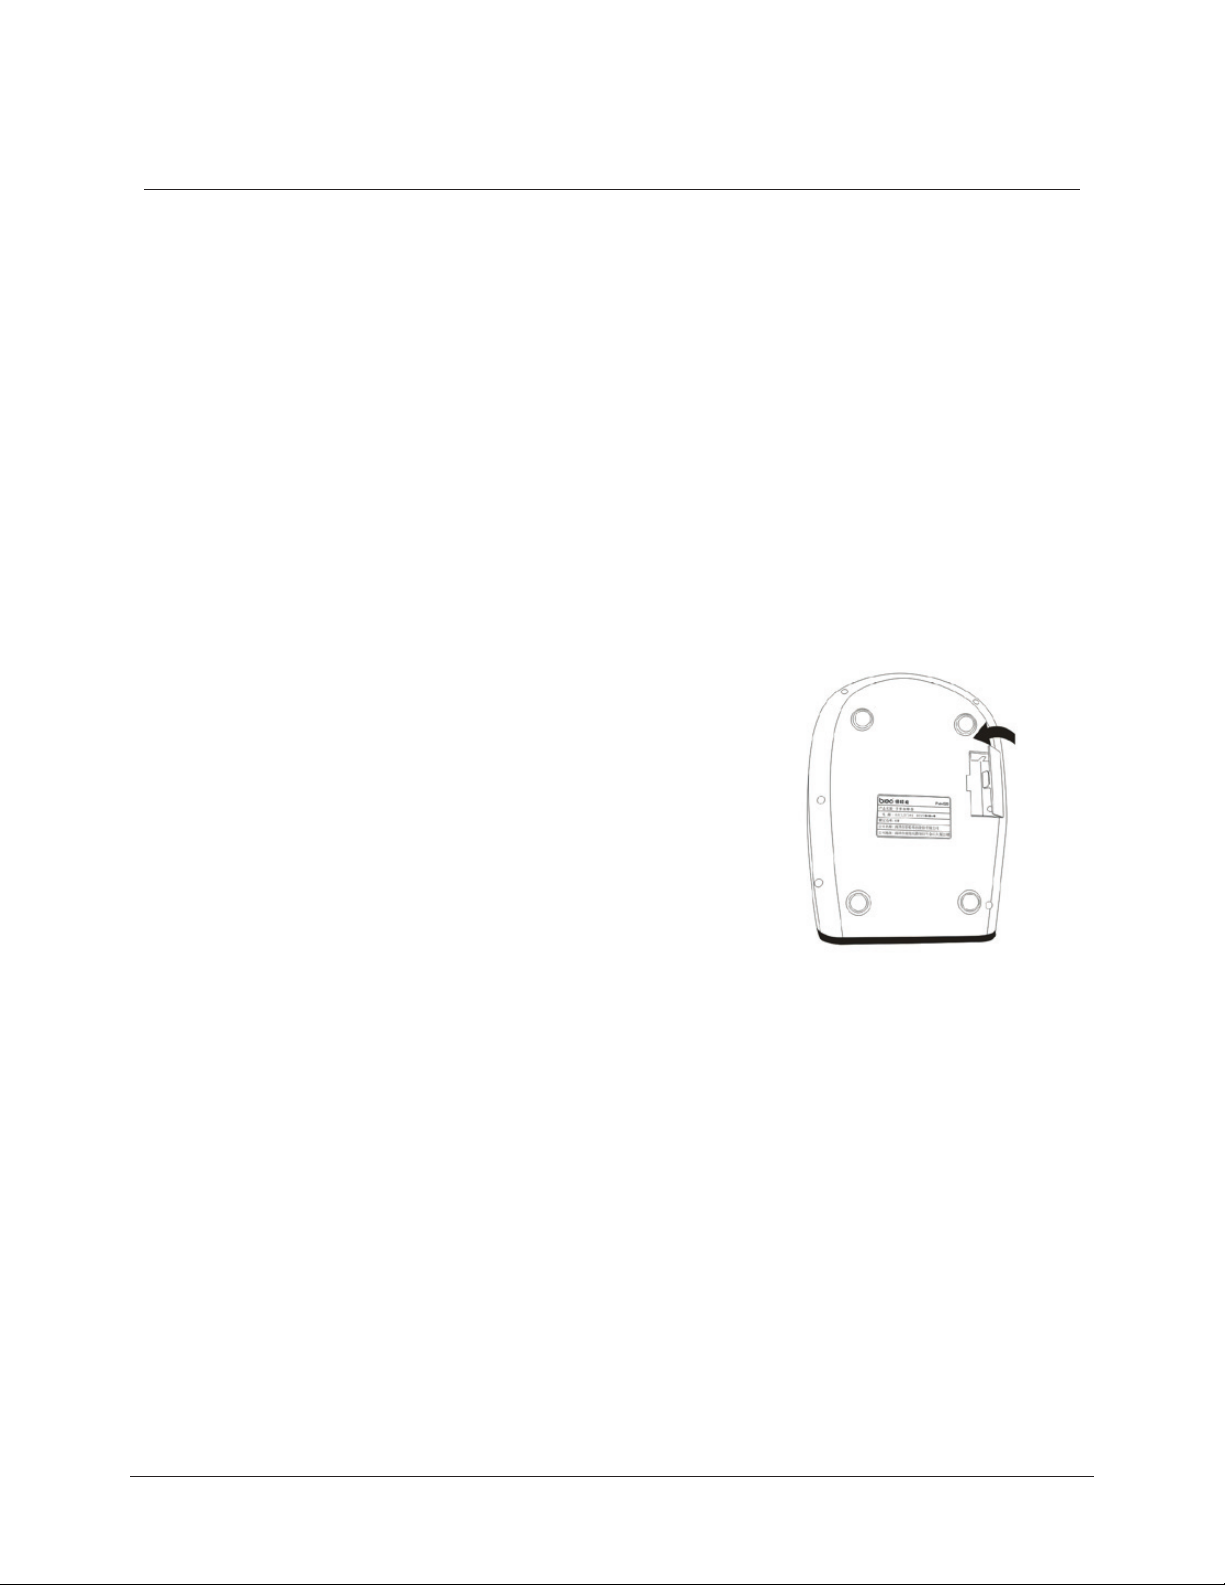
Power Options
1. Batteries
Open the battery cover on the back of the controller.
a.
Install 4 AA batteries in accordance with the positive and
b.
negative poles.
Close the battery cover.
c.
2. AC Adapter
Insert the AC adapter in the controller’s DC port.
a.
Connect the other end to AC power socket.
b.
* Choose power option #1 OR #2.
5
Page 7

Operation
Place hand (palm down) into the massager.
Turn the power on, select function key, and set air pressure &
heat to preference.
Manual Mode
Power On/Off
Power On – Press and hold Power Button
Preset default is air pressure (circulating from low-high), 5 minutes
duration.
Manually operate related function buttons to switch between air
pressure and hot compress modes.
Power Off – Press and hold Power Button
*Note: After turning off the unit, allow approximately 40 seconds for
air pressure to be released. During this period, the unit will not start
when the Power ON button is pressed.
Time – Press the Time Button to select massage duration.
Heat – Press the Heat Button to select temperature (Low - High - OFF)
Air Pressure – Press the Air Pressure Button to select among three
modes (Standard - Powerful - Soft)
*Important Tip: When you feel the air pressure is too much and/or
uncomfortable, press the Pressure Reduction Valve (red button) to
release air.
6
Page 8

Precautions
Please read this User Manual carefully for correct and safe use of this
massager.
Do not use while walking or driving.
1.
Keep the massager away from humidity, heat, and/or corrosive gas.
2.
Individuals with indisposed symptoms like inflammation, blood stasis
3.
or have undergone hand operation should not use this product.
Do not wear hand ornaments and/or jewelry when using this massager.
4.
Don’t apply nail polish within 1 hour before using this massager.
5.
Put hand into the unit BEFORE turning the power on. This also
6.
prevents damage to the air bag due to too much pressure.
If the massager will not be used for a long time, remove the batteries
7.
to avoid battery leakage.
This massager is designed as a personal care product. It is not for
8.
diagnosis/treatment of any health disorder, nor meant for commercial use.
To clean, wipe with aseptic cotton and alcohol. Do not wash or
9.
immerse in water.
Only use the supplied 6V DC power adapter (included).
10.
If an individual has soft, tender or delicate hands, set the machine on
11.
low pressure to avoid pain or discomfort.
The machine could feel like it is too hot on the highest heat and
12.
pressure settings because the added pressure intensifies the heat.
It is normal for the user to have dimples on their skin after using the
13.
massager. The dimples will gradually disappear within approximately
15 minutes.
This product is not a substitute for healthcare professionals' advice
14.
and treatment. In case of doubt or if necessary, please consult your
healthcare professional.
7
Page 9

This massager features heat compression. Individuals who are
15.
incapable of or do not ordinarily feel heat / cold sensation should
use this device with caution.
This device complies with Part 15 of the FCC Rules. Operation is
16.
subject to the following two conditions: (1) this device may not
cause harmful interference, and (2) this device must accept any
interference received, including interference that may cause
undesired operation.
Please note that changes or modifications not expressly approved
17.
by the party responsible for compliance could void the user’s
authority to operate the equipment.
This equipment has been tested and found to comply with the limits
18.
for a Class B digital device, pursuant to Part 15 of the FCC Rules.
These limits are designed to provide reasonable protection against
harmful interference in a residential installation. This equipment
generates, uses and can radiate radio frequency energy and, if not
installed and used in accordance with the instructions, may cause
harmful interference to radio ommunications. However, there is no
guarantee that interference will not occur in a will not occur in a
particular installation. If this equipment does cause harmful
interference to radio or television reception,which can be determined
by turning the equipment off and on,the user is encouraged to try to
correct the interference by one or more of the following measures:
– Reorient or relocate the receiving antenna.
– Increase the separation between the equipment and receiver.
– Connect the equipment into an outlet on a circuit different from
that to which the receiver is connected.
– Consult the dealer or an experienced radio/TV technician for help
8
Page 10

Troubleshooting &
Technical Parameters
When operational problems occur, please refer to the chart below.
Do not disassemble the machine or try to repair it by yourself.
Problem
Power-ON failure
AC adapter is not connected
Weak heat or air
pressure
Cable is broken / in bad
condition
Batteries are low / out
Batteries are not installed
correctly
properly
Batteries are low / out Change batteries
Possible Reason
Technical Parameters
Power supply:
Ideal environment:
DC: 6V
Temperature: 5°C - 40°C
Possible Solution
Check the condition of the cable
Change batteries
Check if positive/negative poles of batteries
are positioned right
Make sure the batteries are snug in place.
Check the connection of the AC adapter to
the power socket .
Make sure the batteries are installed
correctly and snug in place
Dimension :
Net Weight:
Power:
Relative humidity: :≤80%
Atmospheric Pressure: 860~1060 hpa
Main Unit: 265mm X 201mm X 90mm
1129g
6W
9
 Loading...