

Page 1
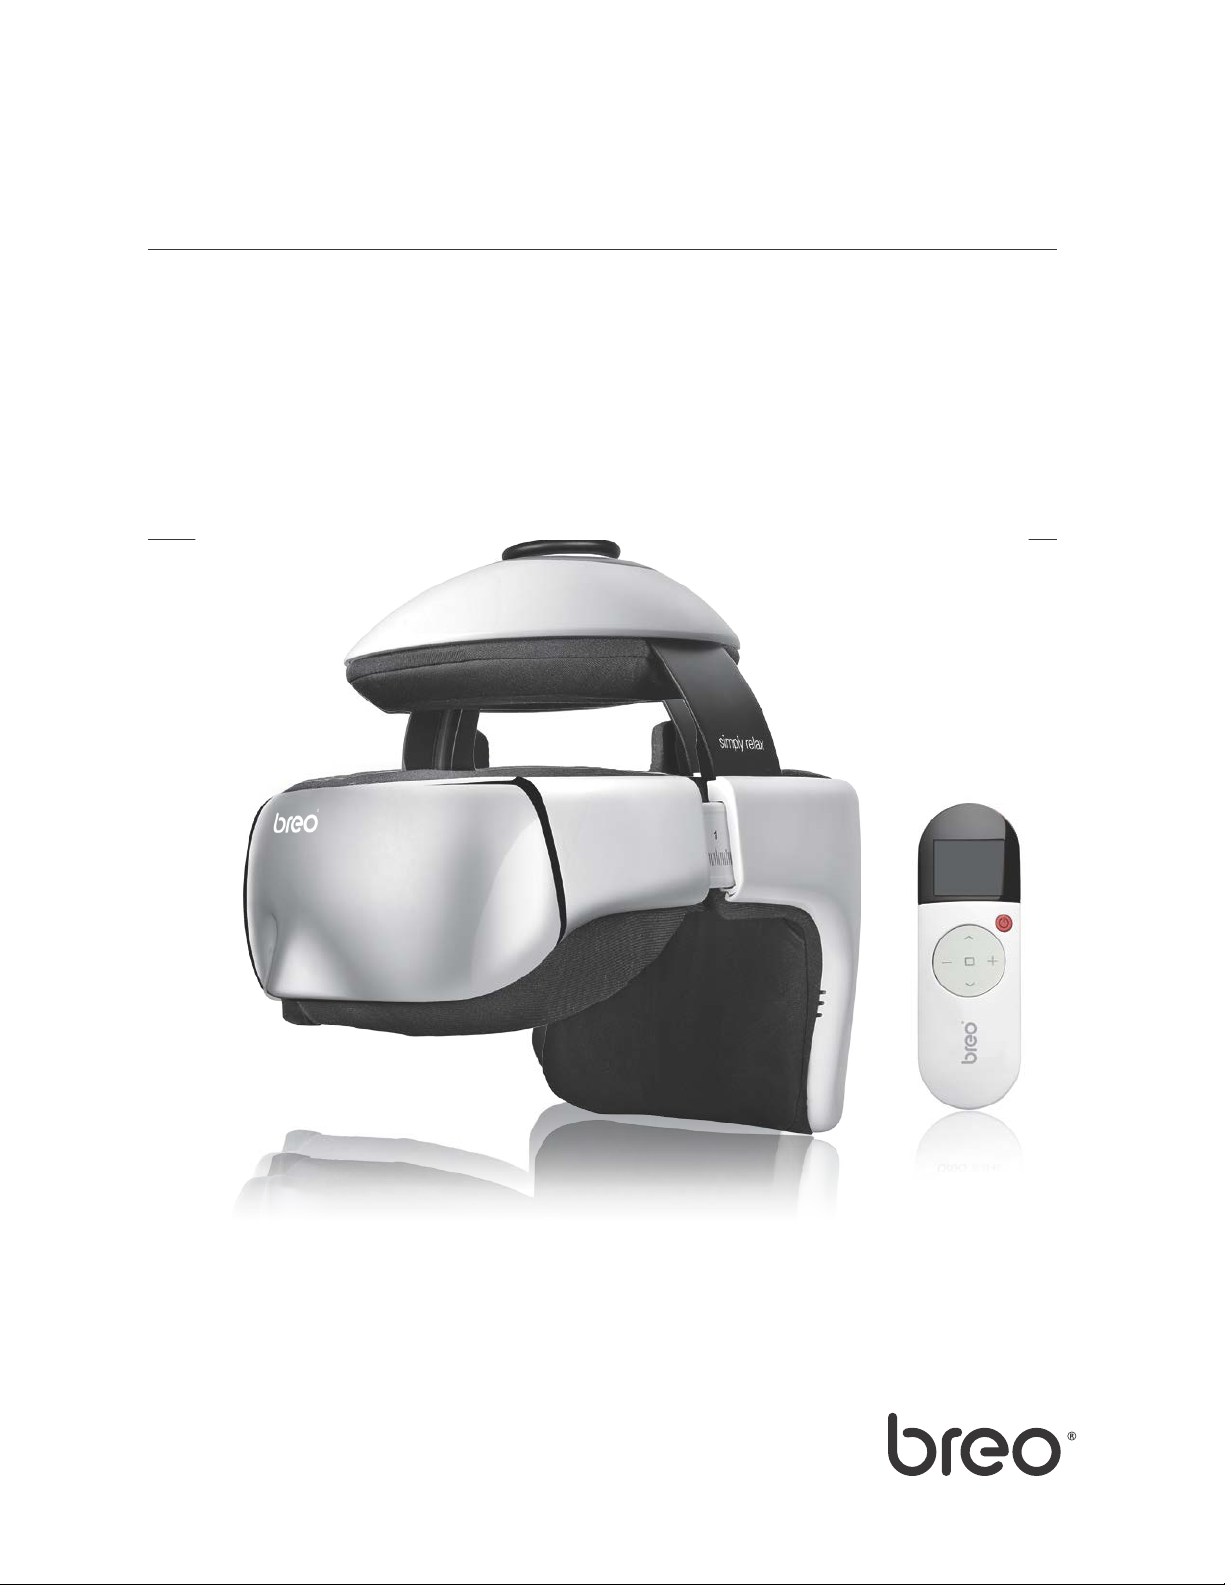
iDream3
HEAD MASSAGER
USER
MANUAL
OBM Distribution / Breo-USA
13900 Sycamore Way
Chino, CA 91710
http://www.breousa.com
[email protected]
Page 2

Thank you for purchasing
BREO iDream3.
Please read this manual carefully before using
the product, and keep it in a safe place for future
reference.
Page 3

Contents
Introduction
Inside the Package
Function Deployment
Preparation
Operation
Precautions
Troubleshooting
Technical Parameters
Storage 12
4 -- 5
6 -- 8
9 -- 10
11
12
3
3
5
2
Page 4
Introduction
The iDream3 adopts air pressure, vibration, and hot compress massaging
technology to massage the head and ocular regions. It comes with
built-in relaxing music. You can now enjoy wonderful music while
massaging, further relaxing your brain.
Inside the Package
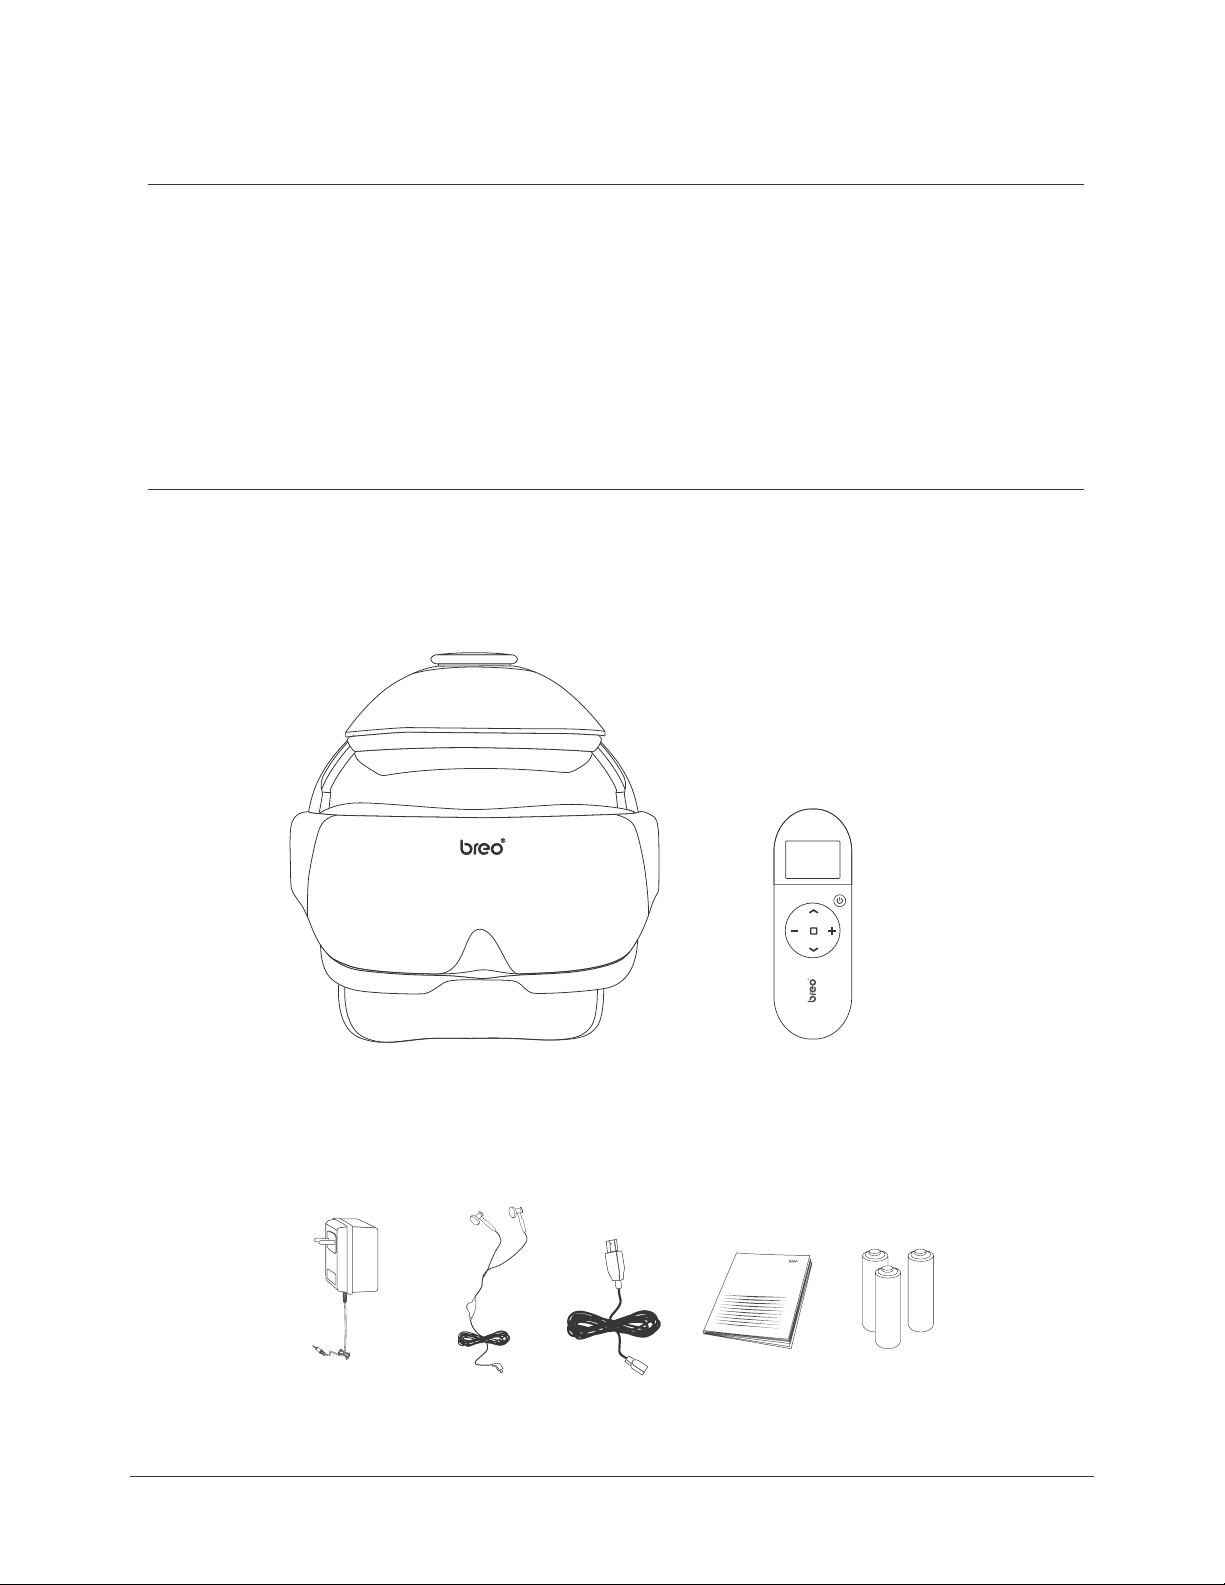
The package includes: Main Unit, Controller, Power Charger, Batteries, User
Manual, Earphones, USB Cable
Main Unit
Power Charger Earphones
USB Cable
Manual
Controller
Batteries
3
Page 5
Function Deployment
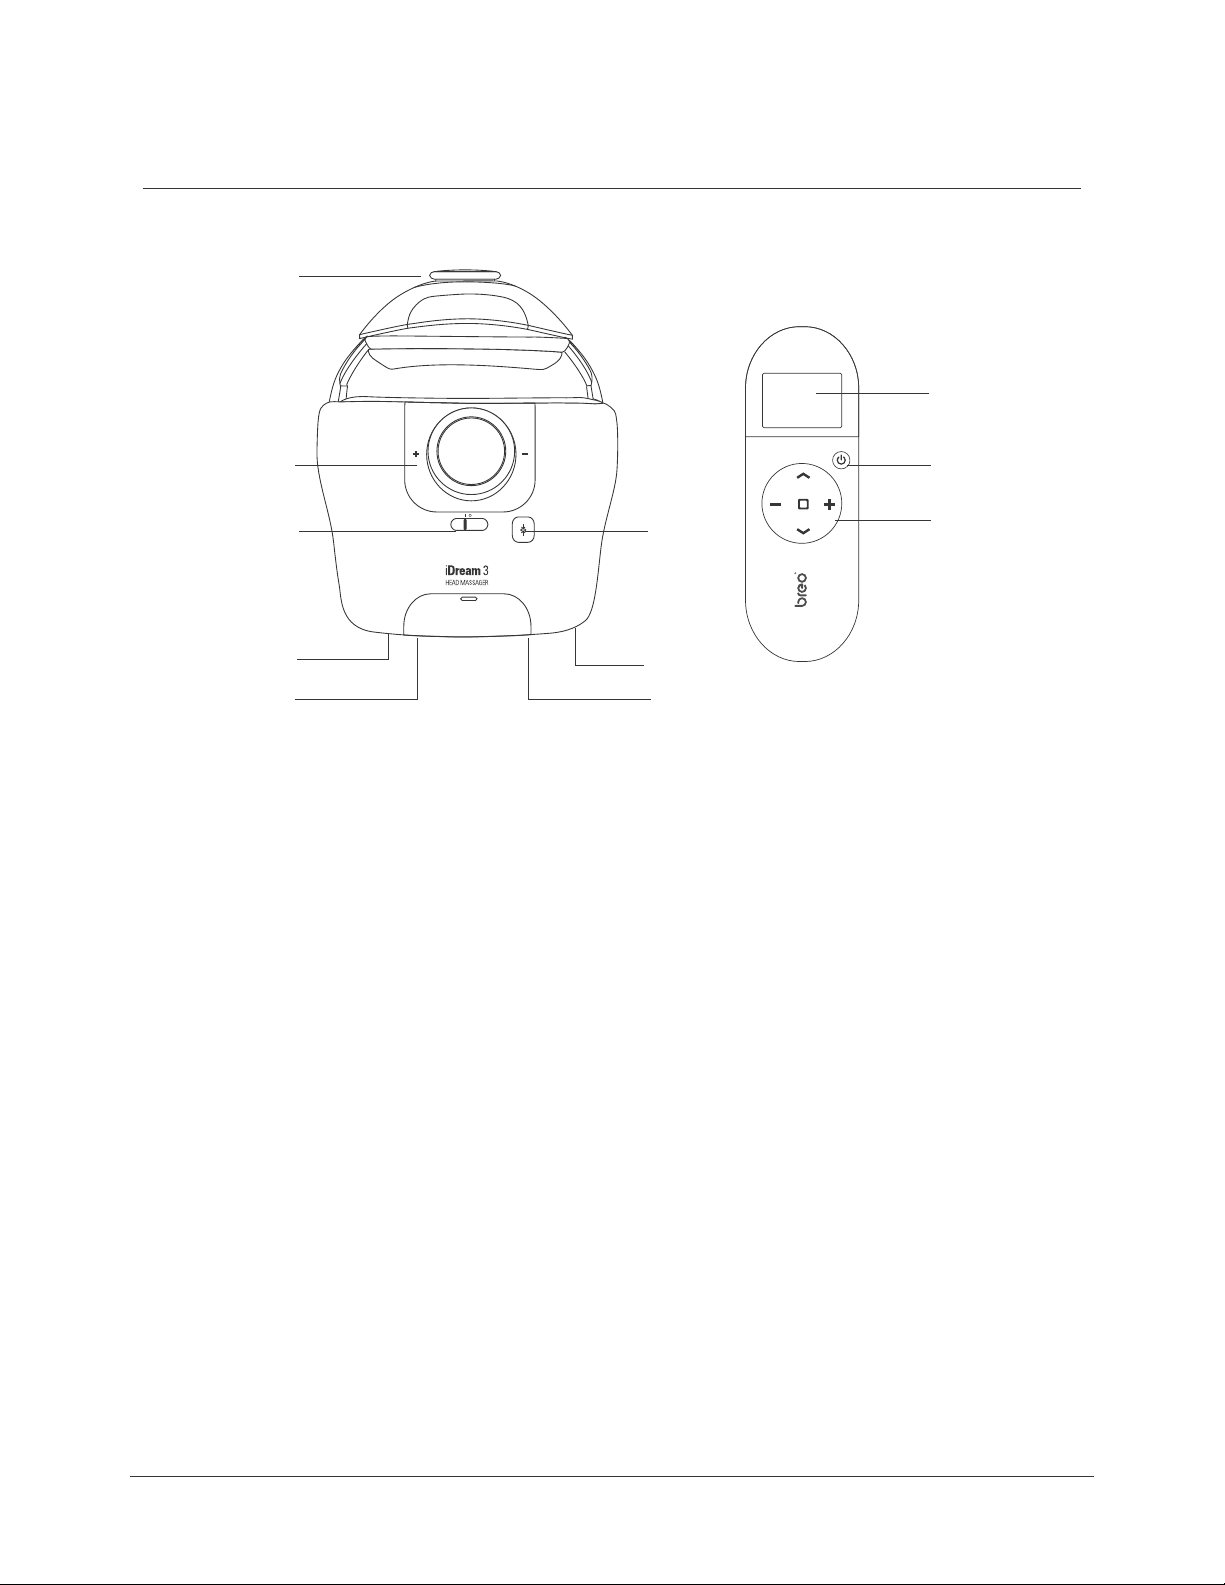
Main Unit and Remote Control
11.
10. 2.
1.
7. 4.
8.
6. 5.
LCD Screen
1.
ON/Off
2.
Operating Buttons
3.
Air discharge
Pressure Reduction Valve
4.
DC power interface
DC Power Port
5.
Earphone Jack
6.
LCD Screen:From top to bottom: Time / Air Pressure / Vibration / Hot Compress / Music
10.
11.
9.
Power Switch Protection key
7.
8.
Encoding Key
USB Port
9.
Size Adjusting Knob
Tightness Adjusting Knob
3.
Operating Button: Clockwise:
Center: OK Button
Power switch protection key: Push left or right to turn ON/OFF
MUST push power switch to Level “O” after each use
Up Button / Function Mode Next / Down Button / Function Mode Previous
4
Page 6

Attention:
In case of problem with connection between the main unit and remote control, you can perform joint
encoding operation:
1.
Turn the remote control off, and push the power switch of the main unit to level “O”.
Press and hold [8] encoding key of the main unit. While still holding it, push the power switch
of the main unit to level “I” to turn it on. The blue LED indicator on the front of the main unit
flashes.
2.
keys of the remote control
Release [8] encoding key, and simultaneously press the
for 2-3 seconds.The remote control LCD lights up while the main unit’s blue LED indicator
turns off -- it means the encoding is successful (This step should be completed within 6
seconds). If unsuccessful, repeat from the start.
Push the power switch of the main unit to level “0”, then back to level “1”. Both the main unit
3.
and
and remote control should now be working.
Please make sure that one main unit is corresponding to one remote controller. The operation of
encoding joint with multiply remote controller to the main unit is prohibited.
Important: Make sure that only one device is paired with the remote control. Multiple pairing of remote
control and main unit is strictly prohibited.
Preparation
Prior to use, check the integrity of the machine and accessories.
1.
No damage on power charger
2.
Battery power is sufficient
5
Page 7
Operation
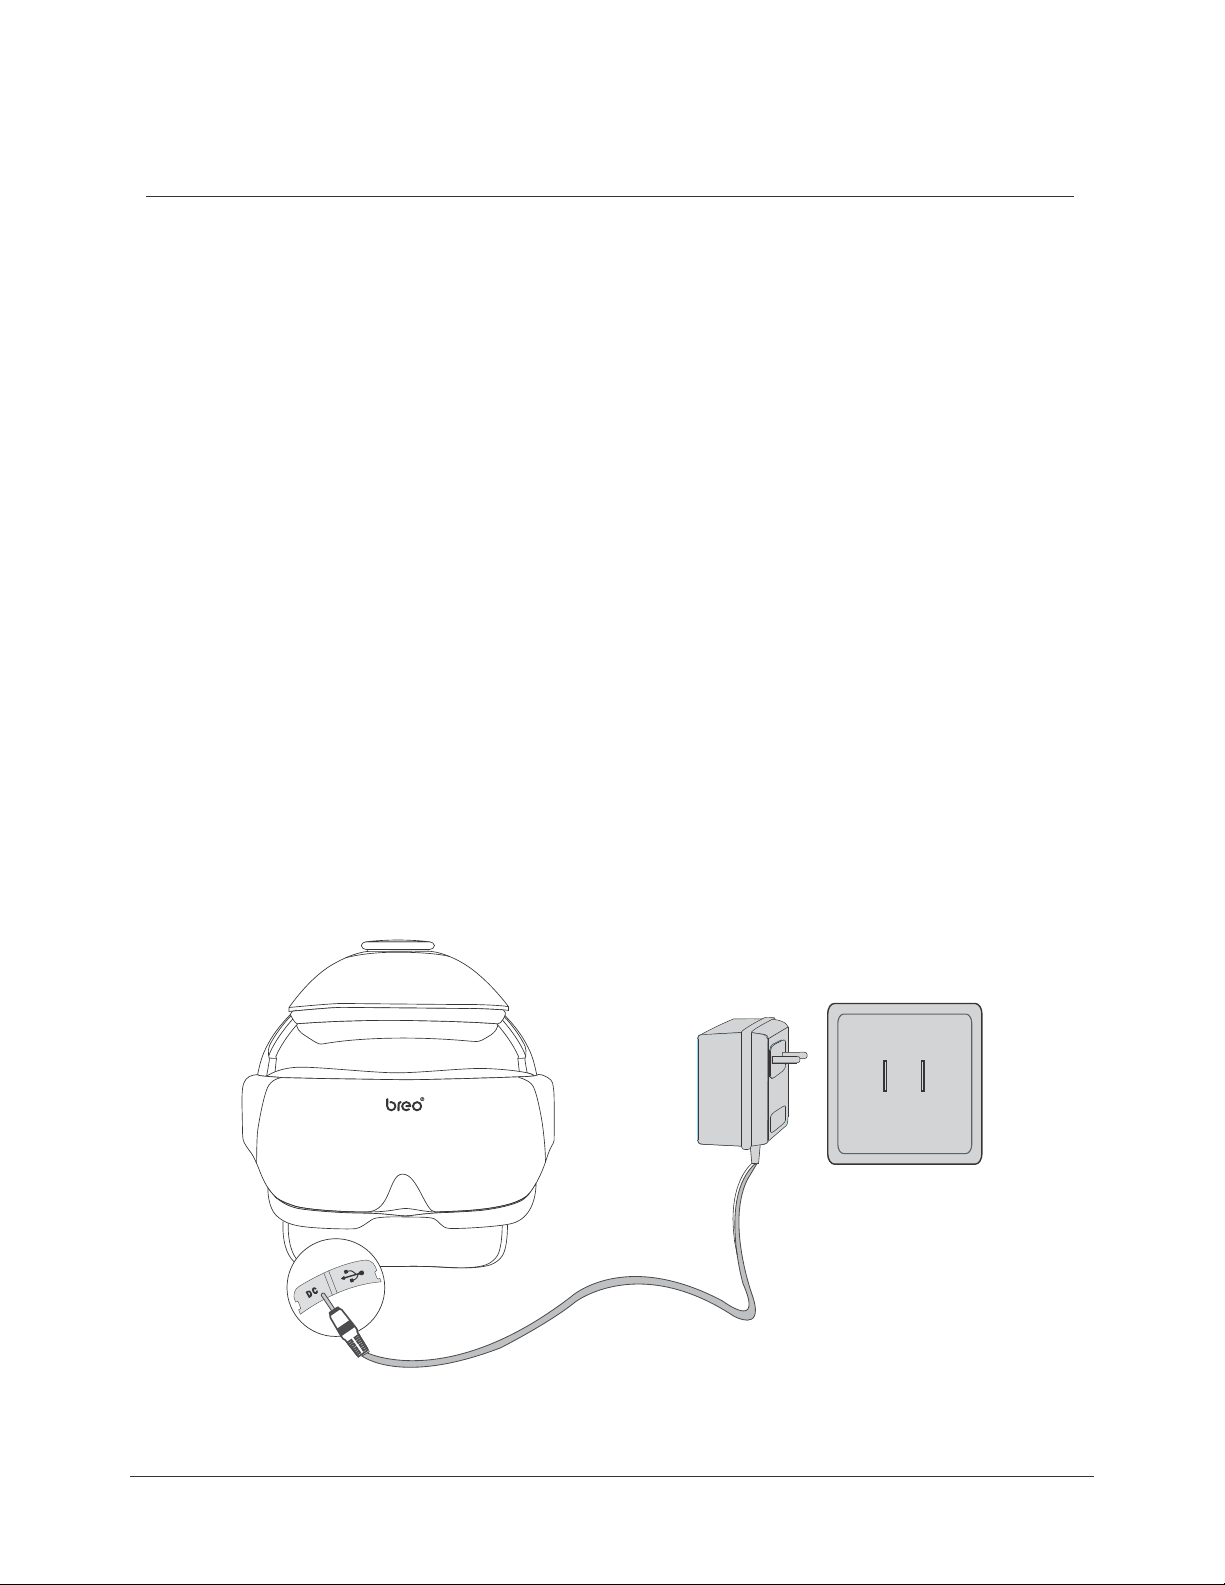
Charging of Main Unit
Open the cover of the DC power port on the main unit.
1.
Insert the plug of the power charger to the DC port.
2.
During charging, the light of the power charger is red. The light turns green when fully
3.
charged.
Attention:
1.
Push the power switch on the main unit to Level “O”. Keep the massager turned OFF
while charging. Charging time is approximately 3-4 hours.
If the massager is turned on while recharging, all functions of the product will run
2.
normally. The machine will automatically stop charging to prevent damage to the
device.
3.
If the power of the battery is lower than 3.2+-0.1V, the machine will automatically turn
off. If the LED indicator of the main unit flashes, it means the lithium battery is low.
Recharge the main unit.
6
Page 8
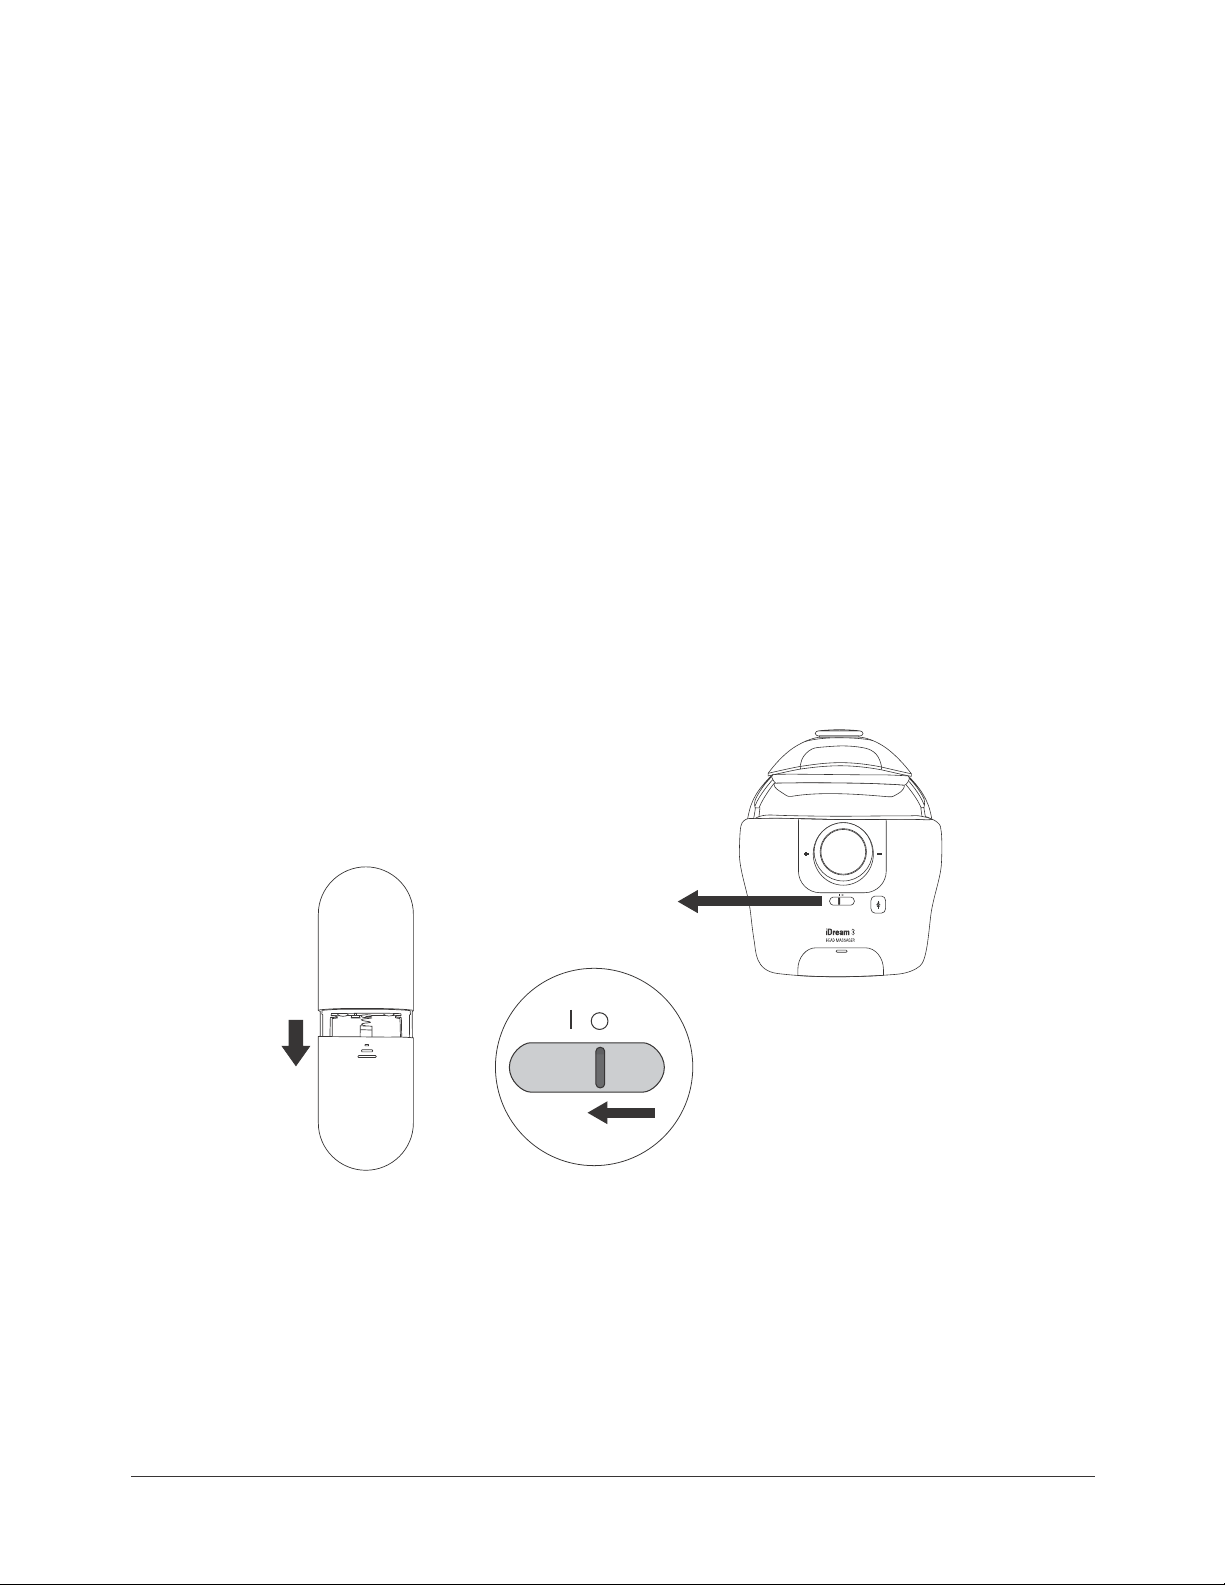
Music Downloading
1.
Connect the main unit to computer using the supplied USB cable;
Push the power protection key on the main unit to Level “1”.
2.
Copy MP3 music to the device.
3.
Wear
1.
Use the back dial to adjust the distance between head to establish the most comfortable fit,
and wear main unit.
Use the top dial in setting the distance above head.
2.
Power On
Open the battery cover on the back of the remote control.
1.
Place 3 AAA batteries in accordance with the positive and negative poles.
2.
Close the battery cover. (Picture1)
3.
(picture 1)
(picture 2)
to Level “I”
7
Page 9
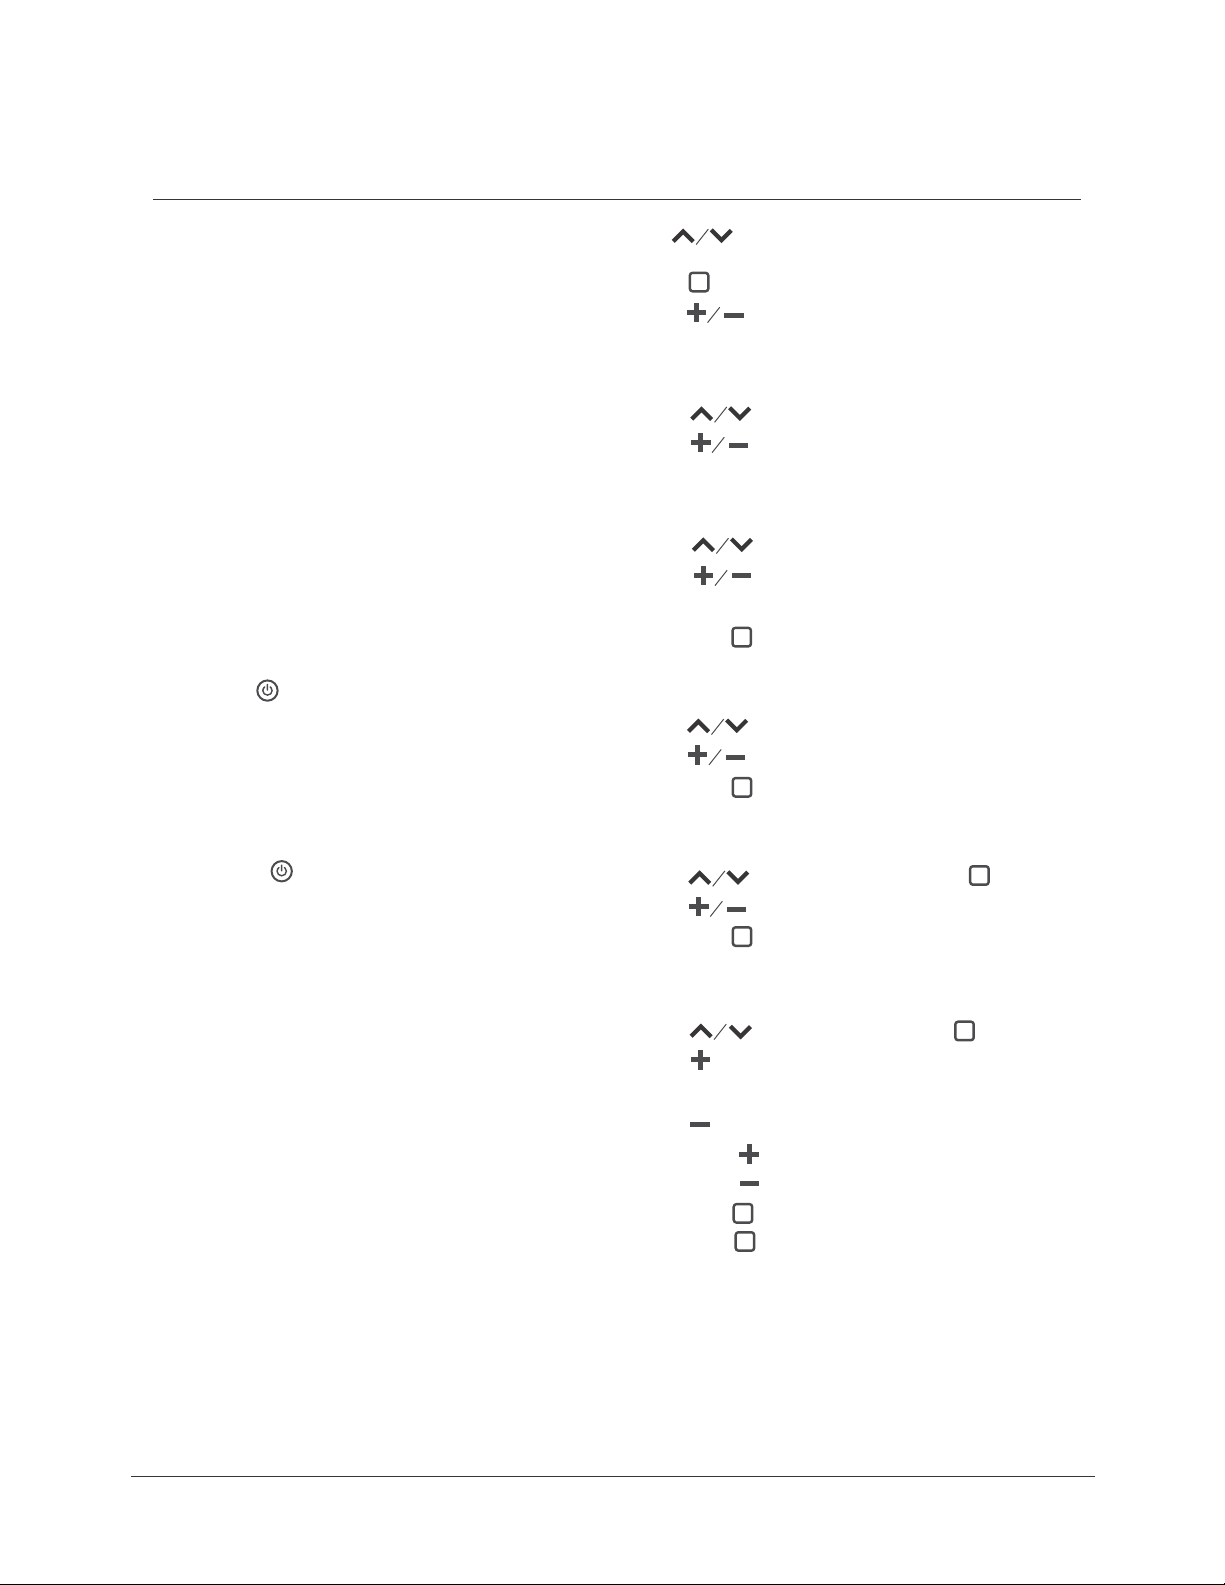
Operation
Automatic Mode (without remote control)
Power On/Off
1.
Power ON – Push the ON/OFF switch on the main unit to Level “I” (Picture2)
No need of remote control. The main unit starts working after 8 seconds.
Preset default is air pressure + heat compression + music + 15 minutes
duration.
Power OFF – The main unit automatically shuts off after 15 minutes.
2.
Push the ON/OFF switch on the main unit to Level “O”.
Manual Mode (using the remote control)
Power On/Off
Power ON: Push the ON/OFF switch on the main unit to Level “I” (Picture2)
1.
The main unit is powered by a high performance, environment-friendly lithium
battery.
Press and hold Button on the remote control
2.
Preset default is air pressure + heat compression + music + 15 minutes
duration
Default air pressure: Mode 5 – circulates among Modes 1 to 4;
Default hot compress: low temperature;
Default Music: Well-being music
Power OFF: Press Button on the remote control.
3.
Push the ON/OFF switch on the main unit to Level “O”
4.
Manually operate related buttons to select air pressure mode, vibration mode,
hot compress temperature, change music and/or massage duration.
Press Button to choose
(Time, Air Pressure, Vibration, Heat, and Music)
— Press Button to turn on/off a function
— Press Button to select air pressure mode, vibration mode, hot
compress temperature, change music and/or massage duration
Time
— Press Button to select “Time”
— Press Button to select massage duration
15 minutes/10 minutes/5 minutes
Air pressure
— Press Button to select “ Air Pressure”
— Press Button to select from the 5 different modes of air pressure
(Preset Default: Mode 5 – circulates among Modes 1 to 4)
— Off/On: Press Button to turn off/on Air Pressure
Heat compression
— Press
— Press Button to select low temperature or high temperature
— Off/On: Press Button to turn off/on Heat Compression
Vibration
— Press Button to select “Vibration”,then Press Button
— Press Button to select from the 5 different modes of vibration
—Off/On: Press Button to turn off/on Vibration
Music
— Press Button to select “Music”,then Press Button
— Press Button to go to the next one
(Preset Default – circulates among pre-recorded music)
— Press Button to go to the previous one
— Press and hold Button: Volume up
— Press and hold Button: Volume down
— Off/On: Press Button to turn off/on Music
— Press and hold Button to switch over between built-in music and MP3
music
Button to select “Heat Compression”
among functions
Attention:
When you feel the air pressure is too much and/or uncomfortable, press the
Pressure Reduction Valve on the main unit to release air.
8
Page 10

Precautions
1.
Please read the manual carefully and operate accordingly.
2.
Children under 7 years old cannot use the massager.
3.
This massager should not be used by people who suffer from a brain
disease, have had brain surgery, or have a physical or mental disorder.
4.
Take off contact lenses/eye glasses before use.
5.
Put on/wear the unit first BEFORE turning the power on.
6.
Do not use while walking or driving.
7.
Keep your eyes closed for a few seconds after use, then open them
slowly.
8.
Keep the massager away from humidity, heat, and/or corrosive gas.
If the massager will not be used for a long time, remove the batteries
9.
to prevent battery leakage.
10.
This massager is designed as a personal care product. It is not for
diagnosis/treatment of any health disorder, nor meant for
commercialuse.
11. This massager features heat compression. Individuals who are
incapable of or do not ordinarily feel heat/cold sensation should use
this device with caution.
12.
To clean, wipe with aseptic cotton and alcohol. Do not wash or
immerse in water.
This product is not a substitute for healthcare professionals' advice
13.
and treatment. In case of doubt or if necessary, please consult your
healthcare professional.
Please use ONLY the DC 4.5V power charger that comes with the
14.
package, and handle it with care.
9
Page 11

15. It is very important to turn the power of the main unit OFF after
each use and before storage to avoid damage to the machine.
Please note that changes or modifications not expressly approved
16.
by the party responsible for compliance could void the user’s
authority to operate the equipment.
This equipment has been tested and found to comply with the limits
17.
for a Class B digital device, pursuant to Part 15 of the FCC Rules.
These limits are designed to provide reasonable protection against
harmful interference in a residential installation. This equipment
generates, uses and can radiate radio frequency energy and, if not
installed and used in accordance with the instructions, may cause
harmful interference to radio ommunications. However, there is no
guarantee that interference will not occur in a will not occur in a
particular installation. If this equipment does cause harmful
interference to radio or television reception,which can be determined
by turning the equipment off and on,the user is encouraged to try to
correct the interference by one or more of the following measures:
– Reorient or relocate the receiving antenna.
– Increase the separation between the equipment and receiver.
– Connect the equipment into an outlet on a circuit different from
that to which the receiver is connected.
– Consult the dealer or an experienced radio/TV technician for help
10
Page 12

Troubleshooting
When operational problems occur, please refer to the chart below.
Do not disassemble the machine or try to repair it by yourself.
Problem Possible Reason Possible Solution
Power-On Failure
Weak air pressure
or vibration
Power Switch Protection key
is not turned on
Lithium battery of the main
unit is low
Remote control batteries are
low/ out
Remote control batteries are not
installed correctly
Lithium battery of the main unit
is low
Push this key to Level “I”
Recharge the main unit at once
Change batteries
Check if positive/negative poles of
batteries are positioned right
Make sure the batteries are snug in
place
Recharge the main unit at once
11
Page 13

Technical Parameters
DC/Power:
Ideal
Environment:
Dimension:
Net Weight:
DC: 4.5V Power: 4.5W
Temperature 5℃~40℃ Relative Humidity ≤80%
Atmospheric Pressure 860hpa~1060hpa
Main Unit:L282mm X W206mm X H254mm
Controller :L132mm X W44mm X H24mm
1125g
Storage
If left unused, checking the product/turning the power on every 6 months
1.
is recommended.
Do not store near the floor, wall or roof.
2.
3.
Maintain good ventilation and keep away from direct sunlight and
corrosive gases.
12
 Loading...