

Page 1
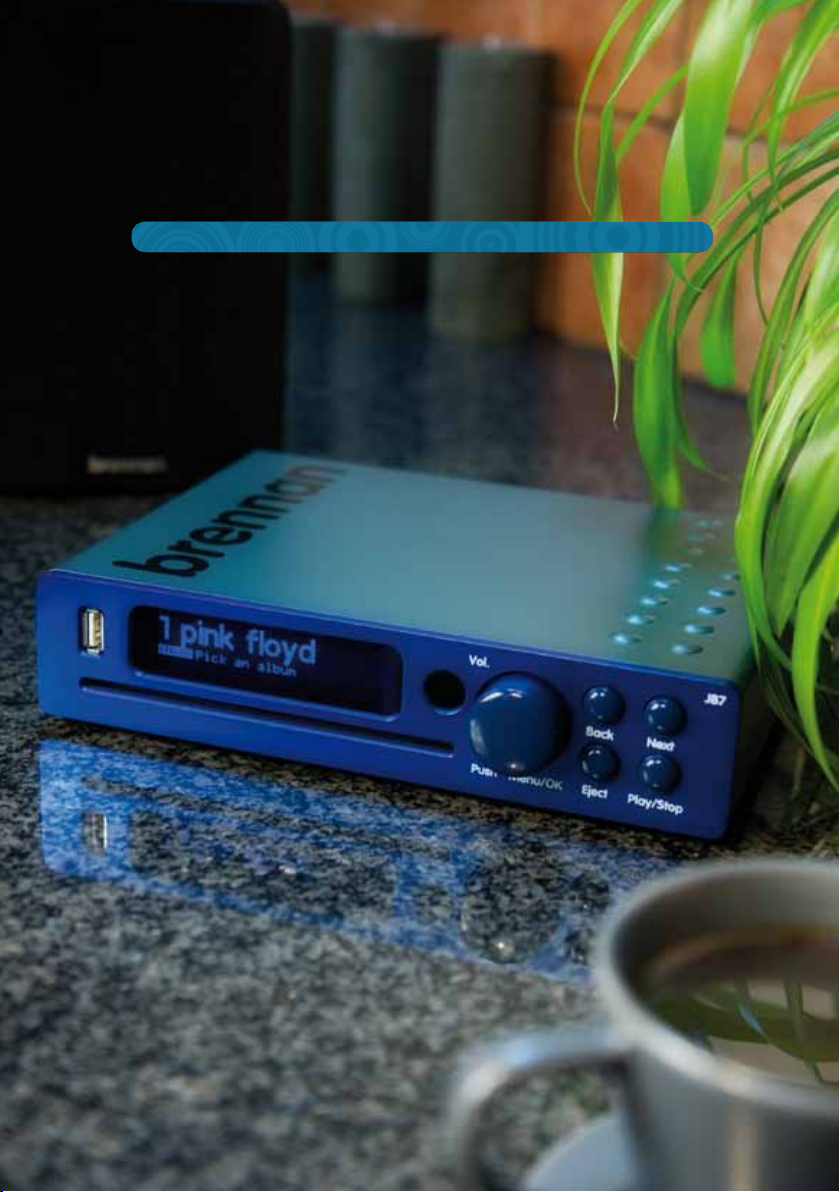
brennan JB7
user guide
Page 2

brennan JB7
introduction
The Brennan JB7 is the result of seven years of
work between 2001 and 2008. I instinctively
felt that hard disks and music were made for
each other, and I wanted a better way to enjoy
my modest collection of 350 CDs.
Initially I tried to license my technology to
existing audio companies and had a measure
of success, but I felt I could do better – so I took
the difficult decision to manufacture my own
product.
I can honestly say that I have learned more in
the last three years than I ever did learning
physics at Cambridge. It has been tough, but
the most rewarding part has been hearing JB7
owners talk with affection and warmth about
their Brennans.
I feel a bit of a cheat of course, because
it’s really the songwriters, composers and
musicians who deserve the credit. I hope you
enjoy your music.
This guide shows you how you can use the Brennan JB7 to
• Upload your entire CD collection to the storage system quickly and simply
• Give you instant access to any of your music
• Play your whole music collection at random, or create playlists of your favourite music
• Scroll through all your albums from the sofa, using the compact remote control
2
Page 3
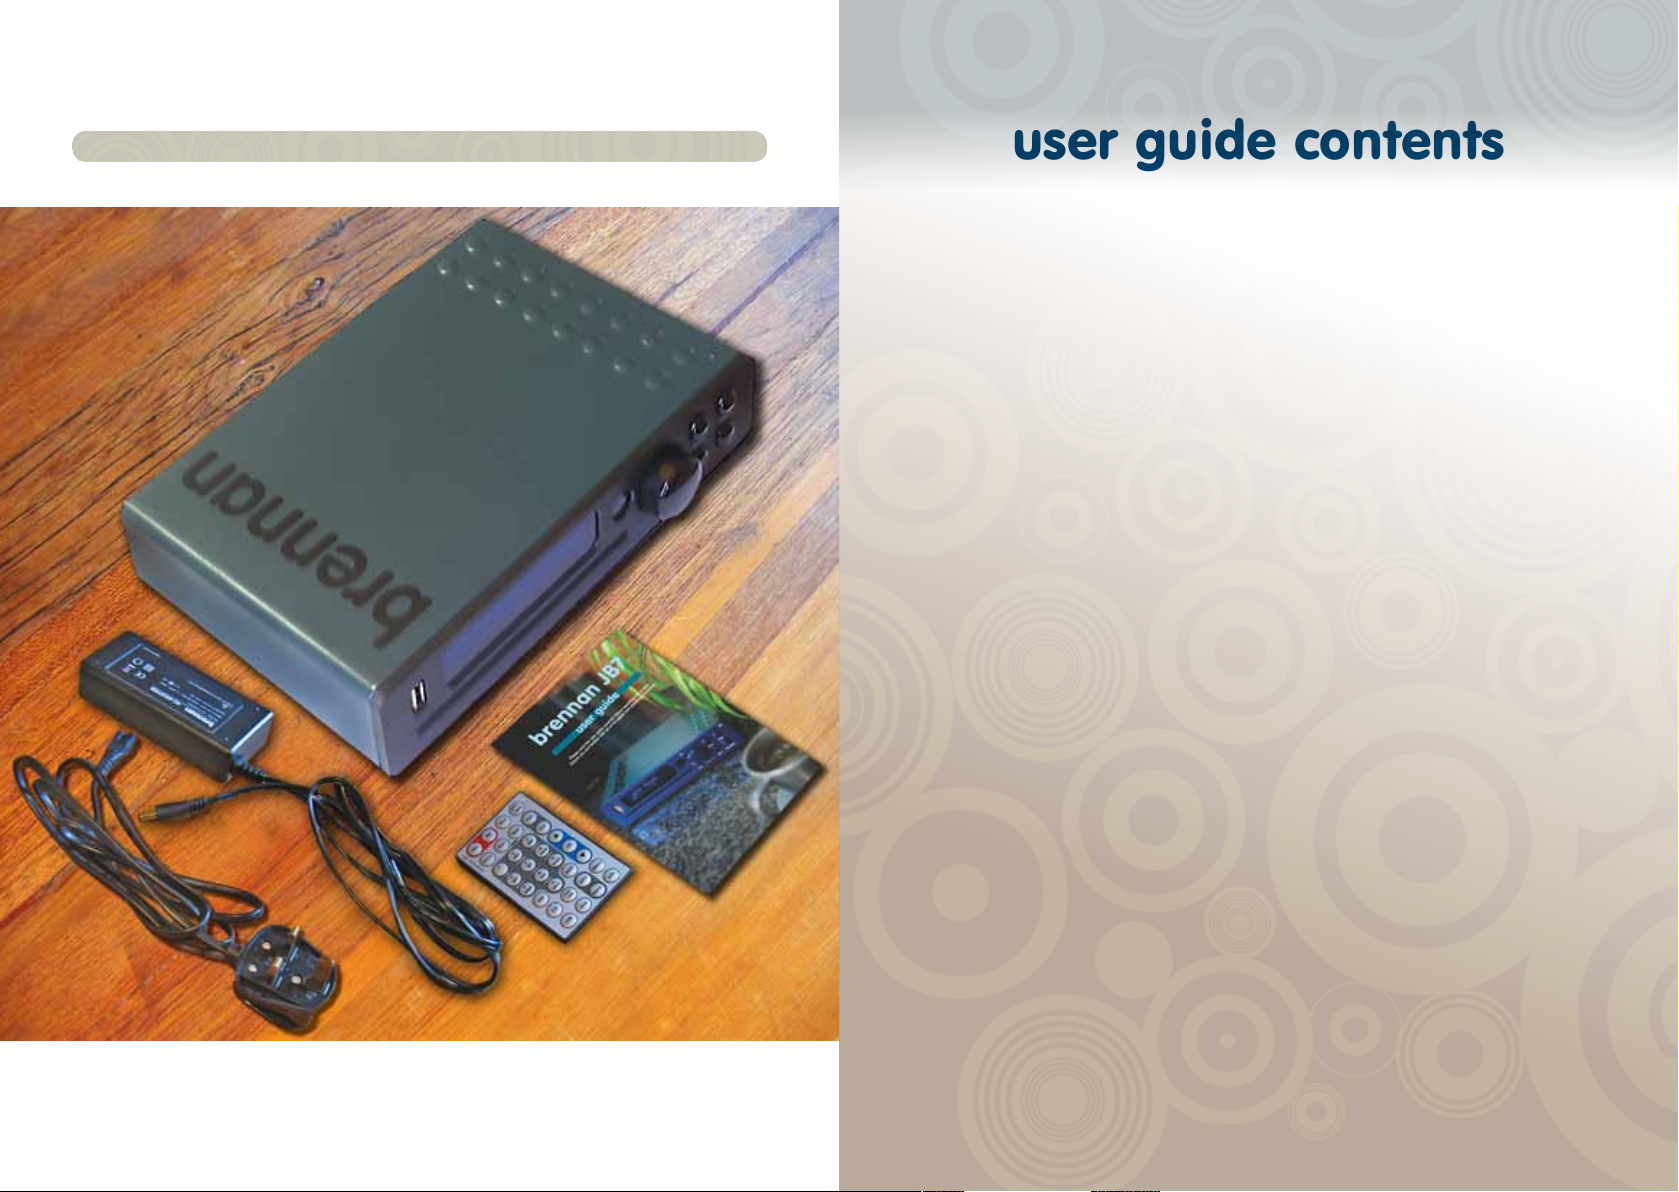
box contents
user guide contents
main unit features 6
remote features 7
using JB7 8
menu system 10
JB7 Main Unit
Transformer
Mains Power Lead
Remote
User Guide
displays 15
loading music 16
playing music 17
searching for a track or album 19
deleting tracks and albums 20
editing track and album titles 20
playlists 22
transferring music to a USB device 23
updating and backing up 25
settings 26
recording 28
about the album database 29
common questions 29
troubleshooting 31
guarantee 32
repairs and returns 32
contact us 32
Page 4
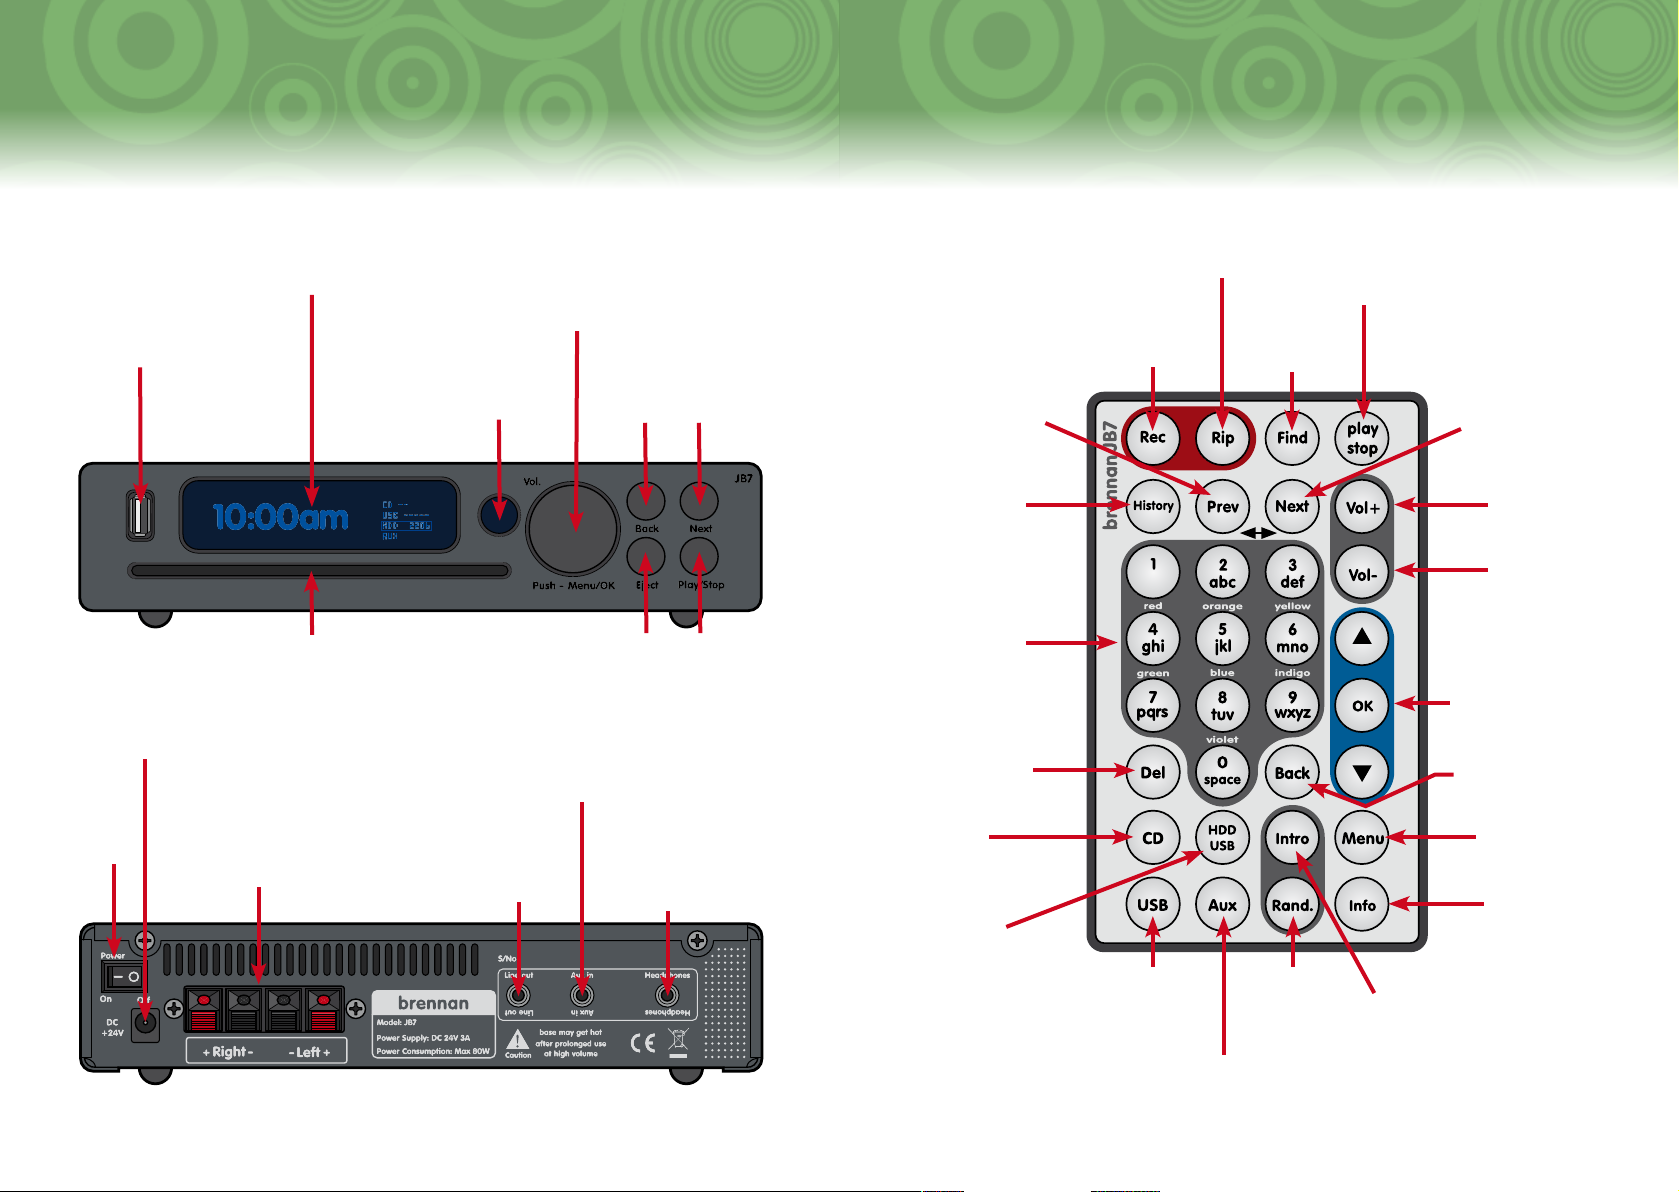
main unit features remote features
USB Port
Compatible with
most USB mass
storage devices
Power
Input from
Transformer
Power
On/Off
Switch
Connections’ on the
Vacuum Fluorescent Display
180 x 32 pixel graphic display
used to display time, status,
menu and help text
via the remote control
CD Slot
Speaker
Connections
See ‘JB7’s
Quickstart Sheet
Main Control Knob
For volume and menu control
(see page 6)
Infra-red Window
For communication
Aux In
(Audio Input)
Connection
Line Out
(Audio Output)
Connection
Next Button
Press to start
JB7 from
standby and
play tracks
Back
Button
Connections’ on the
Quickstart Sheet
at random
Eject
Play/Stop
Button
Headphones
Connection
See ‘JB7’s
Button
Press and
hold to stop
everything
Previous Button
Jumps to previous
track; also used to
leave the menu or to
move the cursor left
when editing text
History Button
Scrolls through
previously-
played tracks
Data Input Buttons
0–9 and a–z work
like mobile phone
input (see pages
19–20); red–violet
correspond to seven
available playlists
(see pages 22–23)
Delete Button
Deletes characters
in data input mode
CD Selection
Button
Plays music
directly from a CD
HDD/USB
Selection Button
Plays music from
an attached USB
device and JB7’s
hard drive
Rip Button
Transfers
current track
to USB device
Record Button
Starts recording from
the audio input to
JB7’s hard drive
USB Selection Button
Selects a USB device as
a music input source
Audio Input Button
Selects an audio
input source
Play/Stop
Button
Starts and
pauses music
Find Button
Starts track
search
Random Mode
Button
Turns random
mode on and off
Next Button
Jumps to next track;
also used to advance
to the next menu
item or to move the
cursor right when
editing text
Vol+ Button
Increases
sound volume
Vol– Button
Decreases
sound volume
Up and Down Arrow
and OK Buttons
Up and down arrows
scroll through menu
options; the OK button
confirms a choice
Back Button
Selects previous menu
level or option
Menu Button
Starts the top-
level menu
Information Button
Displays disk
statistics and
context-dependent
information
Intro Mode Button
Turns intro mode on and
off (see page 16)
6
7
Page 5

using JB7
This table shows you how to carry out actions
using either the front panel or the remote control.
Some people prefer to use the controls on JB7’s
front panel, some prefer to use the remote – you
will soon work out what is best for you.
Note that the main control knob on the front
panel functions in two ways. Turning the knob
changes volume, cycles through menu options,
and chooses alphanumeric characters. Pushing
the knob in displays the menu and confirms your
choices.
The display offers context-sensitive help – it tells
you which buttons to press. Experiment with the
menu (you won’t break anything).
To …
start the onscreen menu
scroll through menu choices
select a displayed item
pick a letter during text searches
increase or decrease the volume
… do this on the front panel … do this on the remote
push in the main control knob press the menu button
turn the main control knob press the up and down arrow buttons
push in the main control knob press the OK button
turn the main control knob press the letter buttons
turn the main control knob press vol+ to increase or vol– to decrease
go back
go to the next track
go to the previous track
delete letters when entering text
turn on and play random tracks from standby
go to the next step in the menu
play a track
pause/stop a track
unpause a track
stop all operations on your JB7 (the ‘panic button’!)
eject a CD
press the back button press the back button
press the next button press the next button
press the back button press the prev button
press the back button press the del button
press the next button press the next button
turn the main control knob press the up and down arrow buttons
press the play/stop button press the play/stop button
press the play/stop button press the play/stop button
press the play/stop button press the play/stop button
press and hold the play/stop button press and hold the play/stop button
press the eject button press the eject button
8
9
Page 6
menu system
To start the menu from the front panel, push
the main control knob then turn it to see the
choices. Push it in again to select a choice.
To start the menu from the remote, press
the menu button then press the up and down
arrow buttons to see the choices available.
Press the OK button to select a choice.
To exit the menu system completely, press
and hold the back button.
The tables below provide a summary of
the menus on JB7, the functions available
under each menu, and an explanation of
what each function does. They also indicate
whether and how a function can be accessed
via a shortcut on the remote control.
You can often access functions in several
ways, and the tables will show you where to
find a particular function under each of the
menus.
Main Menu
Functions
Track Search
Album Search Searches for albums in your collection,
History Scrolls through the tracks you have
Browse Albums Browses the albums in your
Playlists Edits and clears playlists, and sends
Current Track Selects the currently playing track,
CD Functions Starts the CD menu 16
USB Functions Starts the USB menu 24
Settings Starts the Settings menu 26
Recording Menu Selects the Aux input, and starts the
Disk Stats Displays a summary of the hard disk
What the function does
Searches for tracks in your collection
and starts the Album menu
played previously
collection
playlists to the USB
and starts the Track menu
Recording menu
usage, how many CDs and tracks you
have loaded, how many have been
converted into MP3, how much space
has been used, and how much is free
Instructions
on page …
19
19
18 History button
17
22
21
28
Remote control
shortcut button
Find button
Info button
Track Menu
Functions
Play Track
Delete Track Deletes the selected track 20
Add to Playlist Adds the selected track to a playlist 22
Rename Track Changes the track name 20
Album Menu Selects an album for a selected track see below
Track to USB Transfers the selected track to the
What the function does
Plays the selected track
USB device
Instructions
on page …
23 Rip button
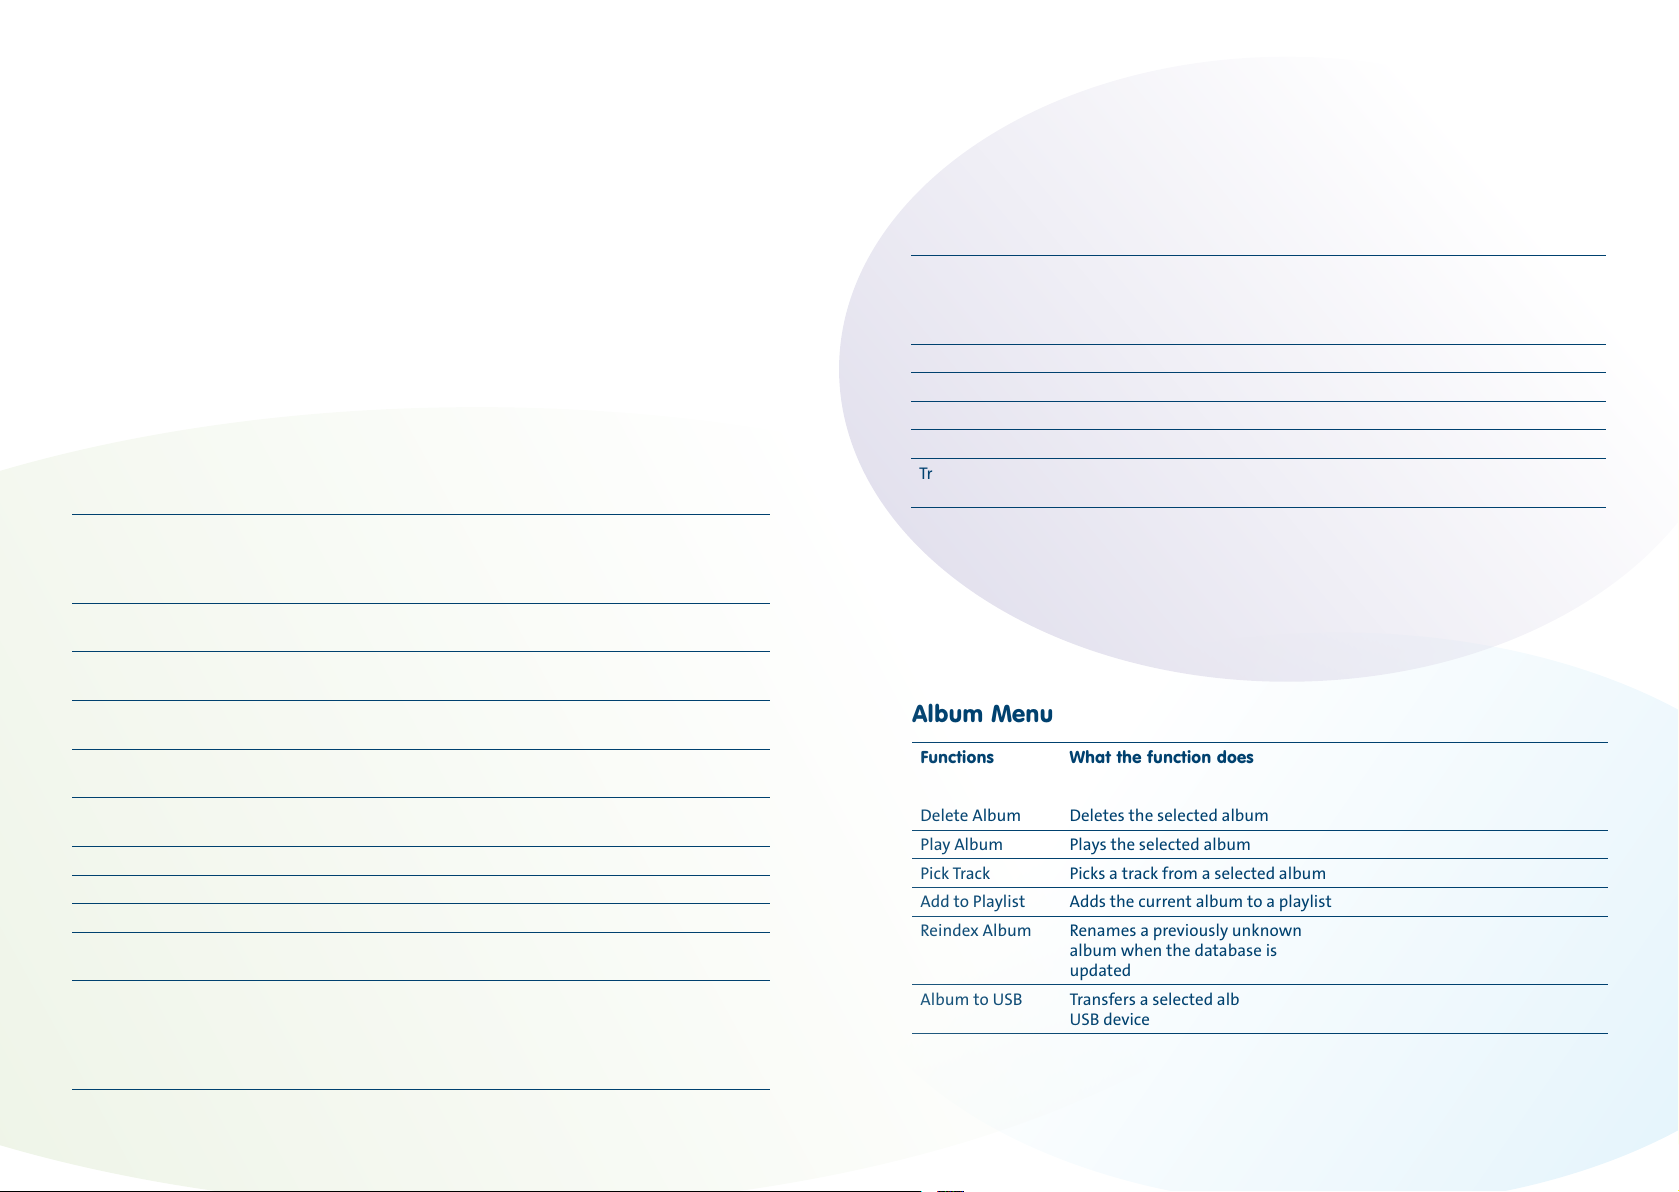
Album Menu
Functions
Delete Album
Play Album Plays the selected album
Pick Track Picks a track from a selected album 19
Add to Playlist Adds the current album to a playlist 22
Reindex Album Renames a previously unknown
Album to USB Transfers a selected album to the
What the function does
Deletes the selected album
album when the database is
updated
USB device
Instructions
on page …
20
21
23
Remote control
shortcut button
10
11
Page 7

Playlist Menu
USB Menu
Functions
Add to Playlist
Play Playlist Selects and plays a playlist 22 Press the
Playlist to USB Transfers all tracks on a selected
Clear Playlist Removes all tracks from a selected
Edit Playlist Cuts and pastes tracks in the
To turn playlists off and resume normal play press the Zero button on the remote.
What the function does
Adds the current track to a playlist
playlist to the USB device
playlist
selected playlist
Instructions
on page …
22
23
22
22
Remote control
shortcut button
Press and hold
corresponding
number button
corresponding
number button
twice
CD Menu
Functions
Load CD to HD
Play CD Plays the CD from track 1 18
CD to USB Copies the entire CD to the USB
Track to HDD Loads one track from a CD to the
Track to USB Loads one track from the CD to the
Go to Track Plays a specific track on the CD 18
Update CDDB Installs a new album database from
What the function does
Loads an entire CD to the internal
hard disk drive (HDD)
device
internal hard disk
USB device
CD-ROM
Instructions
on page …
16
23
16
23
25
Functions
Play USB
Track to USB Copies the currently playing track to
Backup Music Makes a backup copy of your music
Restore Music Recovers music from a backup USB
USB Directory Determines the target directory for
Playlist to USB Transfers all tracks on a selected
Export Names Creates a file on a USB device called
Import Names Renames any tracks and albums
What the function does
Plays music from an attached USB
device
a USB device
to a USB device
hard drive
tracks transferred to a USB device
playlist to a USB device
‘JB7 catalogue’, which contains the
names of all the albums and tracks
stored on JB7
changed in the ‘JB7 catalogue’ file
Instructions
on page …
18
23 Rip button
25
25
24
23
24
25
Remote control
shortcut button
12
13
Page 8

Settings Menu
11:55am 1/11
Current
time
Artist, track title and album title
move continuously across display
NormalHDD
Elbow Leaders of the Free
1:36
Source
of
track
Number
1 of 11
tracks
Playing
time of
track
Playing
mode
displays
Functions
Play Mode
Bass Adjusts the amount of bass 26
Treble Adjusts the amount of treble 26
Set Time Adjusts the time displayed
Set Alarm Sets an alarm time 26
Compression Gives four settings for levels
Brightness Adjusts the display
Maintenance Resets settings, erases all
New CDDB Installs a new album
S/W Upgrade Upgrades the product
What the function does
Selects the mode in which to
play a track
on JB7
of compression, from no
compression to high quality
brightness
music, disk check, etc.
database from a CD-ROM
operating system from a data
CD
Instructions
on page …
26
26
27
27
27
25
25
Remote control
shortcut button
Press the Rand button for
random mode, or the Intro
button for intro mode
When JB7 is not playing
Current time CD inserted with 13 tracks
13
CD
156
USB
11:55am
Number of tracks
stored on hard drive
HDD
AUX
3753
No auxiliary device
inserted
When JB7 is playing
USB device
inserted
with 156
tracks
Recording Menu
Functions
Start Recording
Stop Recording Stops the recording 28 Press the Rec button
Recording Level Adjusts the recording level to
Recording Time Sets the recording time from
What the function does
Starts recording from the
Aux input to a file in the
‘Recordings’ album
limit distortion or clipping
0 to 99 minutes
(selecting this menu automatically selects the auxiliary input)
Instructions
on page …
28
28
28
14
Remote control
shortcut button
Press the Aux button, then
the Rec button
15
Page 9

loading music
playing music
JB7’s primary function is to store a large number of CD albums on one device, so you can find and
play tracks easily and start enjoying your whole music collection again. This does mean that you have
to transfer the music on your CDs onto JB7, but you only need to do it once, and we have made the
operation as quick and effortless as we possibly can.
Load your CDs using the front-loading CD reader on the front of JB7, which detects and gently
draws in the CD as you insert it, and then automatically ejects it when the contents have been
transferred. You can comfortably load twenty to thirty CDs on to JB7 in an evening.
To load a CD onto the
hard disk
1 Insert the CD gently into the slot until it
is drawn in.
2 The CD menu will automatically start
after a few seconds, displaying the ‘Load CD
to HD’ option.
3 Push the main control knob in to choose
that option, and to load the CD.
4 Turn the knob to view the album
name choices for the CD in the album
database, and push the knob in to select the
appropriate album name.
5 If the suggested names do not match the
CD, select the option ‘Other’.
You will then be presented with a temporary
name for the CD, something like ‘album123’.
It’s quicker to edit the name at this point
before loading than rename the album
after it is loaded. Track names will be given
temporary names, ‘track1’, ‘track2’ and so
on. To rename the album, see ‘To rename an
album’ on page 21.
6 The CD will then start to load onto the
HD, and progress will be displayed on the
front panel.
7 You can use JB7 as usual whilst the CD
loads, although loading will slow down a bit
because the system is doing two things at
once.
8 You can stop a CD loading by ejecting the
CD, or by pressing and holding the Play/Stop
button.
9 Once the CD has fully loaded, JB7 will
automatically eject the CD.
To load a track onto the
hard disk
1 Insert the CD gently into the slot until it
is drawn in.
2 The CD menu will automatically start
after a few seconds.
3 Turn the main control knob until it shows
Track to HDD, and push the knob in.
4 Turn the knob to view the album name
choices for the CD in the album database,
and push the knob in to select the
appropriate album name.
5 If the suggested names do not match the
CD, select the option ‘Other’.
6 You will then be presented with a
temporary name for the CD, something
like ‘album123’. Track names will be given
temporary names, ‘track1’, ‘track2’, and so
on. To rename the album, see page 21.
7 Turn the main control knob to scroll
through a list of tracks, and push the knob
to select a track. This will load your chosen
track onto JB7. Progress will be displayed
on the front panel. Press the Eject button to
retrieve the CD.
Once you have loaded your first album, you can start playing your first transferred tracks.
To play an album or track, push in the control knob to show the main menu. Turn it to Browse
Albums, push to select, then turn it again to scroll to the album you would like to play. Select it
by pushing the knob, then press the Play/Stop button to play it.
To play a particular album
If you know the name of the album you wish
to play, follow the steps in the section ‘To
search for an album’ on page 20.
If you do not know the name of the track
you wish to play, follow steps under the
section ‘To browse albums’ below.
To play tracks randomly
A quick way to enter Random Mode
is to press Next when JB7 is stopped.
Alternatively, if already in use, on the front
panel push the main control knob and
turn the knob to select Settings, then Play
Mode. Scroll through the options and select
Random Mode.
While a track is playing, press the Rand
button on the remote control. Keep pressing
Rand to select Random On or Random Off.
Selecting Random Off will play tracks in the
order they appear in their albums, and albums
in the order you loaded them onto your JB7.
To browse albums
2 Scroll through albums with the up and
down arrow buttons.
3 Press the Play/Stop button to play the
album.
To browse all tracks
If you know the name of the track you wish to
play, follow the steps in the section ‘To search
for a track on the HD or USB drive’ on page 19.
If you do not know the name of the track
you wish to play, you can browse tracks as
follows.
On the front panel
1 Push the main control knob to start the
main menu, then turn the knob and scroll to
Track Search. Select it by pushing the knob.
2 Instead of entering letters as you would
to search for a specific track, press the Next
button.
3 This will show you a list of all the tracks
loaded onto JB7 in the order that you loaded
them. Turn the knob to scroll through the
tracks and push the knob to select one.
On the front panel
1 Push the main control knob to start the
main menu, then turn it to scroll to Browse
Albums and push to select.
2 Scroll to the album you want to play, then
press the Play/Stop button.
On the remote control
1 Press the Find button.
2 Press the Next button.
3 Press the up and down arrow buttons to
scroll down the list of tracks, then press OK
to select one.
On the remote control
1 Press the Menu button, then use the up
and down arrow buttons to scroll to Browse
Albums. Press OK to select.
16
17
Page 10

To play a CD
On the front panel
1 Insert the CD, then press the Play button;
alternatively you can select Play CD from the
CD Menu.
2 If the CD has already been inserted into
the player, push the main control knob to
access the Main Menu, scroll to select CD
Functions, select the Play CD option, and
push the main control knob again to play
the CD.
On the remote control
Press the CD button, then the Play button.
To play a specific track
on a CD
1 The CD menu will automatically start
when you insert a CD; alternatively push and
turn the main control knob to scroll through
the main menu to select CD Functions, then
push the knob.
2 Turn the knob to scroll to Go to Track, and
push the knob to select this option.
3 You will be asked to select the album
name. Do this by turning the knob and
pushing it to select the appropriate name.
4 Select the track you wish to play by
pushing the knob.
To play music from a
USB device
On the front panel
1 Insert the USB device.
2 Push the main control knob to start the
main menu.
3 Turn the knob to select USB Functions
and push it to select the option. Turn the
knob again and push it to select Play USB.
USB functions
MAIN
Transfer to/from USB
On the remote control
1 Insert the USB device.
2 Press the USB button, then press the
Play/Stop button.
To play and search tracks solely from the USB
device, select USB on the remote.
To play and search tracks from both the
internal disk and the USB device, select HDD
USB on the remote.
To scroll through previously
played tracks and play
them again
On the front panel
1 Push the main control knob to start the
main menu, then turn it to scroll to History
and push to select.
2 Select a track to play by pressing the Play/
Stop button.
On the remote control
1 Press the History button.
2 Recently played tracks will appear on the
front panel display. The track index is shown
as a negative number, so –1 means this was
the last track that was played, –2 the track
before that, and so on.
3 Scroll through the list of previous tracks
using the up and down arrow buttons.
4 Select a track to play by pressing the Play/
Stop button.
The History function will remember tracks
played from the HD or a USB device, but
not tracks played from a CD. Tracks are
only recorded once in the History, so if you
keep replaying a track it won’t keep getting
repeated in the History list.
searching for a
track or album
To search for a track on the
HDD or a USB drive
If USB is selected on the remote then track
search will only search the USB device. If
HDD+USB is selected on the remote, track
search will search the internal disk and the
USB device.
On the front panel
1 Push the main control knob to start the
main menu. Turn the knob until it shows
Track Search, then push it to select.
2 Turn the control knob again – letters will
appear on the front panel.
3 Push the knob to select a letter.
4 Repeat the process, pressing the Back
button If you need to delete the last letter
you’ve entered.
5 JB7 will search for tracks after each
letter is entered, and display the number of
matching tracks found.
6 The search is not case sensitive, and looks
for the letter combination anywhere in the
title. For example, if you enter the letters
‘elv’ this might match with both ‘Elvis’ and
‘velvet’.
7 When the number of matches is low
enough (say under twenty), press the Next
button. This will show the list of matches.
8 Turn the control knob to view the list of
tracks. Matches on an attached USB device
are shown with a small letter ‘u’.
9 If the matches don’t fit what you are
looking for, press the Back button and reenter the letters.
10 To play a track, scroll to the track with
the control knob, then press the Play/Stop
button.
11 If you want to do something else with the
track, for example transfer it to a USB device,
push the control knob. This will take you to
the track menu.
On the remote control
1 Press the Find button.
2 Use the buttons on the remote control
to enter letters, in the same way as a mobile
phone – for example press the number 2
button once for a, twice for b, three times for c.
3 If you need to delete the last letter you’ve
entered, press the Del button.
4 JB7 will search for tracks after every
letter is entered, and display the number of
matching tracks found on the front panel.
5 The search is not case sensitive, and looks
for the letter combination anywhere in the
title. For example, if you enter the letters
‘elv’ this might match with both ‘Elvis’ and
‘velvet’.
6 When the number of matches is low
enough (say under twenty), press the Next
button. This will select a list of tracks.
7 Press the up and down arrow buttons to
see the track names if there is more than
one match. Matches on an attached USB
device are shown with a small letter ‘u’.
8 If the matches don’t fit what you are
looking for, press the Back button and reenter the letters.
9 To play a track, scroll to the track using
the up and down arrow buttons, then press
the Play/Stop button.
10 If you want to do something else with
the track, for example, transfer it to a USB
device, press OK. This will take you to the
track menu.
18
19
Page 11

To search for an album
On the front panel
1 Push the main control knob to start the
main menu, then turn it to scroll to Album
Search and push to select.
2 Follow steps 2–11 (front panel) of ‘To
search for a track’.
On the remote control
1 Press the Menu button, then use the up
and down arrow buttons to scroll to Album
Search. Press OK to select.
2 Follow steps 2–10 (remote control) of ‘To
search for a track’.
JB7 can search for albums on a connected
USB device. If the tracks on the USB device are
in folders, JB7 will treat the folders as albums
and can search for them.
deleting tracks and albums
To delete a track
On the front panel
1 Select the track you want to delete by
following steps 1–9 of ‘To search for a track’.
2 Turn the main control knob to find Delete
Track, and push to select.
3 You will be asked ‘Are you sure?’ Push
the knob again to confirm that you want to
delete the track.
On the remote control
1 Select the track you want to delete by
following steps 1–8 of ‘To search for a track’.
2 Press OK to select a track.
3 Press the up and down arrow buttons
and select Delete Track.
4 You will be asked ‘Are you sure?’ Press OK
to confirm you wish to delete the track.
To delete an album
To delete an album, follow the same steps as
‘To delete a track’ but scroll to Album Search
and select an album instead.
editing track and album titles
To rename a track
This is useful if you have loaded a CD which
the album database has not recognised so
has named the tracks ‘track1’, ‘track2’, and
so on. After renaming you will be able to
find the track more easily. Albums and tracks
can both have names of up to 64 characters
including spaces. These 64-character ‘names’
can include extra information such as artist,
genre, year and composer – you can put
anything you find helpful, and edit them as
many times as you want.
If you change the name after putting the
track/album in a playlist JB7 will not find it,
so edit the names before making a Playlist.
Note that when using either the front
panel or the remote control, the name of
the track may be longer than the length of
the display can accommodate, so only part
of the name near the cursor will be shown.
20
On the front panel
1 To rename a currently playing track, push
the main control knob then select Current
Track.
2 Turn the main control knob and select
Rename Track.
new text
track3_
Press next to finish
3 The cursor will be positioned at the end
of the text; you add or delete letters at this
cursor.
4 Add letters by turning the main control
knob to see the letters, then push the knob.
5 Press the Back button to delete letters.
6 Press the Next button when complete.
On the remote control
The advantage of using the remote control
rather than the front panel to rename a
track is that you can add or delete letters
and move the cursor, so for example you
can change or add letters in the middle of a
track name. It is also the only way to insert
capital letters.
1 To rename a currently playing track, press
OK and use the up and down arrow buttons
to select Current Track. Press OK, and use
the up and down arrow buttons to find and
select Rename Track.
2 Enter letters on the remote using the
numeric buttons in the same way as texting
on a mobile phone, e.g. press the ‘2’ button
once for ‘a’, twice for ‘b’, three times for ‘c’
and so on.
3 If you wish to enter a capital letter, these
appear after the lower case letters, so keep
pressing until they appear.
4 To delete a letter press the Del button.
5 To move the cursor left and right, press
the Prev and Next buttons.
6 When you’ve finished entering the
letters, press OK.
To rename an album
On the front panel
1 Push the main control knob and select
the album using Browse Albums (or use the
Album Search on page 20, then turn the
knob to Rename Album).
2 Select the album you wish to rename by
scrolling through the choices and pushing
the knob to select.
3 Turn the knob to scroll to Rename Album.
Follow steps 3–6 in ‘To rename a track’.
On the remote control
1 Press the Menu button, then use the up
and down arrow buttons to scroll to Browse
Albums.
2 Use the up and down arrow buttons to
scroll through albums, and press the OK
button to select the album you wish to
rename.
3 Use the up and down arrow buttons to
select Rename Album.
4 Follow steps 2–7 in ‘To rename a track’.
To reindex an album
This can be used when the album database
is updated to include recently published CDs
which were not in the old database.
On the front panel
1 Select the album that you wish to relabel.
Push the main control knob, then turn to
scroll to Reindex Album.
2 A list of possible album names will
appear. Select the correct album name by
turning the main control knob and pushing
to select.
On the remote control
1 Follow steps 1–2 as for ‘To rename an
album’ above.
2 Use the up and down arrow buttons to
select Reindex Album.
21
Page 12

playlists
JB7 lets you organise tracks or albums into selections called playlists. You can compile a playlist
of your all-time favourite music, for example, or music for a particular occasion or purpose. You
can create up to seven playlists, each represented by a colour of the rainbow – red, orange, yellow,
green, blue, indigo and violet. Each playlist matches a named button on the remote control.
Playlists can be played in order or at random.
Note that renaming a track or album will break the link between it and any playlist containing it.
On the remote control
1 Press Menu, then use the up and down
arrow buttons to select Playlists; press OK.
2 Select Edit Playlist, then press OK.
3 Use the up and down arrow buttons
to scroll through the playlists. Select the
playlist you wish to cut an item from by
pressing OK.
4 Press the up and down arrow buttons to
see the items in the playlist.
5 Press the Del button to cut an item.
6 Continue to cut items, or scroll to a
new position and insert, or jump to a new
playlist.
7 Press OK to insert the clipboard.
8 Press the Next button when done.
To create a playlist
On the front panel
Add a currently playing track to a playlist by
pushing the main control knob to show the
main menu, then turn it to scroll to Current
Track, followed by Add to Playlist. Turn the
main control knob to scroll to the playlist
you wish to add the track to, and push the
knob to select.
To add an album to a playlist, push the
main control knob to show the main menu,
then turn it to scroll to Browse Albums, push
again to show albums and turn to scroll
through them. Push to select chosen album,
then scroll to Add to Playlist. Push to select
playlists then scroll to find chosen playlist.
On the remote control
Add a currently playing track to a playlist
by pressing and holding the corresponding
number button on the remote. For example, if
you want to add a track to the orange playlist,
just press and hold the orange button.
To clear a playlist
On the front panel
1 Push the main control knob to start the
main menu, then turn the knob to scroll to
Playlists. Select by pushing the knob.
2 Turn the knob to scroll to Clear Playlist
and push to select.
3 Select which playlist you want to clear by
turning the knob and pushing. Once you have
pushed the knob again to confirm, all the
tracks in the selected playlist will be deleted.
On the remote control
1 Press OK to show the main menu and
scroll using the up and down arrow buttons,
then press OK to select Playlists.
2 Use the up and down arrow buttons to
select the Clear Playlists option.
3 Select which playlist you want to clear,
and press OK to confirm. All the tracks in the
selected playlist will be deleted.
To edit a playlist
This allows you to cut and paste tracks
from one playlist to another. It relies on an
invisible copy of a track, called the ‘cut track’
or clipboard (as on a PC). The clipboard can
be either an album or a track and can be
pasted many times in different playlists. It
will remain in memory until another track
or album is selected for cutting and pasting.
If you want a copy of a track you must cut it
and then immediately paste it back.
On the front panel
1 Push the main control knob to start the
main menu, turn it to select Playlists, push
and turn it to Edit Playlist, then push to
select the required playlist.
2 Turn the knob to see all the items in the
playlist.
3 Press the Eject button to cut an item.
4 Continue to cut items, or scroll to a
new position and insert, or jump to a new
playlist.
5 Push the knob again to insert the cut item.
6 Press the Next button when done. You
will be returned to the normal display.
transferring music
JB7 is compatible with USB mass storage
devices formatted with the FAT file system.
In practice that means USB flash drives
and correctly formatted USB hard drives
but also includes simple (non-video) MP3
players, some mobile phones, iPods and
even cameras. iPods are best played through
an Apple Universal dock, although you can
To transfer a track, playlist or
album to a USB device
Insert the USB device.
On the front panel
1 To add a selected track, playlist or album
push the main control knob, then turn the
knob to scroll to Track Search, Playlists or
Album Search. Select by pushing the knob.
2 Turn the knob to scroll to Track to USB,
Playlist to USB or Album to USB, and push
the knob to select.
On the remote control
1 To add the current track to the USB device
press the Rip button on the remote.
2 Entire albums and playlists cannot be
transferred using the Rip button on the
remote. Instead, press Menu, then use the up
and down arrow buttons and select Album
Search or Playlists by pressing OK. Use the up
charge them using the JB7 USB port. If you
attach a USB device to JB7, it will treat it as a
separate source of music or as an extension
to the internal hard disk.
Note Do not send music from JB7 to an
iPod, as the iPod will only play music loaded
onto it via iTunes.
and down arrow buttons again to select the
album or playlist and then press OK to select
Album to USB or Playlist to USB.
To specify a target directory on the USB
device, see page 24.
To transfer a track on a CD
to a USB device
1 Insert the CD.
2 The CD menu will start automatically.
3 Turn the main control knob to scroll, then
push the knob to select Track to USB.
4 Scroll to select which track you wish to
transfer. This will then load the track to the
USB device.
5 On the remote, this can be done when
the track on the CD is playing. Just press the
Rip button. Note that playing will stop as it
is mechanically inefficient to rip and play the
CD at the same time.
22
23
Page 13

To rip a CD to a USB device
1 Insert the USB device.
2 Insert the CD into the slot gently until it
is pulled inside.
3 Push the main control knob to start the
main menu, then turn and push the knob to
select CD to USB.
4 You will be asked to pick a name from the
album database. Select by pushing the knob.
5 This will then copy the entire CD to the
USB device. The CD will be compressed
to MP3 format (for more information on
compression, see page 27).
To determine the target
directory for tracks
transferred to the USB device
For many simple MP3 players, the root
directory is OK and it is not necessary to
determine a target directory. However this
is useful when, for example, you wish to
transfer tracks to a mobile telephone, as they
will only play MP3 files in a specific directory.
JB7 will allow you to pick a suitable directory
or enter a user-defined directory.
Push the main control knob to start the
main menu, then turn the knob and push to
select USB Functions. Then turn and push
the knob to select USB Directory.
Target directory for transfers to USB
2 Root
USB Destination directory
Several options will appear, these are
1 Automatic: JB7 decides on the directory
2 Root: the top level directory of the USB
device
3 MP3
4 Mobile/audio
5 Music
6 Other
Choose the ‘other’ option if you need to define
a different directory. You will then be allowed
to edit the user-defined target directory.
Separate directories with a slash
(1 key on remote)
dir/subdir_
Enter text using remote
Note If you need to enter a forward slash
between directories for a nested target
directory, use the remote control, as you
cannot enter forward slash from the front
panel. The forward slash is found if you keep
pressing the ‘1’ button.
To export names to a
USB device
If you need to make substantial changes to
track and album titles it is possible to export
these to a text file, and then make the
changes to this file. It is worth making small
changes and reimporting to avoid making
errors.
Note Do not change the number of lines in
the file and avoid punctuation marks in the
names.
1 Insert the USB device (e.g. memory stick).
2 Push the main control knob to start the
main menu, then turn the knob to scroll to
USB Functions. Select it by pushing the knob.
3 Turn the knob, scroll to Export Names,
and push to select.
4 JB7 will then create a file on the USB device
called ‘jb7 catalogue’. The file contains the
names of all the albums and tracks stored on
JB7, which allows you to rename lots of tracks
and album names in a convenient way.
5 In the file you will find the album name,
album identifier, number of tracks and track
names. Only track names and album names
should be edited. Use a simple text editor
like notepad not a word processor.
To import names from a
USB device
If you have edited album and track names in the
‘jb7 catalogue’ you can then import the edited
names from the USB device back onto JB7.
1 Push the main control knob to start the
main menu, then turn the knob to scroll to
USB Functions. Select it by pushing the knob.
2 Turn the knob again, scroll to Import
Names, and push to select. JB7 will then
rename files changed in the ‘jb7 catalogue’.
updating and backing up
To update the CDDB (the
album names database)
1 Insert the CD-ROM with the new album
database.
2 The CD menu will start automatically.
Alternatively push and turn the knob to
scroll to select CD Functions.
3 Turn the knob and push to select Update
CDDB. The new album database will be
installed.
Note This is derived from a database
known as CDDB that contains details on
more than 2 million CDs. The file on the
CD-ROM, actually called SQDB, is over 500
megabytes and is decompressed as it is
loaded. Progress will be displayed on the
front display panel with snippets from
the database. The whole process will take
around 20 minutes. If you interrupt the
update you will be left without a valid
album database and will have to start again.
To upgrade the product
operating system
The software upgrade is sent as a zip file.
Open the zip file, right click on the file JB1.hex,
and save it to a datastick. Plug the datastick
into JB7’s USB port. Scroll to USB Functions.
Select S/W Upgrade and push the knob
in. You will see flashing digits on the main
display for a minute or so, and will then be
prompted to ‘turn on and off’.
Warning This operation overwrites the
operating system and can render the system
inoperable. Only use with data supplied by
3GA and do not interrupt the process.
To make a backup copy of
your music to a USB device
1 Plug in the USB hard disk.
2 Push the main control knob to start the
main menu, then turn the knob to scroll and
select USB Functions, then Backup Music.
3 While the system is doing a backup (and
not otherwise engaged) it displays the
number of tracks backed up and progress of
the current track.
Note The internal hard disk is a mechanical
device like the engine on a car, and is subject
to wear and breakdown. It makes sense to
make a backup of the music to save having to
reload the CDs in the event of a breakdown.
To backup the music you will need a USB
hard drive formatted with FAT32 and with
sufficient capacity. You can find how much
space is used by the music on the internal
disk drive by selecting Disk Stats in the main
menu. Backup is time-consuming but is
incremental and is done in the background.
You can interrupt a backup and restart it later.
If you buy a second JB7 for another room in
your home, you can use the backup to load
the second JB7 rather than reload all your CDs
onto the second system.
To recover music from a
backup USB hard drive
1 Attach the backup USB hard drive.
2 Push the main control knob to start the
main menu, then turn the knob to scroll and
select USB Functions, then Restore Music.
24
25
Page 14

settings
To set a play mode
On the front panel
1 Push the main control knob to start the
main menu, then turn the knob to scroll to
Settings. Select it by pushing the knob.
2 Turn the knob again and push it to select
Play Mode.
3 Turn the knob to scroll through the
options and press the knob to select either
a Normal Play: plays tracks in the order
they appear on the CD and plays the CDs in
the order they were loaded. When you pick
an album – using Browse Albums or Album
Search – then JB7 assumes you want to
listen to the tracks in order and will select
Normal mode automatically. Normal mode
enables segue.
b Intro Mode: starts the next track after
12 seconds.
c Random Mode: plays tracks from any
album on the hard disk (and on a USB
device if plugged in) in a random order. It
will first pick a random track, and if it has
been played recently, it will try again and
pick a different track.
d Random Intro: starts the next track
after 12 seconds and plays the tracks in
random order.
e Segue Off: stops a track blending into
the next.
f Classical: turns off segue and stops
playing at the end of each album.
Note Play mode can be set in the same way
by using the remote control. Random and
intro modes can be turned on and off with
the corresponding buttons on the remote.
To adjust the amount of bass
or treble
1 Push the main control knob to start the
main menu, then turn the knob to scroll to
Settings. Select it by pushing the knob.
2 Turn the knob again and push to select
Bass or Treble.
3 Turning the main control knob will allow
you to increase or decrease the levels of bass
or treble. Push the knob to select the level
you would like.
Note For the technically minded, the bass
control uses a shelving filter with a corner
frequency of 330Hz and –9.0dB to +9.0dB gain
in 1.5dB steps. The treble control is similar, but
with a corner frequency of 3300Hz.
To set the time on JB7
1 Push the main control knob to start the
main menu, then turn the knob to scroll to
Settings. Select it by pushing the knob.
2 Turn the knob, scroll to Set Time, and
push to select.
24 hour clock
14:26:37
Adjust hours
3 Turn the knob, or press the up and down
arrow buttons on the remote control, to
increase or decrease the hours. To advance to
minutes, push the knob or press Next on the
remote. Then push the knob or press Next on
the remote to advance to seconds. Push the
knob or press OK on the remote to set the time,
and return to the normal display. To go back at
any time, press the Back button.
Note The Set Time function uses a 24 hour
clock even though the clock is displayed with
am/pm. JB7 has a battery-backed clock so it
will continue to run through power cuts.
To set an alarm
1 Push the main control knob to start the
main menu, then turn the knob to scroll to
Settings. Select it by pushing the knob.
2 Turn the knob, scroll to Set Alarm, and
push to select.
3 Turn the knob, or press the up and down
arrow buttons on the remote control, to
increase or decrease the hours. To advance to
minutes, push the knob or press Next on the
remote. Press OK and then choose On or Off
by turning the knob and pushing it to select.
4 Once the alarm is set the alarm time will
appear on the left side of the display.
08:00
11:00 am
Note The alarm plays music at the current
volume, so make sure the volume is set to
the correct level.
To adjust or disable the level
of data compression
Note When you load music, JB7 will
compress the music to MP3 format so
that you can store more music on the hard
disk. Compression reduces the amount of
disk space used. Music is quickly loaded
in raw form, and then JB7 compresses the
music when it is in standby mode, to save
time. During compression JB7 displays the
percentage progress and the number of
remaining uncompressed tracks.
JB7 allows you to choose the level of
compression or disable compression. When
compression is disabled, any CDs loaded will
not be compressed. This may be useful if
you wish to keep an exact copy of a CD. An
uncompressed album will have a little letter
‘p’ next to the number when you browse
through the albums. You can think of it as
being protected or perfect.
Generally it is hard to notice when a track
has been compressed but it occasionally
will affect the sound quality. If you do
encounter a CD that does not respond well
to MP3 compression, reload the CD with the
compression disabled. It will overwrite the
previously compressed version – you don’t
have to delete it.
1 Push the main control knob to start the
main menu, then turn the knob to scroll to
Settings. Select it by pushing the knob.
2 Turn the knob, scroll to Compression, and
push to select.
3 The following options will appear:
a No Compression: music will not be
compressed
b Most Compress: 128k bits/sec
c Normal: 192k bits/sec
d High Quality: 320k bits/sec
The following table indicates how the
compression level alters the number of CDs
you can store on the hard drive.
Compression level Size of JB7 hard drive
160G 320G 500G
128k 2500 5000 5000
192k 1600 3200 5000
320k 1000 2000 3000
Uncompressed 210 420 630
To adjust the display
brightness
1 Push the main control knob to start the
main menu, then turn the knob to scroll to
Settings. Select it by pushing the knob.
2 Turn the knob, scroll to Brightness, and
push to select.
3 JB7 has two levels of display brightness.
Choose whichever one best suits your
environment, and push the knob to select it.
The maintenance menu
You may be instructed to use this menu by
our call centre if you have a problem with
your JB7. Unless you are particularly techie,
it is probably best avoided.
26
27
Page 15

recording
about the album database
JB7 can record music from an external source (such as a radio or record player) using the Aux
in input. You will need a cable that plugs into an output of the source device, with a 3.5mm
headphone jack to plug into the Aux in (see the Quickstart Guide for an illustration).
Recordings will be saved into an album called ‘Recordings’ and named sequentially (Aux 1, Aux
2, etc.). You will need to adjust the recording level for optimum quality. There is a recording
timeout which will stop the recording after a fixed time – this is to avoid accidentally recording
a month’s worth of silence!
To start a recording from the
Aux input
On the front panel
1 Push the main control knob to start the
main menu, then turn the knob to scroll to
Recording. Select it by pushing the knob.
2 Turn the knob, scroll to Start Recording,
and push to select. It will record from
the Aux input to a file with a name like
Aux1, Aux 2, etc. in an album called
‘Recordings’. You can then edit the name
of the ‘Recordings’ album to reflect what
you recorded, and subsequent recordings
will be put in a new ‘Recordings’ album. For
instructions on renaming tracks and albums,
see page 20.
On the remote control
Press the Aux button, then the Rec button.
Recording will continue up to a maximum
time or can be stopped (see below for
instructions).
To stop a recording
On the front panel
Press the Play/Stop button.
To adjust the recording level
1 Push the main control knob to start the
main menu, then turn the knob to scroll to
Recording. Select it by pushing the knob.
2 Turn the knob, scroll to Recording Level,
and push to select. For best results the
recording level should be as high as possible
without distortion or clipping on the loudest
passages of music. To test this, make sure
that something is being played into the
Aux in. Once you are at the loudest part of
the music, set the recording level as high
as possible but ensure the audio does not
distort.
To adjust the recording time
To avoid filling the hard disk with silence
if you forget to stop recording, JB7 has a
recording timeout, which will automatically
stop recording after a specified time.
1 Push the main control knob to start the
main menu, then turn the knob to scroll to
Recording. Select it by pushing the knob.
2 Turn the knob, scroll to Recording Time,
and push to select. Turn the knob to increase
or decrease the time, and choose from 0 to
99 minutes.
The album database is derived from
freedb.org, a public domain album database.
The database is updated every month,
and can be obtained through the Brennan
website at www.brennan.co.uk. The
database currently has the album and track
names for 2,700,000 CDs, and JB7 owners
typically find that 95–97% of their CDs are
in the database. The database has been
compiled by members of the public over
many years, so may contain misspellings
and other oddities. CDs do not, in general,
contain information about album and track
names, and a CD has to be identified by the
common questions
Can I use my JB7 when in another
country?
The AC adapter is universal, so you just need
to substitute the mains lead to work with
your particular country’s mains sockets.
Will the database recognise the
names of albums on a USB?
The database will only recognise the names
of tracks and albums loaded from a CD.
Do I need to leave JB7 on constantly?
You can turn JB7 off at any time as long as it is
not in the middle of completing a task. A good
way to turn off JB7 is to press and hold the stop
button – twice. This stops everything and parks
the disk drive heads.
pattern of track lengths. This pattern is a
kind of fingerprint used to find the details
in the album database. Often several CDs
share the same fingerprint, which is why you
sometimes need to select the right details
when loading a CD. On occasions a music
publisher releases different recordings of a
CD, so the fingerprint on your CD no longer
matches the details in the database. If that
happens you can enter the album name
manually, and name your favourite tracks.
See page 25 for how to load the album
database.
What level of compression is best?
The normal level of compression
recommended is 192k. If you notice that
the music quality is not as good as you
think it should be, try compressing it at the
high quality level of 320k. If this is still not
satisfactory, do not compress the music at
all.
Can I delete tracks and rearrange
them?
You can delete tracks from the HDD. You
cannot rearrange tracks on an album, but
you can make a playlist with them in any
order.
On the remote control
Press the Rec button. To stop one recording
and start another (e.g. between tracks) press
Rec twice.
28
29
Page 16

troubleshooting
Having loaded the CDs onto JB7, can I
rearrange their numerical order?
You cannot rearrange the numerical order of
the CDs once they are loaded onto JB7, but you
can make a playlist with them in any order.
How do I move a CD from one playlist
to another?
You first need to select the album by using
Browse album or Find album. This will take
you to the Album menu, where you can
select the option Add to playlist. You can
then use the Edit playlist function to remove
it from the first playlist.
Is the power supply only 240V?
The power supply works on 110V or 240V.
Can I use JB7 as an alarm clock?
Yes. This can be done in Settings under the
main menu.
Can I use JB7 with an amplifier?
Yes. Although it is not necessary, many
people use their JB7 with an amplifier. This
can be done by using either JB7 line out or
Headphone out. It is usually beneficial to
use Headphone out as JB7 will detect the
headphone is being used and turn off the
internal power amplifier. Also when using
Headphone out it is possible to use the main
volume control to control the volume.
Does JB7 support WMA (Windows
Media Audio) format files?
JB7 does not play WMA files, but there are
programmes such as Switch freely available
on the internet which convert WMA files to
MP3. Once you have them in an MP3 format
you will be able to put them onto a USB
drive and load them onto JB7 as normal.
Will my iPod work with JB7?
iTunes tracks can be converted to MP3s
using free software that can be downloaded
from the internet. The best way to play your
iPod through JB7 is via the line-in connector
so that you can select tracks and use the
iPod menu structure. You may be able to
transfer the contents of the iPod to JB7, but
all tracks will be in a single album without
track information. Tracks can be ‘played’
from the attached device but, again, you
cannot select or search the tracks.
What is the best way to get music
from JB7 onto my iPod?
Transfer the music from JB7 onto a USB
memory stick. Then plug the memory stick
into a PC. Copy the MP3s to a folder on the
PC then use iTunes to load the MP3s onto
your iPod.
Does JB7 have an internal amp?
Yes. The internal 60W amp can be bypassed
via the headphone socket if you wish to use
a different amp.
Can you search for an artist or
composer?
Yes. The artist or composer is usually
appended to the album name (or to the
track name for compilations of various
artists). For example, if you use the Search
albums function and search for ‘mend’ you
will find all albums with Mendelssohn in the
name.
My JB7 is freezing and sticking
Try turning JB7 on and off at the mains. If
this does not work, follow the commands
below for ‘The display is saying “Disk error”’.
The display is saying ‘Disk error’ in big
writing
Try the following commands:
• Main menu–Settings–Maintenance–
Clean up
• Main menu–Settings–Maintenance–
Reset settings
• Map disk (note that this can take up to
20 hours).
There is no sound coming from my
speakers or only one speaker is
working
• Loudspeakers are disabled by
headphones so please remove them.
• If the left speaker has no sound, try
swapping the speakers. If the sound then
appears on the left speaker, the other
speaker is faulty.
• Make sure the speaker wire is not forced
in all the way to the back of JB7.
If the problem persists, please call our
technical support team.
My JB7 is skipping tracks
Make sure the Random mode is turned off.
You can do this by pressing Play mode in
Settings and changing the mode.
If the problem persists, try the following
commands:
• Settings–Maintenance–Clean up
• Settings–Maintenance–Reset settings.
If the problem persists, please call our
technical support team.
My JB7 keeps rejecting CDs
Try washing the CD by hand with Fairy
Liquid. Rinse in cold water then dab dry with
a soft cloth.
There’s a CD stuck in my JB7
• Hold down the eject button
• Still holding the eject button, turn off the
power
• Still holding the eject button, turn the
power back on.
You can try to avoid this problem by not
using flexible free CDs or CDs with thick
labels in JB7, as these can damage your
Brennan CD mechanism.
My JB7 keeps removing the
prolonged gaps from my music.
How do I stop this?
My remote control is not working
Try changing the battery in the remote.
If you turn off ‘segue’, this will play the
music in the original format with no gaps.
For solutions to other problems visit the Brennan website at
www.brennan.co.uk
or call the technical support team on 0844 561 0443
30
31
Page 17

guarantee
Your JB7 has a twelve-month guarantee.
If you have any problems give us a call on 0844 561 0443
After twelve months we will repair your JB7
for a fixed fee (call us for details).
You may wish to record your date of purchase here
for future reference.
repairs and returns
Please telephone us and we will arrange collection
or provide you with the address of our service centre.
Do not send your JB7 to the Head Office.
contact us
3GA Ltd
St John’s Innovation Centre
Cowley Road
Cambridge
CB4 0WS
email: sales@brennan.co.uk
telephone: 0844 561 0443
(from outside the UK +44 121 352 6543)
For up to date information and instruction videos
visit the Brennan website at
www.brennan.co.uk
 Loading...