

Page 1

Caution : You must read this before you proceed
ROCKING CHAIR
Page 1 OF 10
Page 2

Label Picture Description QTY
A Frame 1
B Back 1
C Seat 1
D
Label Picture Description QTY
①
②
Rocking Base
2
Bolt (M8*70MM) 3
Screw (M4*40mm) 11
Page 2 OF 10
Page 3

③
Spring Washer 4
④
⑤
⑥
Before
Beginning
Assembly:
Washer 4
Allen Key 1
Screwdriver 1
Page 3 OF 10
Page 4
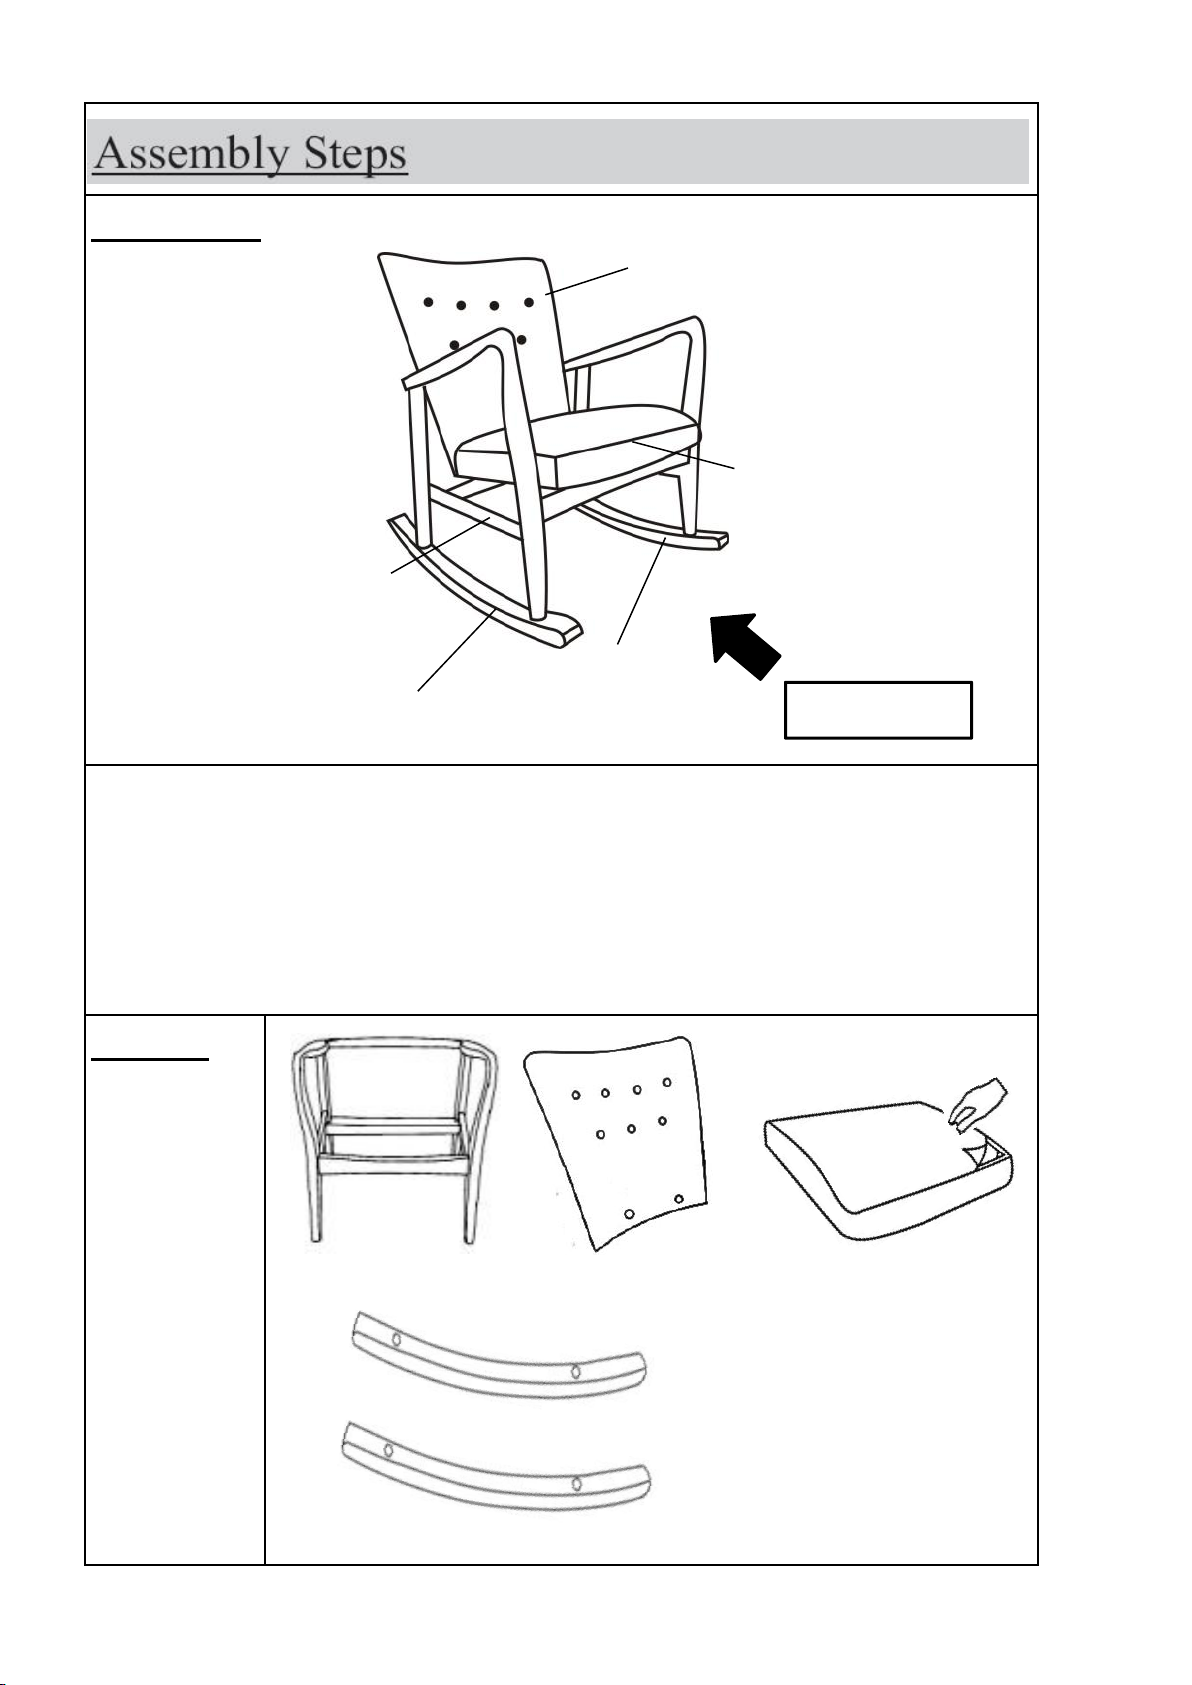
Overview
Back (B)
Seat (C)
Frame (A)
Rocking Base(D)
Rocking Base(D)
Front Facing
This Rocking Chair has multiple parts and may require up to 30
minutes to assemble. To give you an overview of the Arm Chair
parts, the above picture is to help you put the various parts into
perspective. Please read through the instructions below to
familiarise yourself with the parts and steps before assembly.
Step 1
A B
D
D
C
Page 4 OF 10
Page 5

Place the Frame(A), Back(B), Seat(C), Rocking Base(D) on a
clean, non-marring surface.
Carefully peel away the Dust Cover from the edge of the Seat(C)
and put it aside.
Step 2
2.1) Align the mounting positions of the Back(B) with Seat(C) and
attach them using Bolts(①), Spring Washers(③) and Washers(④)
with Allen Key(⑤).
Note: If the mounting positions cannot be aligned well and
hinder the installation, then sway the Seat(C) lightly when
locking the Bolts, this action could help prevent the Bolts
from getting stuck and ensure smooth assembly.
2.2) Tighten the Bolts fully in a sequential manner; then smooth
down the Dust Cover with your hands on all four edges of the Seat
bottom.
⑤
Back(B)
Seat(C)
2.1
2.2
Back(B)
Seat(C)
Page 5 OF 10
Page 6

Step 3
Place the assembled Seat(C) and Back(B) on the side of a table,
with the Back(B) facing down.
3.1) Place the Frame(A) onto the assembled Seat(C) and Back(B)
as shown in the picture.
3.2) Attach Frame(A) to Seat(C) using Screws(②) with
Screwdriver(⑥).
Note: If there are gaps between the Frame(A) and Seat(C)
which hinders installation, then pull the Seat(C) upwards into
the Frame(A), this action helps to ensure there are no gaps
between them.
Do not fully tighten the Screws.
3.1
Seat(C)
Frame(A)
Table
Back(B)
Seat(C)
Frame(A)
3.2
⑥
②
Seat(C) and Back(B) stuck in the middle of the Frame(A)
Page 6 OF 10
Page 7
Step 4
Attach Frame(A) to Back(B) using Screws(②) with Screwdriver
(⑥).
Note: Please press the Back(B) to Frame(A) before attaching.
Do not fully tighten the Screws.
Step 5
Table
Frame(A)
Seat(C)
Back(B)
⑥
②
Rocking Base(D)
Rocking Base(D)
Frame(A)
Seat (C)
Table
⑥
②
Page 7 OF 10
Page 8

Align the mounting positions of the Rocking Base(D) with the
Frame(A) and attach using Screws(
②)
with Screwdriver(
⑥)
.
Do not fully tighten the Screws.
Note: There are two mounting sites on the Rocking Base,
please insert the back foot into the back mounting position
first and then do the same for the front foot, this action
should ensure smoother assembly.
Step 6
Test for Stability
Page 8 OF 10
Page 9

Inspect the Rocking Chair and make sure all parts are adequately
connected.
Gently and carefully, sit into to the Rocking Chair.
This would help to align all the parts at all joints.
Then get off the Rocking Chair, and place it facedown.
Proceed to tighten all Bolts and Screws at all joints in a
sequential manner.
If there are still wobbles, loosen the Bolts and Screws and
execute this same process.
Step 7
Your Rocking Chair is ready for use.
This Rocking Chair can only be used on a flat, level surface.
Page 9 OF 10
Page 10

Do not put hot items directly on furniture surface
Do not clean furniture with harsh cleansers or polish.
Do not place furniture under direct sunlight.
Do not place furniture near heating or cooling vents.
Do not write on furniture without a padded barrier to protect the
surface.
Do not place furniture outside . For indoor use only .
Not for commercial use. For residential use only .
Stains may be removed with mild soap solution and damp cloth.
Children should not climb or jump on the furniture.
Dust and pick-up spills using a clean, non-colored, lint-free cloth .
Page 10 OF 10
 Loading...