

components
king bed frame assembly
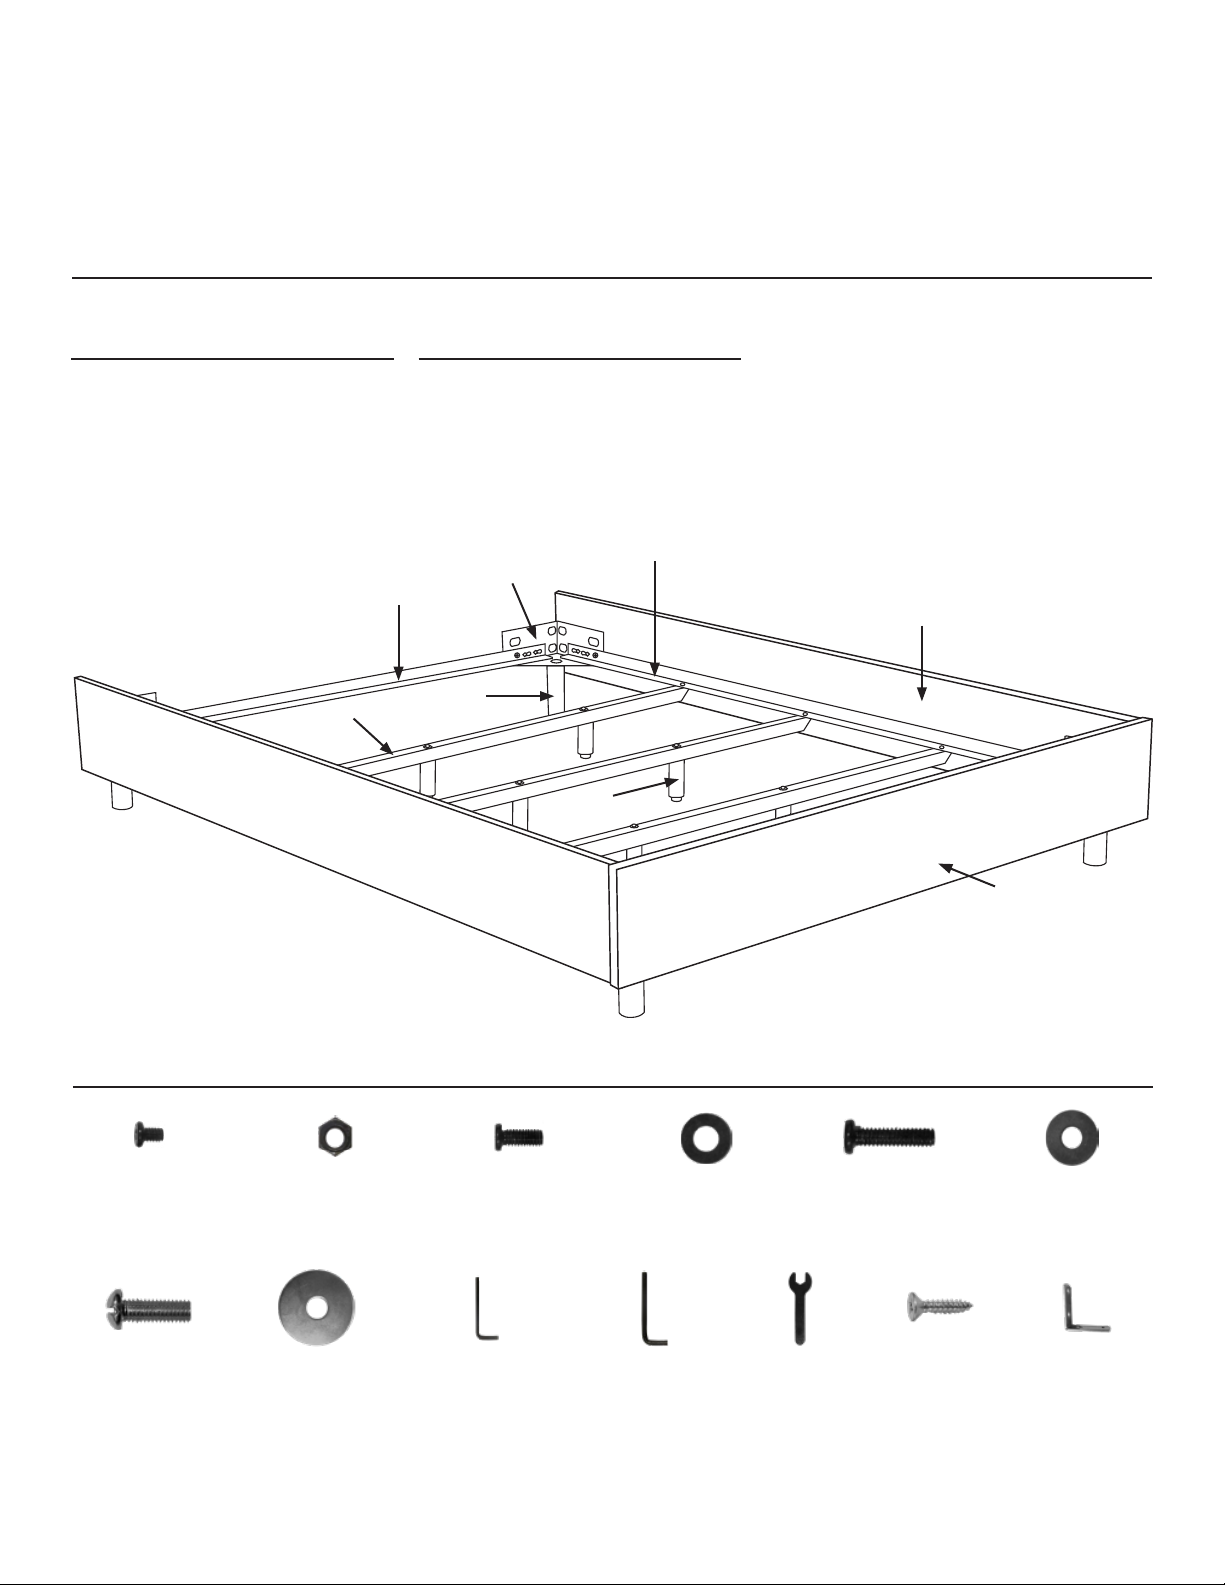
item description qty
A Metal corners 4
B Metal side rail 2
C Metal end rail 2
D Corner leg 4
E
item description qty
E Center support rail 3
F Center support leg 6
G Upholstered side rail 2
H Upholstered foot rail 1
B
A
C
G
D
F
H
hardware
(H1) x 14
1/4” bolt
(H7) x 6
1” x 5/16” bolt
Please note: you will need a at head and phillips head screwdriver to assemble your bed frame.
(H2) x 14
1/4” nut
(H8) x 6
1 1/4” washer
Smaller L wrench
(H3) x 4
3/4” x 5/16” bolt
(H9) x 1
Larger L wrench
(H4) x 4
3/4” washer
larger hole
(H10) x 1
(H11) x 1
Wrench
(H5) x 6
1” x 1/4” bolt
(H12) x 8
3/4” screw
optional
(H6) x 6
3/4” washer
smaller hole
(H13) x 2
L bracket
optional
1

king bed frame assembly
step 1 - building the metal bed frame
1.1
Place (A) metal corners in a
rectangular shape roughly the size
of your mattress.
1.2
Lay (B) and (C) metal rails into (A) metal
corners to create the shape of your bed
frame. Snap into place.
1.3
Secure (B, C) metal rails to (A) metal
corners using (H1) bolts and (H2) nuts.
Tighten using (H9) L wrench and (H11)
wrench.
Please note: (H2) nuts should be on the
inside of the frame.
1.4
Carefully attach (D) corner legs
underneath (A) metal corners using (H3)
bolts and (H4) washers. Tighten using
(H10) L wrench.
2

king bed frame assembly
step 2 - center support system
B
E
2.1
Align holes of (E) center support rail
with holes on (B) metal side rails.
Attach using (H1) bolts and (H2) nut.
Tighten using (H9, H11) wrenches.
Please note: (E) center support rail
attaches underneath (B) metal side
rails.
2.2
Attach (F) center support legs to (E)
center support rail using (H5) bolts
and (H6) washer. Tighten using (H9)
L wrench.
step 3 - attaching the upholstered rails
3.1
Loosely attach (G, H) upholstered rails
to bed frame using (H7) bolts and (H8)
washers.
Please note: if (G) upholstered side rails
have an additional hole, make sure the
hole faces upwards and away from the
(H) upholstered foot rail.
3

king bed frame assembly
step 3 - attaching the upholstered rails continued
3.2
Push (G) upholstered side rails toward
(H) upholstered foot rail to eliminate any
gaps. Tighten (G) upholstered side rails
first, then (H) upholstered foot rail using
flat head screwdriver.
3.3 (OPTIONAL)
To reinforce stability of (G, H) upholstered
rails, use a phillips screwdriver to attach
(H13) L brackets using (H12) screws.
Please note: this requires screwing (H12)
directly into the upholstered side rail.
attaching your headboard
For instructions on how to attach your headboard to your bed frame, please consult the assembly instructions found in the
box your headboard was shipped in.
limited warranty
We guarantee our upholstered furniture against defects in construction for a period of one (1) year. When a structural defect is brought to our attention, we
will repair or replace it at our option at no charge to the customer (includes parts and labor, not transportation costs). Fabric wear-ability for upholstered
furniture is not covered by the warranty. Vacuum for regular cleaning.
PLEASE DISPOSE OF PLASTIC BAGS AND CARTONS RESPONSIBLY.
4
 Loading...