

BRAUN PHOTO TECHNIK Super 8 Scanner Service Manual
NovoScan Super 8 - Normal 8
User's Manual
Version 1.0

Table of Contents
Introduction ................................................................................................ 1
Product Features......................................................................................... 1
Please Note ................................................................................................. 1
Package Contents........................................................................................ 2
Film Type ................................................................................................................ 2
Function of Buttons .................................................................................... 2
Getting Started ........................................................................................... 3
Preparing the Film .................................................................................... 3
1. Attach Power Cord ............................................................................... 3
2. Insert SD/SDHC Memory Card (Max. 32 GB) ........................................ 3
3. Turn on/off the Film Scanner ............................................................... 4
4. Clean the Light Table ................................................................................. 4
5. Mount the Reels and Film .................................................................... 4
6. Menu Selections ................................................................................... 5
Record ................................................................................................... 6
Playback ................................................................................................ 6
Rewind .................................................................................................. 7
Exposure ............................................................................................... 7
Sharpness.............................................................................................. 8
USB ....................................................................................................... 8
Frame Adjust ......................................................................................... 8
Language ............................................................................................... 8
Format .................................................................................................. 8
Connect to a TV set ................................................................................... 9
Specifications ............................................................................................ 9
EN

1
Introduction
It has never been easier to digitize and save your old film treasures:
Just select between 8mm and Super 8, load the film into the scanner and
start it.
The film is scanned frame by frame at a rate of about two images per
second and is written as MP4 video in HD quality directly onto SD card.
No computer is needed! The digitized film can later be displayed on any
kind of smartphone, tablet or PCs. BRAUN NovoScan Super 8 – Normal 8
can also be connected directly to a TV to playback your digitized . You can
also edit, upload movie files to the internet or burn them to DVD's.
Product Features
• Film Type: Super 8 and 8mm – max. reel size 5 inch (12,7 cm)
• Image Sensor: 3.53 Megapixels (2304 x 1536) 1/3" CMOS
• Output Resolution: 1440 x 1080 p @ 20fps (MP4)
• Image Area: adjustable in x-, y- and z-axis
• Exposure Control: Auto/Manual (-2.0 to 2.0)
• Scanning Speed: 2 frames per second - ca. 30 minutes for a reel of 15 m
• External Memory: SD/SDHC cards with up to 32 GB (not included)
• Display: 2,4 inch (6,1 cm) LCD
• Light Source: LED
• PC Interface: USB 2.0 (for data transfer)
• TV-Out: NTSC/PAL
Please Note
This device is intended for domestic use only and is not suitable for
commercial applications.
Do not record or rewind films in bad condition, like damaged perforation,
misaligned or overlapping splices or showing damages, dirt or wear debries.

2
Package Contents
1. BRAUN Film Scanner (1x)
2. Power Adapter 12V DC (1x)
3. USB Cable (1x)
4. TV-Out Cable (1x)
5. 5" Reel (1x)
6. Reel Adapters (2x)
7. Cleaning Cloth (1x)
8. User's Manual (1x)
Film Type
8 mm Super 8
Reel Adapter
8 mm to 13 mm
EN
Function of Buttons
1. Power button: To turn power on or off.
2. Up or Down arrow buttons: To highlight Menu item on LCD viewer.
3. Enter/Start/Stop button: To Start/Stop highlighted item.
4. Menu button: To go back to Menu selection; Press twice to go to
Menu mode or record mode.

3
Getting Started
Preparing the Film
If your film is not in good condition (broken, damaged perforation,
misaligned, taped overlaps, bent, thick splices etc.), please check and fix
the problem first.
Before recording, it is good practice to use a lint-free cloth and/or antistatic film cleaner to remove dirt particles, clean any processing
chemical residues, and to remove any debries on the film in order to
prevent them showing up on recorded videos.
1. Attach Power Cord
Plug in the included DC 12V power adapter.
2. Insert SD/SDHC Memory Card (Max. 32 GB)
Insert the SD/SDHC memory card before powering on the Film Scanner
device.
• Using a MicroSD card with an adapter, or SDXC card (64GB), which is
not compatible with the Film Scanner will lead to a "Card error"
message appearing on the screen. The Film Scanner can only take a
SD/ SDHC memory card of up to a maximum capacity of 32 GB.
• Make sure the SD/SDHC card is unlocked (white tab in forward position).
• Insert and push the SD/SDHC card inward until it clicks. Improper
insertion may damage the card reader or the SD/SDHC Card, which
neither is covered under warranty.

4
3. Turn on/off the Film Scanner
Press the power button to turn the Film Scanner on/off.
4. Clean the Light Table
Push the film door tab left to flip open the door. Use the included cloth,
a brush or compressed air to clean the light table.
5. Mount the Reels and Film
a. If your film reel has a 8 mm (small) mounting hole, mount the
reel directly to the shaft, otherwise use the provided reel
adapter.
b. Mount the included 5" reel onto the right shaft.
c. Follow the film routing diagram printed on the face of the scanner
to route the film.
EN

5
Record
Playback
Rewind (More )
Exposure
Sharpness
USB (More )
Frame adj
Language
Format (More )
Version (More )
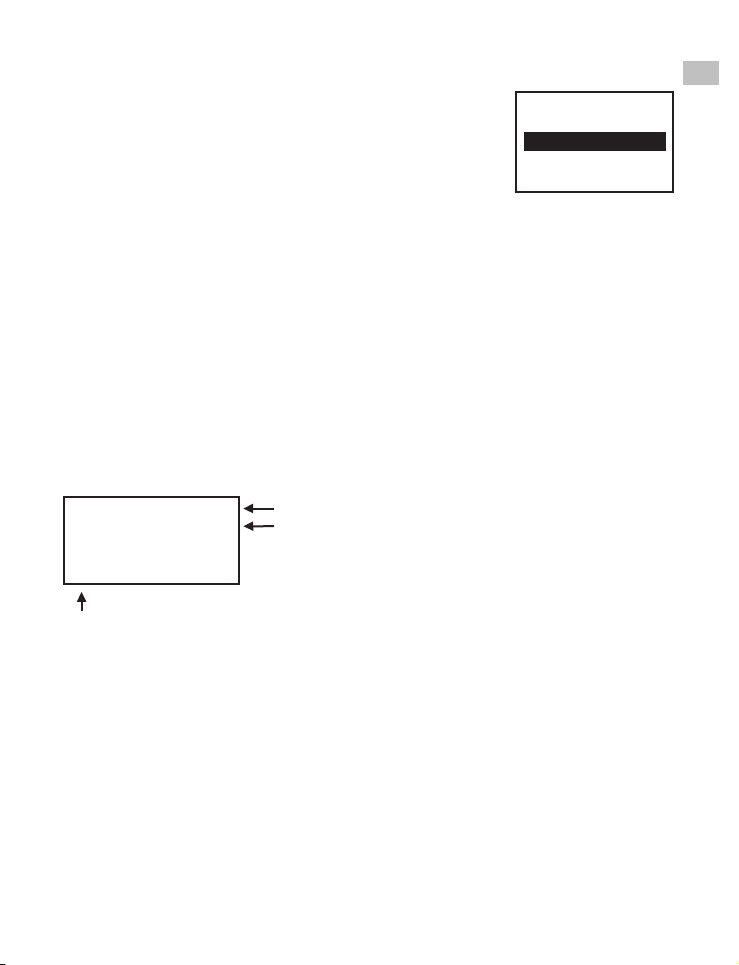
d. Push open the flap door, place film perforation holes at the top but
under the two white tabs.
2 white taps
e. Close the film flap door after the film has been properly placed.
f. Select film type by pushing the film type lever to either the left or right.
6. Menu Selections
Use the Up or Down arrow buttons to highlight the Menu selection and
then press Enter.
1st page 2nd page 3rd page 4th page

6
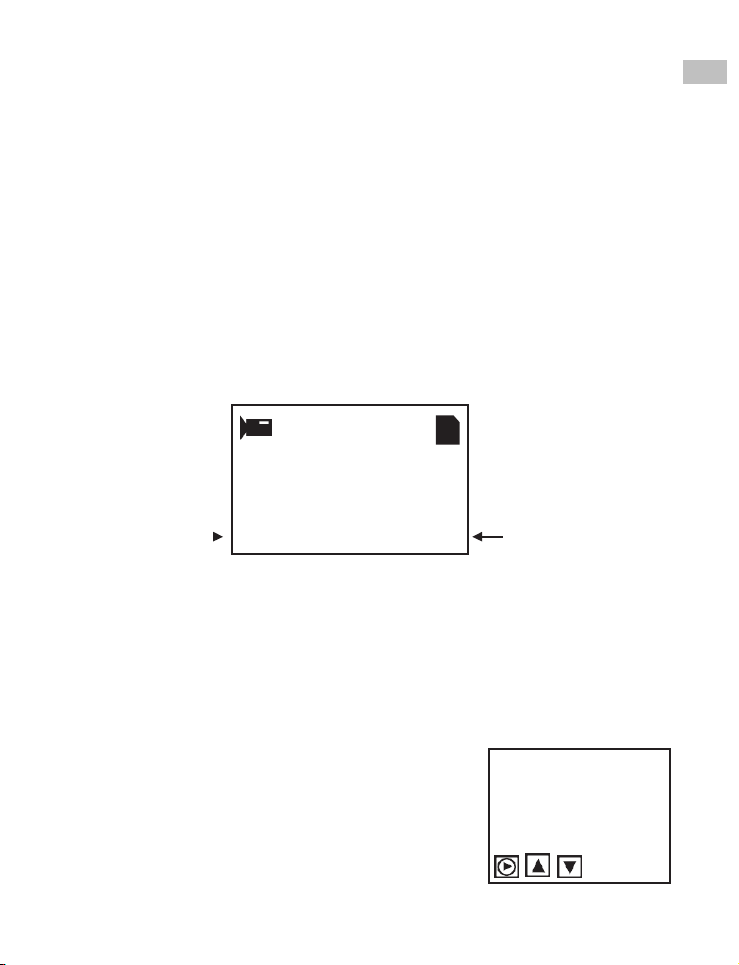
00000
Super8
Exposure0.0 SD
Record
0036.MP4
1. Move the film type lever left (8 mm) or right (Super 8) to select the
film type then press the Enter/Start button.
2. Press Enter/Start to start recording. While recording is in process, a
red dot on the upper left corner will blink.
3. The film scanner will stop recording 2 seconds after the user presses the
Enter/Stop button.
4. The frame counter at the lower right corner will increase by one for
every scanned frame.
Note:
Adjustments for Exposure, Sharpness, Frame adjustment are available please make adjustments before recording.
Film Type
Frame Counter
Playback
1. Press the Menu button, highlight the
Playback selection, then press Enter.
2. Press the Up/Down arrow button to select the
file to Playback, then press Enter/Start.
3. Press Enter/Stop to pause the playback.
4. Press the Menu button once to the enter Edit
mode. Highlight Return (go back to Playback) or
Delete (delete the current file).
5. Press the Menu button twice to go back
to Record mode or the Main menu.
EN

7
0.5
0
-0.5
Note: Mac computers will create and add hidden files to SD/SDHC
memory card each time the user playbacks the recorded MP4 movie
files on the Mac. The hidden or modified MP4 files stored on the
SD/SDHC memory card can no longer be played back on the Film
Scanner. A "No File" message will be displayed on the Viewer instead.
Rewind
1. Open the flap door and remove film, then close the flap door.
2. Swap reels. Place an empty reel on the right shaft and place film
perforation holes on the outside.
3. Follow the instructions on the screen.
4. Press the Enter button to Start/Stop the rewinding process.
Exposure
1. Exposure range is from 2.0 to -2.0.
2. Press Up/Down to change the value and press Enter to complete
the change selection.
3. The default setting is 0.0. Negative values provide a darker effect and
an Exposure of 2.0 gives the brightest result.
4. Adjust the required Exposure before recording.
8
Sharpness
Film type:
X adjust, Enter
X:
Y:
Z:
Low
Medium
High
1. Sharpness range is from Low to High. The default
setting is Medium.
2. Press Up/Down to change the value and press
Enter to complete the change selection.
3. Adjust the required Sharpness before recording.
USB
Plug in the included USB cable to upload the recorded MP4 files. The SD/
SDHC memory card is read as an External Drive, called NO_NAME drive.
The stored MP4 files are located under the directory of FilmScanner/
MOVIE.
Frame Adjust
You can make adjustments for the Movie Register (the film centre X and Y).
It needs to be adjusted before recording if the default setting is off.
8mm or Super 8
Select X or Y or Z by pressing the Enter
button
X = shift centre left or right
Y = shift centre up or down
Z = zoom-in or zoom-out
Adjust the values of X, Y, Z by pressing the Up or Down buttons
Language
English, German, French, Spanish, Italian and Dutch are available on
the film scanner.
EN
Format
Highlight Yes or No to format your SD card. This will erase all files on
the inserted SD/SDHC memory card.

9
Connect to a TV set
You can use your TV screen as the default screen.
1. Turn on the scanner and your TV.
2. Set TV input to A (or TV, TV) mode.
3. Connect the film scanner "TV OUT" port to your TV's Video-In port
(yellow) with the included TV-Out cable.
4. The LCD screen on the scanner will turn dark and the display will be on
your TV instead.
Specifications
Image sensor: 3.53 Megapixels (2304H x 1536V) 1/3" CMOS sensor
Display: Colour 2.4" TFT LCD
Exposure control: Auto/Manual (-2.0 to2.0)
White Balance: Auto
Resolution: 1440 x 1080 p
Playback frame rate: 20 frames per second
Film type: 8 mm and Super 8 film in 3" or 5" reel
File format: MP4 (AVC)
TV-out type: NTSC/PAL
External memory: SD/SDHC memory cards up to 32 GB (Max.)*supported
Power Supply: DC 12V
Interface: USB 2.0
Languages: English, German, French, Spanish, Italian andDutch
Dimensions: (L/W/H): 269 x 166 x 114 mm/10.6 x 6.5 x 4.5inch
Weight: 1410 g/3.1 lb
Note:
*Each 50 ft film takes about 125 MB of memory and about 30 minutes to
record.

Inhaltsverzeichnis
Einleitung .................................................................................................... 1
Produktmerkmale ....................................................................................... 1
Bitte beachten .............................................................................................. 1
Lieferumfang ............................................................................................... 2
Filmtyp ........................................................................................................ 2
Tastenfunktionen ........................................................................................ 2
Erste Schritte ............................................................................................... 3
Vorbereitung des Films ............................................................................. 3
1. Anschließen des Netzkabels ................................................................. 3
2. Einsetzen der SD/SDHC-Speicherkarte (max. 32 GB)............................ 3
3. Ein-/Ausschalten des Film-Scanners ..................................................... 4
4. Reinigen des Lichttisches ...................................................................... 4
5. Montieren der Spulen und Filme .......................................................... 4
6. Menüauswahl ....................................................................................... 5
Aufnahme ............................................................................................. 6
Wiedergabe .......................................................................................... 6
Zurückspulen ........................................................................................ 7
Belichtung ............................................................................................. 7
Schärfe .................................................................................................. 8
USB ....................................................................................................... 8
Bildausschnitt ....................................................................................... 8
Sprache ................................................................................................. 8
Formatieren .......................................................................................... 8
Anschluss an ein Fernsehgerät ................................................................. 9
Spezifikationen ......................................................................................... 9
DE

1
Einleitung
Nie war es einfacher, Ihre alten Filmschätze zu retten und zu digitalisieren:
Zwischen Normal 8 und Super 8 auswählen, den Film einlegen und den
BRAUN Film Scanner Super 8 – Normal 8 starten.
Der Film wird mit einer Geschwindigkeit von zwei Bildern pro Sekunde Bild
für Bild eingescannt und als MP4-Video in HD-Qualität direkt auf eine SDKarte geschrieben.
Es werden dafür kein Computer und keine Software benötigt. Die
digitalisierten Filme lassen sich auf allen Smartphones, Tablets oder PCs
abspielen. Der Scanner kann aber auch zur Wiedergabe der Filme direkt
mit einem Fernseher verbunden werden. Sie können die Filmdateien auch
bearbeiten, in das Internet hochladen oder auf DVDs brennen.
Produktmerkmale
• Filmtyp: Super 8 und Normal 8 – max. Spulengröße 5“ (12,7cm)
• Bildsensor: 3.53 Megapixel (2304 x 1536) 1/3" CMOS
• Auflösung: 1440 x 1080 p @ 30fps (MP4)
• Bildausschnitt: in x-, y- und z-Achse einstellbar
• Scangeschwindigkeit: 2 Bilder pro Sekunde - ca. 30 min / 15m-Rolle
• Externer Speicher: SD/SDHC-Speicherkarten mit bis zu 32 GB
• Display: 2,4 Zoll (6,1 cm) LCD
• Lichtquelle: LED
• PC-Anschluss: USB 2.0 (für Datentransfer)
• TV-Out: NTSC/PAL
Bitte beachten
Diese Gerät ist ausschließlich für den privaten Gebrauch vorgesehen und
nicht für den gewerblichen Einsatz geeignet.
Es ist davon abzusehen, Filmmaterial zu scannen oder umzuspulen, das sich
in schlechtem Zustand befindet und beispielsweise beschädigte Perforation,
schlechte Klebestellen, Risse oder Schmutz und Abrieb aufweist.

2
Lieferumfang
1. Film-Scanner (1x)
2. Netzteil (1x)
3. USB-Kabel (1x)
4. TV-OUT-Kabel (1x)
5. 5" Filmspule mit 8 mm Durchmesseröffnung (1x)
6. Filmspulenadapter (2x)
7. Bürste (1x)
8. Bedienungsanleitung (1x)
Spulenadapter
8 mm auf 13m
Filmtyp
8 mm Super 8
DE
Tastenfunktionen
1. Netzschalter: Zum Ein-/Ausschalten.
2. Pfeiltasten Up oder Down: Zum Markieren von Menüpunkten auf
der LCD-Anzeige.
3. Enter/Start/Stop-Taste: Zum Starten/Stoppen von markierten Punkten.
4. Menu-Taste: Zur Rückkehr zur Menüauswahl. Zweimal drücken, um zum
Menümodus oder Aufnahme-Modus zu gehen.

3
Erste Schritte
Vorbereitung des Films
Wenn sich der Film in einem schlechten Zustand befindet (d. h. er ist
gebrochen, zerrissen, mit Löchern perforiert, falsch ausgerichtet, mit
Klebeband überzogen, verbogen, an den Kanten geknickt, klebrig oder dick),
überprüfen Sie ihn und beheben zuerst das Problem.
Vor der Aufzeichnung ist es sinnvoll, ein fusselfreies Tuch und/oder
einen Antistatik-Filmreiniger zu verwenden, um Schmutzpartikel oder
Rückstände zu entfernen, um so zu verhindern, dass diese auf den
aufgezeichneten Videos zu sehen sind.
1. Anschließen des Netzkabels
Schließen Sie das mitgelieferte 12 V DC-Netzteil an.
2. Einsetzen der SD/SDHC-Speicherkarte (max. 32 GB)
Setzen Sie eine SD/SDHC-Speicherkarte ein, bevor Sie den Film-Scanner
einschalten.
• Die Verwendung einer Micro-SD-Karte mit einem Adapter oder einer
SDXC-Karte (64 GB), die nicht mit dem Film-Scanner kompatibel ist,
führt dazu, dass auf dem Bildschirm die Meldung „Card error“
angezeigt wird. Der Film-Scanner kann nur eine SD/SDHC-Speicherkarte
mit einer maximalen Kapazität von 32 GB aufnehmen.
• Stellen Sie sicher, dass die SD/SDHC-Karte entsperrt ist (weiße Lasche in
der Vorwärts-Stellung).
• Setzen Sie die SD/SDHC-Karte ein und drücken sie in das Gerät, bis die Karte
einrastet. Falsches Einsetzen kann zur Beschädigung des Kartenlesers oder
der SD/SDHC-Karte führen. Dies ist nicht von der Gewährleistung abgedeckt.

4
3. Ein-/Ausschalten des Film-Scanners
Drücken Sie den Netzschalter, um den Scanner ein- oder auszuschalten.
4. Reinigen des Lichttisches
Drücken Sie die Filmtürverriegelung nach links, um die Tür zu öffnen.
Verwenden Sie die mitgelieferte Bürste, um den Lichttisch vorsichtig zu reinigen.
5. Montieren der Spulen und Filme
Wenn Ihre Filmspule eine 8 mm (kleine) Befestigungsöffnung hat,
montieren Sie die Spule direkt auf der Welle. Ansonsten verwenden Sie
die mitgelieferten Spulenadapter.
a. Setzen Sie die mitgelieferte 5-Zoll-Spule auf die rechte Welle. Für
das Einsetzen des Films folgen Sie bitte der Linie, welche auf dem
Film-Scanner aufgedruckt ist.
DE

5
b. Öffnen Sie die Klapptür, setzen Sie den Film ein, sodass sich die
Aufzeichnung
Wiedergabe
Zurückspulen
Belichtung
Schärfe
USB (Mehr)
Rahmen
anpassen
Sprache
Format (Mehr)
Version (Mehr)
Perforation oben, jedoch unter den weißen Laschen befindet.
weiße Laschen
c. Schließen Sie die Klapptür, nachdem der Film korrekt eingelegt wurde.
d. Wählen Sie den Filmtyp aus, indem Sie den Schalter für die
Filmauswahl entweder nach links oder rechtsdrücken.
6. Menüauswahl
Verwenden Sie die Pfeiltasten „Up“ oder „Down“, um die Menüauswahl
zu markieren und drücken Sie dann Enter.
1. Seite 2. Seite 3. Seite 4. Seite
6
00000
Super8
Exposure0.0 SD
Aufnahme
0036.MP4
1. Verschieben Sie den Film-Auswahlschalter nach links (8 mm) oder rechts
(Super 8), um den Filmtyp auszuwählen und drücken Sie dann die Taste
Enter/Start.
2. Drücken Sie Enter/Start, um die Aufnahme zu beginnen. Während
des Aufnahmevorgangs blinkt in der oberen linken Ecke ein roter
Punkt.
3. Der Film-Scanner hält die Aufnahme 2 Sekunden nachdem der Benutzer
die Taste Enter/Stopp gedrückt hat an.
4. Der Dateizähler in der unteren rechten Ecke erhöht sich nach jedem
aufgenommenen Einzelbild.
Hinweis:
Es stehen Einstellmöglichkeiten für Belichtung, Schärfe, Bildausschnitt zur
Verfügung. Bitte nehmen Sie diese Einstellungen vor der Aufnahme vor.
Filmtyp
Wiedergabe
1. Drücken Sie die Menu-Taste, markieren Sie die Wiedergabeauswahl und
drücken dann die Taste Enter/OK.
2. Drücken Sie die Pfeiltasten Up/Down zur Auswahl der wiederzugebenden
Datei und drücken dann Enter/Start.
3. Drücken Sie Enter/Stop, um die Wiedergabe zu
unterbrechen.
4. Drücken Sie die Menu-Taste einmal, um den
Bearbeitungsmodus aufzurufen. Markieren
Sie Return (Zurück zur Wiedergabe) oder
Delete (aktuelle Datei löschen).
5. Drücken Sie die Menu-Taste zweimal, um
zum Aufnahmemodus oder dem
Hauptmenü zurückzukehren.
DE
Bildzähler

7
Hinweis: Mac-Computer erstellen und fügen jedesmal eine versteckte
0.5
0
-0.5
Datei auf der SD/SDHC-Speicherkarte hinzu, wenn der Benutzer die
aufgenommene MP4-Filmdatei auf dem Mac wiedergibt. Die auf der
SD/SDHC-Speicherkarte versteckten oder geänderten MP4-Dateien
können nicht mehr auf dem Film-Scanner wiedergegeben werden.
Stattdessen wird auf dem Viewer die Nachricht „No File“ angezeigt.
Zurückspulen
1. Öffnen Sie die Klapptür und entfernen Sie den Film.
2. Tauschen Sie die Spulen. Setzen Sie eine leere Spule auf die rechte Welle und
legen den Film mit der Perforation auf der Außenseite ein.
3. Folgen Sie den Anweisungen auf dem Bildschirm.
4. Drücken Sie die Taste Enter, um den Rückspulvorgang zu starten/zu stoppen.
Belichtung
1. Der Belichtungsbereich liegt zwischen 2,0 bis -2,0.
2. Drücken Sie die Tasten Up/Down, um den Wert zu ändern und die
Taste Enter, um die Änderung abzuschließen.
3. Die Standardeinstellung ist 0,0. Negative Werte
ergeben einen dunkleren Effekt und eine
Belichtung von 2,0 ergibt das hellste Ergebnis.
4. Passen Sie die gewünschte Belichtung vor der
Aufnahme an.
 Loading...