

Braun DigiFrame 10.2 User Manual


TABLE OF CONTENTS
QUICK START………………………………………...…………...…..……………1
DIAGRAM OF THE DIGITAL PHOTO FRAME...………………………………2
KEYPAD BUTTON FUNCTIONS...……..…………………………………………3
REMOTE CONTROL FUNCTIONS………………………………………………..4
DIGITAL PHOTO FRAME NAVIGATION…..……………....…………………...5
OSD MENU FUNC TIONS…………………………………….…………………….6
ADDITIONAL PHOT O FRAME FEATURES..... …..………………………………7
ADDITIONAL FEATURES CONTINUED…...……………....…………………...7
USING THE MINI-USB FOR FILE TRANSFER…..…………………….………8
SAVING AND DELETING FILE FROM INTERNAL MEMORY..…….………9
TECHINICAL SPECIFICATIONS…..…………………………………………....10
FREQUENTLY ASKED QUESTIONS….………………………………………...11
IMPORTANT SAFETY INSTRUCTIONS……………………………………….12
CLEANING THE DIGITAL PHOTO FRAME…………………………………..14

TM
TM
TM
TM
Congratulations on your purchase of BRAUN DigiFrame 10.2 with 10.2” LCD
Display. Please read carefully and fo llow all warnin gs and instructions in this
User's Manual and those marked on t he product before you use the Digital
Photo Frame. Failing t o follow warnings can result in personal injury or damage
to t he Digital Photo Frame. Please keep t his User's Manual in a convenient
location for future reference. Important: Save the original b ox and all packing
material for future shipping needs.
Quick Start
1. Plug the AC adapter into the DigiFrame 10.2 a nd plug it into a power
outlet.
2. Insert a memory card into one of the slots:
Slot 1 - Secure Digital or MultiMedia Card
Slot 2 - Compact Flash
TM
or M ic r o Drive
TM
Slot 4 - Memory Stick , Memory Stick PRO , Memory Stick
Duo
TM
, or Memory Stick PRO Duo
TM
Or ins er t a USB Thumbnail Drive into the USB por t.
Note: To view a sample of how th e Photo Frame displays digital photos, simply
turn on the frame without inserting a memory card.
3. Push the power button for a few seconds on the back of the Digital
Photo Frame to turn on the frame.
1
TM
TM
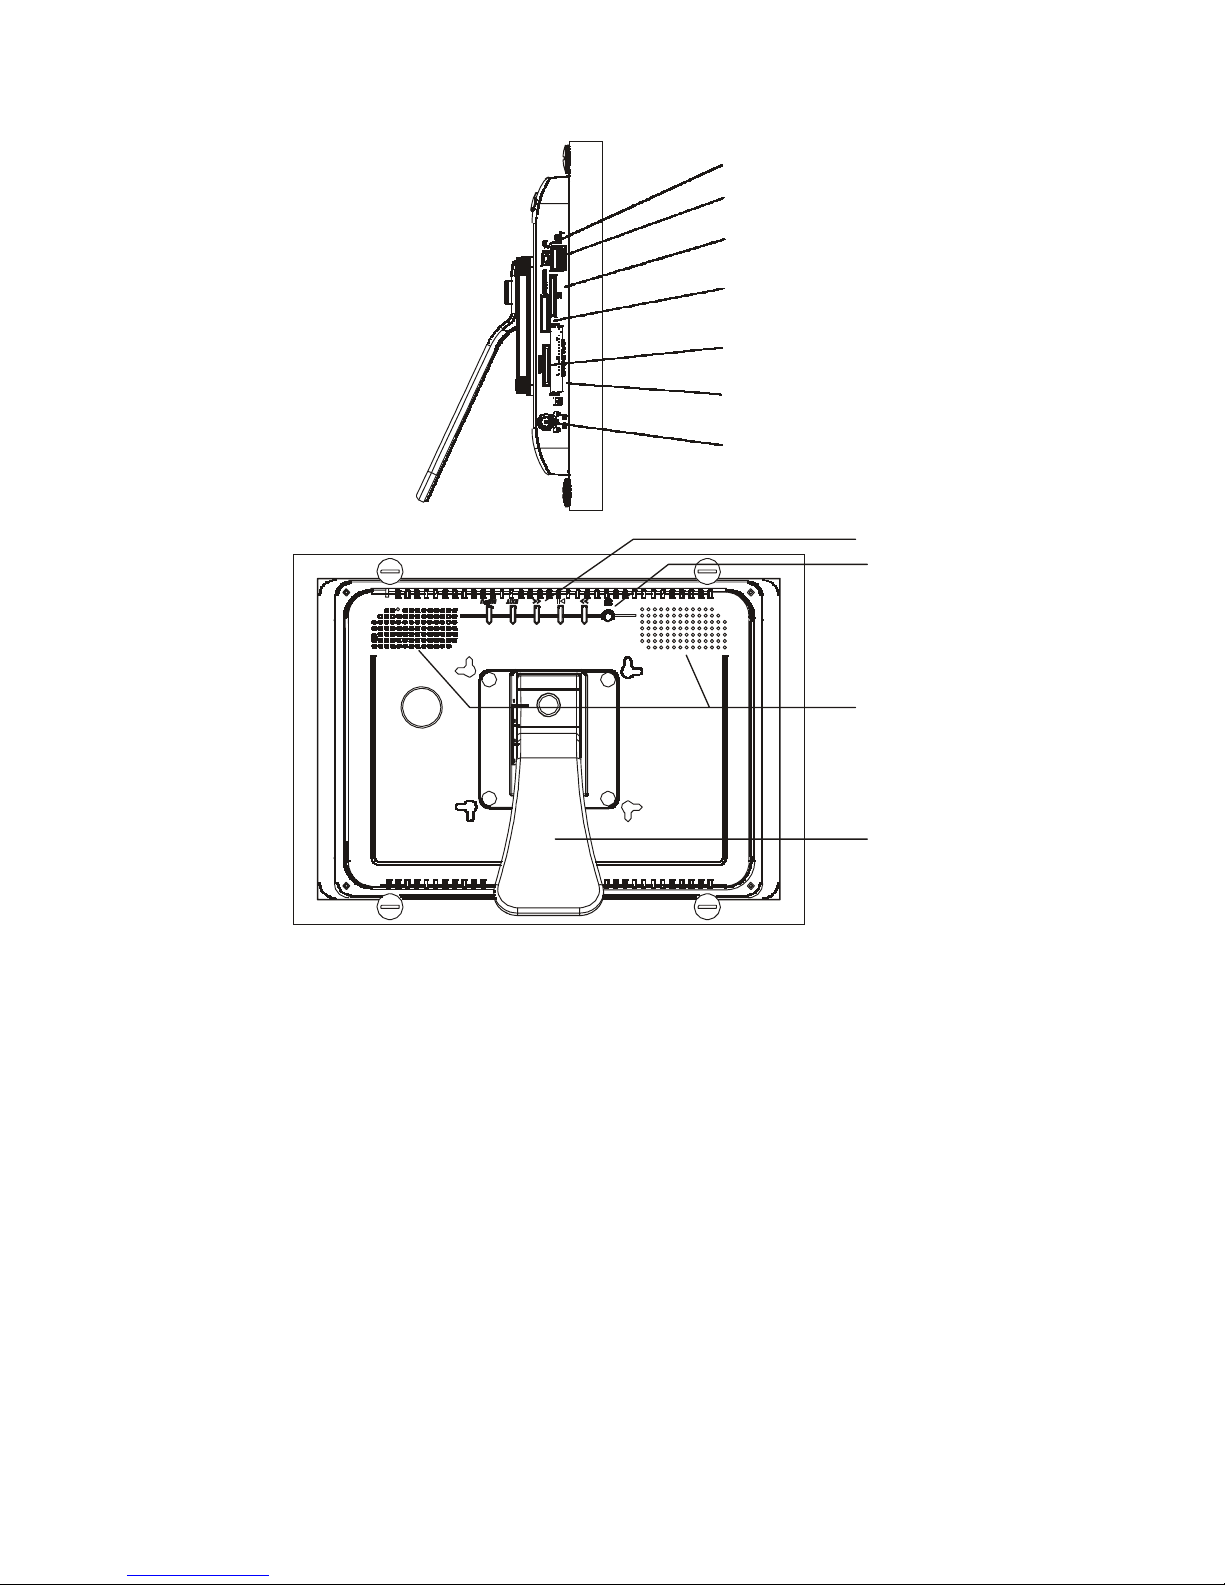
Diagram of the Digital Photo Frame
Mini USB Port for File Transfer
USB Port for USB Flash Drives
Memory Stick
TM
,Memory Stick PROTM,
Memory Stick Duo
TM
,and
Memory Stick PRO D u o
TM
Slot
Secure Digital and
Multi Media Card
TM
Slot
Compact Flash and
Micro Drive
TM
Slot
AC Power Input
Keypad
Power Button
Adjustable Stand
2

Keypad Button Functions
On Screen Display Functions
Note: To enter the On Screen Display (OSD), press t he Menu button at any
time (except when in Slide Show ). To exit the OSD, simply press the Ex it
button.
Button Command
<< Up
Play Select
>> Down
Exit Exit OSD M enu
Menu Enter OSD Menu
Viewing Images Individually
Button Command
<< Go to Previous Image
Play Start Slide Show
>> Go to Next I mage
Exit Return to Thumbnail View
Menu Enter OSD Menu
Thumbnail View / Select Mode Pa ge / Card Select Page
Button Command
<< Left
Play Select
>> Right
Exit Back to previous page
Menu Enter O SD Menu
3
 Loading...