

Page 1

A. Installation
B. Operating
instructions
E
N
G
L
I
S
H
Page 2

2
E
N
G
L
I
S
H
Page 3

3
E
N
G
L
I
S
H
CONTENTS
Part A Installation
CONTENTS···························································································4
IMPORTANT NOTES ················································································4
SAFETY NOTES·····················································································5
INSTALLING THE COMPONENTS································································8
INSTALLING THE APPLICATION SOFTWARE AND THE DRIVER (PC)················8
INSTALLING THE APPLICATION SOFTWARE AND THE DRIVER (MAC)··············9
INSTALLING THE SCANNER···································································9
Part B Operating instructions
INSERTING SLIDES ·············································································· 10
SCANNING SLIDES ·············································································· 12
SCAN SOFTWARE CYBERVIEW X – MS ··················································16
Part A Installation and Part B Operating instructions are included as Adobe PDF file
on the CyberView X – MS-CD. The file will be installed with the driver and will be
available on the computer after the installation without the CD.
Note:
The CyberView X software and the TWAIN plug-in are being developed
permanently. It is recommended to regularly check the home pages of
the manufacturers for driver updates.
The driver updates can be stored without previously installing the
software.
It is recommended to download the latest software version on the
Internet so that it can be used for the initial installation.
Page 4

4
E
N
G
L
I
S
H
CONTENTS
Please check the box for completeness.
Note!
Save the original box, receipt and packaging material in case you have to
return the scanner.
CONTENTS
Ø Slide scanner 3600
Ø magazine
Ø power adapter and power cord
Warning!
Using a different power adap ter may severely damage the scanner and
will void the product warranty.
Ø USB-2.0 cable
Ø IEEE-1394 cable
Ø CD with CyberView X – -MS drivers (PC and Mac)
Ø CD with Adobe Photoshop Elements and Adobe Photoshop Album
IMPORTANT NOTES
Ø The reproduction of this manual in whole or in part without the manufacturer's
written permission is prohibited.
Ø The information contained in this manual and the hardware and software are
subject to change without notice.
Ø The manufacturer is not liable for damages of film material resulting from the use
of this scanner.
Ø The manual was compiled with greatest diligence. In case you detect errors we
would be grateful to receive notification thereof through the respective section on
our home page.
Page 5

5
E
N
G
L
I
S
H
SAFETY NOTES
Please observe the following safety notes in order to avoid damages of the scanner
or injuries to yourself or other persons.
Do not modify the scanner
Inside the housing, there are energized parts. Do not open the housing.
There is the risk of fire or electrical shock. Have any repair work carried
out by authorized dealers.
Do not touch parts inside the scanner or of the power adapter
In case the scanner or the power adapter is damaged (e.g. when falling
down) do no longer use the scanner or power adapter. There is the
danger of suffering an electrical shock. Disconnect the power cord from
the power outlet and contact the manufacturer's after-sales service.
In case of unusual incidents, switch of the scanner
immediately and disconnect from the power outlet
If the scanner or the power adapter emits unusual sounds or odors or if
smoke escapes, switch of the scanner immediately and disconnect it from
the power outlet.
There is the risk of fire in case of continued operation!
Have the manufacturer's after-sales service repair the scanner. Do not try
to repair it yourself - you will expose yourself to severe risk.
Make sure that no objects enter the housing
Do not place objects on top of the scanner housing (by no means
containers filled with liquids).
Objects or liquids entering the scanner result in the risk of fire or electrical
shock. In addition, the scanner may be damaged.
Do not operate the scanner near flammable gas or when dust
generates
The non-compliance with this precautionary measure results in the risk of
fire and explosion.
Keep children away from the scanner
The scanner contains parts small enough to swallow which represents a
special danger for infants. In case a child swallows a part of the scanner,
consult a physician immediately.
Page 6
6
E
N
G
L
I
S
H
Do not touch the power cord during periods of lightning
activity
Do not operate the scanner during periods of lightning activity. You might
suffer an electrical shock via the electrical cords. The scanner may also
be damaged. Disconnect the scanner from the power outlet during
electrical storms.
Ensure the correct power connection
The scanner must be operated with a power connection of 50/60 Hz and
100 to 240 V. Use only power cords which are approved for these values
and which meet the safety regulations of your country.
Observe the necessary safety regulations when using the
power cord
Make sure the power cord is not damaged. Do not make any modifications
to the power cord. When heavy objects are placed on the cord, if the cord
is subject to heat or open fire or if it is excessively stretched or twisted,
there is the risk of fire or electrical shock.
If the power cord insulation is damaged or if wires are blank contact the
manufacturer's after-sales service immediately. Do not use damaged
power cords, there is the risk of fire or electrical shock.
Do not touch the power cord with wet or damp hands. The noncompliance with this precautionary measure results in the risk of an
electrical shock.
Do not play the CD-ROMs with an audio CD player
The CD-ROMs supplied with the scanner shall not be played with an
audio CD player. Playing a CD-ROM with an audio CD player may
damage the hi-fi system and produce sounds which can seriously damage
the hearing (or even result in a complete loss of hearing).
Operating ambient temperature range
+50º to +104ºF (+10º to +40ºC)
Do not turn on the scanner unless it is within this range.
If the scanner has been stored or transported outside of this range, allow it
to return to within this range before turning it on.
Page 7

7
E
N
G
L
I
S
H
Operating ambient humidity range
15% to 76% relative humidity (non-condensing)
If the scanner was stored or transported in cold temperature and then
brought into a warm, humid environment condensation may occur. Allow
the scanner to fully adapt to the room temperature before turning it on.
Page 8

8
E
N
G
L
I
S
H
INSTALLING THE COMPONENTS
INSTALLING THE APPLICATION SOFTWARE AND THE DRIVER
(PC)
If you have installed Windows XP on your system a test dialog may appear during
installation. In this case, select "Continue anyway".
1. Place the Adobe Photoshop Elements software CD into your CD-ROM drive. If
you have the autoplay function switched off search the CD for the “Autoplay.exe”
file and open it with a double click. Follow the on-screen instructions to complete
the installation and remove the CD from the drive.
2. Place the CyberView X – MS CD (PC version) into your CD-ROM drive. If you
have the autoplay function switched off search the CD for the “Launch.exe” file
and open it with a double click.
3. Click on "CyperView X" to start the installation wizard. Follow the on-screen
instructions to complete the installation.
4. There may be additional test software products on the installation CD. If they are
installed follow the on-screen instructions to complete installation.
Note: If you have Windows XP installed DO NOT remove the CyberView X –
MS CD after rebooting.
5. Set the switch for the scanner connection to the USB or IEEE-1394 interface and
use the supplied USB or IEEE-1394 cable to connect the scanner to the computer.
6. After rebooting switch on the scanner. The operating system will recognize the
hardware connected to the USB or IEEE-1394 interface and searches the
respective driver.
7. In the “Found New Hardware Wizard” window, select “Install the software
automatically (Recommended) and click “Next”.
8. In the “Completing the Found New Hardware Wizard” window, click “Finish”, then
remove the CD.
9. The installation is completed.
Page 9
9
E
N
G
L
I
S
H
INSTALLING THE APPLICATION SOFTWARE AND THE DRIVER
(Mac)
Mac users shall install the application software (Adobe Photoshop Elements) prior to
installing the scanner driver CyberView X – MS.
If a TWAIN compatible application software or a Mac plug-in is already installed on
your computer you can install the scanner driver directly.
1. Place the Adobe Photoshop Elements software CD into the CD-ROM drive and
double click on the "Adobe Photoshop Elements" icon in order to install the
application. Remove the CD.
2. Place the CyberView X – MS software CD into the CD-ROM drive. The icon for
the CyberView X – MS CD will appear on the desktop.
3. Double click on the "CyberView X – MS" icon.
4. Double click on the "CyberView X – MS Installer" folder in order to install the
driver.
5. There may be additional test software products on the installation CD. If they are
installed follow the on-screen instructions to complete installation.
INSTALLING THE SCANNER
1. Make sure the scanner is switched off.
Remove the transportation adhesive straps on the inserted magazine.
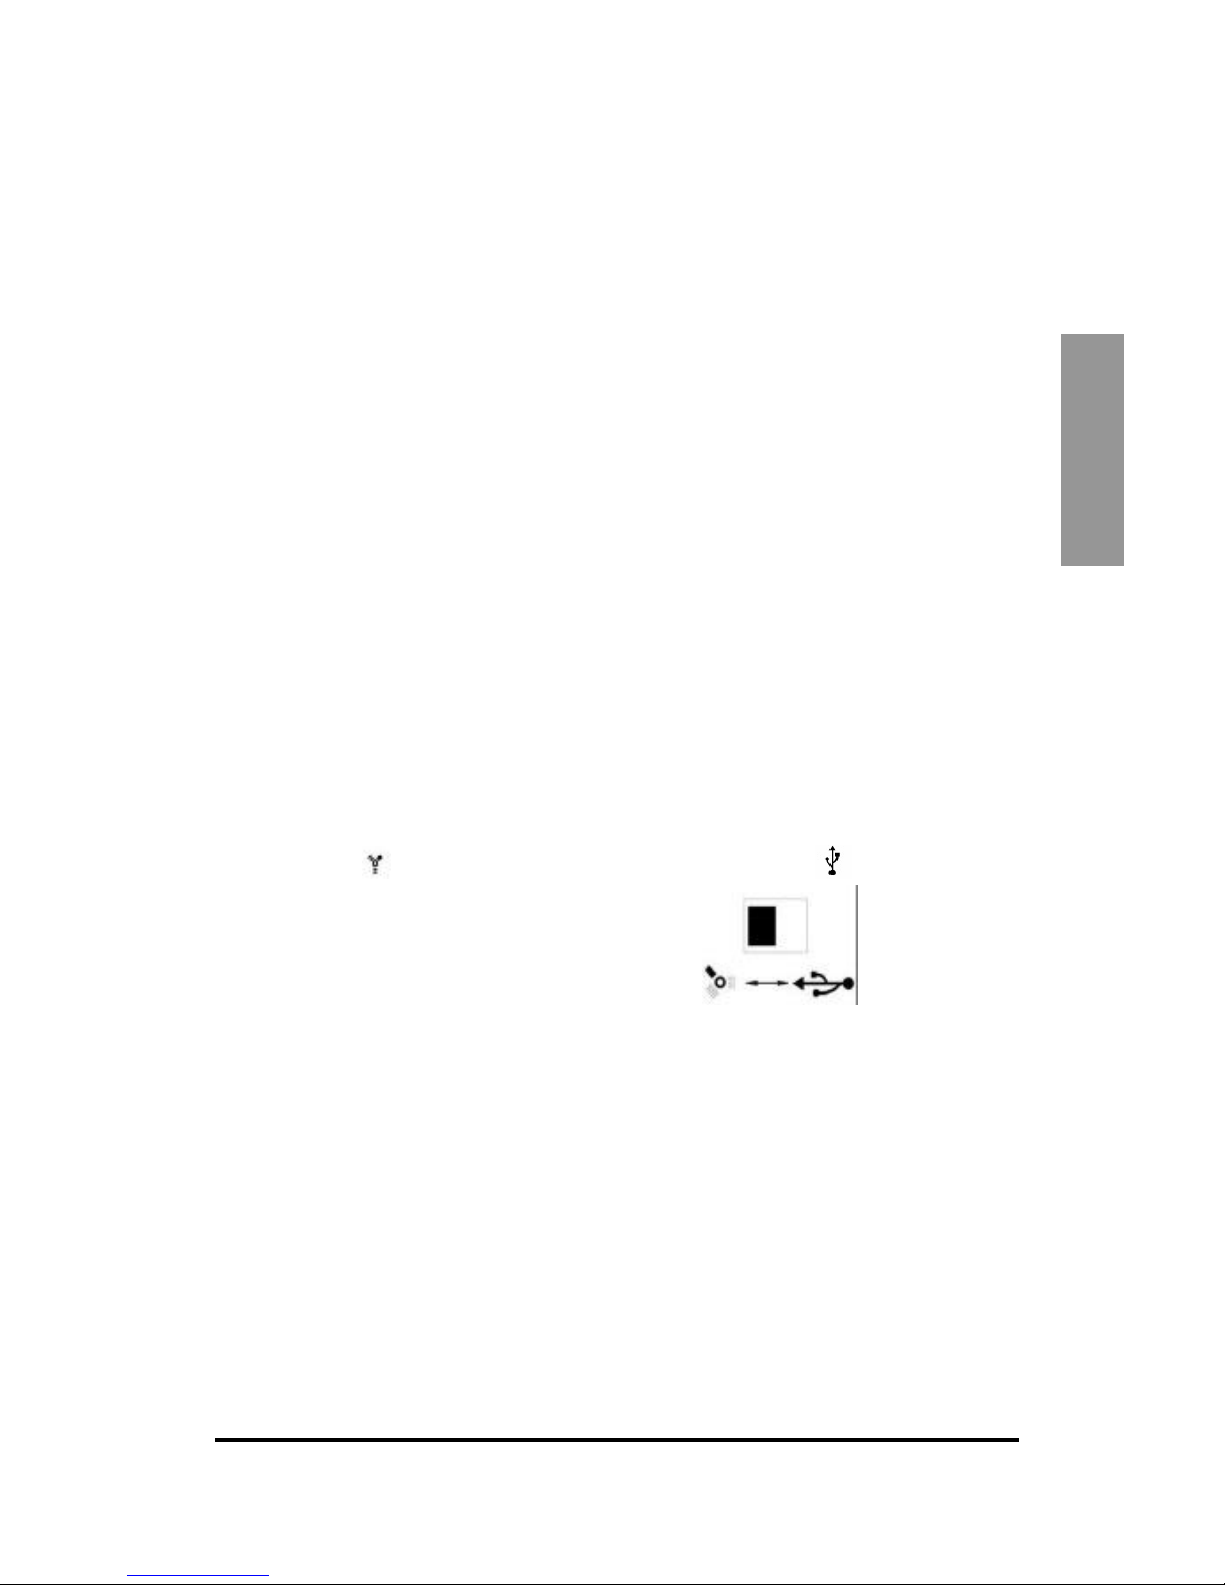
2. Check the USB/IEEE 1394 switch on the scanner connection.
Set it to the symbol for the IEEE-1394 int erface or to the
symbol for the
USB interface.
3. The scanner shall only be operated with the voltage specified on the scanner.
Connect the power cord to the power adapter. At first, connect the power cord to
the mains supply, then connect it to the scanner.
4. Connect the appropriate end of the USB or IEEE-1394 cable to the respective
socket on your computer.
Connect the other end to the appropriate connection on the scanner.
5. Switch on the scanner. The slide transport arm will extend. Do not push the arm
back during warming up.
Page 10
10
E
N
G
L
I
S
H
OPERATING INSTRUCTIONS
INSERTING SLIDES
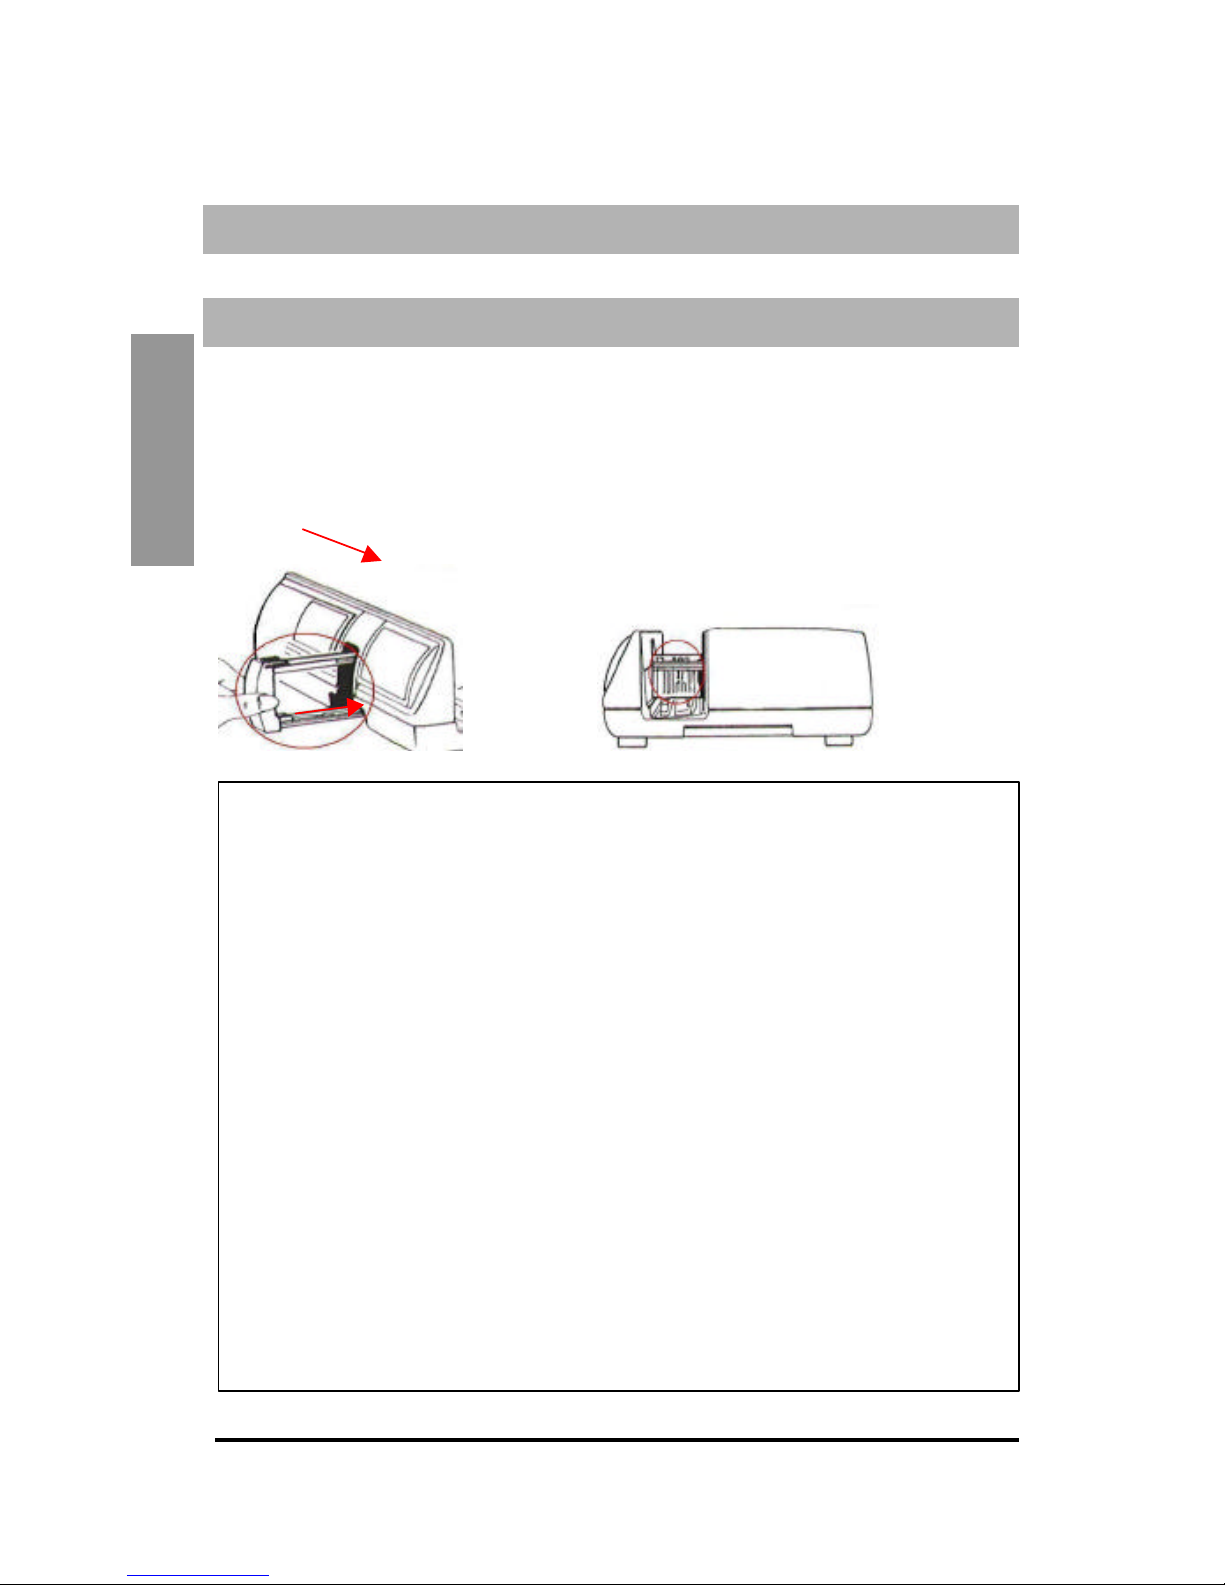
Inserting a magazine
Push the slide transport arm fully into the scanner (Fig. 1) and insert the magazine
from the back until it touches the slide transport arm (Fig. 2). Make sure that the
magazine moves easily.
Make sure there are no objects next to the scanner for the slide transport arm to
extend fully (<10 cm).
Fig. 1 Fig. 2
Loading various magazines
Paximat round magazine
• P ull out the slide transport arm fully.
•
Load the magazine from the top into the magazine tunnel so that the open side points to
the scanner. The inner ring shall contact the guiding pins.
Note: The round magazine shall be filled evenly with slides.
CS magazine
• It is recommended to use the original CS system (reflecta, Braun) exclusively.
Other CS magazines or CS frames may lead to disturbances.
Universal magazine
• Use only magazines with a DIN 108 label. Other magazines may lead to disturbances.
• Pull out the slide transport arm fully.
• Gently press the orange adapter on the slide transport arm. Move the adapter on the
slide transport arm to the front until it snaps in.
• Push the slide transport arm back into the scanner.
• Load the magazine from the back in the respective guiding rails of the magazine tunnel
until it hits the slide transport arm.
For all other magazines (except for the universal magazine described above), you
must return the adapter to its original position at the grip of the slide transport
arm.
To release the adapter, gently press its outer tip.
Insert from the back
Page 11
11
E
N
G
L
I
S
H
Removing a magazine
Pull out the slide transport arm fully and remove straight magazines to the front or
back. Lift round magazines to the top.
TIP: Do not tilt the magazine to the open side since slides may fall out.
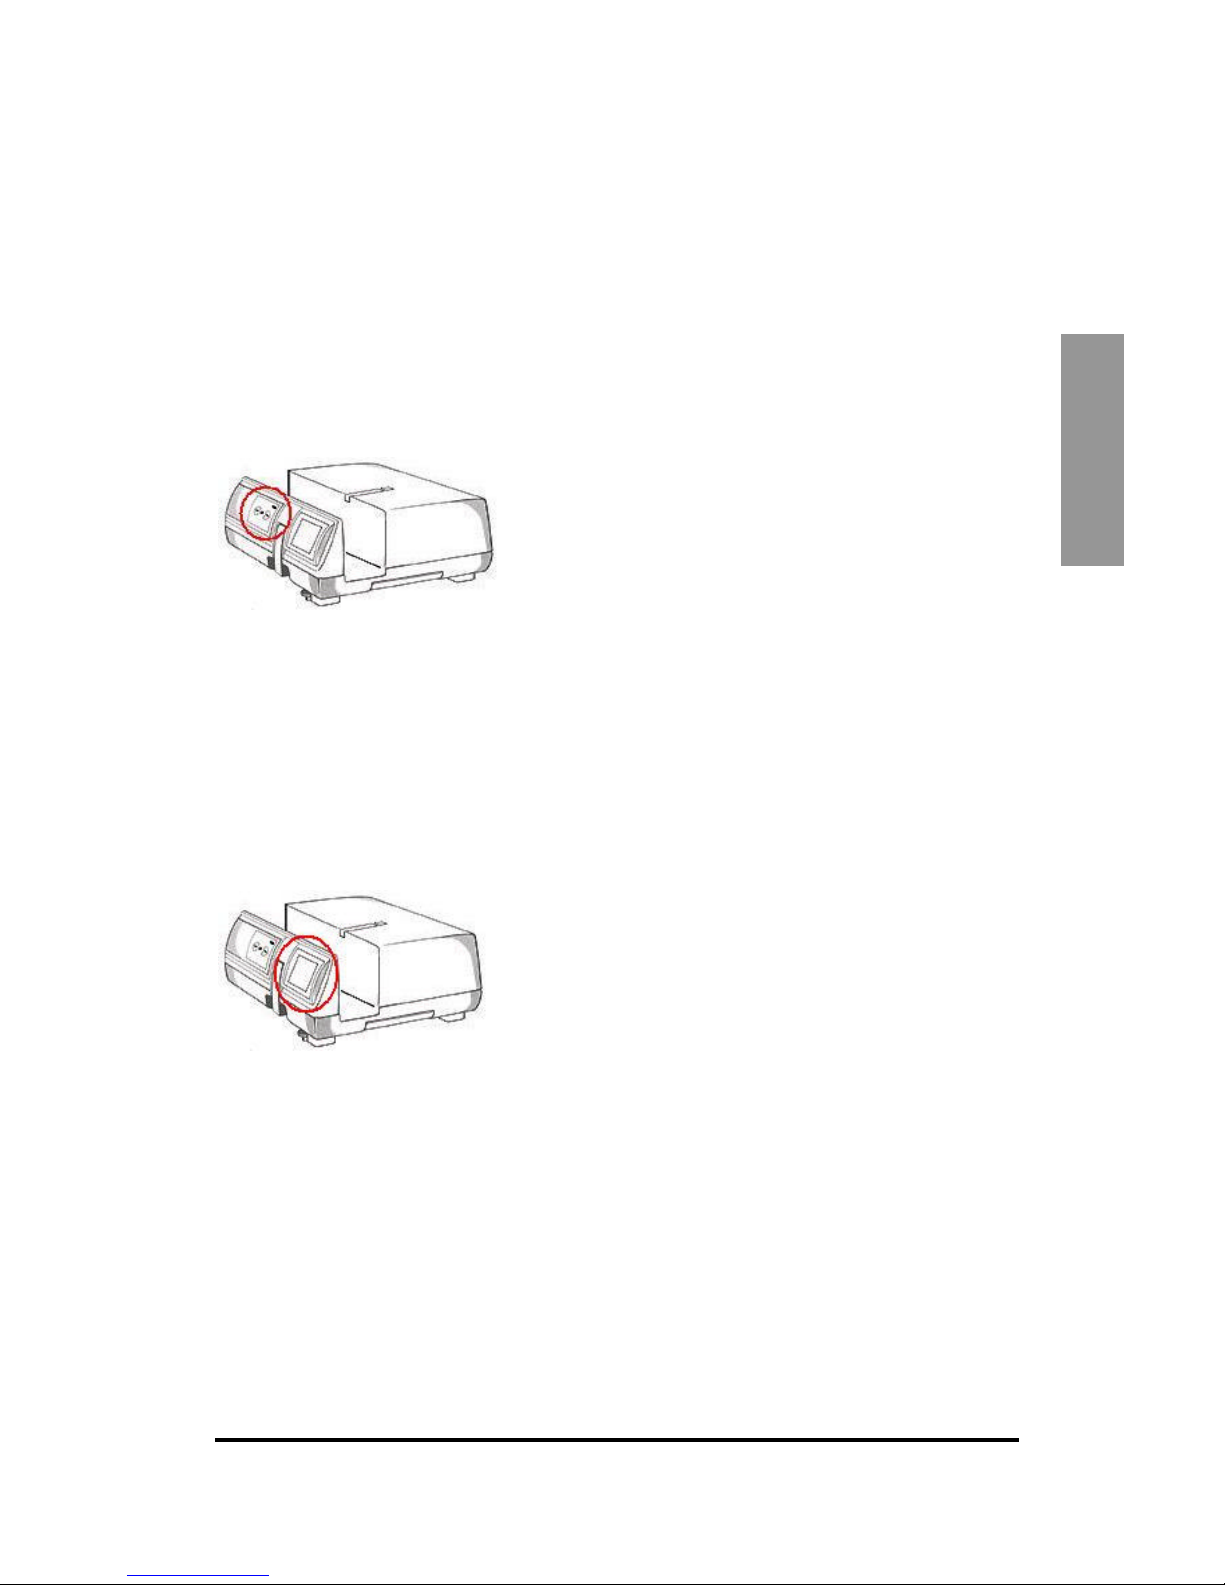
Moving magazine backward/forward
You can insert the next or previous slide in the magazine for scanning by pressing
the respective arrow button (ÅorÆ) in the lateral control panel (see Fig. 3).
Fig. 3
As an alternative, you can use the arrow buttons in the CyberView X – MS GUI to
move the magazine.
Previewing individual slides
Insert the slide into the slide viewer at the side of the scanner for previewing (Fig. 4).
Gently press the slide onto the "mini light table" to switch on the necessary light. The
scanner must be switched on.
Fig. 4
Inserting single slides without magazine
Using the slide lift, you can scan single slides. To insert a slide, press on the green
eject button (Fig. 5) and the slide holder will lift-up.
Place the slide into the slide lift and press the slide holder down until it snaps in
(Fig. 6).
Page 12

12
E
N
G
L
I
S
H
Note!
When using the single slide scanning function, please make sure that the slide lift
snapped into place and that the slide transport arm has been moved completely into
the scanner.
Fig. 5 Fig. 6
The magazine tunnel should be empty or an empty magazine should be loaded
correctly since the slide transport arm moves out during warm-up and calibration.
SCANNING SLIDES
Starting the program
Load the magazine into the scanner and open the Adobe Photoshop Elements or
another TWAIN compatible application software.
When using Adobe Photoshop Elements, select File à Import à CyberView X - MS
... to open the TWAIN driver.
Information about Adobe Photoshop Album
(Please refer to the Adobe Photoshop Album manual for additional details.)
Open the Photoshop Album program and select File à Get Photos à From
Scanner…“. Select CyberView X - MS to open the TWAIN driver.
With the CyberView X software, you can scan directly onto your hard disk without
using an application software.
Basic settings for scanning
Selecting the film type (PC)
Select the film type, the manufacturer and the brand. If the film type is not specified
explicitly the best results will be obtained using the Generic setting.
Example: For a positive film, select Positive à Generic à Generic Positive.
Page 13

13
E
N
G
L
I
S
H
Selecting the film type (Mac)
Select the film type and the model.
Example: For a positive film, select Positive Film à Generic Reversal.
Previewing the scan
Select Prescan Current Frame to pre-scan a single slide or Prescan… to create a
selection of slides for pre-scanning.
Single prescan Multi prescan
Settings for the scanning process
Define the resolution, the color depth and the quality of the slide scan.
If you do not specify values the settings defined in the Preference dialog (Scan ->
Preference...) are used for the scan.
Note: The higher the resolution, the more scanning time is needed and larger
storage space required.
The following table lists the required storage space for a slide 24x36 mm, slides with
40x40 mm require appropriately more space.
Page 14

14
E
N
G
L
I
S
H
Scan resolution
in dpi
Color depth
in bit
Required storage
space as tif file in
MB (approx.)
Required storage
space as jpg file in MB
(approx.)
1200 8 5 0.5
1800 8 11.7 1
2400 8 21 1.2
3000 8 33 2.3
3600 8 47 3.2
1200 16 11 0.5
1800 16 23.5 1
2400 16 42 2
3000 16 66 2.4
3600 16 94 3.3
For the jpg file format, the quality BEST was used to store the scans listed above.
Starting the scan process
Select Scan Current Frame to scan the slide loaded into the scanner, Scan Selected
Films to scan the slides selected in the preview, or Multi-Scan... to specify the
number of slides in the magazine you want to scan.
You can select the same functions to store one or several slides directly to a file.
Page 15

15
E
N
G
L
I
S
H
Scanning single slides
When you press the scan button (l) in the lateral control panel of the scanner, the
current slide will be scanned automatically and transferred to the opened application
software.
Exiting the program
After scanning the slides, the images are transferred to the application software (e.g.
Adobe Photoshop Elements) or stored to the specified storage location. Click on the
X in the top right corner of the screen or select Scan -> Exit to close the driver. You
can now edit, save and print the images with the application software.
Page 16

16
E
N
G
L
I
S
H
Description of CyberView X – MS
The CyberView X software (CVX) can be used in two different ways:
1. as independent program
2. as TWAIN driver directly from other programs.
The user interface and the functioning of the program differ only slightly. With the
TWAIN driver, the Scan menu offers options where you can define to transfer the
scanned data to the calling program or directly to the hard disk. When CVX is started
as independent program, the data can be stored to the hard disk only (see 1.1.1
Scanning).
The CyberView X user interface consists of four areas:
1. the main window with the menu bar to select the scan commands and
to control the scanner
2. the preview window
3. the window with the preference for the active image
4. the window with the thumbnail panel to select the active image and the
images to be scanned
Page 17

17
E
N
G
L
I
S
H
1. Main window
1.1 Menu bar
1.1.1 Scan
Prescan:
- Prescan Current Frame
- Prescan…
In contrast to the Prescan Current Frame option where a single slide is scanned,
you can use the Prescan… option to enter a range. Individual ranges are specified
using a hyphen (–), several ranges or single slides are separated by a comma.
Example: 1-5,10,12,20-25.
Scan:
- Scan Current Frame
- Scan Selected Films
- Multi-Scan …
- Scan Current Frame to File …
- Scan Selected Films to File …
- Multi-Scan to File …
The first three menu items of the Scan sub-menu are displayed only when CVX is
started as TWAIN driver. In contrast to the other menu items, the corresponding
scan is transferred to the program where CVX was started. When CVX is used
independently, the scan(s) are saved as files to the hard disk.
The differences of the menu items are as follows:
- Scan Current Frame: The slide currently in the scanner will be scanned.
- Scan Selected Films: This option is only available after a pre-scan. The images
of the pre-scans can be selected in the Thumbnail Panel. Please refer to the
corresponding section for a detailed description.
- Multi-Scan…: When you select this menu item, you are prompted to enter the
Page 18

18
E
N
G
L
I
S
H
number of scans you want to perform. The scans are performed starting from the
current position of the magazine.
When you select Scan ... to File…, you are prompted to enter the storage location,
the base file name, the file type and the quality (JPEG) of the image(s).
- Enter the desired path or click on the Browse... button to select a path.
- Enter the name of the first image in the Base File Name field.
- Select the file type.
- If the image is stored as JPG file select the quality of the image in the JPEG
Quality field.
The images are numbered automatically, where the first three digits correspond to
the numbering of the scan, the next two digits define the selection frame of the
scan (see preview window section).
These two digits may be omitted.
- Revert
All modifications of the current preview windows are discarded and the image is
displayed in its original state in the preview window.
Page 19

19
E
N
G
L
I
S
H
- Preference...
This section is divided into three 3 sub-windows:
1.1.1.1.Scan Setting
You can define the resolution, the color depth and the scan mode for the prescans and the scans.
Note for the color depth: Please note that various programs cannot work with a 16
bit color depth.
Note for the scan mode: When using the Quality option, the scan will be slower
resulting in less noisy scans.
1.1.1.2.Advanced Setting
You can set the CVX program to perform an automatic exposure correction (Auto
Exposure) and/or an automatic gamma correction (Auto Gamma).
Page 20

20
E
N
G
L
I
S
H
1.1.1.3. Default Scanning Area
CVX recognizes three different scan formats.
You can specify the slide sizes to be used automatically for the pre-scans and a
scan offset to position the actual slide section.
Please note that the x/y values for the offset must correspond to the coordinate
values as required by Adobe Photoshop.
+x and +y moves the slide to the right/down.
- Exit
The CVX user interface is closed. The system returns to the calling program if
applicable.
Page 21

21
E
N
G
L
I
S
H
1.1.2 Preview
- Zoom In: CVX changes the mouse pointer to a magnifying glass. When you now
click in the preview window, the pre-scan is magnified.
- Zoom Out: When you click in the preview window, the pre-scan is reduced.
- Rotate 90 Left: The preview is turned 90 degrees counter clockwise.
- Rotate 90 Right : The preview is turned 90 degrees clockwise.
- Flip Horizontal: Flips the preview horizontally.
- Flip Vertical: Flips the preview vertically.
Page 22

22
E
N
G
L
I
S
H
1.1.3 Image Adjustment
You can use the Variations..., Color Balance..., and Curves and Levels...
menu items to adjust color and contrast.
The settings supplement or add to each other.
In the bottom area of the Image Adjustment window, you can save the
settings defined in the three windows to be used for other scans.
Please note that the settings will only be valid for the current slide (the one
displayed in the preview). In order to transfer the settings to other slides,
you can save and load the settings.
Note:
The Reset All button restores the settings of all three areas. In order to only
reset the changes of the current area, press the button with the green arrow.
Press the OK button to confirm your entries and transfer the modifications to
the preview.
In case you pressed this button erroneously, activate the Image Adjustment
window again and press the Reset All button. This will restore the settings to
the original state.
The Cancel button discards your changes like the Reset All button. If your
settings were not saved they will be lost irrevocably. In addition, the window
will be closed.
Note: If you activated the Image Adjustment window using the button
the changes are applied to the active frame only.
Page 23

23
E
N
G
L
I
S
H
1.1.3.1. Variations
In this window, you can correct the colors and the brightness of the scan
using the three areas "Shadows", "Midtones" and "Hightlights" with a
corresponding setting between Fine (for little change) and Coarse (for great
change).
Prior to correcting the scan, set the area and the degree. Now, click on one
of the corrected images to accept the correction. The image next to the
original image shows the cumulative modifications of your image. You can
zoom in and out using the + and – buttons to have a closer look at the
changes.
Page 24

24
E
N
G
L
I
S
H
1.1.3.2.Color Balance
The values for brightness, contrast, saturation and color (CMY or RGB) of the
image can be adjusted with the sliders or by entering the values in the
corresponding fields.
You can use the buttons with the magnifying glasses to zoom in and out the
Before and After windows to have a close look at the changes.
Page 25

25
E
N
G
L
I
S
H
1.1.3.3. Curves and Levels
You can adjust the color values through gamma correction.
As in the Color Balance window, you can use the magnifying glasses buttons to
zoom in the Before and After windows to have a close look at the modifications.
You can use the three buttons with the pipettes to set a black, gray or white eye
drop for the image with a simple mouse click.
You can also use the sliders below the gamma curve to change the values.
You can use the button with the multi-colored point to adjust the gamma correction
automatically.
You can select the color in the channel menu to perform the changes for each
color individually.
Page 26

26
E
N
G
L
I
S
H
1.1.4 Window
- Exposure Setting…
Using the sliders for the different colors, you can correct the exposure already
when scanning. If your images to be scanned have a color imbalance you can
make corrections already when scanning.
The same applies for dark images – increase the three colors evenly in order to
obtain a stronger general exposure without shifting colors during the scanning.
Page 27

27
E
N
G
L
I
S
H
- Output Preview…
By defining the output format via the output medium (type and size) and the output
parameters (resolution in DPI and dimensions), you will receive an impression of
the designed output.
1.1.5 Help
- User Manual
Opens this manual in CVX.
- Update Firmware
You can upgrade the firmware version; this menu item is necessary to upgrade the
firmware installed in the scanner in case of software upgrades. After selecting this
menu item, specify the path for the upgrade file. Perform this step only when
requested to do so by the support.
- About...
Displays information about the hardware and software of the scan system. Keep
this information ready when contacting the telephone support.
Page 28

28
E
N
G
L
I
S
H
1.2 Icon bar
With the icon bar, you can access the features of the menus faster.
Menus with sub-menus are identified wit h the arrow to the left of the icon.
Please refer to the menu bar section of this manual (1.1) for a detailed description.
[ Negative ]
[ Positive/slide ]
[ Black & white ]
Selecting the film type -
If the film type is not specified explicit ly, the best results are achieved with the
Generic setting.
Example: With a positive film (slides), select Positive -> Generic -> Generic
Positive.
In the following, the icons and the corresponding menus are listed:
San -> Prescan
Scan -> Scan
Image Adjustment
Window -> Output Preview
The following icons are used to control the scanner:
Moves the magazine back one frame.
Moves the magazine forward one frame.
Loads a new magazine and resets the image counter to 1.
Before pressing this button, you should load the magazine
manually as described in the operating instructions (Inserting Slides).
Page 29

29
E
N
G
L
I
S
H
If you move the magazine manually to a new position you can use
this menu item to enter the new position so that the counter in the
CVX works properly.
You can enter a position which the scanner shall address. Example:
You want to scan all slides from position 51-100. Use this button to
go to position 51 and select Multi-Scan to File… Enter the number of
slides to be scanned.
(There are certainly other ways to solve this task, this is meant as an example.)
2. Preview window
The following settings and information are available in the preview window:
When selecting the scan area, you can select several areas at the same
time. Click on this button and draw the respective frames in the preview window of
the image. The frame size can be changed afterwards. To delete the current frame,
press the Del key. For each frame drawn, a separate file is created during the scan
process. The settings for the respective scan can be modified individually in the
Active Frame Setting window.
The following buttons have exactly the same functions as the respective menu
item in the menu bar (see section 1.1.).
Page 30

30
E
N
G
L
I
S
H
Preview -> Zoom In (maximum value 1000%)
Preview -> Zoom Out
Preview -> Rotate 90 Left
Preview -> Rotate 90 Right
Preview -> Flip Horizontal
Preview -> Flip Vertical
Scan -> Revert
Selecting the ruler units in the Preview window
You can specify the measurement unit in "in" (inch, US), "cm" (centimeter), or "px"
(Pixel) by clicking on the top left corner. The units are transferred to the Active
Frame Setting window. Make sure to enter the values in accordance with the
selected measurement unit.
Click
Page 31

31
E
N
G
L
I
S
H
Status line (Preview window)
In the bottom left corner, the color levels of red, green, blue, and the coordinates of
the respective position are displayed [see I]. In the bottom right corner, the current
image, the zoom level, and the number of selected frames [see II] are displayed.
[ I ]
[ II ]
The status line of the main window shows the settings for the exposure in the
bottom right corner.
3. Active Frame Setting
You can select the scan resolution, the color depth, and the scan quality of the
currently scanned (active) image. You can also set the size of the image. Please
note that the unit you selected (in the Preview window) is the basis for the format
specifications. You can use the button with the lock for a proportional adjustment
of width and height.
The Information area in the bottom part displays different information such as, e.g.,
the expected file size and the current dimensions of the image.
Page 32

32
E
N
G
L
I
S
H
The Advanced mode displays additional information about the planned output.
Changes in these two entry areas result in corresponding changes of the other
values.
Page 33

33
E
N
G
L
I
S
H
4. Thumbnail Panel
The images from the preview are displayed as thumbnails. By default, all images
of the preview are selected (visible from the marked check boxes below the
images).
When pre-scanning more than six images, you can use the left/right arrow buttons
to scroll through the images.
Use the check boxes to select the images to be scanned. You can use the + / buttons on the bottom left corner of the window to mark/unmark all images. The
active pre-scan image is indicated with a red frame.
Page 34

34
E
N
G
L
I
S
H
5. Support
Visit our home page for support and driver updates.
The Adobe Photoshop Elements and Adobe Photoshop Album products are
updated by Adobe. Please contact the following web site if you need support for
these products:
www.adobe.de
 Loading...