

Page 1
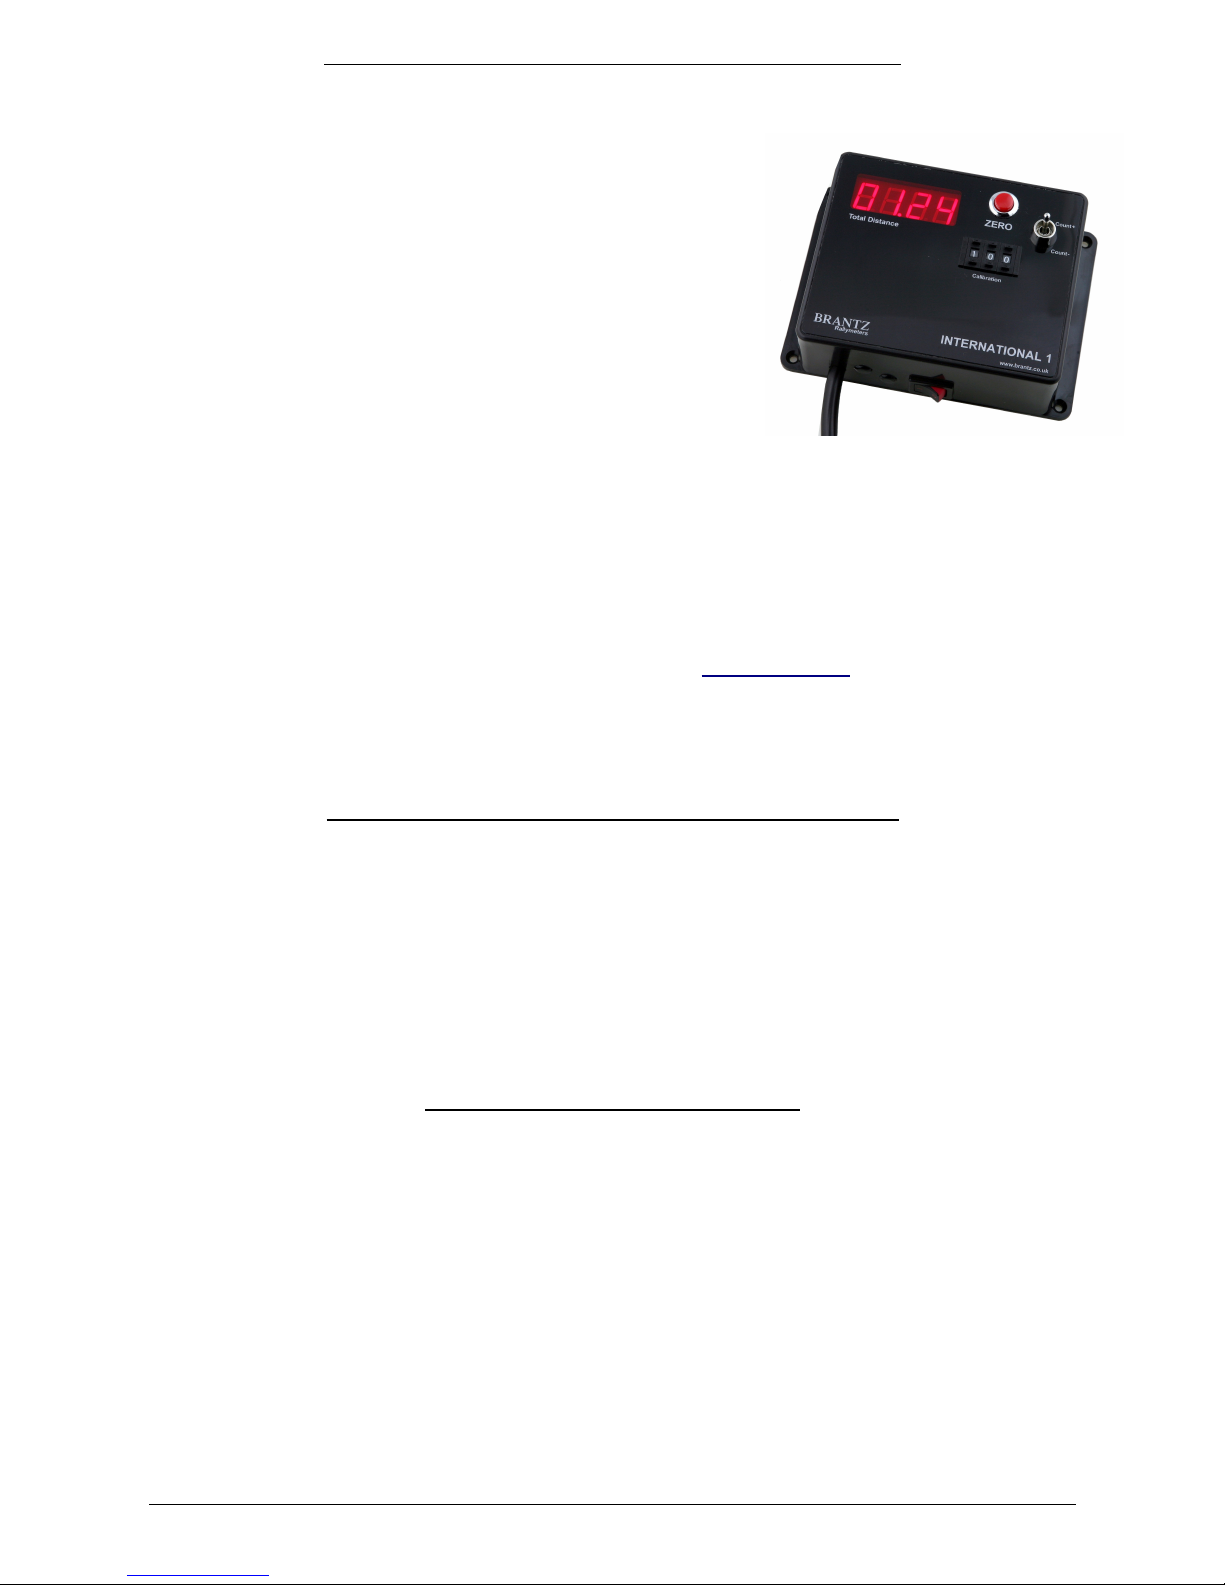
Set Up Instructions for Brantz International 1 Pro Tripmeters (BR13)
Wiring (Not Applicable of you are using your meter in conjunction with a BR57 & BR45/BR47):
• Power:
• Connect up to the vehicles 12 volt power supply as directed by the label
on the BLACK POWER CABLE coming out of the base of the tripmeter or
Plug Kit (BR43). This is BROWN to the POSITIVE Terminal and
GREEN/YELLOW to the NEGATIVE Terminal.
• Connect straight to the vehicles battery posts via a 2 Amp fuse (Not
Provided - Available from Brantz) on the live wire, usually the BROWN on
+12V cars, however on Positive Earth vehicles it is customary to fit the
fuse to the live GREEN/YELLOW wire.
• Sensor:
• The Sensor is connected to the GREY CABLE coming out of the base of the
tripmeter as directed by the separate sensor instruction sheet showing
how to wire the exact type of sensor you have chosen.
Calibration:
• The Tripmeter is calibrated to be accurate on any vehicle fitted with any type of Brantz Sensor and using any wheel size or
gearing by means of the three push-wheel switches marked 'CALIBRATION'.
• If the Tripmeter is to measure in hundredths of a Kilometre/Mile the push-wheel switch needs first to be set to 100.
• At the start of an accurately measured Kilometre/Mile, press the Zero button to ensure the counter reads 00.00.
• Drive the measured distance and stop accurately at the end of the distance – Note the figure that comes up on the readout.
(This is the Calibration Figure for this particular vehicle)
• Enter this figure into the calibration push-wheel switches on the front of the tripmeter. e.g. If the readout is 05.67 set the
push-wheel switches to 567. N.B. If the readout is greater than 09.99 a Pre-Scaling Interface (BR5)/Dividing Pre-Scaler (BR5-
2A) is required – please contact us on 0044 (0) 1625 669366 or Email: [email protected]
• The accuracy can be confirmed by re-running the measured distance from zero, the meter should read exactly 01.00
• If several wheel sizes and gearings are available for the vehicle; repeat the calibration procedure for each combination and
note down the different calibration figures.
• If you are using a Dual Sensor Switch (BR49) make a note of the calibration figures for both sensors A and B.
Operating Instructions for Brantz International 1 Tripmeters (BR13)
Use/Controls:
• The tripmeter is switched on by use of the switch on the base of the tripmeter.
• When the switch is moved from position '0' to the 'I' position the meters digits will light up. N.B. A battery charger is not a
suitable power source to test the tripmeter.
• The red push-button on the front of the tripmeter marked 'ZERO' when pressed zero's the readout.
• The small toggle switch on the front of the tripmeter marked 'Count +'/'Count –' allows the tripmeter to count upwards or
downwards.
• For Long Distance events the decimal place on the TOTAL display can be shifted from 00.00 to 000.0, by:
• With the tripmeter OFF; hold down the Red Zero button and switch the tripmeter ON.
• The tripmeter will return to it's default 00.00 when the unit is switched Off and On again.
Official Measured Distances and Calibration
If the rally organiser has laid out an 'official distance' or you wish to make your tripmeter read the same as the rally organisers
distances then the following instructions apply for calibration:
• Enter 100 (C) into the push-wheel calibration digits (N.B. If the official measured distance is greater than 20 miles you would
need to enter a much higher figure for C e.g. between 399-999).
• With the Total and Intermediate Displays showing Zero drive the total official measured distance i.e. 4.8 (D) miles and note
down the readings i.e. 21.98 (T) (this should be identical on both Intermediate and Total Displays)
• Now use the following formula:
(T/D) x C
e.g.
(21.98/4.8) x 100
=>4.579 x 100
=>457.91
So enter 458 into your calibration push-wheel switches.
To confirm the figure, re-drive the measured distance and your displays should show the official distance e.g. 4.8 miles.
Page 2

Trouble-Shooting
Electrical Interference – Please read this first
Electrical interference (EMI) coming from your car can affect your Brantz equipment in a variety of ways, although we are constantly updating
our products to guard against this some interference is too strong to guard against in the equipment itself and must be suppressed within
your vehicle.
Symptoms such as;
• number randomly changing (mismatching displays)
• numbers jumping about
• displays zeroing themselves (particularly the intermediate display)
• self stepping when the engine is running but not moving
• freezing of the entire unit
are all typical of EMI (Electrical Magnetic interference) most likely coming from your electronic ignition.
You will need to fit suppression to remove the EMI that is attacking your Brantz Tripmeter. If you fitted new copper cored plug leads at the same time
as the new ignition system you need to start with these and fit suppressed leads (Like the Magnacor E/Sport 7 or 8mm).
Generally we would advise investigating most likely sources of interference such as:
• Plug Leads (we would always advise suppressed plug leads other than on magneto driven cars) – mentioned above
• The Generator (Alternator/Dynamo/Magneto)
• The Coil
• Fuel Pump
Suppressors for each of these items are readily available.
Test for Interference:
This is particularly common when home-made HT spark-plug leads have been used, but can come from damaged alternators or fuel
pumps/horn/wipers etc.
If interference is present it is always too powerful to defend against and should be fixed at source by suppressors or new silicon leads etc.
• Take a portable radio, select the AM band (important) and tune into a quiet spot between stations.
• Turn up the volume and start the vehicle.
• Listen for loud clicks. That's interference!!
• Compare the vehicle with a normal road car as a guide to what is acceptable. Try other vehicle accessories to locate intermittent sources of
trouble. You are also welcome to send you unit in for a upgrade to the newest specification which may help; however it is best to resolve
the problem with the car.
Sensor Check:
Before fitting any type of sensor to a vehicle; connect the sensor up to the Brantz meter and check its correct operation:
1. Connect your sensor to a Brantz tripmeter via the Grey Cable. Make absolutely sure that sensors are correctly connected before turning on
the meter as they will be destroyed by reverse current.
2. Set the Tripmeter to a low calibration figure i.e. 009
3. Turn on the tripmeter and simulate the sensor via one of the following methods (depending on your sensor type):
• Rotating the inner of Speedometer Cable Sensor (BR1)
• Rotating the inner of the Gearbox Sensor (BR3/BR4)
• Repeated touching of Wheel Sensor (BR2A) to a metal object
• Repeated touching of the Drive/Prop Shaft Sensor (BRH2) to a Magnet
If it is suspected that either a Wheel Sensor (BR2A) or Speedometer Sensor (BR1) has been damaged whilst in use (i.e. tripmeter does not
increment on the road) then the output from the sensor can be tested with a voltmeter which has the negative lead connected to ground
and for the wheel sensor voltage varies as wheel is rotated 2.0 volts to 4 volts approximately or the speedo cable sensors blue connection
varies 0v to 5v as internals are rotated.
4. The readouts should increment. If the readouts do not increment there is a problem which should be investigated – first refer to Tripmeter
Check below.
Tripmeter Check:
If the sensor check does not work you can check the tripmeter itself by the following test which must be carried out strictly in the order described:
1. Switch off the meter.
2. Pull off the three push-on connectors from the grey cable to the sensor.
3. Ease back the insulating sleeves from the Blue and Green wires of the grey cable described above. Keep these away from contact with
anything else.
4. Select calibration 009 on the tripmeter.
5. Switch on the tripmeter.
6. Press all the zeroing buttons.
7. Tap the above Blue and Green wire connectors together electrically many times.
8. The tripmeter should increment.
If the tripmeter increments in this test but not during the sensor check it suggests that the sensor is faulty/been damaged.
If the tripmeter does not increment during this test it suggests there is a problem with the tripmeter itself and should be returned to Brantz for a
Service.
Please See our Website for Frequently Asked Questions or alternatively Phone: 0044 (0) 1625 669366 or
Email: s[email protected]
v1.0
 Loading...