

BRANDT DWE350 User Manual

Code :3.12333B - 06/02
DK
GR
NL
P
D
F
GB
Dishwasher
OPERATING INSTRUCTIONS
Lave-Vaisselle
NOTICE D'UTILISATION
Geschirrspüler
GEBRAUCHSANWEISUNG
Opvaskemaskine
BRUGSANVISNING
Maquína de lavar
MANUAL DE INSTRUÇÕES
Afwasmaschine
GEBRUIKSAANWIJZING
РлхнфЮсйп
РйЬфщн
ПДЗГЙЕУ ЧСЗУЕЩУ
Lavavajillas
MANUEL DE INSTRUCCIONES
ZZmmyywwaarrkkaa
INSTRUKCJA OBS£UGI
E
PL

2
GB
Contents list
Page
Safety precautions 3
Softening the water 4
Adding the rinse aid 5
Adding the detergent 5
Loading the dishwasher 6 - 7
Presenting your Dishwasher 7
Selecting a washing programme 8 - 9
Cleaning and maintenance instructions 10
Information for test laboratories 10
Troubleshooting 11
Presenting your dishwasher Fig. 1

GB
3
Safety precautions
Please read the information in this instruction
leaflet carefully. It gives all the information you
need for safety, installation, use and
guarantees for the appliance. We advise you to
keep this leaflet and to pass it on to the new
owner if you sell the machine.
Please be sure to comply with the information
below, so that we can fulfil our responsibilities :
- Dispose of the packaging in a suitable
manner and comply with legal standards
regarding protection of the environment.
- If there is any visible damage to the machine,
do not connect it to the mains power supply,
but contact your supplier.
- The machine must be located in a frost-free
environment. In the event of frost, the hydraulic
components may be damaged.
- The inlet and outlet pipes must be connected
in accordance with the leaflet. Incorrect
connections can lead to damage.
- In order to ensure good stability, flush-fitting
machines must be installed under a continuous
work top fixed to the adjoining cabinets.
- Do not climb or lean on the door of the
dishwasher when it is open. The machine can
overbalance or be damaged.
- The machine is designed as a dishwasher
and must not be used for any other purpose.
- We advise you to only use dishwasher
products and not solvents.
- You should store dishwasher products as well
as other cleaning products out of the reach of
children. These products have a corrosive
effect on the mouth and pharynx if they are
swallowed.
- Keep dishwasher products as well as other
cleaning products out of reach of children.
These products, if they are swallowed, have a
corrosive effect in the mouth and pharynx.
- If the machine does not operate correctly for
reasons other than those mentioned in this
leaflet, disconnect the machine from the mains
power supply (pull out the plug) or disconnect
the fuse in the circuit concerned and contact
our after-sales service.
- Broken machines should be taken to the
closest recycling centre. Destroy the door
closing system so it no longer works (children
may close themselves in whilst playing and
suffocate). Cut the electric cable after having
removed the plug from the socket.
- You are strongly advised to disconnect the
machine after use and turn off the water
supply.
- Do not allow children to play with the machine
or handle it.
- The water inside the machine is not drinkable.
- When the machine is running, do not open
the door. This may provoke important steam
leakage or splattering of water.
4
GB
Softening the water
Filling the container with
regenerating salt (fig. 5)
Filling with salt is essential for the regeneration
of the resins that soften the water so removing
the hardness from it, except if the water supply
is already sufficiently soft. (see “Adjusting the
water softener).
You should fill just before starting the
programme.
1 - Unscrew and remove the salt container cap.
2 - Use a funnel to pour: fill the container with
regenerating salt
specially designed for
dishwashers.
3 -
The first time, fill up with water
Screw down the salt container cap again
properly.
Important:
If adjusting the water softener does
not require the addition of regenerating salt
(Wash light on),
you should nevertheless fill
the salt container with water before using.
Never pour detergent into the container
,
you will destroy the water softener
Only use “special dishwasher” rege-
neration salt
. Do not use table salt, cooking
salt, etc. These salts can contain insoluble
elements and will cancel out the effect of the
softener.
Identifying the regenerating salt
level
A light on the control band tells you to add
regenerating salt.
If you move or your water supply changes,
adjust the water hardness settings. Check with
your local water company.
Adjusting the water softener
The water softener should be properly
adjusted to optimise salt consumption and for
best washing results.
• Check the hardness of the water using the
water-testing strip provided.
• Adjust the water softener following the
instructions with the strip and using the table
opposite.
•
Consult your fitter for water that is more
than 28° (position 5)
Hardness of your
water supply (in
British (clarke
degrees)
> à 28°
*
22° to 28°
14° to 21°
10.5° to 14°
7° to 10.5°
0° to 7°
YES
YES
YES
YES
YES
NO
Adjust the cursor
depending on the
result to the
adjustment position
on the left of the tub.
5
4
3
2
1
1
salt
requirements
Position
Number of
washes
between
two fills
(about)
20
30
50
120
Important : The cursor must be in front of a figure

GB
5
Adding the detergent
The washing product container has been
placed in front of the upper basket to make the
machine easier to fill. This means that you can
load the washing powder without bending down
or completely opening the door.
tablet
Use washing products specifically designed
for dishwashers.
See the manufacturers’
recommendations on the packet as well as the
advice for use below.
The distributor offers you a choice between using tablets or powder
or liquid detergent.
Before starting the programme :
put the
tablet
in the upper compartment.
Put the tablet in the outside compartment. Using tablets is
particularly recommended for the Eco programme and for full loads
of dishes.
Or,
Pull the container to fill with washing
powder
or
liquid
and fill
up to:
Minimum setting
for slightly dirty dishes
Maximum setting
for dirty dishes
Close the container
VERY IMPORTANT:
keep all products out of the reach of
children
and away from humidity.
powder or liquid
Adding the rinse aid
Rinsing product is necessary as it avoids stains
on the dishes and makes drying easier.
IMPORTANT! Only use products intended
for dishes and NOT detergents intended for
hand washing !
Filling and adjusting the rinsing
product container (Fig. 6 - 7)
Put the door in a horizontal position when filling
the container and unscrew the cap in the door.
Fill to just below the to the adjusting lever.
If the product overflows during filling, remove
the excess with a sponge to avoid foam
forming.
If you experience stains or bad drying after
several cycles, you may if necessary adjust the
dosage using the selector:
Soft water : level 1 to reduce the dose
Hard water : level 3 to increase it.
Finding the level of the rinsing
product.
A light on the control band shows you
requirements in rinsing product when the door
is ajar.
6
GB
Loading the dishwasher
Upper basket
(Fig. 10 - 12)
This basket is particularly intended to hold
glasses, cups, ramekins, small salad bowls,
bowls, saucers etc…
Place glasses so that they do not touch and tip
them sufficiently so that they do not retain any
water.
Place the hollow end of glasses, cups
and bowls facing downwards.
Arrange the
dishes methodologically to gain space (rows of
glass, cups, and bowls).
You can if you wish unclip the saucer rack to
gain space.
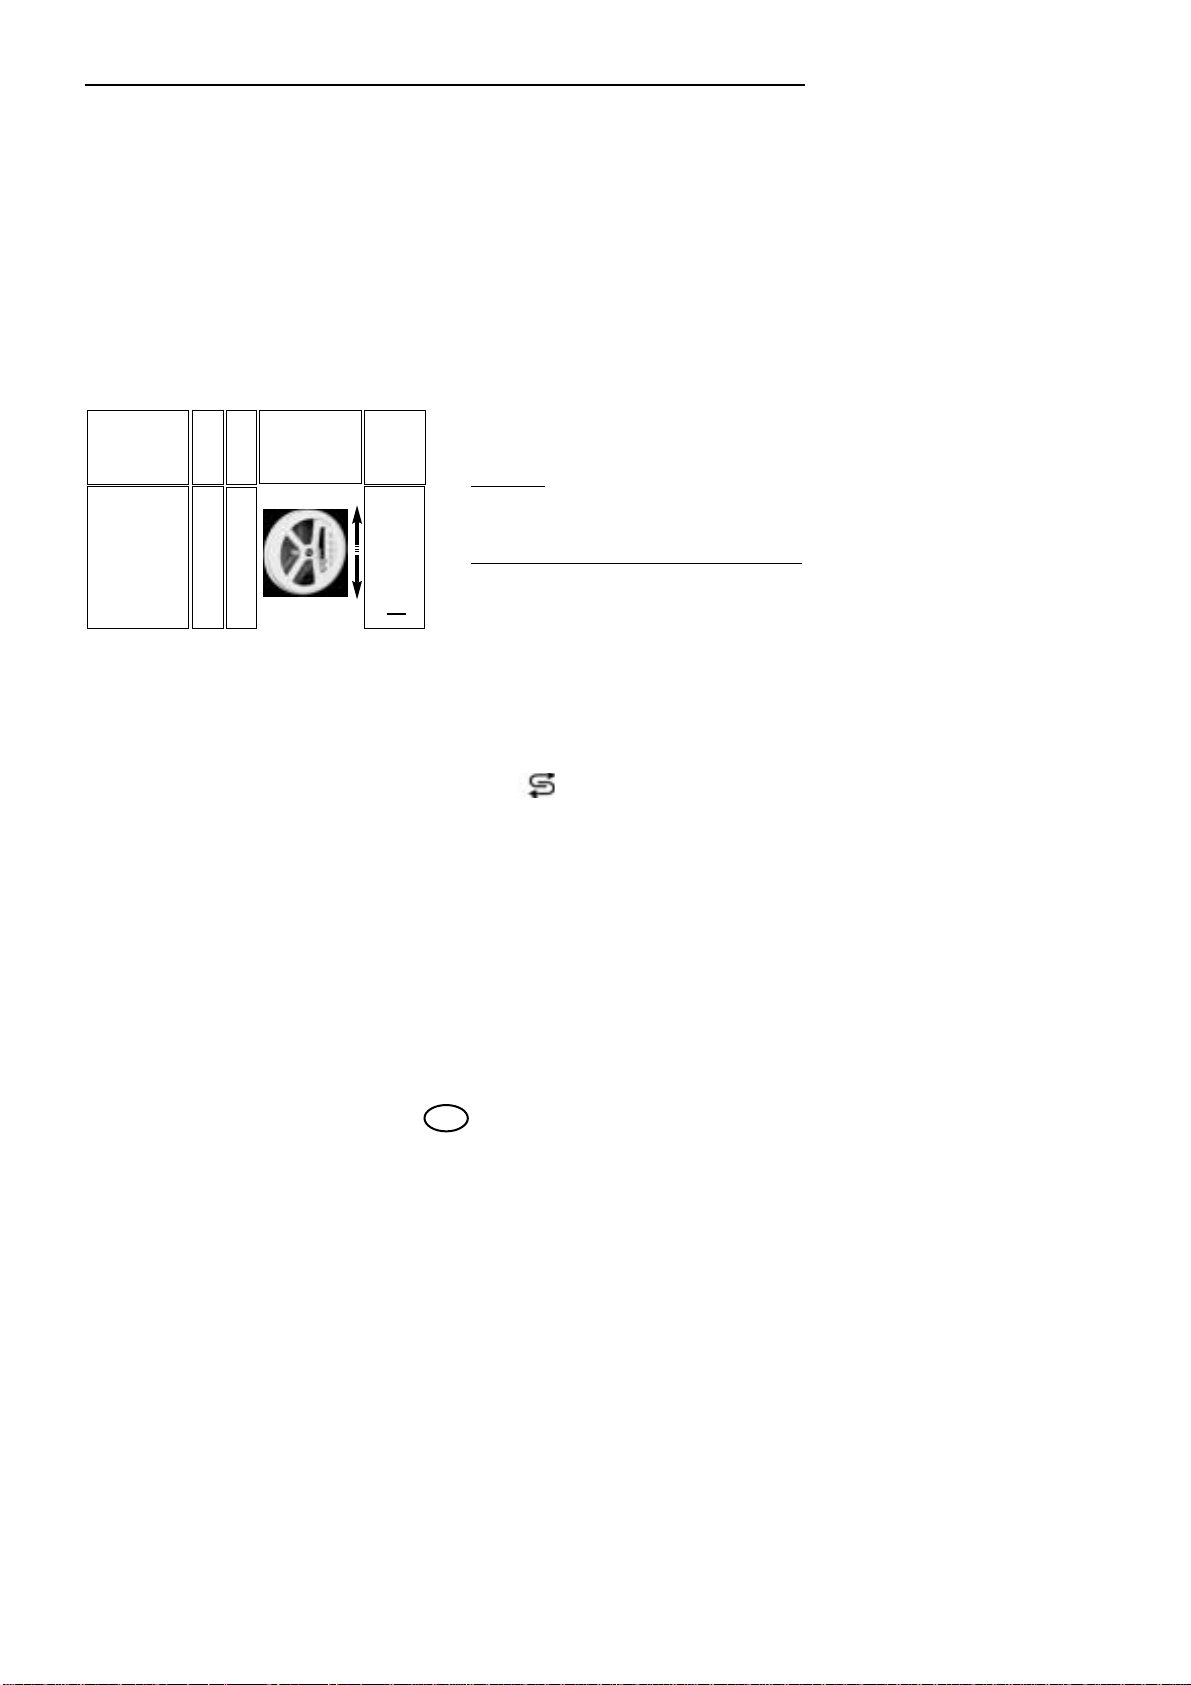
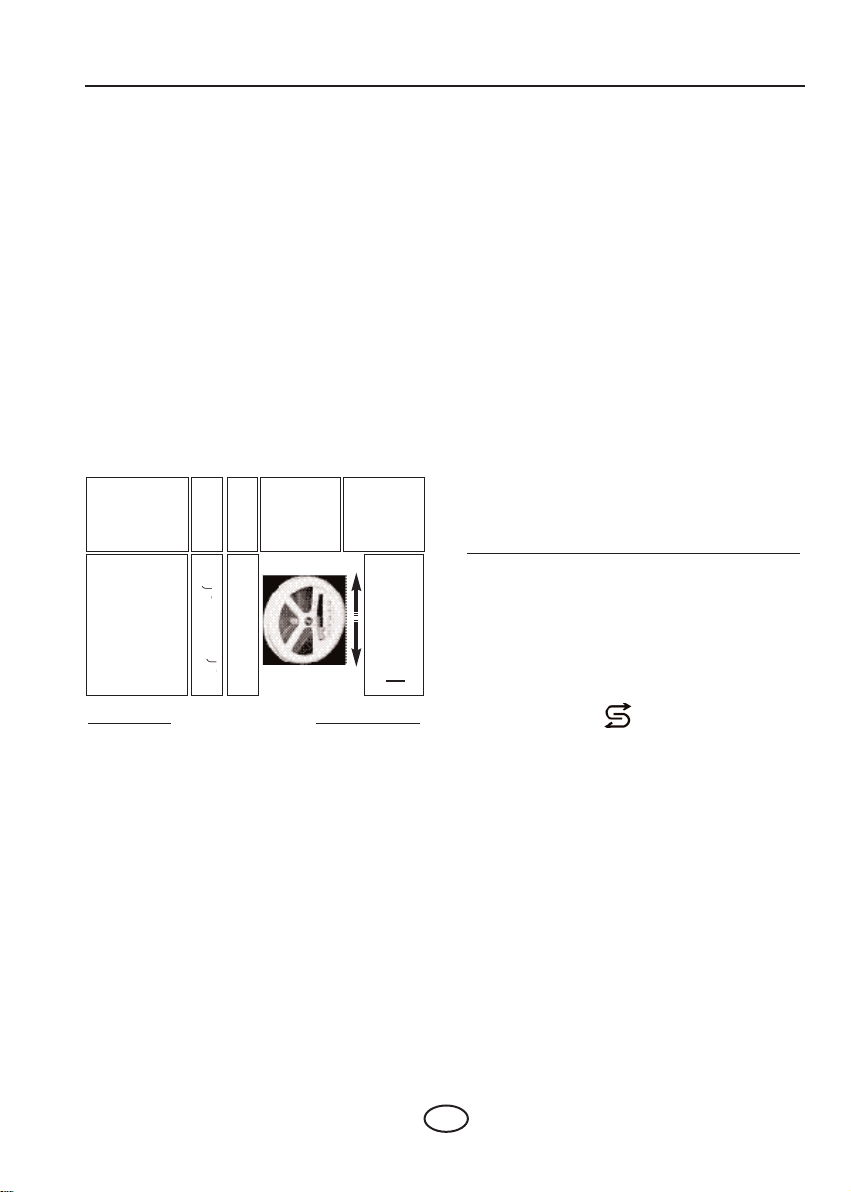
The upper basket should be adjusted to the
HIGH position when loading large plates in the
lower basket. The setting can be execute
basket in charge.
In order to obtain good cleaning results, be
sure to remove any large food residues before
switching on the machine. Any burnt or stuckon residues must be removed beforehand.
The model dish-washer has two racks for 12
place-settings, or 162 items (figures 10-11), to
standard DIN 44990.Always point the inside of
the crockery downwards. Ensure that no item
conceals another and that nothing obstructs
the spraying facility. After switching on, check
that the spraying arms can move freely. No
item should overlap the baskets.
Lower basket
(Fig. 8 - 9 - 11)
Place the dishes so that water may circulate
freely and spray all the utensils. (Avoid
attaching and piling dishes up).
This basket is especially intended to hold:
plates, cutlery, dishes, frying pans, saucepans.
Put large-sized plates and frying pans on
the side.
Avoid mixing plates and soup dishes.
You
should preferably place same-sized plates
together. Place soup dishes at the back, in
the high pin area.
Make sure nothing obstructs the rotation of
the lifting arm (saucepan handles, cutlery or
large dishes).
The cutlery trays slide
and can be put
anywhere on the lower basket. You can adjust
them according to the dishes you wash.
Removable grids
are available if you wish to
load cutlery in an orderly fashion.
For optimum washing, you can use these
separation grids.
Cutlery : (Fig. 13)
• Place handles downwards.
• Separate silverware from other metals using
the separating grill.
• It is preferable to place small spoons in the
separating grills.
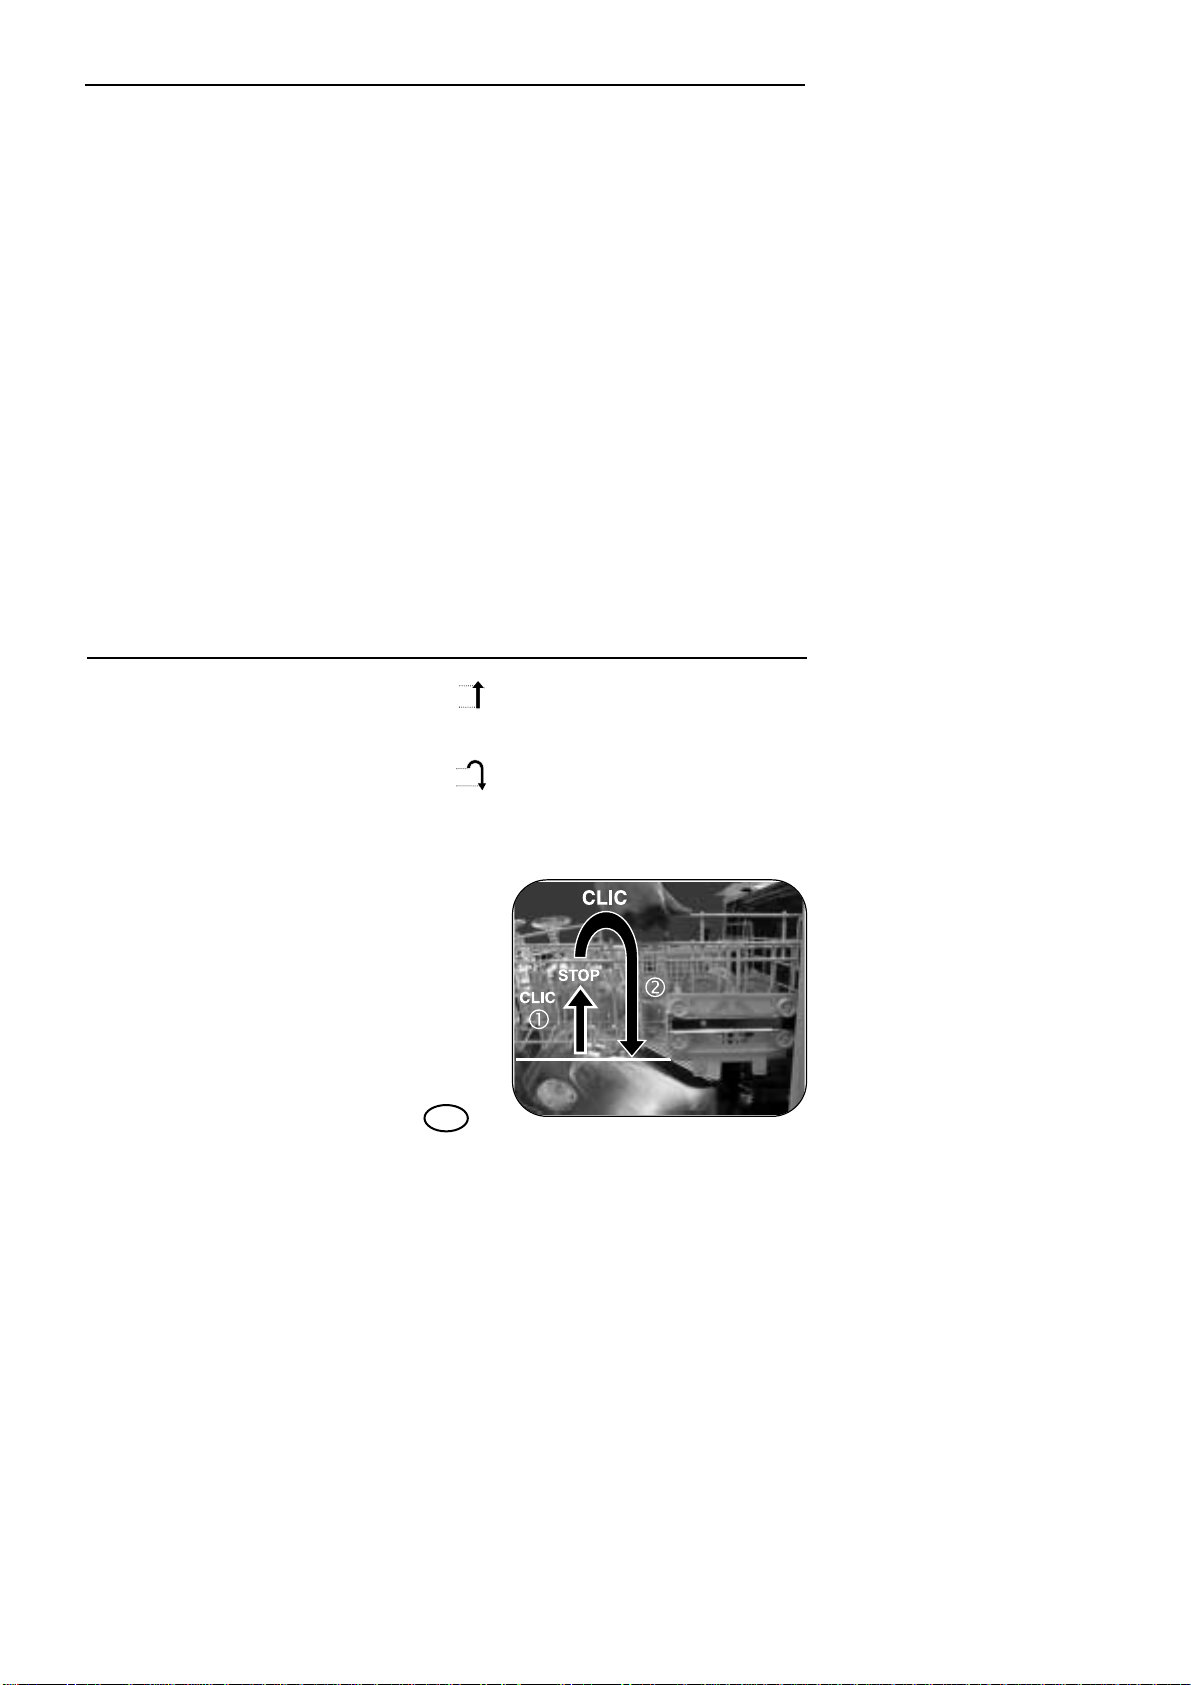
Setting the HIGH POSITION
Slowly lift the basket until you hear a
click
on each side.
Setting the LOW POSITION
Lift the basket completely on both sides
(click)
and then follow it downwards.
Make sure that the two runners are
adjusted to the same level.
①①
②②
GB
7
Presenting your Dishwasher
These values refer to normal conditions of use.
They may vary depending on the load, the
temperature, the hardness of the water or the
supply voltage
Loading the dishwasher
IMPORTANT NOTE :
For
reasons of safety, we recommend you
place sharp-ended table knives blade
down in the cutlery basket.
Long-bladed cutlery and other sharp
utensils should be placed flat in the upper
basket
.
Objects not suitablefor your
dishwasher
- Wooden chopping boards
- Pewter or copper objects
- Non-stainless steel objects
- Cutlery with wooden, horn or mother-of-pearl
handles
- Antique or hand-painted crockery
When buying dishes or cutlery, check they are
suitable for dishwashers.
①
⑤
②
➅
④
⑦
➇
③
Water*Electricity
Intensive 70°C 17/18 L. 1,80 kWh
Normal 60°C 17/18 L. 1,70 kWh
Eco 55°C 17/18 L 1,55 kWh
BIO 50°C 18 L. 1,24 kWh
Fragile 45°C 17/18 L. 1,25 kWh
Soak 5 L. 0,10 kWh
*
(according to drying)
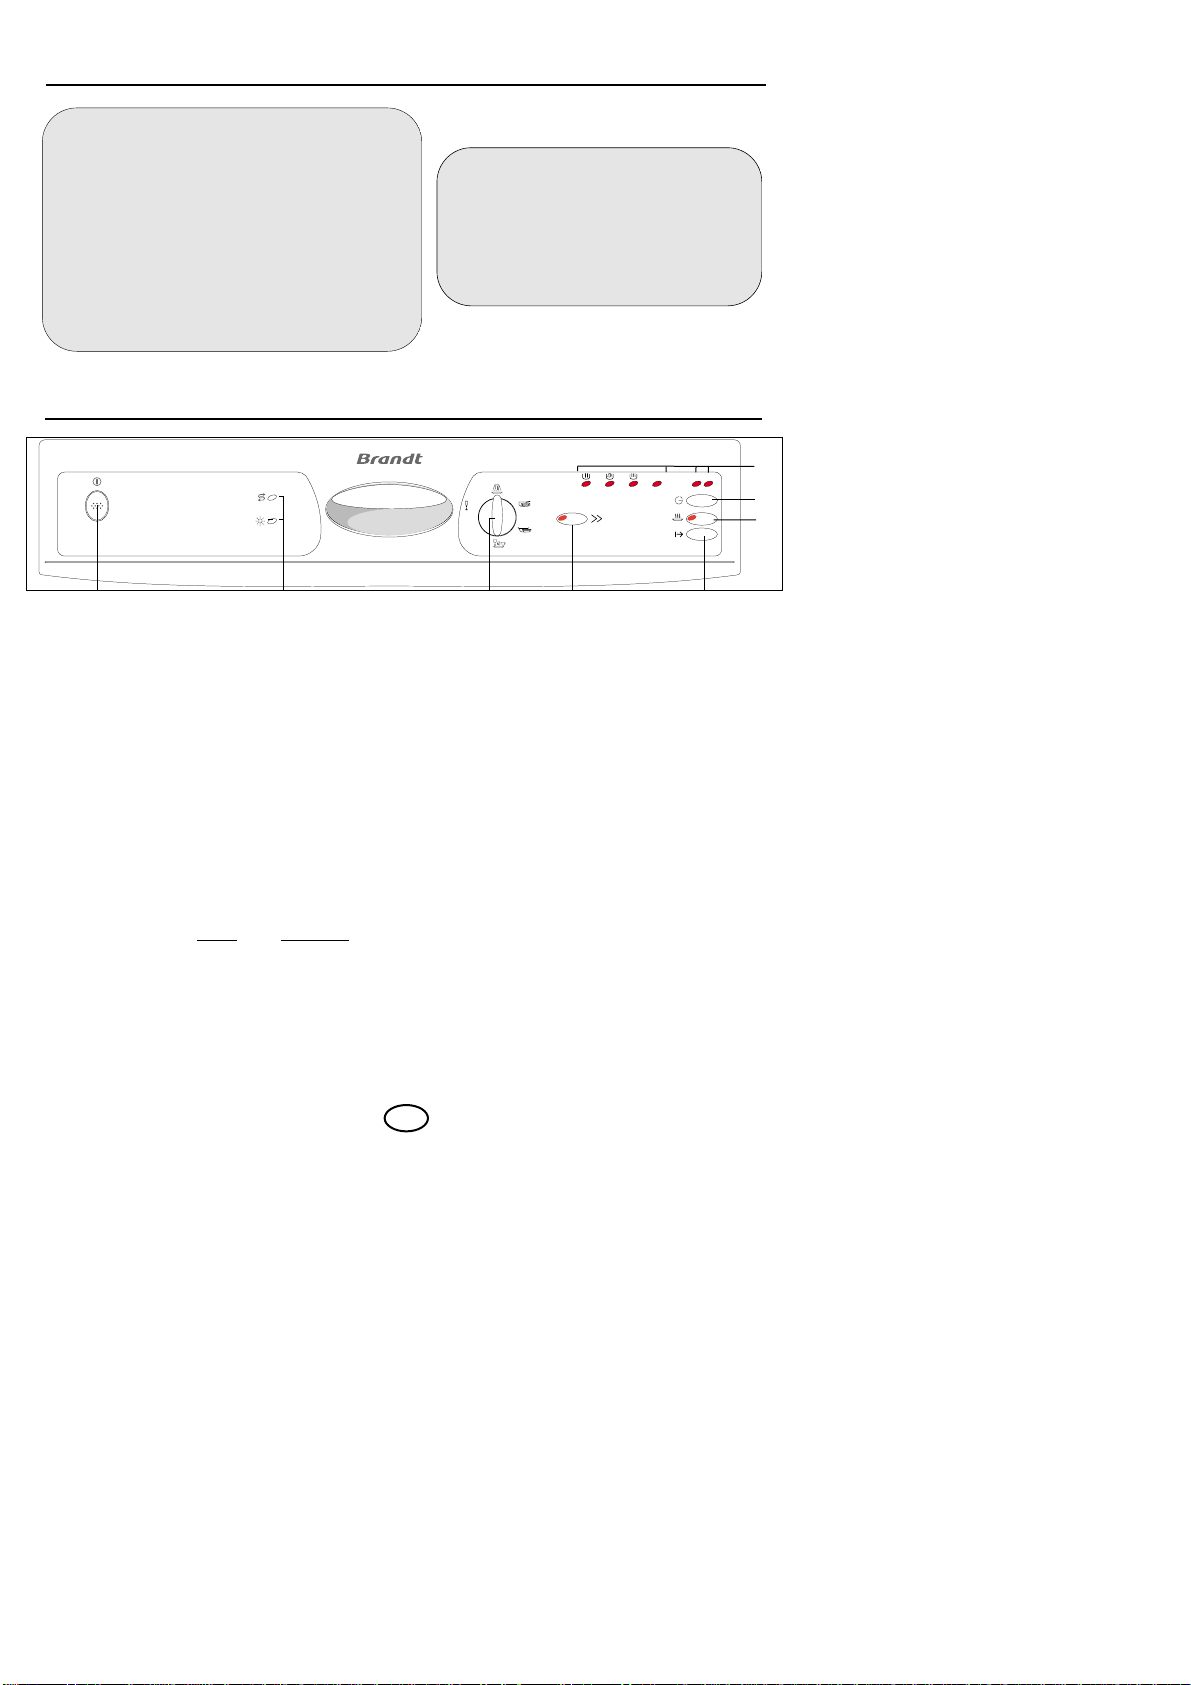
① START/STOP: Press this button to switch your dishwasher on.
② PROGRAMME KNOB: Turn this knob to select your programme.
③ OPTION BUTTON: Press this button if you wish condenser drying.
④ START/CANCEL: Pressing this button starts this programme.
Holding the button pressed down for 2 seconds cancels the
programme.
⑤ INDICATOR LIGHTS: These indicate lack of a washing product: regenerating salt, rinsing
agent.
➅ PROGRAMME INDICATORS: These show the programme time, the delayed start time and the
water hardness setting.
⑦ DELAYED START: Press this button to delay the start of the programme.
➇ RAPID BUTTON: Press this button if you want a quick wash cycle.
3h 9h
Stop
45˚C
70˚C
Bio
50˚C
60˚C
55˚C

8
GB
Selecting a washing programme
①
Switching on your machine
After switching on your machine and selecting
your programme, press the
"Start"
button.
The programme progress lights illuminate
according to their role as the programme
progresses.
②
Selecting a traditional
programme
After switching on your machine, set the
programme knob to the desired position.
The programme progress lights illuminate
according to their role as the programme
progresses.
Soak
This very short cycle, which uses no detergent, enables you to keep your crockery
from drying out while waiting to be washed, if it will not be washed until the following
or the day after.
Intensive 70°C
Recommended for very dirty crockery with a large amount of dried-on residue:
grease, sauce, baked-on cheese and other residue. Everyday crockery and
cookware.
Normal 60°C
Recommended for dirty crockery with a normal amount of dried-on residue: everyday
crockery.
This programme is particularly suitable for "powder or liquid" detergent.
Eco 55°C
Recommended for dirty crockery with a normal amount of dried-on residue: everyday
crockery
This programme is particularly suitable for detergent in "tablet" form.
Bio 50°C
Recommended for slightly dirty crockery, not greasy and with only a small amount of
residue: coffee cups, dessert dishes or everyday crockery.
Bio 50°C + "Condenser drying" button selected
An economical, low-temperature programme suitable for all types of crockery
stains.
The washing cycle is extended to compensate for the low energy
consumption - low temperature. Consequently, we recommend using this
programme in the evening.
Fragile 45°C
Recommended for fragile crockery, only slightly dirty and with only a small amount of
residue: glass or fragile porcelain that does not withstand high temperatures
45˚C
Bio
50˚C
70˚C
60˚C
55˚C
45˚C
Bio
50˚C
45˚C
Bio
50˚C
45˚C
Bio
50˚C
45˚C
Bio
50˚C
45˚C
Bio
50˚C
45˚C
Bio
50˚C
70˚C
60˚C
55˚C
70˚C
60˚C
55˚C
70˚C
60˚C
55˚C
70˚C
60˚C
55˚C
70˚C
60˚C
55˚C
70˚C
60˚C
55˚C

GB
9
Selecting a washing programme
④
Starting the washing cycle
After programming the machine, press the
"START"
button.
This button does not remain pressed in.
The programme starts immediately if delayed
start has not been selected (indicator lights 3 9 hours unlit).
⑦
Selecting delayed programme
start
After selecting your programme, press the
"Delayed Start"
button.
If you wish to delay the start by 3 hours, the
relevant light illuminates.
Press the button again for a 9-hour delay
(pressing the button after a 9-hour delay is
indicated, selects immediate start).
Press the
"Start"
button.
The 3-hour or 9-hour light remains lit until the
programme starts.
Cancelling a programme
To do this, press the
"Start"
button down
for 2 seconds. The programme stops, the
progress light goes out and the "Stop" light
illuminates.
End of programme
The programme is ended when the "Stop" light
illuminates.
You can then remove your crockery.
The selected programme and the selected
"Condenser Drying"
option remain in
memory at the end of the cycle.
If you wish to cancel the option, press the
button again. The indicator light will go out.
Selecting option
③
or
➇
First select the washing programme (position
70°C to 45°C). The selected programme will
adapt itself to the chosen washing option.
Press the button for the chosen option. The
relevant light illuminates and goes out at the
end of the cycle.
If you wish to cancel the chosen option, press
the button again. The light will go out and you
can then select a new option, if required.
➇
Rapid wash
A rapid programme recommended for slightly
dirty crockery, not greasy and composed of
fragile items.
③
"Condenser Drying" option
To complete the drying of the various items of
crockery, your machine is equipped with a
condenser drying system.
This process dries your crockery perfectly, with
no steam when you open the door.
LThe missing product indicator
lights
go on when the machine is turned on.
Salt:
lights up when salt is low. After you
have added regenerating salt it may stay on
until the salt has dissolved sufficiently. This
happens generally after a cycle (or if you have
not properly filled the machine – see page 4)
for example when starting off with the sample.
Note:
where water is particularly soft
regenerating salt is not needed but the light will
remain on.
Rinsing product:
Goes on, door ajar,
when you should add rinsing product (see filling
page 5)
Economical and ecological washing
Do not pre-wash your dishes by hand.
Use all the capacities of your dishwasher. It will
wash economically and ecologically.
Always choose the programme best adapted to
the stains and the type of dishes.
Avoid using too much detergent, regenerating
salt and rinsing liquid. Observe the
recommendations contained in this manual
(pages 5, 6 and 7) as well as the product
manufacturer’s instructions.
Make sure that the water softener is properly
adjusted. (see page 4)
10
GB
Cleaning and maintenance instructions
• Your dishwasher comes with a self-cleaning
pulse filter that constantly filters small
particles of dirt trapped in the washing bath.
The filter and the main filter cannot be
dismantled as the cleaning arm constantly
cleans them.
N
EVERTHELESS
:
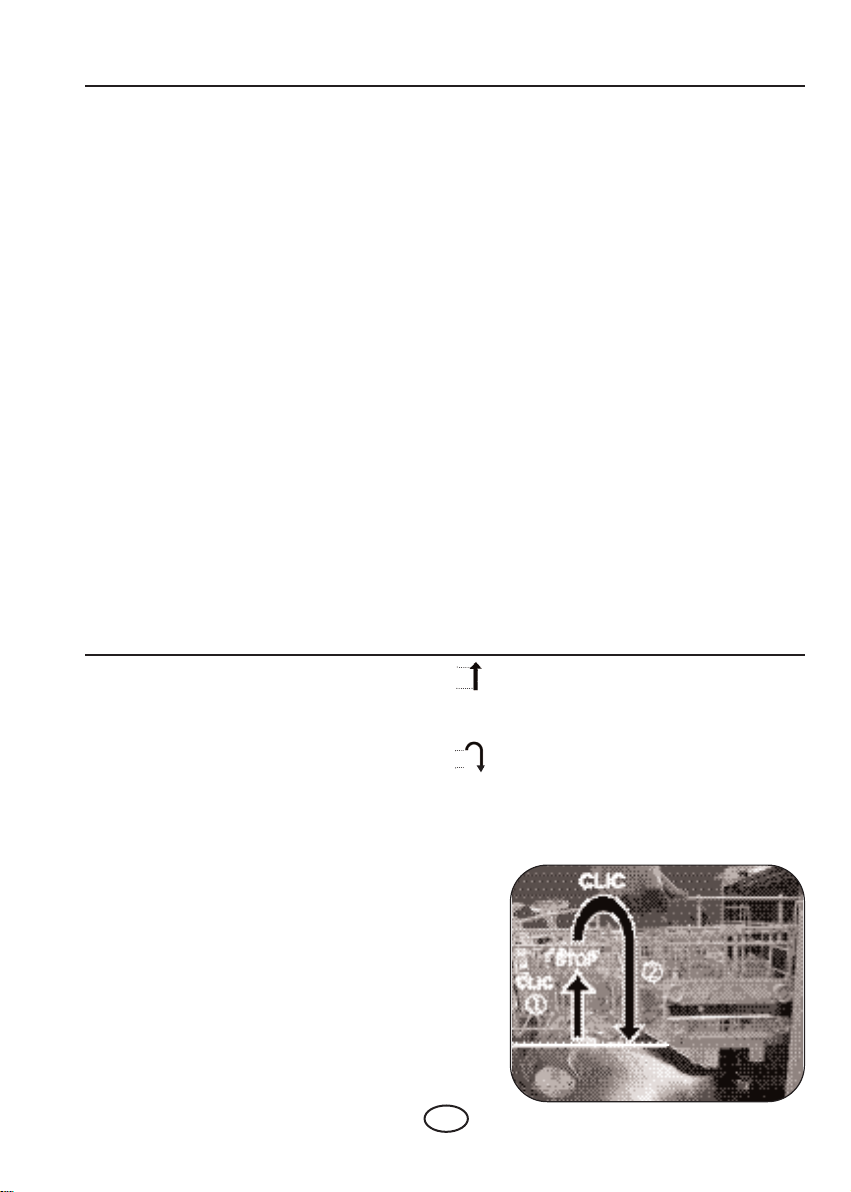
- regularly clean the waste trap. To do this:
Fig. 14
➀➀
Pull the waste trap handle upwards.
- clean the drainage outlet (3 to 4 times per
annum). To do this:
Fig. 14
➁➁
Remove the drainage outlet by
pushing the tab backwards, and then pulling
upwards.
- Remove residue using a brush.
- Clean under running water.
- Return the unit to its housing taking care that
it is well engaged.
Clean as necessary
• Underneath the filters, around the door and
the door joint with a damp sponge to remove
any deposit.
•
Use only soap and water for the bodywork
and control board.
Do not clean with abrasive powders, scouring
pads, spirit-based products or solvent.
Use preferably a cloth or a sponge.
• If you have stainless steel door you may use
products adapted for stainless steel. See the
manufacturer’s instructions for advice on their use.
Every year
To maintain your machine in perfect working
order you should clean it once or twice a year.
Run an intensive programme with the machine
empty and a special dishwasher cleaning product
available from any reputable dealer.
Prolonged period of non-use
Clean your machine completely then unplug the
electricity supply and close the water tap.
Keep the machine away from frost.
Information for test laboratories
COMPARATIVE TESTS
according to
:
Fig. 10-11
with the drying condensor activated
IEC 436, DIN 44990 :
Program “Normal 60° C”
EN 50242 :
Program “
Bio 50
°C”
•
Capacity : 12 place setting
•
Rinsing product set at
: 2 • Quantity
of washing product
: 30 g.
product
B
- It is essential that the softener be adjusted to a setting immediately above the recommended one,
according to the hardness of your water, to take into account the lack of phosphate in the
standardised detergent.
- Should deviations exist compared with EN0242 comparative tests regarding the degree of soiling,
the type of dishes and cutlery etc..., contact the manufacturer of the equipment before starting tests.
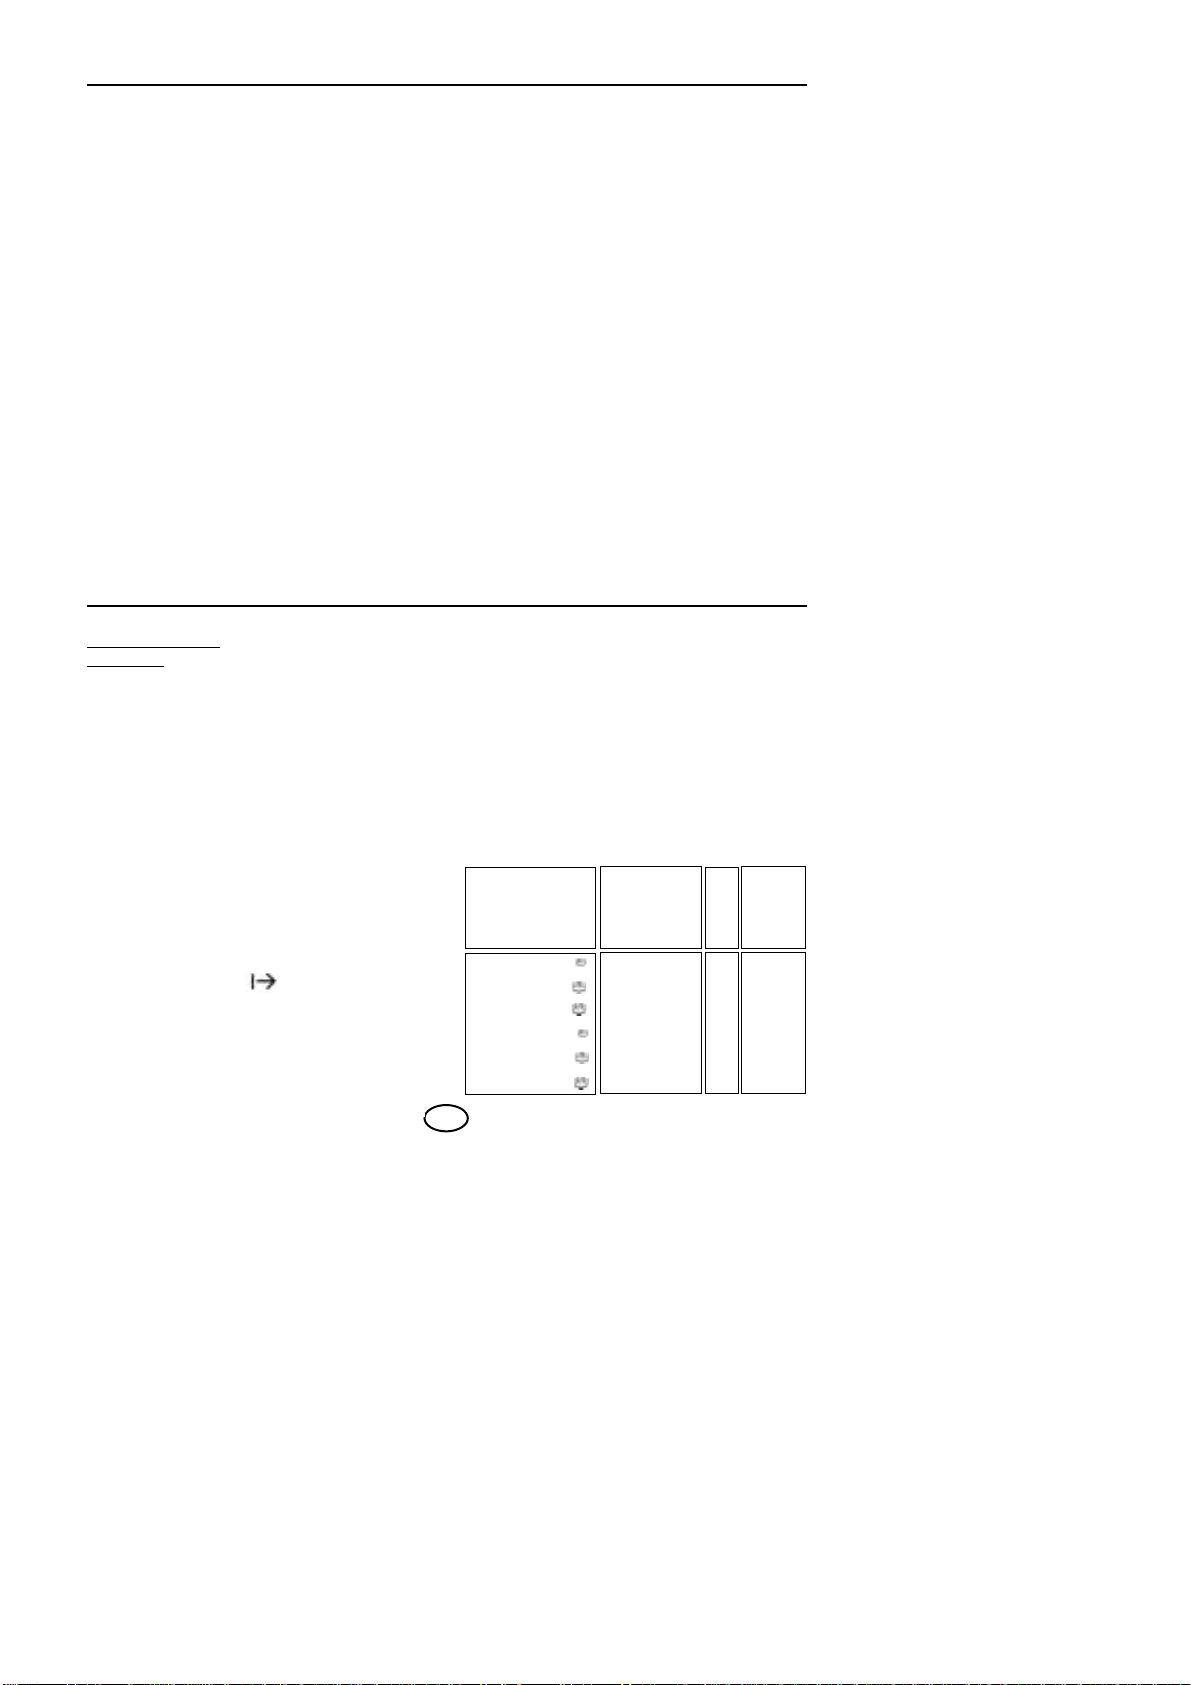
Electronic water-hardness setting
Prior to any operation, set the machanical
cursor to position 5 (refert to the paragraph on
saftener setting).
Hold down the
“Condenser Drying”
key, and
press the
“Start”
key. The waterhardness range is then indicated by the
indicator lights for programme progress as
indicated below:
To change the range, release and then repress the
"Start"
key while holding down the
"Condenser
Drying"
key.
Hardness of your
water supply (in
French degrees
of hardness)
0 to 10° F
10 to 25° F
25 to 35° F
35 to 45° F
45 to 70° F
> 70° F
N0
YES
YES
YES
YES
YES
salt
requirements
Number of
washes
between
two fills
(about)
—
120
50
30
20
15
Light on or flashing
Light on
Light on
Light on
Light flashing
Light flashing
Light flashing

GB
11
Troubleshooting
Problems
The dishwasher will not start
The dishes are not properly washed (or
their are stains in it)
Greasy stains
Limescale deposits on the dishes
The dishes are dull
Traces of salt (salty taste on the dishes)
Blackened or marked silverware
Traces of rust on knife blades
The dishwasher does not empty
Causes
- Is it plugged in ?
- Is the door properly closed ?
- Is the water connected ?
- Check that the “delayed start” is on “0” (according to the model)
- Programme choice. Choose the programme best adapted to the
type of wash
- Make sure nothing is blocking the circulation of the water
- Check the dishes are properly arranged.
- Only use specially designed washing products
- Check the waste well, filters, arms, joints and door rim are clean
- Clean the filter
- Check that the washing arm can freely rotate
- Increase the dose of washing product
- Use a new packet of washing product
- Choose a better adapted programme
Check it is limescale (clean with vinegar). If yes :
- Check the hardness of the water
Too soft water is aggressive for glasses.
- Check the hardness of the water
-
Reduce the softener and if necessary remove the regenerating
salt.
-
Add water to the salt pot and reload if necessary.
- Cap badly closed.
- Remove food residue immediately after use
- Separate silverware from other metals
- Choose detergent recommended for silverware
- Use knives suitable for dishwashers
- Remove the siphon stop valve
- Check the drain pipe is not bent or crushed
- You have moved your dishwasher and have tipped it backwards. To
restart the pump, unhook the draining rod, lay it on the floor at the
end of a basin, draining should restart. Then turn off the “Start/Stop”
button, put the draining rod back and restart your programme.
This machine complies with all applicable safety standards. Any
repairs should be carried out by a qualified technician. Repairs
carried out by unqualified technicians may be dangerous for the user.
If you have problems not covered by these
remarks, consult your dealer or After-Sales
Service. Have the machine type, series
number or that mentioned on the rating plate
(inside the door) ready.
You will so avoid unnecessary delays and
cost.


12
F
Table des matières
Page
Conseils de sécurité 13
Adoucissement de l’eau 14
Introduction du produit de rinçage 15
Introduction du produit de lavage 15
Chargement du lave-vaisselle 16 - 17
Présentation de votre lave-vaisselle 17
Sélection d’un programme de lavage 18-19
Instructions de nettoyage et d’entretien 20
Indications pour laboratoire d’essais 20
Remèdes en cas de pannes 21
Présentation de votre lave-vaisselle Fig. 1

F
13
Conseils de sécurité
Veuillez lire avec attention les informations sur
cette notice explicative. Elle vous donne les
indications nécessaires pour la sécurité,
l’installation, l’utilisation et les garanties de
l’appareil. Nous vous conseillons de conserver
cette notice et de la transmettre en cas de
vente au nouveau propriétaire de cette
machine.
Nous dégageons toutes responsabilités en cas
de non respect des indications ci-dessous :
- Prière d’éliminer l’emballage de manière
adaptée et conforme aux normes de la loi pour
la protection de l’environnement.
- Dans le cas où l’appareil est visiblement
endommagé, ne le branchez pas, mais
contactez votre fournisseur.
- L’emplacement doit être hors gel. En cas de
gel, il est possible que les parties hydrauliques
soient endommagées.
- Les tuyaux d’alimentation et d’évacuation
doivent être branchés conformément à la
notice. Des branchements incorrects peuvent
entraîner des dommages.
- Afin d’assurer une bonne stabilité, les
appareils encastrables doivent être installés
sous un plan de travail continu fixé aux
meubles voisins.
- Il est déconseillé de monter ou de s’appuyer
sur la porte ouverte du lave-vaisselle.
L’appareil peut basculer ou être endommagé.
- La machine a pour fonction le lavage de la
vaisselle et ne doit pas être utilisée pour
d’autres usages.
- Pour l’entretien de votre lave-vaisselle
l’utilisation de solvants est fortement
déconseillée.
- Veuillez stocker les produits pour lavevaisselle ainsi que les autres produits de
nettoyage hors de la portée des enfants. Ces
produits ont, s’ils sont avalés, un effet corrosif
pour la bouche et le pharynx.
- Dans le cas d’un mauvais fonctionnement de
l’appareil suite à d’autres causes que celles
mentionnées sur cette notice, débranchez
l’appareil (retirez la prise) ou couper le circuit
concerné et prenez contact avec notre service
après-vente.
- L’appareil répond aux consignes de sécurité
en vigueur. Les réparations éventuelles doivent
être effectuées par des personnes qualifiées.
Les réparations ou changements non
conformes peuvent entraîner des dangers pour
l’utilisateur. Dans le cas d’un remplacement,
n’utilisez que des pièces d’origine.
- Les appareils hors service doivent être
apportés au centre de recyclage le plus
proche. Détruisez le système de fermeture de
porte afin que celle-ci ne ferme plus (des
enfants peuvent s’enfermer en jouant à
l’intérieur de l’appareil - risque d’étouffement).
Coupez le câble d’alimentation électrique après
avoir enlevé la fiche de la prise de courant.
- II est fortement conseillé de mettre l’appareil
hors tension après usage et de fermer le
robinet d’arrivée d’eau.
- Ne laissez pas les enfants jouer avec la
machine ou manipuler celle-ci.
- L’eau à l’intérieur du lave-vaisselle n’est pas
potable.
- Pendant le fonctionnement de la machine, ne
pas ouvrir la porte au risque de provoquer des
fuites importantes de vapeur ou des projections
d’eau.
14
F
Adoucissement de l’eau
Remplissage du réservoir à sel
régénérant (fig. 5)
Le remplissage en sel est indispensable pour
régénérer les résines qui adoucissent l’eau en la
débarrassant de son calcaire, sauf si l’eau du
réseau est suffisamment douce (voir “réglage de
l’adoucisseur”).
Cette opération de remplissage doit s’effectuer
juste avant de lancer un programme.
1 - Dévissez et enlevez le bouchon du réservoir à
sel.
2 - A l’aide de l’entonnoir fourni, remplissez le
réservoir avec du sel régénérant spécialement
conçu pour lave-vaisselle.
3 - La première fois, complétez avec de l’eau
jusqu’au bord du réservoir.
Revissez bien à fond le bouchon du réservoir à sel.
Important : Dans le cas où le réglage de
l’adoucisseur ne nécessite pas de sel régénérant
(0 à 6°dH), il est tout de même impératif de
remplir le réservoir à sel avec de l’eau lors de la
mise en service.
Ne jamais verser de détergent dans ce réservoir,
vous détruiriez l’adoucisseur.
N’utilisez que du sel de régénération “spécial
lave-vaisselle“. Ne pas employer de sel de table,
sel de cuisine ou autres. Ces sels peuvent contenir
des éléments non solubles et annuler la fonction de
l’adoucisseur.
Repérage du niveau de sel régénérant
Un voyant lumineux situé sur le bandeau de
commande vous indique qu’il faut rajouter du sel
régénérant.
En cas de déménagement ou après une
modification de l’alimentation en eau de votre
appareil, ajustez la dureté de l’eau. Renseignezvous auprès du Service des Eaux local.
Dureté de l’eau
(en degré français
de dureté)
> à 70° F *
45 à 70°F
35 à 45°F
25 à 35°F
10 à 25°F
0 à 10°F
OUI
OUI
OUI
OUI
OUI
NON
Réglage
situé à
gauche dans
la cuve
5
4
3
2
1
1
besoin en sel
Position
Nbre de
lavages entre
2 remplissages
(environ)
20
30
50
120
IMPORTANT: Le curseur doit être impérativement
en face d’un chiffre.
Réglage de l’adoucisseur
Le réglage de l’adoucisseur doit être effectué
correctement pour optimiser la consommation
de sel et pour obtenir un résultat de lavage
idéal. Pour cela :
• Vérifiez la teneur en calcaire de votre eau à
l'aide de la bandelette aqua-test fournie.
• Réglez l’adoucisseur en suivant les instructions
qui accompagnent la bandelette et à l’aide du
tableau ci-dessous.
En fonction du résultat, réglez le curseur à la
position.
* Pour les eaux >70°F (position 5) consultez
votre revendeur.

F
15
Introduction du produit de rinçage
Le produit de rinçage est nécessaire car il
permet d’éviter les traces de gouttes sur la
vaisselle et favorise le séchage.
IMPORTANT
! Utiliser seulement des
produits prévus pour lave-vaisselle et NON
des produits lessiviels destinés au lavage à
la main !
Remplissage et réglage du distributeur
de produit de rinçage
(fig. 6 - 7)
Afin de remplir le compartiment, mettez la porte
dans la position horizontale et dévissez, dans
le sens des aiguilles d’une montre, le bouchon
se trouvant sur la porte.
Remplissez jusqu’à affleurer le haut du levier
de réglage.
En cas de débordement de produit lors du
remplissage, épongez l’excès pour éviter la
formation de mousse.
Vous pouvez si besoin, après quelques cycles
en cas de traces ou de mauvais séchage,
ajuster le réglage au moyen du sélecteur :
Eau douce : repère 1 pour diminuer le dosage,
Eau dure : repère 3 pour l’augmenter.
Repérage du niveau de produit de
rinçage
Un voyant lumineux situé sur le bandeau de
commande vous indique qu’il faut rajouter du
produit de rinçage.
Introduction du produit de lavage
Pour faciliter le chargement de la lessive, le
distributeur à produits de lavage est situé en
face avant du panier supérieur. Ce qui vous
permet de mettre la lessive sans vous baisser
ni ouvrir complètement la porte.
pastille
poudre ou liquide
Utilisez des produits de lavage spécialement
conçus pour lave-vaisselle. Reportez-vous
aux indications du fabricant figurant sur
l’emballage ainsi qu’aux conseils d’utilisation
ci-dessous.
Ce distributeur vous offre le choix d’utilisation de pastille ou
lessives poudre et liquide.
Avant de lancer un programme de lavage :
• Disposez la pastille dans le compartiment extérieur. L’utilisation
des pastilles est plus particulièrement recommandée pour le
programme Eco et pour un chargement complet de vaisselle.
ou
• Tirez le distributeur pour approvisionner en lessive poudre ou
liquide et remplissez jusqu’au
repère min. pour une vaisselle peu sale
repère max. pour une vaisselle sale
Fermez le distributeur.
TRÈS IMPORTANT : Conservez tous ces produits hors de
portée des enfants et à l’abri de l’humidité.
16
F
Chargement du lave-vaisselle
Panier supérieur (fig. 10 - 12)
Ce panier est destiné plus particulièrement à
recevoir : les verres, les tasses, les ramequins,
les petits saladiers, les bols, les soucoupes etc.
Rangez vos verres de façon à limiter les points
de contact. Orientez le creux de verres, des
tasses des bols vers le bas. Rangez la
vaisselle de façon méthodique afin de gagner de
la place (rangée de verres, de tasses, de bols).
Vous avez la possibilité de déclipper la clayette
soucoupes de manière à profiter d’un maximum
de place.
Le chargement de grands plats dans le panier
inférieur nécessite le réglage du panier supérieur
en position haute. Le réglage peut être effectué
panier chargé.
Réglage en POSITION HAUTE :
Soulevez lentement le panier jusqu’à
entendre le premier clic de chaque côté.
Réglage en POSITION BASSE :
Soulevez le panier à fond des deux côtés
(clic) et raccompagnez le ensuite vers le
bas.
Assurez-vous que le réglage des deux
glissières est bien à la même hauteur.
①①
②②
Pour obtenir un bon résultat de lavage, prenez
soin, avant de charger la vaisselle, de la
débarrasser des résidus alimentaires
importants. Tous les restes brûlés ou attachés
doivent être préalablement éliminés.
Votre lave-vaisselle dispose de deux paniers
pour 12 couverts (140 pièces) selon la norme
DIN 44990 (fig. 10, 11). Toujours orienter
l’intérieur de la vaisselle vers le bas. Veillez à
ce qu’aucune pièce n’en cache une autre et
qu’il n’y ait aucune obstruction pour l’aspersion.
Vérifiez après chargement la libre rotation des
bras d’aspersion. Aucune pièce ne doit
dépasser des paniers.
Panier inférieur (fig. 8 - 9 - 11)
Disposez la vaisselle de façon à ce que l’eau
puisse circuler librement et asperger tous les
ustensiles.
(Évitez assiettes accolées, superposition).
Ce panier est destiné plus particulièrement à
recevoir : les assiettes, les couverts, les plats,
les poêles, les casseroles.
Placez les plats, les poêles de grand
diamètre sur les côtés.
Évitez d’intercaler les assiettes plates et
creuses.
Disposez de préférence à la suite les
assiettes de même forme. Placez les
assiettes creuses à l’arrière, dans la zone
des picots hauts.
Assurez-vous qu’aucun objet ne gêne la
rotation des bras de lavage (queue de
casserole, couverts ou plat trop grand).
Les paniers à couverts sont coulissants et
peuvent être disposés à n’importe quel endroit
du panier inférieur vous offrant ainsi la facilité
d’effectuer des chargements divers en fonction
des pièces de vaisselle.
Des grilles amovibles sont à votre disposition
si vous souhaitez un chargement des couverts
ordonné.
Pour un lavage optimum, vous pouvez utiliser
ces grilles de séparation.
Les couverts
(fig. 13)
• Orientez-les le manche vers le bas.
• Séparez l’argenterie des autres métaux en
utilisant la grille de séparation.
• Utilisez de préférence une grille de séparation
pour ranger les petites cuillères.
 Loading...