

Page 1
INSTALLATION(INSTRUCTIONS
1271 Instructions 9-11-14.doc Page 1 of 4
2010 – 2015 Chevy Equinox/GMC Terrain Qi Wireless Charging Kit
(Kit # FDMC-1271)
Please read thoroughly before starting installation and check that kit contents are complete.
Items Included in the Kit:
Tools & Supplies Needed:
Qi Wireless Charging Module with
Equinox/Terrain Specific Substrate and Mat
Power Harness with 3 amp Fuse
Adhesive Pad
These Instructions with Template
Removable Consumer Product Label
Plastic Trim Removal Tool
7mm Socket Drive
Center Punch/Scribe Tool
Power Drill
1/2” Drill Bits
Wire Ties
Soldering Iron & Solder
(Recommended)
Tape or Heat Shrink Electrical Tubing
*Note this product is designed to work with Qi compatible devices. Please confirm that
your device is Qi compatible before installation. Visit www.brandmotion.com for phone
compatibility guide.
Safety Precautions:
• Work in well ventilated area that is clear of obstructions.
• Secure vehicle with tire chucks in both front and rear of tires.
• Turn vehicle accessories OFF and ensure ignition key is in OFF position.
• Wear safety goggles and snug fitting clothes.
• Use tools only for their intended purpose and which are in good repair.
• Only perform this task if confidence, skill, and physical ability permit.
NOTE: We strive to provide accurate and up-to-date installation instructions.
For additional assistance please call Brandmotion Technical Assistance at (734) 619-1250 then dial 2.
IMPORTANT: Do not place smart keys
within 15cm of charging mat. Vehicle
may not detect key to start vehicle. Do
not place metal objects in tray while
charging.
Page 2

INSTALLATION(INSTRUCTIONS
1271 Instructions 9-11-14.doc Page 2 of 4
Step 1: Use a Plastic Trim Removal Tool to
remove left and right side console bin trim.
Step 2: Use 7mm Nut Driver to remove the
(4) 7mm nuts.
Step 3: Slide Plastic Trim Removal Tool under
floor of bin to help slide out
Step 4: Pull out storage bin and disconnect
Power Point and LED Connectors to
completely remove bin.
Step 5: Cut out provided template, place on
bottom of bin and mark ½ hole location.
Step 6: Drill 1/2” hole in marked location.
Page 3
INSTALLATION(INSTRUCTIONS
1271 Instructions 9-11-14.doc Page 3 of 4
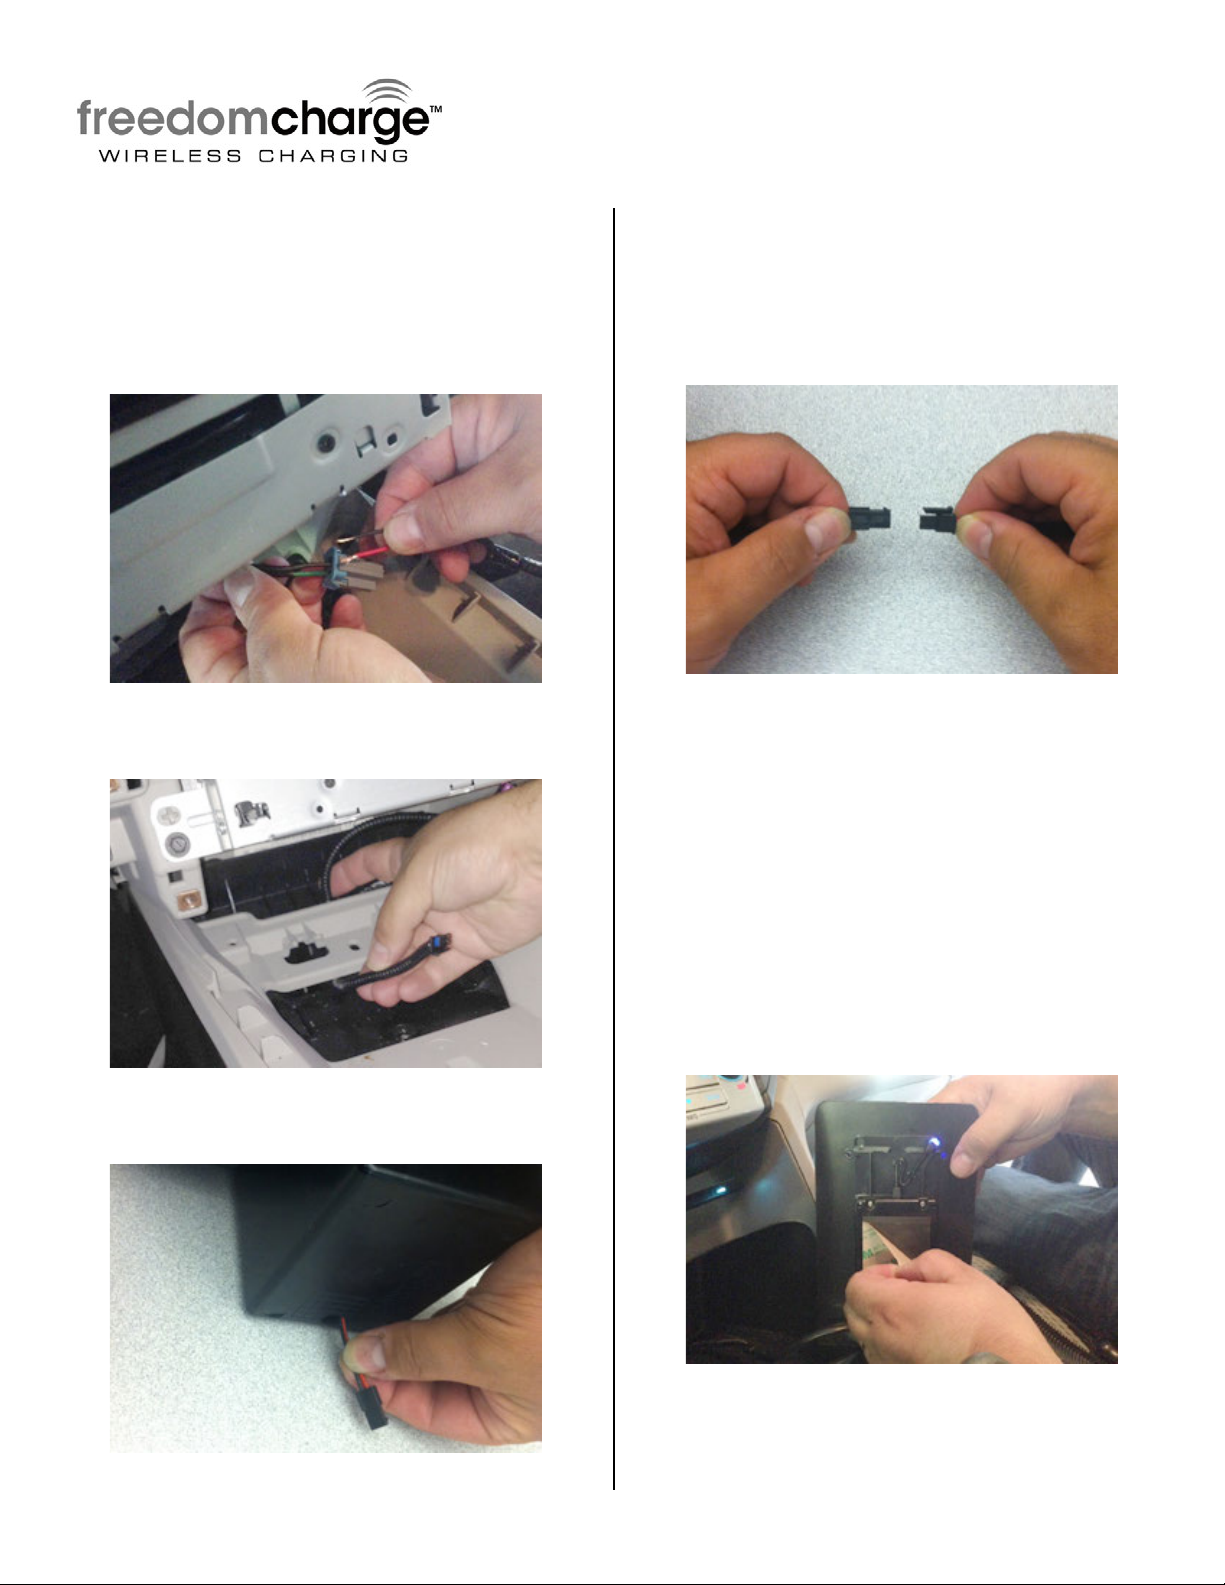
Step 7: Splice Red wire of Power Harness to
the Green (12v ignition) wire of the power
point plug and Splice Black wire of Power
Harness to the Black (ground) wire of the
power point plug
RECOMMENDED: Solder wires and cover with Heat
Shrink Tubing.
Step 8: Route Power Harness under plastic
console cross brace.
Step 9: Route Plug of Charging Module
through 1/2" hole and place module in bin.
Step 10: Connect Charging Module to Power
Harness and reconnect PowerPoint and LED
Connectors. Re install the (4) 7mm bolts to
secure bin.
Step 11: Test system. LED light will
illuminate Blue once accessories are on.
Once Qi equipped device is placed on
Freedom Charge LED will illuminate Green
and charging begins. *Please note on some
devices syncing may take up to 15 seconds. Coil
locations vary on various devices; move device on
mat until LED illuminates green.
Step 12: Using the double sided Adhesive
Pad provided in kit remove one side of
backing and attached to Charging Module
then remove backing from other side.
Page 4
INSTALLATION(INSTRUCTIONS
1271 Instructions 9-11-14.doc Page 4 of 4
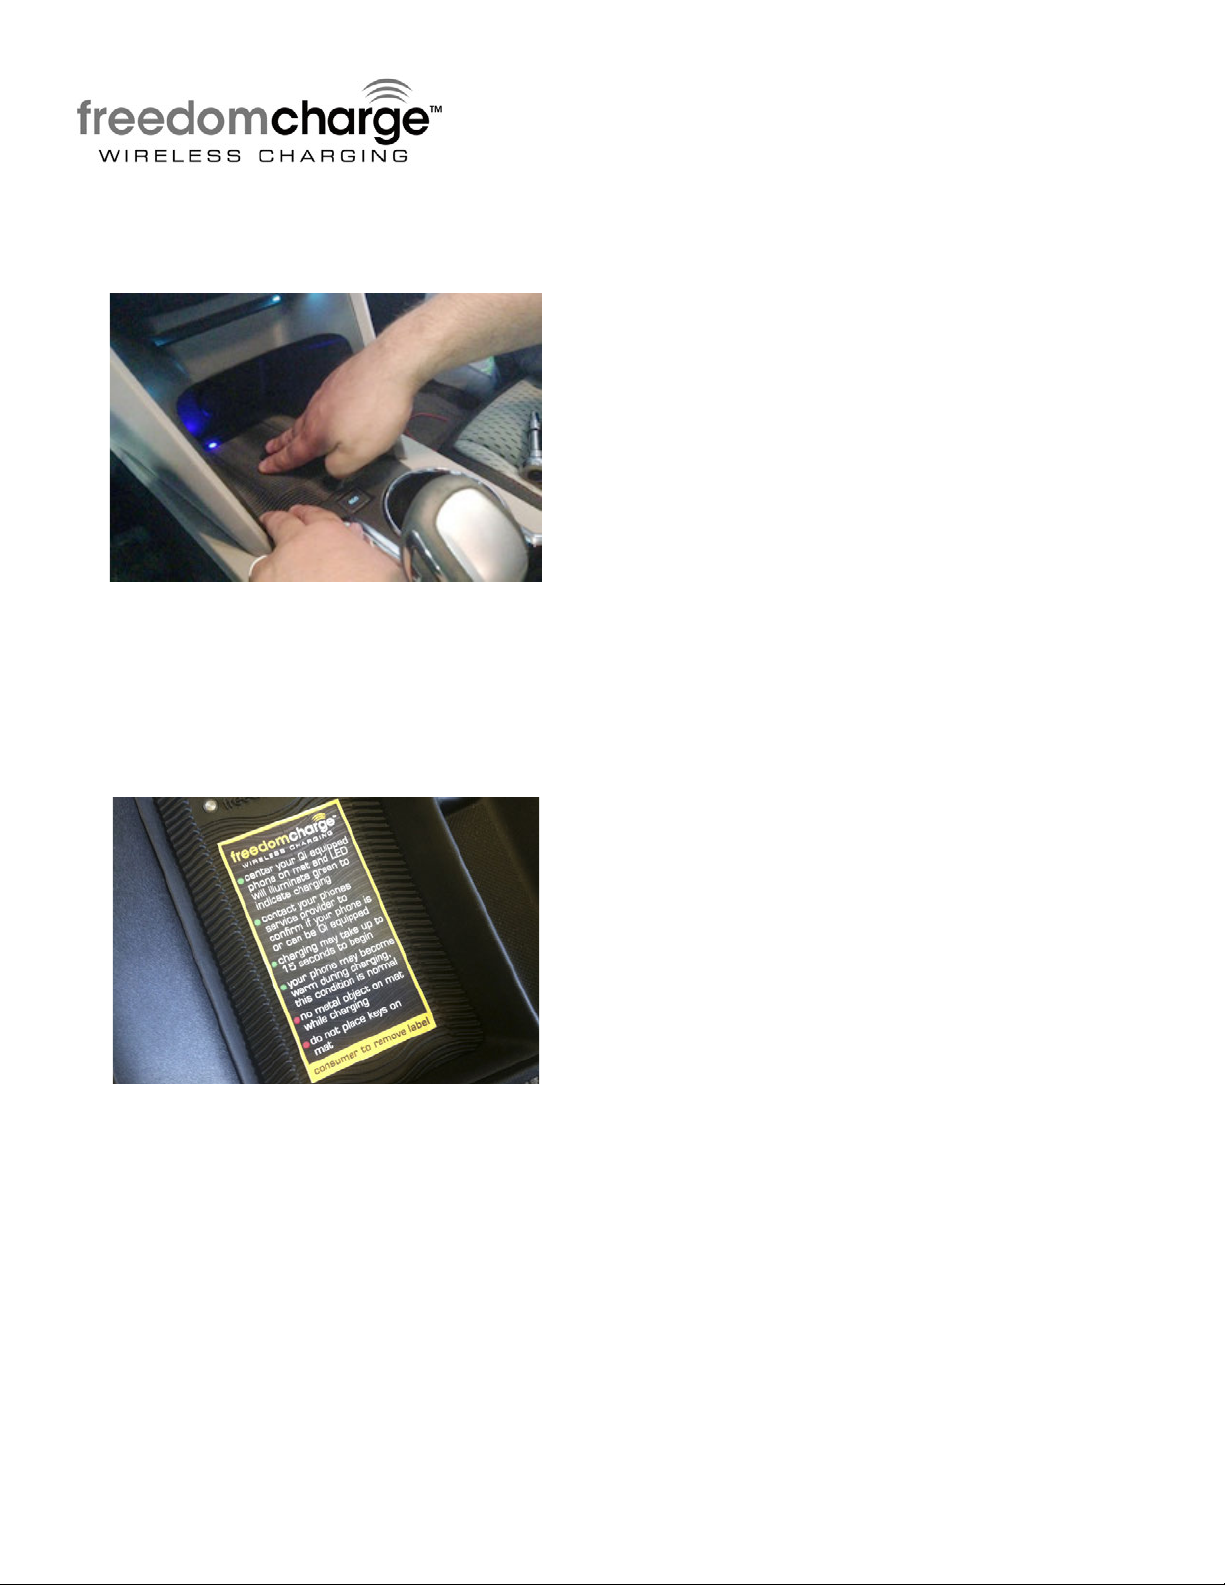
Step 13: Carefully place Charging Module in
bin insuring it is sitting all the way back.
Then firmly press Charging Module down.
Step 14: Reassemble vehicle. Follow your
disassembly steps in reverse order, taking care not
to bind the harness wiring when reinstalling trim.
Step 15: Place removable consumer product
label on center of mat.
 Loading...