

Page 1
220 East Huron St Suite 235
Ann Arbor, MI 48104 Tel 734-619-1250
www.brandmotion.com 1 Fax 480-247-5999
Installation Instructions Curb Alert PRO
Preparation:
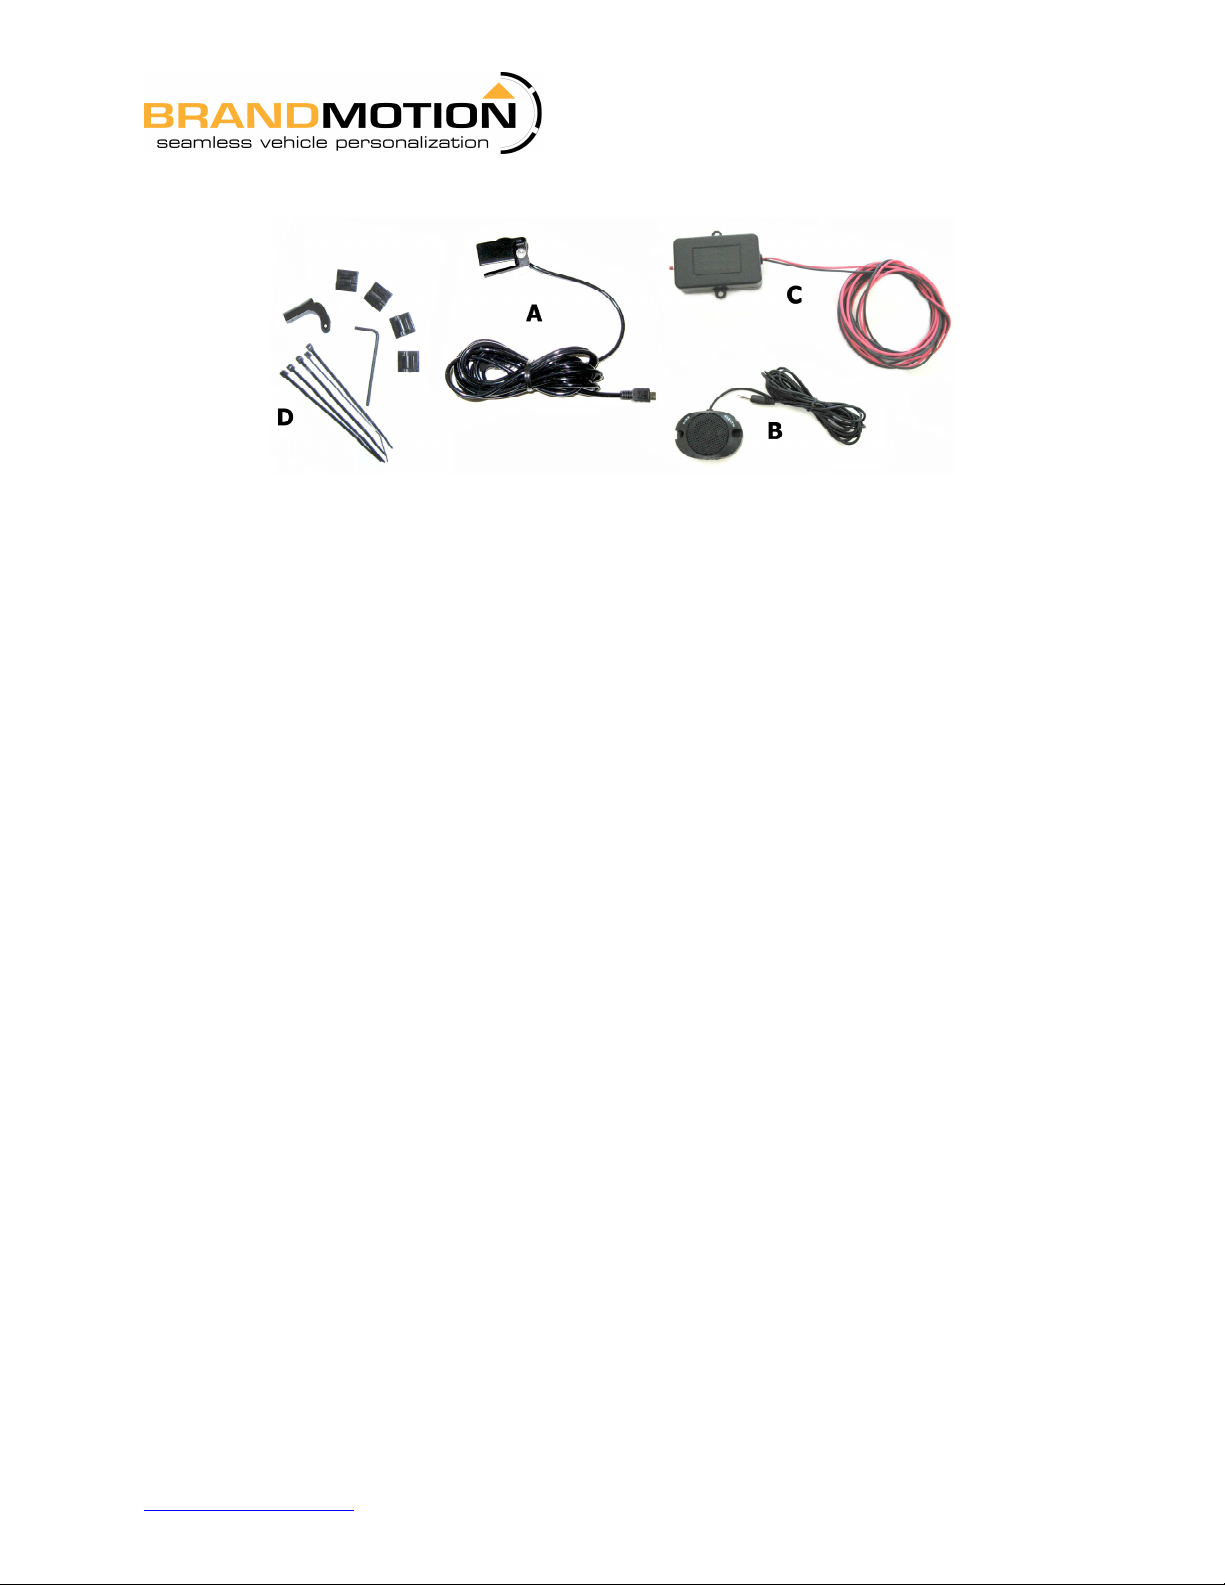
1) Identify and familiarize yourself with all components of kit
• A: Proximity Sensor
• B: Buzzer with built-in Power Off-Lo-Hi switch
• C: Main Module with built-in Program Switch
• D: Accessory pack including Top Mount Bracket as well as cable ties, mount tabs and Allen wrench
• NOTE: Do NOT discard box as it will be used during calibration of system at final steps.
Installation:
2) Find an appropriate place to mount all components
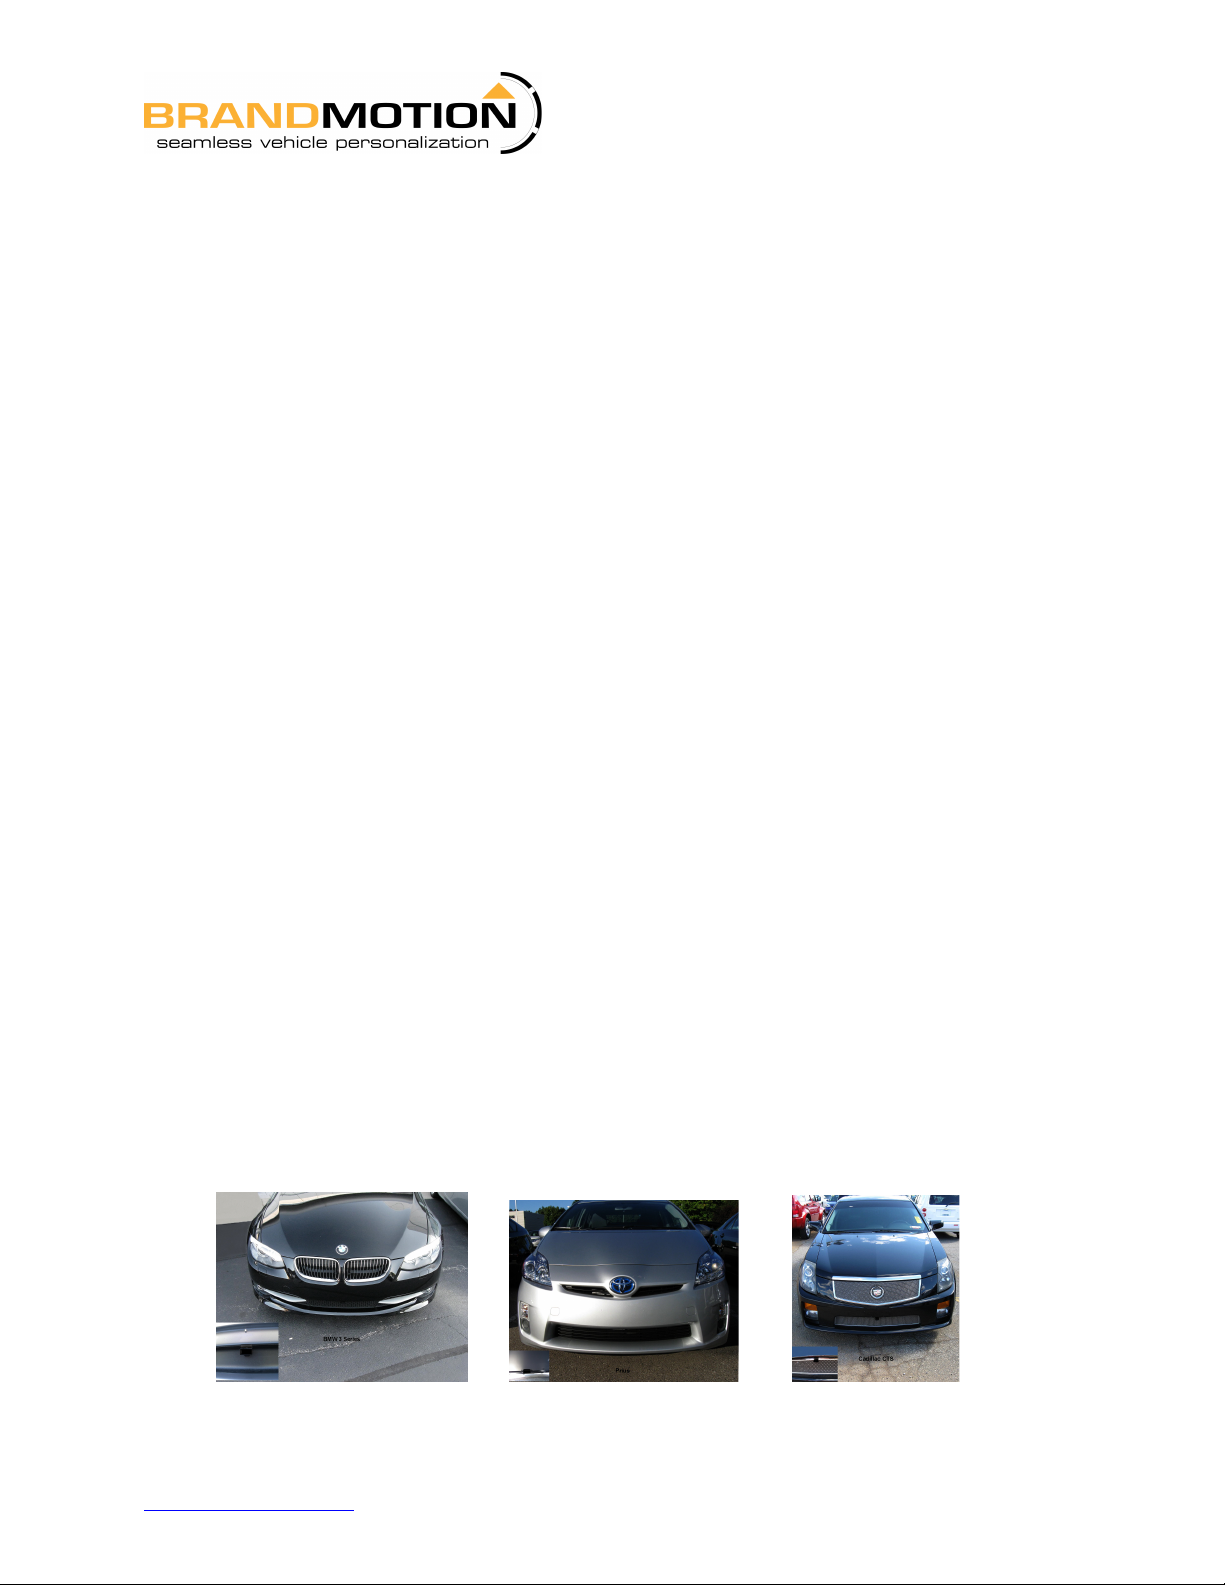
• The Proximity sensor MUST be mounted as close as possible to the center of the front of the vehicle
with a clear line of sight to the curb (it is an IR sensor and so it CANNOT be mounted behind the
license plate, any panel and or object that will obstruct its view).
Note: the sensor must be placed where it will not be easily struck or damaged by road debris or so low
that it will be damaged during entry or exit out of driveways.
• The Buzzer must be accessible to the vehicle owner in order to allow operation of the built-in Power
switch.
• The Main Module must be mounted in the cabin area where it will be easy to program for proper
operation once installed (the program switch will NOT be used by customer once installation and
proper programming is done and so it can be hidden out of sight).
3) Installing hardware:
• Clean the mounting surface where the sensor will be adhered using a clean cloth and a cleaning
solution or alcohol. \\Make sure not to leave any residue on the surface (do NOT tighten Allen screw
completely as the sensor will be adjusted later during programming).
• Route the sensor harness through the firewall into cabin area making sure to stay away from any
moving parts and away from extreme temperature engine components.
• Mount the Buzzer by first cleaning the surface with either a cleaning solution or alcohol.
• Mount the Main Module using the supplied cable ties making sure not to obstruct any objects such as
the steering column and or foot petals under the steering column area (make sure that nothing will
accidentally press the Program switch as this will de-calibrate the unit).
• Connect the buzzer as well as the sensor connector to the module, leave about a 1/8th of an inch of
slack. Use a cable tie to secure them to the power cable (this will insure that the connections will not
come lose while vehicle is in normal operation).
4) Power connection:
• Connect the BLACK wire of the power harness to a good solid ground (it is recommended to trim
cable to appropriate length).
Page 2
220 East Huron St Suite 235
Ann Arbor, MI 48104 Tel 734-619-1250
www.brandmotion.com 2 Fax 480-247-5999
• Connect the RED wire of the power harness to an Ignition controlled power source (it is recommended
to trim cable to appropriate length).
5) Programming:
(It is important that the device be programmed in the vehicle on a flat surface with NOTHING in front of the vehicle
for a minimum of 4 feet).
• A- Slide power switch on Buzzer to Hi position
• B- Aim sensor about 5 to 10 degrees higher than horizontal
• C- Turn Ignition switch to Run position (System will emit a series of beeps)
• D- Place box on either 3” or 4” side depending on how high curbs are in your local area at a distance of
20” from the front of the vehicle.
• E- Rotate sensor down until it is pointing at the top edge of the front of the box (the sensor has a pencil
beam IR line of sight and so it must be aimed properly).
• F- Press the Program switch and the unit will beep 2 times followed by a constant tone (if this did not
happen return to step E and possibly aim sensor slightly lower then repeat step F).
• G- Raise box straight up and as soon as the sensor no longer detects the box the solid tone will stop
(this will confirm that the sensor is aimed properly. If the sensor continues to emit a tone with the box
lifted the sensor is aimed too low and is picking up the road, if so repeat steps E & F and retry step G).
• H- If the distance is acceptable and the height is accurate then simply turn Ignition switch Off and the
distance will now be programmed in (if you prefer a different distance then place the box at the desired
distance and redo all steps starting with step D).
6) Pre-delivery testing:
• Tighten sensor to screw using supplied Allen wrench to insure that the sensor will not move during
normal operation.
• Place box in front of vehicle at a distance of 30”
• Turn Ignition On (unit will beep to confirm power up)
• Slide box toward vehicle until 3 beeps are heard from Buzzer.
• Measure distance from box to vehicle and the distance and height should be as they were when
programmed.
7) Use, Care and Maintenance:
• When the vehicle is turned ON you will hear a series of beeps to notify that the device is up and
running
• Simply drive up to the curb at a slow speed (the device is intended for curbs that are vertical to the
parking space, curbs that are at an angle will not be detected properly), and once the curb is within
programmed distance the device will beep to notify you to stop.
• The device will shut down automatically when the ignition key is turned OFF.
• It is recommended that every time the oil is changed on the vehicle the sensor should be inspected for
proper angle of adjustment and to insure that the sensor screw has not come loose.
• At every car wash the sensor should be wiped down and any debris that are obstructing the lens be
removed (the sensor is relies on line of sight and so any build up will affect its performance).
BMW 3 Series Toyota Prius Cadillac CTS
 Loading...