

Page 1
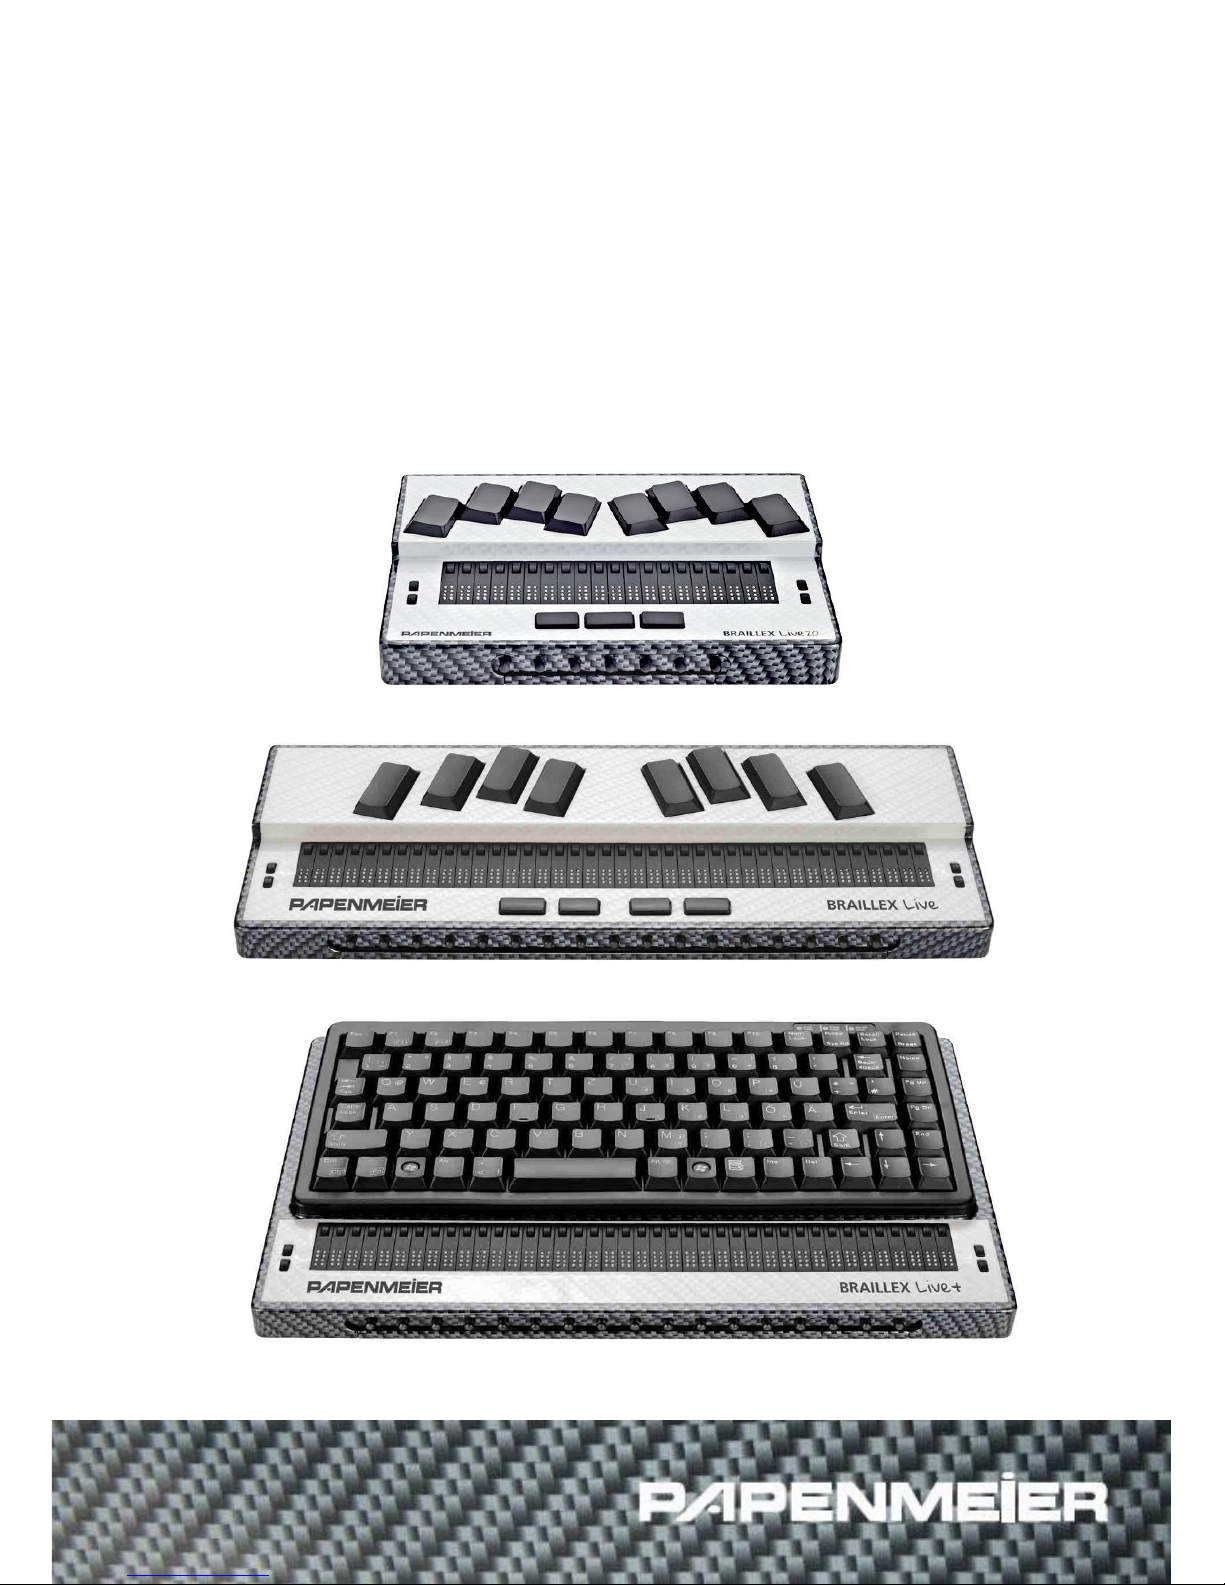
BRAILLEX
Live / Live+ / Live 20
User’s Manual
0090.469.00 - V 1.2.1 – 10.2014
Page 2

Page 3

INTRODUCTION ................................................................... 7
General Issues ................................................................. 7
System Requirements ...................................................... 7
Scope of delivery ............................................................. 7
Copyright ........................................................................ 7
Address .......................................................................... 7
BRAILLEX LIVE / LIVE+ / LIVE 20 ...................................... 9
Getting started with BRAILLEX Live ................................. 9
Left side panel ................................................................. 9
Right side panel ............................................................... 9
Back panel ...................................................................... 9
Top panel ........................................................................ 9
Bottom panel .................................................................. 9
Getting started with BRAILLEX Live 20 .......................... 10
Left side panel ................................................................ 10
Right side panel .............................................................. 10
Back panel ..................................................................... 10
Top panel ....................................................................... 10
Bottom panel ................................................................. 10
Getting started with BRAILLEX Live+ ............................. 11
Left side panel ................................................................ 11
Right side panel .............................................................. 11
Back panel ..................................................................... 11
Top panel ....................................................................... 11
Bottom panel ................................................................. 11
Front panel .................................................................... 11
Power supply of BRAILLEX Live / Live+ / Live 20 .......... 12
USB port ........................................................................ 12
Switching the battery on / off ........................................... 12
Charging the battery ....................................................... 12
Battery operation time ..................................................... 12
Messages indicating the battery status .............................. 12
Changing the battery ....................................................... 12
Installing BRAILLEX Live / Live+ / Live 20 .................... 13
Connecting to peripheral devices ...................................... 13
USB driver installation ..................................................... 13
Installation of a Bluetooth connection ................................ 14
BrxCom ......................................................................... 16
Changing the connection mode ......................................... 17
Installing a new version of your screen reader .................... 17
Keyboards ...................................................................... 18
BRAILLEX Live / Live 20– Braille keyboard functions ............ 18
BRAILLEX Live+ - PC keyboard functions ........................... 22
The internal menu .......................................................... 25
The internal menu of BRAILLEX Live / Live 20 .................... 25
The internal menu of BRAILLEX Live+................................ 25
The internal menu items .................................................. 25
BRAILLEX Live / Live+ / Live 20 for JAWS ..................... 29
Simple operation............................................................. 29
The Easy Access Bar ........................................................ 29
Command lists ................................................................ 30
Working modes............................................................... 30
Mouse functions with Braille display .................................. 33
Attributes on the Braille display – Braille marking ............... 33
Braille presentation ........................................................ 34
Braille modes ................................................................. 34
Grade two translation ...................................................... 35
Spaces on the Braille display ............................................ 35
Page 4

Display in 7 or 8 dot Braille .............................................. 36
Flash messages .............................................................. 37
Jaws settings ................................................................. 38
Configuring the Braille display for Jaws .............................. 38
Adding a Braille display .................................................... 38
Service ........................................................................... 39
Safety Advice ................................................................. 39
Service Maintenance ....................................................... 39
Purpose of the Device ...................................................... 39
General Precautions ........................................................ 39
CE Marking .................................................................... 39
Technical Data ................................................................ 40
Declaration of conformity ............................................... 41
Page 5

5
General Issues
Copyright F.H. Papenmeier GmbH & Co. KG
All rights reserved.
BRAILLEX Live / Live+ / Live 20 User's manual
As of: 10.2014
This User’s Manual is protected by copyright belonging to F. H. Papenmeier GmbH & Co. KG, with all
rights reserved. The User’s Manual may not be copied in whole or in part, without written consent from
F.H. Papenmeier GmbH & Co. KG.
Changes and/or improvements of this product are subject to change without prior notice.
Page 6

Page 7
7
General Issues
Introduction
Thank you for purchasing BRAILLEX Live, Live+ or Live 20.
Connected to a Smartphone or notebook, it will soon be a
"must-have" for you. By means of the integrated Bluetooth
module, you are able to establish an easy connection to
your Smartphone or notebook.
The integrated battery which can be charged inside the
device provides you with electricity throughout the whole working day. Thanks to the high-quality
keyboard of your BRAILLEX Live / Live+ / Live 20, you are able to write fast and flawlessly. A relaxed
reading position is guaranteed for the device is no higher than 18 mm. Additionally, your wrist strains
are reduced. The patented Easy Access Bar ensures a comfortable one-hand-operation. It is a long
single lever (like a space bar) situated on the front panel of the device, all along the Braille display,
which can be moved in four directions.
Thus, you navigate back and forth, up and down on the Braille display safely and easily from every
place in a document without ever taking your fingers off the reading position.
Forty high-quality Braille cells guarantee fast and comfortable reading.
The BRAILLEX Live, BRAILLEX Live+ and BRAILLEX Live 20 devices combine state-of-the-art
communication technology with the highest ergonomics and functionality exactly suiting your
requirements.
General Issues
System Requirements
For the use of your BRAILLEX Live, BRAILLEX Live+ or Live 20 on a PC, the following requirements have
to be fulfilled:
A USB port on your PC
A Windows operating system such as Windows XP, Windows Vista, Windows 7 or Windows 8
JAWS starting from Version 10 with a suitable driver (Included in the scope of delivery) or another
appropriate screen reader
Bluetooth adapter (optional for a Bluetooth connection)
Scope of delivery
BRAILLEX Live / Live+ / Live 20 ships with the following components:
BRAILLEX Live, BRAILLEX Live+ or BRAILLEX Live 20
Integrated battery
Power supply unit
USB connection cable
Carrying case
User's manual in print
User's manual in electronic format
Copyright
BRAILLEX® is a registered trademark of
F. H. Papenmeier GmbH & Co. KG.
The name Bluetooth® and other Bluetooth trademarks are properties of the Bluetooth SIG, Inc.
Address
F. H. Papenmeier GmbH & Co. KG
Talweg 2
58239 Schwerte, Germany
Internet: http://www.papenmeier.de/reha
Phone: +49-2304-946-0
Page 8

Page 9

9
Getting started with BRAILLEX Live
BRAILLEX Live / Live+ / Live 20
Getting started with BRAILLEX Live
Please position your BRAILLEX Live in front of you. Your fingers should rest on the keys of the Braille
keyboard.
Left side panel
In the middle of the left side panel, you will find a flip switch. By means of it, you can switch BRAILLEX
Live on or off when the device is operated in battery mode. When BRAILLEX Live is connected via
power supply unit or via USB, it will be activated automatically. On the front of the left side panel, you
will find a blue LED. A blue light indicates that Bluetooth has been activated.
Right side panel
At the very top of the right side panel, the power connector is located. Right below the power
connector, a LED provides information about the battery charging process.
A yellow light indicates that the battery is charging.
A green light indicates that the charging process is completed.
A red light indicates that an error has occurred during the charging process.
In the centre of the right side panel, you will find the mini USB connector. The blue LED is located right
below the USB connector indicating when BRAILLEX Live is in operation, no matter if BRAILLEX Live is
operated in battery mode, connected to a power supply unit or via USB.
Back panel
There are no switches or connectors at the back of the device.
Top panel
BRAILLEX Live is equipped with 40 Braille cells having either flat or concave cell caps. Above each
Braille cell, you will find a routing key. On either side of the Braille display, there are two rounded keys.
One key is located behind the other one. Their shape and size corresponds to the one of a routing key.
The keys are described as follows:
Key [K1] is located on the top left beside the Braille cells.
Key [K2] is located on the bottom left beside the Braille cells.
Key [K3] is located on the top right beside the Braille cells
Key [K4] is located on the bottom right beside the Braille cells.
Above the Braille display, you will find the eight-key-ergonimic Braille keyboard. Two space keys and
two thumb keys are located in front of the Braille display. When your hands are correctly lying on the
Braille keys, your thumbs are resting on the left and right space key automatically. Of the four keys in
the space key row, the space keys are the two inner ones. Additionally, two external keys, the so-called
thumb keys, are located to the right and to the left of the space keys which you can easily operate with
your thumbs.
Bottom panel
On the bottom panel of your BRAILLEX Live, you will find the battery compartment cover. In case you
wish to change the battery, please contact our technical service.
Phone: +49-2304-946-118.
Front panel
In front of your BRAILLEX Live you will find the Easy Access Bar. The bar has got a rubber profile
Page 10

10
Getting started with BRAILLEX Live 20
10
Getting started with BRAILLEX Live 20
Please position your BRAILLEX Live 20 in front of you. Your fingers should rest on the keys of the Braille
keyboard.
Left side panel
In the middle of the left side panel, you will find a flip switch. By means of it, you can switch BRAILLEX
Live 20 on or off when the device is operated in battery mode. When BRAILLEX Live 20 is connected via
power supply unit or via USB, it will be activated automatically. On the front of the left side panel, you
will find a blue LED. A blue light indicates that Bluetooth has been activated.
Right side panel
At the very top of the right side panel, the power connector is located. Right below the power
connector, a LED provides information about the battery charging process.
A yellow light indicates that the battery is charging.
A green light indicates that the charging process is completed.
A red light indicates that an error has occurred during the charging process.
In the centre of the right side panel, you will find the mini USB connector. The blue LED is located right
below the USB connector indicating when BRAILLEX Live 20 is in operation, no matter if BRAILLEX Live
20 is operated in battery mode, connected to a power supply unit or via USB.
Back panel
There are no switches or connectors at the back of the device.
Top panel
BRAILLEX Live 20 is equipped with 20 Braille cells having either flat or concave cell caps. Above each
Braille cell, you will find a routing key. On either side of the Braille display, there are two rounded keys.
One key is located behind the other one. Their shape and size corresponds to the one of a routing key.
The keys are described as follows:
Key [K1] is located on the top left beside the Braille cells.
Key [K2] is located on the bottom left beside the Braille cells.
Key [K3] is located on the top right beside the Braille cells
Key [K4] is located on the bottom right beside the Braille cells.
Above the Braille display, you will find the eight-key-ergonimic Braille keyboard. One space keys and
two thumb keys are located in front of the Braille display. When your hands are correctly lying on the
Braille keys, your thumbs are resting on the space key automatically. Of the three keys in the space key
row, the space key is the inner one. Additionally, two external keys, the so-called thumb keys, are
located to the right and to the left of the space key which you can easily operate with your thumbs.
Bottom panel
On the bottom panel of your BRAILLEX Live 20, you will find the casing cover. In case you wish to
change the battery, please contact our technical service.
Phone: +49-2304-946-118.
Front panel
In front of your BRAILLEX Live 20 you will find the Easy Access Bar. The bar has got a rubber profile
Page 11

11
Getting started with BRAILLEX Live+
Getting started with BRAILLEX Live+
Please position your BRAILLEX Live+ in front of you. Your fingers should rest on the device’s keyboard.
Left side panel
In the middle of the left side panel, you will find a flip switch. By means of it, you can switch BRAILLEX
Live+ on or off when the device is operated in battery mode. When BRAILLEX Live+ is connected via
power supply unit or via USB, it will be activated automatically. On the front of the left side panel, you
will find a blue LED. A blue light indicates that Bluetooth has been activated.
Right side panel
At the very top of the right side panel, the power connector is located. Right below the power
connector, a LED provides information about the battery charging process.
A yellow light indicates that the battery is charging.
A green light indicates that the charging process is completed.
A red light indicates that an error has occurred during the charging process.
In the centre of the right side panel, you will find the mini USB connector. The blue LED is located right
below the USB connector indicating when BRAILLEX Live+ is in operation, no matter if BRAILLEX Live+
is operated in battery mode, connected to a power supply unit or via USB.
Back panel
There are no switches or connectors at the back of the device.
Top panel
BRAILLEX Live+ is equipped with 40 Braille cells having either flat or concave cell caps. Above each
Braille cell, you will find a routing key. On either side of the Braille display, there are two round keys.
One key is located behind the other one. Their shape and size corresponds to the one of a routing key.
The keys are described as follows:
Key [K1] is located on the top left beside the Braille cells.
Key [K2] is located on the bottom left beside the Braille cells.
Key [K3] is located on the top right beside the Braille cells.
Key [k4] is located on the bottom right beside the Braille cells.
Behind the Braille display, you will find the PC keyboard which is comparable to the one of a notebook.
Bottom panel
On the bottom panel of your BRAILLEX Live+, you will find the battery compartment cover. In case you
wish to change the battery, please contact our technical service.
Phone: +49-2304-946-118.
Front panel
In front of your BRAILLEX Live+ you will find the Easy Access Bar. The bar has got a rubber profile.
Page 12

12
Power supply of BRAILLEX Live / Live+ / Live 20
12
Power supply of BRAILLEX Live / Live+ / Live 20
USB port
If you wish to connect your BRAILLEX Live / Live+ / Live 20 to a USB port, please make use of the
supplied USB cable. You will find the mini USB port on the right side panel of your BRAILLEX Live /
Live+ / Live 20. Please insert the connector at the other end of the USB cable into a free USB port on
your PC.
As long as voltage is supplied to the USB port, BRAILLEX Live / Live+ / Live 20 will be active.
Please note that the battery will not be charged when the device is connected to the USB port.
Furthermore, please note that the battery is also discharging while being switched on additionally.
Switching the battery on / off
If you wish to use BRAILLEX Live / Live+ / Live 20 in battery mode, please dip the switch on the left side
panel to the front which means towards you. In order to switch off the battery, please dip the switch to
the rear which means away from you.
We recommend that you switch off the battery when BRAILLEX Live / Live+ / Live 20 is connected to
the USB port because the battery will discharge nevertheless.
Charging the battery
If you wish to charge the battery of your BRAILLEX Live / Live+ / Live 20, please connect the enclosed
power supply unit to a power socket and connect it also to the power connector on the right side
panel of the device. While the battery is charging, BRAILLEX Live / Live+ / Live 20 is ready for
operation. The complete battery charging process will take approximately 3 hours.
The battery charging status is indicated by a LED on the right side panel of the device.
A yellow light indicates that the battery is charging.
A green light indicates that the charging process is completed.
A red light indicates that an error has occurred during the charging process.
The battery status will also be displayed in the internal menu. Please activate the menu item "info /
energy".
Battery operation time
With fully recharged batteries BRAILLEX Live / Live+ / Live 20 has an operation time of about 20 hours
at an average use.
Messages indicating the battery status
If you wish to check the remaining battery operation time, please activate the internal menu item "info
/ energy". Please note that this is only possible when the battery is switched on.
Changing the battery
The integrated battery is located under the cover of the battery compartment at the bottom panel of
your BRAILLEX Live or Live+. The BRAILLEX Live 20 does not have a separate battery compartment; the
battery is located under the casing cover. In case you wish to change the battery, please contact our
technical service.
Phone: +49-2304-946-118.
Page 13

13
Installing BRAILLEX Live / Live+ / Live 20
Installing BRAILLEX Live / Live+ / Live 20
Connecting to peripheral devices
BRAILLEX Live / Live+ / Live 20 is able to communicate with other peripheral devices via USB or
Bluetooth. Thus, USB or Bluetooth only establish a connection between the two devices. On the PC, the
program "BrxCom" controls the necessary communication with your BRAILLEX Live / Live+ / Live 20.
The installation of BRAILLEX Live / Live+ / Live 20 consists of two parts:
The first part is the installation of a connection via USB or Bluetooth between the devices.
The second part is the communication via BrxCom.
In the following chapters, the installation of a USB- and a Bluetooth connection will be described.
USB driver installation
Please connect your BRAILLEX Live / Live+ / Live 20 to the USB port of a Windows PC. Certainly, this
can also be done while the system is running. Please note that for the installation of the USB driver,
administrator privileges are required. The operating system indicates that a new hardware by the name
"BRAILLEX II
USB Device" has been found. When there is an internet connection, the driver will be installed
automatically.
In case you should still use Windows XP or Windows 7 or Windows 8 without an active internet
connection, you have to install the driver manually as follows:
In the scope of delivery, a driver CD is included. Please insert the CD into the CD ROM drive.
When you work with Windows XP, a dialog box pops up asking you to specify the source for the
suitable driver. By default, Windows checks the removable storage media CD and disk
automatically for the appropriate driver. Hence, just hit enter to confirm the dialog box. Now,
Windows is searching the specified sources for the suitable driver.
Once the installation is done, you will see another dialog box informing you that the installation
procedure has been completed. Please click on the "Finish" button to close the dialog box. Hit the
Enter key.
Finally, the driver installation is completed.
Page 14

14
Installing BRAILLEX Live / Live+ / Live 20
14
Installation of a Bluetooth connection
Bluetooth offers a wireless connection to many devices. BRAILLEX Live / Live+ / Live 20 behaves like
any other Bluetooth device. When you initiate a search for Bluetooth devices, the Bluetooth adapter
will automatically recognize BRAILLEX Live / Live+ / Live 20.
Connection to a PC via Bluetooth
If you wish to connect your BRAILLEX Live / Live+ / Live 20 to your PC, please consider the following:
The Bluetooth adapter on the PC or notebook must be activated. Bluetooth should be set up in a way
that it recognizes new devices. The configuration of the Bluetooth adapter depends on the producer of
the device; therefore we can only give some generic hints for the preparation of the Bluetooth
connection on the PC side.
The Bluetooth adapter of your PC or notebook offers the communication via a so-called pairwise
connection. For this purpose, a serial Bluetooth connection is established with BRAILLEX Live / Live+ /
Live 20, using the search assistant of the Bluetooth software installed on the PC or notebook. You must
have administrator privileges to be able to install such a connection.
Setting up BRAILLEX Live / Live+ / Live 20
Please make sure that your BRAILLEX Live / Live+ / Live 20 and the Bluetooth module are both
activated.
In the chapter "Activating / deactivating Bluetooth" beginning on page 26, we will describe how to
activate a Bluetooth connection.
Please make sure that your BRAILLEX Live / Live+ / Live 20 is placed close to the PC or notebook.
Setting up the PC
Activate the search for Bluetooth devices in the neighbourhood of your PC Bluetooth adapter.
Select the found device named "BRAILLEX Trio".
NOTE: For compatibility reasons, BRAILLEX Live / Live+ / Live 20 identifies itself as "BRAILLEX
Trio".
When initializing the pairwise connection, please enter the BRAILLEX Live / Live+ / Live 20's PIN as
a pass key.
The serial connection is established and a serial port number is assigned for incoming and
outgoing connections. You need to remember the port number for outgoing connections, e.g.
"Com4". This serial port number will be required for the BrxCom installation.
If necessary, please activate the serial connection to BRAILLEX Live / Live+ / Live 20 in the
Bluetooth Manager of the PCs.
Please start the installation of BrxCom.
Page 15

15
Installing BRAILLEX Live / Live+ / Live 20
Connection to an iPhone or iPad via Bluetooth
If you wish to connect your BRAILLEX Live / Live+ / Live 20 to an iPhone or iPad, you need to consider
the following:
Setting up BRAILLEX Live / Live+ / Live 20:
Please make sure that your BRAILLEX Live / Live+ / Live 20 and the Bluetooth module are both
activated.
In the chapter "Activating / deactivating Bluetooth" beginning on page 26, we will describe how to
activate a Bluetooth connection.
Please make sure that your BRAILLEX Live / Live+ / Live 20 is placed close to the PC or notebook.
Setting up your iPhone or iPad:
Please activate "VoiceOver".
Then, activate the Bluetooth connection and open the "Settings" category. Please select
"Bluetooth" and activate the "Bluetooth" button.
Select BRAILLEX Live / Live+ / Live 20 as a Braille device.
Please open the "Settings" category, select "General", then "Accessibility" and afterwards
"VoiceOver".
Select the "Braille" item. In the lower half of the screen, you will see a list with the found Braille
devices. It may take some time until your iPhone or iPad has found the Braille display.
NOTE: For compatibility reasons, BRAILLEX Live / Live+ / Live 20 identifies itself as "BRAILLEX
Trio".
Please select the appropriate device and double-click. After a short while, you are asked to enter
the PIN. Now, enter the PIN which is defined in the BRAILLEX Live / Live+ / Live 20. By default, the
PIN has got the following digits: "0000".
Finally, the connection is completed.
NOTES:
Please always consider the user's manuals of the iPhone's or iPad's iOS version.
If the connection cannot be established, we recommend that you completely restart your Apple
device.
Page 16

16
Installing BRAILLEX Live / Live+ / Live 20
16
BrxCom
After the installation of the USB driver or the Bluetooth connection, the BrxCom program has to be
installed on the PC or notebook. BrxCom controls the communication between the PC and BRAILLEX
Live / Live+ / Live 20. Thus, the installation requires administrator privileges. If the installation does not
start automatically, please open the file "SETUP.EXE" on the CD. The Braille display driver which is
required for the screen reader will be installed as well. Please note that the screen readers JAWS or
Supernova must have been installed before you install BrxCom.
Please note that when the connection to the PC should change BrxCom has to be configured once
again. This could occur in case of a new Bluetooth connection or if you wish to toggle between USB
and Bluetooth. For that reason, open the start menu, select the category "Papenmeier" and choose
"BrxCom configuration".
After the installation has been completed and the end user license agreement has been accepted you
can select the interface. Hence, you define with what kind of interface your BRAILLEX Live / Live+ / Live
20 and your PC or notebook should be connected.
NOTE: When you select "Bluetooth" a serial connection between the Bluetooth device and the PC has
to be established before. In the next dialog, the installation program will ask for the port number. Just
enter the number of the Bluetooth connection, e.g. "4" for "COM4".
When you select "USB", no further steps are required.
In the next dialog, choose whether the keyboard driver for your BRAILLEX Live / Live+ / Live 20 should
be installed. The keyboard driver enables you to use BRAILLEX Live / Live+ / Live 20 as an input device
for the connected PC. Deactivate the check box panel if the driver should not be installed.
Once the keyboard driver has been selected, you will be asked to choose a locale (keyboard language)
for the Braille input. You can only make one choice at a time. The locale selection is necessary for the
keyboard layout.
If several JAWS versions are installed, a list of all available and compatible JAWS versions on your PC
will appear in the next screen. Move through the list and activate the desired JAWS program versions
for which BrxCom should be installed by pressing the space bar. However, it is possible to select
several versions.
If the Dolphin screen reader is installed on your PC, please select whether the driver for Dolphin should
be installed in the next dialog box.
You can verify the installation again in the summary of the selected components.
When the keyboard driver has been installed you will finally be asked to restart the PC.
Page 17

17
Installing BRAILLEX Live / Live+ / Live 20
Changing the connection mode
If you connect BRAILLEX Live / Live+ / Live 20 on the same PC via USB and Bluetooth you need to start
the BrxCom configuration every time you change the connection. Thus, the currently relevant Interface
has to be selected. You will find the BrxCom configuration in the start menu under "Programs",
"Papenmeier". Similar to the installation routine, the program will guide you through the configuration.
At first, interface and keyboard will be selected. Afterwards, both components will be installed.
Installing a new version of your screen reader
If you install JAWS or Dolphin after the installation of BrxCom, select the Braille display "BRAILLEX EL"
during screen reader installation.
After the installation has been performed, you have to install BrxCom once again. In this way, BRAILLEX
Live / Live+ / Live 20 will be available for the new screen reader.
The selected interface is called "BrxCom". It is not called "USB" or "Com", for BrxCom controls the
connection to BRAILLEX Live / Live+ / Live 20 via USB or Bluetooth.
Page 18

18
Keyboards
18
Keyboards
BRAILLEX Live, BRAILLEX Live 20 and also BRAILLEX Live+ are equipped with high-quality keyboards
allowing you to work quickly and comfortably.
BRAILLEX Live / Live 20– Braille keyboard functions
BRAILLEX Live
Above the Braille display of the BRAILLEX Live, you will find the Braille keyboard with 8 big keys. In
front of the Braille display, two space and two thumb keys are located. When your hands are correctly
lying on the Braille keys, your thumbs are resting on the two inner space keys. Furthermore, two
additional keys, the so-called thumb keys, are located to the right and to the left of the space keys.
BRAILLEX Live 20
Above the Braille display of the BRAILLEX Live 20, you will find the Braille keyboard with 8 keys. In front
of the Braille display, one space and two thumb keys are located. When your hands are correctly lying
on the Braille keys, your thumbs are resting on the space key. Furthermore, two additional keys, the
so-called thumb keys, are located to the right and to the left of the space key.
Using the Braille keyboard on a Windows PC
Below, we will describe how you can perform different functions by means of the Braille keyboard.
As abbreviations for the keys of the Braille keyboard, we will use the following terms:
Space key: SP
Right thumb key: RT
Left thumb key: LT
Function
Key
Enter
SP + dot 8 or dot 8 only
Escape
SP + dot 7
Cursor up
SP + dot 2
Cursor down
SP + dot 5
Cursor left
SP + dot 1
Cursor right
SP + dot 4
Previous screen (Page up)
SP + dot 3
Next screen (Page down)
SP + dot 6
Backspace
SP + dot 6,8 or dot 7
Home
SP + dot 1,2
End
SP + dot 4,5
Insert
SP + dot 2,3
Delete
SP + dot 5,6
F1-F12
RD + letters A-L
Ctrl + letter
SP + dot 7,8
Page 19

19
Keyboards
Braille emulation of PC-functions
You are able to emulate SHIFT, CTRL and ALT on the Braille keyboard by means of the so-called "sticky
keys". Consequently, you press a key and release it again. Then, enter the desired character within the
next 5 seconds.
This method can be compared to using the number sign in six-dot-Braille. Braille out the number sign
first, followed by the letter. Hence, the number sign indicates that this is a number and not a letter.
If you wish to Braille out "Alt + d", please press the Braille combination for Alt (LT + dot 3) followed by
the letter d (dots 1,4,5).
Below, we will describe the emulation of SHIFT, CTRL and ALT:
Key
Dot combination
SHIFT
LT + dot 1
CTRL
LT + dot 2
ALT
LT + dot 3
Windows (for combinations)
LT + dot 4
CTRL + SHIFT
LT + dots 1,2
ALT + SHIFT
LT + dots 1,3
CTRL + ALT
LT + dots 2,3
CTRL + ALT + SHIFT
LT + dots 1,2,3
Insert (JAWS key!)
LT + dots 3,7
Disable prefix
LT + dot 7
More key combinations
Key
Dot combination
CTLR + Escape
SP + dots 1,2,3,4,5,6
TAB
CTRL +I or SP + dots 3,7
CTRL + ALT + Delete
SP + dots 1,2,3,4,5,6,7,8
Using the Braille keyboard with iPhone and iPad
Below, we will describe how to perform different functions by means of the Braille keyboard.
As abbreviations for the keys of the Braille keyboard, we will use the following terms:
Space key: SP
Right thumb key: RT
Left thumb key: LT
Page 20

20
Keyboards
20
VoiceOver action
Dot combination
Move to previous item
SP + dot 1
Move to next item
SP + dot 4
Move to previous item using rotor setting
SP + dot 3
Move to next item using rotor setting
SP + dot 6
Select previous rotor setting
SP + dots 2,3
Select next rotor setting
SP + dots 5,6
Move to the first element
SP + dots 1,2,3
Move to the last element
SP + dots 4,5,6
Read page starting at selected item
SP + dots 1,2,3,5
Read page starting at the top
SP + dots 2,4,5,6
Activates the Home button
SP + dots 1,2,5
Goes to the status bar
SP + dots 2,3,4
Activates the Volume Up button
SP + dots 3,4,5
Activates the Volume Down button
SP + dots 1,2,6
Activates the Back button if present
SP + dots 1,2
Activates the Delete key
SP + dot 7
Activates the Delete key
SP + dots 1,4,5
Activates the Return key
SP + dot 8
Activates the Return key
SP + dots 1,5
Activates the Tab key e
SP + dots 2,3,4,5
Toggle Screen Curtain on and off
SP + dots 1,2,3,4,5,6
Pause or continue speech
SP + dots 1,2,3,4
Toggle speech on and off
SP + dots 1,3,4
Scroll up one page
SP + dots 3,4,5,6
Scroll down one page
SP + dots 1,4,5,6
Scroll left one page
SP + dots 2,4,6
Scroll right one page
SP + dots 1,3,5
Deselect text
SP + dots 2,3,5
Select text
SP + dots 2,5,6
Select all (iOS6 only)
SP + dots 2,3,5,6
Cut (iOS6 only)
SP + dots 1,3,4,6
Copy (iOS6 only)
SP + dots 1,4
Paste (iOS6 only)
SP + dots 1,2,3,6
Undo typing (iOS6 only)
SP + dots 1,3,5,6
Redo typing (iOS6 only)
SP + dots 2,3,4,6
Pan Braille to the left
SP + dot 2
Pan Braille to the right
SP + dot 5
Toggle announcement history
SP + dots 1,3,4,5
Switch between contracted and uncontracted Braille
SP + dots 1,2,4,5
Move to previous container (iPad only)
SP + dots 1,7
Move to next container (iPad only)
SP + dots 4,7
VoiceOver help (leave with ESC)
SP + dots 1,3
Label function
SP + dots 1,2,3,4,6
Toggle 8 dot / 6 dot Braille
SP + dots 2,3,6
Fade in virtual keyboard
SP + dots 1,4,6
Activates the selected item
SP + dots 3,6
List of all items in the current window
SP + dots 2,4
Page 21

21
Keyboards
Using the Easy Access Bar and the Braille keys with your iPhone and iPad
The Easy Access Bar and the Braille keys of the BRAILLEX Live and BRAILLEX Live 20 have the following
functions when they are connected to an iPhone or iPad:
The key [K1] and key [K2] present the previous text part on the Braille display. This function is
equal to the dot combination SP + dot 2.
The key [K3] and key [K4] present the following text part on the Braille display. This function is
equal to the dot combination SP + dot 5.
Pushing the Easy Access Bar to the left selects the previous object. This function is equal to the dot
combination SP + dot 1.
Pushing the Easy Access Bar to the right selects the following object. This function is equal to the
dot combination SP + dot 4.
Pushing the Easy Access Bar up selects the previous object depending on the rotor setting. This
function is equal to the dot combination SP + dot 3.
Pushing the Easy Access Bar down selects the following object depending on the rotor setting.
This function is equal to the dot combination SP + dot 6.
Page 22

22
Keyboards
22
BRAILLEX Live+ - PC keyboard functions
The PC keyboard is comparable to the one of a notebook. The keyboard is equipped with high-quality
keys having a tactile "feedback".
Below, we will point out some particularities of the keyboard:
CTRL key – This key is located in the bottom row to the very left.
Fn key – This key is located in the bottom row at the second position from the left.
Windows key – This key has got a clear tactile mark and is located in the bottom row at the third
position from the left.
Alt key - This key is located in the bottom row at the fourth position from the left.
"<" key - This key is located in the bottom row at the fifth position from the left.
Space key – This key is considerably larger than the other ones and is located in the bottom row at
the sixth position from the left.
AltGr key - This key is located in the bottom row at the eights position from the right, directly to
the right side of the space key.
Windows key – This key has got a clear tactile mark and is located in the bottom row at the
seventh position from the right.
Menu key - This key is located in the bottom row at the sixth position from the right.
Insert key - This key is located in the bottom row at the fifth position from the right.
Delete key - This key is located in the bottom row at the fourth position from the right.
Cursor left - This key is located in the bottom row at the third position from the left.
Cursor down - This key is located in the bottom row at the second position from the right.
Cursor right - This key is located in the bottom row on the very right.
End key - This key is located in the second row from the bottom on the very right.
Cursor up - This key is located in the second row from the bottom at the second position from the
right.
SHIFT key - This key is located in the second row from the bottom at the third position from the
right.
Page-Down - This key is located in the third row from the bottom on the very right.
Return / Enter - This key is located in the third row from the bottom at the second position from
the right. It is considerably larger than other keys but does not extend two rows.
Page-Up - This key is located in the fourth row from the bottom on the very right.
Home - This key is located in the fifth row from the bottom on the very right.
Backspace - This key is located in the fifth row from the bottom at the second position from the
right.
"1" key - This key is located in the fifth row from the bottom on the very left.
Break key (internal menu) – This key is located in the top row on the very right.
SCROLL key (toggle connection) - This key is located in the top row at the second position from
the right.
PrtSc key - This key is located in the top row at the third position from the right. It does not fulfill
any function.
Num key - This key is located in the top row at the fourth position from the right. It does not fulfill
any function.
F11 key – Please press the FN key and the F1 key.
F12 key – Please press the FN key and the F2 key.
Using the Live+ keyboard with iPhone and iPad
Below, we will describe how to perform different functions by means of the PC keyboard.
As abbreviations for the keys of the Braille keyboard, we will use the following terms:
Cursor right: RI
Cursor left: LE
Cursor up: UP
Cursor down: DN
Space key: SP
Page 23

23
Keyboards
VoiceOver Action
keyboard command
Move to previous item
LE or CTRL + ALT + LE
Move to next item
RI or CTRL + ALT + RI
Move to previous item using rotor setting
UP or CTRL + ALT + UP
Move to next item using rotor setting
DN or CTRL + ALT + DN
Select previous rotor setting
UP + LE
Select next rotor setting
UP + RI
Move to the first element
CTRL + UP
Move to the last element
CTRL + DN
Read page starting at selected item
CTRL + ALT + A
Read page starting at the top
CTRL + ALT + B
Activates the Home button
CTRL + ALT + H
Goes to the status bar
CTRL + ALT + M
Activates the Volume Up button
F8
Activates the Volume Down button
F7
Activates the Back button if present
Escape
Activates the Delete key
Backspace
Activates the Return key r
Enter
Activates the Tab key
Tabulator
Toggle Screen Curtain on and off
CTRL + ALT + SHIFT + S
Pause or continue speech
CTRL
Toggle speech on and off
CTRL + ALT + S
Scroll up one page
ALT + UP
Scroll down one page
ALT + DN
Scroll left one page
ALT + LE
Scroll right one page
ALT + RI
Deselect text
SHIFT + LE
Select text
SHIFT + RI
Select all (iOS6 only)
WIN + A
Cut (iOS6 only)
WIN + X
Copy (iOS6 only)
WIN + C
Paste (iOS6 only)
WIN + V
Undo typing (iOS6 only)
WIN + Z
Redo typing (iOS6 only)
WIN + SHIFT + Z
Pan Braille to the left
WIN + LE
Pan Braille to the right
WIN + RI
Toggle announcement history
WIN + UP
Switch between contracted and uncontracted Braille
WIN + DN
Move to previous container (iPad only)
CTRL + LE
Move to next container (iPad only)
CTRL + RI
VoiceOver help (leave with ESC)
CTRL + ALT + K
Label function
CTRL + ALT + -
Toggle 8 dot / 6 dot Braille
WIN + B
Fade in virtual keyboard
WIN + K
Activates the selected item
CTRL + ALT + SP
List of all items in the current window
CTRL + ALT + I
Page 24

24
Keyboards
24
Using the Easy Access Bar and the Braille keys with the iPhone and iPad
When using your BRAILLEX Live+ with an iPhone or iPad, the Easy Access Bar and the Braille keys have
got the following functions:
By pressing key [K1] and key [k2], the previous text paragraph will be presented on the Braille
display. This corresponds to the function "Pan Braille to the left" which can be activated with the
key combination WIN + LE.
By pressing key [K3] and key [k4], the next text paragraph will be presented on the Braille display.
This corresponds to the function "Pan Braille to the right" which can be activated with the key
combination WIN + RI.
By pushing the Easy Access Bar to the left, the previous object will be selected. This corresponds to
the key combination LE or CTRL or ALT + LE.
By pushing the Easy Access Bar to the right, the next object will be selected. This corresponds to
the key combination RI or CTRL or ALT + RI.
By pushing the Easy Access Bar up, the next object will be selected, depending on the rotor
setting. This corresponds to the key combination UP or CTRL + ALT + UP.
By pushing the Easy Access Bar down, the next object will be selected, depending on the rotor
setting. This corresponds to the key combination DN or CTRL + ALT + DN.
Page 25

25
The internal menu
The internal menu
BRAILLEX Live / Live+ / Live 20 includes an internal menu which contains different settings and
information concerning your BRAILLEX Live / Live+ / Live 20.
The internal menu of BRAILLEX Live / Live 20
Please switch on your BRAILLEX Live / Live 20. After the start message has appeared, press keys 7 and
8 together with the space key (SP + dots 7,8) on the Braille keyboard. If you wish to leave the internal
menu, please press the dot combination Space and dots 7 and 8 (SP + dots 7,8) on the Braille
keyboard again. When you restart the menu, you will be located in the menu item which you have
selected before.
The internal menu of BRAILLEX Live+
Please switch on your BRAILLEX Live+. After the start message has appeared, press the BREAK key on
your BRAILLEX Live+. This key is located in the top row on the very right. If you wish to leave the
internal menu, please press the BREAK key again. When you restart the menu you will be located in the
menu item which you have selected before.
The internal menu items
By means of the Easy Access bar or in combination with a routing key if necessary, you are able to
navigate through the menu of BRAILLEX Live / Live+ / Live 20.
Please push the Easy Access Bar down in order to move to the next item.
Please push the Easy Access Bar up in order to move to the previous item.
If you wish to select a menu item, please press and hold a routing key while pushing the Easy
Access Bar down.
If you wish to leave a menu item, please press and hold a routing key while pushing the Easy
Access Bar up.
In the following chapters, we will describe the menu of your BRAILLEX Live, BRAILLEX Live+ or Live 20.
Connection
Once you are in the menu, you can select the interface you would like to use for your connection.
By pushing the Easy Access Bar to the left or to the right, you are able to switch between Bluetooth
and USB. The underlined connection will be selected automatically.
Press and hold a routing key while pushing the Easy Access Bar down. In that way, you define the
desired default connection. This is the connection with which the device will start automatically.
Quickly changing the connection
You are able to quickly change the connection outside the menu.
In order to make a quick connection change on your BRAILLEX Live / Live 20, please press both
thumb keys in combination with dots 7 and 8 (LT + RT + dots 7,8) on your Braille keyboard.
In order to make a quick connection change on your BRAILLEX Live+, please press the SCROLL key.
This key is located in the top row at the second position from the right.
Bluetooth settings
If you wish to select this menu item, please press and hold a routing key while pushing the Easy
Access Bar down.
Once you have selected the "Bluetooth Settings" menu, you will be given information and settings
of the Bluetooth module.
Page 26

26
The internal menu
26
Activating / deactivating Bluetooth
When selecting this item, you can activate or deactivate Bluetooth.
This item will indicate the current status of the Bluetooth module e.g.:
bluetooth: on
In order to change the setting, press and hold a routing key while pushing the Easy Access Bar down.
Now, the following options will be presented:
bluetooth: on / off
The setting which has last been activated is always underlined with dots 7,8.
In order to change the setting, please push the Easy Access Bar to the right or to the left. In order to
confirm the change, please press and hold a routing key while pushing the easy Access Bar down. You
will leave the current menu item and read the current setting e.g.:
bluetooth: off
In order to leave the current menu item or to reject the changes, please press and hold a routing key
while pushing the Easy Access Bar up.
Bluetooth name
Once you have selected this item, you will read the current Bluetooth name, e.g.:
bluetooth name: braillex trio 0000
In order to change the setting, please press and hold a routing key while pushing the Easy Access Bar
down.
A cursor will now appear under the last digit. Please push the Easy Access Bar up or down to change
the number value at the selected position. You are able to move the cursor under the digits by
pushing the Easy Access Bar to the left and to the right. In order to confirm the selected name, please
press and hold a routing key while pushing the Easy Access Bar down. You will leave the current menu
item and read the current name, e. g.:
bluetooth name: braillex trio 0100
In order to leave the current menu item or to reject the changes, please press and hold a routing key
while pushing the Easy Access Bar up.
NOTE: For compatibility reasons, BRAILLEX Live / Live+ / Live 20 identifies itself as "BRAILLEX Trio".
Bluetooth pin
Once you have selected this item, you will read the current Bluetooth pin, e. g.: bluetooth pin: 0000
In order to change the setting, please press and hold a routing key while pushing the Easy Access Bar
down.
A cursor will now appear under the last digit. Please push the Easy Access Bar up or down to change
the number value at the selected position. You are able to move the cursor under the digits by
pushing the Easy Access Bar to the left and to the right. In order to confirm the selected pin, please
press and hold a routing key while pushing the Easy Access Bar down. You will leave the current menu
item and read the current pin, e. g.:
bluetooth pin: 1234
In order to leave the current menu item or to reject the changes, please press and hold a routing key
while pushing the Easy Access Bar up.
Page 27

27
The internal menu
Settings
If you wish to select this menu item, please press and hold a routing key while pushing the Easy Access
Bar down.
Once you have selected the "settings" menu item, you will be given settings concerning dot firmness,
guest systems and firmware upgrade.
Dot firmness
Once you have selected this item, you will read the current dot firmness e. g.:
dot firmness: 7
The digit "7" is the firmest setting of the Braille dots.
In order to change the setting, please press and hold a routing key while pushing the Easy Access Bar
down. A cursor will now appear under the last digit. Behind the digit you will read the value range in
brackets (1-7). You are able to change the value by pushing the Easy Access Bar up or down.
In order to confirm the desired dot firmness, please press and hold a routing key while pushing the
Easy Access Bar down. You will leave the current menu and read the currently selected dot firmness,
e.g.:
dot firmness: 4
In order to leave the menu item or to reject the changes, please press and hold a routing key while
pushing the Easy Access Bar up.
Guest systems (BRAILLEX Live+ and Live 20 only)
In order to identify the right keyboard, it is important to select a guest system. Such a guest system
clarifies whether a Windows or an Apple keyboard will be used. A guest system is the operating system
which is located at the corresponding selected interface. Usually, a USB interface corresponds with
Windows whereas Bluetooth corresponds with Apple.
Once you have selected this item, you will read the current guest system, e.g.:
Guest system bluetooth: apple
In order to change the setting, please press and hold a routing key while pushing the Easy Access Bar
down.
Now, you are given the following options:
bluetooth: windows / apple
The last selected setting is underlined.
In order to change the setting, please push the Easy Access Bar to the left or to the right.
In order to confirm the selected setting, please press and hold a routing key while pushing the Easy
Access Bar down. You will leave the current menu item and read the currently selected guest system
e.g.:
Guest system bluetooth: windows
In order to leave the menu item or to reject the changes, please press and hold a routing key while
pushing the Easy Access Bar up.
Firmware upgrade
NOTE: If you wish to upgrade the firmware of your BRAILLEX Live / BRAILLEX Live+ / Live 20, please
contact our technical service.
Phone: +49-2304-946-118.
Info
If you wish to select this menu item, please press and hold a routing key while pushing the Easy Access
Bar down.
Once you have selected the "info" menu item, you will be given information about the battery and the
firmware of your BRAILLEX Live / Live+ / Live 20.
Page 28

28
The internal menu
28
Energy
After you have selected this menu item, you will be given information about the battery status. The
battery is integrated into the device. You will also be informed about the charging process of the
battery.
The battery status is indicates by means of three cells. A full cell contains dots 1 to 8. An empty cell
contains dots 1,2,7,8
A cell represents a third of the device runtime. Please note that the battery status can only be indicated
when the battery is switched on, see page 12, “Switching the battery on / off”. After the battery has
been switched on, it may take a short while until the battery status will be indicated.
If the power supply unit is connected, the battery will be charged automatically. A complete charging
process will approximately take 3 hours. Hence, a corresponding message about the charging process
will appear behind the status display of the battery. You will be informed whether the battery is
charging, if it is fully charged or whether an error has occurred during the charging process.
In case of an active USB connection, the information "USB" will be presented at the end of the
message.
In order to leave the menu item, please press and hold a routing key while pushing the Easy Access Bar
up.
Firmware version
Once you have selected the menu item, you will read the current firmware version.
braillex live rev. 1.21 d
or
braillex live+ rev. 1.21 d
In order to leave the menu item, please press and hold a routing key while pushing the Easy Access Bar
up.
Page 29

29
BRAILLEX Live / Live+ / Live 20 for JAWS
BRAILLEX Live / Live+ / Live 20 for JAWS
Simple operation
BRAILLEX Live / Live+ / Live 20 has got two keys on each side of the Braille cells. Their shape and size
corresponds to the one of a routing key. Thus, you control your Braille presentation with the Easy
Access Bar and those four function keys. They are described as follows:
Key [K1] is located on the top left beside the Braille cells.
Key [K2] is located on the bottom left beside the Braille cells.
Key [K3] is located on the top right beside the Braille cells.
Key [K4] is located on the bottom right beside the Braille cells.
Principally, the functionality consists of a command selection which cannot be activated directly
anymore by means of a key combination. Instead, it will now be selected from a set of command lists.
Thus, you only have to remember a few key strokes for your braille display. You can access the
available command lists, with the function keys [K1], [K2] and [K3].
At present, three topically structured lists are offered:
Braille attributes - The key [K1] presents a list which contains a range of commands to reveal
different text attributes and to change the current one.
Braille options - The key [K2] presents a list which contains a range of commands that enable you
to change the Braille mode, Braille presentation, Grade two translation and Braille compression.
Working mode - The key [K3] presents a list of working modes. In this list, the current working
mode of the Easy Access Bar can be defined.
The key [K4] does not present any dialog box. This function enables you to switch cursor tracking on or
off.
The Easy Access Bar
By means of the Easy Access Bar, you move the reading window across the screen. You can control the
cursor with the Easy Access Bar as well.
You can push the Easy Access Bar to the left, to the right, up and down, one step each.
Users who are already familiar with Papenmeier EL displays also know the second step of the Easy
Access Bar. Because of its reduced height BRAILLEX Live / Live+ / Live 20 does no longer have the
second step. Nonetheless, second step functions are available. In order to execute second step
functions, please press and hold a routing key while pushing the Easy Access Bar in the desired
direction.
In order to change the working mode for example, as described in the next chapters, you have to
understand how command lists work. You might be familiar with similar JAWS setting lists which work
in quite the same way.
Page 30

30
BRAILLEX Live / Live+ / Live 20 for JAWS
30
Command lists
This is how command lists work:
Once you have pressed one of the function keys [K1], [K2] or [K3], a JAWS dialog box will pop up.
JAWS will read the title of the current setting dialog. On the Braille display, you will see the first
item in the list.
The list item is always divided into two columns: On the left, you will read the function or the
command, e. g.: "Working mode". On the right, behind the hyphen, you will see the current value,
e. g.: "Navigation mode".
In order to select a command, please push the Easy Access Bar up or down. Thus, a corresponding
cursor movement will be performed.
In order to change the value, please press and hold a routing key while pushing the Easy Access
Bar to the left or to the right. You can either press the Space key on the keyboard. The current
value will be spoken and displayed.
In order to confirm changed settings, please press and hold a routing key while pushing the Easy
Access Bar down. You can either hit the Enter key.
Working modes
The orientation in Navigation Mode is suitable for all situations in all windows. Yet, there are certain
situations in which you will gain more comfort using the PC Mode or the Combined Mode.
Thanks to the Easy Access Bar, certain operations can be made easier. When moving through dialog
boxes in a program, you have to take your hands away from the Braille display, move to the keyboard
and back to the display. In PC Mode, this "switching process" will be avoided by executing keyboard
commands with the Easy Access Bar. The Reading Mode (Combined Mode) allows you to comfortably
read longer documents without having to take your hands off the Braille display.
Working in Navigation Mode
In Navigation Mode, you can completely read the active window, from top to bottom. This is the
default working mode.
Switching between working modes:
Please press key [K3].
Choose the item "Easy Access Bar assignment / Navigation Mode" from the list. For this purpose,
press and hold a routing key while pushing the Easy Access Bar to the left or to the right. You can
either press the space key on the keyboard.
Close the dialog box. For this purpose, press and hold a routing key while pushing the Easy Access
Bar down. You can either hit Enter on the keyboard.
The Easy Access Bar moves the reading window in the desired direction:
Easy Access Bar up moves the reading window one line up.
Easy Access Bar down moves the reading window one line down.
Easy Access Bar to the right moves the reading window to the right by the width of the set
character number.
Easy Access Bar to the left moves the reading window to the left by the width of the set
characters.
This means the Easy Access Bar moves the reading window without moving the cursor. As a default the
width of the set character number is the cell number of your Braille display which can also be set
manually.
Page 31

31
BRAILLEX Live / Live+ / Live 20 for JAWS
You are able to access additional navigation functions. Therefore, press and hold a routing key while
pushing the Easy Access Bar in the desired direction:
Press a routing key while pushing the Easy Access Bar to the left. This moves the Braille window to
the beginning of the current line.
Press and hold a routing key while pushing the Easy Access Bar to the right. This moves the Braille
window to the end of the current line.
Press and hold a routing key while moving the Easy Access Bar up. This moves the Braille display
to the first line of the active window. In most cases, it is the title bar.
Press and hold a routing key while pushing the Easy Access Bar down. This moves the Braille
display to the last line of the active window. In most cases, it is the status bar. Here, you are given
status information to the current application.
Back to focus
In "Navigation Mode", the Braille display is moved whereas the cursor remains at its position which
means you will leave your focus. In order to quickly return to the current cursor position, several
functions are available. The cursor tracking always refers to the current cursor. Hence, it can also be the
PC cursor, the JAWS cursor or the virtual PC cursor.
Returning to focus:
Press function key [k4] in all working modes.
When the Braille display presents the cursor line, key [K4] always switches the cursor tracking off.
When the Braille display has left the cursor line, you can switch cursor tracking on using key [K4].
The message "the Braille display will follow the active cursor" will be spoken.
When using the JAWS cursor, just switch to the PC cursor if you wish to get back to the active
focus.
You can also track the JAWS cursor to the PC cursor and vice versa (If the cursor is able to get
there).
Please press JAWS-Key + "-" on the numeric keypad, if the JAWS cursor should be moved to the
PC cursor. The mouse pointer will be moved to the PC cursor position.
Please press JAWS-key + "+" on the numeric keypad, if the PC cursor should be moved to the
JAWS cursor. For that purpose, the PC cursor should be able to get to this position.
Working in PC Mode
Please make use of the PC Mode whenever you work in dialog boxes, on the desktop or in the start
menu. It is also suitable when you enter data in data base masks or when it comes to reading out
spread sheets.
Switching to PC Mode:
Please press key [K3].
Choose the item "Easy Access Bar assignment – PC Mode" from the pop up list. For this purpose,
press and hold a routing key while pushing the Easy Access Bar to the left or to the right. You can
either press the Space key on the keyboard.
Close the dialog. For this purpose, please press and hold a routing key while pushing the Easy
Access Bar down. You can either hit Enter on the keyboard.
Now, the Easy Access Bar represents the cursor cross of the PC keyboard:
Easy Access Bar up moves the Cursor one line up.
Easy Access Bar down moves the cursor one line down.
Easy Access Bar to the right moves the cursor one character to the right.
Easy Access Bar to the left moves the cursor one character to the left.
Thus, the Easy Access Bar moves the cursor exactly the way the cursor keys do.
Page 32

32
BRAILLEX Live / Live+ / Live 20 for JAWS
32
You are able to access additional keyboard functions. Therefore, press and hold a routing key while
pushing the Easy Access Bar in the desired direction:
Please press a routing key while pushing the Easy Access Bar to the right. This will execute the TAB
command. Make use of this function, if you wish to jump to the next element in dialogs.
Please press and hold a routing key while pushing the Easy Access Bar to the left. This will execute
the key combination SHIFT + TAB. Hence, you are able to jump in dialogs back to the previous
dialog element.
Please press and hold a routing key while pushing the Easy Access Bar down. This will execute
Enter.
Please press and hold a routing key while pushing the Easy Access Bar up performs an action
which depends on the situation:
◦ When there is a menu bar in the active window the Easy Access Bar executes the Alt key.
Consequently, it will activate or deactivate the command menu.
◦ When there is no menu bar as in most dialog boxes, the Esc key will be executed. Thus,
you will leave the dialog box without any changes.
Switch to one of the two other modes if you wish to leave the "PC Mode".
Working in Combined Mode
The Combined Mode is suitable when it comes to reading longer documents.
Switching to Combined Mode:
Please press key [K3].
Choose the item "Easy Access Bar assignment – Combined Mode" from the pop up list. For this
purpose, please press and hold a routing key while pushing the Easy Access Bar to the left or to
the right. You can either press the Space key on the keyboard.
Close the dialog. For this purpose, please press and hold a routing key while pushing the Easy
Access Bar down. You can either hit Enter on the keyboard.
Hence, the Easy Access Bar executes the following functions:
Easy Access Bar up moves the cursor one line up, like in PC Mode.
Easy Access Bar down moves the cursor one line down, like in PC mode.
Easy Access Bar to the right moves the reading window to the right by the width of the set
character number, like in Navigations Mode.
Easy Access Bar to the left moves the reading window to the left by the width of the set character
number, like in Navigations Mode.
You are able to access additional functions. Therefore, press and hold a routing key while pushing the
Easy Access Bar in the desired direction:
Please press a routing key while pushing the Easy Access Bar to the left. This shows the beginning
of the Braille display's line, regardless of the line length, like in Navigations Mode.
Please press and hold a routing key while pushing the Easy Access Bar to the right. This shows the
end of the Braille display's line, regardless of the line length, like in Navigations Mode.
Please press and hold a routing key while pushing the Easy Access Bar up. This shows the first line
of the window.
Please press and hold a routing key while pushing the Easy Access Bar down. This shows the last
line of the window.
By means of these commands you are able to read continuously e. g. in a text editor without moving
your hands to the PC keyboard. At the bottom of the screen, the text will be scrolled automatically
because the cursor follows the downward movement.
Page 33

33
BRAILLEX Live / Live+ / Live 20 for JAWS
Mouse functions with Braille display
You can activate mouse functions by using the routing keys. In order to execute a mouse function
move the reading window to the line where you wish to perform a click. In order to perform a left
mouse click at the desired position press the corresponding routing key. The active cursor will appear
on the character.
Text marking - Attributes
Text which does not need a specific font presentation will be declared as "regular text". The font
presentation does not depend on the foreground or background colour. Font differences are only
made when the font face of the characters varies whereas the font stays the same. This difference is
called "attribute". An underlined heading is such an attribute.
JAWS is able to recognize and display many attributes. Sometimes, the attribute displayed for the
current text depends on the program. JAWS can recognize more attributes in Microsoft Office
applications than in other programs.
An attribute can be presented on the Braille display (Braille marking) and in speech. In the JAWS
Settings Centre, you are able to specify whether the changes will be indicated automatically or at your
command.
Example: Text which has a colour background (highlighted) will be spoken automatically. This attribute
is called highlighted colour.
Attributes on the Braille display – Braille marking
On the Braille display, text with attributes will be revealed specifically. In addition, character sets with
attributes will be presented with dots 7 and 8. This way of presentation is called "Braille marking".
Since all five available attributes are marked in the same way you only know that an attribute exists
and which characters it stands for.
If you wish to know exactly what kind of attribute it is, use the command lists function to determine it.
Attributes on the Braille display:
Please press key [K1]. You will see a dialog box with the Braille options.
The first item presents the current attribute at the cursor position. For example, the attribute
"highlighted", will be displayed when the cursor is positioned on marked text. It is not possible to
make any changes. Additionally, the current font and the font size will both be indicated.
Please push the Easy Access Bar down to select the next item "Braille marking".
To generally switch Braille marking on or off, please press and hold a routing key and while
pushing the Easy Access Bar to the left or to the right. You can either press the Space key on the
keyboard.
In order to display a specific attribute, please choose one of the listed attributes Highlight, Bold,
Underline, Italic, Strike out, Colours and Script defined marking. In order to switch the desired
attribute on or off, please press and hold a routing key while pushing the Easy Access Bar to the
left and to the right. You can either press the Space key on the keyboard. It is possible to activate
several attributes.
After you have switched on an attribute to be presented, the setting for the selection "Braille
Marking" will change to "Changed". Next time you recall this setting, the value "see below" will be
presented. This indicates that the settings have been changed in contrast to the default value.
In order to leave the dialog box, please press and hold a routing key while pushing the Easy Access
Bar down. You can either hit the Enter key.
Page 34

34
Braille presentation
34
When changing the Braille marking, you change settings in the JAWS configuration as well. You are
also able to make the same changes in the JAWS Settings Centre under "Braille".
When JAWS has been started, the attribute "Highlighted" will usually be activated. This is most
common in Windows because it is used for the selector in menus and lists, for the marking in
documents and for the focus presentation. The attribute is underlined with dots 7 and 8 automatically
until another attribute will be activated. This also applies to other applications if the setting for a
program has not been changed explicitly in the JAWS Settings Centre. Starting JAWS, the default
attribute can be changed in the JAWS Settings Centre.
NOTE: All commands for the attribute presentation in the Braille or speech will not change the text on
the screen. Only the presentation on the Braille display will change.
JAWS presents every kind of text, not depending on the colour in which it appears on the screen. Thus,
JAWS is able to evaluate a colour or a colour combination as an attribute. In order to recognize a
colour as an attribute, it has to be defined first. This can be done in the JAWS Settings Centre and is
either globally available or it refers to an application. Therefore, a foreground or a background colour
will be defined which should be revealed as an attribute. Hence, when the setting "Colour" is activated
for attributes, JAWS will present it as an attribute when the appropriate colour appears.
In specific cases, a Braille marking will be defined in a JAWS script. Scripts are used by JAWS
depending on the application in order to access specific elements and procedures of a program with
speech and Braille. If script defined markings are available for the used application, they can be
switched on and off in the above-list.
Braille presentation
In some areas, the Braille presentation can be adjusted according to your wishes. Please select the
settings with key [K2]. You will see a corresponding list of commands.
The settings in this list apply to the following areas:
Braille mode – presentation in "Line" or in "Structured"
Grade 2 translation - switch on / off / set
Grade 2 Suppress Capital Signs – switch on / off
Grade 2 Expand Current Word – switch on / off
Text display in Braille – presentation "As on screen" or "Line up text"
Display in – Switch "Six dot Braille" or "Eight-dot-Braille" presentation
Flash messages on / off
If you wish to change the Braille options, please press key [K2]. Select one of the seven indicated
options and change the settings by means of the Easy Access Bar.
Braille modes
With the first item in the list, you change the Braille presentation between "Line" and "Structured"
mode.
In "Line" mode JAWS will present the whole line of the active window. Spaces are indicated as in the
original document. In "Line" mode, it is possible to navigate line by line across the screen with your
Braille display.
In "Structured" mode the current user interface element and its content will be presented on the Braille
display. The advantage of this presentation is that the user gets additional information belonging to
this user interface element. Thus, the active user interface element can be discovered quickly such as
check and dialog boxes, buttons, control panels.
Page 35

35
Braille presentation
Switching between line mode and structured mode:
Please press key [K2].
The dialog box "Adjust Braille Options" will appear.
Push the Easy Access Bar up or down in order to select the item "Braille mode".
Switch between "Line" and "Structured". Press and hold a routing key while pushing the Easy
Access Bar to the left or to the right. You can either press the Space key on the keyboard.
Close the dialog. For this purpose, press and hold a routing key while pushing the Easy Access Bar
down. You can either hit Enter on the keyboard.
Grade two translation
Text on a Braille display is usually presented in Computer Braille. Thus, the Screen reader is able to
present text in a Braille translation. The JAWS speech and the text on the screen will not be changed.
You can change to Grade 2 translation at any position at any time.
Switching between Computer Braille and grade two:
Please press Key [K2].
The dialog box "Adjust Braille Options" will appear.
Push the Easy Access Bar up or down in order to select the item "Grade 2 Translation".
Switch the translation on or off. Please press and hold a routing key while pushing the Easy Access
Bar to the left or to the right. You can either press the Space key on the keyboard.
Close the dialog box. For this Purpose, press and hold a routing key while pushing the Easy Access
Bar down. You can either hit Enter on the keyboard.
Suppressing capital signs in Grade two:
Please press Key [K2].
The dialog box "Adjust Braille Options" will appear.
Push the Easy Access Bar up or down in order to select the item "Grade 2 Suppress Capital Signs".
Switch the marking of capital signs on or off in the following way. Please press and hold a routing
key while pushing the easy Access Bar to the left or to the right. You can either use the Space key
on the keyboard.
Close the dialog. For this purpose, press and hold a routing key while pushing the Easy Access Bar
down. You can either hit Enter on the keyboard.
When you move through a document with the cursor, you will notice the untranslated word under the
cursor. By default, the current word is expanded and you can edit it easily. If you want the word under
the cursor to be abbreviated as well, you will find the suitable option in the dialog box "Adjust Braille
Options".
Switching untranslated word on or off:
Please press key [K2].
The dialog box "Adjust Braille Options" will appear.
Push the Easy Access Bar up or down in order to select the item "Grade 2 Expand Current Word".
Switch the translation on or off. Please press and hold a routing key while pushing the Easy Access
Bar to the left or to the right. You can either press the Space key on the keyboard.
Close the dialog. For this purpose, press and hold a routing key while pushing the Easy Access Bar
down. You can either hit Enter on the keyboard.
Spaces on the Braille display
When text in the current window is torn apart by many spaces, you can optimize the presentation.
Then, you will obtain more text and less spaces. This way of presentation can only be selected in "Line"
mode. In "Structured" mode the screen layout will not be considered.
A permanent change can only occur in the JAWS Settings Centre. In the "Adjust Braille Options" you
are able to make temporary changes.
Page 36

36
Braille presentation
36
Changing the displayed spaces in JAWS:
Please press key [K2].
The dialog box "Adjust Braille Options" will appear.
Push the Easy Access Bar up or down in order to select the item "Text display in Braille" in the list.
The current setting will be indicated e.g.: "As on screen". Thus, all spaces can be seen on the Braille
display, too.
Please choose the other option e.g.: "Line Up Text". Now, all big spaces are reduced to one single
space. Select the other option. Please press and hold a routing key while pushing the Easy Access
Bar to the left or to the right. You can either press the Space key on the keyboard.
Close the dialog. For this purpose, please press and hold a routing key while pushing the Easy
Access Bar down. You can either hit Enter on the keyboard.
If you wish to change the setting permanently, please use the JAWS Settings Centre.
Display in 7 or 8 dot Braille
In case you are bothered by dots 7 and 8 which are necessary to present Computer Braille, you can
deactivate them. Please note that this setting occurs temporarily as well.
Deactivating or activating dots 7 and 8 on the Braille display:
Please press key [K2].
The dialog box "Adjust Braille Options" will appear.
Push the Easy Access Bar up or down in order to select the item "Display in" in the list.
Switch to "Six dot Braille" or "Eight dot Braille". Please press and hold a routing key while pushing
the Easy Access Bar to the left or to the right. You can either press the Space key on the keyboard.
Close the dialog. For this purpose, press and hold a routing key while pushing the easy Access Bar
down. You can either hit Enter on the keyboard.
Although switching from 6- to 8-dot Braille and vice versa will be spoken, no translation into grade 1
will be made. Only Dots 7 and 8 are deactivated. If you wish to have Grade two presented in the
reading window, you are able to activate this function separately.
Page 37

37
Braille presentation
Flash messages
Since JAWS version 6, is has been possible to indicate flash messages on the Braille display. Hence, you
can switch them on or off in this list. Flash messages are short presentations on the Braille display
which will disappear after a defined time automatically. These messages contain additional information
to the current focus and JAWS messages.
Switching flash messages on or off:
Please press key [K2].
The dialog "Adjust Braille Options" will appear.
Push the Easy Access bar up or down in order to select the item "Flash messages" in the list.
Switch flash messages on or off. Please press and hold a routing key while pushing the Easy Access
Bar to the left or to the right. You can either press the space key on the keyboard.
Close the dialog. For this purpose, press and hold a routing key while pushing the Easy Access Bar
down. You can either hit Enter on the keyboard.
Page 38

38
Jaws settings
38
Jaws settings
Configuring the Braille display for Jaws
When installing JAWS, BRAILLEX EL has been selected as a Braille display. BRAILLEX Live / Live+ / Live
20 cannot be selected explicitly. Please note that when it comes to installing BRAILLEX Live / Live+ /
Live 20 it is important to execute the BrxCom installation in any case. You will obtain the current JAWS
settings for the Braille display from the JAWS window or the JAWS menu.
Selecting the current Braille display:
Please press JAWS-key + J in order to move to the JAWS window.
Select the item "Braille" from the "Options" sub menu.
The dialog box "Braille Basic Settings" will appear. In the first list, a Braille display selection will be
offered to you. Beneath the title bar, the active and currently used Braille display will be indicated.
Please select the "default Braille display" in the list box. This is the Braille display which JAWS
searches when being started.
Beneath the list box, JAWS presents the interface used for the selected Braille display. Please press
ALT + N if you wish to change the interface. Now, JAWS presents a selection list. The list contains
the serial interfaces and the USB port. Please make your choice and confirm with Enter. For
BRAILLEX Live / Live+ / Live 20, only "USB" or "BrxCom" can be selected. A serial connection will
not be supported. If you have made a change you will be asked to restart JAWS. Now, you will get
back to the dialog box "Braille Basic Settings".
If no Braille display is connected, if the interface is not specified correctly or if the Braille display is
defective JAWS can display a corresponding message while starting. Therefore, the checkbox
"Show Braille Load Error" has to be activated.
Adding a Braille display
The button "Add Braille Display" in the dialog box "Braille Basic Settings", recalls the installation wizard
in which you can select a Braille display for the installation. BRAILLEX Live / Live+ / Live 20 cannot be
installed by means of this function.
Setting the character set
How does JAWS know which dot combinations are used to show characters on the Braille display? The
answer can be found in the so-called character set that controls the translation of texts into dot
combinations. Since Computer Braille has existed, character sets (translation tables) have been
maintained in the corresponding languages. Every character set contains 255 characters. Since JAWS
version 6, the Unicode character set has been supported.
Selecting the current translation table
Please activate the JAWS menu with JAWS key + J.
Please select the item "Braille" from the "Options" sub menu.
Press ALT + B in order to move to the list of translation tables.
Use cursor keys UP and DN for the selection.
Confirm the change with Enter.
The setting will be saved automatically.
Page 39

39
Service
Service
In case of any defect of the Braille display unit, please contact an authorized Papenmeier service
centre. If you are in doubt about the service centre responsible for your area, please contact
Papenmeier:
F. H. Papenmeier GmbH & Co. KG
Phone: +49-2304-946-0
Fax: +49-2304-946-246
E-mail: [email protected]
If possible give a short description of the kind of disturbance
Safety Advice
Before starting to operate the BRAILLEX device, the user should read this manual.
The device may only be used in closed and dry rooms. The ambient temperature must not exceed
40° C (ca. 105° F). Do not expose the device to direct sunlight or humidity (rain).
Repairs and maintenance work may only be undertaken by Papenmeier or by authorized service
centers.
Do not expose the product to strong pressure, and do not drop any objects on the product. This
might damage the product or lead to malfunctions.
Service Maintenance
Avoid touching the device with dirty hands. You may clean the surface of the device (NOT the Braille
cells) with a soft, damp cloth. Do not use any aggressive detergent or soap.
WEEE Rg. Nr.: DE 60886380.
Purpose of the Device
All BRAILLEX displays are intended to be used for the purpose of compensation for the visual handicap
of blind people.
All BRAILLEX displays comply with the requirements of the European Union Medical Devices Directive,
as an active class I medical product intended to be used for the purpose of compensation for a
handicap.
This product may only be used in home or office environments. In medical facilities, this product may
only be used in office rooms.
The BRAILLEX devices and their original accessories comply with the relevant standards regarding the
electro-magnetic compatibility (EMC) and the safety, and are marked with the CE sign.
There are no known risks for your health that might be caused by the use of this product.
General Precautions
Our products guarantee optimum safety and reduce to a minimum the strain caused through overexertion. However, when respecting some precautions you can contribute to avoid prejudice to your
health or damage to the product.
If a cellular phone is used close to the product, a minimum distance of 30 cm (1 ft) shall be respected.
Do not expose the product to strong pressure, and do not drop any objects on the product. This might
damage the product or lead to malfunctions.
In order to avoid repetitive strain injury at your hands caused through long-time use of the function
elements and reading the Braille display, we suggest pauses and relaxation exercise. In specialized
bookshops you also find literature on how to equip a workplace in an ergonomically way and on how
to avoid strain through an appropriate sitting position.
CE Marking
The BRAILLEX devices and their original accessories comply with the relevant standards regarding the
electro-magnetic compatibility (EMC) and the safety, and are marked with the CE sign.
Page 40

40
Service
40
FHP cannot guarantee however that these products still comply with these EMC standards if they are
connected to cables or devices not produced by F. H. Papenmeier. In this case, the person(s) who
connected the cables or devices are responsible for taking care that the combination complies with the
required standards. In order to avoid EMC problems, you should observe the following advice:
Only connect accessories and devices marked with the CE mark.
Only use shielded connecting cables.
Technical Data
Power supply R#4337.00000
Input voltage: 100 V-240 V AC 50-60 Hz
Output voltage: 12V DC 2A
USB cable
USB-A, Mini-B, 90°/2m R#3490.000077
Manual R#0090.469.00
Case, Neoprene, BRAILLEX Live R#8522.000003
Case, Neoprene, BRAILLEX Live+ R#8522.000004
Case, Neoprene, BRAILLEX Live 20 R#8522.000005
Size
BRAILLEX LIVE 298 x 115 x 18mm reading height / 23 mm height
BRAILLEX LIVE+ 298 x 18 x 18mm reading height / 23mm height
BRAILLEX Live 20 170 x 111 x 18mm reading height / 23mm height
Weight
BRAILLEX LIVE – ca. 900g (incl. battery)
BRAILLEX LIVE+ – 1200g (incl. battery)
BRAILLEX Live 20 – 547 g (incl. battery)
This User’s Manual or the described products within it are subject to change without prior notice.
Any implied responsibilities are expressly disclaimed. F. H. Papenmeier GmbH & Co. KG shall not, in
any case, be liable for special, incidental, consequential, indirect, or other similar damages arising from
any errors or misleading content in this user’s manual.
Copyright
© 1999/2014 F.H. Papenmeier GmbH & Co. KG
All rights reserved
Page 41
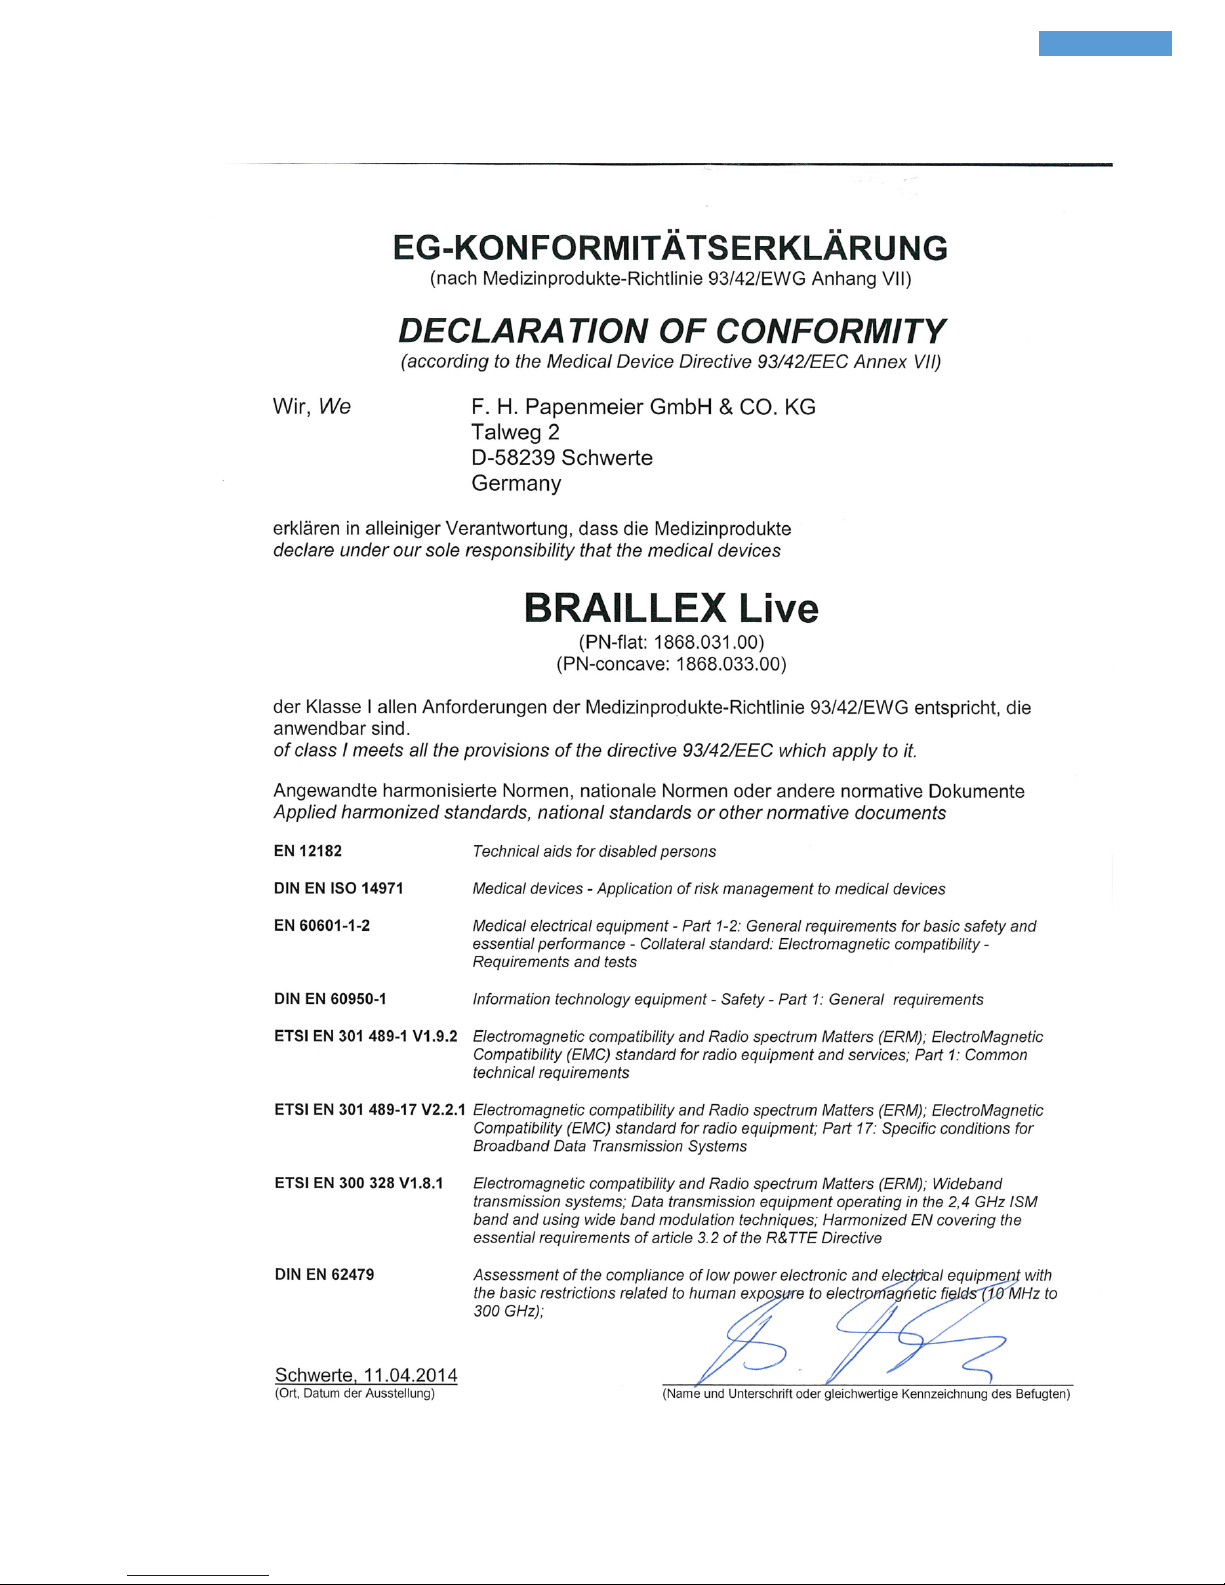
41
Declaration of conformity
Declaration of conformity
Page 42

42
Page 43
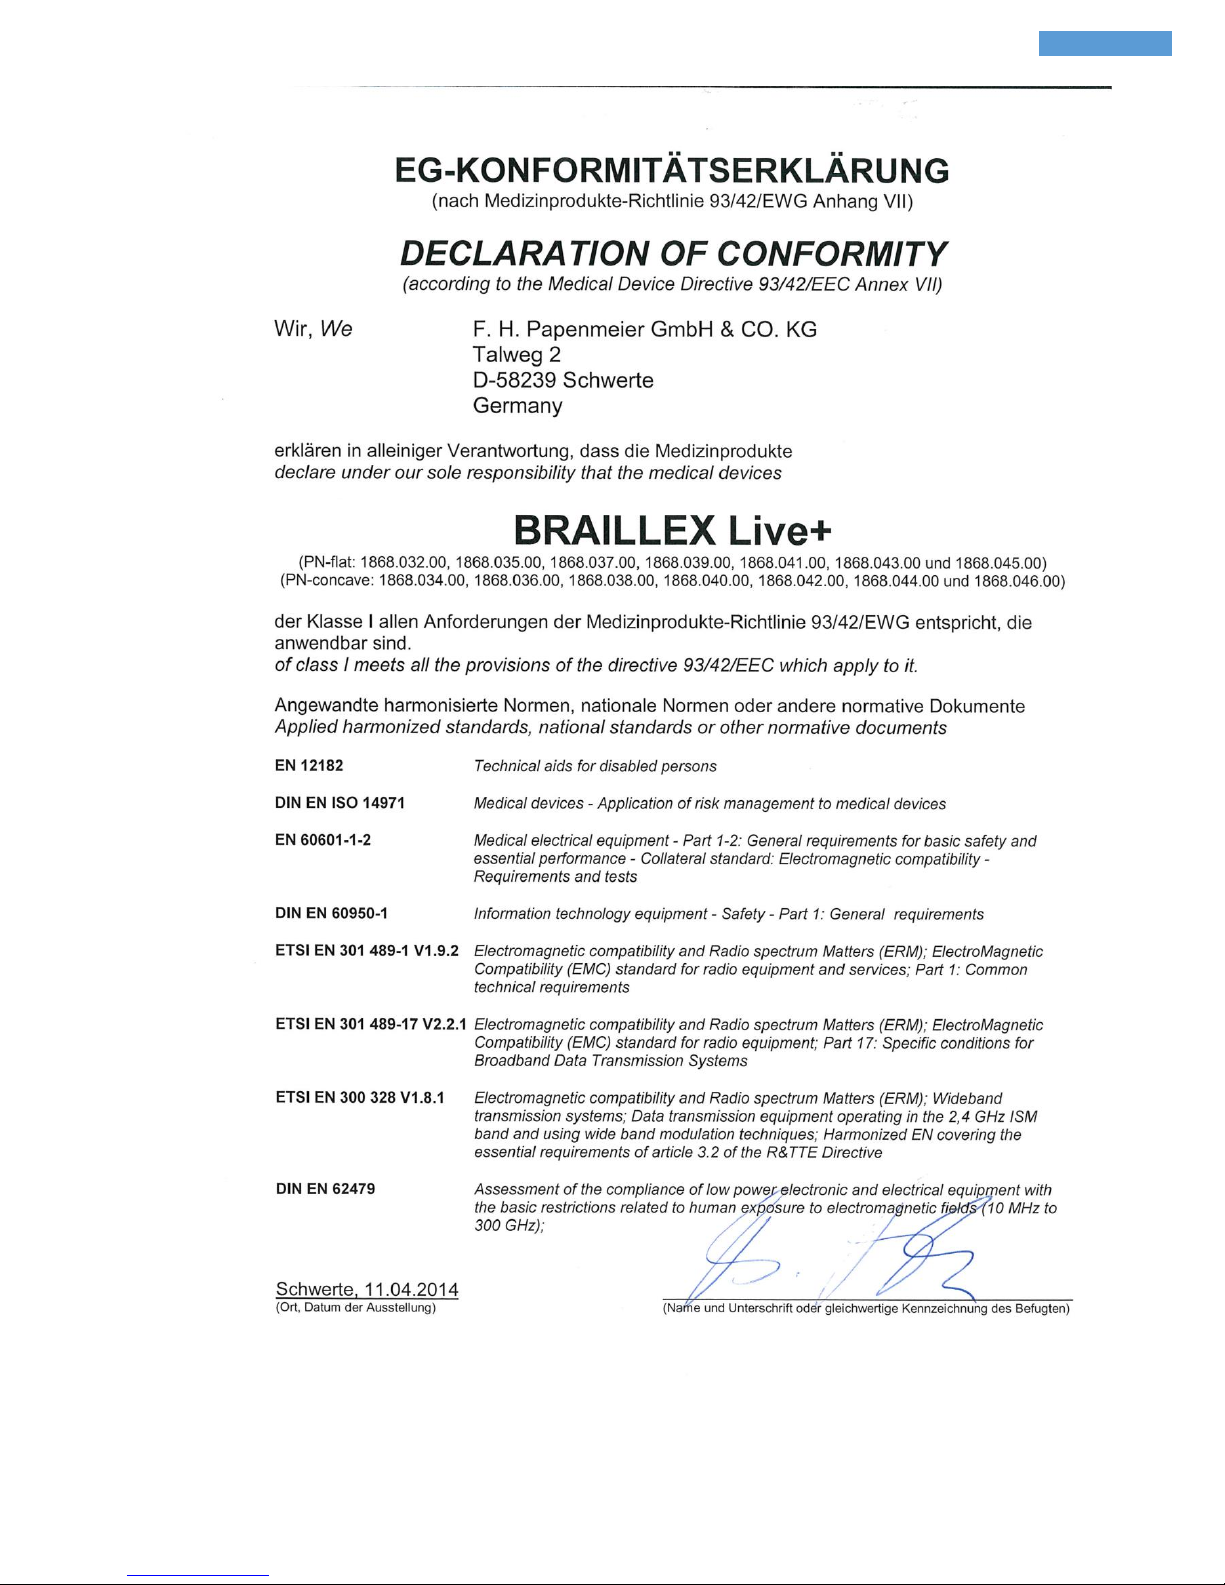
43
Declaration of conformity
Page 44

44
Page 45
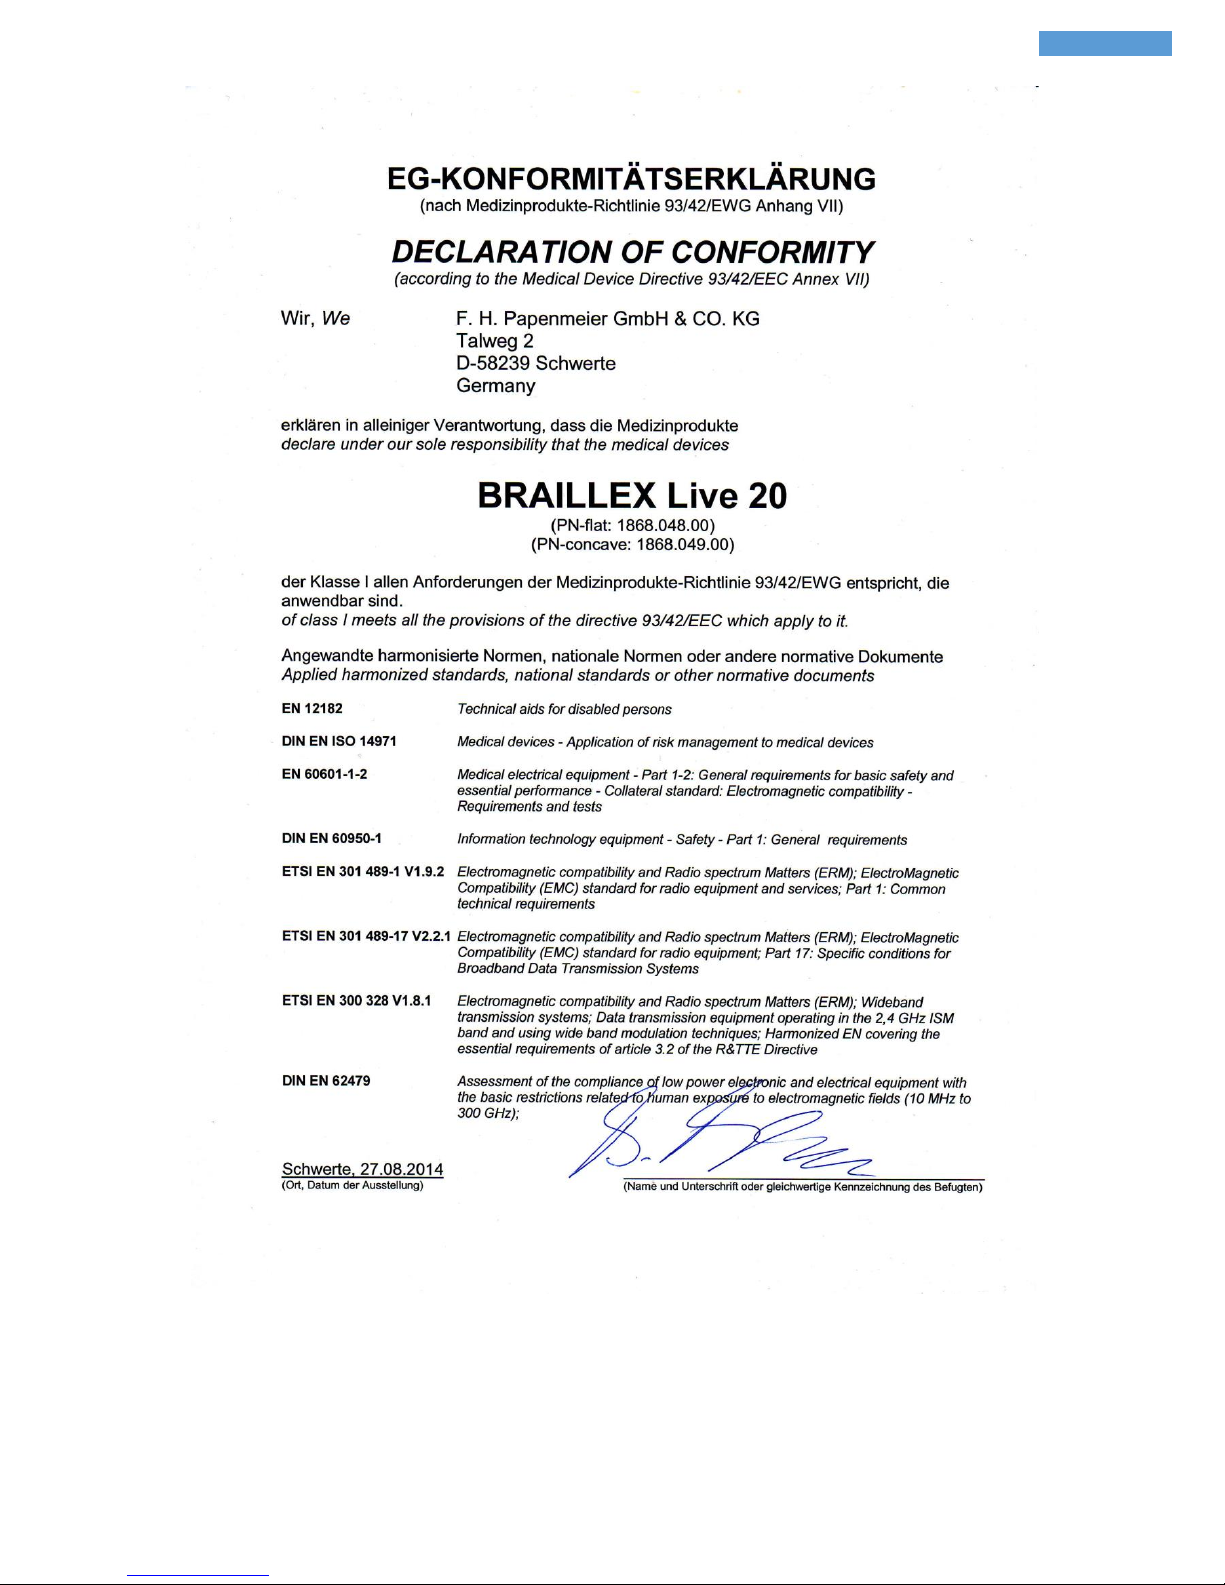
45
Declaration of conformity
 Loading...