

Page 1
Installation
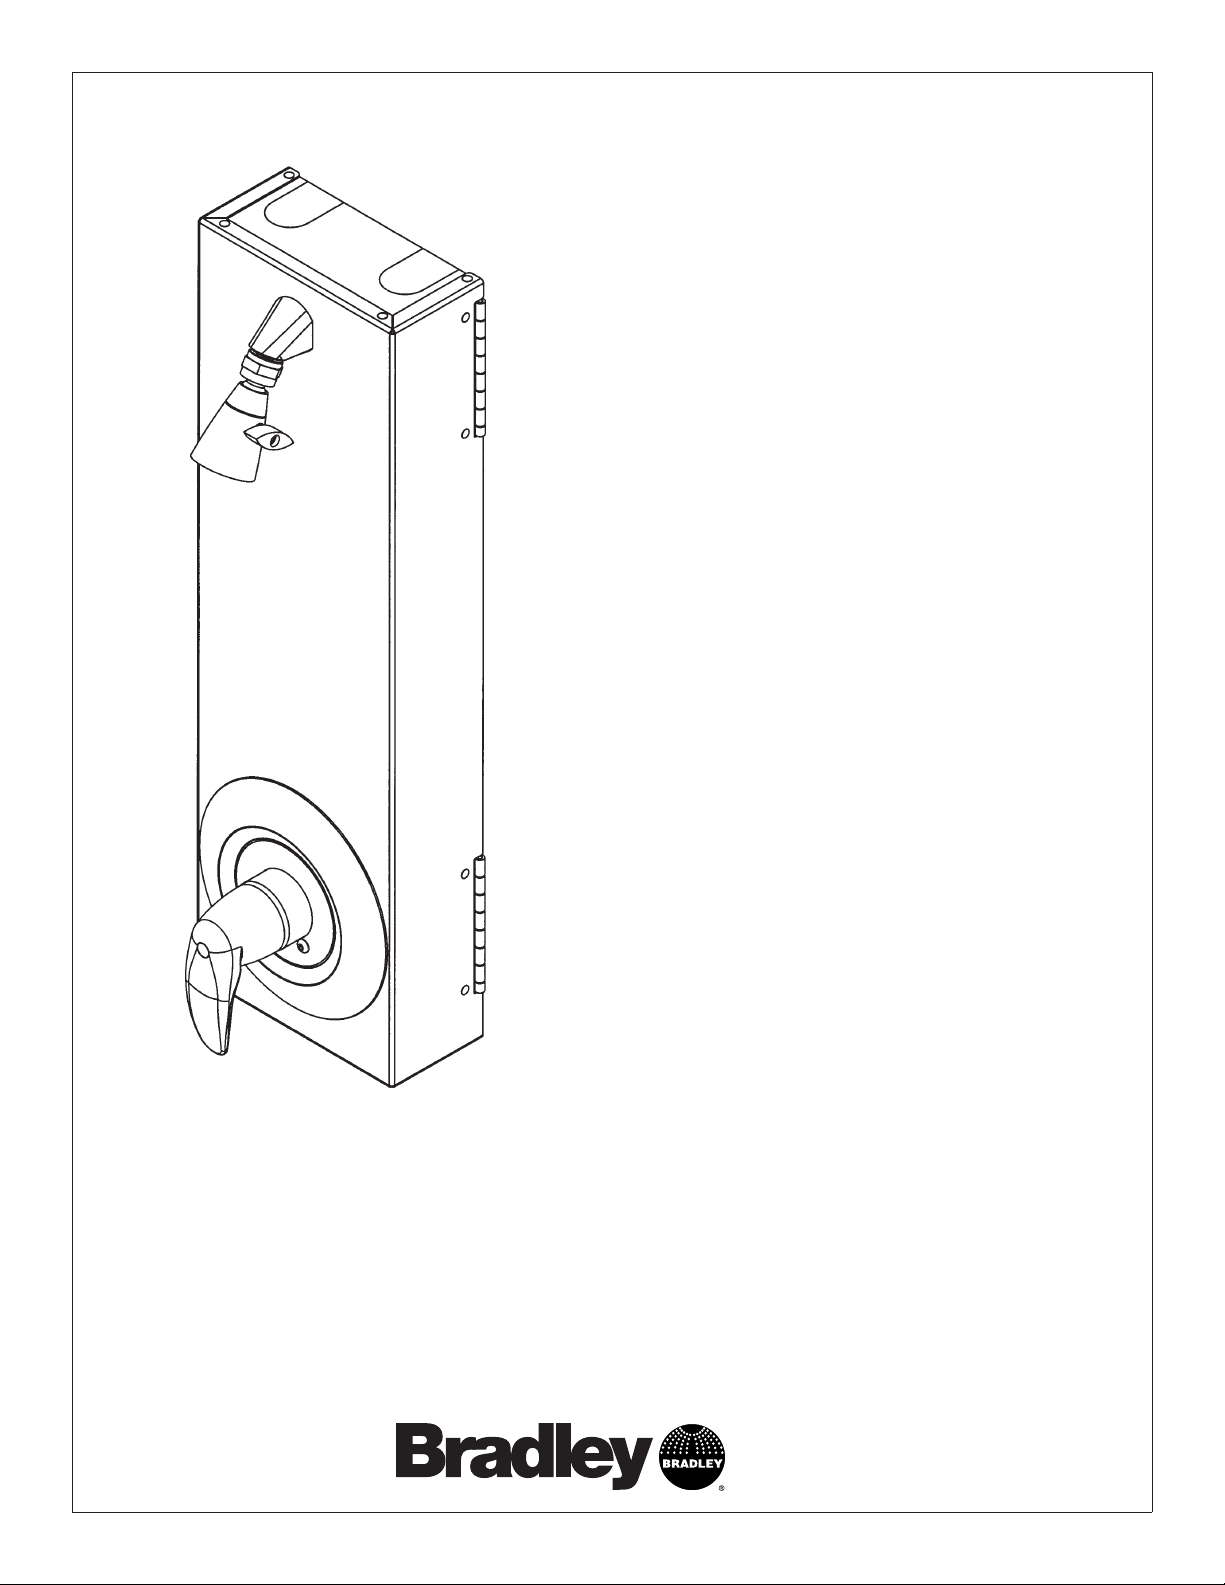
WS-1X
INDIVIDUAL PIVOTING
WALL SHOWER
DOUCHE MURALE
PIVOTANTE
INDIVIDUELLE DUCHA
INDIVIDUAL DE PARED
CON PIVOTE
Table of Contents
Supplies Required ...........................2
Recommended Shower Heights ..............2
Wall Shower Components ....................2
Wall Shower Dimensions .....................3
Step 1: Rough-In Piping ......................3
Step 2: Install Shower ........................3
Vertical Shroud Installation ...................4
Horizontal Shroud Installation ................4
215-1441 Rev. C EN 07-304
© 2007 Bradley Corporation
Page 1 of 10 4/2/07
Table des Matières
Fournitures requises ......................... 5
Hauteurs de douche conseillées ..............5
Éléments de la douche ......................5
Dimensions de la douche .................... 6
Étape 1 : Tuyauterie de raccordement .........6
Étape 2 : Pose de la douche ..................6
Pose de gaine verticale ......................7
Pose de gaine horizontale ....................7
Contenido
Materiales necesarios .......................8
Alturas recomendadas de la ducha ...........8
Componentes de la ducha de pared ..........8
Dimensiones de la ducha de pared ...........9
Paso 1: Colocación de tuberías empotradas . . . 9
Paso 2: Instalación de la ducha ...............9
Instalación vertical del recubrimiento .........10
Instalación horizontal del recubrimiento ......10
P.O. Box 309, Menomonee Falls, WI 53052-0309
Phone: 1-800-BRADLEY Fax: 262-253-4161
www.bradleycorp.com
Page 2
WS-1X Installation
IMPORTANT!
Installation
When fi nished with the installation, fi le this manual with the owner or
maintenance department. Compliance and conformity to local codes
and ordinances is the responsibility of the installer.
Read this entire installation manual to assure proper installation.
Packing List
Separate parts from packaging and make sure all parts are
accounted for before discarding any packaging material. If any parts
THIS
E
SID
P
U
are missing, do not begin installation until you obtain the missing
parts.
Make sure that all water supply lines have been fl ushed and then
completely turned off before beginning installation. Debris in supply
lines can cause valves to malfunction.
Product warranties may be found under “Product Information” on our
web site at www.bradleycorp.com.
Supplies Required
• Water supply piping to connect 1/2" NPT flexible
hose(s)
• Suitable wall anchors and 1/4" diameter fasteners
to mount shower to the wall
• Pipe Sealant
Recommended Shower Heights
Age Male Female
Adult 6'0" (1.83m) 6'0" (1.83m)
Teenage 6'0" (1.83m) 5'6" (1.68m)
Pre-Teens 5'6" (1.68m) 5'6" (1.68m)
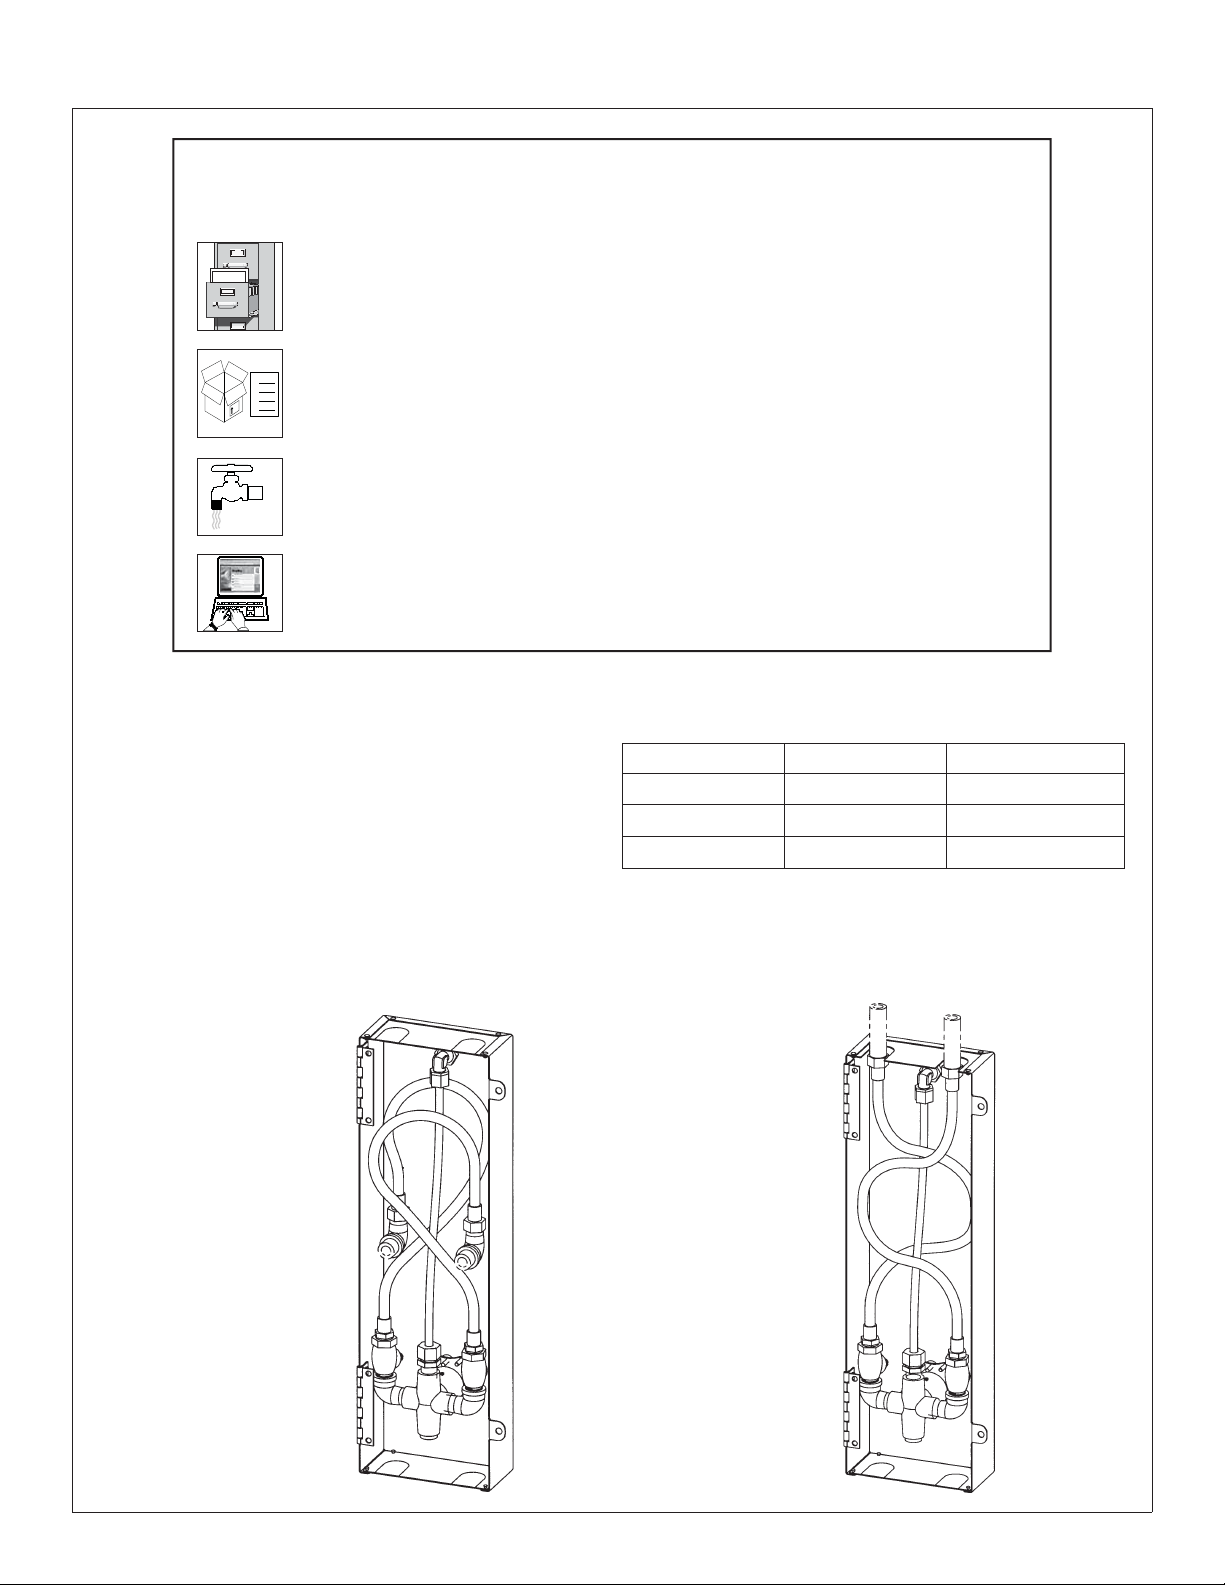
Shower Components
Supplies
thru-wall
2 4/2/07 Bradley Corporation • 215-1441 Rev. C; EN 07-304
Supplies
from above
Page 3

Installation WS-1X
Shower Dimensions
Supplies from above
Front Rear
1
Rough-In Piping
Hot
(127)
(152)
13-3/4"
(349)
5"
6"
Supplies
Thru
Wall
6-3/4"
(173)
(102)
Cold
or
Tempered
1/2"
(13)
4"
(102)
22-3/4"
(579)
3-1/8"
(80)
4"
16-3/4"
(425)
3-1/2"
(89)
1-3/4"
(44)
1/2"
(12)
17-3/4"
(452)
3-1/4"
(82)
1/2"
(12)
6-7/8"
(173)
Supply inlets are 1/2" NPT fl exible hose and are accessible from the back of the shower or from knockouts on the top cover.
Bradley’s Equa-Flo valve shown; other valve versions install in similar manner.
• If supplies will be run “thru-wall”, Bradley recommends using a 90° street ell to connect the supply hoses.
• If supplies will be run “from above”, Bradley recommends running them approximately 1/2" into the top cover.
2
Install Shower
Connect the 1/2" flexible hoses
to the supply lines. Turn the
B
water on and check for leaks
and adequate water spray.
Using the shower hinge as a
template, mark wall and drill
holes for 1/4" fasteners (wall
A
anchors and fasteners
supplied by installer). Secure
hinge side to the wall.
Close the shower tight to
the wall and mark the
holes for the mounting
tabs on the wall. mark wall
C
and drill holes for 1/4"
fasteners. Secure tabs to
the wall.
See table on page 2 for recommended
showerhead heights.
Bradley Corporation • 215-1441 Rev. C; EN 07-304 4/2/07 3
Page 4

WS-1X Installation
Vertical Shroud
Installation
Position the shroud mounting
bracket (140-904) on the wall
above the shower. Secure the
A
bracket to the wall with 1/4"
fasteners (wall anchors and
fasteners supplied by installer).
CEILING LINE
6-1/2"
(165mm)
(102mm)
6-1/2"
(165mm)
3/4"
(19mm)
6-5/8"
(168mm)
"
4
Position the slip ring (186-1358)
against the wall at the ceiling
and in line with the shroud
B
bracket. Secure the slip ring to
the wall with 1/4" fasteners.
"
3
(76mm)
Position the shroud and
secure with the fasteners
provided. Using the holes in
the top of the shroud as a
C
template, drill and tap #10-24
holes in the slip ring with a
.149 drill bit. Secure the
shroud to the slip ring.
SHOWER
Horizontal Shroud
Installation
A
Using the horizontal shroud as a
guide, secure the slip ring to the
B
wall with 1/4" diameter fasteners.
Using the shroud as a template,
drill and tap #10-24 holes in the
C
slip ring with a .149 drill bit.
Secure the brackets to the wall with
1/4” diameter fasteners (wall anchors
and fasteners supplied by installer).
#10-24 SCREW
(160-138)
(4) PLACES
CORNER LINE
4 4/2/07 Bradley Corporation • 215-1441 Rev. C; EN 07-304
Page 5

Installation WS-1X
IMPORTANT !
Installation
Lorsque la pose est terminée, remettre ce manuel au propriétaire
ou au service d’entretien. La mise en conformité et le respect
de la réglementation en vigueur relèvent de la responsabilité de
l’installateur.
Veiller à lire ce manuel en entier pour assurer une pose correcte.
Packing List
Déballer les pièces et s’assurer qu’elles sont toutes présentes avant
THIS
E
SID
UP
de jeter les emballages. Le cas échéant, ne pas commencer la pose
avant d’avoir obtenu toutes les pièces manquantes.
S’assurer que toutes les conduites d’arrivée d’eau ont été purgées
puis correctement fermées avant de commencer la pose. La
présence de débris dans les conduites peut causer un mauvais
fonctionnement des vannes.
Les garanties de produits peuvent être trouvées sous « Product
Information » sur notre site Web à www.bradleycorp.com.
Fournitures requises
• Conduites d’arrivée d’eau avec raccord 1/2 po
NPT pour tuyau(x) flexible(s)
• Chevilles d’ancrage et vis de 1/4 po de diamètre
adaptées pour fixer la douche au mur
• Ruban d’étanchéité pour tuyaux
Hauteurs de douche conseillées
Âge Masculin Féminin
Adulte 1,83 m (6'0") 1,83 m (6'0")
Adolescent 1,83 m (6'0") 1,68 m (5'6")
Pré-adolescent 1,68 m (5'6") 1,68 m (5'6")
Éléments
de la douche
Arrivée à
travers le mur
Bradley Corporation • 215-1441 Rev. C; EN 07-304 4/2/07 5
Arrivée par
le haut
Page 6

WS-1X Installation
173 mm
Dimensions
de la douche
1
Tuyauterie de raccordement
Arrivée par le haut
Supplies from above
Avant
Chaud
Hot
127 mm
(127)
(5")
152 mm
(152)
349 mm
13-3/4"
(13-3/4")
(349)
5"
(6")
6"
Supplies
Arrivée à
Thru
travers le mur
Wall
6-3/4"
(6-3/4")
(173)
102 mm
(102)
(4")
Cold
Froid ou
or
Tempered
tempéré
13
1/2"
mm
(13)
(1/2")
4"
102
(102)
mm
(4")
579 mm
22-3/4"
(22-3/4")
(579)
80 mm
3-1/8"
(80)
(3-1/8")
4"
Arrière
425 mm
16-3/4"
(16-3/4")
(425)
mm
3-1/2"
(3-1/2")
(89)
89
44 mm
1-3/4"
(44)
(1-3/4")
12 mm
1/2"
(1/2")
(12)
173 mm
6-7/8"
(6-7/8")
(173)
452 mm
17-3/4"
(17-3/4")
(452)
82 mm
3-1/4"
(3-1/4")
(82)
12 mm
1/2"
(1/2")
(12)
Les arrivées d’eau sont des tuyaux fl exibles de 1/2 po NPT, accessibles depuis l’arrière de la douche ou à travers des
ouvertures défonçables sur le dessus. Vanne Equa-Flo de Bradley représentée ; les modèles équipés d’autres vannes se
posent de la même manière.
• Si les conduites arrivent « à travers le mur », Bradley conseille d’utiliser des coudes mâle-femelle de 90° pour
raccorder les fl exibles.
• Si les conduites arrivent « par le dessus », Bradley conseille de les faire pénétrer de 13 mm (1/2 po) environ par le
couvercle supérieur.
2
Pose de la douche
Utiliser la charnière de
douche en guise de
Using the shower hinge as a
A
A
gabarit pour marquer le
AAAAA
template, mark wall and drill
mur et percer des trous
holes for 1/4" fasteners (wall
A
pour les vis de 1/4 po
anchors and fasteners
A
(chevilles d’ancrage
supplied by installer). Secure
et vis fournies par
hinge side to the wall.
l’installateur). Fixer le
côté charnière sur le mur.
Raccorder les tuyaux fl exibles de
Connect the 1/2" flexible hoses
1/2 po aux conduites d’arrivée.
to the supply lines. Turn the
Ouvrir l’eau et vérifi er l’absence
B
B
water on and check for leaks
de fuites et le débit d’eau.
and adequate water spray.
Fermer la douche
Close the shower tight to
contre le mur, marquer
the wall and mark the
l’emplacement des
holes for the mounting
trous de pattes de
tabs on the wall. mark wall
C
C
fi xation sur le mur et
and drill holes for 1/4"
percer des trous pour
fasteners. Secure tabs to
vis de 1/4 po. Fixer les
the wall.
pattes sur le mur.
Voir les hauteurs de pomme de
douche conseillées à la page 5.
6 4/2/07 Bradley Corporation • 215-1441 Rev. C; EN 07-304
Page 7

Installation WS-1X
Pose de gaine
verticale
CEILING LINE
LIGNE DE PLAFOND
Placer le support de fi xation de
Position the shroud mounting
gaine (140-904) sur le mur
bracket (140-904) on the wall
au-dessus de la douche.
above the shower. Secure the
A
A
Fixer le support au mur avec
bracket to the wall with 1/4"
des vis de 1/4 po (chevilles
fasteners (wall anchors and
d’ancrage et vis fournies par
fasteners supplied by installer).
l’installateur).
165 mm
6-1/2"
(6-1/2")
(165mm)
102 mm
"
4
(102mm)
(4")
165 mm
6-1/2"
(6-1/2")
(165mm)
19 mm
3/4"
(3/4")
(19mm)
168 mm
6-5/8"
(6-5/8")
(168mm)
Position the slip ring (186-1358)
Placer le manchon (186-1358)
contre le mur au niveau du
against the wall at the ceiling
plafond, aligné sur le support
and in line with the shroud
B
B
de gaine. Fixer le manchon au
bracket. Secure the slip ring to
mur avec des vis de 1/4 po.
the wall with 1/4" fasteners.
"
76 mm
3
(76mm)
(3")
Mettre la gaine en place et
la fi xer avec les vis fournies.
Position the shroud and
Utiliser les trous du haut de
secure with the fasteners
la gaine en guise de gabarit
provided. Using the holes in
pour percer et tarauder
the top of the shroud as a
C
C
des trous n°10-24 dans le
template, drill and tap #10-24
manchon avec un foret de
holes in the slip ring with a
0,149. Fixer la gaine sur le
.149 drill bit. Secure the
manchon.
shroud to the slip ring.
SHOWER
DOUCHE
Pose de gaine
horizontale
A
A
En se guidant sur la gaine
Using the horizontal shroud as a
horizontale, fi xer le manchon au
guide, secure the slip ring to the
B
B
mur avec des vis de 1/4 po de
wall with 1/4" diameter fasteners.
diamètre.
Utiliser la gaine en guise de
Using the shroud as a template,
gabarit pour percer et tarauder
drill and tap #10-24 holes in the
C
des trous n°10-24 dans le
slip ring with a .149 drill bit.
C
manchon avec un foret de
0,149.
Fixer les supports au mur avec des
Secure the brackets to the wall with
vis de 1/4 po de diamètre (chevilles
1/4” diameter fasteners (wall anchors
d’ancrage et vis fournies par
and fasteners supplied by installer).
l’installateur).
MANCHON
144-064
TROUS OBLONGS POUR VIS DE
1/4 PO DE DIAMÈTRE
HORIZONTALE
GAINE
#10-24 SCREW
VIS N°10-24
(160-138)
(160-138)
(4) PLACES
(4) EMPLACEMENTS
SUPPORT
TROUS OBLONGS
POUR VIS DE 1/4 PO
DE DIAMÈTRE
MANCHON
186-1358
140-903
CORNER LINE
LIGNE DE COIN
VIS À TÊTE
RONDE SIX
PANS CREUX
N°10-24 X 1/2"
160-138
GAINE
VERTICALE
165 mm
(6-1/2")
SUPPORT
140-904
DOUCHE
Bradley Corporation • 215-1441 Rev. C; EN 07-304 4/2/07 7
Page 8

WS-1X Installation
¡IMPORTANTE!
Lea este manual de instalación completo para garantizar una
Installation
TH
SID
UP
IS
E
instalación adecuada. Una vez que termine la instalación, entregue
este manual al propietario o al Departamento de Mantenimiento.
Cumplir los códigos y las ordenanzas locales y apegarse a ellos es
responsabilidad del instalador.
Packing List
Saque las piezas del embalaje y asegúrese de haberlas sacado todas
antes de desecharlo. Si falta alguna pieza, no comience la instalación
sino hasta obtenerla.
Asegúrese de purgar todas las tuberías de suministro de agua; y
que éstas estén completamente cerradas antes de comenzar la
instalación. Los desechos acumulados en las tuberías de suministro
pueden provocar el funcionamiento defectuoso de las válvulas.
Las garantías del producto se pueden encontrar en “Información del
producto” o en nuestro sitio Web, www.bradleycorp.com.
Materiales necesarios
• Tubería de suministro de agua para conectar
mangueras flexibles NPT de 1/2"
• Anclajes para pared adecuados y sujetadores de
1/4" de diámetro para instalar la ducha en la pared
• Sellador para tubos
Componentes
de la ducha
Tubería de suministro
a través de la pared
Alturas recomendadas de la ducha
Edad Hombre Mujer
Adulto 1,83 m (6'0") 1,83 m (6'0")
Adolescentes 1,83 m (6'0") 1,68 m (5'6")
Pre-adolescentes 1,68 m (5'6") 1,68 m (5'6")
Tubería de suministro
desde arriba
8 4/2/07 Bradley Corporation • 215-1441 Rev. C; EN 07-304
Page 9

Installation WS-1X
173 mm
Dimensiones
de la ducha
Tubería de suministro
Supplies from above
Parte frontal
desde arriba
Caliente
Hot
127 mm
(127)
(5")
152 mm
349 mm
13-3/4"
(13-3/4")
(349)
5"
6"
(6")
(152)
suministro a través
Tubería de
Supplies
Thru
de la pared
Wall
6-3/4"
(6-3/4")
(173)
102 mm
(102)
(4")
Cold
Fría o
or
Tempered
templada
13
1/2"
mm
(13)
(1/2")
4"
102
(102)
mm
(4")
579 mm
22-3/4"
(22-3/4")
(579)
80 mm
3-1/8"
(80)
(3-1/8")
4"
Parte
posterior
425 mm
16-3/4"
(16-3/4")
(425)
mm
3-1/2"
(3-1/2")
(89)
89
44 mm
1-3/4"
(44)
(1-3/4")
12 mm
1/2"
(1/2")
(12)
173 mm
6-7/8"
(6-7/8")
(173)
452 mm
17-3/4"
(17-3/4")
(452)
82 mm
3-1/4"
(3-1/4")
(82)
12 mm
1/2"
(1/2")
(12)
1
Colocación de tuberías empotradas
Las entradas de suministro son mangueras fl exibles NPT de 1/2" y se puede acceder a ellas desde la parte posterior de la
ducha o desde los orifi cios ciegos de la cubierta superior. La válvula que se muestra es Equa-Flo de Bradley; otras versiones
de válvulas se instalan de forma similar.
• Si la tubería de suministro se instalará “a través de la pared”, Bradley recomienda usar un codo de rosca macho y
hembra de 90° para conectar las mangueras de suministro.
• Si la tubería de suministro se instalará “desde arriba”, Bradley recomienda instalarla aproximadamente a 13 mm (1/2") de
profundidad en la cubierta superior.
2
Instalación de la ducha
Con la bisagra de la
ducha como plantilla,
marque la pared y
A
A
AAAAA
Using the shower hinge as a
taladre orifi cios para
template, mark wall and drill
los sujetadores de
holes for 1/4" fasteners (wall
A
1/4" (los anclajes para
A
anchors and fasteners
pared y los sujetadores
supplied by installer). Secure
hinge side to the wall.
los proporciona el
instalador). Fije el
costado de la bisagra a
la pared.
Conecte las mangueras fl exibles de
1/2" a las tuberías de suministro.
Connect the 1/2" flexible hoses
Dé el agua y verifi que que no haya
to the supply lines. Turn the
B
B
fi ltraciones y que el agua se rocíe
water on and check for leaks
and adequate water spray.
adecuadamente.
Acerque bien la ducha
a la pared y marque los
Close the shower tight to
orifi cios de las lengüetas
the wall and mark the
de montaje en la pared,
holes for the mounting
C
marque la pared y
tabs on the wall. mark wall
C
taladre orifi cios para los
and drill holes for 1/4"
sujetadores de 1/4". Fije las
fasteners. Secure tabs to
the wall.
lengüetas a la pared.
Consulte la tabla de la página 8 para
conocer las alturas recomendadas
de la ducha.
Bradley Corporation • 215-1441 Rev. C; EN 07-304 4/2/07 9
Page 10

WS-1X Installation
Instalación vertical
del recubrimiento
LÍNEA DEL CIELO RASO
Coloque el soporte de montaje
Position the shroud mounting
del recubrimiento (140-904)
bracket (140-904) on the wall
en la pared sobre la ducha.
above the shower. Secure the
A
Fije el soporte a la pared
bracket to the wall with 1/4"
A
con sujetadores de 1/4" (los
fasteners (wall anchors and
anclajes para pared y los
fasteners supplied by installer).
sujetadores los proporciona el
instalador).
CEILING LINE
165 mm
6-1/2"
(6-1/2")
(165mm)
"
102 mm
4
(102mm)
(4")
165 mm
6-1/2"
(6-1/2")
(165mm)
19 mm
3/4"
(3/4")
(19mm)
168 mm
6-5/8"
(6-5/8")
(168mm)
Coloque el anillo deslizante
Position the slip ring (186-1358)
(186-1358) contra la pared en
against the wall at the ceiling
el cielo raso y en línea con el
and in line with the shroud
B
soporte del recubrimiento. Fije
B
bracket. Secure the slip ring to
el anillo deslizante a la pared
con los sujetadores de 1/4".
the wall with 1/4" fasteners.
"
76 mm
3
(76mm)
(3")
Coloque el recubrimiento
y fíjelo con los sujetadores
proporcionados. Con los
Position the shroud and
orifi cios de la parte superior
secure with the fasteners
del recubrimiento como
provided. Using the holes in
modelo, taladre y rosque
the top of the shroud as a
C
C
orifi cios para tornillos
template, drill and tap #10-24
Nº 10-24 en el anillo
holes in the slip ring with a
deslizante con una broca
.149 drill bit. Secure the
de taladro de 0,149. File
shroud to the slip ring.
el recubrimiento al anillo
deslizante.
SHOWER
DUCHA
Instalación horizontal
del recubrimiento
Fije los soportes a la pared con
sujetadores de 1/4" de diámetro
Secure the brackets to the wall with
(los anclajes para pared y los
A
1/4” diameter fasteners (wall anchors
A
sujetadores los proporciona el
and fasteners supplied by installer).
instalador).
Con el recubrimiento horizontal
Using the horizontal shroud as a
como modelo, fi je el anillo
guide, secure the slip ring to the
B
B
deslizante a la pared con
wall with 1/4" diameter fasteners.
sujetadores de 1/4" de diámetro.
RANURAS PARA SUJETADORES
Con el recubrimiento como
Using the shroud as a template,
modelo, taladre y rosque orifi cios
drill and tap #10-24 holes in the
C
para tornillos Nº 10-24 en el
slip ring with a .149 drill bit.
C
anillo deslizante con una broca
de taladro de 0,149.
DESLIZANTE
DE 1/4" DE DIÁMETRO
RECUBRIMIENTO
HORIZONTAL
ANILLO
144-064
TORNILLO
#10-24 SCREW
Nº 10-24 (160-138)
(160-138)
(4) UBICACIONES
(4) PLACES
SOPORTE
RANURAS PARA
SUJETADORES DE 1/4"
DE DIÁMETRO
ANILLO
DESLIZANTE
186-1358
140-903
LÍNEA DE LA
CORNER LINE
ESQUINA
TORNILLOS
ALLEN DE
CABEZA
SEMIESFÉRICA
Nº 10-24 x 1/2"
160-138
RECUBRIMIENTO
VERTICAL
165 mm
(6-1/2")
SOPORTE
140-904
DUCHA
10 4/2/07 Bradley Corporation • 215-1441 Rev. C; EN 07-304
 Loading...