

Page 1
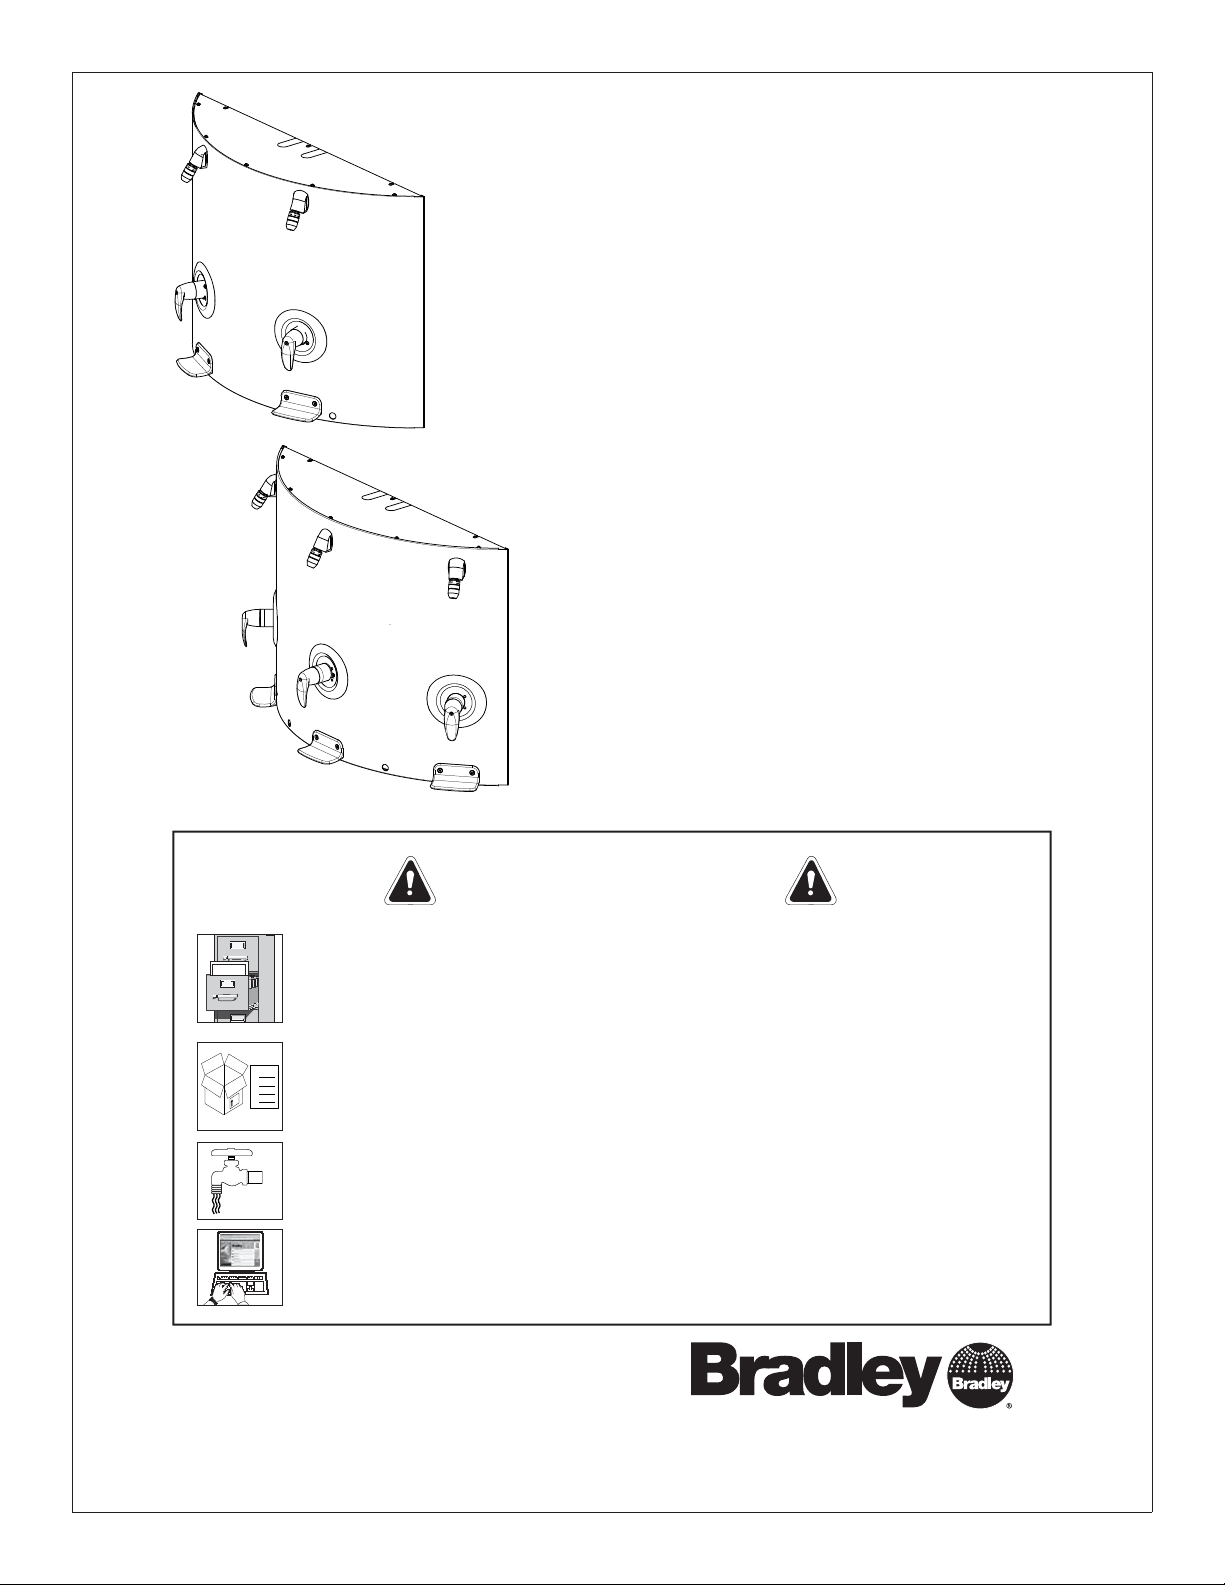
WS-2WMD
Installation
Wall-Saver Shower
WS-2WMD, WS-3WMT
Supplies Required ................................................. 2
Dimensions ............................................................ 2
Installation ............................................................. 3
Optional Vertical Shroud Installation ...................... 3
Optional Horizontal Shroud Installation ................. 4
Cleaning Instructions ............................................. 4
WS-3WMT
Installation
Packing List
•
•
•
THIS
SIDE
•
UP
IMPORTANT!
Read this entire installation manual to ensure proper installation. When
fi nished with the installation, fi le this manual with the owner or maintenance
department. Compliance and conformity to local codes and ordinances is
the responsibility of the installer.
Separate parts from packaging and make sure all parts are accounted for
before discarding packaging material. If any parts are missing, do not begin
installation until you obtain the missing parts.
Make sure that all water supply lines have been fl ushed and then completely
turned off before beginning installation. Debris in supply lines can cause
valves to malfunction.
Product warranties may be found under “Products” on our web site at
bradleycorp.com.
215-1706 Rev. A EN 11-03-001A
© 2011 Bradley Corporation
Page 1 of 4 8/23/2011
P.O. Box 309, Menomonee Falls, WI USA 53052-0309
PHONE 800.BRADLEY (800.272.3539) FAX 262.251.5817
bradleycorp.com
Page 2
WS-2WMD, WS-3WMT Installation
Supplies required for installation:
• Water supply inlets for 3/4" nom. type “L” copper tube
• (4) Wall anchors and 1/4" diameter bolts for mounting support
brackets
• (OPTIONAL) 1/4" diameter screws for mounting shroud brackets
• (OPTIONAL) 3/4" union
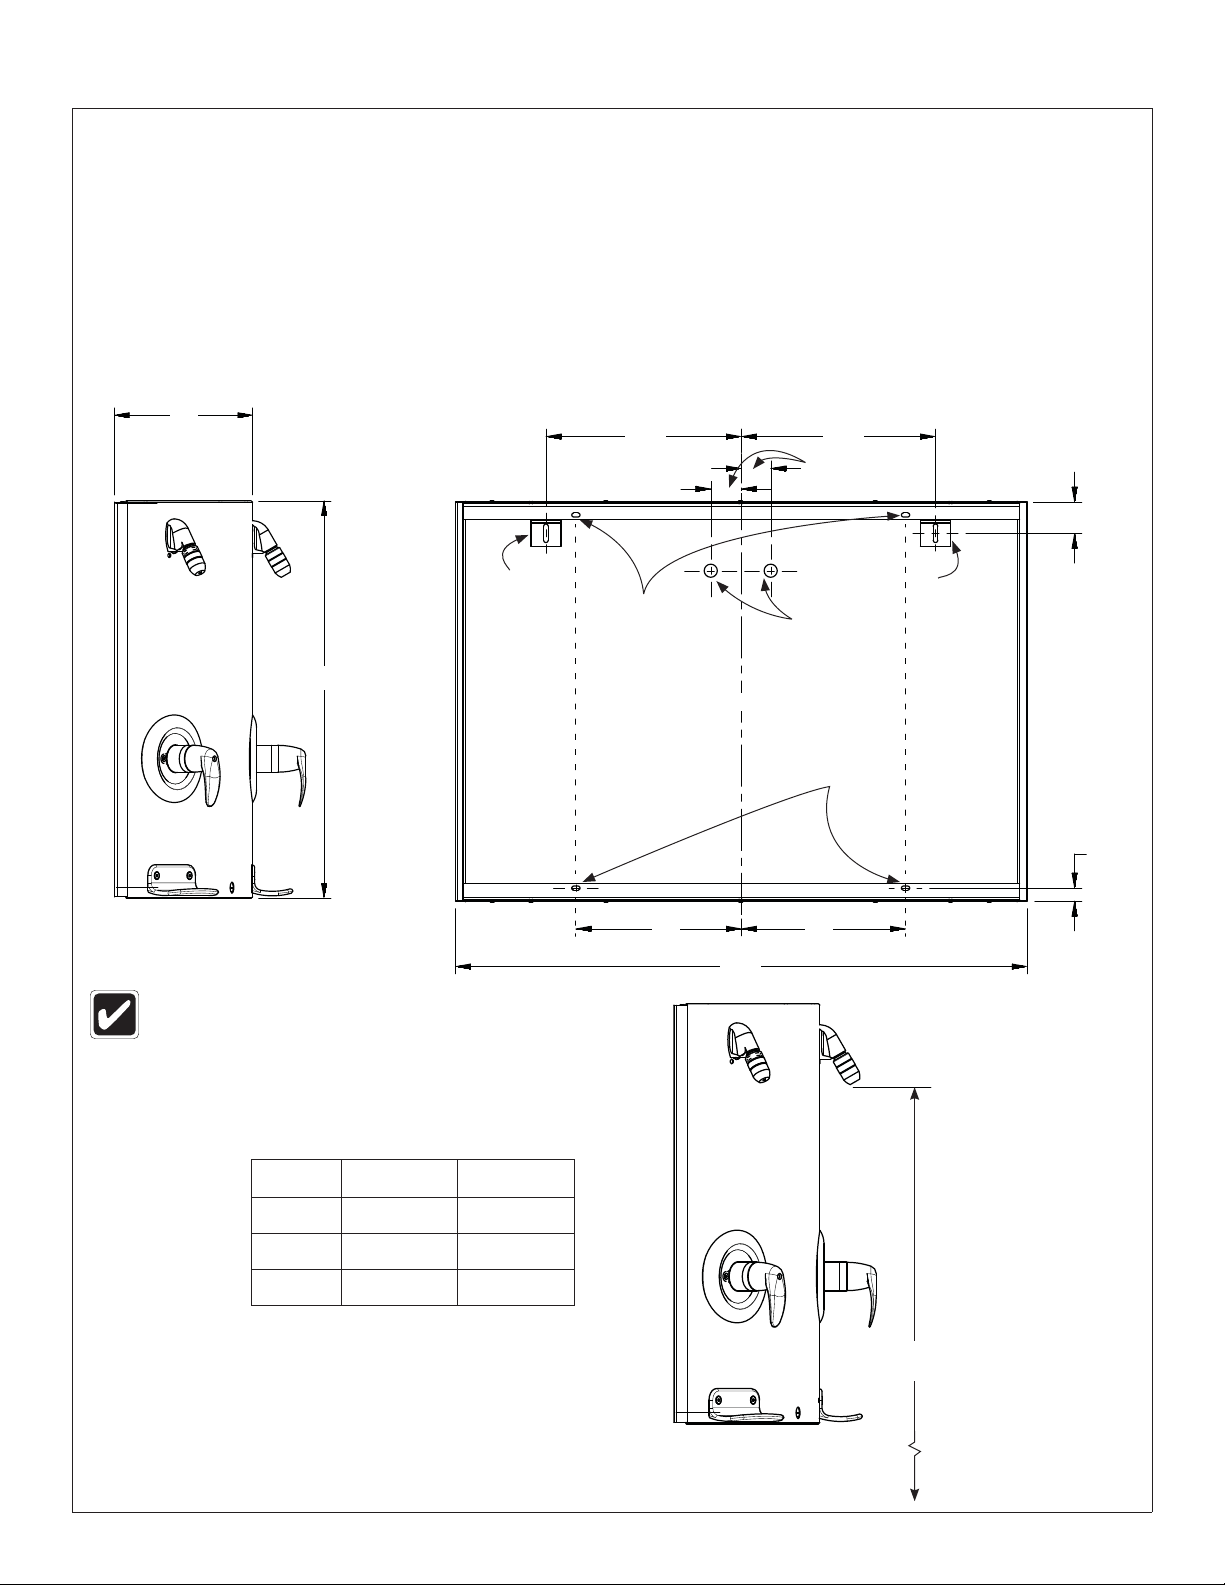
Dimensions (mm)
9"
(229)
13"
(330)
2"
(51)
13"
(330)
2"
(51)
Mounting
Bracket
26-3/4"
(679)
Rough in supply lines before making connections.
Use the Cold Inlet for Tempered Supply.
Recommended Shower Height
(from Showerhead tip to fi nished fl oor)
Anchor
Holes
11"
(279)
C
L
38-1/4"
(972)
Supply
from Wall
11"
(279)
Anchor
Holes
Mounting
Bracket
Standard S24-038
Showerhead Shown
7/8"
(17)
Age Male Female
Adult 6'0" (1.83m) 5'6" (1.68m)
Teen 6'0" (1.83m) 5'6" (1.68m)
Pre-Teen 5'6" (1.68m) 5'6" (1.68m)
Distance to
fi nished fl oor
2 8/23/2011 Bradley Corporation • 215-1706 Rev. A; EN 11-03-001A
Page 3

Installation WS-2WMD, WS-3WMT
Install Shower
1
Remove top and bottom covers.
A
Supplies may be brought in from
back of shower unit or through
knock- outs located on top of
shower unit.
Measure from top of unit to tip of showerhead.
Subtract 2" and add the total to the desired
B
mounting height (see page 2). Mark the wall
with level horizontal line.
Drill 1/4" holes on marked line and attach
mounting brackets to wall using suitable hardware.
C
Hang unit on brackets. Fasten to wall at the four
anchor holes, using suitable hardware.
Mounting
Bracket
Top Cover
Bottom
Cover
X 8
Supply
Knockouts
Mounting
Bracket
X 8
Connect water supply to copper tubes inside the
shower unit. Turn on water to your shower and
D
check for leaks. Attach top and bottom covers.
Installing Optional Vertical Shroud
Position Bracket on top of shower and secure
A
to wall with 1/4" screws (provided by installer).
Position Slip Ring on top of shower against
ceiling and secure to wall with 1/4" screws
B
(provided by installer).
Position Shroud and secure to lower bracket with
screws provided. Using holes on top of shroud
C
as guides, drill and tap #10-24 holes in Slip Ring.
Secure Shroud to Slip Ring.
Slots for 1/4"
Dia. Screws
(supplied by
installer)
Bracket
Top of
Wall Saver
Shower
1" (25)
Ceiling
Slip Ring
6-1/2"
(165)
10-24 x 1/2"
Allen Button
Head Screws
(mm)
4" (102)
6-1/2"
(165)
Shroud
Bradley Corporation • 215-1706 Rev. A; EN 11-03-001A 8/23/2011 3
Page 4

WS-2WMD, WS-3WMT Installation
(mm)Installing Optional Horizontal Shroud
Slots for 1/4"
Dia. Screws
#10-24
Holes
Bracket
(supplied by
installer)
Position Bracket and Slip Ring on wall and
A
secure with 1/4" screws (provided by installer).
Slip
Ring
10-24 x 1/2"
Allen Button
Head Screws
Position Shroud over the bracket and secure with
B
screws provided.
Using shroud as guides, drill and tap #10-24
holes in Slip Ring. Secure Shroud to Slip Ring.
C
Shrouds
Cleaning Stainless Steel
Material Description: Stainless steel is extremely durable, and maintenance is simple and inexpensive. Proper care, particularly under corrosive
conditions, is essential. Always start with the simplest solution and work your way toward the more complicated.
Routine cleaning: Daily or as often as needed use a solution of warm water and soap, detergent, or ammonia. Apply the cleaning solution per the
manufactures instructions and always use a soft cloth or sponge to avoid damaging the fi nish.
Stubborn Stains: To remove stains from stainless steel, use a stainless steel cleaner and polish such as Ball® stainless steel cleaner or a soft
abrasive. Always follow the manufactures instructions and apply in the same direction as the polish lines.
Never use ordinary steel wool or steel brushes on stainless steel.
Always use stainless steel wool or stainless steel brushes.
Special Situations for Material
Fingerprints and Smears: To remove fi ngerprints or smears use a high quality stainless steel cleaner and polish in accordance with the
manufactures instructions. Many of these products leave a protective coating that helps prevent future smears and fi ngerprints.
Grease and Oil: To remove grease and oil, use a quality commercial detergent or caustic cleaner. Apply in accordance to the manufactures
instructions and in the direction of the polish lines.
Precautions: Avoid prolonged contact with chlorides (bleaches, salts), bromides (sanitizing agents), thiocyanates (pesticides, photography chemicals,
and some foods), and iodides on stainless steel equipment, especially if acid conditions exist.
Do not permit salty solutions to dry and evaporate on stainless steel.
The appearance of rust streaks on stainless steel leads to the belief that the stainless steel is rusting. Look for the actual source of the rust in some
iron or steel particles which may be touching, but not actually a part of the stainless steel structure.
Strongly acidic or caustic cleaners may attack the steel causing a
reddish fi lm to appear. The use of these cleaners should be avoided.
Brand Names: Use of brand names is intended only to indicate a type of cleaner. This does not constitute an endorsement, nor does the omission of any brand name cleaner imply its
inadequacy. Many products named are regional in distribution, and can be found in local supermarkets, department and hardware stores, or through your cleaning service. It is emphasized
that all products should be used in strict accordance with package instructions.
4 8/23/2011 Bradley Corporation • 215-1706 Rev. A; EN 11-03-001A
 Loading...