

Page 1
Installation
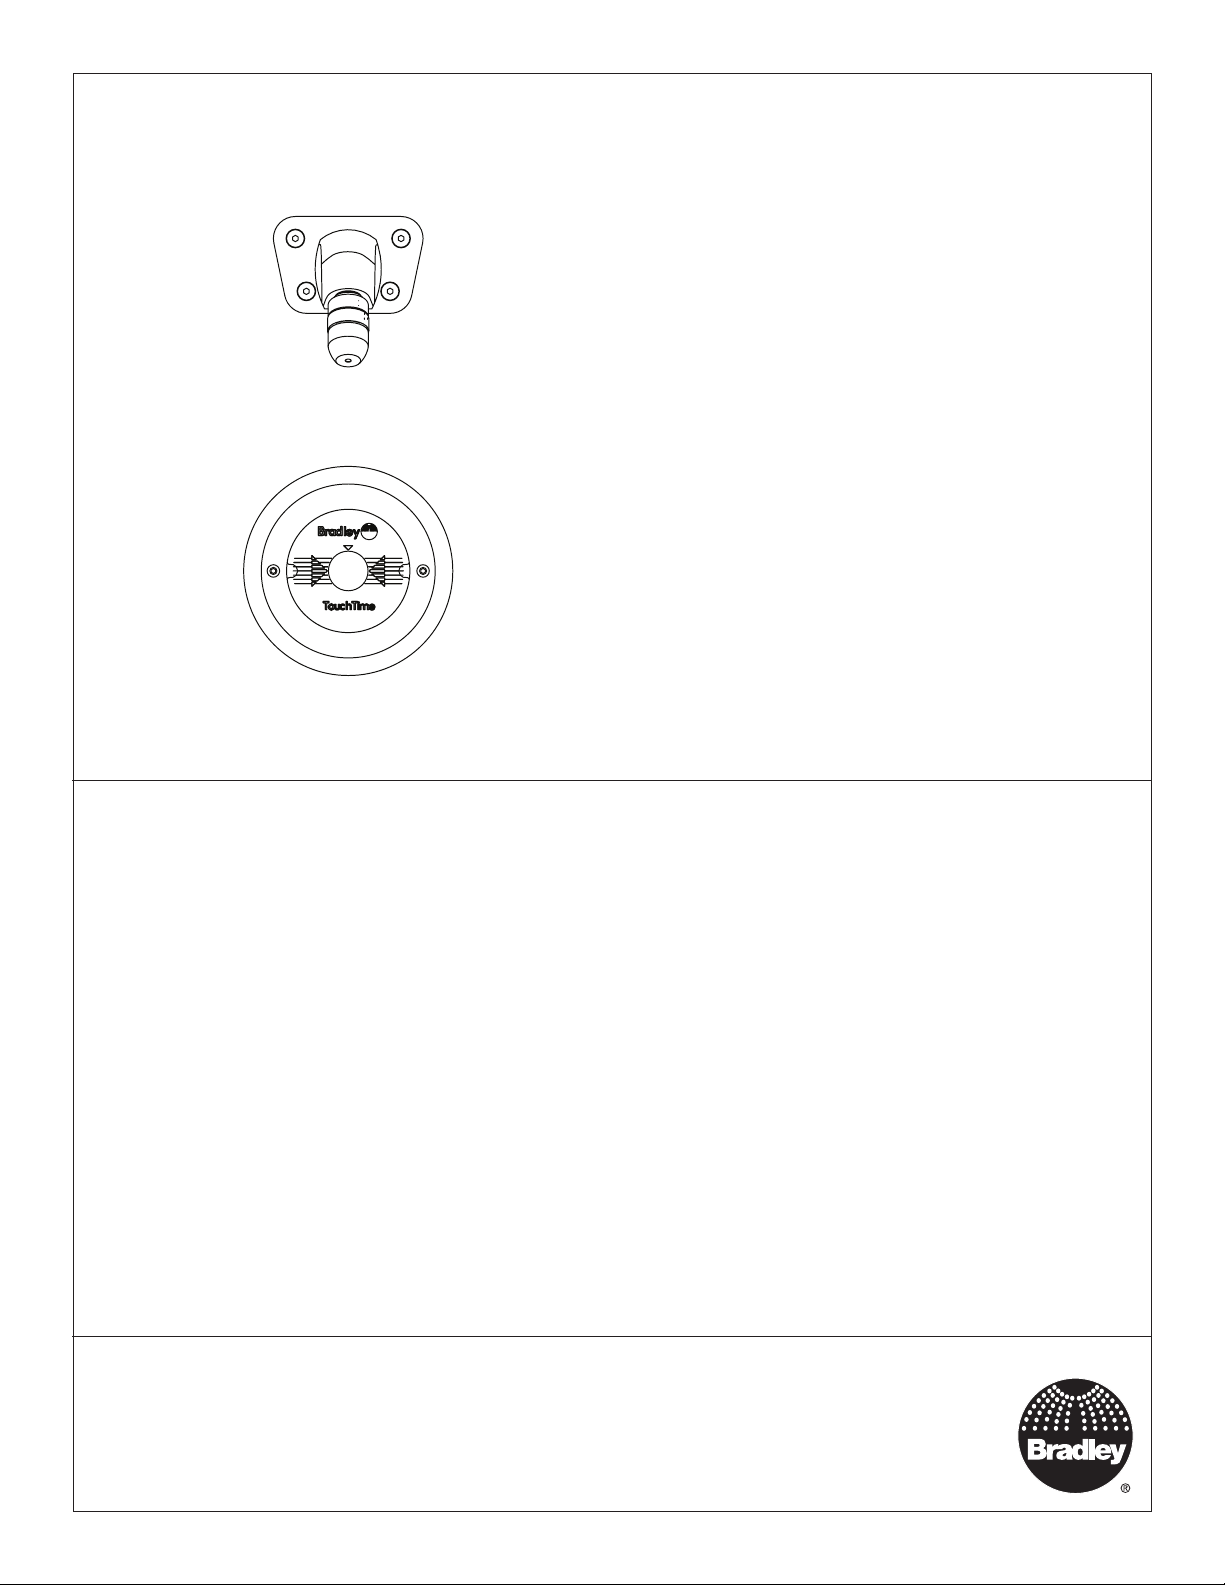
Bradley 1C TouchTime®
Individual Built-In Wall
Shower with Concealed
Supplies
Table of Contents
Pre-Installation Information ....................... 2
Rough-In ..................................... 3
Make Electrical Connections ...................... 4
Adjusting the TouchTime Module .................. 4
Complete Installation ............................ 5
TouchTime Valve Parts List ...................... 5
Cleaning and Maintenance for Stainless Steel ........ 5
WARNING
Make sure that all water supply lines have been flushed and then completely turned off before beginning
installation. Debris in the supply lines can cause valves to malfunction.
NOTICE
Water supply requires a flowing pressure of at least 20 psi, but no greater than 80 psi.
IMPORTANT
Read this entire installation manual to ensure proper installation. When finished with the installation, file
this manual with the owner or maintenance department. Compliance and conformity to local codes and
ordinances is the responsibility of the installer.
Separate parts from packaging and make sure all parts are accounted for before discarding packaging
material. If any parts are missing, do not begin installation until you obtain the missing parts.
Product warranties may be found under “Products” on our website at www.bradleycorp.com.
215-1855 Rev. A; ECN 17-03-011
© 2017 Bradley
Page 1 of 5 8/23/2017
Menomonee Falls, WI 53052 USA
P.O. Box 309
800 BRADLEY (800 272 3539)
+1 262 251 6000
bradleycorp.com
Page 2

Bradley TouchTime® Individual Built-In Wall Shower with Concealed Supplies Installation
Pre-Installation Information
TouchTime
The 1C TouchTime® Shower controls water flow at each station through the use of a timer module. When the pushbutton is
pushed, a signal is sent controlling the opening and closing of the fixture's solenoid valve. The valve then delivers water to the
fixture for a preset length of time of 60 seconds (timing is adjustable on module).
Recommended showerhead heights
Bradley 1C TouchTime showers can be installed at any height (see
recommended heights). NOTE: The heights listed are measured from
finish floor to showerhead tip.
Age Male Female
Adult 6' (1.83m) 5'6" (1.68m)
Teenage 6' (1.83m) 5'6" (1.68m)
Pre-Teen 5'6" (1.68m) 5'6" (1.68m)
Components
Material: All exposed parts are stainless steel or polished chrome-plated brass.
Supply Inlet: The supply inlet to the valve assembly is 1/2" IPS.
TouchTIme and Solenoid Valve: Each TouchTime mechanical pushbutton/piezo switch activates a flow of water. Each nozzle
is controlled by a separate solenoid valve, allowing each user to activate a flow of tempered water from one spray nozzle with a
pushbutton or piezo switch for 60 seconds. Each valve uses less than half the maximum amount of hot water allowed by the ANSI/
ASHRAE/IES 90A-1980 Standard. Activation time can be adjusted in the field.
Solenoid Valve: An electronically controlled solenoid valve serves as the metering mechanism. Few moving parts provide reliable
metering performance and the solenoid is unaffected by chemicals and minerals often present in municipal water supplies.
Supplies Required for Installation
• 1/2" IPS piping and 1/2" IPS tempered water supply piping and fittings (for solenoid)
• four 1/4"-20 wall anchors for showerhead and two #10 wall anchors for pushbutton assembly
• Teflon tape or teflon pipe dope
• 110 VAC power source for 12V DC plug in adapter (available from Bradley as an option)
• OPTIONAL: Bradley recommends installing an electrical cut-off switch to the unit. This feature allows no accidental
water delivery during regular maintenance and service.
2
8/23/2017 Bradley • 215-1855 Rev. A; ECN 17-03-011
Page 3

Installation Bradley TouchTime® Individual Built-In Wall Shower with Concealed Supplies
1
Rough-In
WARNING The 1C TouchTime shower must be connected with a 120VAC/12V DC plug in adapter. Not using
the provided adapter can cause personal injury and will result in damage to the electronics.
Refer to recommended shower heights shown above.
Mechanical pushbutton shown, piezo switch similar.
1/2" IPS Piping
(supplied by installer)
Reducer
Elbow, 1/4 NPTM x 5/16 Tube
5/16" Plastic
Tubing
Need to secure
valve assembly to
structure (hardware
by installer).
Rough-in 1/2" tempered
water supply piping
to the valve assembly
A
as required for your
installation.
Rough-in wall openings
for the showerhead and
pushbutton as required
B
for your installation.
3" (76mm)
Showerhead
1/2" (13mm)
2-3/8" (60mm)
2-3/4"
(70mm)
1-1/2" (38mm)
(4) 1/4"-20
Anchors
(supplied by
installer) and
(4) screws
(supplied by
Bradley)
Install two #10 wall
anchors (supplied
by installer) to
C
secure pushbutton
assembly.
Escutcheon
(2) #10-24 Screw
(supplied by
Bradley) and
(2)#10 wall
anchors (supplied
by installer)
2-1/4"
(57mm)
4-1/4"
(108mm)
5-7/8"
(149mm)
Bradley • 215-1855 Rev. A; ECN 17-03-011 8/23/2017
3
Page 4

Bradley TouchTime® Individual Built-In Wall Shower with Concealed Supplies Installation
2
NOTICE: Connection of leads other than shown below may cause permanent damage to the electrodes.
Make Electrical Connections
WARNING DO NOT put the 120VAC/12VDC plug in adapter in the shower room. Check local codes and
ordinances for proper location and connection requirements. Conformity to local codes is the
responsibility of the installer.
WARNING DO NOT activate power to your shower until installation is complete.
WARNING Verify that the electrical source to the fixture is 12V DC.
Activation of the pushbutton takes place only when it
is released, thereby preventing "hold open" activation.
Install a 120VAC/12V DC
plug in adapter in a remote
location a safe distance from
Connect cable from solenoid to TouchTime
module. Connect cable from pushbutton
B
to TouchTime module. Connect cable
from DC adapter to TouchTime module.
A
the shower room.
3
Pushbutton
Cable
TouchTime
Module Cable
Adjusting the TouchTime Module
The TouchTime module is set at the factory with the selector
switch in position 7. This provides a 60 second time out period.
The 24 hour flush function will activate water flow for a period of 60 seconds any
time there has been no activation within the past 24 hours. This function is used
to help clear stagnant water from the plumbing system and can provide some
measure of prevention against the formation of bacteria in supply pipes.
TouchTime
Module
Plug-In
Adapter Cable
Pushbutton
Cable
To adjust the TouchTime module to a different time
out period, turn the selector switch to the desired time
out setting (4 through 9 for no flush, A though F for 24
A
hours flush) as indicated on the module label.
4
8/23/2017 Bradley • 215-1855 Rev. A; ECN 17-03-011
Page 5

Installation Bradley TouchTime® Individual Built-In Wall Shower with Concealed Supplies
4
Complete Installation
Secure the showerhead to the 1/4"-20 wall
anchors (supplied by installer) using the screws
A
provided.
Secure the pushbutton to the #10 wall anchors
(supplied by installer).
B
Turn on the water supply to the 1C TouchTIme
shower and check for leaking.
C
Turn on the power to the control module and
press the pushbutton several times to purge air
D
from the lines.
TouchTime® Valve Parts List
For service please see service guide 215-1369-38 for solenoid valve and TouchTime information.
Cleaning and Maintenance for Stainless Steel
Material Description: Stainless steel is extremely durable, and maintenance is simple and inexpensive. Proper care, particularly
under corrosive conditions, is essential. Always start with the simplest solution and work your way toward the more complicated.
Routine cleaning: Daily or as often as needed use a solution of warm water and soap, detergent, or ammonia. Apply the
cleaning solution per the manufacturer's instructions and always use a soft cloth or sponge to avoid damaging the finish.
Stubborn Stains: To remove stains from stainless steel use a stainless steel cleaner and polish such as Ball® stainless steel
cleaner or a soft abrasive. Always follow the manufacturer's instructions and apply in the same direction as the polish lines.
NOTICE! Never use ordinary steel wool or steel brushes on stainless steel. Always use stainless steel wool or
stainless steel brushes.
Fingerprints and Smears: To remove fingerprints or smears use a high quality stainless steel cleaner and polish in accordance
with the manufacturer's instructions. Many of these products leave a protective coating that helps prevent future smears and
fingerprints.
Grease and Oil: To remove grease and oil use a quality commercial detergent or caustic cleaner. Apply in accordance to the
manufacturer's instructions and in the direction of the polish lines.
Precautions: Avoid prolonged contact with chlorides (bleaches, salts), bromides (sanitizing agents), thiocyanates (pesticides,
photography chemicals, and some foods), and iodides on stainless steel equipment, especially if acid conditions exist.
NOTICE! Do not permit salty solutions to evaporate and dry on stainless steel.
The appearance of rust streaks on stainless steel leads to the belief that the stainless steel is rusting. Look for the actual source
of the rust in some iron or steel particles which may be touching, but not actually a part of the stainless steel structure.
NOTICE! Strongly acidic or caustic cleaners may attack the steel causing a reddish film to appear. The use of these
cleaners should be avoided.
Brand Names
Use of brand names is intended only to indicate a type of cleaner. This does not constitute an endorsement, nor does the
omission of any brand name cleaner imply inadequacy. Many products named are regional in distribution, and can be found in
local supermarkets, department and hardware stores, or through your cleaning service. It is emphasized that all products should
be used in strict accordance with package instructions.
Bradley • 215-1855 Rev. A; ECN 17-03-011 8/23/2017
5
 Loading...