

Page 1
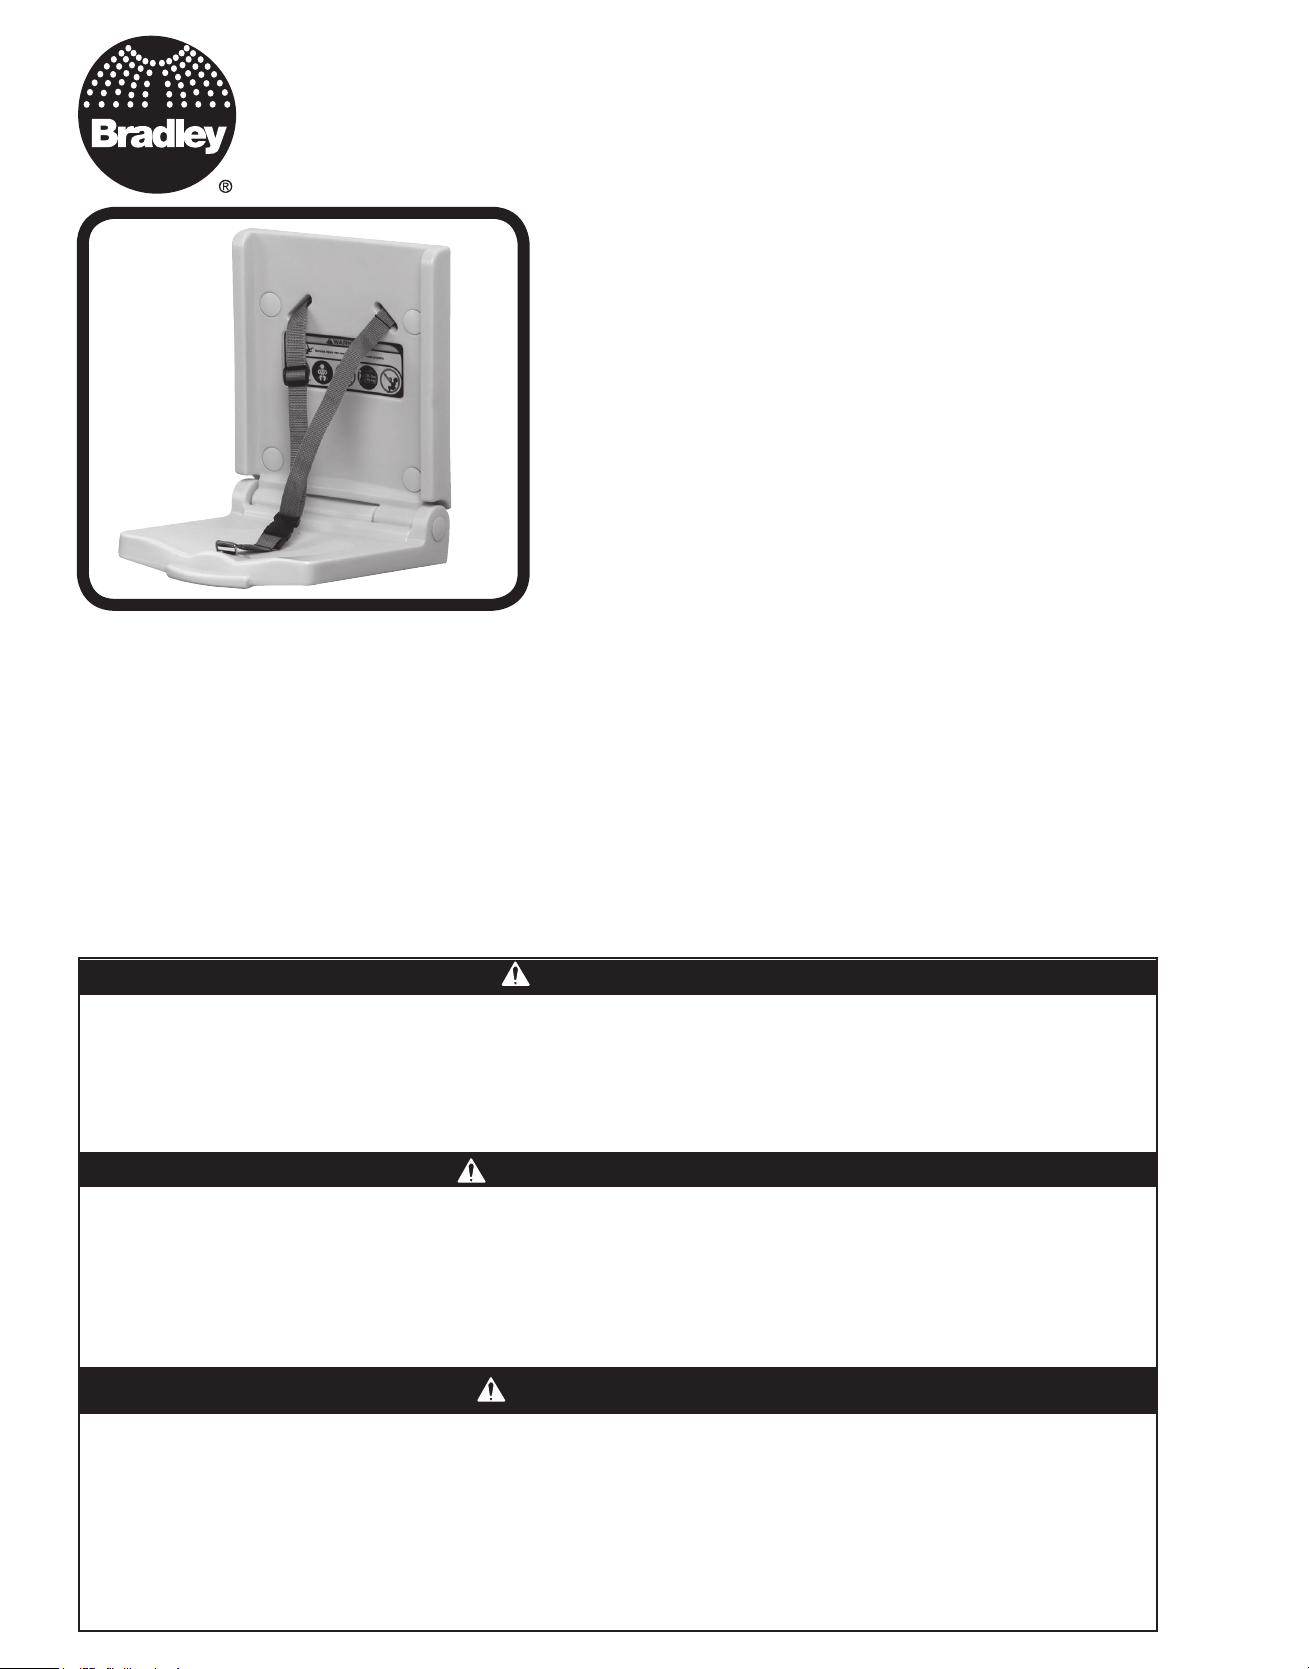
Wall Seat Installation
Instructions
Instructions
d’installation
du siège mural
Instrucciones para
la instalación del
asiento de pared
Model / Modèle / Modelo
# 964-000000
Thank you for purchasing a quality Bradley product. Our goal is 100% consumer satisfaction!
If, for any reason you are not satisfied or if you have any questions regarding your product or installation,
please contact our customer service team at 800 BRADLEY (800 272 3539), Please DO NOT contact your
distributor or reseller as we are better prepared to assist you.
Nous vous remercions d'avoir acheté un produit Bradley de qualité. Notre objectif est 100% la satisfaction du
consommateur! Si, pour une raison quelconque, vous n'êtes pas satisfait ou si vous avez des questions concernant
votre produit ou votre installation,Veuillez communiquer avec notre équipe de service à la clientèle au
800 BRADLEY (800 272 3539), s'il vous plaît ne contactez pas votre Distributeur
ou revendeur que nous sommes mieux préparés pour vous aider.
Gracias por comprar un producto de calidad Bradley. ¡Nuestra meta es 100% satisfacción del consumidor!
Si, por alguna razón, no está satisfecho o si tiene alguna pregunta con respecto a su producto o instalación,
Por favor póngase en contacto con nuestro equipo de servicio al cliente en 800 BRADLEY (800 272 3539), NO
contacte con suDistribuidor o revendedor, ya que estamos mejor preparados para ayudarle.
WARNING
• Failure to follow these warnings and the installation instructions could result in serious injury
or death.
• Read all instructions before installing wall seat. keep these instructions. DO NOT discard.
• The installer is responsible for confirming the wall construction, anchors, and fasteners are in good
condition and capable of withstanding 200 pounds pull out force or greater. Contact the building
architect or engineer for confirmation when in doubt.
AVERTISSEMENT
• Le non-respect de ces avertissements et des instructions d'installation peut entraîner des blessures
graves Ou la mort.
• Lisez toutes les instructions avant d'installer le siège mural. Conservez ces instructions. NE PAS jeter.
• L'installateur est responsable de confirmer la construction murale, les ancres et les attaches sont
en bon éta Condition et capable de résister à 200 livres pull force ou plus. Contacter le bâtiment
Architecte ou ingénieur pour confirmation quand je doute.
ADVERTENCIA
• El no seguir estas advertencias y las instrucciones de instalación podrían resultar en lesiones
graves O la muerte.
• Lea todas las instrucciones antes de instalar el asiento de la pared. Guarde estas instrucciones.
No descartes.
• El instalador es responsable de verificar la construcción de la pared, anclajes y elementos de
fijación estén en buen estado y capaz de soportar 200 libras halar la fuerza o mayor. En caso de
duda póngase en contacto con el arquitecto o ingeniero de construcción para su confirmación.
P20-214 Rev
ECN 16-15-047 04/04/2017
B
AB20224B
Page 2
ASSEMBLY INSTRUCTIONS
ADULT INSTALLATION REQUIRED.
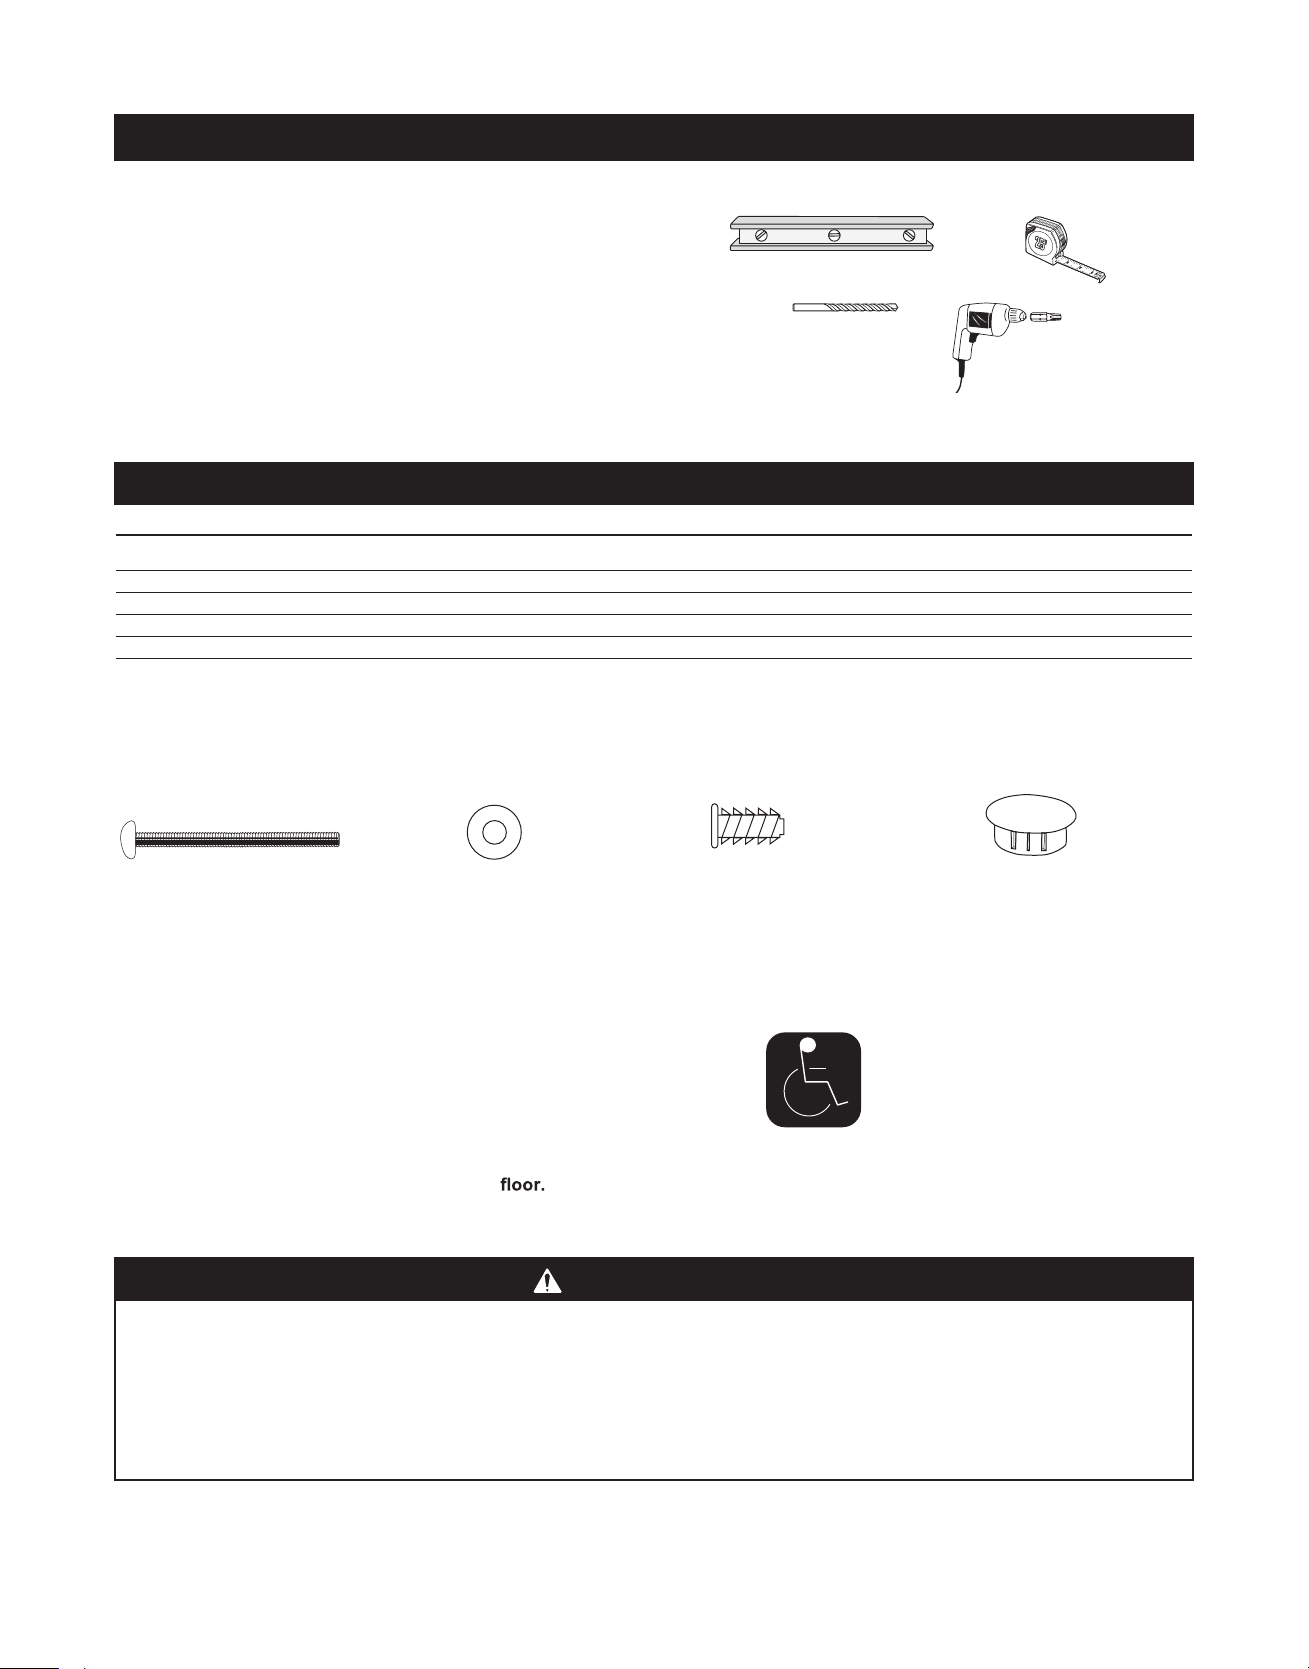
TOOLS REQUIRED:
A
B
Level (A)
Measuring tape (B)
Power drill with 3/8” bit (C)
C
D
Power screwdriver with bull nose phillips bit (D)
• READ ALL INSTRUCTIONS BEFORE ASSEMBLY OF WALL SEAT.
• Unpack carton and identify all parts.
PARTS LIST
Parts Description Quantity
Hardware for installation:
1/4 - 20 x 1-1/4” Machine Screws 4
1/4” Flat Washers 4
1/4 -20 x 9/16” T-Nuts 4
1-1/4” Caps 4
1/4 - 20 x 1-1/4” Machine Screws
IMPORTANT:
The enclosed hardware is for through-bolt mounting on a
1” thick steel partition only. If mounting unit on a partition
of different thickness or on a wall, provide the appropriate
backing and hardware.
1/4” Flat Washers
- Wall seat MUST be mounted in a convenient location at
or near the same height as the toilet tissue dispenser. If
mounting in a changing room, mount so bottom of wall
seat is approximately 20-1/2” from the Make sure
there is adequate clearance in front of the seat for safe
operation.
WARNING
• The wall seat is no stronger than the anchors or walls to which they are attached and, therefore, MUST be firmly secured
in order to support the weight they are intended to support.
• Check mounting hardware at least once a month to ensure screws are tightly fastened.
• Always secure a child with restraint system. NEVER leave child unattended.
• DO NOT mount to a door.
• The installer is responsible for confirming the wall construction, anchors, and fasteners are in good condition and
capable of withstanding 200 pounds pull out force or greater. Contact the building architect or engineer for confirmation
when in doubt.
1/4 -20 x 9/16” T-Nuts
A.D.A. Compliance:
307.2 Maximum Protruding Objects
308.2 Forward Reach
308.3 Side Reach
309.4 Operation
Compliant when properly installed.
1-1/4” Caps
P20-214 Rev B ECN 16-15-047 04/04/2017
1
Page 3
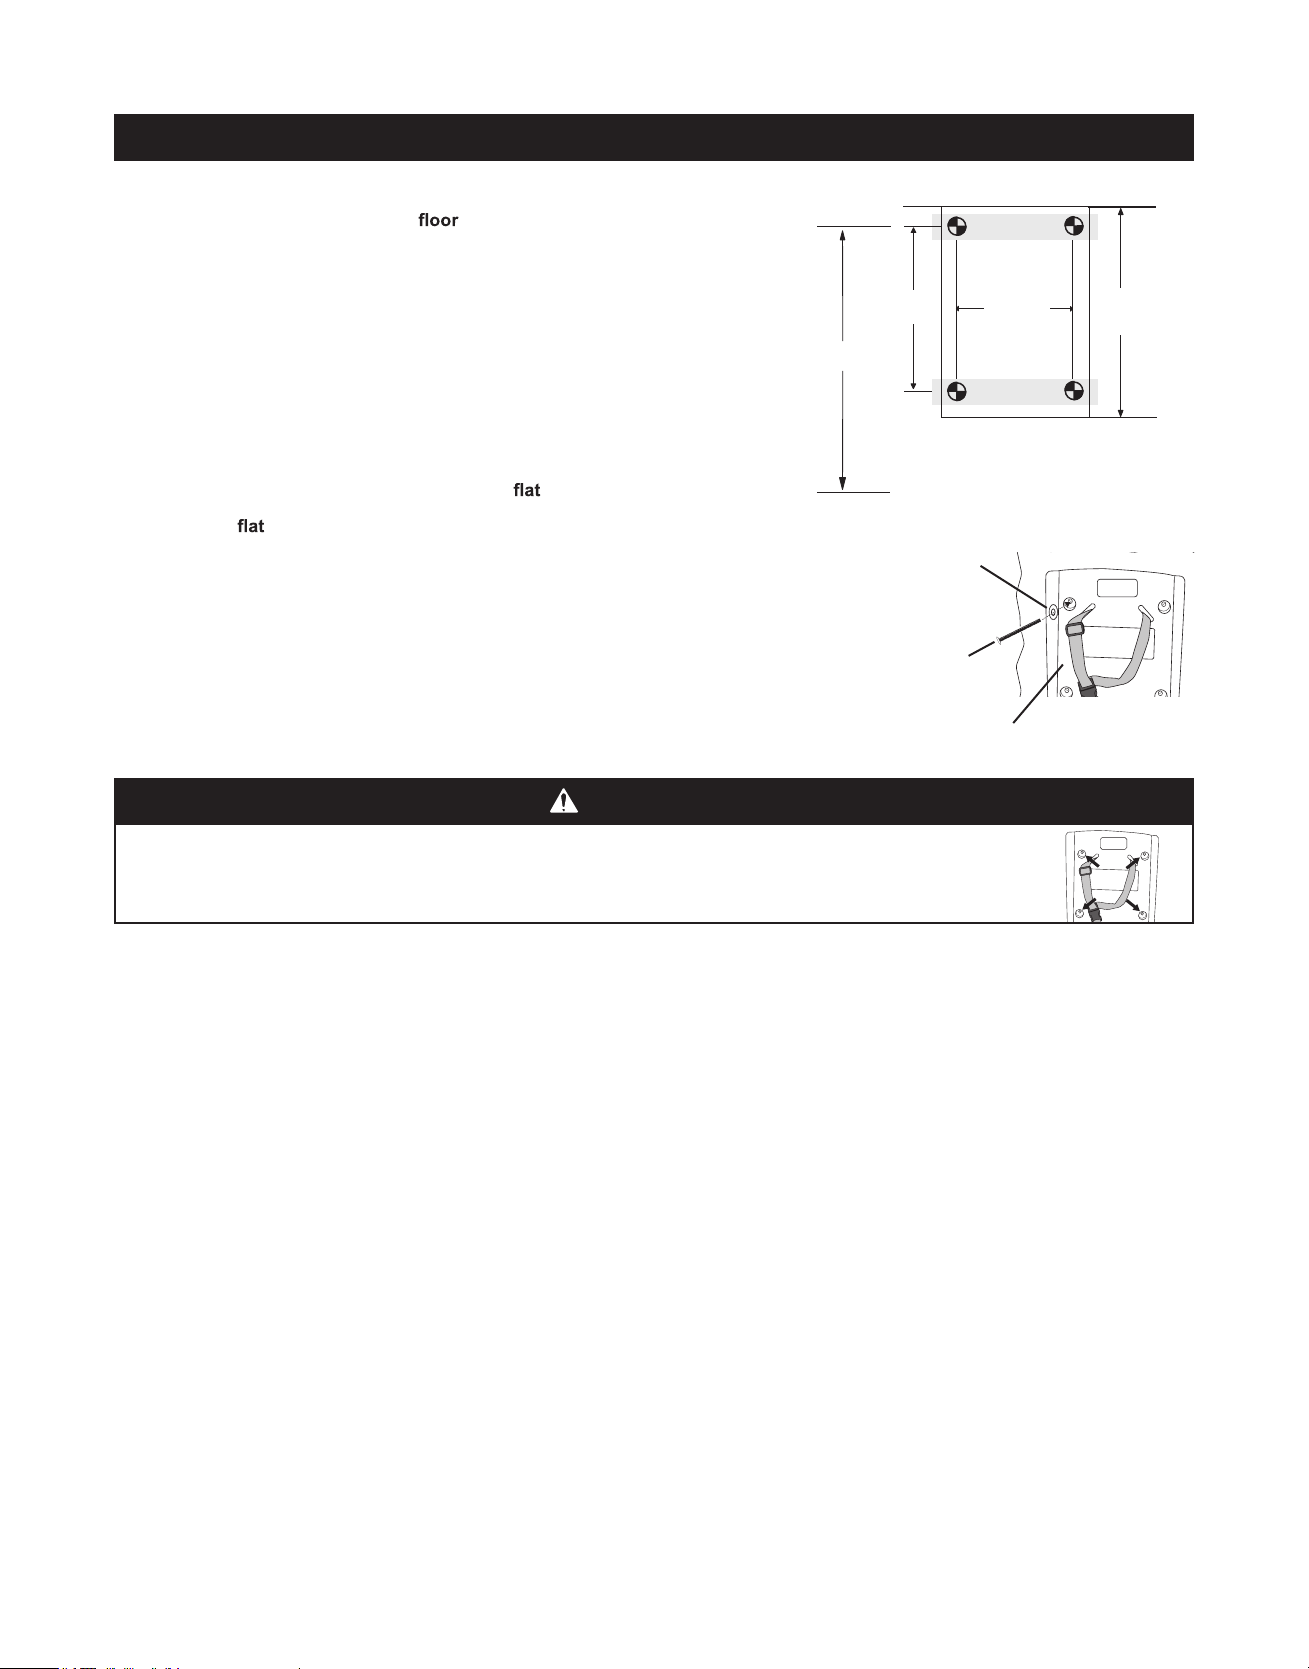
INSTALLATION
1. Locate area that can support the wall seat when mounted to the partition.
2. Measure up 33” (84 cm) from the and mark the partition (Fig. a).
This locates the position for the top left attachment hole.
3. Align hole in top left corner of wall seat with mark on partition and hold in
place.
4. Using a level and measuring tape, mark the remaining three (3) holes. After
marking holes, set wall seat down on ground.
5. Use a power drill and 3/8” bit to drill four (4) holes through partition a
mounting points.
6. From opposite side of partition, insert four (4) T-nuts into mounting holes.
7. Align holes in wall seat with drilled holes and secure top left corner of wall
seat to partition using a machine screw and washer into the T-nuts.
Continue to secure the three (3) remaining corners using the machine
screws and washers into the T-nuts (Fig. b).
33”
(84 cm)
A. F. F
8"
(203 mm)
Washer
Machine
Screw
Flat
Wall Seat
Top
8 1/2”
(216 mm)
Fig. a
(414 mm)
Fig. b
16-5/16"
WARNING
All 4 of these locations MUST be used for safe installation.
•
8. Ensure all four (4) screws are tight and snap caps over screw heads.
NOTE: Operate seat three (3) or four (4) times to ensure proper function.
OPERATION:
Rotate base downward. Place infant on top of the changing surface. Use restraint system as described below. After child has
been changed, remove restraint system and rotate base back up against the wall.
USE OF RESTRAINT SYSTEM:
Place child on wall seat. Place restraint system over child shoulders and buckle between child’s legs. Insert buckle tongue
into buckle and snap together. To tighten or loosen straps, slide adjuster up or down strap. To remove restraint system, press
sides of buckle to release tongue and pull tongue out of buckle.
MAINTENANCE AND CLEANING:
Check all hardware and components monthly or as required to ensure hardware is tight and there are no missing or damaged
components. Take unit out of service if any component is missing or damaged and contact customer service to order
replacement parts. Do not substitute parts. For replacement parts, contact customer service at 800 BRADLEY (800 272 3539).
Clean by using a damp cloth with mild soap or mild multi-purpose cleaner. Do not use any strong chemical cleaners or
cleaning agents that may be hazardous to children.
P20-214 Rev B ECN 16-15-047 04/04/2017
2
Page 4

INSTRUCTIONS D’ASSEMBLAGE
L’INSTALLATION DOIT ÊTRE EFFECTUÉE PAR UN ADULTE.
OUTILS REQUIS :
A
B
Niveau (A)
Ruban (B)
Perceuse électrique avec mèche de 3/8 po (C)
C
D
Tournevis électrique à embout cruciforme arrondi (D)
• LISEZ ATTENTIVEMENT TOUTES LES INSTRUCTIONS AVANT D’ASSEMBLER LE SIÈGE MURAL.
• Déballez le carton et identifiez toutes les pièces.
LISTE DES PIÈCES
Description des pièces Quantité
Ferrures pour l’installation :
Vis à métaux 1/4 - 20 x 1-1/4 po 4
Rondelles plates de 1/4 po 4
Écrous à pointes à enfoncer 1/4 -20 x 9/16 po 4
Capuchons de 1-1/4 po 4
Vis à métaux 1/4 - 20 x 1-1/4 po
IMPORTANT :
- Les ferrures fournies sont conçues uniquement pour une
installation boulonnée à une cloison en acier de 2,5 cm
(1 po) d’épaisseur. Si le montage se fait sur une cloison
d’une autre épaisseur ou sur un mur, vous devez vous
procurer une pièce de renfort et des ferrures appropriées.
Rondelles plates
de 1/4 po
- Le siège mural DOIT être fixe à un emplacement pratique
hygiénique. S’il est installé dans une pièce à langer, la
base du siège mural doit être à environ 52 cm (20,5 po) du
sol. Assurez-vous que l’avant du siège est
dégagé pour qu’il puisse être utilisé en toute sécurité.
à peu prèsà la même hauteur que le distributeur de papier
AVERTISSEMENT
• Le siège mural n'est pas plus résistant que les ancrages ou les murs auxquels ils sont fixés et, par conséquent,
DOIT être solidement fixé afin de supporter le poids qu'ils sont destinés à supporter. Contact et architecte ou
• Vérifiez le matériel de montage au moins une fois par mois pour vous assurer que les vis sont bien serrées.
• Toujours sécuriser un enfant avec un système de retenue. Ne laissez JAMAIS l'enfant sans surveillance.
• NE PAS monter sur une porte.
•
L'installateur est responsable de confirmer la construction du mur, les ancres, et les attaches sont en bon état
et capable de résister à 200 livres sortir force ou plus. En cas de doute contacter l'architecte du bâtiment ou de
l'ingénieur pour confirmation.
Écrous à pointes à enfoncer 1/4 -20 x 9/16 po
Conformité ADA :
307.2 Dépassement maximal des
objets en saillie
308.2 Portée maximale à l’avant
308.3 Portée latérale
309.4 Utilisation
Conforme aux normes lorsque
correctement installé.
Capuchons de
1-1/4 po
3
P20-214 Rev B ECN 16-15-047 04/04/2017
Page 5

INSTALLATION
1. Trouvez un endroit qui peut soutenir le siège mural lorsqu’il sera à la cloison.
2. Faites une marque sur la cloison à 84 cm (33 po) du sol (Fig. a). Cette marque
indique l’emplacement du trou de supérieur gauche.
3. Alignez le trou supérieur gauche du siège mural avec la marque faite sur la
cloison et maintenez-le en place.
4. À l’aide d’un niveau et d’un ruban, marquez les trois (3) autres trous. Lorsque
l’emplacement des trous est marqué, déposez le siège sur le sol.
5. À l’aide d’une perceuse électrique munie d’un foret de 3/8 po, percez les
quatre (4) trous dans la cloison.
6. À partir de l’arrière de la cloison, insérez quatre (4) écrous à pointes à
enfoncer dans les trous de montage.
7. Alignez les trous du siège mural avec les trous percés et le coin
supérieur gauche du siège mural à la cloison à l’aide d’une vis à métaux et
d’une rondelle plate insérées dans l’écrou à pointes à enfoncer. Fixer les
trois (3) autres coins à l’aide de vis à métaux insérées et de rondelles plates
dans
les écrous à pointes à enfoncer (Fig. b).
84 cm
(33 po)
A. F. F
Rondelle
métaux
203 mm
(8 po)
plate
Vis à
Siège
mural
Dessus
216 mm
(8-1/2 po)
Fig. a
Fig. b
414 mm
(16-5/16 po)
AVERTISSEMENT
•
Les trous inférieurs permettent la à travers les supports en métal.
Les 4 emplacements DOIVENT être utilisés pour obtenir une installation sécuritaire.
8. Assurez-vous que les quatre (4) vis sont solidement
et enclenchez les capuchons sur les têtes de vis.
REMARQUE : Déployez le siège à trois (3) ou quatre (4) reprises pour vous assurer de son bon fonctionnement.
UTILISATION DU SIÈGE MURAL :
Faites pivoter le siège mural vers le bas. Placez l’enfant sur le siège mural. Attachez l’enfant avec le dispositif de retenue,
comme il est décrit ci-dessous. Pour enlever l’enfant du siège mural, détachez le dispositif de retenue, dégagez-le, enlevez
l’enfant du siège mural et faites pivoter le siège mural vers le haut, contre la cloison.
UTILISATION DU DISPOSITIF DE RETENUE :
Placez l’enfant sur le siège mural. Placez le dispositif de retenue par-dessus les épaules de l’enfant et bouclez-le entre les
jambes de l’enfant. Insérez la languette dans la boucle et enclenchez-la. Pour serrer ou desserrer les sangles, faites glisser
l’ajusteur vers le haut ou vers le bas de la sangle. Pour détacher le dispositif de retenue, appuyez sur les côtés de la boucle
et retirez la languette de la boucle.
ENTRETIEN ET NETTOYAGE
les ferrures sont solidement et qu’il n’y a pas de composant manquant ou endommagé. Retirez du service si un
toutes les ferrures et tous les composants une fois par mois ou aussi souvent que nécessaire pour vous assurer que
composant est manquant ou endommagé et veuillez contacter le service à la clientèle des pièces de rechange. Ne substituez
pas de pièces. Pour obtenir des pièces de rechange, veuillez contacter le service à la clientèle au 800 BRADLEY (800 272 3539).
Nettoyez à l’aide d’un chiffon humide et d’un savon doux ou d’un nettoyant polyvalent doux. N’utilisez aucun agent de
nettoyage ou produits chimiques forts qui pourraient être dangereux pour les enfants.
4
P20-214 Rev B ECN 16-15-047 04/04/2017
Page 6

INSTRUCCIONES PARA EL ENSAMBLAJE
LA INSTALACIÓN DEBE SER REALIZADA POR UN ADULTO.
A
B
HERRAMIENTAS NECESARIAS:
Nivel (A)
Cinta métrica (B)
Taladro eléctrico con broca de 3/8 de pulg (C)
C
D
Destornillador eléctrico de cabeza roma Phillips (D)
• LEA TODAS LAS INSTRUCCIONES ANTES DE ENSAMBLAR EL ASIENTO DE PARED.
• Desempaque la caja de cartón e todas las piezas.
LISTA DE PIEZAS
Descripción de las piezas daditnaC
Herrajes para la instalación:
Tornillos para metales de 1/4 - 20 x 1-1/4 4 glup
Arandelas planas de 1/4 de pulg 4
Tuercas en T de 1/4 -20 x 9/16 pulg 4
Tapas de 1-1/4 pulg 4
Tornillos para metales
de 1/4 - 20 x 1-1/4 pulg
IMPORTANTE:
- Los herrajes adjuntos solamente son para el montaje en un
tabique de acero de 2,5 cm (1 pulg) de espesor con pernos
que lo at raviesan por completo. Si va a montar la unidad en
un tabique de un espesor distinto o en una pared,
proporcione el respaldo y los herrajes apropiados.
Arandelas planas
de 1/4 de pulg
- El asiento de pared se DEBE montar en un lugar
conveniente a la misma altura, o casi a la misma altura que
para cambiar pañales, móntelo de manera que la parte
inferior del asiento de pared se encuentre aproximadamente
a 52 cm (20-1/2 pulg) del piso. Cerciórese de que haya
espacio suficiente delante del asiento para su
funcionamiento seguro.
el surtidor de papel higiénico. Si lo va a montar en un cuarto
Tuercas en T de
1/4 -20 x 9/16 pulg
Conformidad con A.D.A.:
307.2 Objetos salientes máximos
308.2 Alcance hacia adelante
308.3 Lado alcance
309.4 Funcionamiento
En conformidad cuando está
correctamente instalada.
Tapas de 1-1/4 pulg
ADVERTENCIA
• El asiento de la pared no es más fuerte que los anclajes o las paredes a los cuales están unidos y, por lo tanto,
DEBE asegurarse firmemente para soportar el peso que están destinados a soportar.
• Revise el hardware de montaje por lo menos una vez al mes para asegurarse de que los tornillos estén
firmemente sujetos.
• Siempre asegure a un niño con un sistema de sujeción. NUNCA deje al niño desatendido.
• NO monte a una puerta.
• El instalador es responsable de verificar la construcción de la pared, anclajes y elementos de fijación estén en
buen estado y capaz de soportar 200 libras halar la fuerza o mayor. En caso de duda póngase en contacto con
el arquitecto o ingeniero de construcción para su confirmación.
5
P20-214 Rev B ECN 16-15-047 04/04/2017
Page 7

INSTALACIÓN
1. Ubique el área que puede sostener el asiento de pared cuando se monta en el
tabique.
2. Mida 84 cm (33 pulg) desde el piso hacia arriba y marque el tabique (Fig. a).
Esta es la posición del de sujeción superior izquierdo.
3. Alinee el de la esquina superior izquierda del asiento de pared con la
marca del tabique y sujete el asiento en esta posición.
4. Usando un nivel y una cinta métrica, marque los tres (3) restantes.
Después de marcar los coloque el asiento de pared en el piso.
5. Use un taladro eléctrico y una broca de 3/8 de pulg para taladrar cuatro (4)
a través del tabique en los puntos de montaje.
6. Desde el otro lado del tabique, introduzca cuatro (4) tuercas en T en los
de montaje.
7. Alinee los del asiento de pared con los taladrados y
la esquina superior izquierda del asiento de pared al tabique usando un tornillo
para metales y una arandela plana en las tuercas en T. Continúe las
tres (3) esquinas restantes usando los tornillos para metales y las arandelas
planas en las tuercas en T (Fig. b).
84 cm
(33 pulg)
A. F. F
203 mm
(8 pulg)
Arandela
plana
Tornillo
para
metales
de pared
Parte superior
216 mm
(8-1/2 pulg)
Asiento
Fig. a
Fig. b
414 mm
(16-5/16 pulg)
ADVERTENCIA
•
inferiores aseguran la instalación a través de los soportes.
DEBEN usarse las 4 ubicaciones para una instalación segura. Los
8. Cerciórese de que los cuatro (4) tornillos estén bien apretados y encaje las tapas sobre las cabezas de los tornillos.
NOTA: Haga funcionar el asiento tres (3) o cuatro (4) veces para asegurarse de que funcione bien.
FUNCIONAMIENTO:
Gire el asiento de pared hacia abajo. Coloque al niño en el asiento de pared. Sujete al niño con el sistema de sujeción como
se describe a continuación. Para sacar al niño del asiento de pared, desabroche el sistema de sujeción, quítele el sistema de
sujeción al niño, saque al niño del asiento de pared y gire el asiento de nuevo hacia arriba contra el tabique.
USO DEL SISTEMA DE SUJECIÓN:
Coloque al niño en el asiento de pared. Coloque el sistema de sujeción sobre los hombros del niño y la hebilla entre las
piernas del niño. Introduzca la lengüeta en la hebilla y abróchela. Para ajustar o las correas, deslice la pieza de ajuste
hacia arriba o hacia abajo de la correa. Para quitar el sistema de sujeción, presione los lados de la hebilla para soltar la
lengüeta y jale la lengüeta para sacarla de la hebilla.
MANTENIMIENTO Y LIMPIEZA
bien
todos los herrajes y componentes todos los meses o según se requiera para cerciorarse de que los herrajes estén
apretados y no haya componentes faltantes o dañados. Deje de usar la unidad si hay componentes faltantes o dañados y
comuníquese con el servicio de atención al cliente para pedir piezas de repuesto. No sustituya ninguna pieza. Para obtener
piezas de recambio, comuníquese con el servicio de atención al cliente al 800 BRADLEY (800 272 3539).
Limpie usando un paño húmedo con jabón suave o un limpiador multiuso suave. No use ningún limpiador químico fuerte o
agentes de limpieza que puedan ser nocivos para los niños.
6
P20-214 Rev B ECN 16-15-047 04/04/2017
 Loading...